Choosing the Right Contact Matching Method for Your Business
In this article
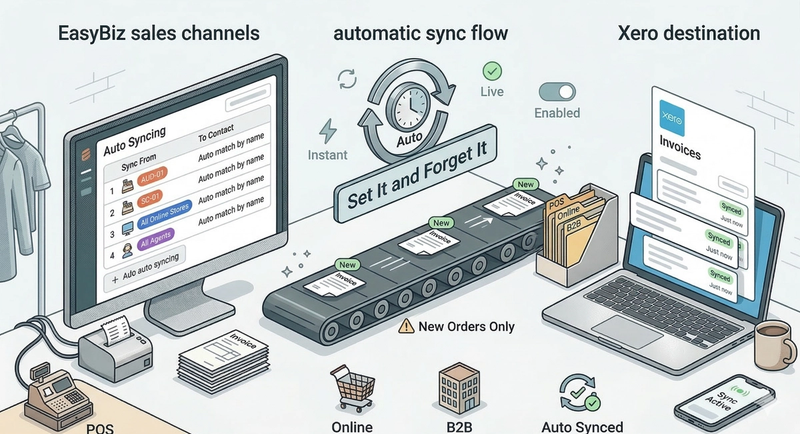
When EasyBiz syncs invoices to Xero, it needs to know which Xero contact to assign each invoice to. You can choose from four matching methods depending on how your business manages customers. This guide explains each method so you can choose the one that best fits your workflow.
Contents
Contents
What is Contact Matching?
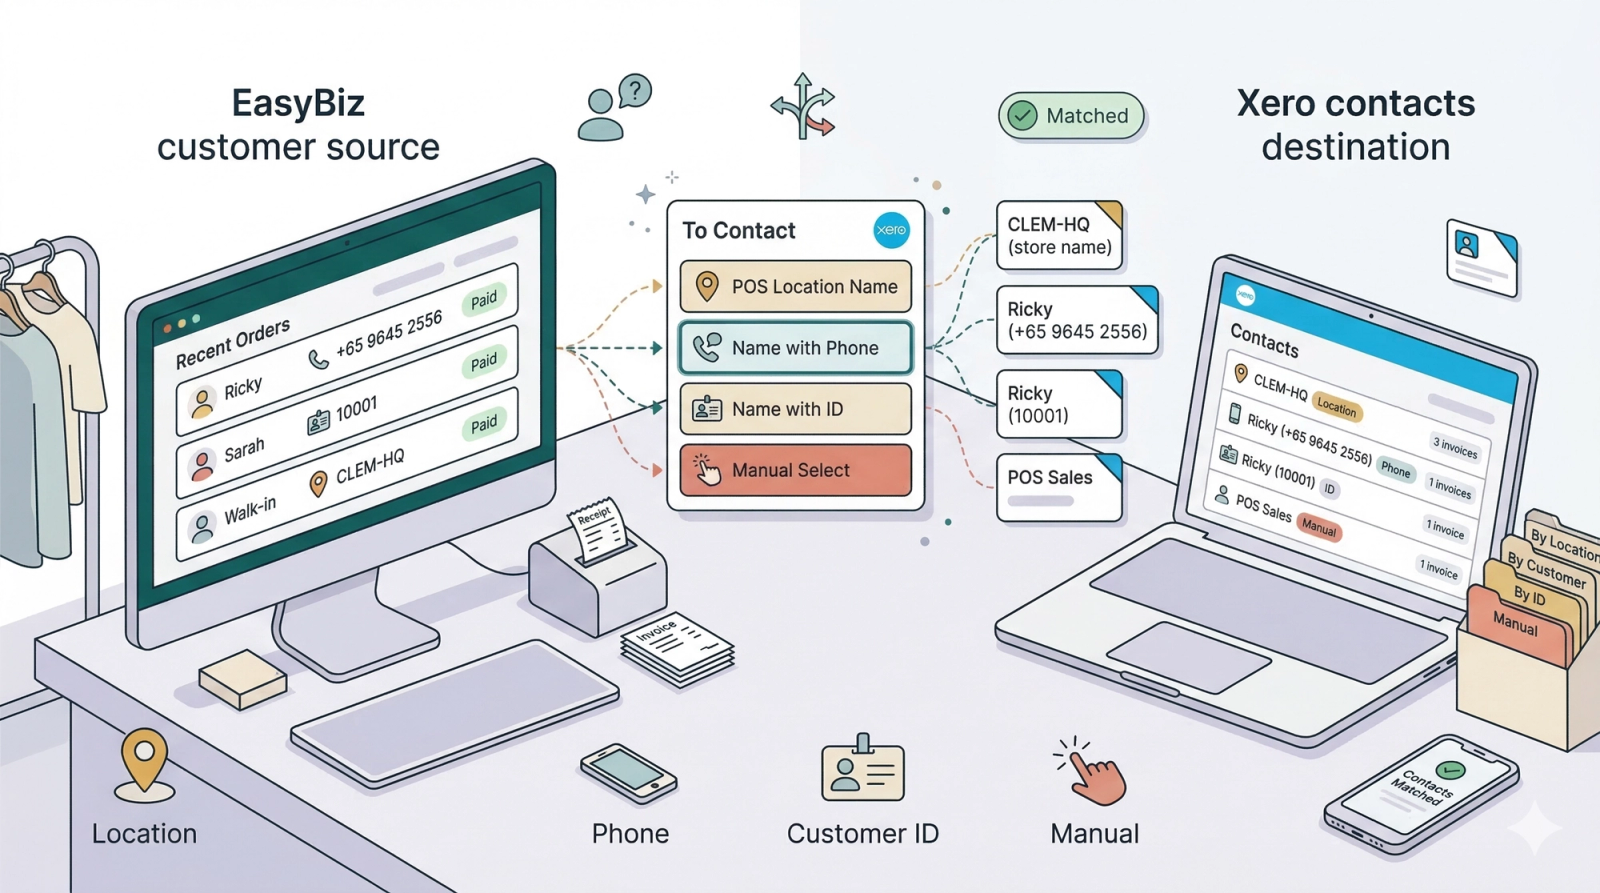
Contact matching is how EasyBiz decides which contact in Xero should receive the synced invoice. For example, if a customer named "John" places an order in EasyBiz, the system needs to find or create a matching contact in Xero to attach the invoice to. The method you choose determines how the system identifies that contact — by store name, phone number, customer ID, or a manually selected contact.
Method 1: Auto Match Using POS Location Name
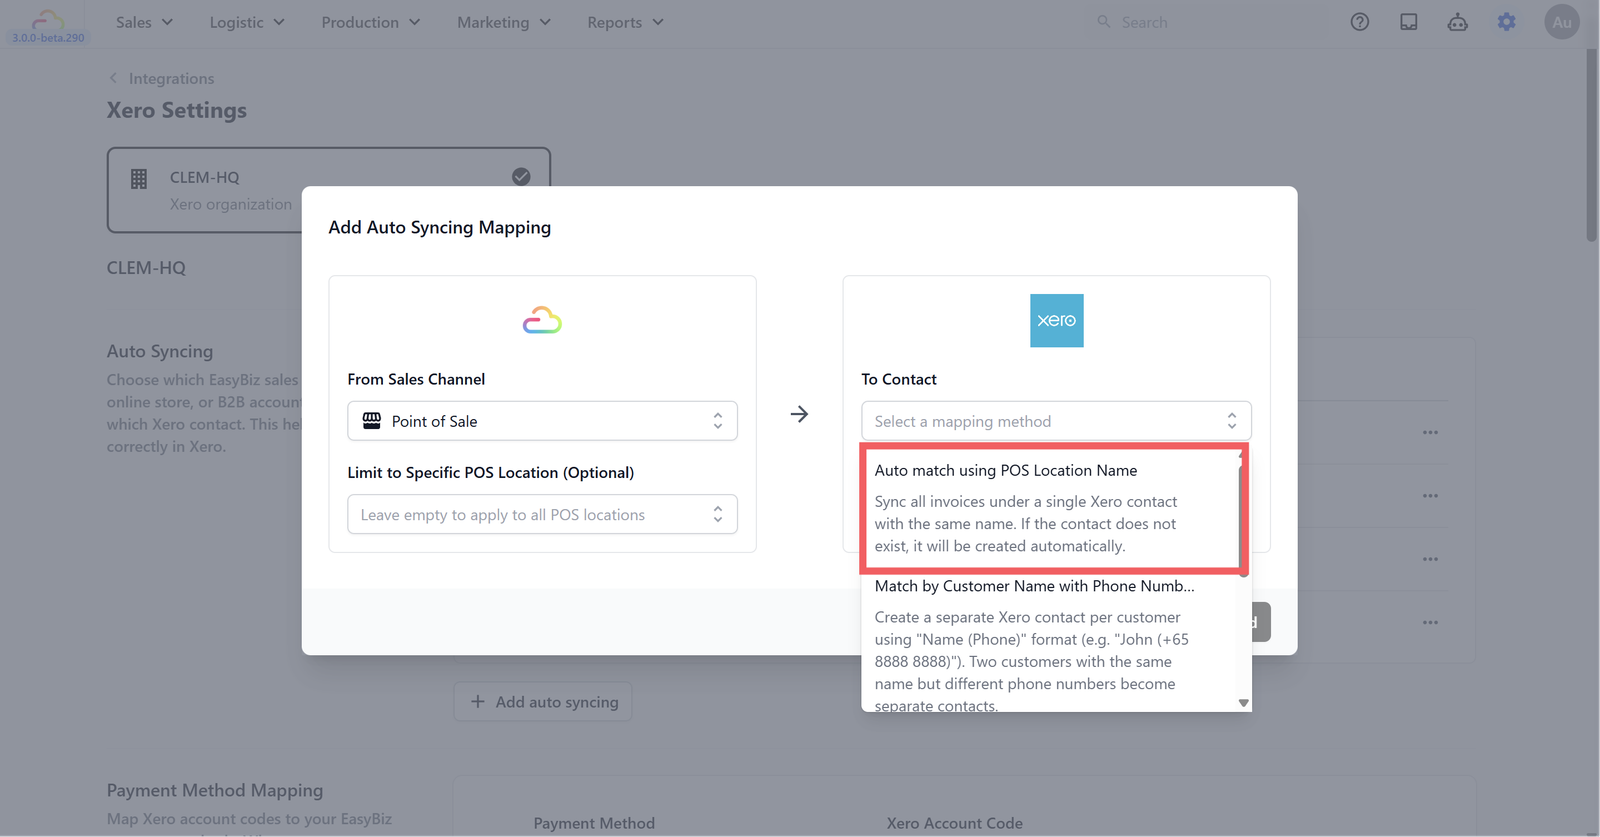
This method syncs all invoices under a single Xero contact using your POS location name. If the contact does not exist in Xero, it will be created automatically.
This is best for businesses that want to group all sales from one location under one contact. For example, if your POS location is called "CLEM-HQ," all invoices from that location will appear under a single Xero contact named "CLEM-HQ" — regardless of which individual customer placed the order.
When to use this: You run one or more store locations and want a simple, location-based view of your revenue in Xero. You do not need to track individual customers in your accounting.
Method 2: Match by Customer Name with Phone Number
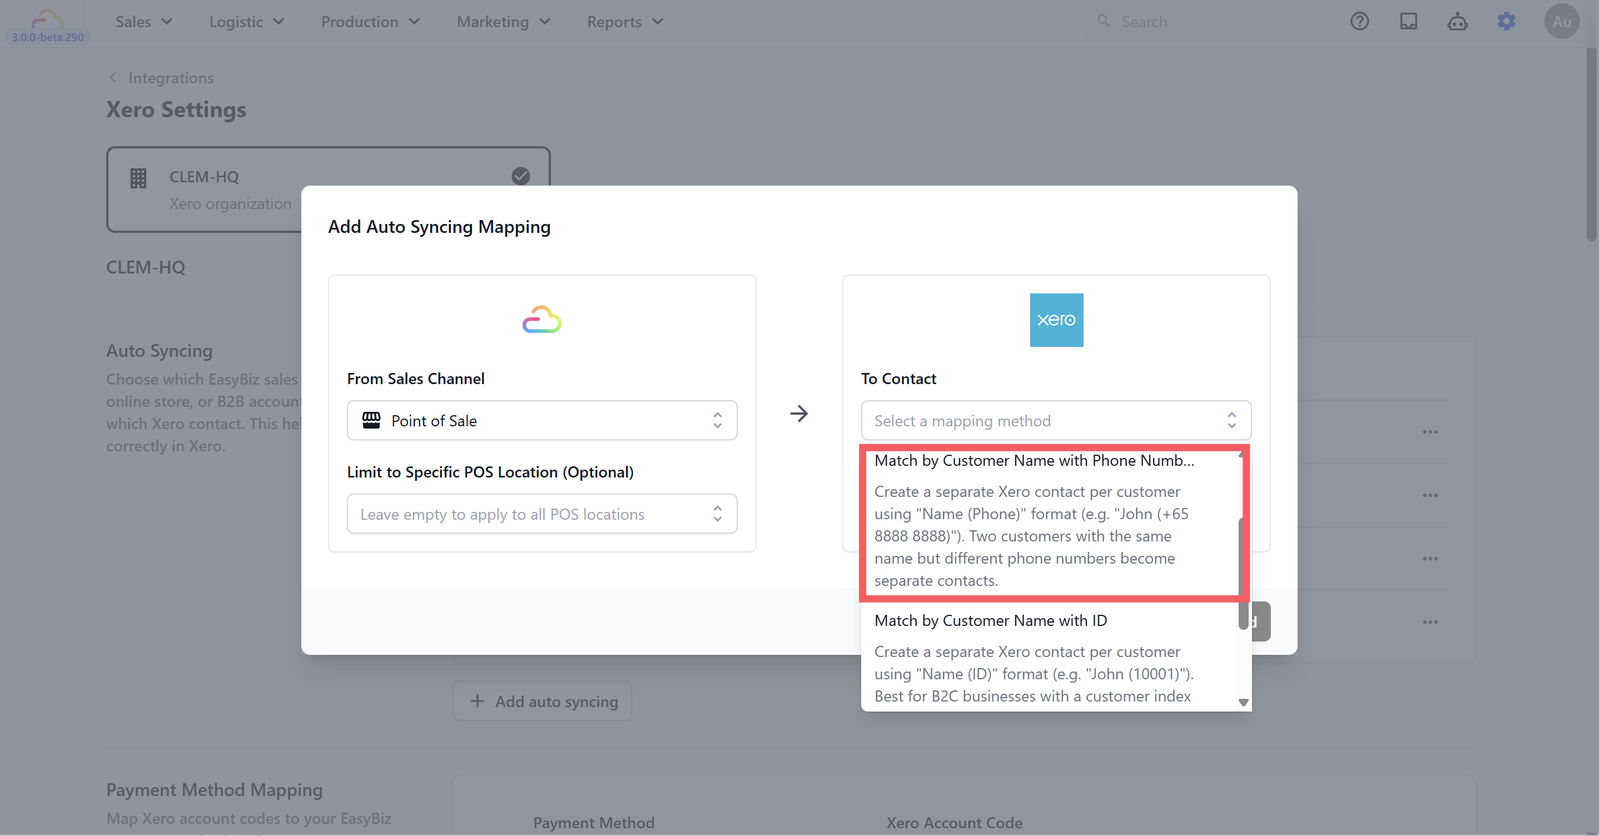
This method creates a separate Xero contact for each customer using a "Name (Phone)" format. For example, a customer named Ricky with phone number +65 8888 8888 will appear in Xero as "John (+65 8888 8888)". If the contact does not exist in Xero, it will be created automatically.
This means two customers with the same name but different phone numbers will become separate contacts in Xero, giving you a more detailed, customer-level view of your invoices.
When to use this: Your customers are registered in EasyBiz with their phone numbers and you want to track invoices per individual customer. This is especially useful if your customers share common names and you need a reliable way to tell them apart.
Method 3: Match by Customer Name with ID

This method creates a separate Xero contact for each customer using a "Name (ID)" format. For example, a customer named John with ID 10001 will appear in Xero as "John (10001)". If the contact does not exist in Xero, it will be created automatically.
When to use this: Your business uses a customer index system where each customer is assigned a unique ID number. This is common in B2C businesses such as laundry shops or repair services where customers are registered with a membership or account number.
Method 4: Manual Select Xero Contact
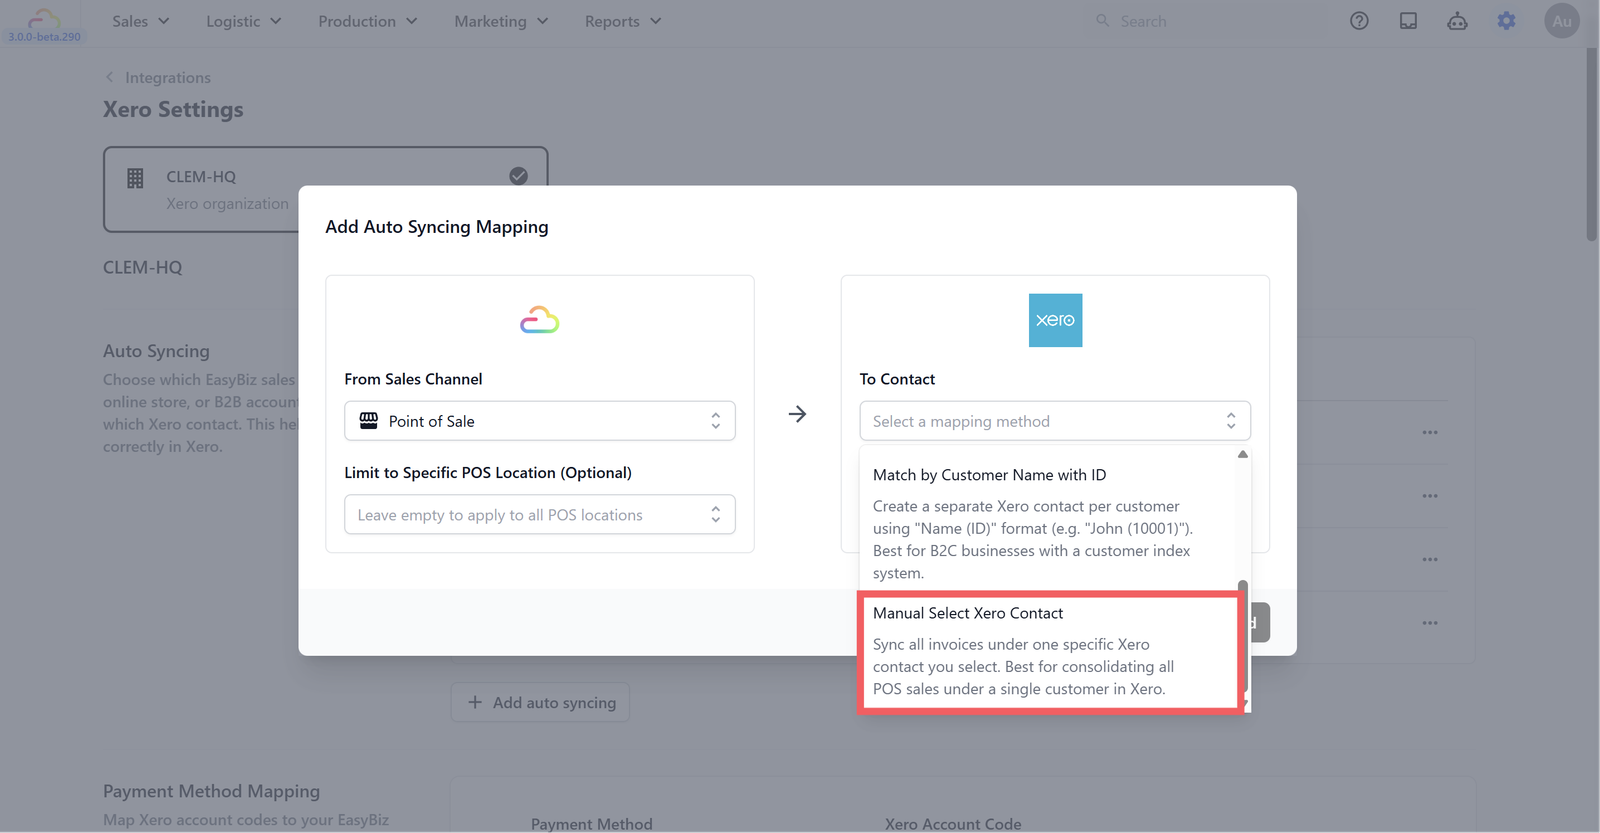
This method lets you choose one specific Xero contact, and all invoices from that sales channel will be synced under that single contact. There is no automatic matching — you decide exactly where the invoices go.
This is the simplest option and best for consolidating all POS sales under a single customer in Xero. For example, you can create a contact in Xero called "POS Sales" and map all your transactions to it. Every invoice will appear under that one contact regardless of who the actual customer was.
When to use this: You want to consolidate all sales under one contact in Xero for simple bookkeeping. You do not need customer-level tracking in your accounting system.
Which Method Should I Choose?
| Method | Best For | Contact format in Xero | Customer-level tracking |
|---|---|---|---|
| POS Location name | Grouping sales by location | Store name | No |
| Customer Name with Phone | Tracking customers by phone | "John (+65 8888 8888)" | Yes |
| Customer name with ID | Tracking customers by ID | "John (10001)" | Yes |
| Manual select | Consolidating all under one contact | Your chosen contact name | No |
What's Next?
Now that customer matching is set, continue to [Auto Sync] to turn on automatic syncing so every sale lands in Xero without manual work.