Configuring Account Codes
In this article
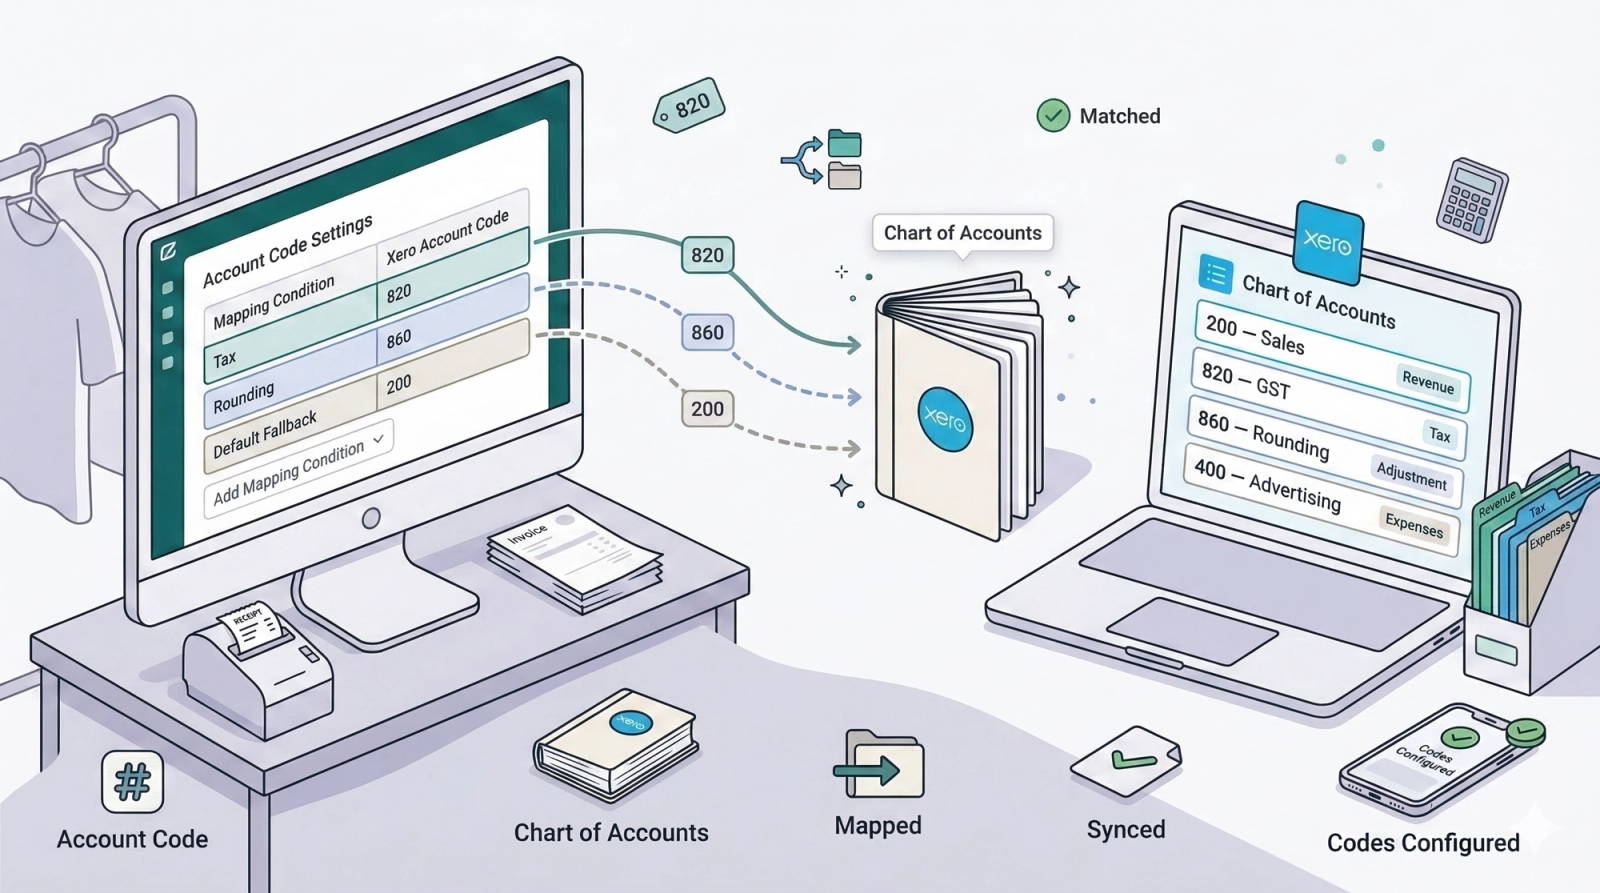
Account Codes are labels used by Xero to categorize your money—such as sales, tax, or fees—so your EasyBiz data is recorded in the correct accounts.
Contents
Contents
What is an Account Code in Xero?
An account code is a unique number assigned to each account in your Xero system. It acts as a label that tells Xero where to categorize a transaction. For example, code 200 means "Sales Revenue," code 820 means "GST," and code 860 means "Rounding." When EasyBiz syncs an invoice to Xero, it uses these codes to put each part of the invoice in the right place.
What is a Chart of Accounts in Xero?

A Chart of Accounts is the full list of all the account codes in your Xero organization. Think of it as a filing system for your money — every dollar that comes in or goes out gets filed into one of these accounts. It includes categories like Revenue, Expenses, Assets, and Liabilities, and each category contains individual accounts with their own codes.
Where Can I Find the Chart of Accounts in Xero?
- Log in to your Xero account.
- Click Accounting in the top navigation bar.
- Select Chart of Accounts from the dropdown menu.
You will see the full list of your account codes, names, types, and tax rates. This is where you can check your existing codes or add new ones if needed.
Where to find this setting?
Go to Settings > Business Portfolios. Click your business > Click the three dots for Xero > Settings. Scroll down to the Account Code Settings section.
Step-by-Step: Mapping Your Account Codes
Before your invoices can sync correctly to Xero, you need to tell EasyBiz which Xero account codes to use for things like tax, rounding, and revenue. This is done through Account Code Mapping.

Scroll down to the Account Code Settings section and click Add Account Code Mapping.

In this guide, we will walk you through adding the two most commonly used account codes: Tax and Rounding. These are the minimum required for your integration to work properly. If your business has other needs (e.g., separate accounts for different payment methods), you can add more mappings or consult your accountant.

For Tax, enter account code 820. This is the default GST account in Xero's Chart of Accounts, used to track tax collected from your sales.

For Rounding, enter account code 860. This is the default rounding adjustment account in Xero, used to handle small rounding differences in your invoices.

Once you have mapped Tax and Rounding, all remaining unmapped items (such as your product sales) will automatically default to account code 200 (Sales), which is your main revenue account in Xero.
What's Next?
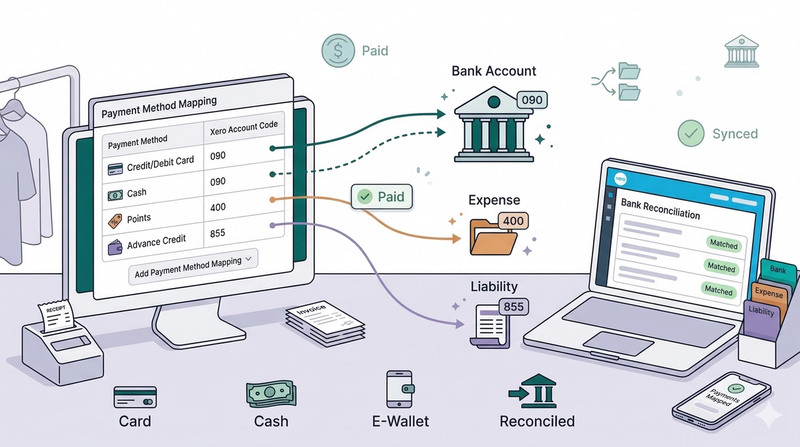
Now that your account codes are mapped, continue to [Mapping Payment Methods] to make sure cash, card, and other payments land in the correct Xero bank accounts.
Give feedback
Up next
Mapping Payment Methods💳 Get paid automatically. Configure your payment mappings to ensure that when a customer pays in EasyBiz, the invoice is instantly marked as 'Paid' in Xero.
Read more