
Setting Up Service Items
In this article
Service Items are the things your customers hand over to you for work, such as bags, shirts, shoes, curtains, or sofas. Setting them up is the first step before you can attach prices, options, or labels to anything you do. This guide walks through every field in the Add Service Item form, how Variants and Shared Variants work, how to organise items with Collections, and how to find, edit, or delete items as your catalogue grows.
Contents
Contents
How to Access Service Items
- Click the ⚙️ Settings icon in the top-right corner.
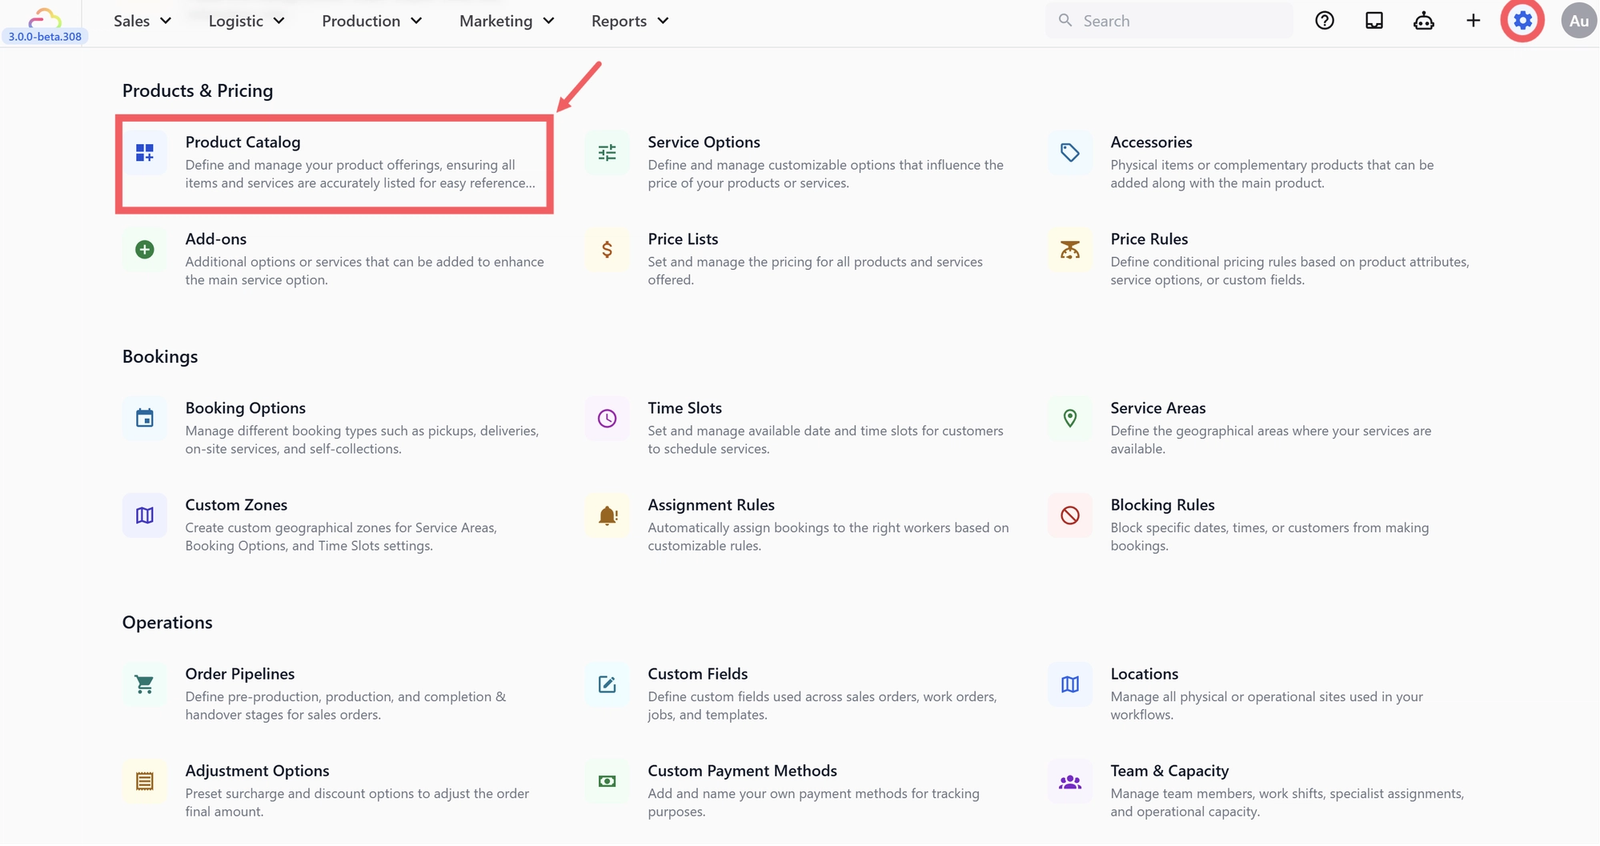
- Under the Products & Pricing section, click Product Catalog.
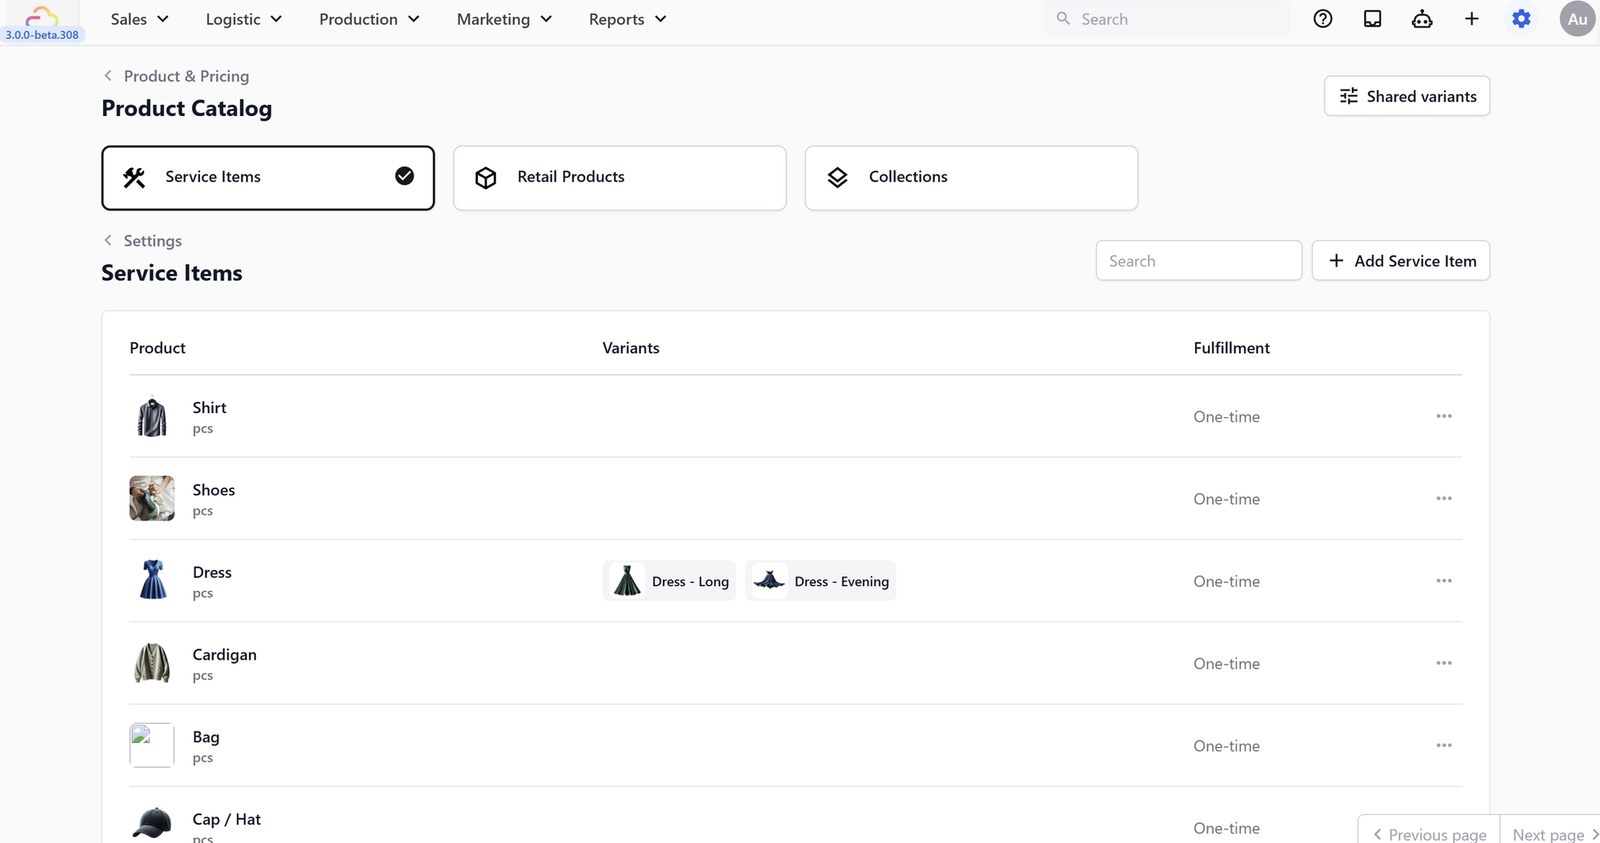
- You land on the Service Items tab by default.
Adding a Service Item
Click + Add Service Item at the top right. A dialog opens.
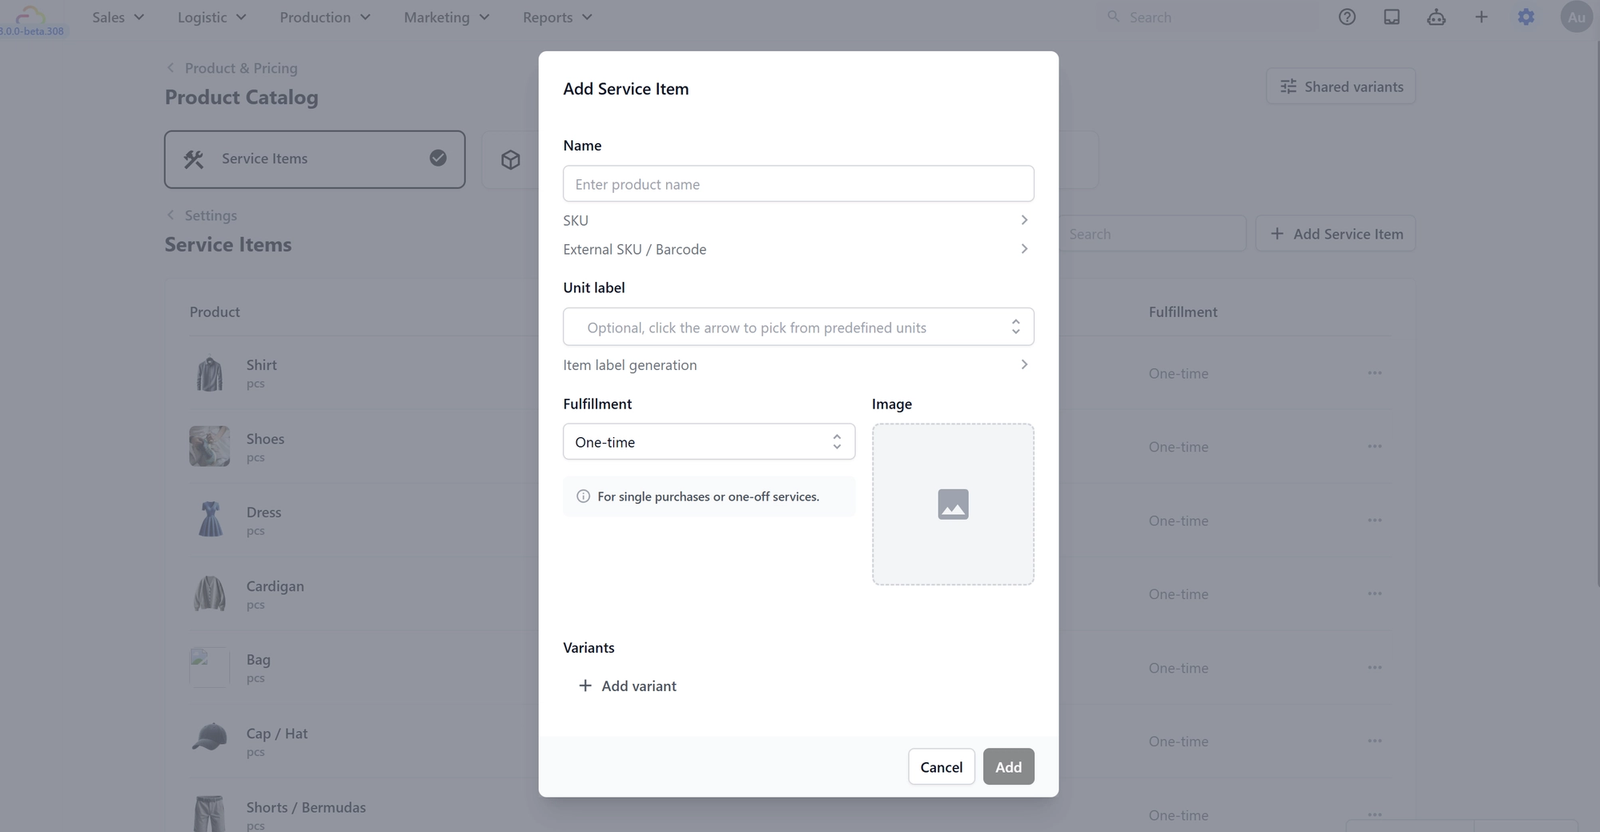
Name
The label your staff sees on the POS. Keep it short and recognisable. Use the item your customer brings in, not the service.
SKU
A unique product code used internally and on labels. Leave the Auto generate SKU toggle on so EasyBiz creates one for you. Click the arrow next to SKU only if you want to type your own.
External SKU / Barcode
For shops that scan barcodes at the counter. Leave blank unless you have a barcode scanner.
Unit label
How this item is measured. Click the arrow on the right to pick from predefined units. For most service businesses, pcs is the right choice. Use pair for shoes, or set for curtain sets.
Item label generation
Controls how many internal labels print per item when staff add it to an order. Leave at the default unless your label workflow needs more.
Fulfillment
Leave this set to One-time. This is the correct setting for service items.
Image
Optional photo. Upload one if your staff is new and you want them to recognise items at a glance.
Click Add to save. The item appears in the Service Items list.
Variants
A Variant is a different version of the same item. Adding variants lets staff be specific at the POS so your workshop knows exactly what came in.
Use a variant when the item is the same product type but a different version. For example, Shirt On Hanger and Shirt Folded should be variants of Shirt, not two separate service items. Use a separate service item when the work, packaging, or label is fundamentally different (e.g. Bag vs Curtain).
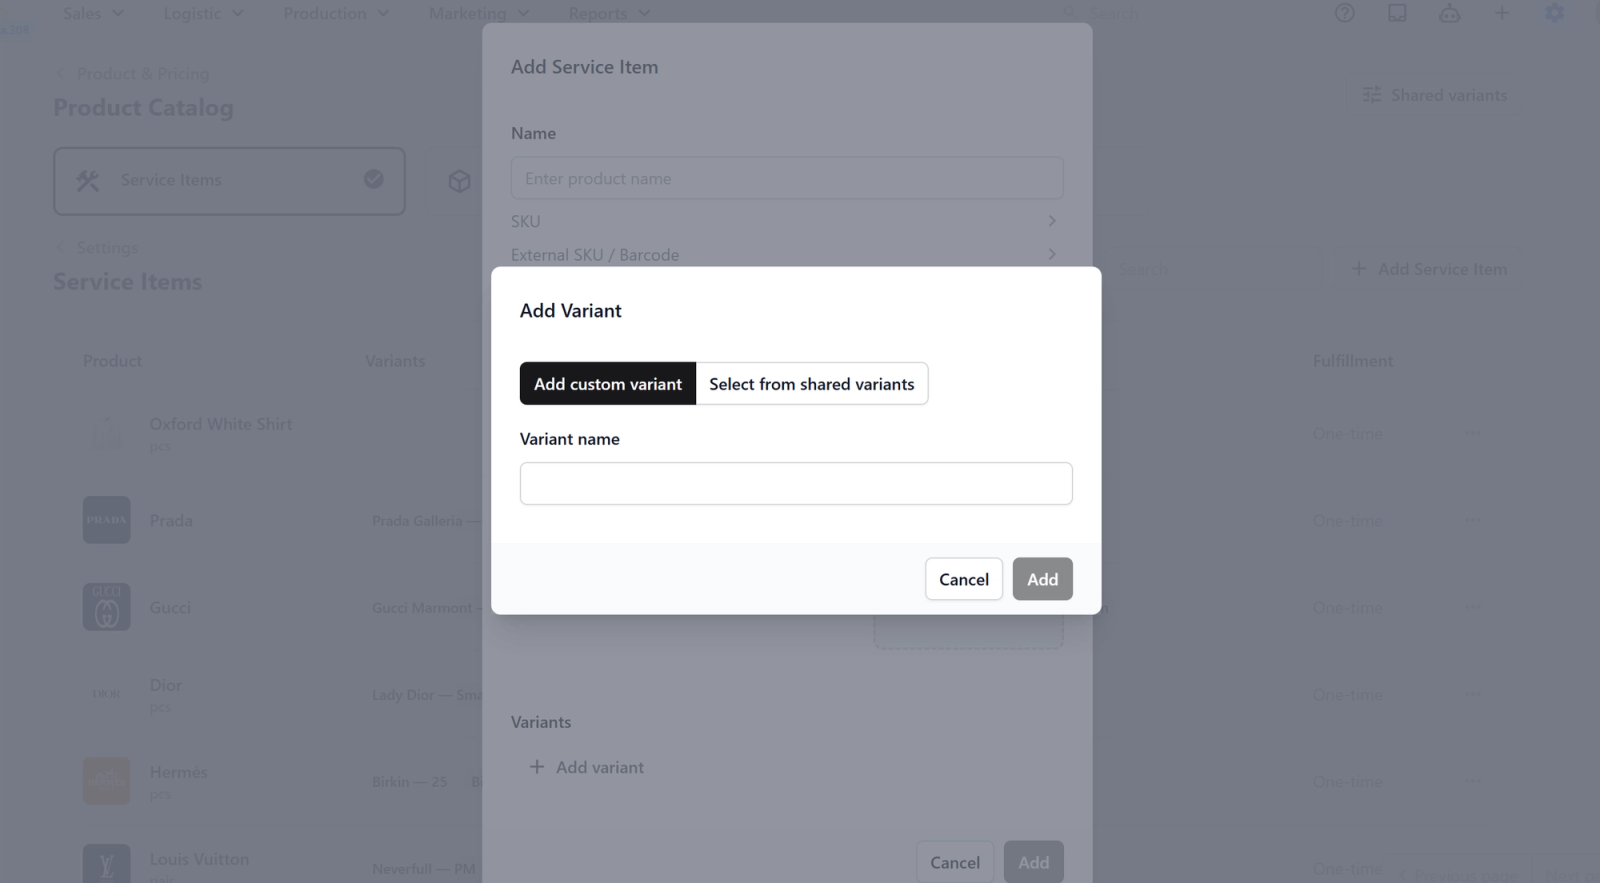
To add a variant:
- Open the Service Item.
- Click + Add variant.
- Choose Add custom variant.
- Type the variant name and click Add.
Drag rows to reorder. Click the three-dots menu on a row to Edit or Delete a variant.
Shared Variants
If many of your items share the same options (e.g. multiple clothing types all available in S, M, L, XL), create a Shared Variant once and reuse it across products instead of re-typing the same options.
The difference from regular variants: a custom variant lives only on one product. A Shared Variant is a master list. When you edit a Shared Variant later (e.g. add an XXL size), every product using that Shared Variant updates automatically.
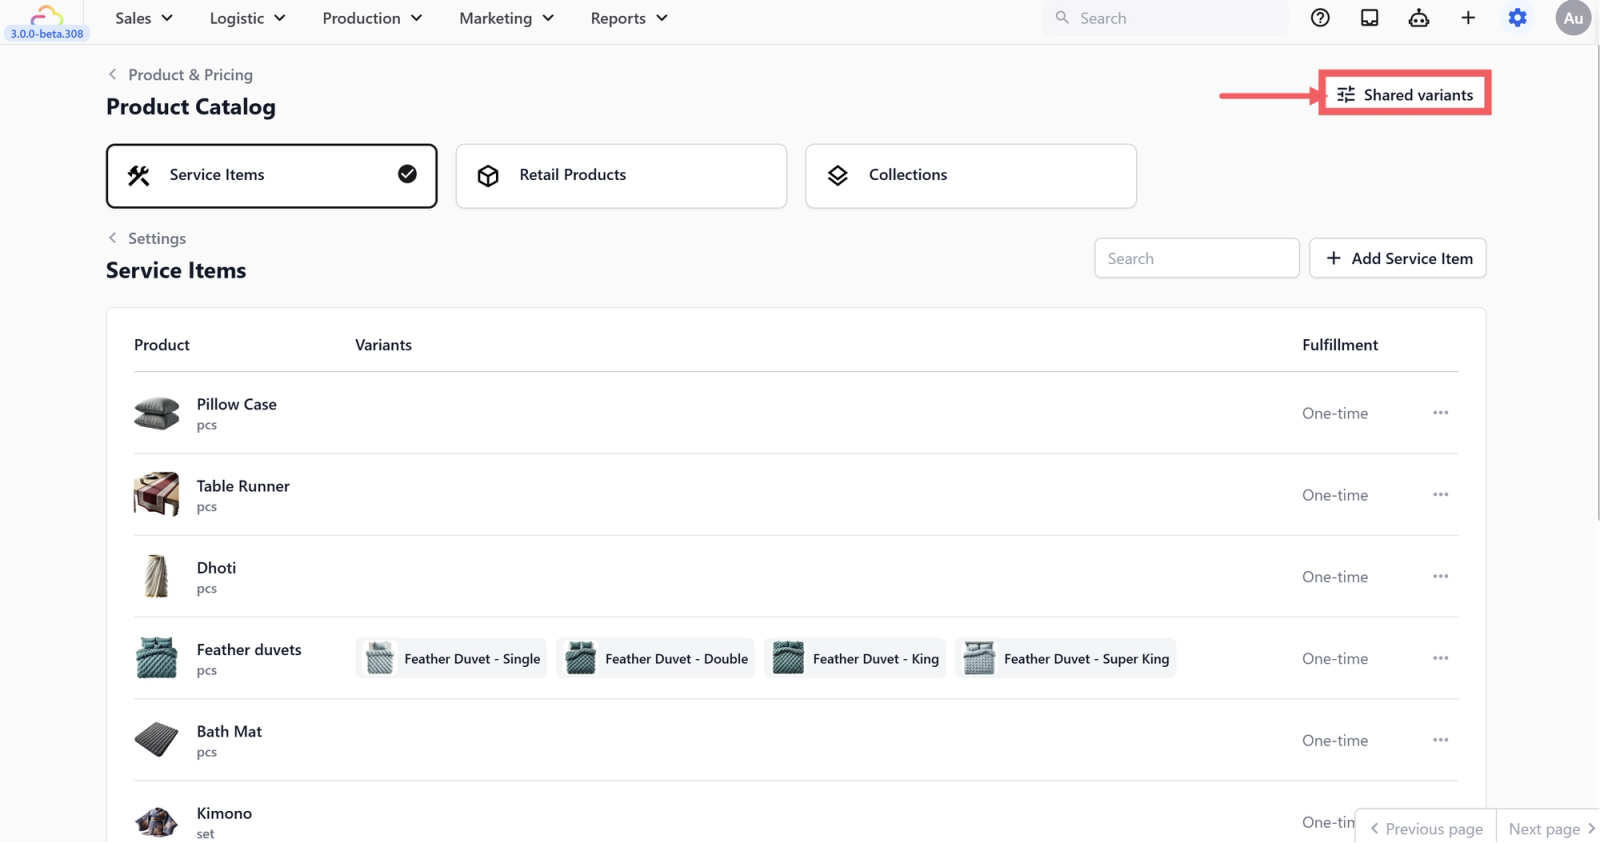
To create a Shared Variant:
- Click Shared variants at the top right of Product Catalog.
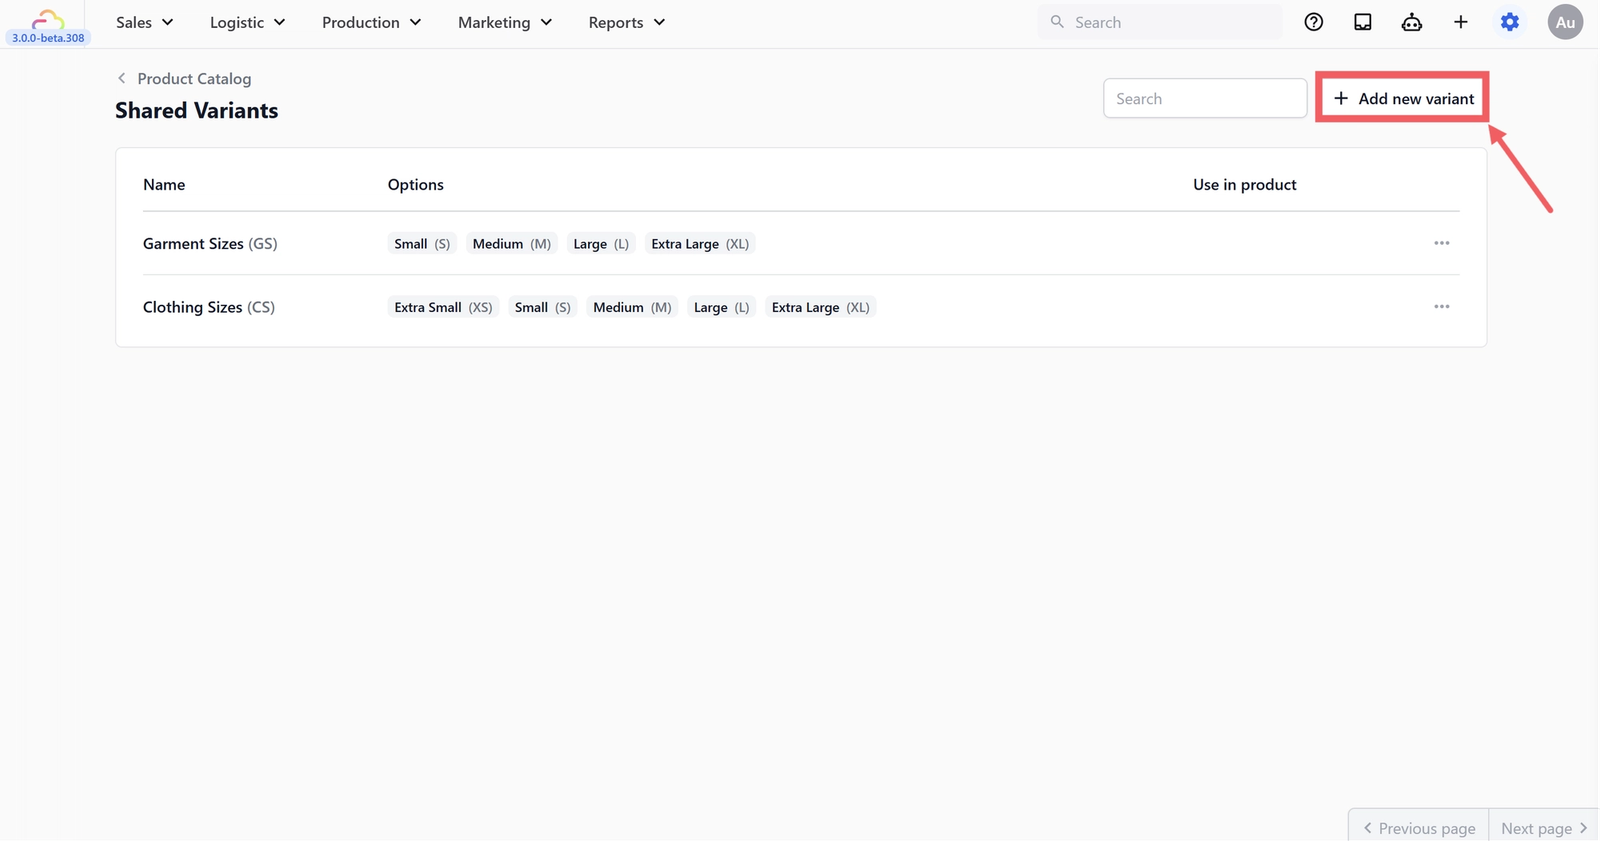
- Click + Add new variant.
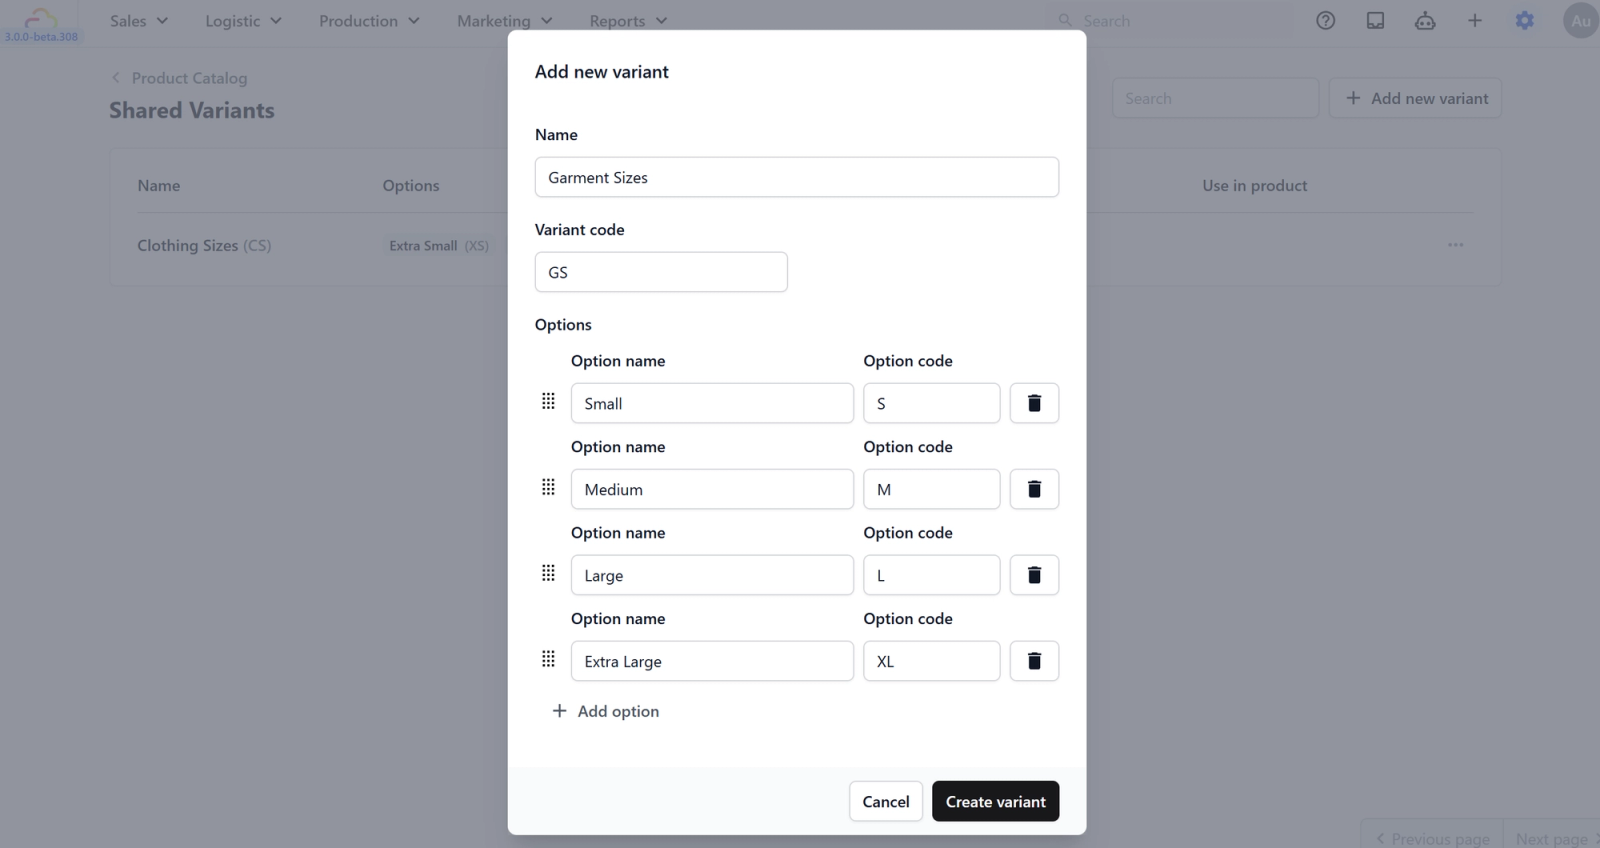
- Enter a Name (e.g. Sizing) and an optional Variant code.
- Add Options with a Name and Code (e.g. Small / S, Medium / M, Large / L).
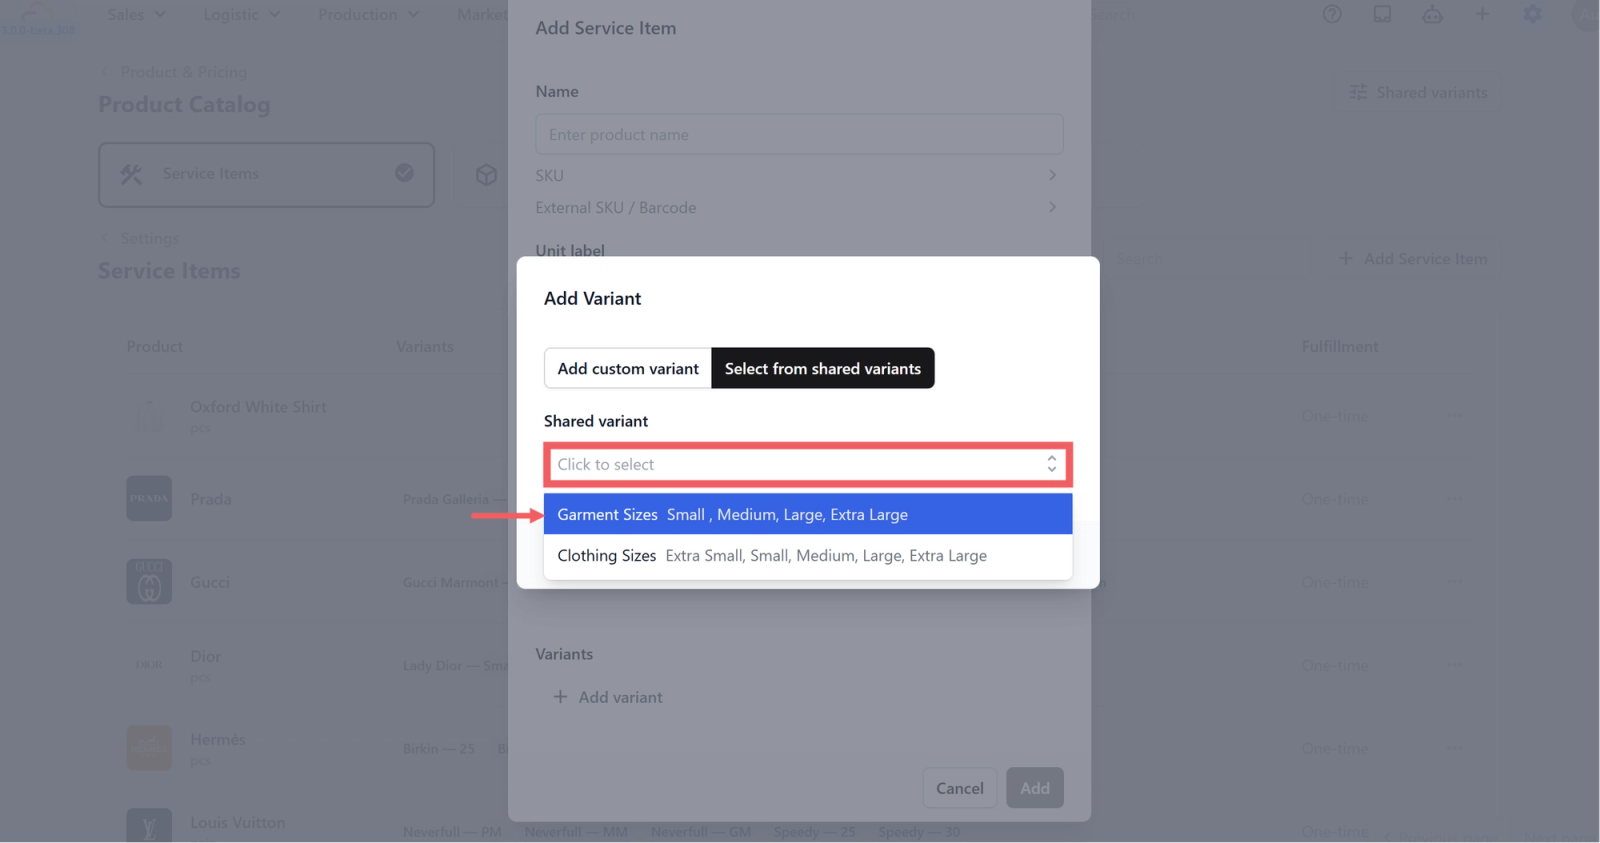
To apply a Shared Variant to a Service Item, open the Add Variant dialog on the item and choose Select from shared variants, then pick the set.
Collections
Collections group items into tabs at the POS. Without Collections, your POS shows one long catalogue list. With Collections, your staff taps a tab (e.g. Bag Services, Laundry) to see only that group.
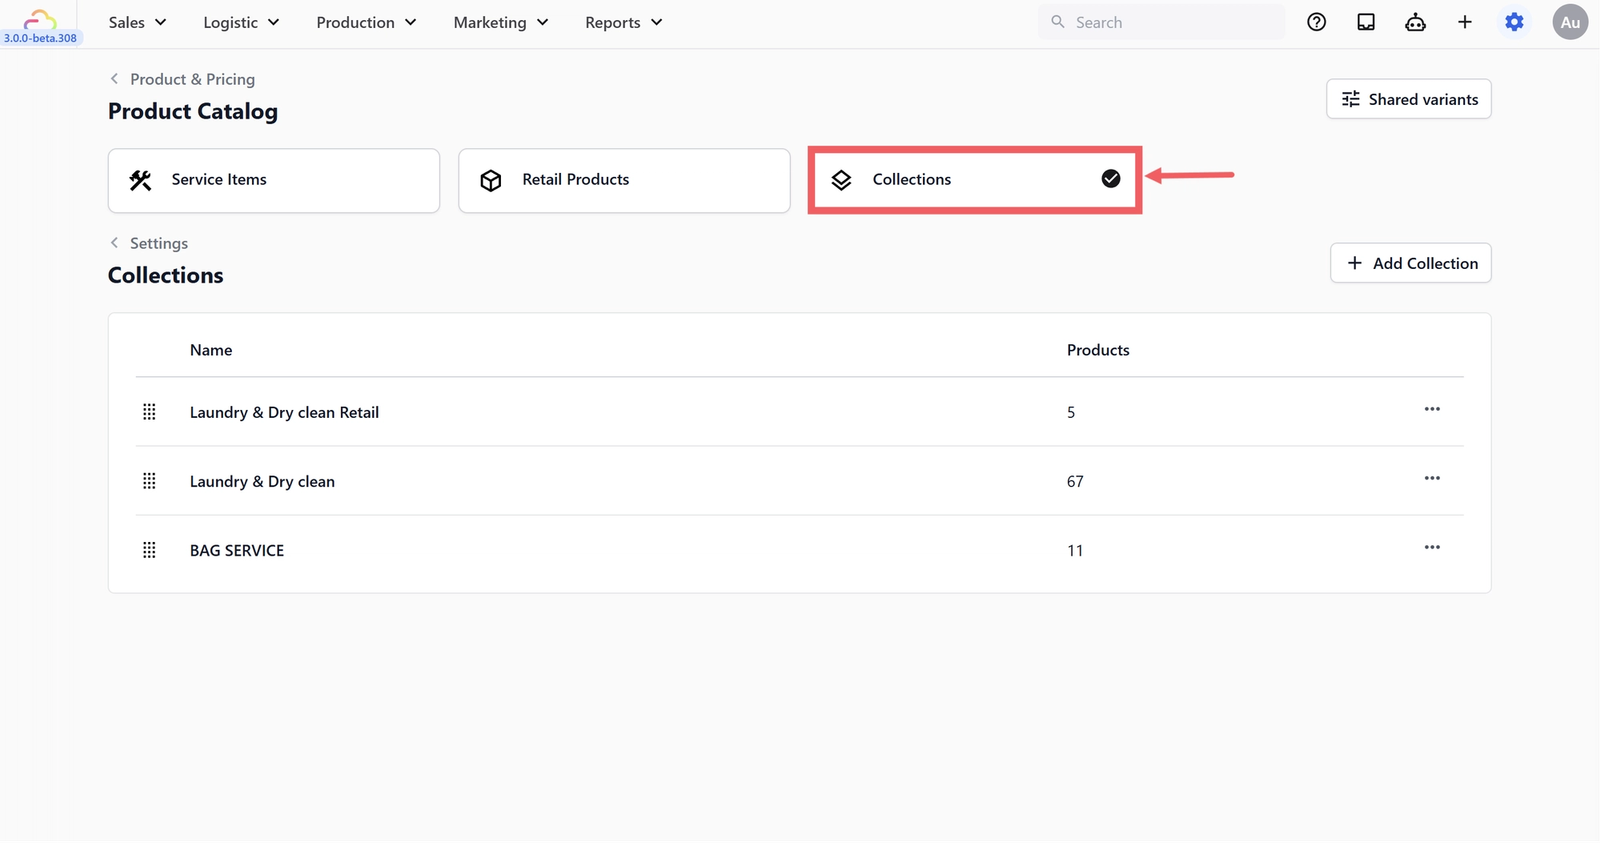
To create a Collection:
- Click the Collections tab inside Product Catalog.
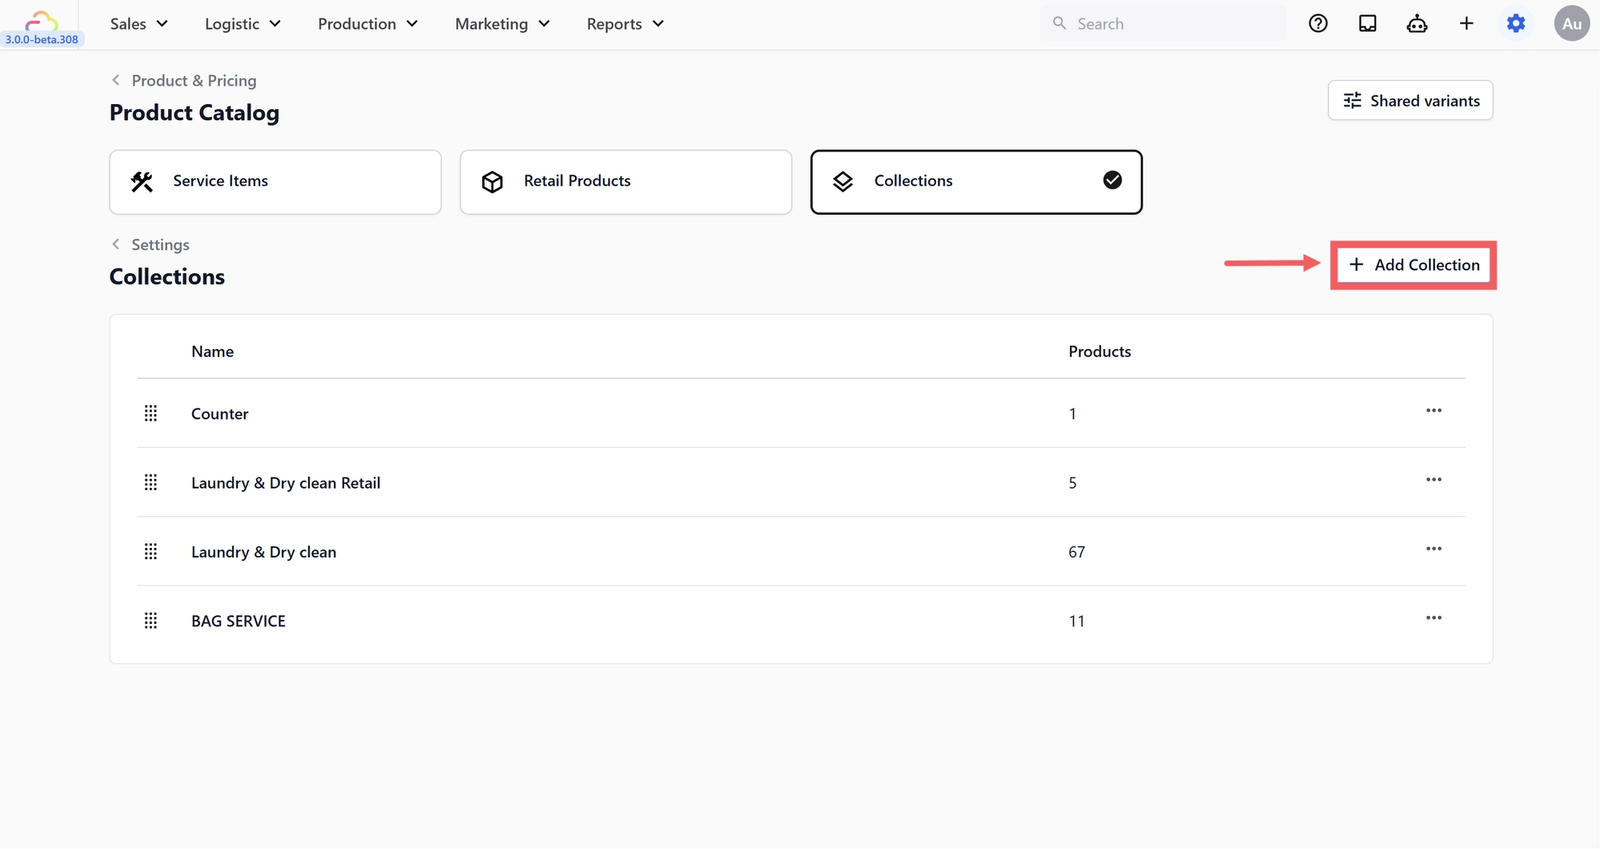
- Click + Add Collection.
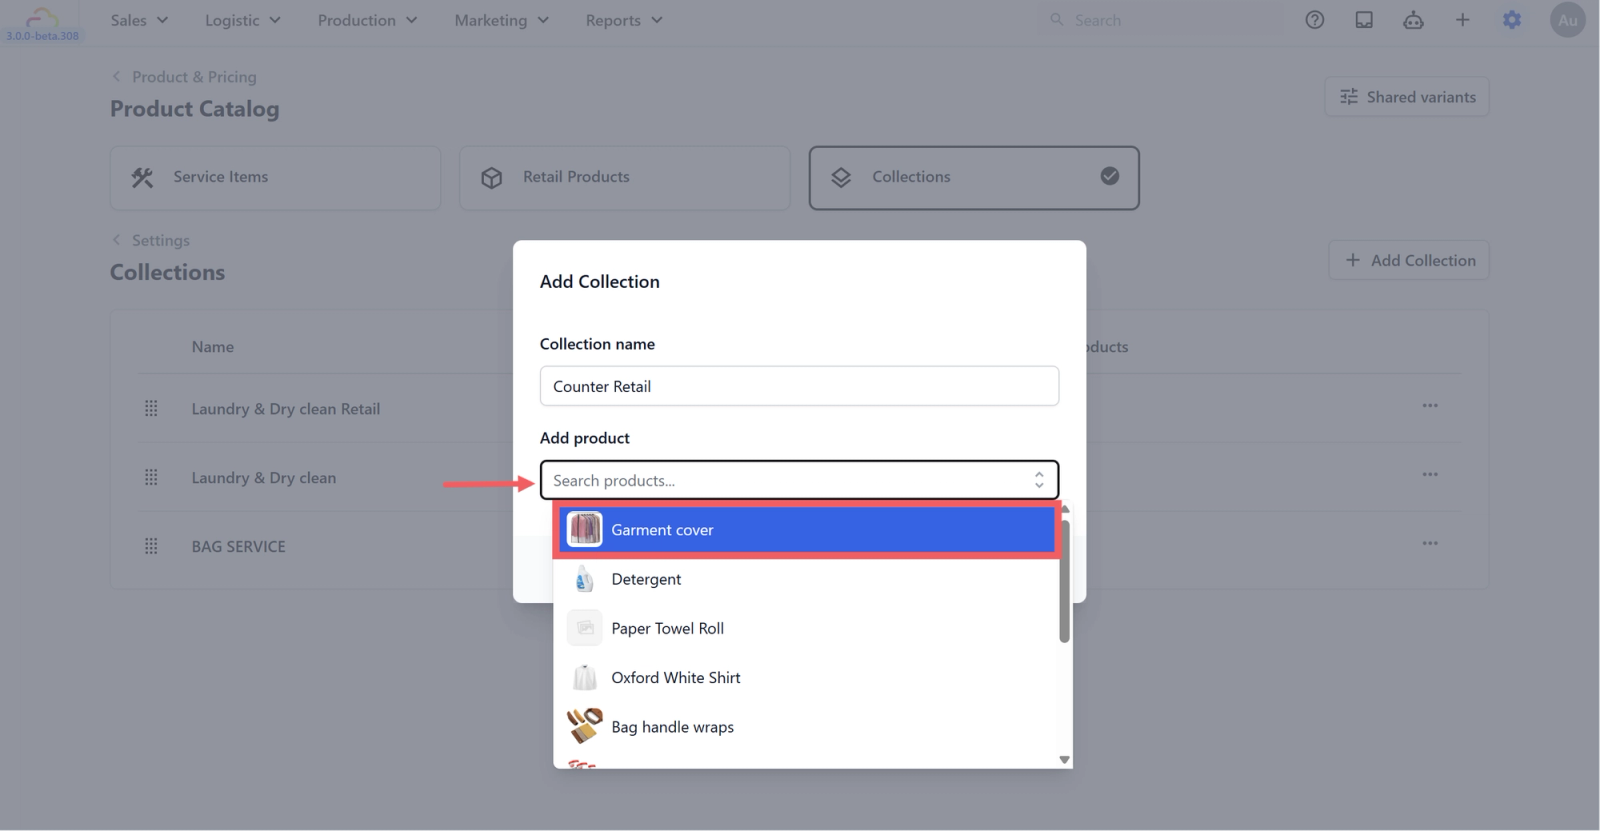
- Name it.
- Use Add product to pick items.
Collections can mix Service Items and Retail Products together. This is the only way to surface both types side-by-side at the POS.
Searching, Pagination, Editing and Deleting
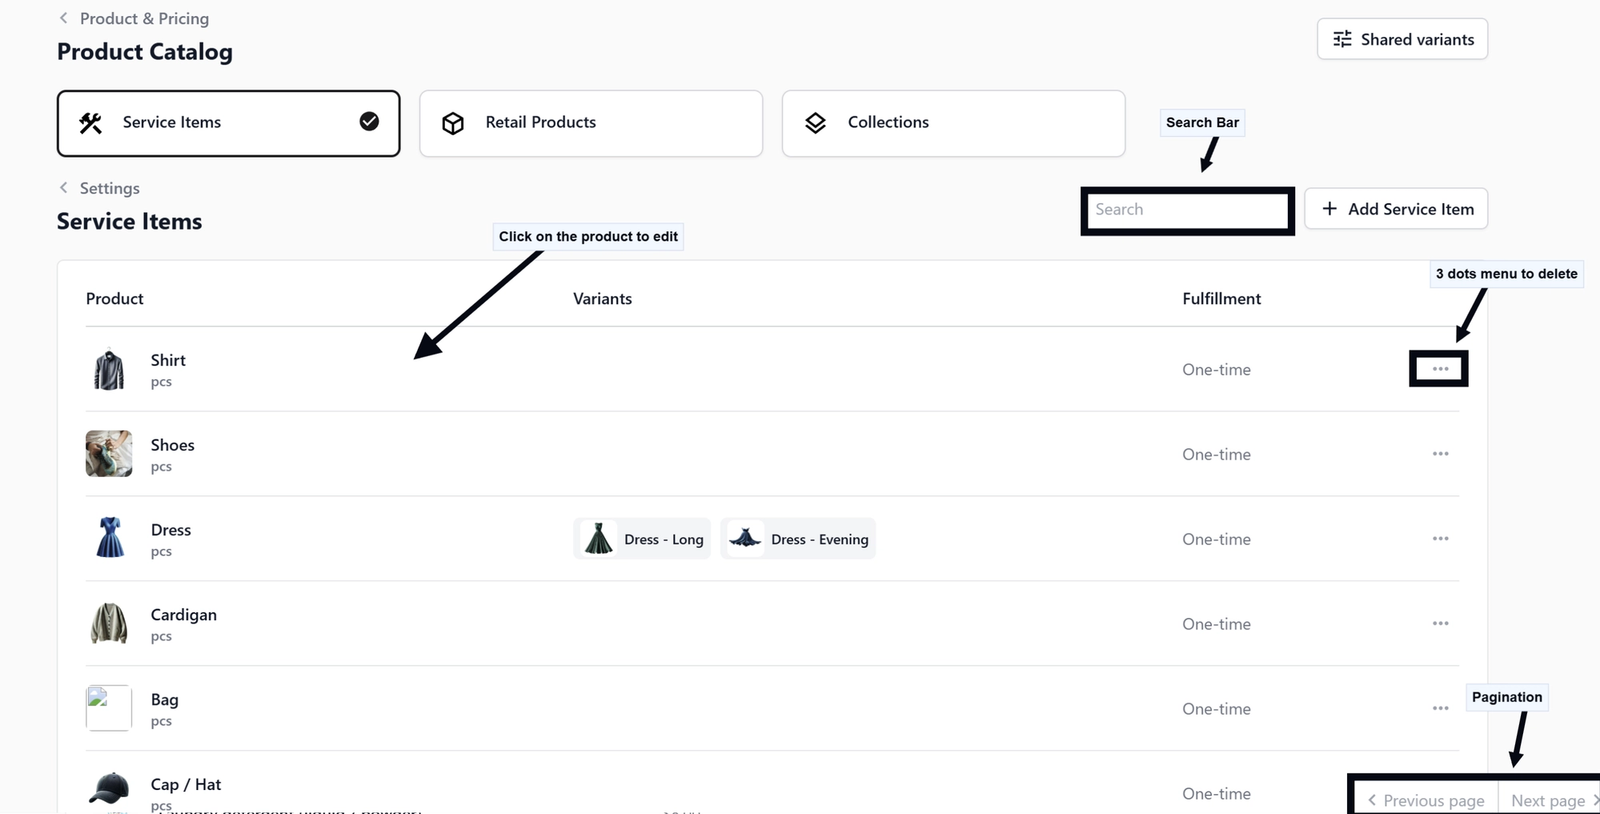
The Service Items tab has a search bar at the top right. Use it to find products by name. If your catalogue is large, page through using Previous page and Next page at the bottom right.
To edit a product, click on the product to open its details. To delete, click the ••• three-dots menu and select Delete.
FAQs
Should I add Shirt and Blouse as separate items or as variants of one item?
If your staff handles them with the same workflow and pricing structure, make Shirt the item and Blouse a variant. If they are different services with different prices, keep them separate.
Can I change a SKU later?
Yes, but if the SKU is already on printed labels, changing it can cause mismatches with old labels. Edit only when no active labels reference it.
Why do I have to fill in Unit label if I never look at it?
Unit label shows on receipts and reports. pcs is fine for most shops. It only matters when you sell something measured differently, like a pair of shoes or a set of curtains.
Can I add prices on this screen?
No. This screen only defines the items. Prices live in your Consumer Price Lists. The two screens are separate so you can have one item priced differently in different lists.
What happens if I add a variant to an item that is already in a published price list?
The new variant appears in the price list editor with no price set. You will need to draft a new version, fill in the price for the new variant, and republish. See Manage Price List Versions.
What's Next
With your service items set up, continue to Setting Up Retail Products for items you sell off the shelf, or jump to Setting Up Service Options to define the work you do on these items.
Give feedback
Up next
Setting Up Retail ProductsAdd the items you sell at a fixed price so your staff can ring them up at the POS instantly.
Read more