
Setting Up Accessories
In this article
Accessories are physical items that arrive together with the item your customer drops off, such as a strap, a brooch, a removable belt, a keychain, or a dust bag. They are not the service itself and they are not something you sell. They are tagged at intake so your team can return them with the finished item. This guide covers how to add an accessory, where accessories appear at the POS, drag-reorder, and edit/delete.
Contents
Contents
How to Access Accessories
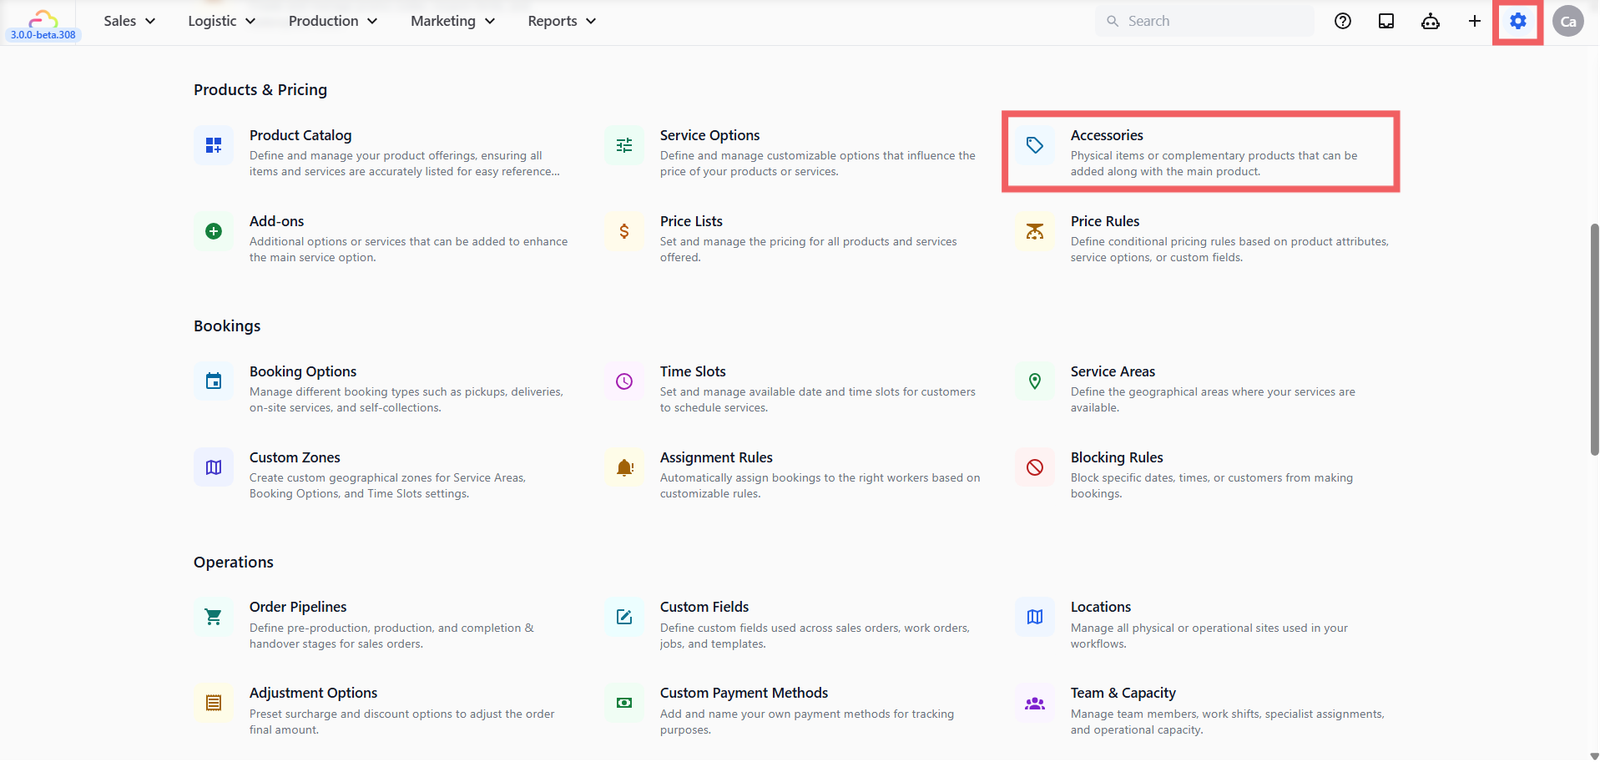
- Click the ⚙️ Settings icon in the top-right corner.
- Under the Products & Pricing section, click Accessories.
Adding an Accessory
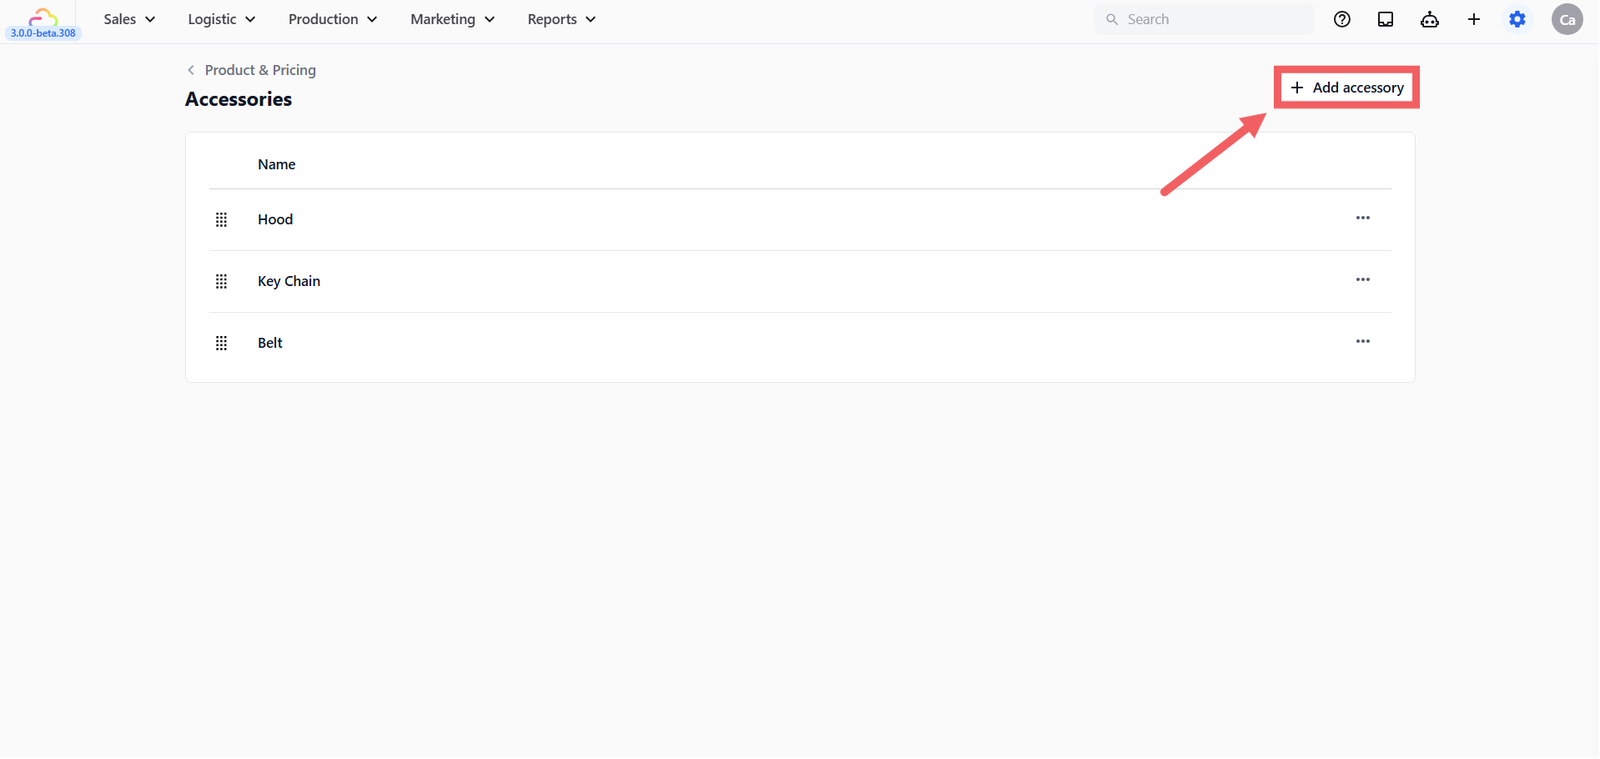
Click + Add Accessory at the top right. A dialog opens with two fields.
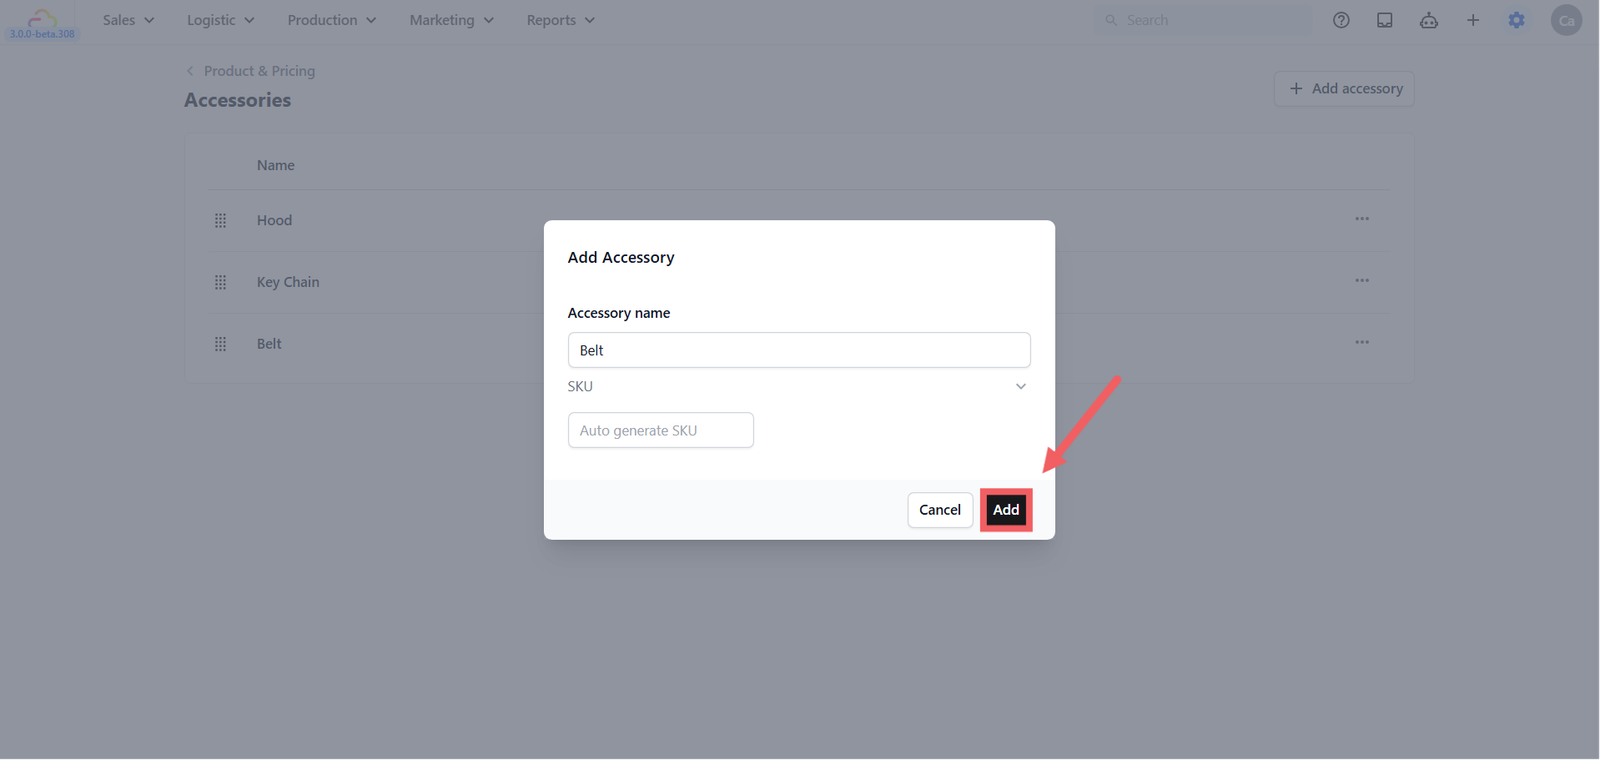
- Accessory name -> What staff sees when they tag an accessory at intake. Keep it specific.
- SKU -> Unique internal code. Leave on Auto generate SKU. Click the arrow to type your own only if you have an existing inventory code.
Click Add to save. The accessory appears in the table.
Where Accessories Appear at the POS
Accessories appear in the line-item edit panel at the POS, not on the initial intake screen. After staff add a Service Item to the order, in the cart block click the Edit button.

The Accessories picker appears alongside the Add-ons picker. Staff increment the count for each accessory the customer brought (e.g. 1 strap, 1 dust bag).
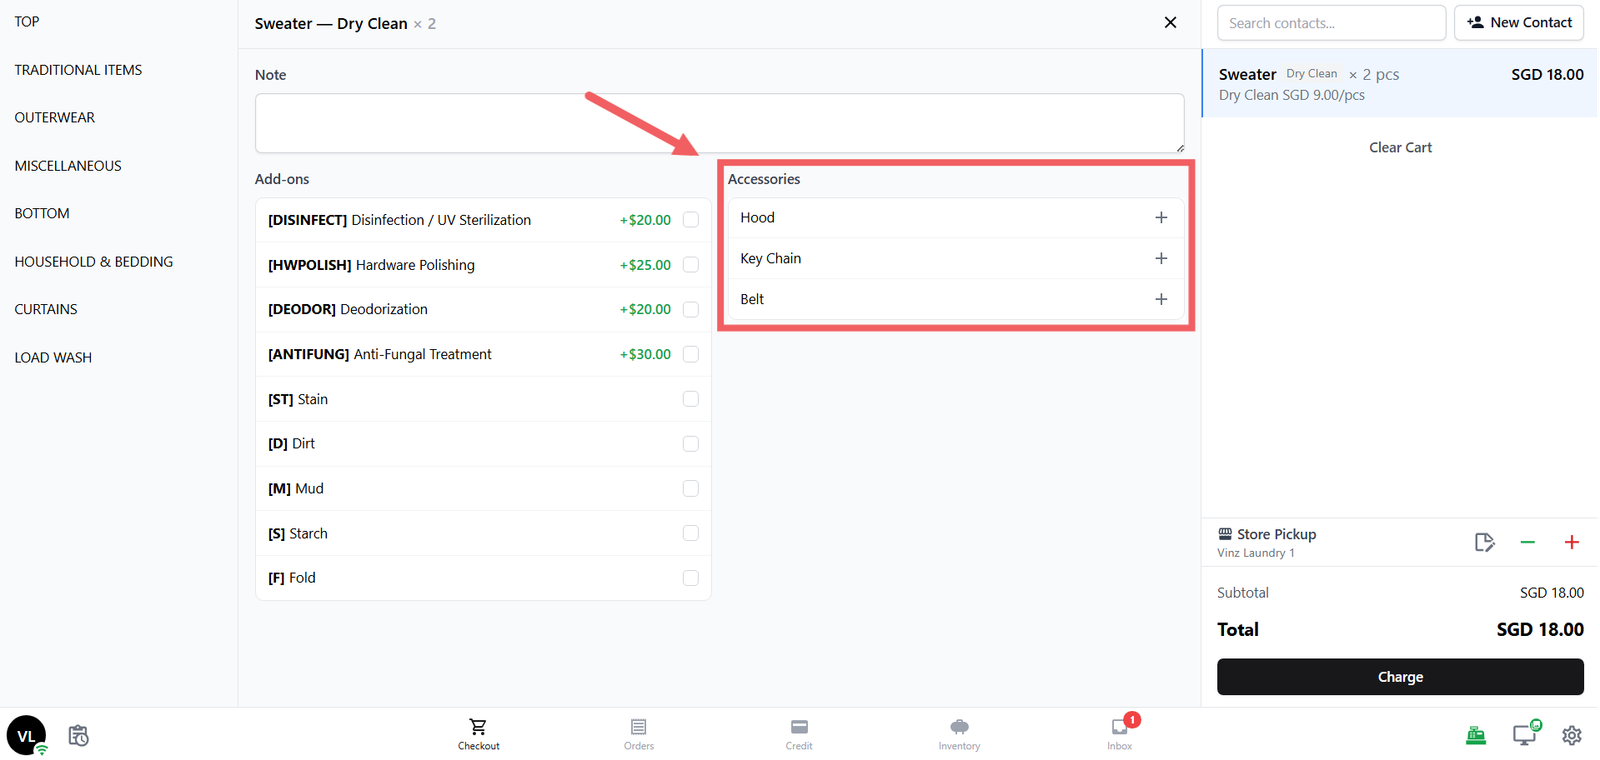
Because accessories are linked to a specific line item, your workshop sees exactly which accessories belong to which item, which matters when one customer drops off multiple items.
Drag-Reorder
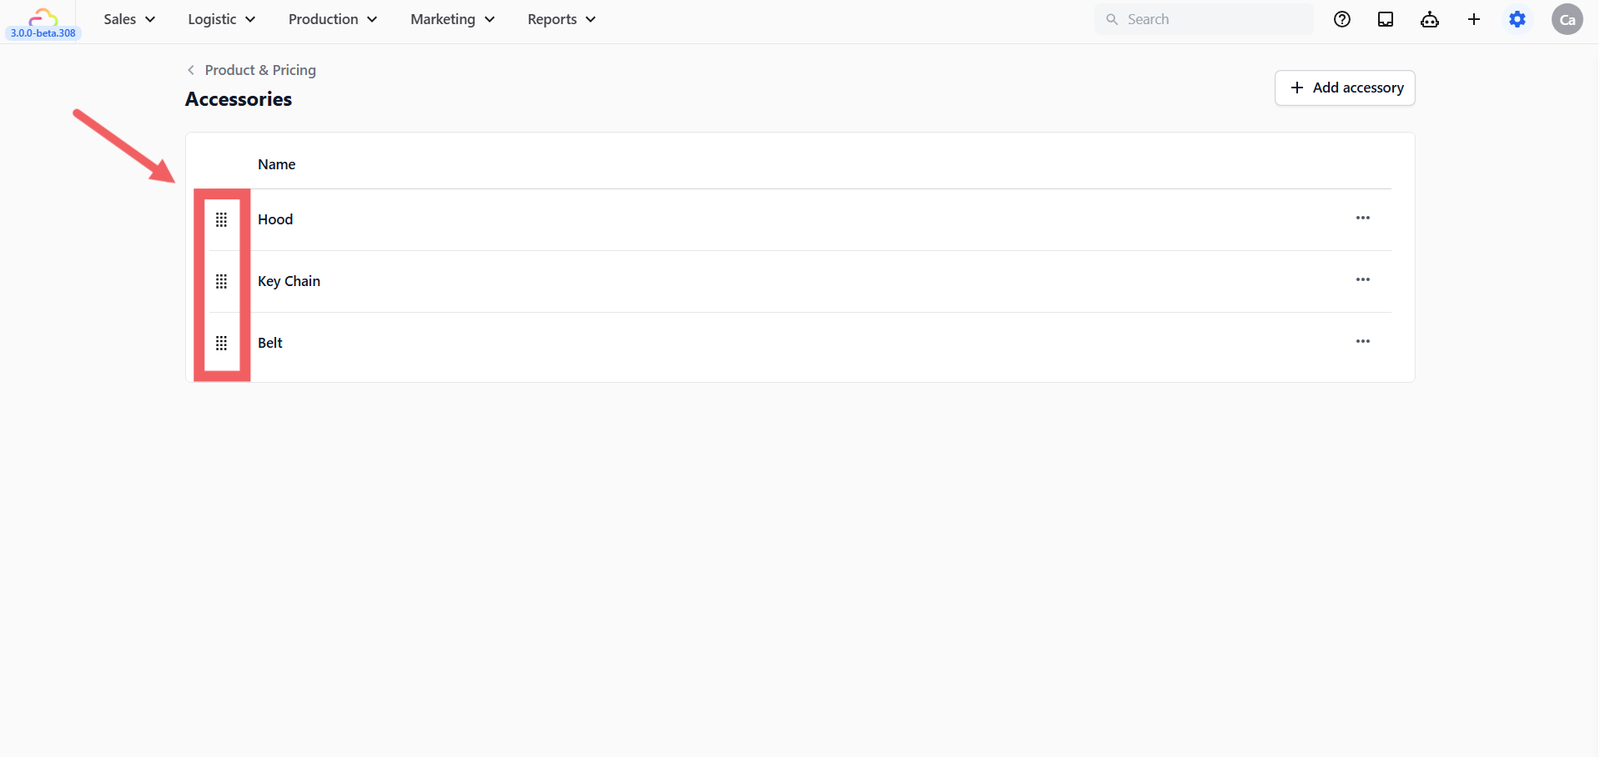
Click and hold the drag handle (six dots on the left of each row) to drag an accessory up or down. The order on the settings page is the order shown in the POS Accessories picker. Place your most common accessories at the top so staff find them in one tap.
Edit and Delete
Click the ••• three-dots menu on a row to Edit or Delete.
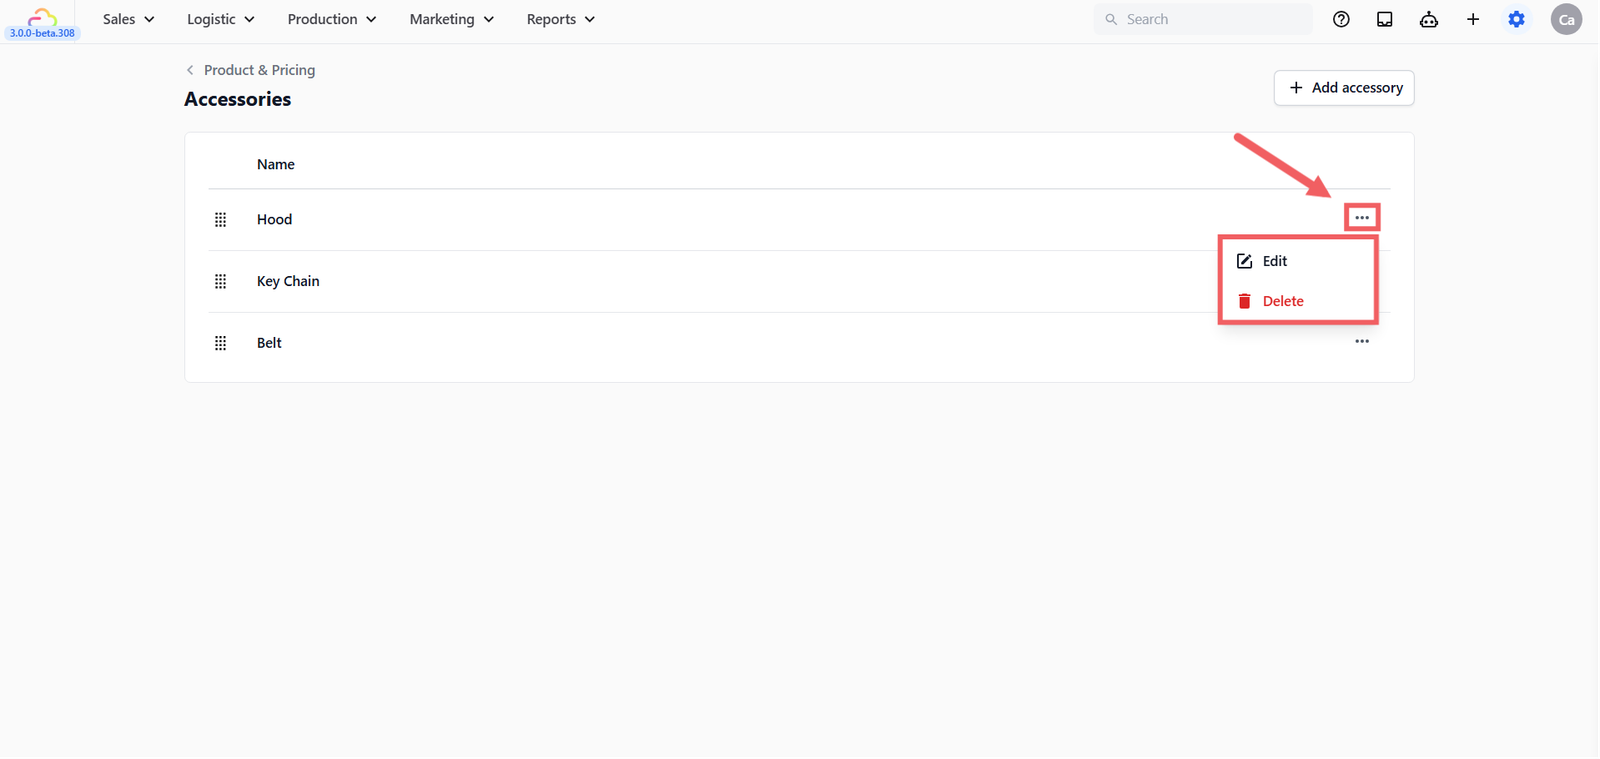
Editing changes the name or SKU on all future intakes. Past orders keep whatever was tagged at the time. Deleting removes the accessory from the picker so staff no longer see it as an option, but past orders that referenced it remain intact.
FAQs
What is the difference between an Accessory and an Add-on?
An Accessory is a physical thing the customer brought with the item (a strap, a hook). It has no charge, it is just recorded so it does not get lost. An Add-on is a paid extra (gift wrap, express, starch) and carries a surcharge. See [Setting Up Add-ons] for the difference in detail.
Can an Accessory be attached to a Retail Product?
No. Accessories live at line-item level on Service Items only. Retail Products are sold standalone and do not need intake tagging.
Do Accessories print on the customer receipt?
They appear on the order detail and on item labels by default, depending on your label template configuration. Check your label template if you want to confirm what prints.
Why don't I see Accessories on my customer's online booking?
Accessories are an in-shop intake feature. They are tagged when staff physically receive the item, not at the booking step. Online bookings carry order notes; accessories are added when the customer drops off.
Does deleting an Accessory affect old orders?
No. Old orders keep the accessory record they were created with. Delete only removes it from the picker for future intakes.
What's Next
Continue to [Setting Up Add-ons] to define paid extras like gift wrapping, starching, or express service.
Give feedback
Up next
Setting Up Add-onsDefine paid extras (express, gift wrap, disinfection) your staff can add on top of a service so the surcharge is calculated automatically.
Read more