Setting Up Custom Zones
In this article
A Custom Zone is a named part of the map your business covers. Once zones exist, everything else in Bookings can reference them — service areas, time-slot limits, assignment rules, and per-zone minimum orders. Use this only if you want to limit or price differently by area.
Contents
Contents
When You Need Custom Zones
Use Custom Zones only if one area needs different rules from another. You can skip this entire section if every customer is covered by the same rules, the same minimum order, and the same driver.
The Three Ways to Create a Zone
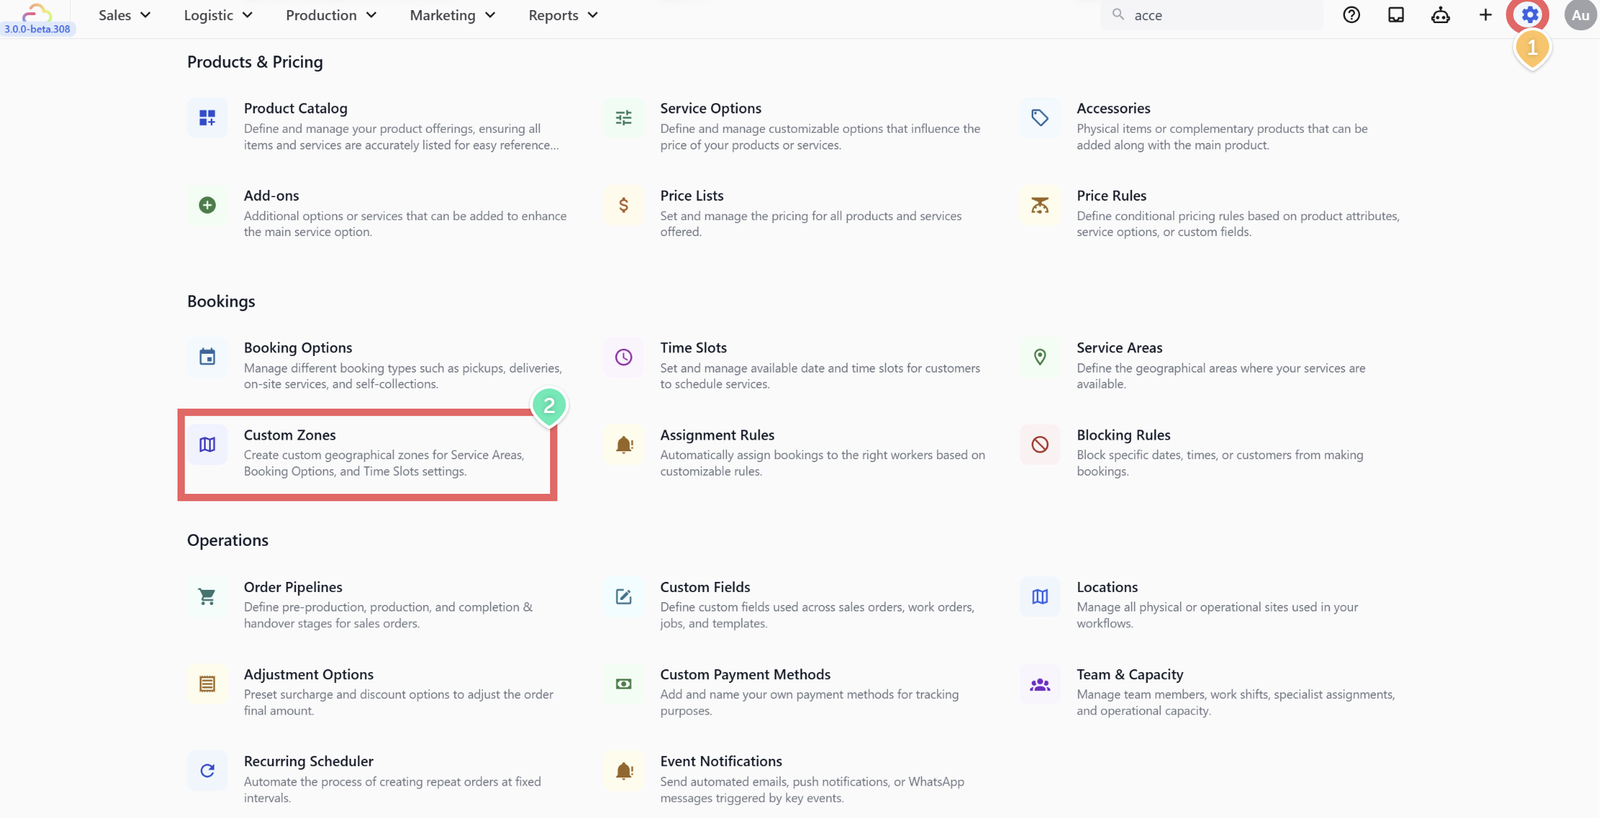
- Click the ⚙️ Settings icon in the top-right corner.
- Under the Bookings section, click Custom Zones.
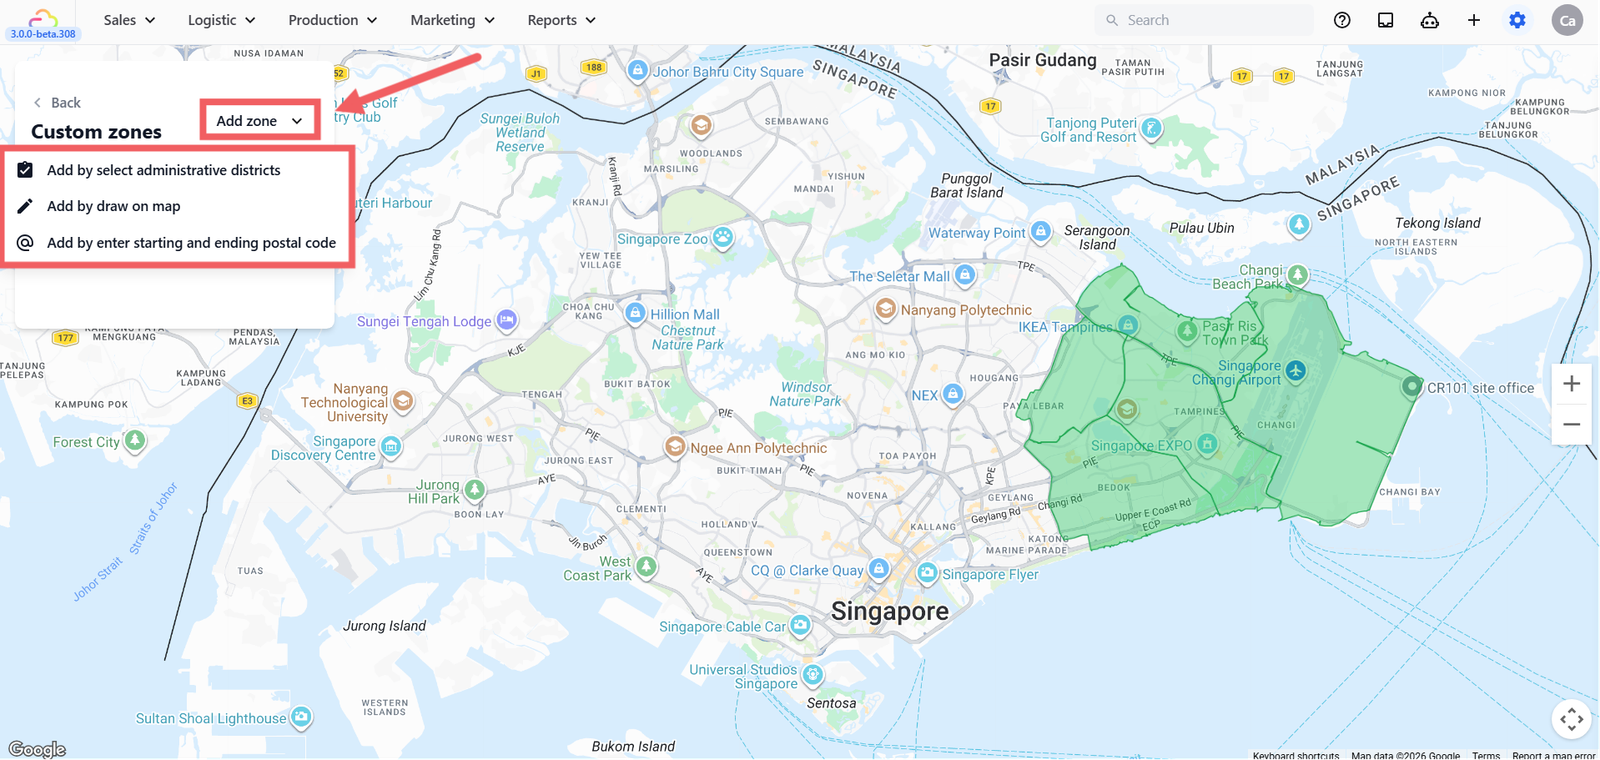
- Click + Add Zone and pick one method.
| Method | How it works | When to use |
|---|---|---|
| Administrative districts | Pick from a pre-built list of government regions | Fast setup when your country has clean district names |
| Draw on Map | Tap points on the map to draw any shape | Neighborhoods or driver routes that do not match a district |
| Postal code range | Enter a start and end postal code | Dense housing estates or a specific area |
Method 1: Administrative Districts
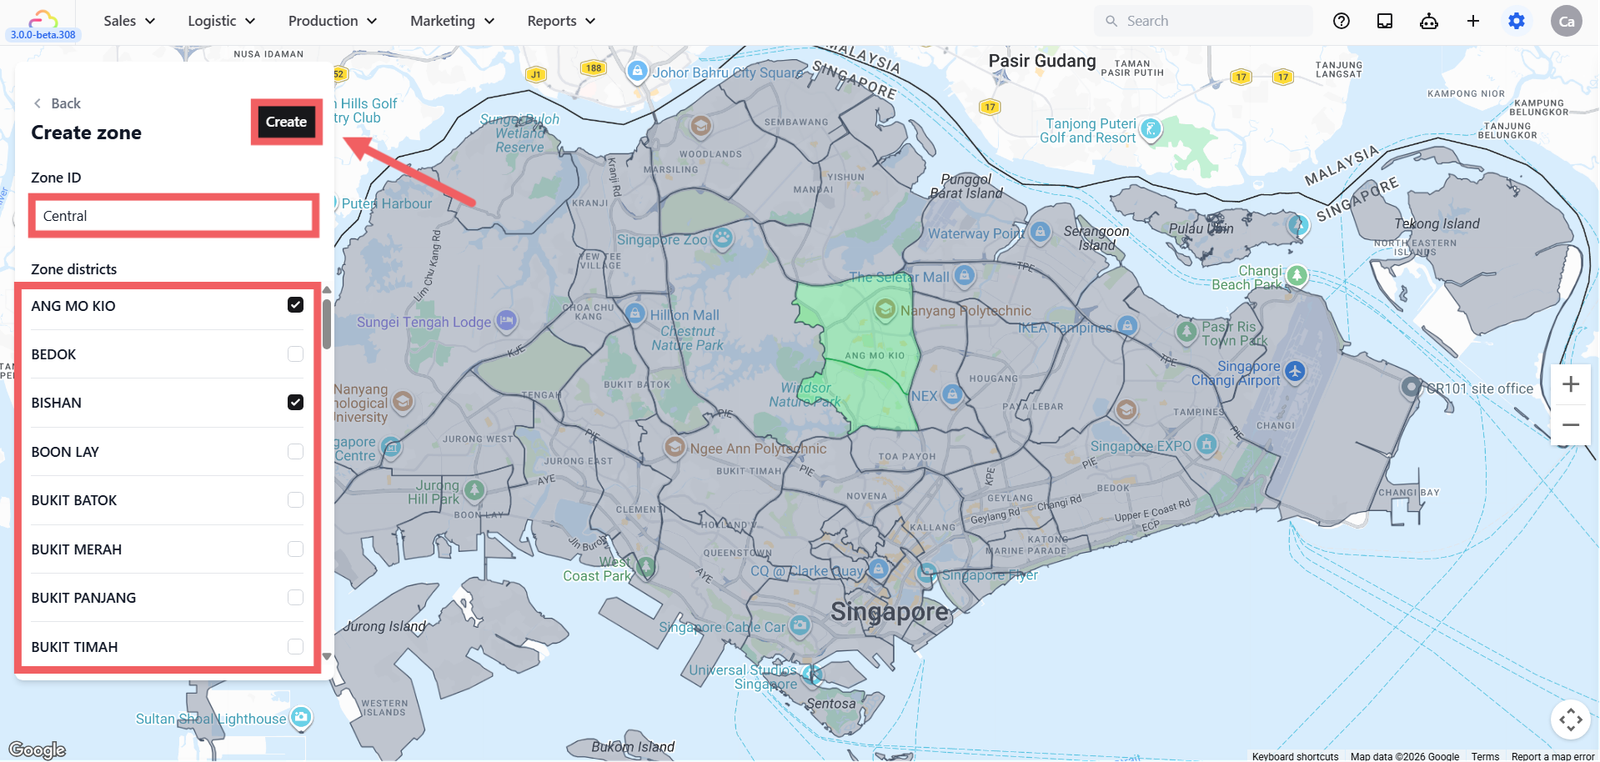
- Click + Add Zone → Add by select administrative districts.
- Enter a Zone ID.
- Tick one or more districts from the list.
- Click Create.
Method 2: Draw on Map
- Click + Add Zone → Add by draw on map
- Enter a Zone ID.
- Tap points on the map to form a closed shape (at least 3 points).
- Click Create.
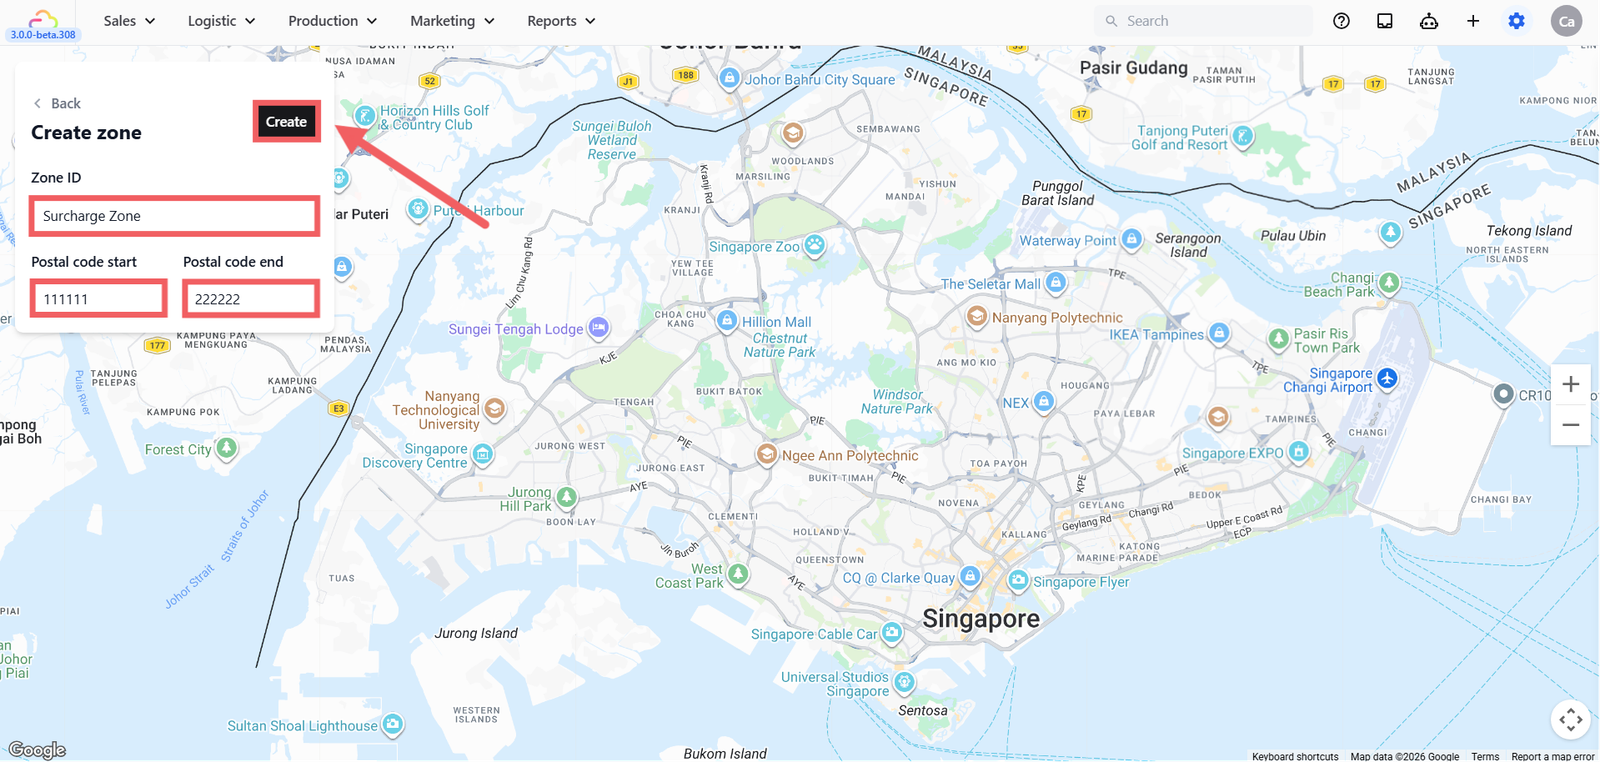
Method 3: Postal Code Range
- Click + Add Zone → Add by enter postal code range.
- Enter a Zone ID.
- Enter the start and end postal codes.
- Click Create.
How to Name Your Zones
The Zone Name is how you will recognize the zone in every other setting.
| Name style | Example | Verdict |
|---|---|---|
| Area name | NORTH, CBD, EAST | Good |
| Area and purpose | REMOTE-WEST, CBD-SURCHARGE | Good |
| Driver name | DRIVER-A-ZONE | Fine if that driver always covers this area |
| Random code | Z1, A, area1 | Avoid, since it will be easier to forget what it means |
FAQs
Do I need Custom Zones before I go live?
Use this only if you want to limit service by area, charge different minimums per area, or auto-assign drivers by area. If you serve everywhere at the same price, skip this section.
Can two zones overlap?
Yes. When a customer's address is inside more than one zone, the system picks the first match. Keep zones separate unless you deliberately want overlap.
What happens if a customer's address is outside every zone?
By itself nothing. The customer will only be blocked if a Service Area is configured with specific zones. See [Setting Up Service Areas].
Can I rename a zone without breaking existing rules?
No. Zone Name is locked after save. Delete and recreate if you must rename, then update the rules that reference it.
What's Next
Now that your zones are drawn and named, continue to [Setting Up Service Areas] to tell each business unit which zones it covers and what the minimum order is per area.
Give feedback
Up next
Setting Up Service AreasTell each business unit which zones it covers, what the minimum order is, and what customers outside your area see.
Read more