Saving, Previewing, and Managing Booking Options

In this article
Once you have finished configuring your booking option — the type, lead time, surcharge, limits, and rescheduling rules — this article walks you through the final steps: saving, assigning to a business unit, previewing the calendar, and managing options after they go live.
Contents
Contents
Saving and Assigning to a Business Unit
When you are done configuring all the settings, click Create option at the top of the page. A dialog will appear asking you to assign this option to one or more business units.

| Pick this | Result |
|---|---|
| One business unit | Option is active for that unit only |
| Multiple business units | Option is active for all selected units at once |

Click Create to save.
Managing Your Options
On the Booking Options list, click the ••• menu on any row to manage an existing option.
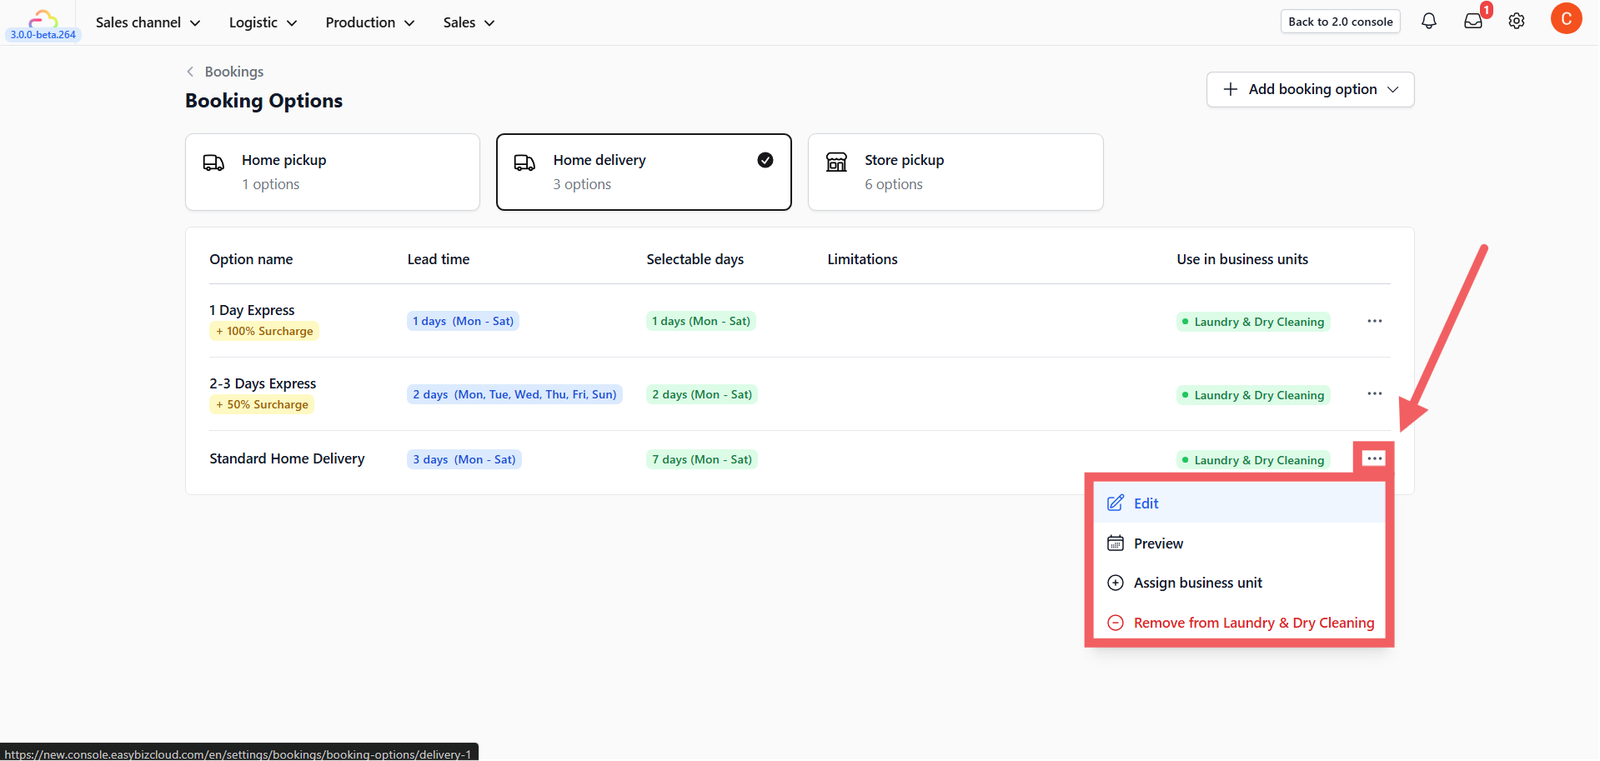
| Action | What it does |
|---|---|
| Edit | Modify lead time, name, or any other setting |
| Preview | Simulate the availability calendar without entering the edit screen |
| Assign to Business Unit | Activate the option for an additional business unit or re-enable an inactive one |
| Remove from Business Unit | Disables the option for a specific business unit without deleting it. Status changes to Inactive. |
| Delete | Permanently removes the option. Only visible when the option is Inactive across all business units. |
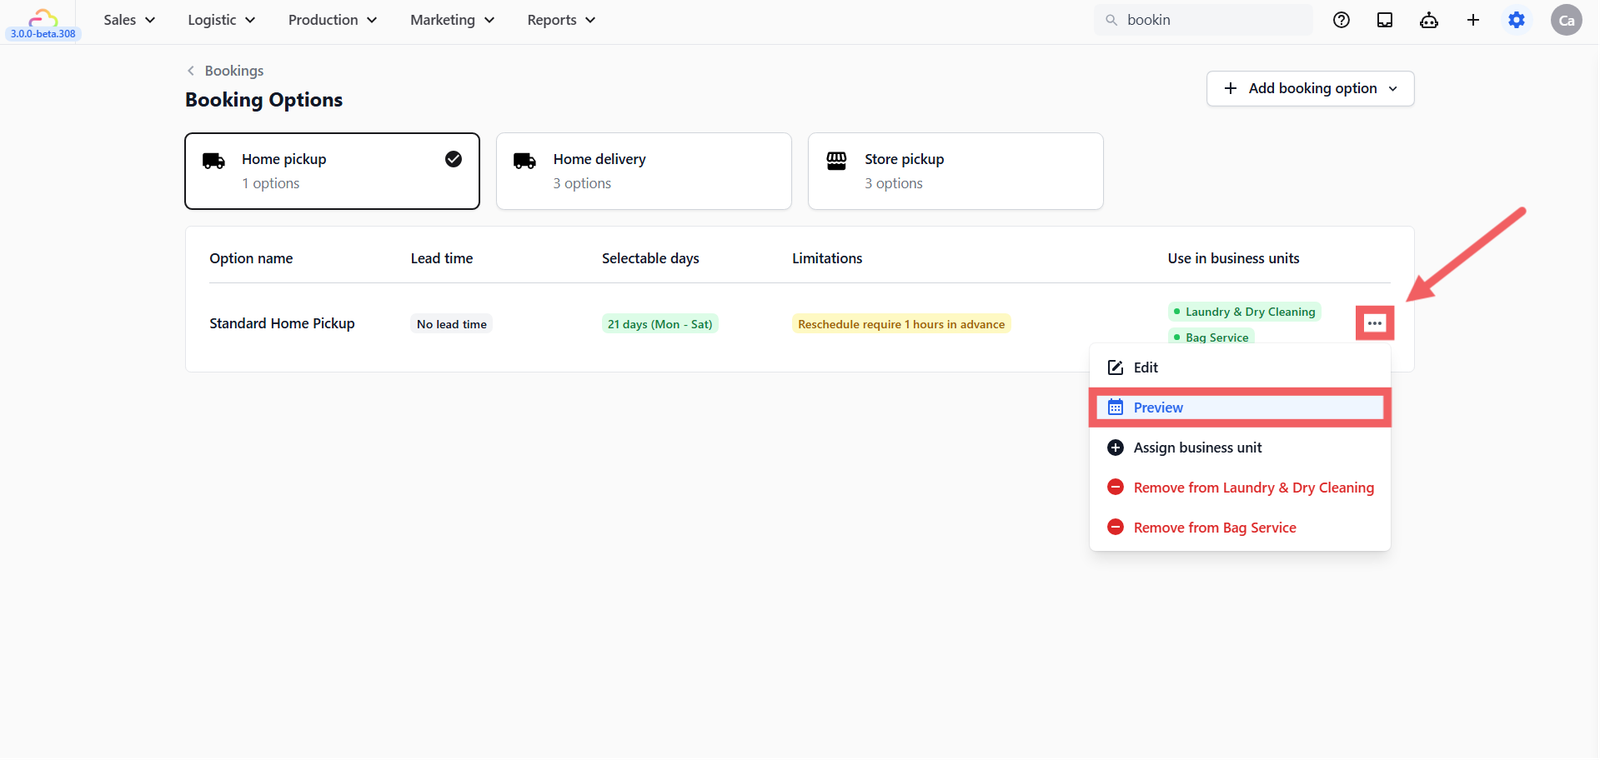
Previewing Your Option
Before going live, use the preview to check that your lead time, selectable days, and blocking rules are producing the right calendar for customers.
- On the Booking Options list, find your option.
- Click the ••• menu on its row.
- Select Preview.
The preview shows a calendar with three colour indicators:
- Blue (Workday) -> days counted as preparation time based on your lead time setting
- Green (Selectable) -> days the customer can actually pick
- Grey (Off Day) -> blocked days, unchecked weekdays, or dates outside the selectable range
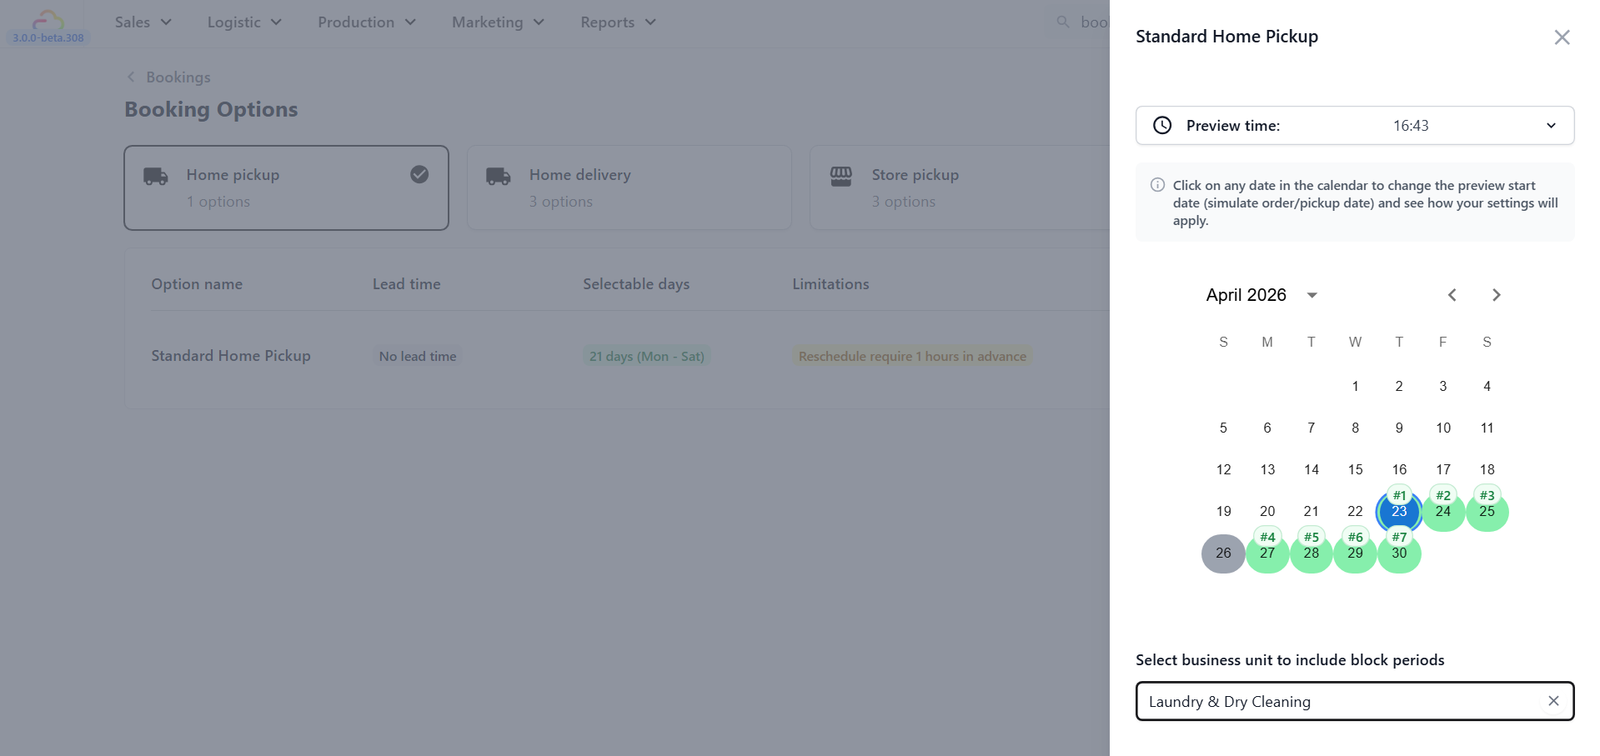
You can manually adjust the Preview Time and Date at the top right of the calendar to test different conditions:
- Change the time to before your cut-off versus after to see how the first available date shifts
- Click a different date on the calendar to simulate a booking made on a future day
To test how public holidays or block-out dates affect this option, select a Business Unit in the dropdown below the calendar. See [Setting Up Blocking Rules] to configure those dates.
FAQs
Do I have to assign to a business unit before the option goes live?
Yes. An option with no business unit assigned is marked Inactive and hidden from customers. Always assign at least one business unit when you click Create option.
Can I assign the same option to all my business units at once?
Yes. The Assign to business units dialog lets you select multiple units in one step.
What is the difference between Remove from Business Unit and Delete?
Remove from Business Unit disables the option for one specific unit but keeps it in the system. Delete permanently removes it and only appears when the option is already Inactive across all units.
Why do I see blue days in the preview even on days I did not block?
Blue days are your lead time buffer, not blocked days. They represent the preparation window before the first selectable date. If you see more blue days than expected, check your lead time setting and working days configuration.
Can I preview how the calendar looks for a specific business unit?
Yes. Use the Business Unit dropdown below the preview calendar to include that unit's blocking rules in the simulation.
What's Next
Now that your booking option is saved and confirmed in the preview, the next step depends on whether you serve specific areas. If you want to restrict which zones can use this option or set different minimum orders by area, continue to [Setting Up Custom Zones]. If every customer can book regardless of location, skip ahead to [Setting Up Time Slots].
Give feedback

Up next
Setting Up Custom ZonesGroup your city into named zones so you can set delivery rules, fees, and driver assignments by area instead of one by one.
Read more