
Before You Start
- The printer must already be connected to this counter. See Connecting Your Printers to the POS.
- Have the replacement roll and ribbon on hand, in the same width as the ones coming out.
- The power button is on the left side of the printer. Every job below starts with the printer switched off.
- For a torn ribbon, have clear tape and a pair of scissors ready.
Changing the Label Roll
- Switch the printer off.
- Press the cover-open buttons on both sides of the printer and lift the cover.
- The roll hangs on a holder with two arms. Pull the arms apart, lift out what is left of the old roll, then hold the arms apart again and drop the new roll on.
- Let the arms close onto the roll and check the stand sits centred on the roll, so the roll cannot wander side to side.
- Move the paper guides in until they sit against both edges of the label, the same width as the roll.
- Pull the labels out until they pass the black roller, the gap sensor and, if your printer has one, the cutter.
- Close the cover and press it down until you hear the click.
- Switch the printer on.
Replacing the Carbon Ribbon
Your label printer holds two rollers. The upper roller winds up the ribbon you have already used, and the lower roller carries the fresh roll that feeds into the printer. Replacing the ribbon means taking both out, putting the new roll on the lower roller, and taping its starting edge to the empty core on the upper one.
- Switch the printer off.
- Press the cover-open buttons on both sides of the printer and lift the cover.
- Press the blue carbon-open button to lift the carbon holder.
- Take both rollers out, following Taking the Rollers Out and Putting Them Back.
- If the two are still joined, cut straight across the ribbon with scissors, then slide the used ribbon off both rollers. Keep the empty cardboard tube from the upper roller, because the new ribbon winds onto it.
- Hold the new roll so its loose starting edge hangs down towards you, then slide the lower roller into it from the left, all the way through.
- Put the empty core back on the upper roller, then fit both rollers back into the holder.
- Pull out enough of the starting edge to reach the upper core, and tape it on straight and centred.
- Push the blue gear on the left until fresh ribbon has wound past the print head and the film is flat, smooth, and sitting in the centre.
- Close the carbon holder, then the cover, until you hear the click.
- Switch the printer on.
Taking the Rollers Out and Putting Them Back
Both rollers come out and go back the same way. The moulded lines inside the printer show you the path.
- To take a roller out, push it to the left until the small spring button at the left end presses in.
- Lift the right end up and out, following the line marked inside the printer on the right.
- To put a roller back, find the end with six flat sides (shaped like a pencil) and point it to the left.
- Push that end to the left until the spring button presses in, then lower the right end into place along the same line on the right.
- Turn the roller by hand. It should spin freely. If it does not, it is not sitting properly, and the ribbon will crease on the next tag.
Joining a Ribbon That Has Split
The carbon ribbon is the black roll that sits above your labels, and its ink is what the printer melts onto each label. When the ribbon tears across the middle, the top roll keeps turning but nothing is being pulled through it any more, so labels come out blank or half printed even though the printer sounds completely normal. You do not need a new roll for this. Tape the two torn ends back together and keep using the ribbon you have.
Switch the printer off.
Press the cover-open buttons on both sides of the printer and lift the cover.
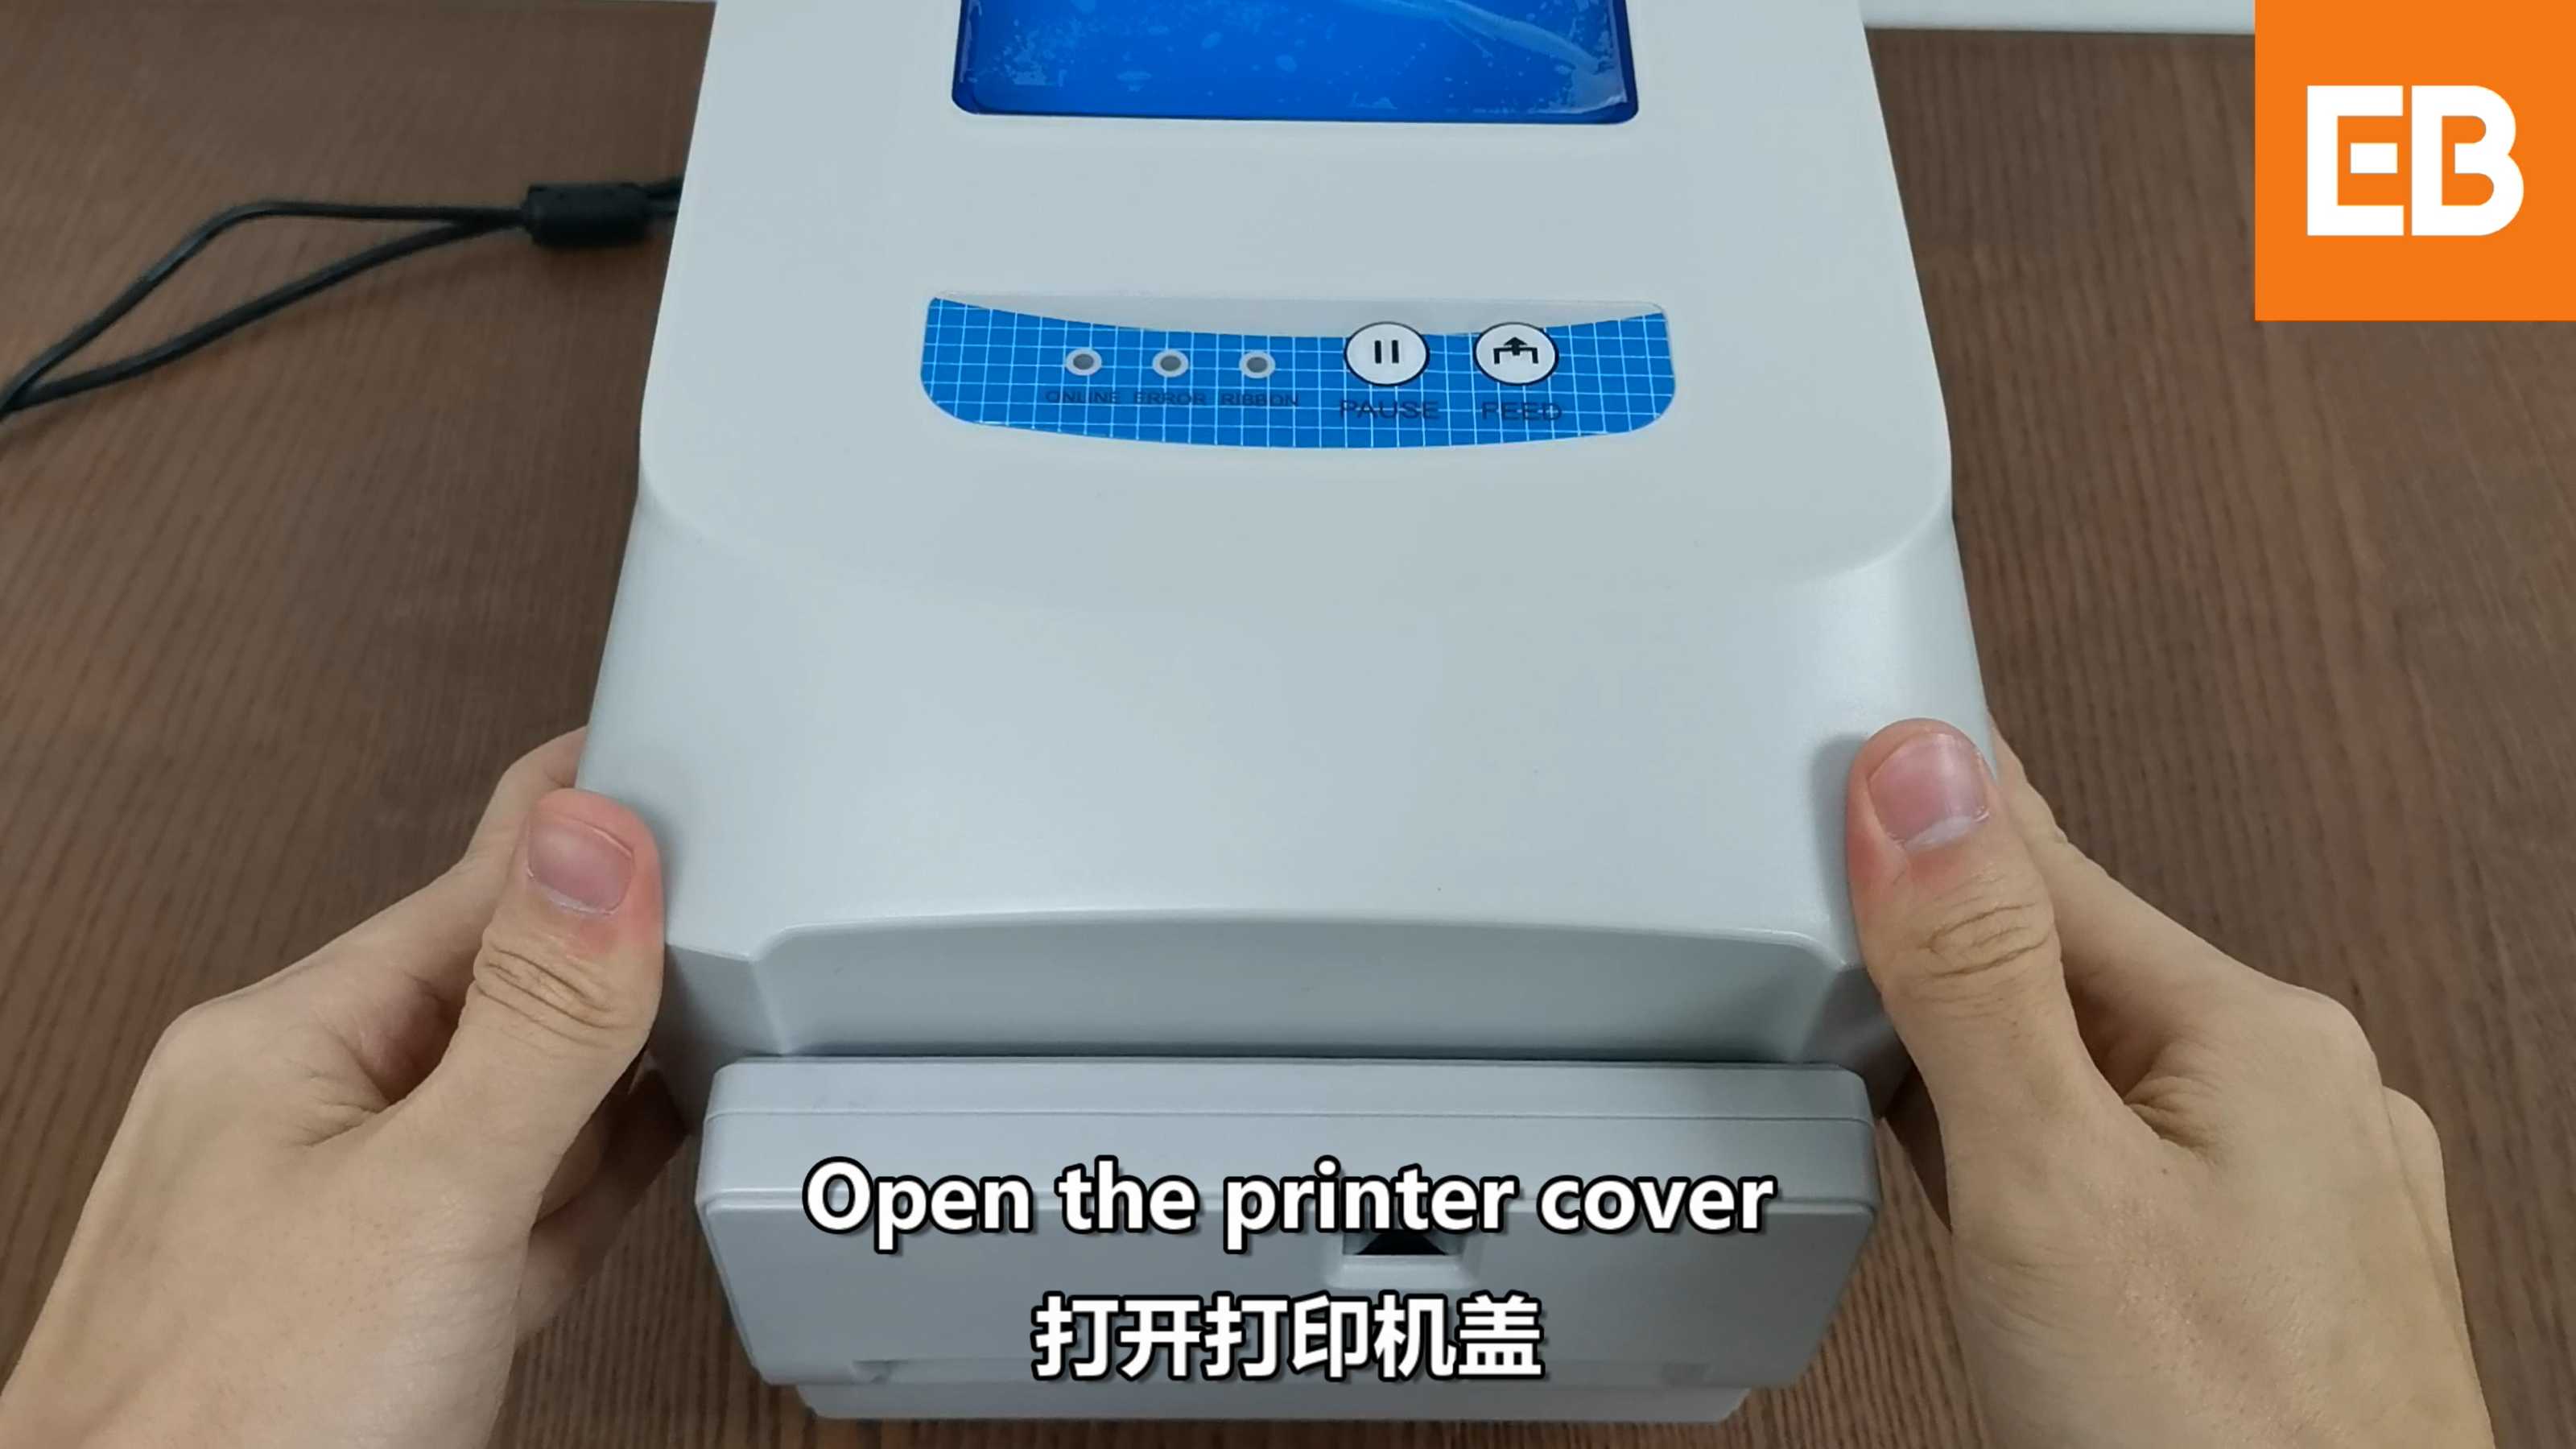
Press the blue carbon-open button to lift the carbon holder.
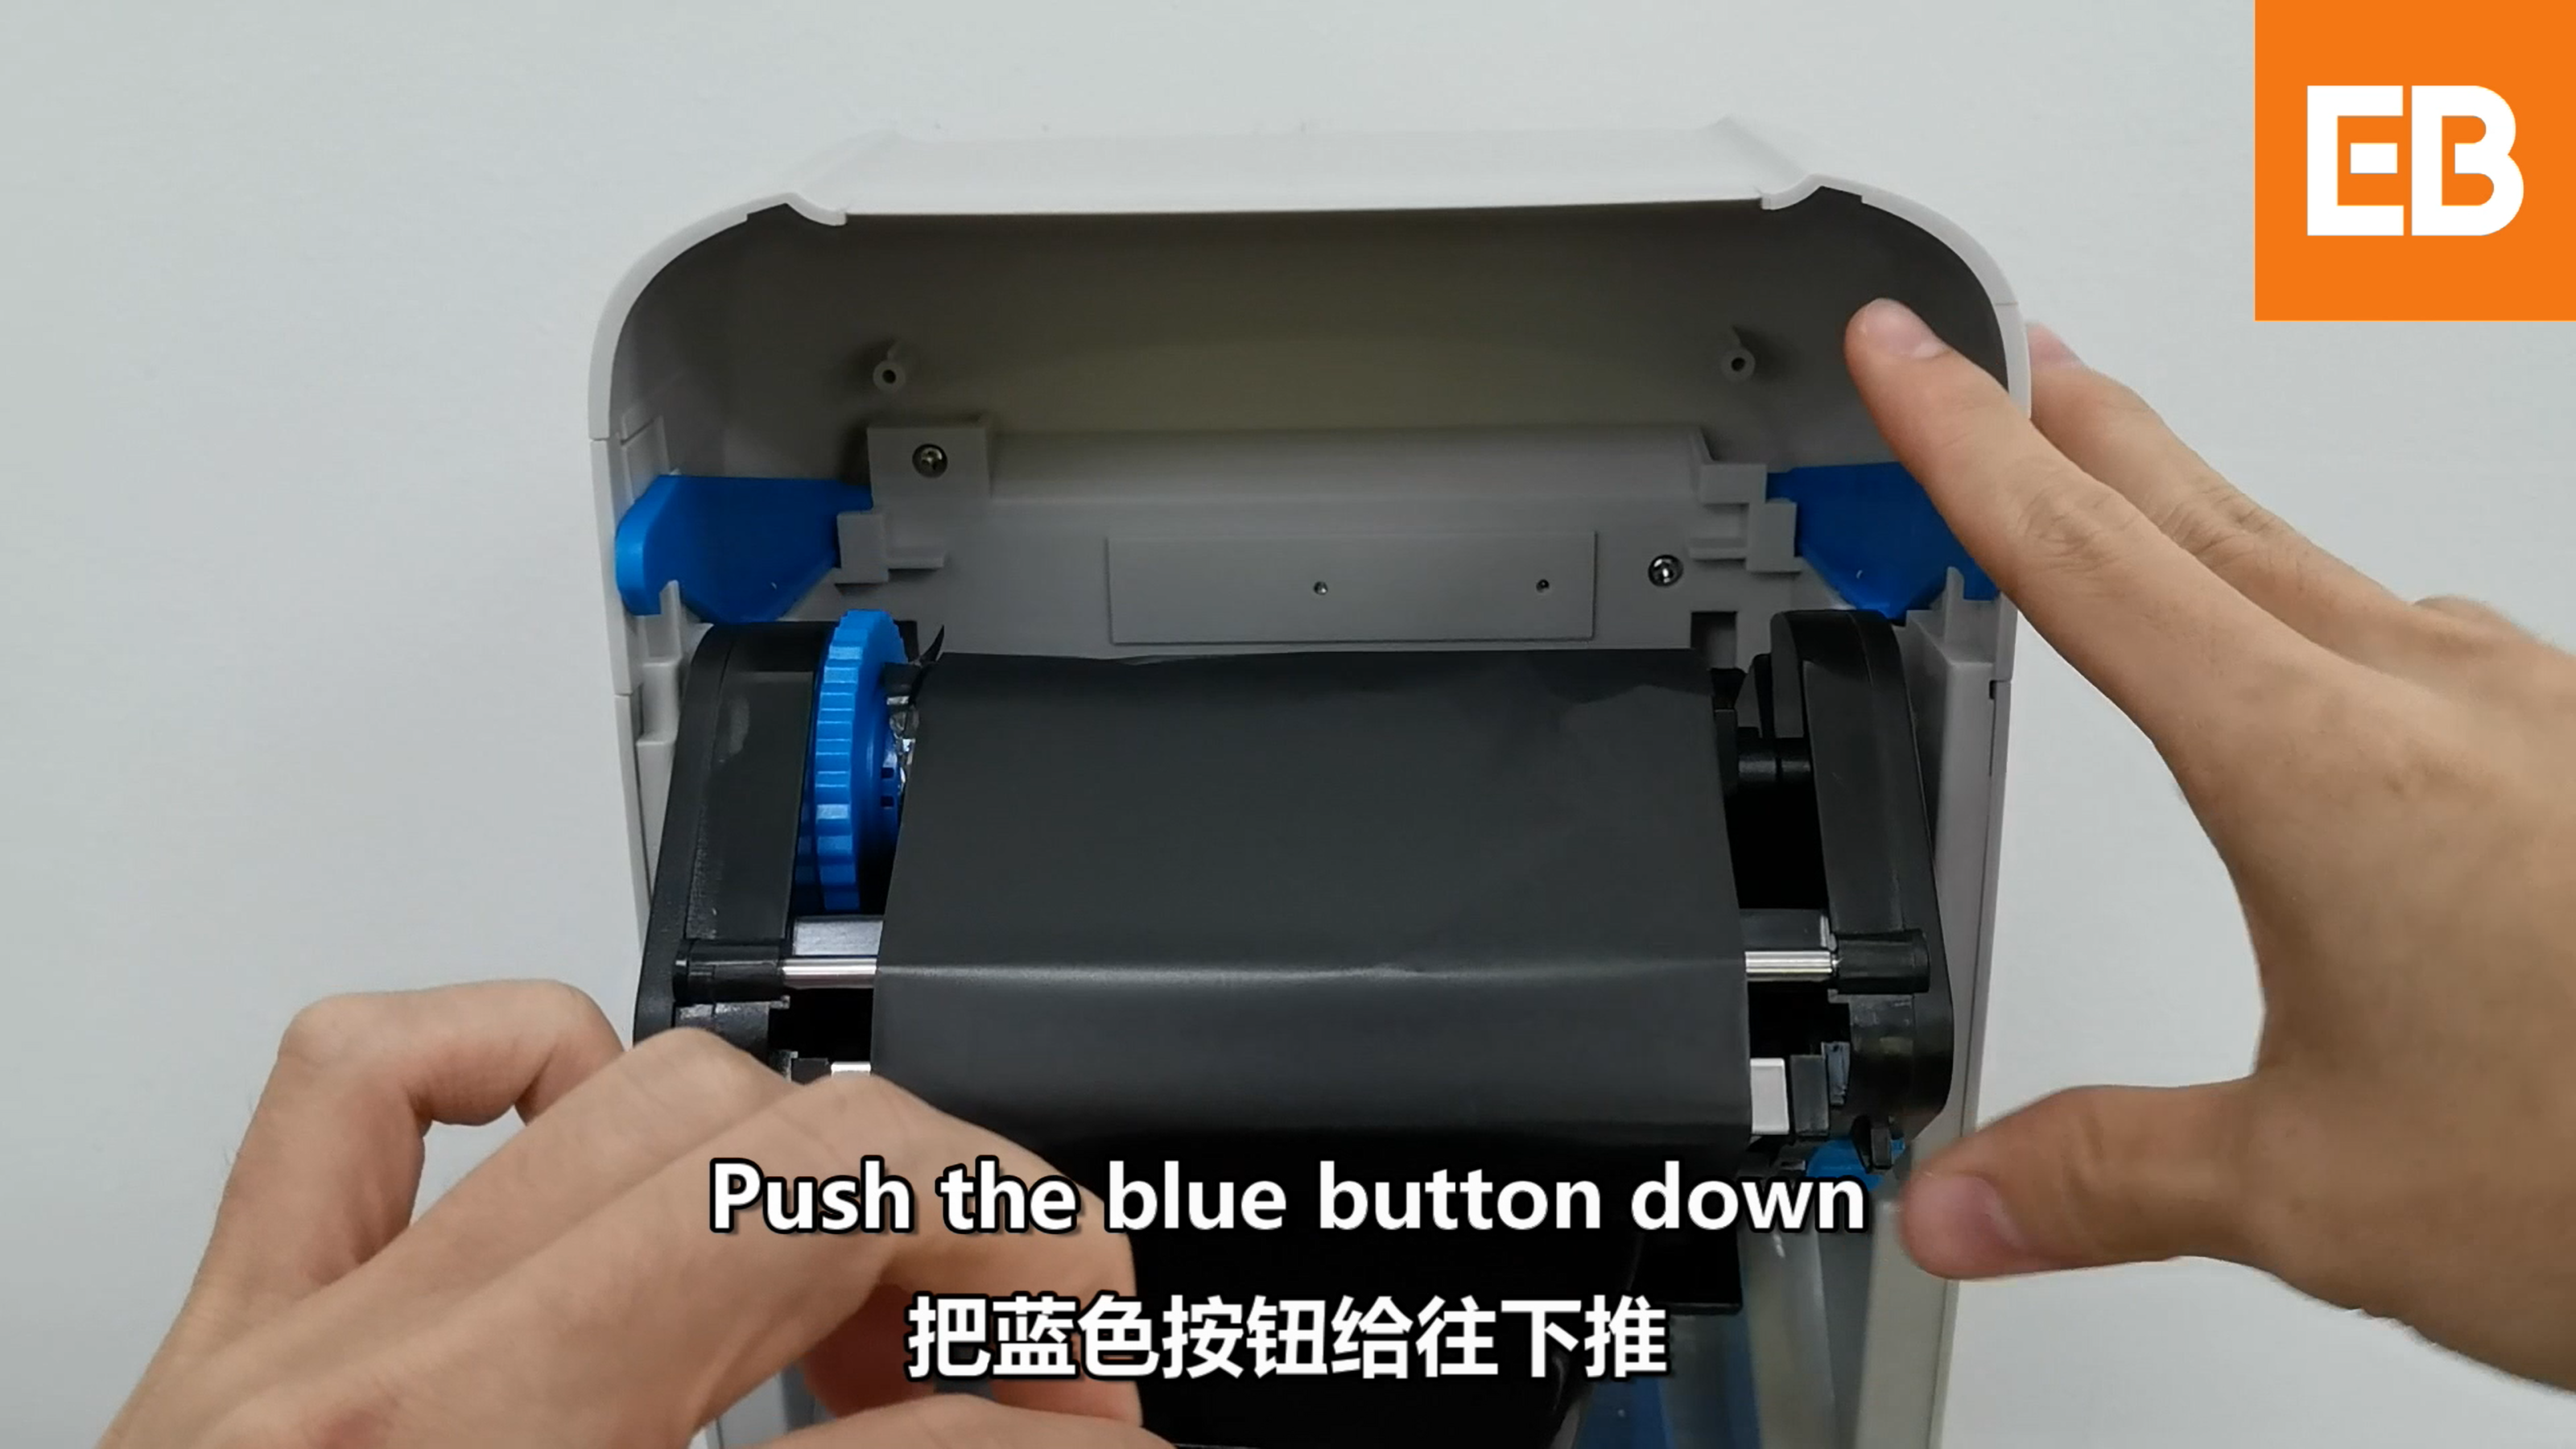
- Cut two short pieces of tape.
- Tape the left edge and the right edge of the lower ribbon end onto the upper roll, so the join sits straight.
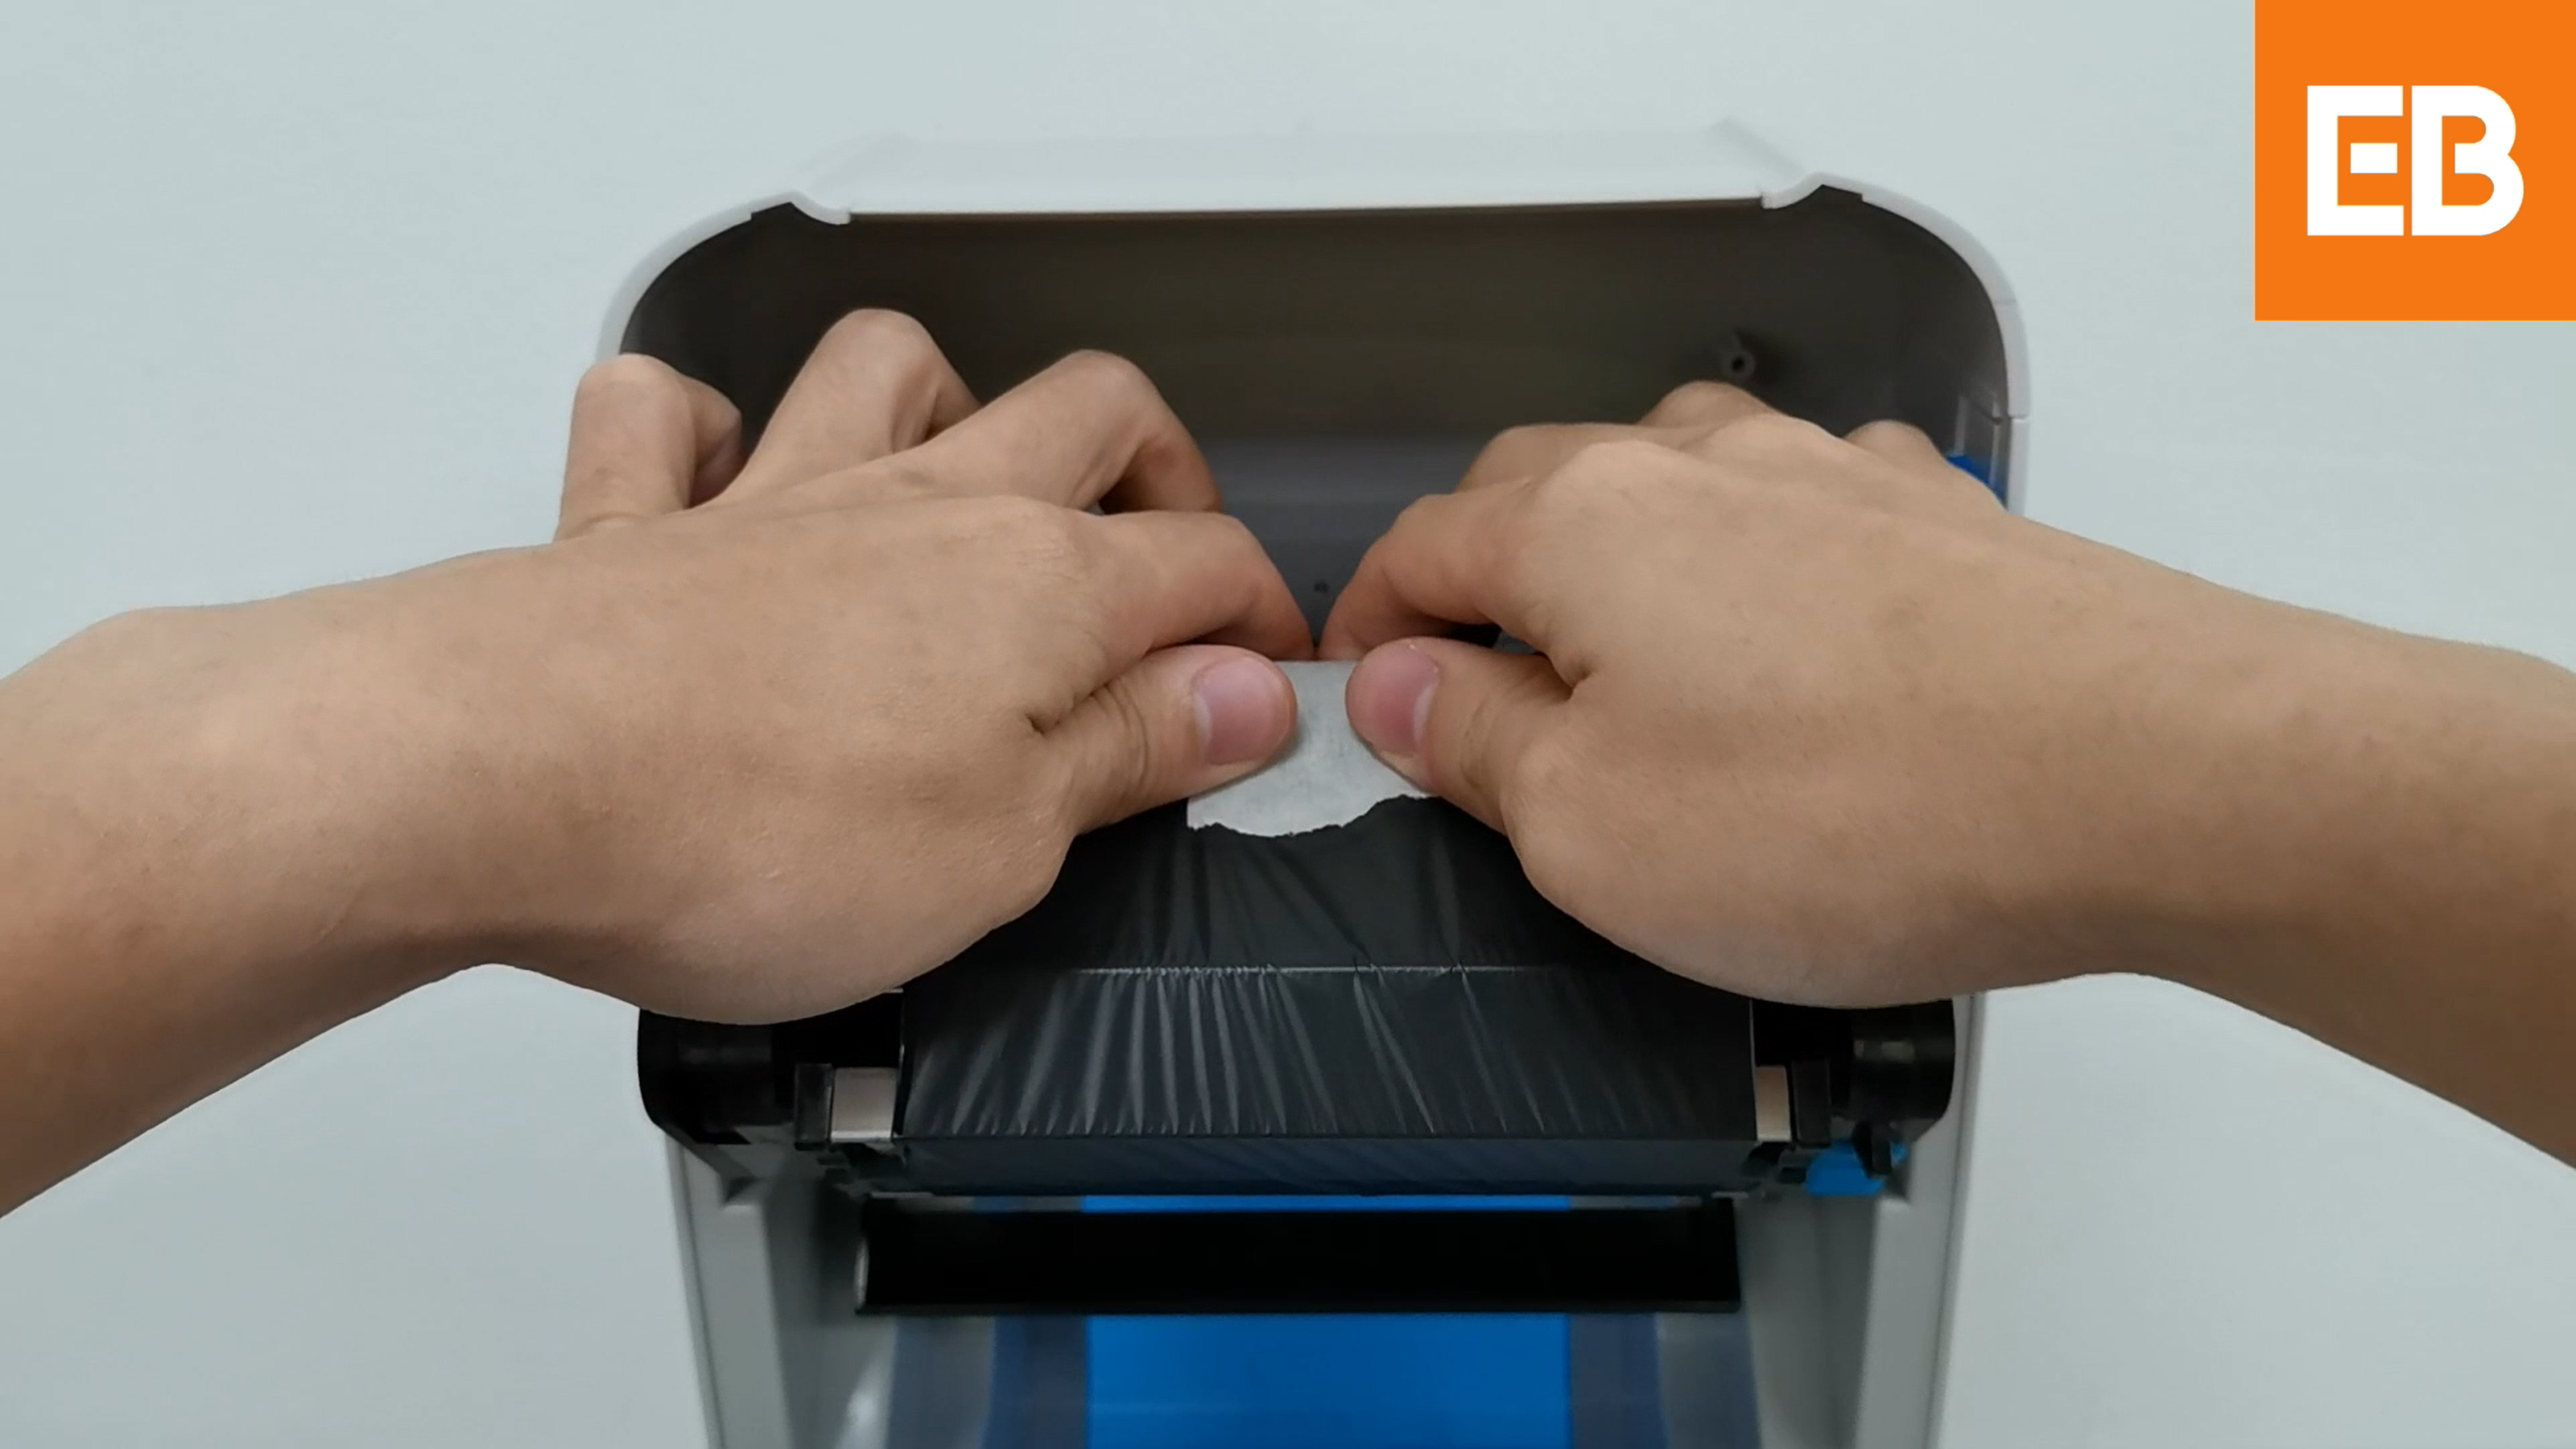
- Turn the upper roll by hand to wind the loose slack away, until the ribbon between the two rolls is pulled tight. Slack ribbon catches as the holder closes and tears again in the same place.
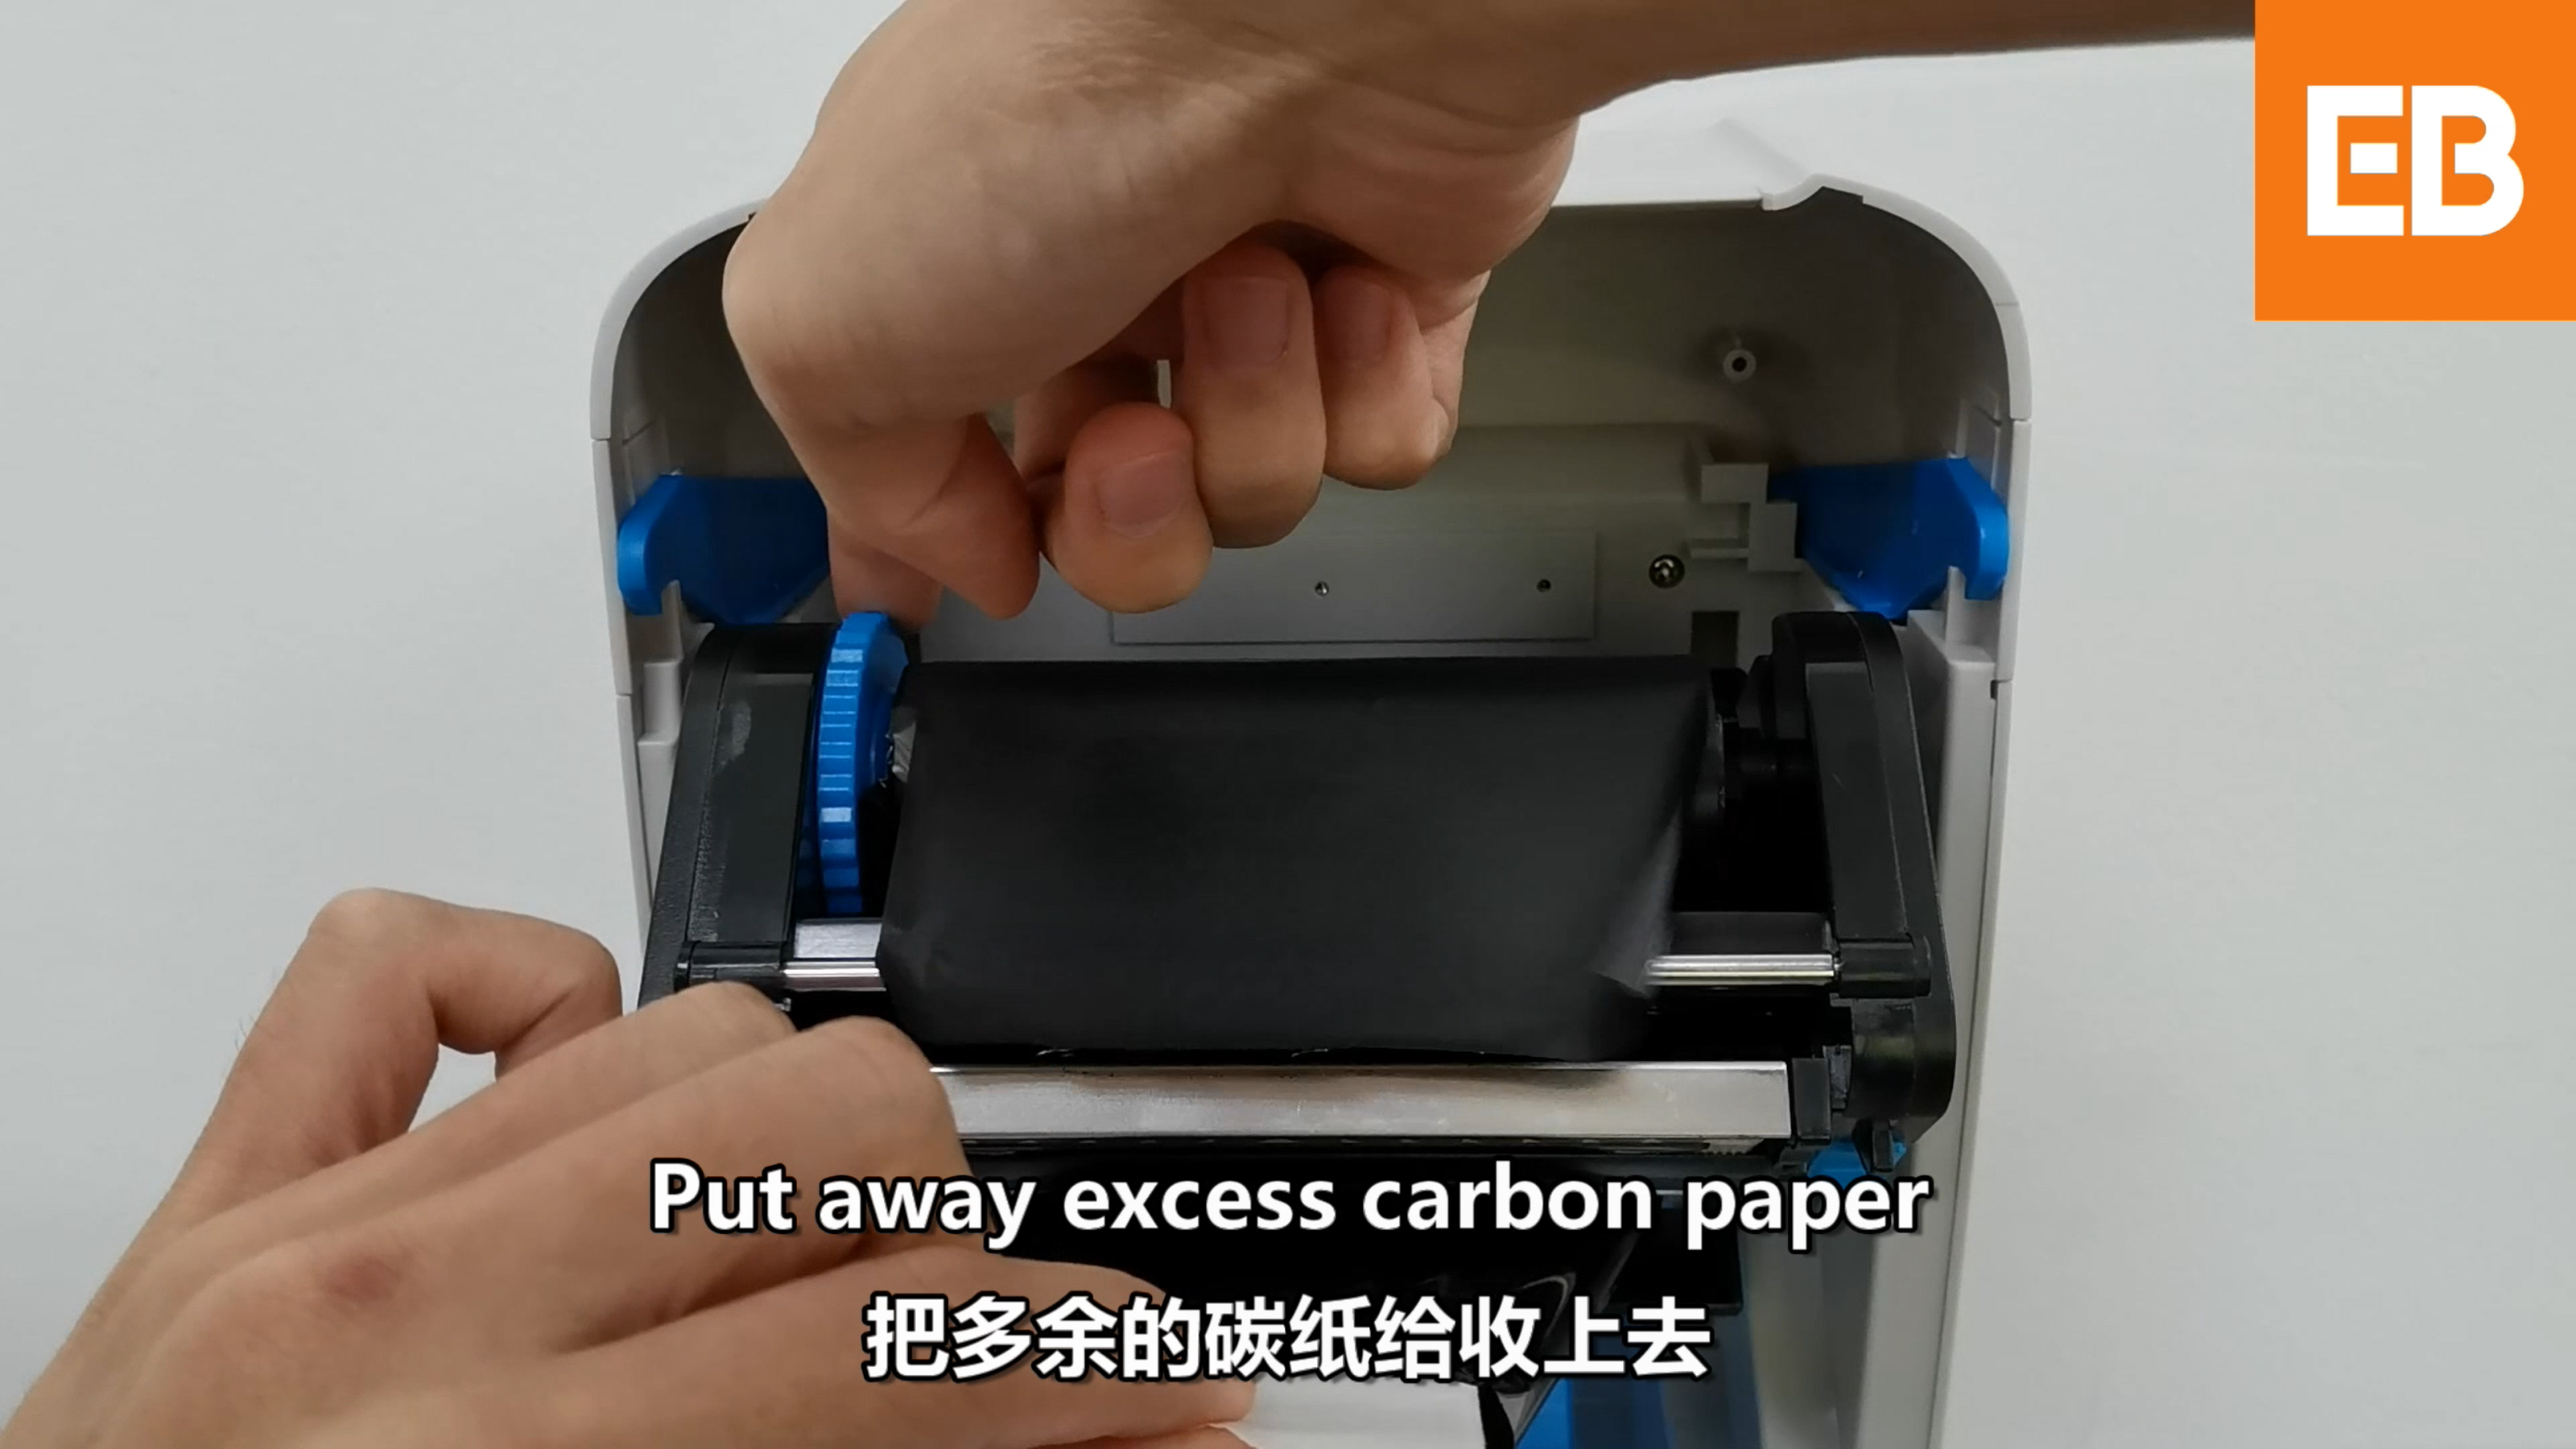
- Smooth away any creased ribbon so the join lies flat.
- Push the blue gear on the left until the taped join has passed the print head.
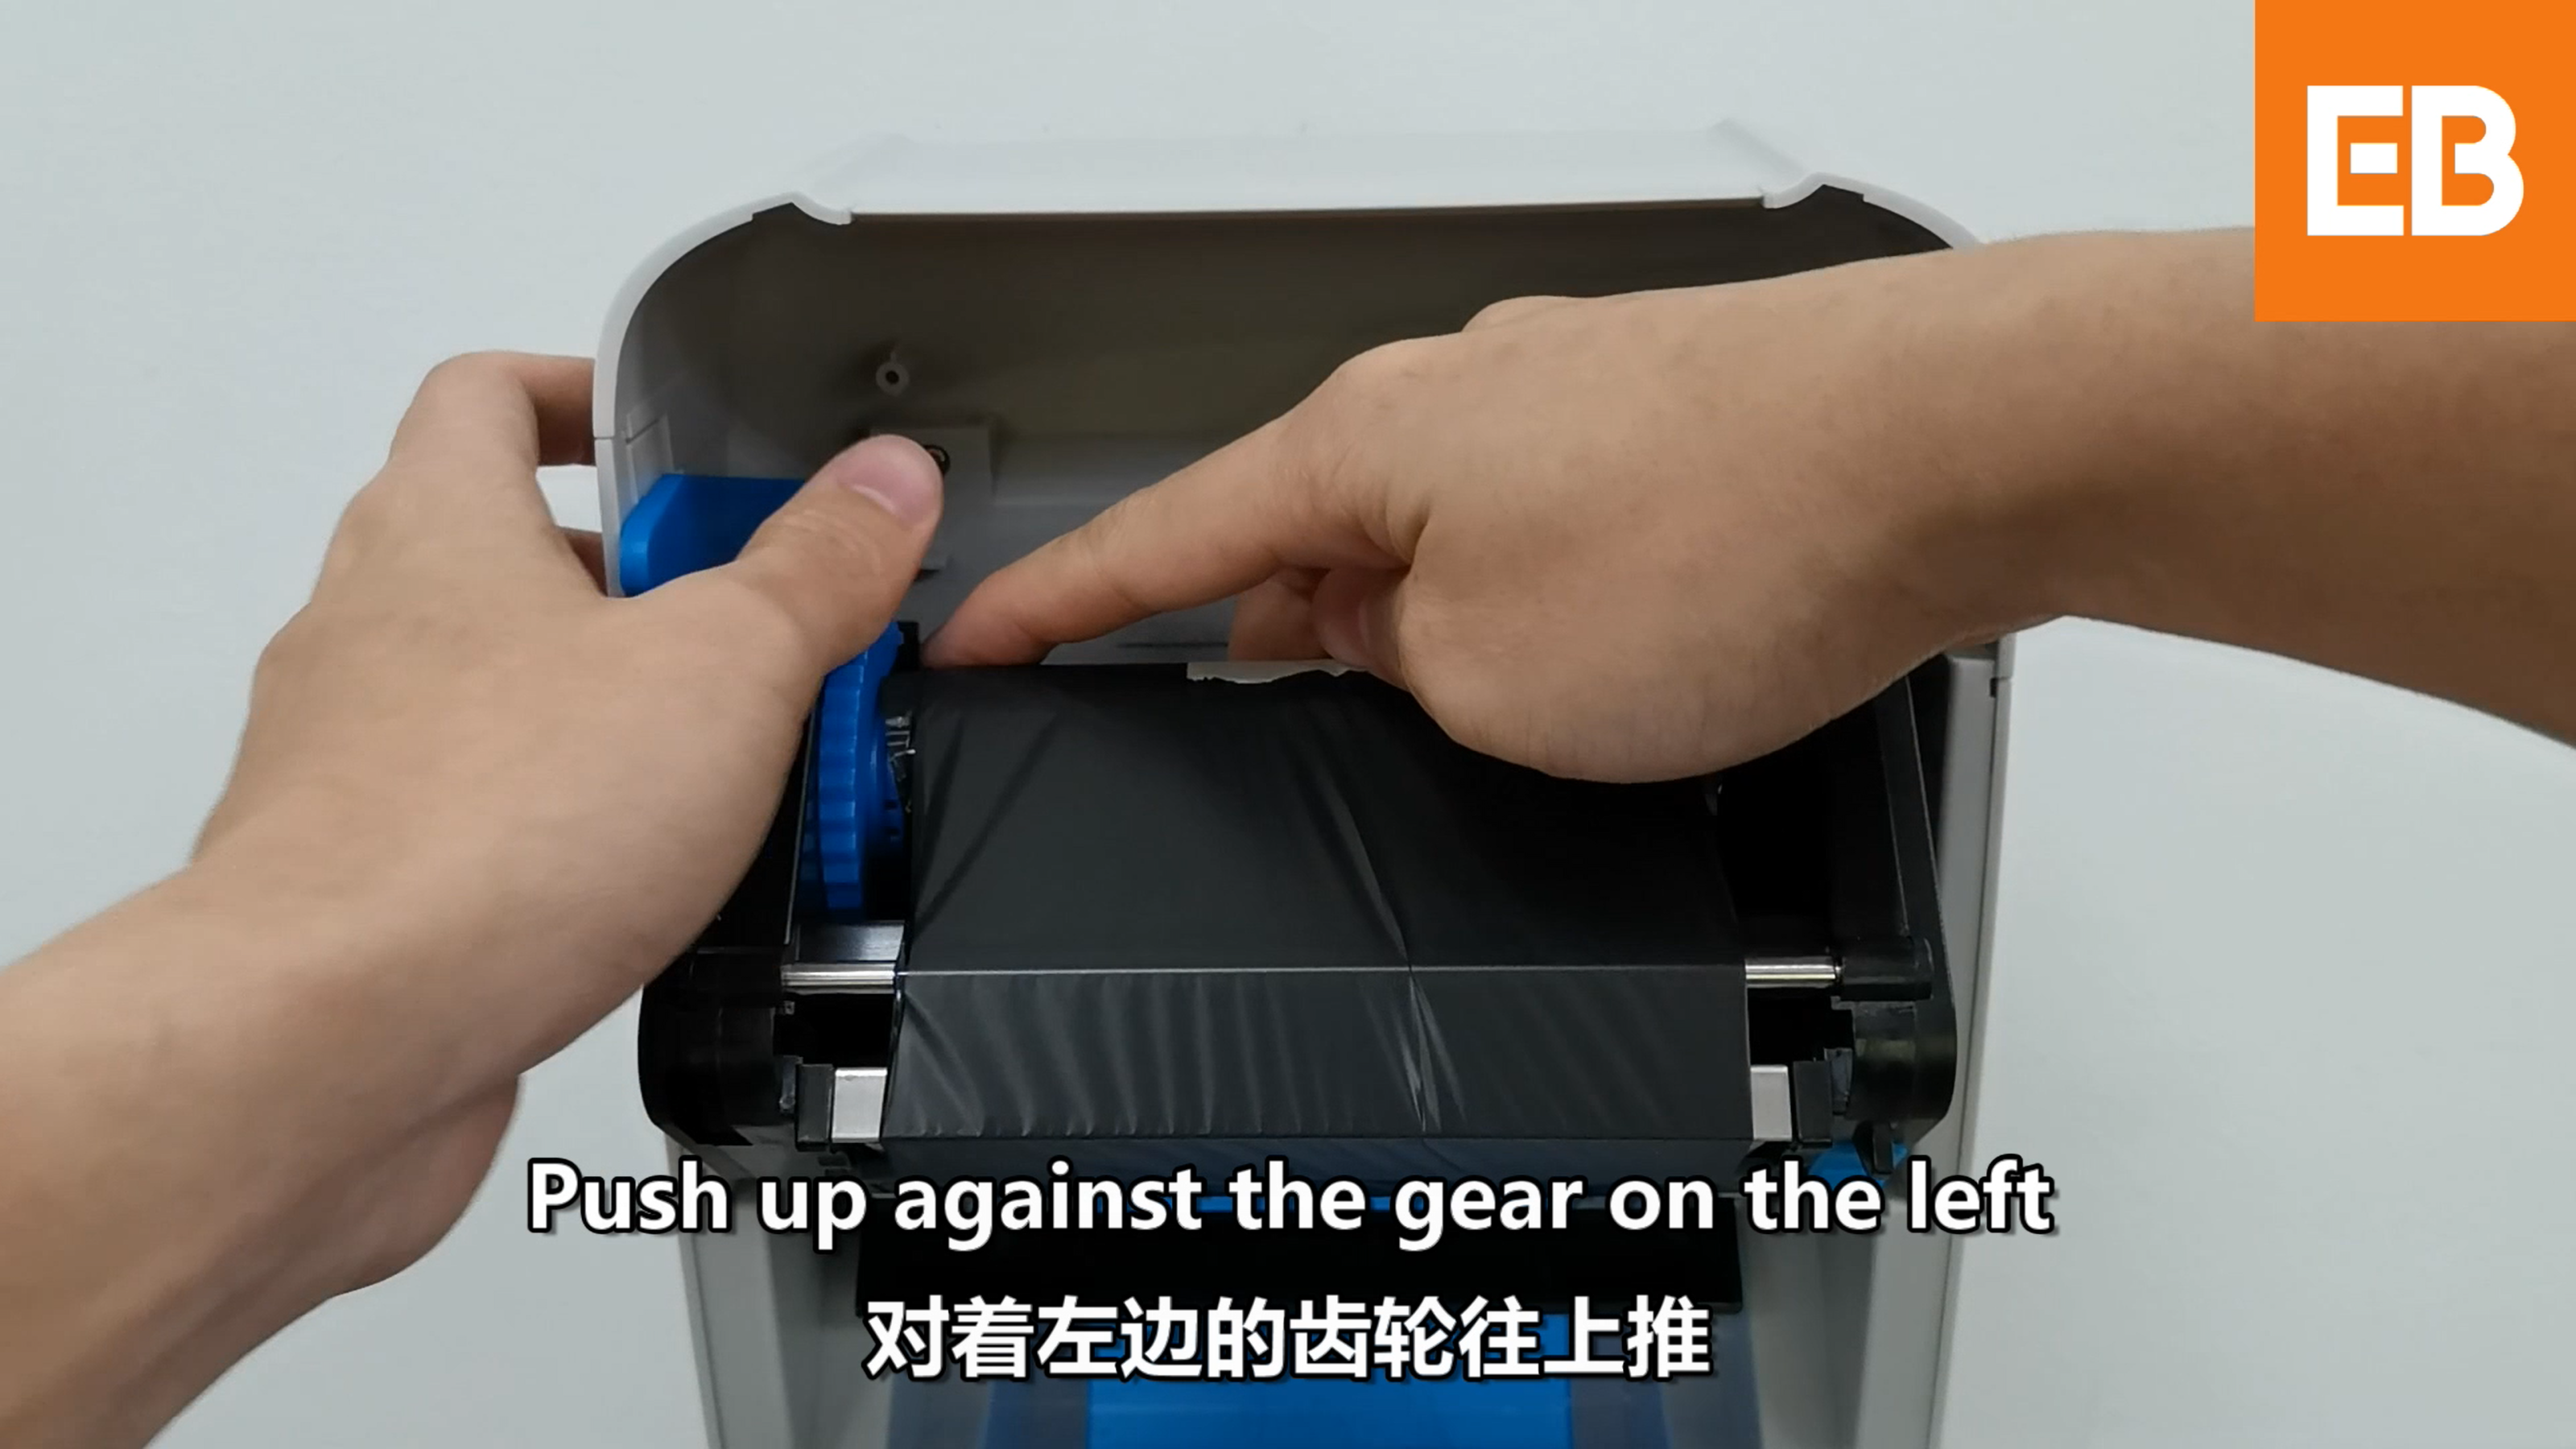
- Close the carbon holder, then the cover, until you hear the click.
- Switch the printer on.
FAQs
Do I have to connect the printer again in the POS after changing a roll?
No. The POS is paired to the printer, not to what is inside it. Swap rolls as often as you like and the Printer section stays on Connected.
Which size roll should I order?
The one that matches your current roll, because nothing in EasyBiz is locked to a supplier. Changing to a different label size is a different job, since the tag layout has to be redrawn for the new size, so send us the size first.
My new ribbon prints faint straight away.
The ribbon is fine and the darkness setting is doing the work. See Blurry or Misaligned Labels to raise it.
Can I run the printer with labels but no ribbon?
No. The label comes out blank. A blank label almost always means the ribbon has finished or split, not that the POS failed to send the tag.
Does the POS warn me when the roll is running low?
No. The printer does not report what is left inside it, so keep a spare roll and ribbon at the counter and change them between customers rather than mid-order.
Which way round does the ribbon go?
The dull carbon side faces down onto the label and the shiny side faces the print head. In backwards, the printer runs normally and every label comes out blank, which looks exactly like a dead printer.
How do I tell a finished ribbon from a split one?
A finished ribbon has wound fully onto the take-up core and what passes the print head is clear and shiny. A split one still has black ribbon on the lower roll with a clean break across it. Replace a finished one, and tape a split one once.
What's Next
Your printer has fresh media in it, so if the tags are printing but look faint, crooked, or cut off at the top, continue to Blurry or Misaligned Labels.