
Before You Start
- The printer must be printing something. If nothing comes out, see Label Printer Will Not Print.
- Know how to open the cover and reload the ribbon. See Loading Labels and Carbon Ribbon.
- Do this at the counter with the problem, because these settings are saved per printer per counter.
- Keep one badly printed tag next to you to compare against.
Faint or Patchy Print
The usual cause is a ribbon that has been run past its end and reused, so there is no carbon left to transfer.
- Switch the printer off and open the cover.
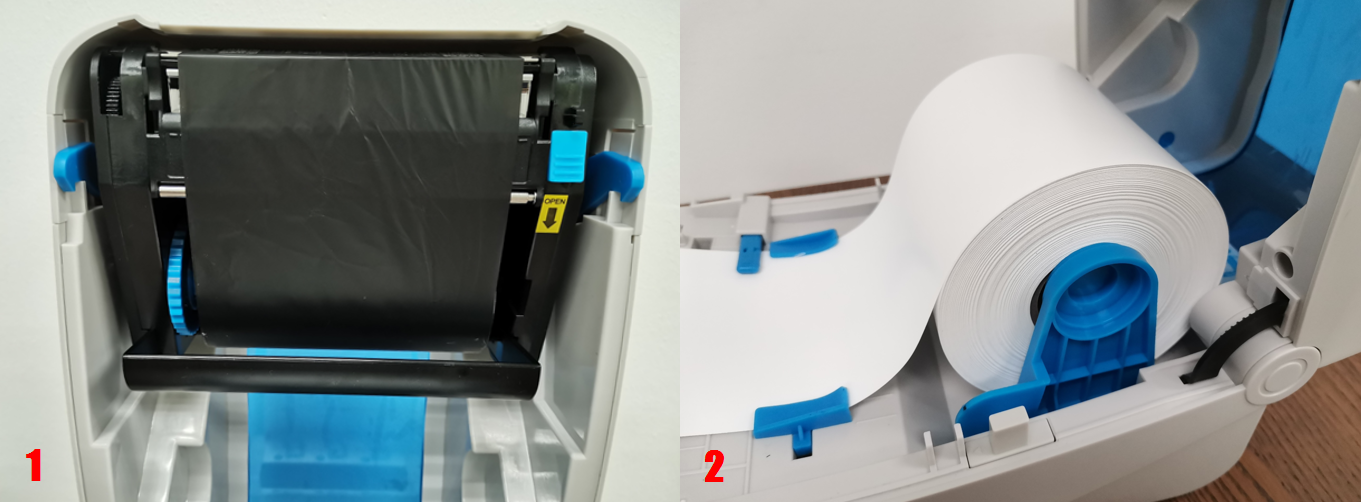
- Press the blue carbon-open button and look at the ribbon where it passes the print head. Used ribbon looks clear or shiny.
- Push the blue gear on the left until fresh black ribbon covers the print head. If the ribbon has run out, fit a new one. See Loading Labels and Carbon Ribbon.
- Close the carbon holder and the cover until you hear the click, then switch the printer on and print a tag.
If the print is still light after a fresh ribbon, raise the darkness in the POS next.
Raise the Darkness in the POS
Darkness controls how much heat the print head uses, so this is the setting to raise when a fresh ribbon still prints too light to read. It sits in the Printer Pairing window, alongside the printer's resolution and its starting point on the label. All three are saved against that one printer at that one counter.
- In the POS, open ⚙️ Settings and find the Printer section.
- On the Label printer row, click Settings. The Printer Pairing window opens with your printer still connected and its settings already showing.
- Raise Darkness level by one or two steps, click Test print, and compare the sample against your badly printed tag.
- Repeat until the tag is readable, then click Close.
| Setting | What it does | When to change it |
|---|---|---|
| DPI | Tells the POS how sharp your printer is (203 or 300) | Leave it on Use template default unless we tell you to change it |
| Darkness level | How dark the print is, from 1 (lightest) to 15 (darkest) | Raise it if the tag is too light to read |
| Vertical offset (dots) | Moves the printing down the label, about 1 mm for every 8 | Raise it if the top line of the tag is cut off |
Test print appears only while the printer is connected. It prints a plain 110mm x 10mm sample label using the settings above, not your own tag layout, so you can check the top line before you print a real tag.
Crooked Labels or Print Off to One Side
- Switch the printer off and open the cover.
- Move the paper guides in until they sit against both edges of the label roll, so the roll cannot wander.
- Check the carbon ribbon lies flat and centred where it touches the print head, and reload it if it is creased or off to one side.
- Pull the label roll out past the gap sensor and the cutter, close the cover until it clicks, then print a tag.
The Top Line Is Cut Off
- Open the printer settings as in steps 1 and 2 of Raise the Darkness in the POS above.
- Raise Vertical offset (dots) by 8. This moves the printing down by about 1 mm.
- Click Test print and check the top line is complete.
- Repeat in steps of 8 until the tag prints in full. The most you can add is 80.
FAQs
I fixed one counter. Do the other counters follow?
No. Darkness, DPI, and offset are saved for that printer at that counter, so a shop with two counters sets each one. This is on purpose, since two printers of the same model often need different settings.
Test print looks right but my real tags are still cut off.
Test print uses a plain sample label, not your own tag layout, so a good sample and a bad tag point at the layout rather than the printer. Send us a photo of both and we will adjust the layout.
Does a higher darkness use up the ribbon faster?
No. Each label uses the same length of ribbon whichever darkness you choose. Very high darkness does wear the print head faster, so raise it only until the tag is readable.
My receipts print faint too.
That is a different printer with different paper, so nothing in this article applies to it. Receipt paper that prints faint is usually old stock or the wrong grade.
The print is smudged rather than faint.
Smudging usually means dust or glue on the print head rather than a settings problem. See Cleaning Your Label Printer.
The tag prints clearly but the barcode will not scan.
If the darkness is set too high, the bars run into each other and the scanner sees one thick block. Lower it by one or two steps, click Test print, and try the scanner again. If it still fails, check the ribbon is lying flat and centred.
I set darkness to 15 and the tag is still faint.
Then it is not a settings problem. A worn ribbon or a dirty print head is the cause. Fit a new ribbon first, then clean the print head. See Cleaning Your Label Printer.
What's Next
Your tags are readable again. If the same printer starts refusing to print at all, work through Label Printer Will Not Print.