
Setting Up the Job Table
In this article
View every pickup, delivery, and on-site job in one screen, edit details directly in the table, and bulk-update many jobs at once.
Contents
Contents
What the Job Table is for
The Job Table is the master list of every job your shop has on the books. A job is one trip your driver makes: picking up dirty laundry, delivering finished items, or visiting a site to do alterations.
Most jobs are created automatically from customer orders, but you can also add manual jobs for one-off tasks. From this single screen you can see what is scheduled, who is doing it, and whether it is done.
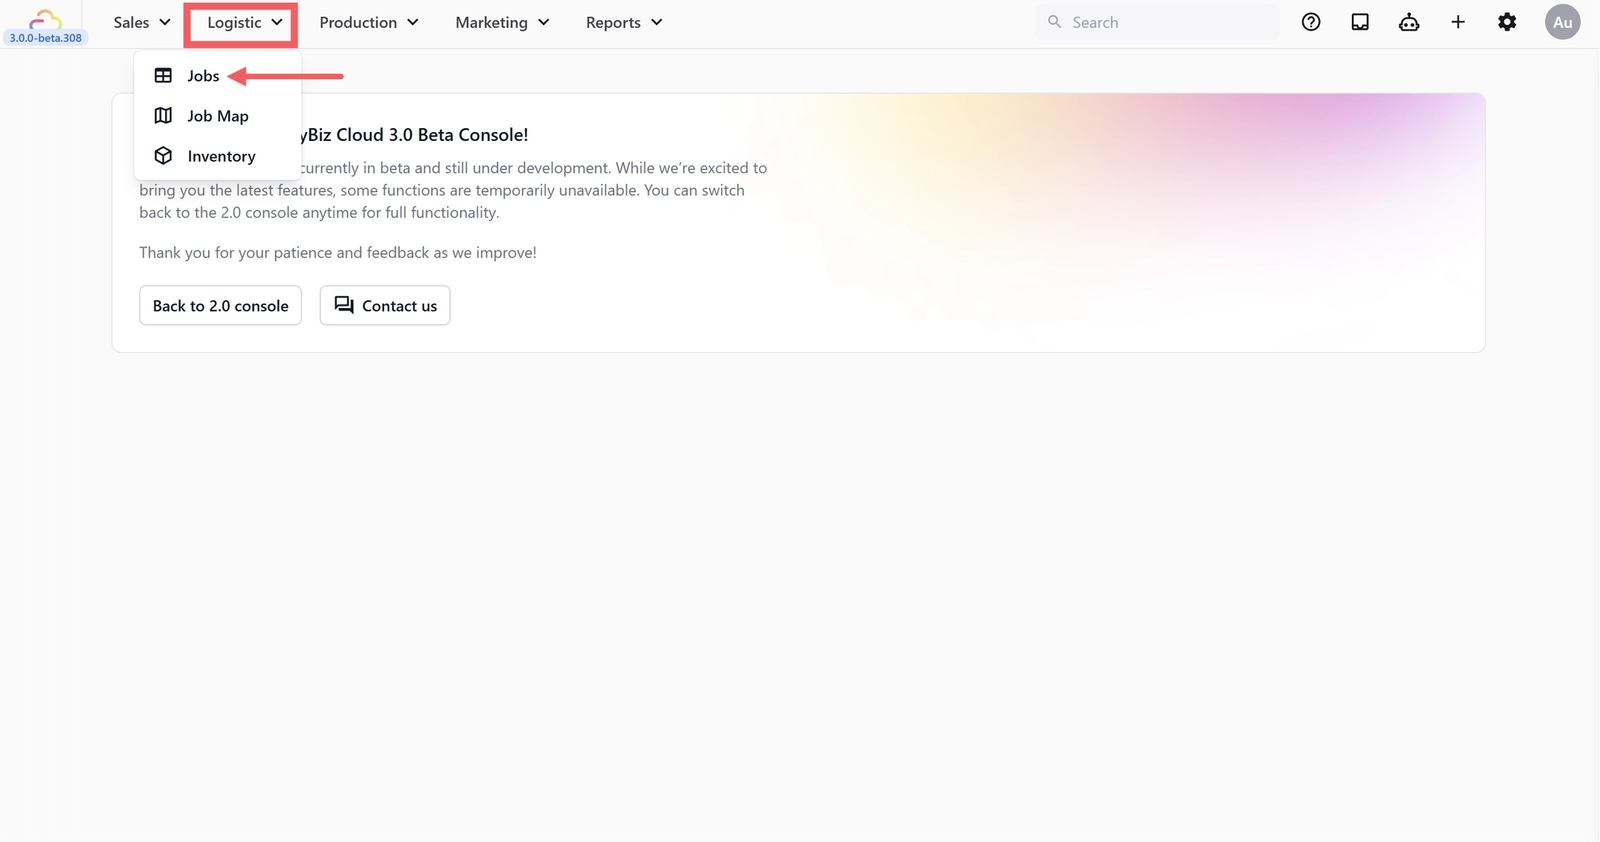
Open the Job Table
- In the top navigation bar, click the Logistic dropdown.
- Click Jobs.
What each column shows
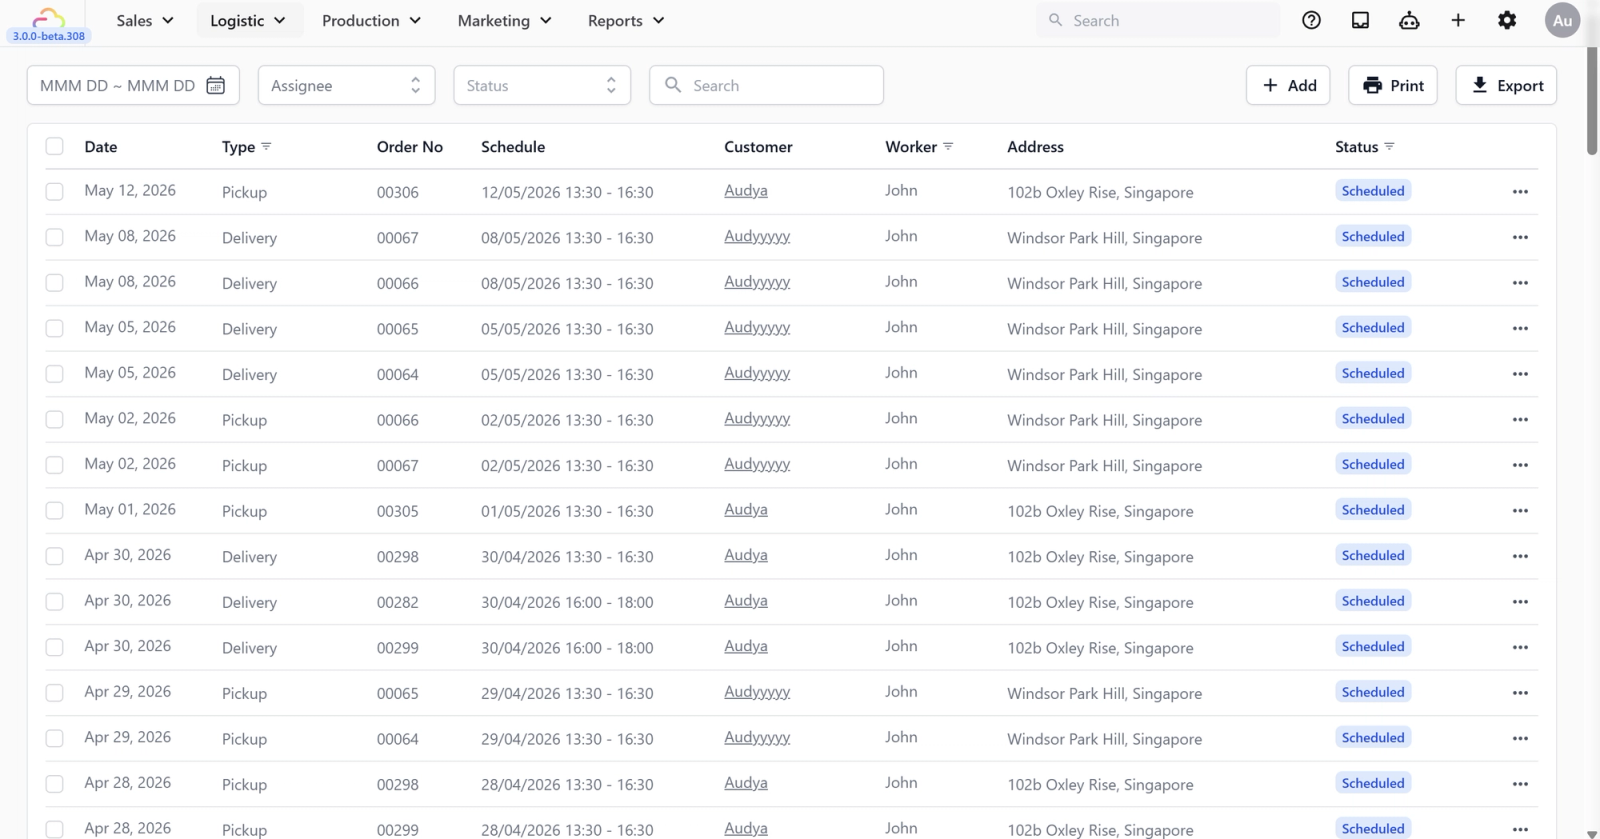
Each row is one job. The default columns are:
| Column | What it shows |
|---|---|
| Date | The date the job is scheduled for. |
| Type | Pickup (collecting from a customer), Delivery (dropping off), or Service (an on-site visit, like alterations done at the customer's home). |
| Order No | The customer order this job is linked to. Empty if the job was created manually. |
| Schedule | The time window the customer expects you, such as 09:00 to 12:00. |
| Customer | The customer name and contact for this job. |
| Worker | The driver assigned to this job. Empty if no one has been assigned yet. |
| Address | The pickup or delivery address. |
| Status | See the status table below. |
Open Job Page Settings
Page Settings is where you turn columns on and off for the Job Table.
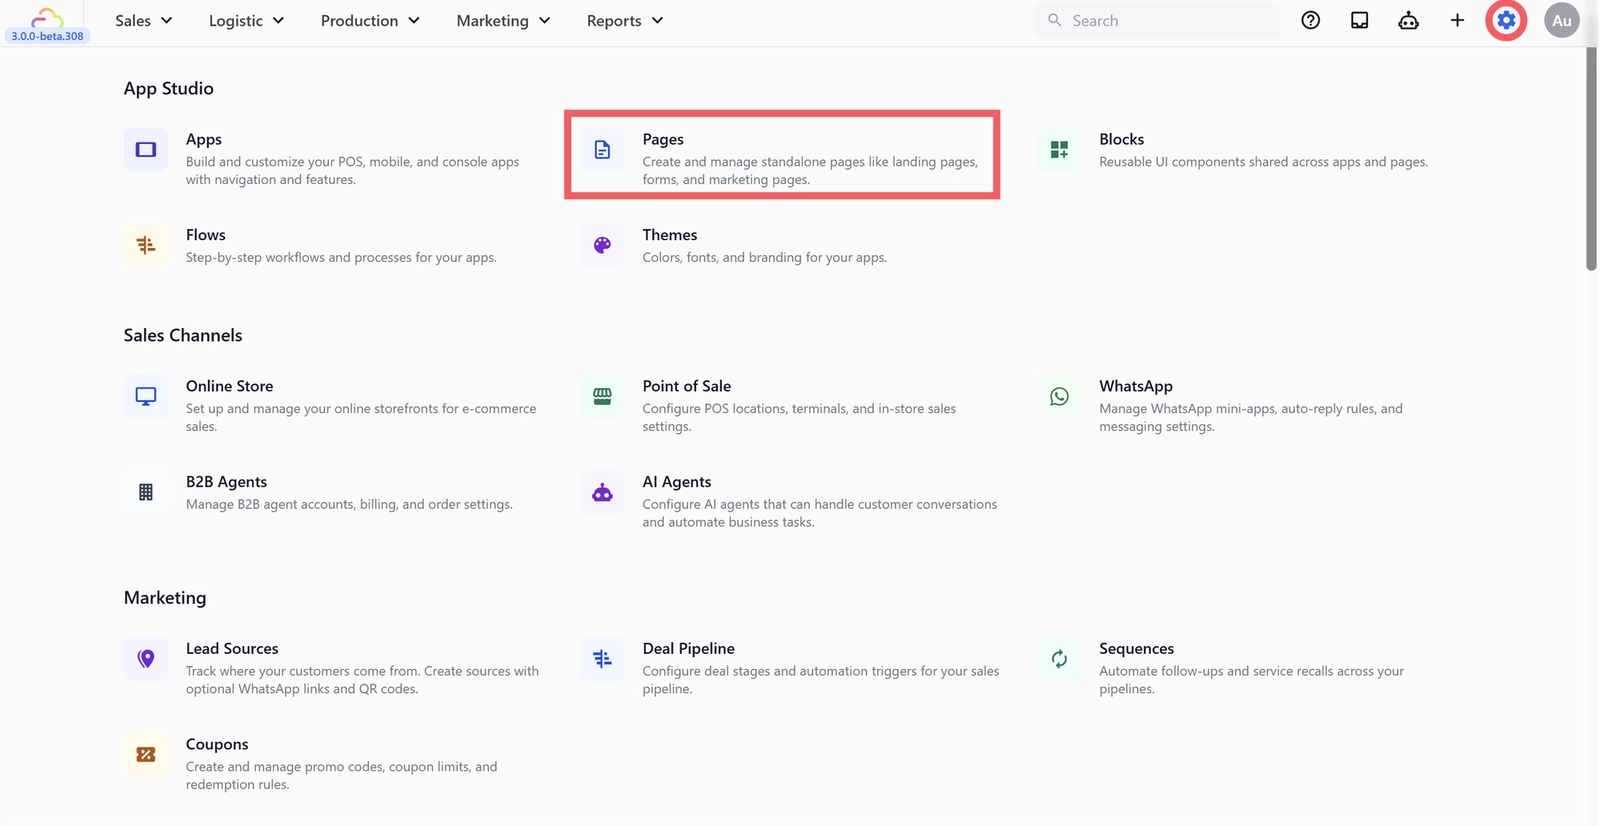
- Click the ⚙️ Settings icon in the top-right corner.
- Under the app studio section, click Pages.
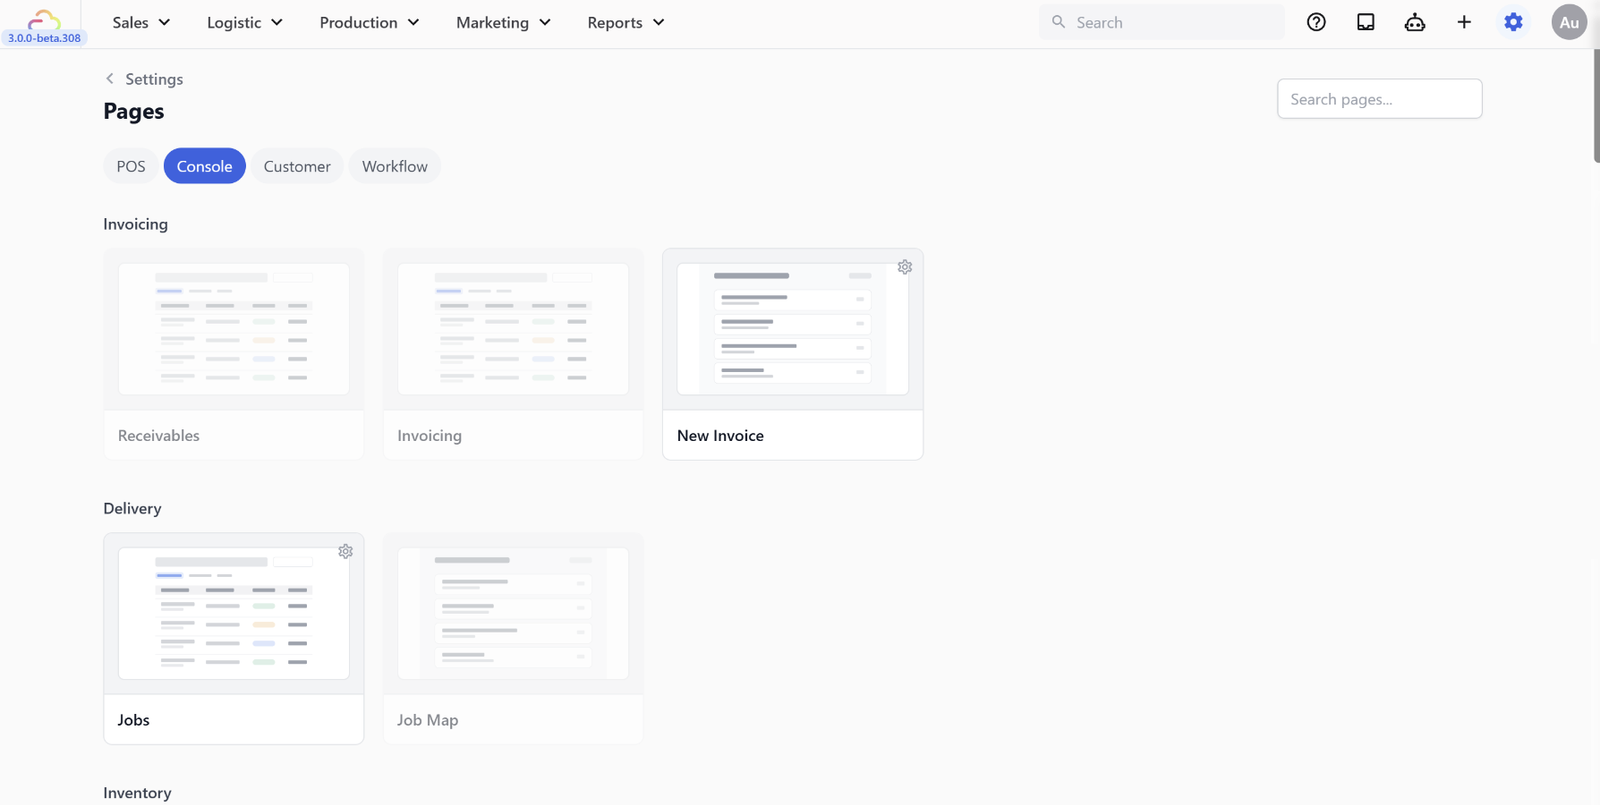
- Click the Console tab.
- Scroll down to the Delivery section and click Jobs.
- You will now see the table column settings.
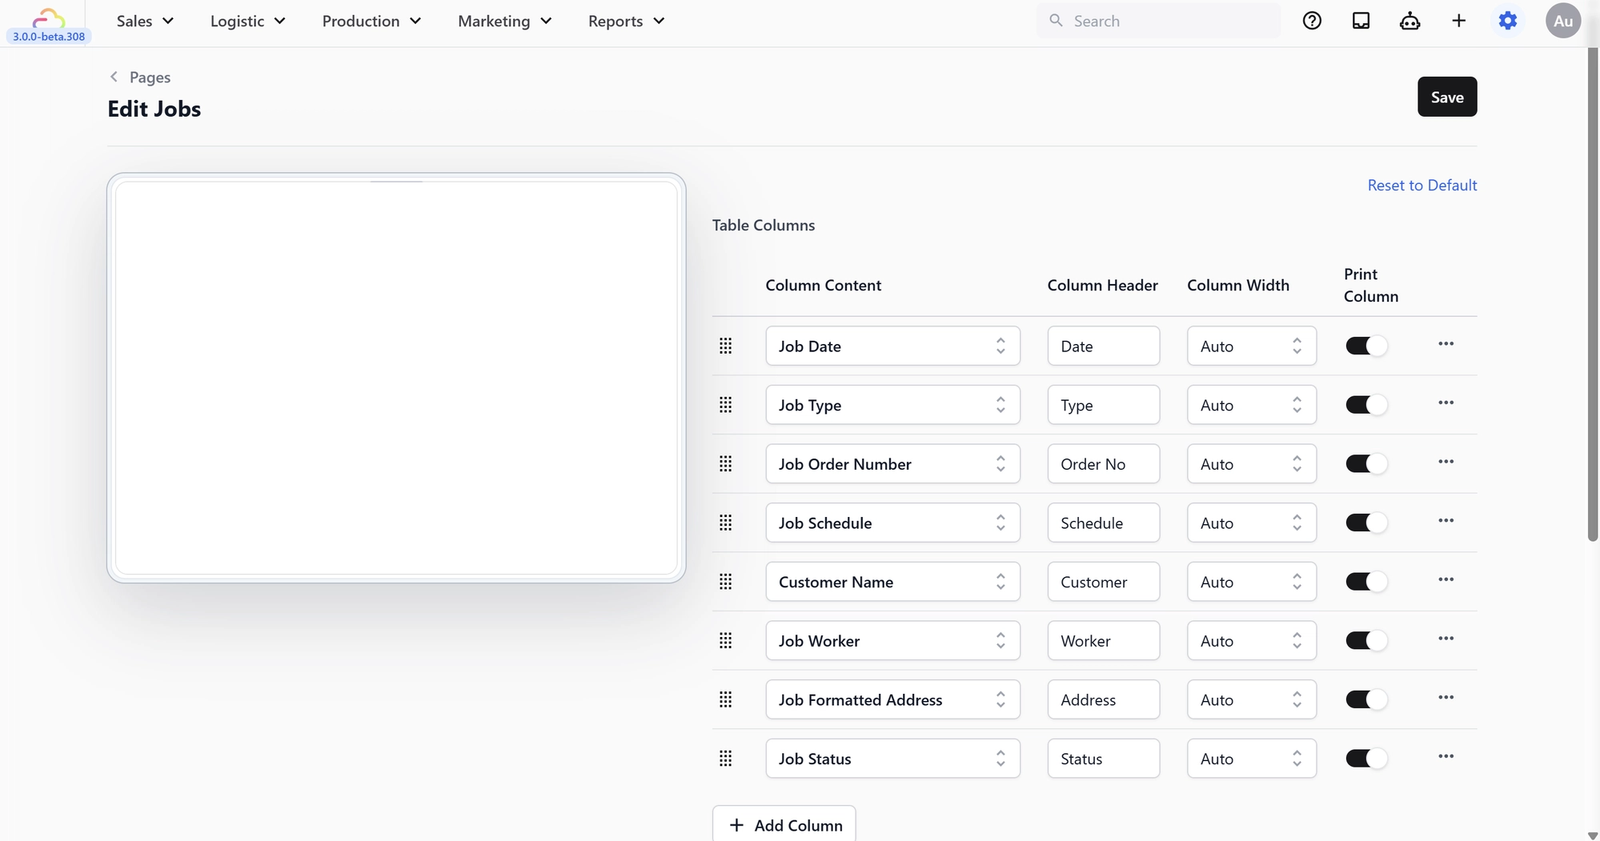
What the Table Columns settings mean
In Page Settings, each row under Table Columns controls one column in the Job Table.
- Column Content chooses what information the column shows, such as customer name, job time, worker, or amount due.
- Column Header changes the label shown at the top of that column. Leave it blank to use the default label.
- Column Width controls how wide the column appears in the table.
- Print Column controls whether the column is included when you print the Job Table.
- ⠿ Drag a row up or down to change where that column appears in the table.
Customize the Job Table columns
The default columns above are set up for daily dispatch work and cover what most shops need. You can keep them as-is, remove columns you do not use, or add optional columns from Page Settings.
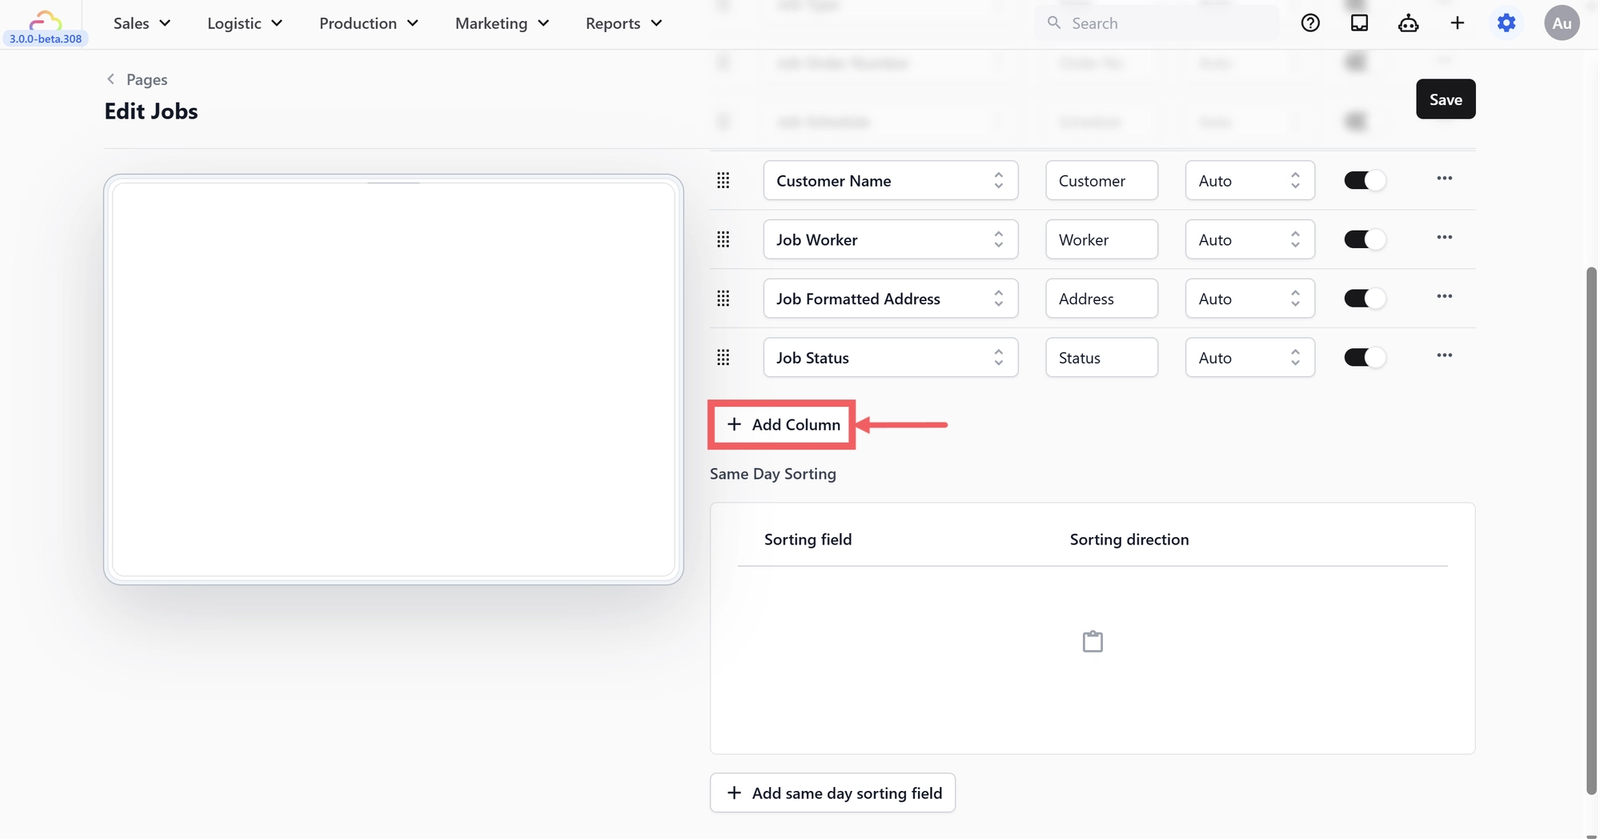
Click + Add Column to add a new column to the table.
| Column | Add it when |
|---|---|
| Customer Phone | Dispatchers or drivers often need to call customers. |
| Customer Private Note | Staff need to see customer-specific internal reminders, like access codes or preferences. |
| Job Time | The table is usually filtered to one day, such as today's route list. |
| Job Schedule Option | Customers choose named pickup or delivery windows. |
| Order Amount Due | Drivers may need to collect payment during delivery. |
| Job Note | You want job-specific instructions visible, like "call before arriving". |
| Job Service Types | Drivers need to know what service the job is for before they arrive. |
| Job Photos | You want proof photos or reference images visible in the table. |
Same Day Sorting
Same Day Sorting controls the order of jobs that fall on the same date. This is useful when you are looking at one day’s route list and want the jobs to appear in a practical sequence, instead of only being grouped by date.
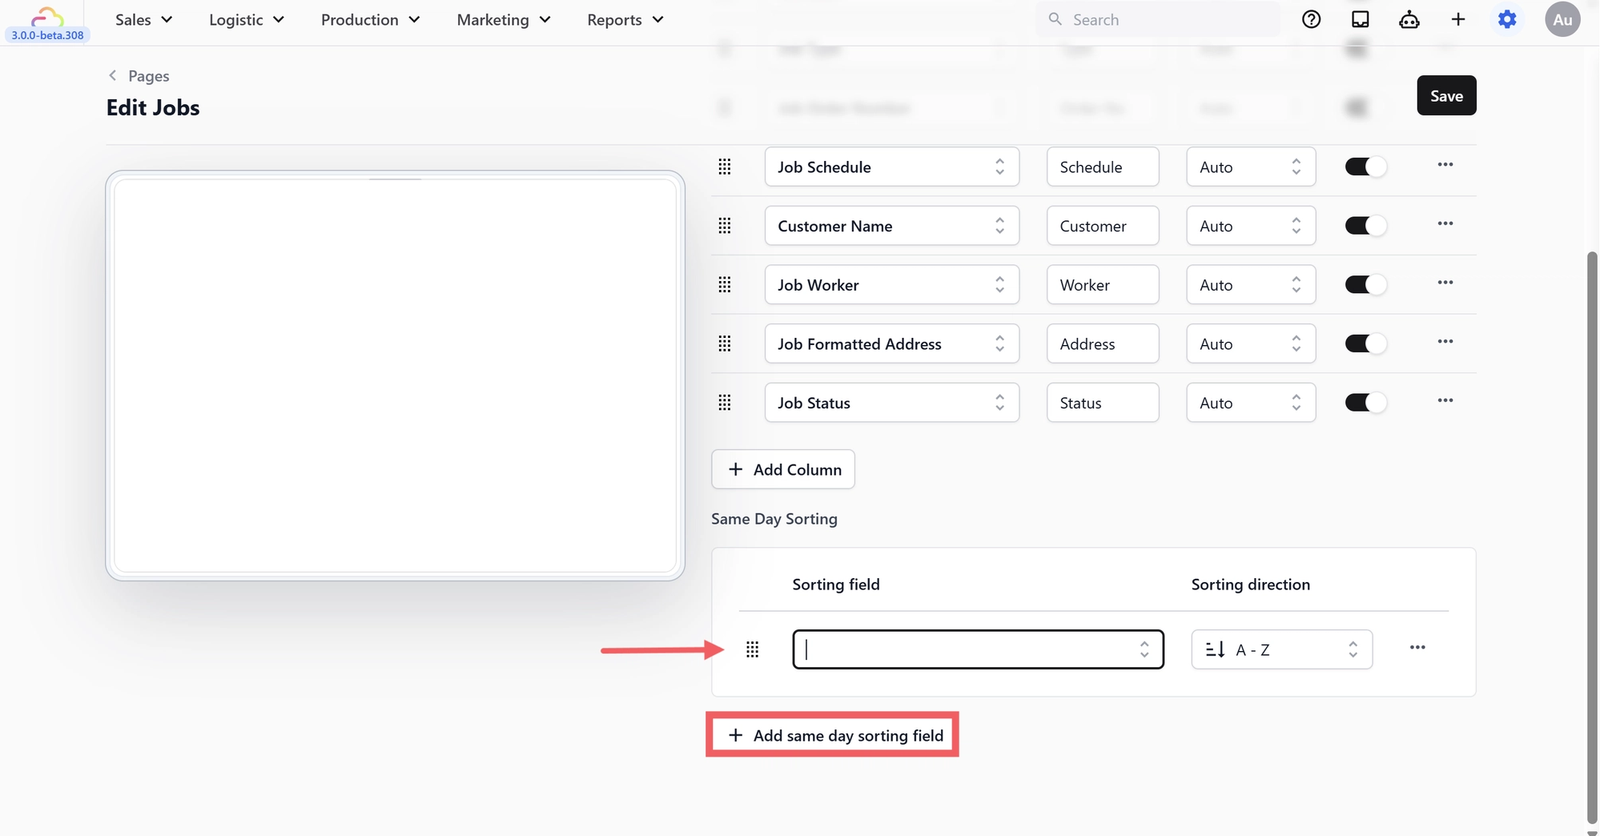
Common sorting fields are:
- Job Time -> shows earlier jobs first, useful for daily dispatch.
- Job Worker -> groups jobs by driver, useful when checking each driver’s route.
- Job Schedule Option -> groups jobs by pickup or delivery window, useful when customers choose fixed time slots.
Job statuses
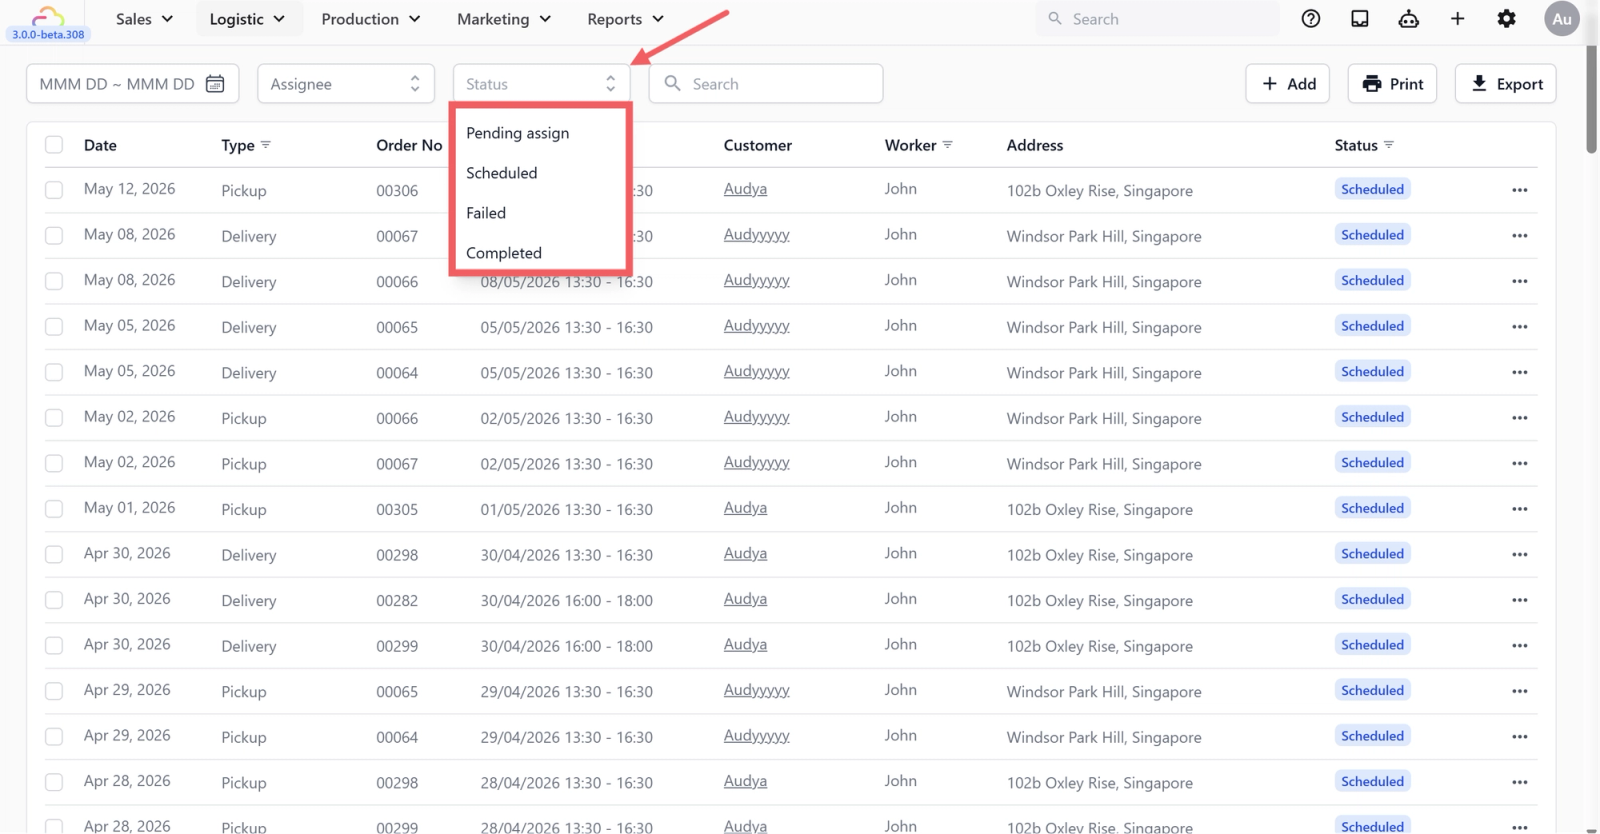
| Status | Meaning |
|---|---|
| Pending | Created but no driver assigned yet. |
| Scheduled | A driver has been assigned and the job is on their list. |
| Completed | The driver finished the job. |
| Failed | The driver tried but could not complete it, for example the customer was not home. |
Filter and search
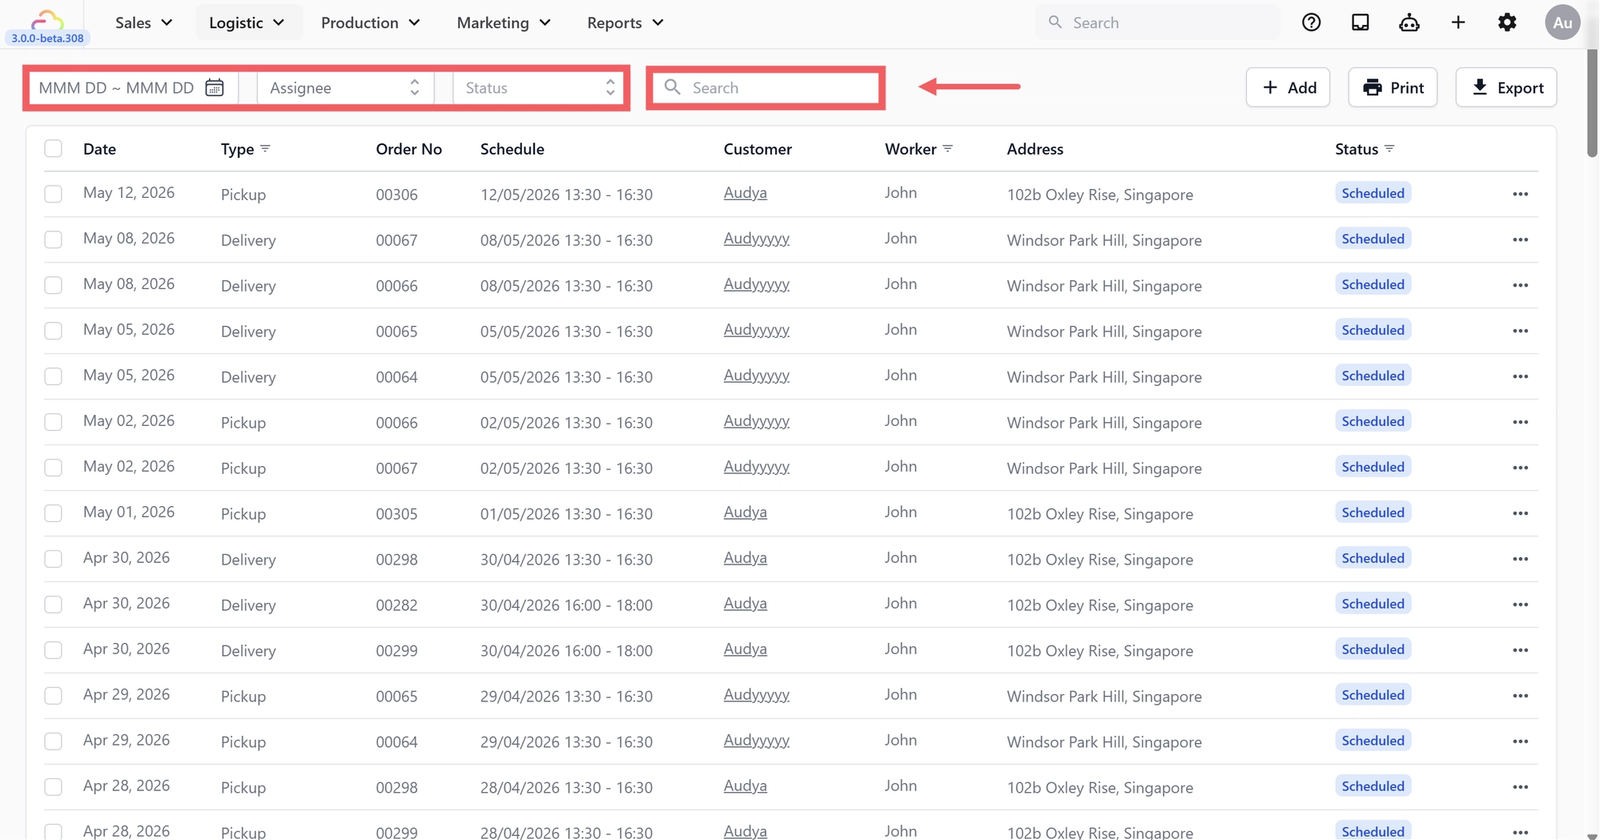
Use the bar across the top of the page to narrow what you see.
- Date range: pick the days you want. Maximum 366 days.
- Assignee: show only jobs for one driver.
- Status: show only pending jobs, only completed jobs, and so on.
- Search: type a customer name, address, order number, or note.
Edit jobs in the table
Most fields can be edited without opening a separate page.
- Click the cell you want to change. Editable fields include Schedule, Address, Customer, Note, Worker, and Status.
- Type or pick the new value.
- Edit more rows the same way if you need to.
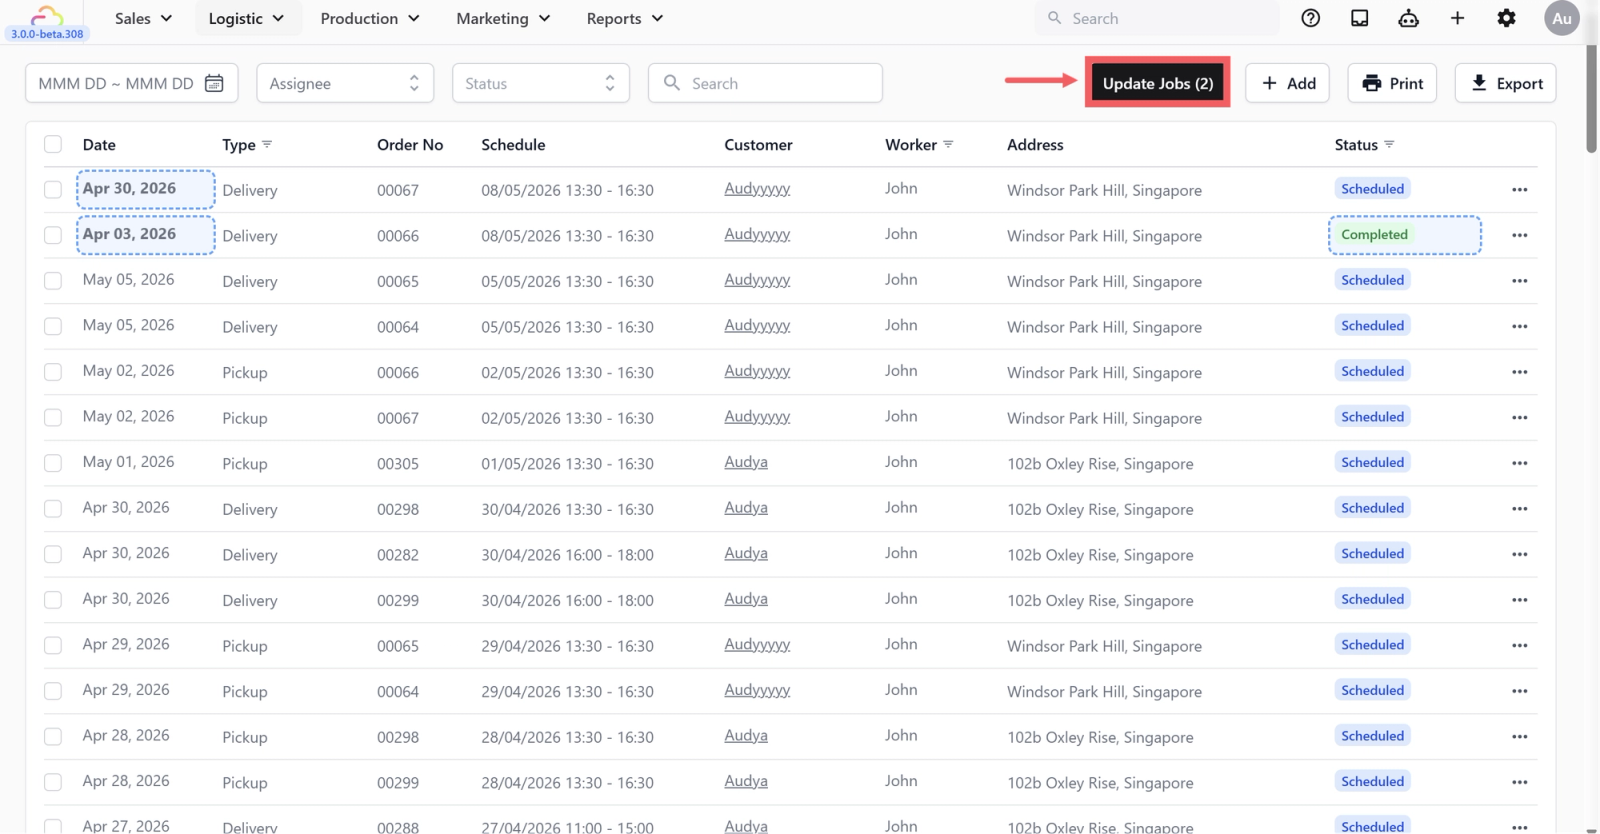
- Click Update Jobs at the top of the page to save all your changes at once.
Add a new job manually
Most jobs are created automatically when an order needs collection or delivery. Use this only if you need a one-off job that is not tied to an order, like an emergency pickup.
- Click + Add at the top of the page.
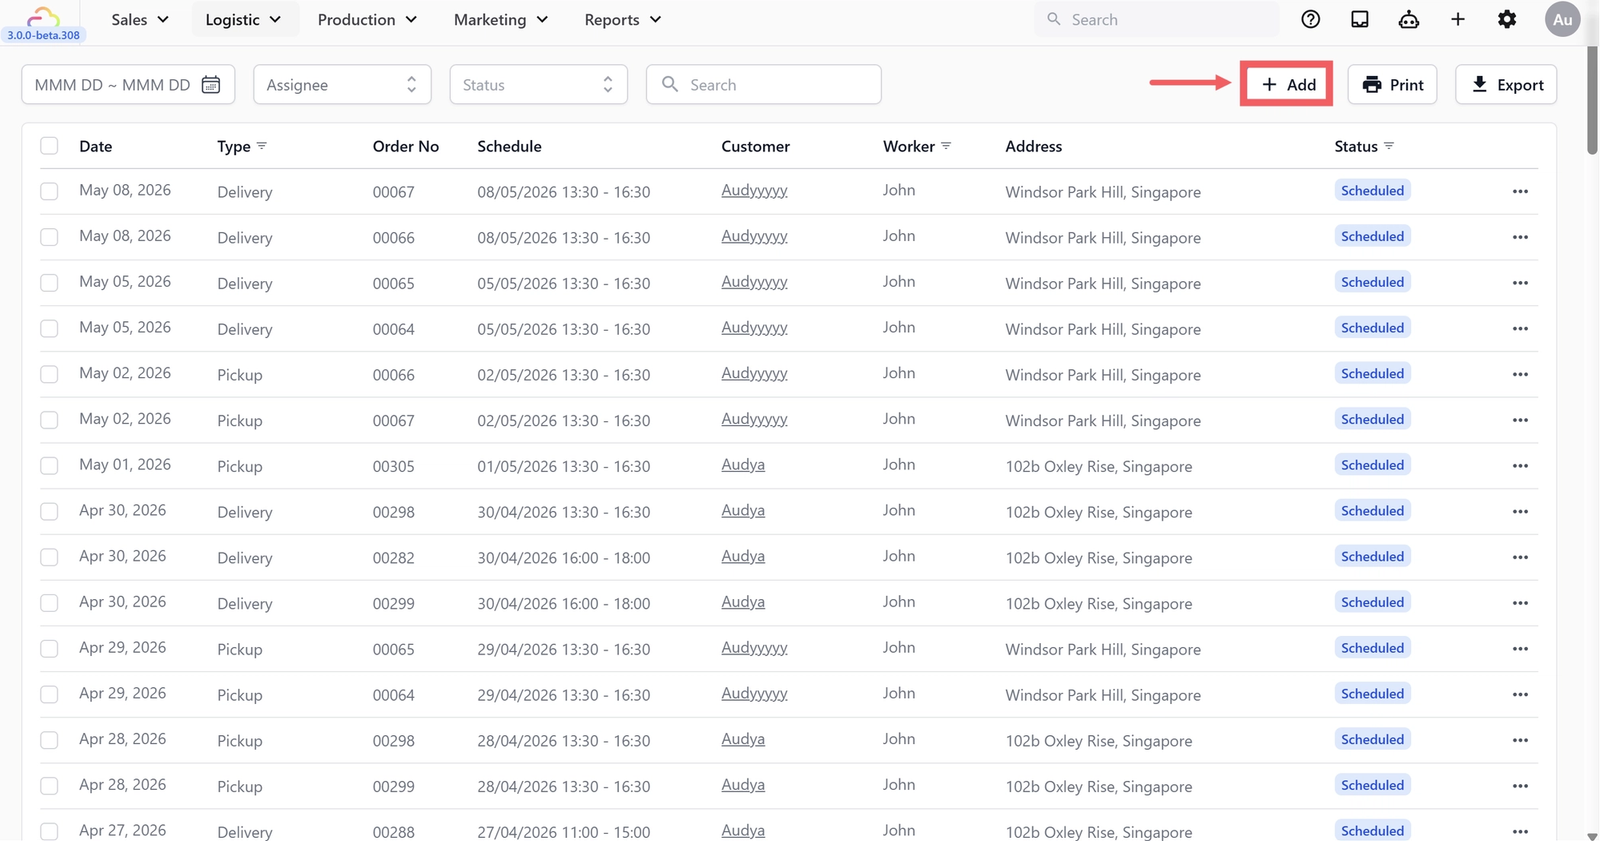
- Fill in the four required fields: customer, type, address with the location pinned, and the schedule date.
- Pick a worker if you already know who. Leave blank to assign later.
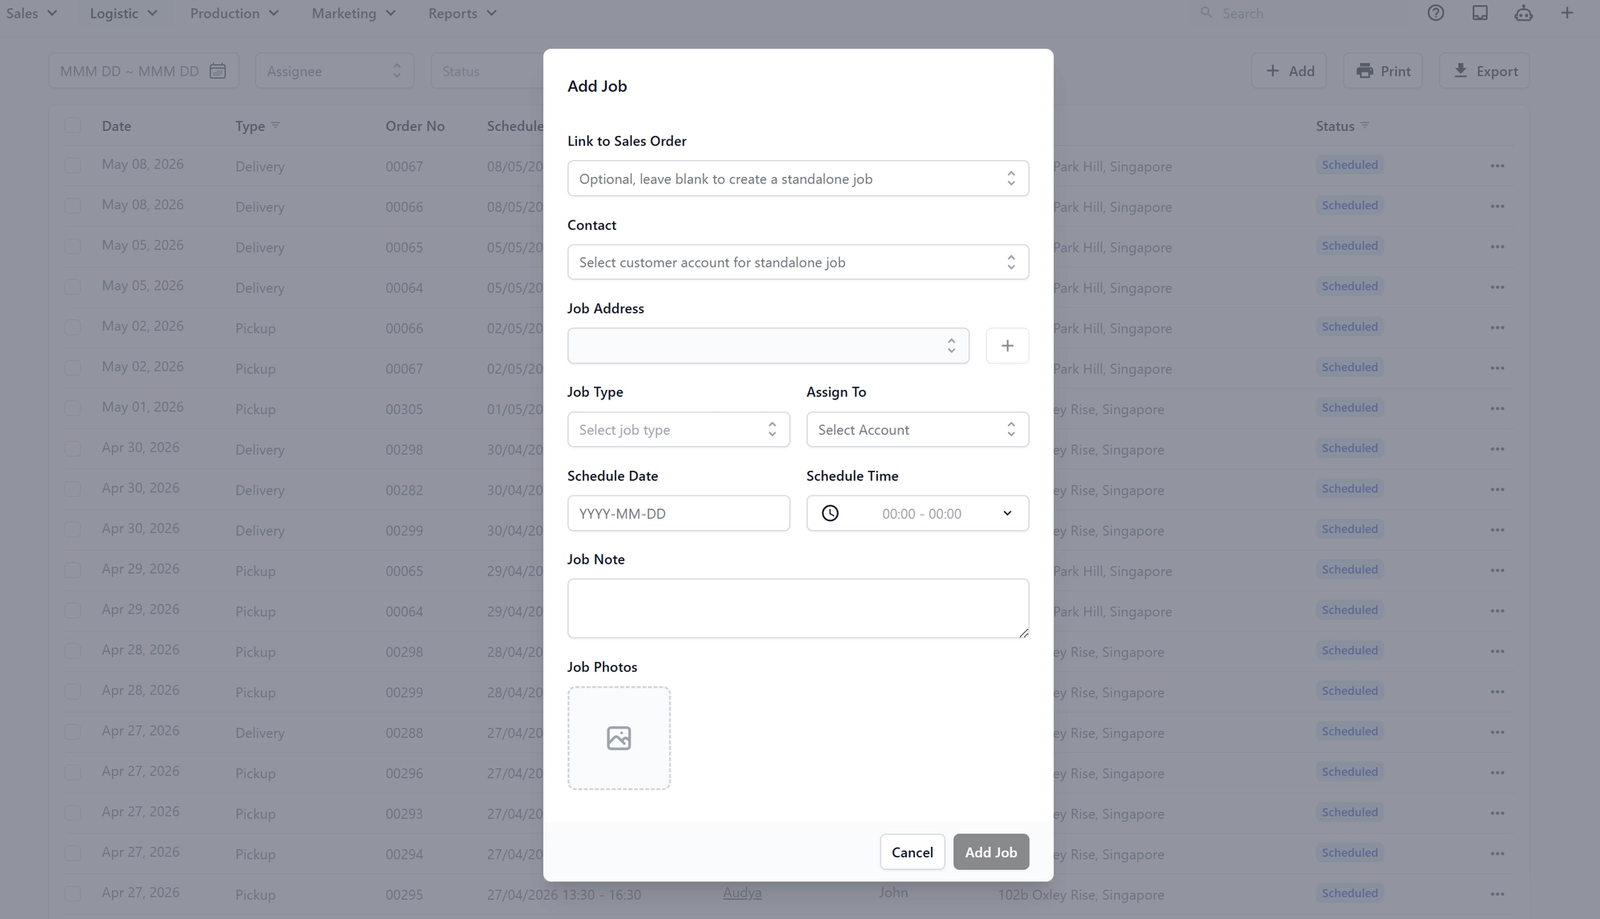
- Click Add Job.
Print and export
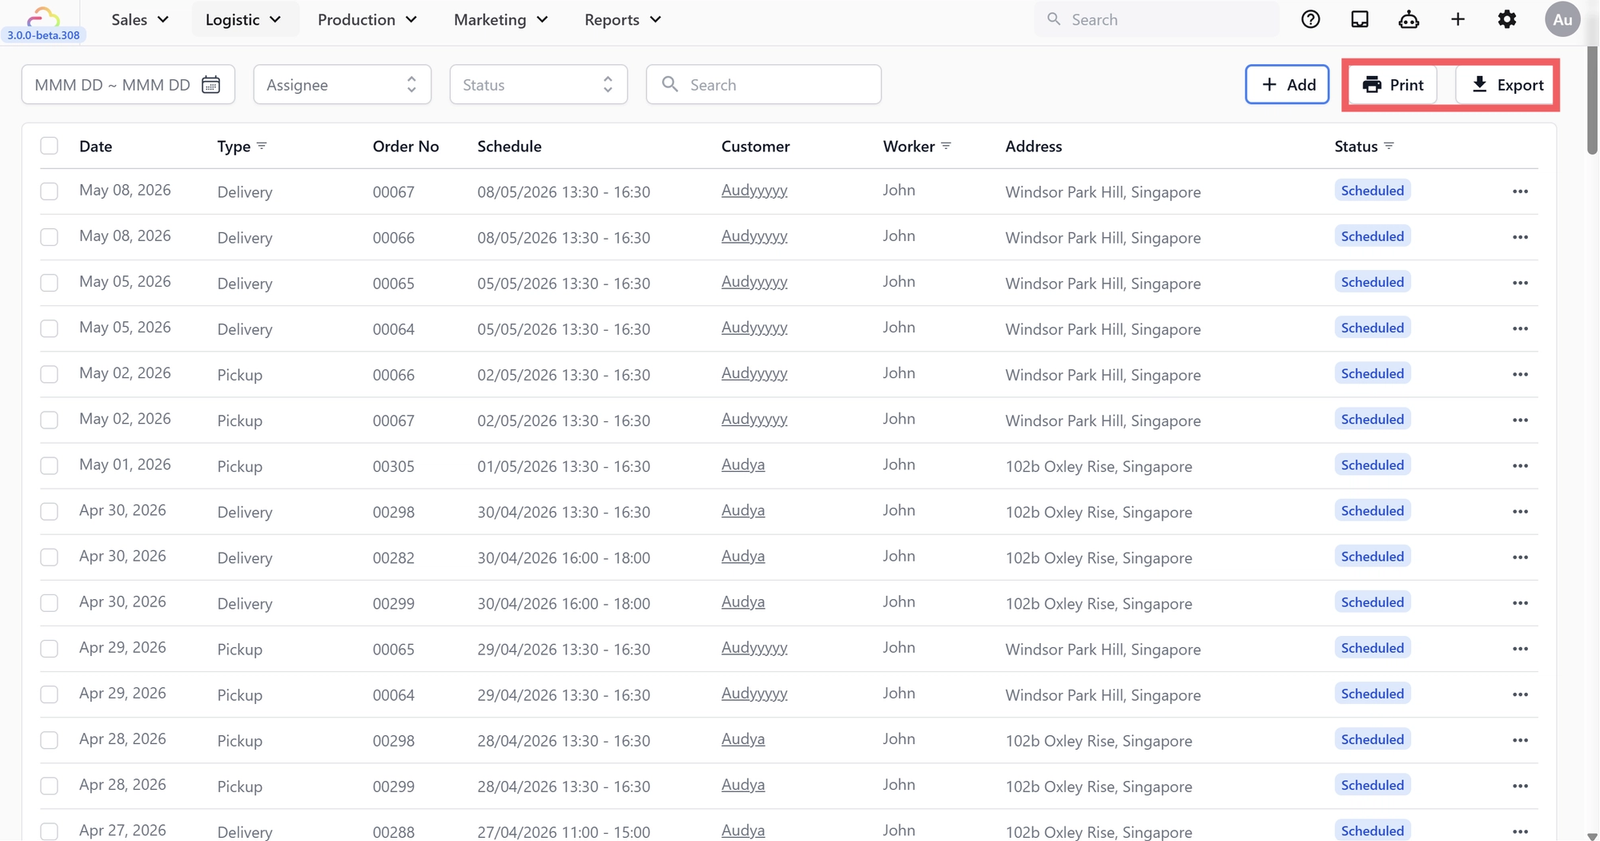
- Print opens a printer-friendly version. Useful for handing a daily run sheet to a driver who does not use the mobile app.
- Export to Excel downloads the current view as an Excel file.
FAQs
Why can I only see 200 jobs when there are more?
The table loads in batches to stay fast. Look at the loaded total at the top. Narrow your date range or use a filter to see more.
My driver's name is missing from the Worker dropdown. Why?
The driver needs a teammate account with app access turned on. The Worker dropdown is built from this list, so a teammate without app access will not appear here. See Setting Up Your Driver Account (Coming Soon).
Can I change a job's status to Failed from the table?
No. The table only lets you mark jobs as Completed. To set a job to Failed or Cancelled, open the job and use the action menu inside it.
I made edits but lost them. What happened?
Edits are only saved when you click Batch Save. If you refreshed or moved away first, the edits were dropped.
If I edit a job here, does it change the linked customer order?
The link goes one way. The job knows which order it came from, but editing the job's schedule, address, or worker does not change the original order. If the customer's order details change, edit the order itself.
Do I need the Job Table if my drivers use the mobile app?
Yes. The mobile app is for the drivers themselves. The Job Table is for you and your office staff to plan, reassign, and check on the work. They stay in sync automatically.
What's next
Now that you can read and update the Job Table, see Setting Up the Job Map to view the same jobs on a calendar or map, drag them around to reschedule, and track where your drivers are.
Give feedback
Up next
Setting Up the Job MapVisualize your operations with true geographic perspective. Plot every scheduled task onto a map to instantly optimize smart routing, spot scheduling overloads in specific areas, and pinpoint exactly where pending versus completed jobs are across the city.
Read more