Setting Up Service Areas
In this article
This article walks through editing a business unit's service area from start to finish. You will open the form, pick the zones the unit covers, set a global and per-zone minimum order, and write the message customers see when they fall outside your coverage. Use this when you want to restrict where a business unit operates or charge a minimum order in certain areas.
Contents
Contents
Opening the Service Areas Page
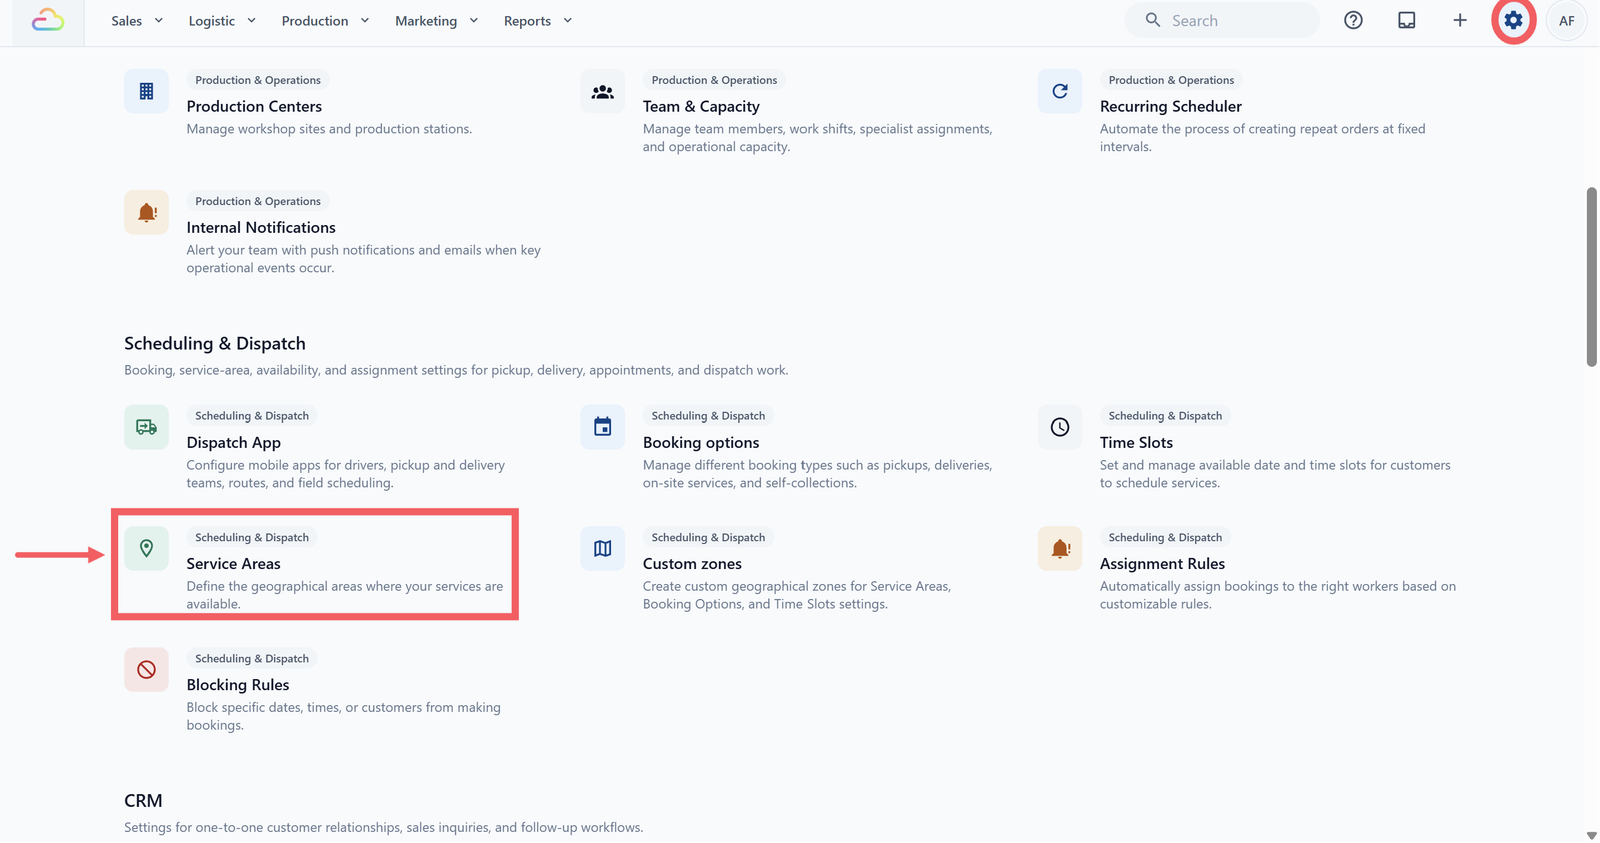
- Click the ⚙️ Settings icon in the top-right corner.
- Under the Scheduling & Dispatch section, click Service Areas.
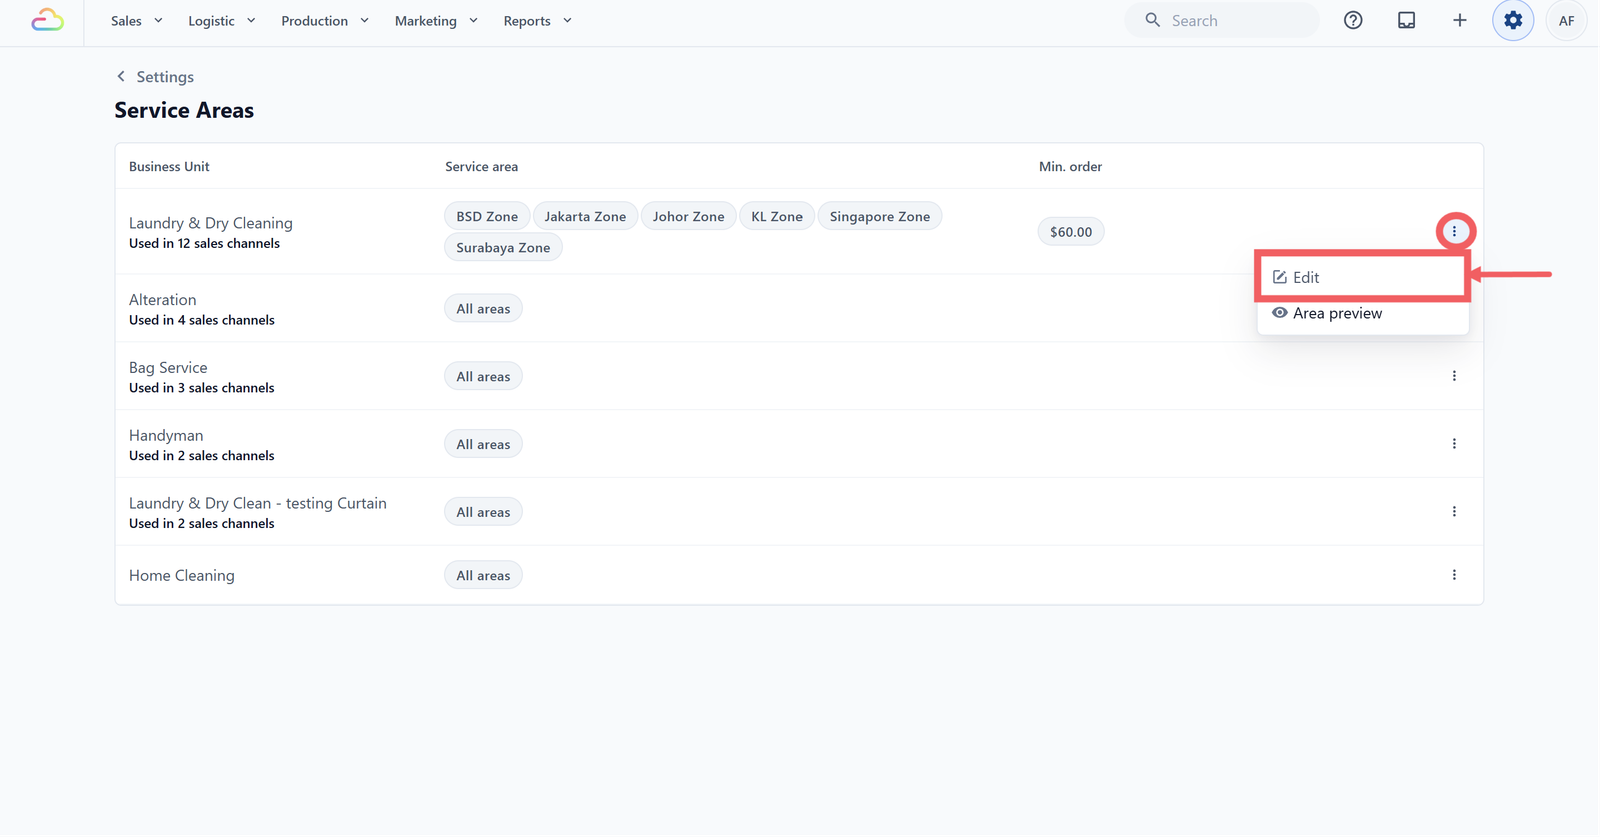
- Find the row for the business unit you want to configure.
- Click the three-dot button at the right end of the row.
- Click Edit.
Pick the Custom Zones You Cover
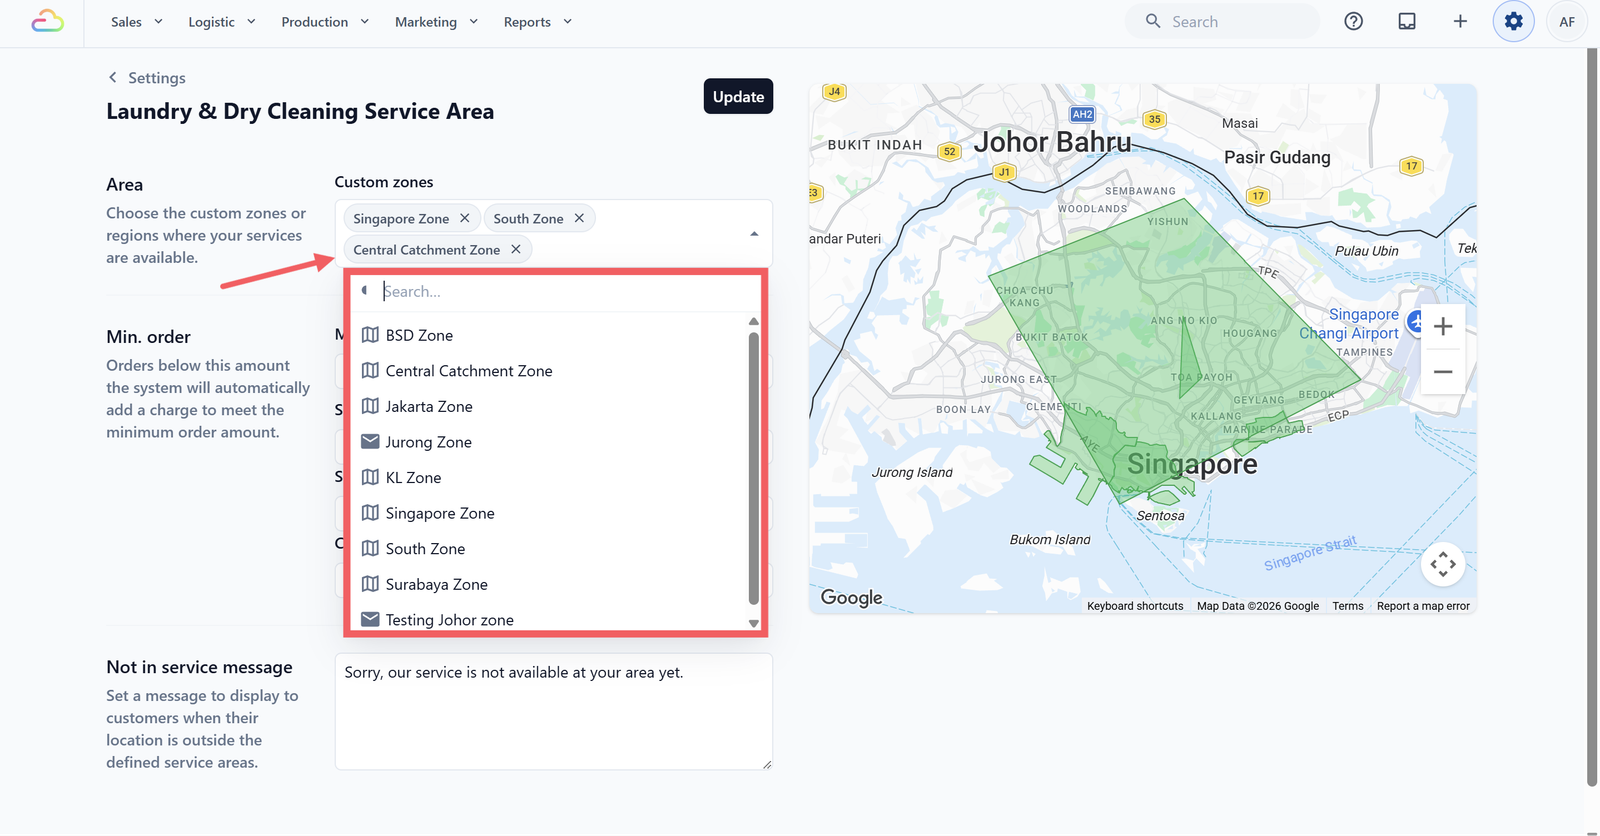
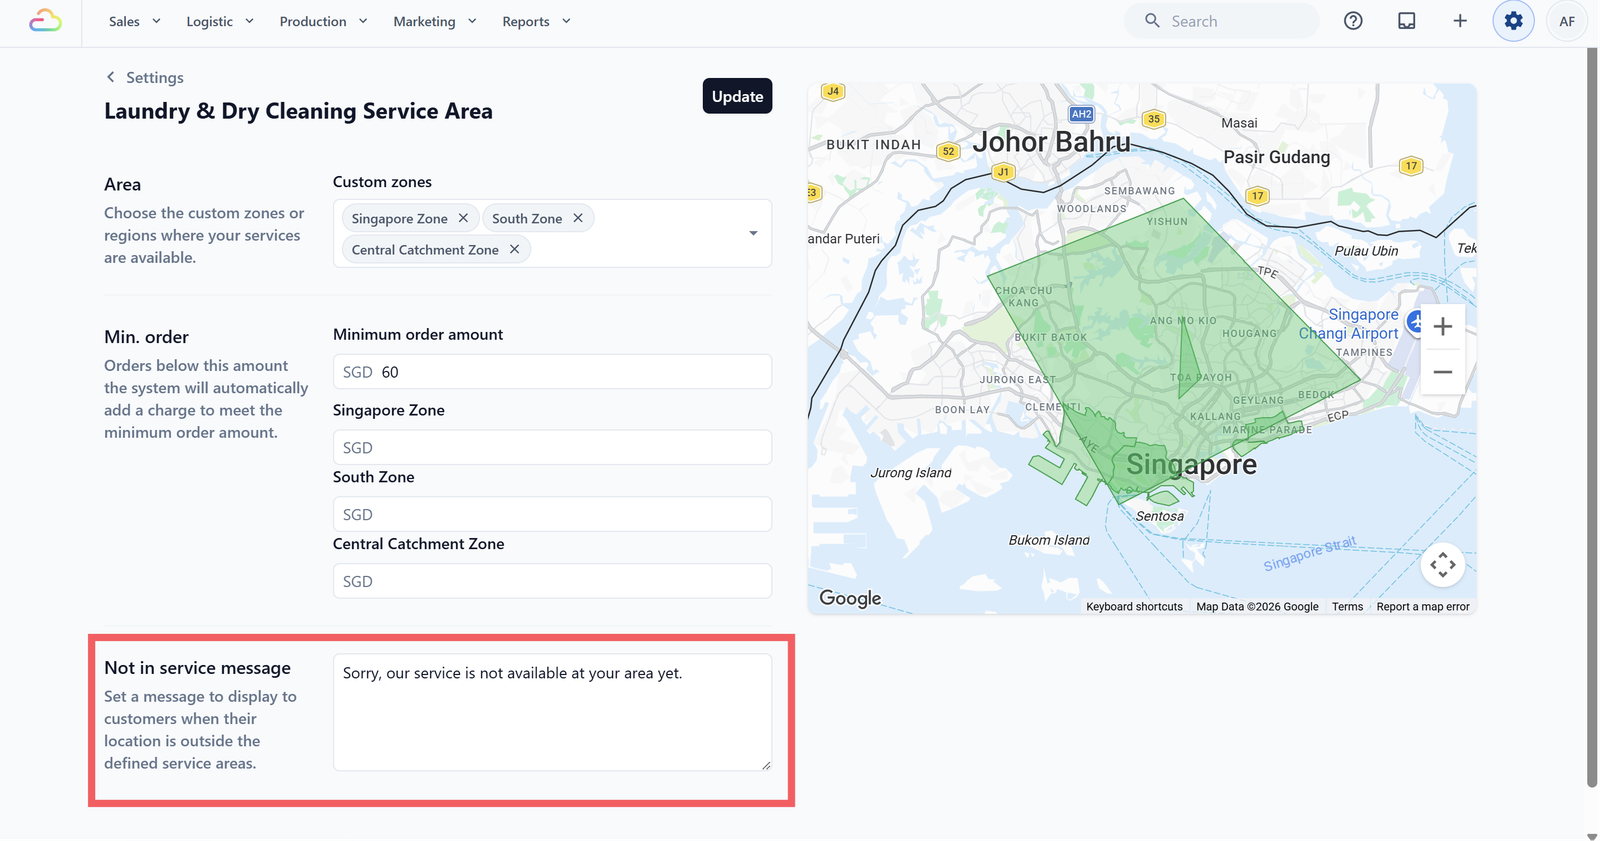
Under the Area section, click the Custom zones picker. A searchable popup opens with all your Custom Zones. Tick every zone this business unit covers. Each selected zone appears as a chip on the picker with a remove button.
Set the Minimum Order
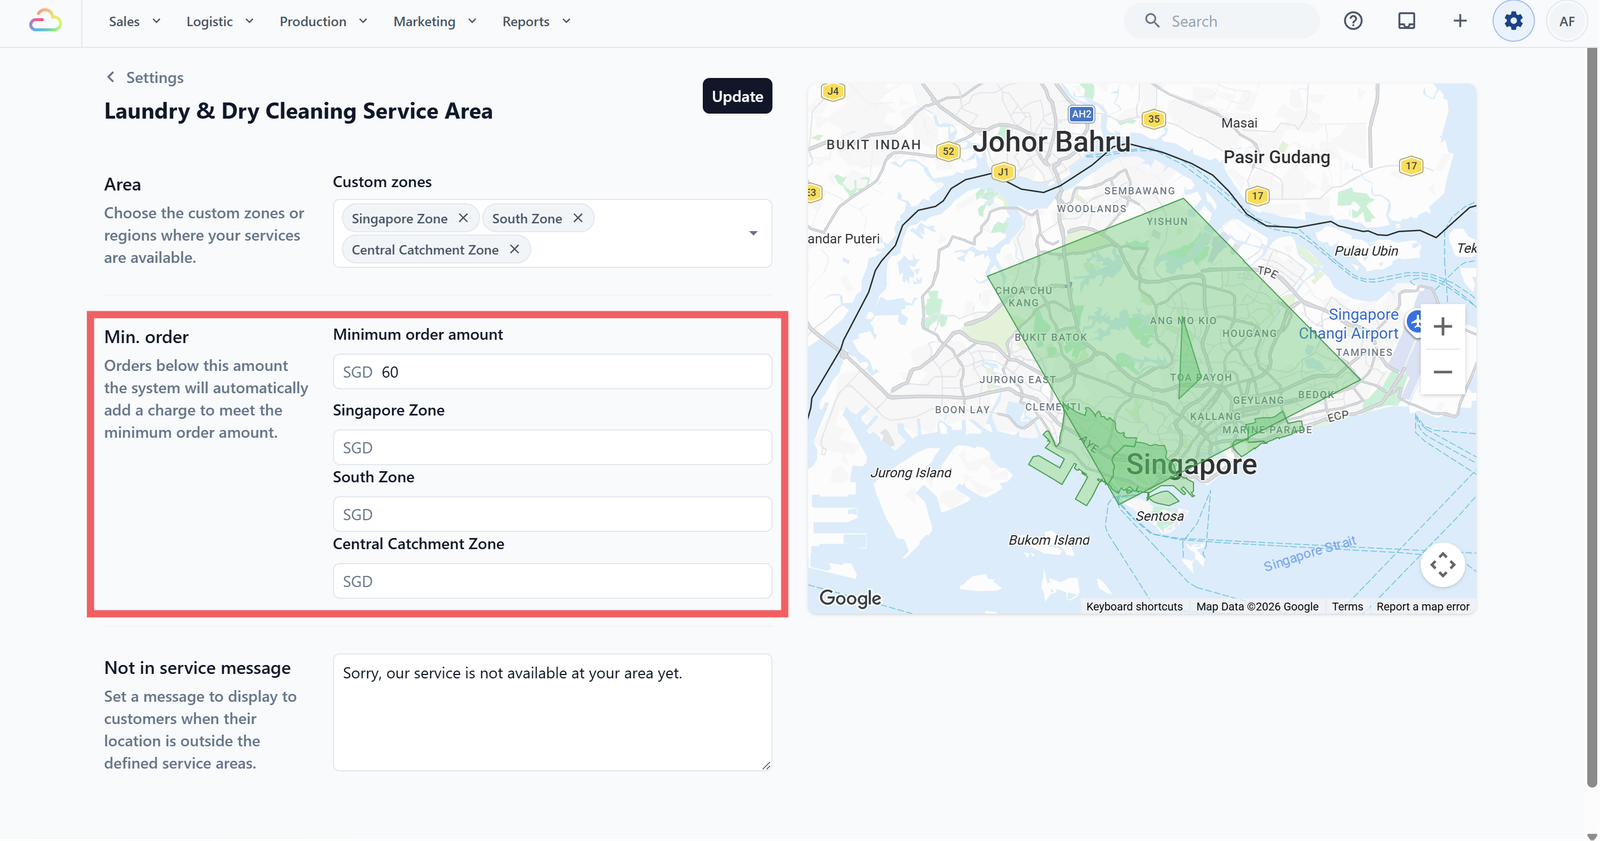
Under the Minimum order section, enter an amount in the Minimum order amount field. The currency prefix is fixed to your account currency.
The per-zone field appears for each zone you selected before. If you leave a zone's field blank, it uses the business unit minimum order instead. If no global minimum is set either, that zone has no minimum.
Write the Out-of-Area Message
Under the Not in service message section, type the message customers should see when their address falls outside all your selected zones. The default placeholder is "Sorry, we are not here yet." Keep it short and tell the customer what to do next, for example contact you or check back later.
Save
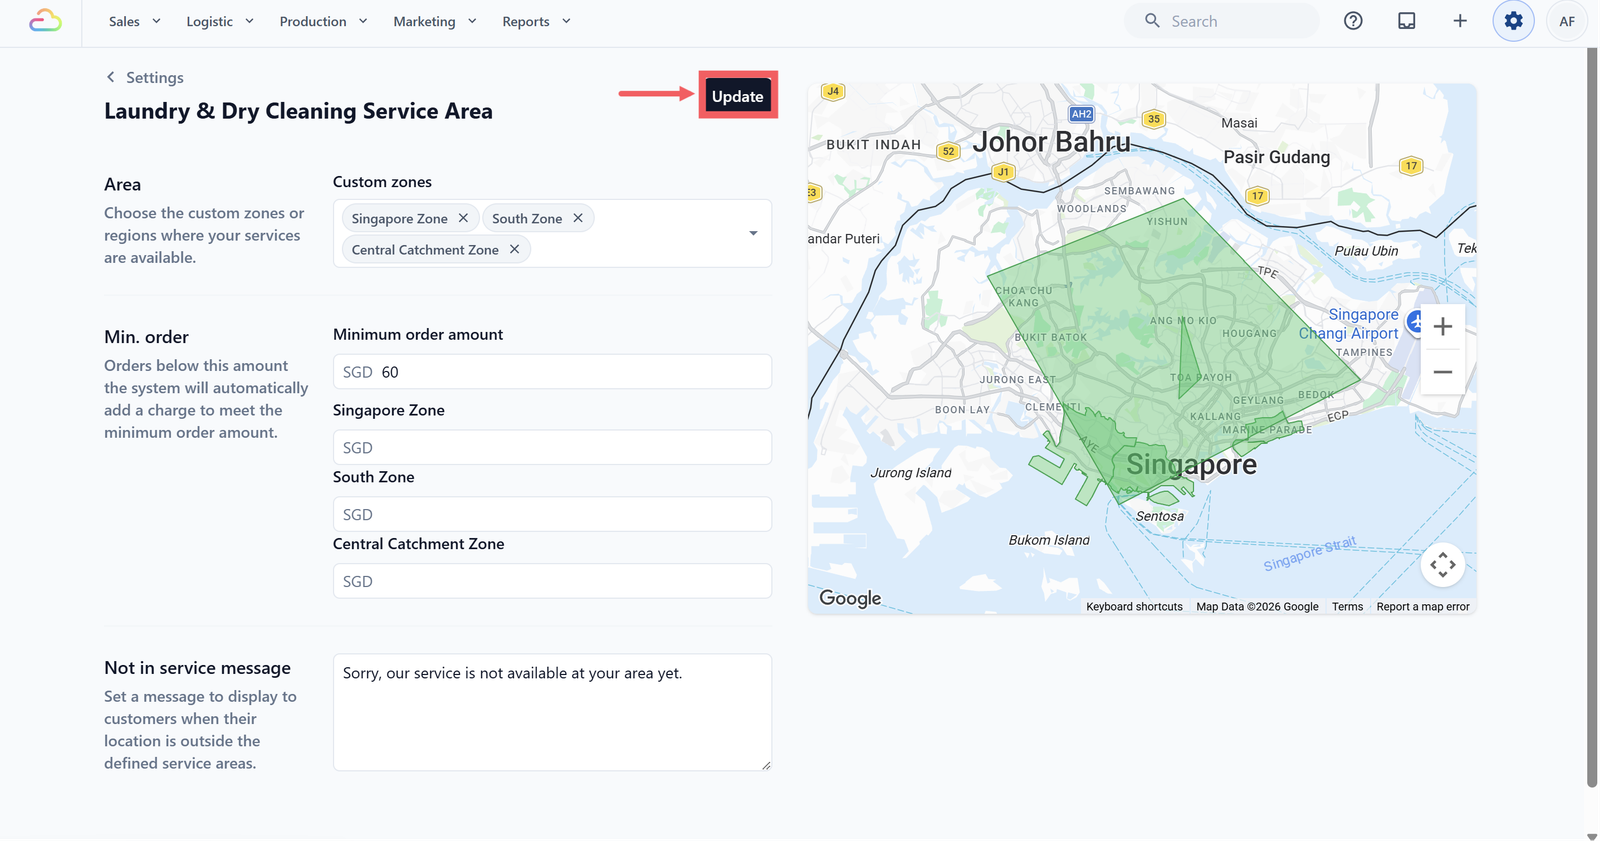
- Click Update in the top-right corner.
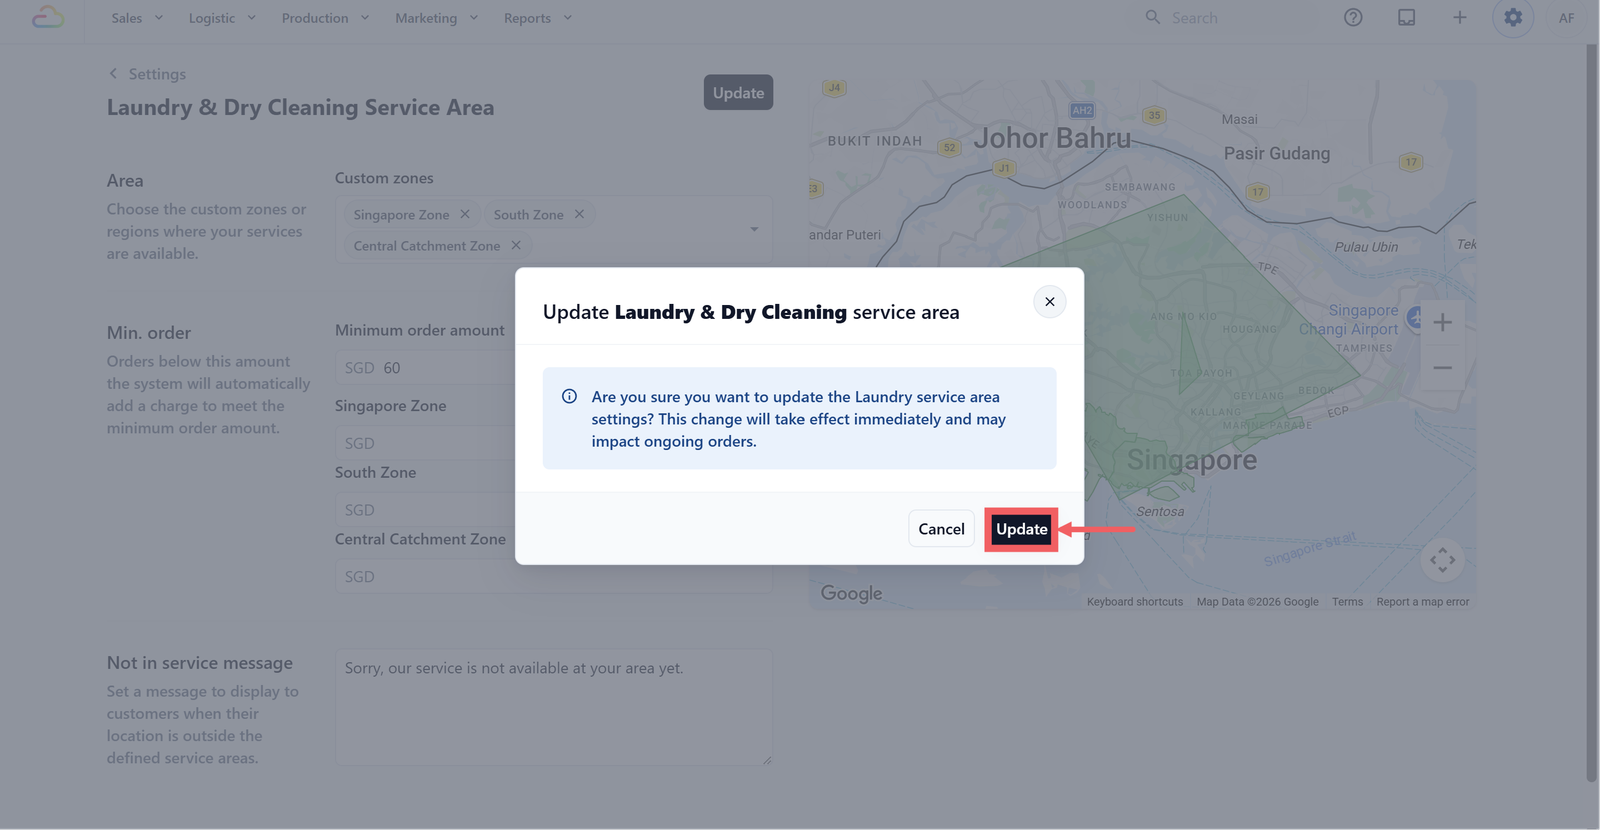
- A confirmation dialog appears warning that this change will take effect immediately and may impact ongoing orders.
- Click Update again to confirm.
Previewing Coverage Without Editing
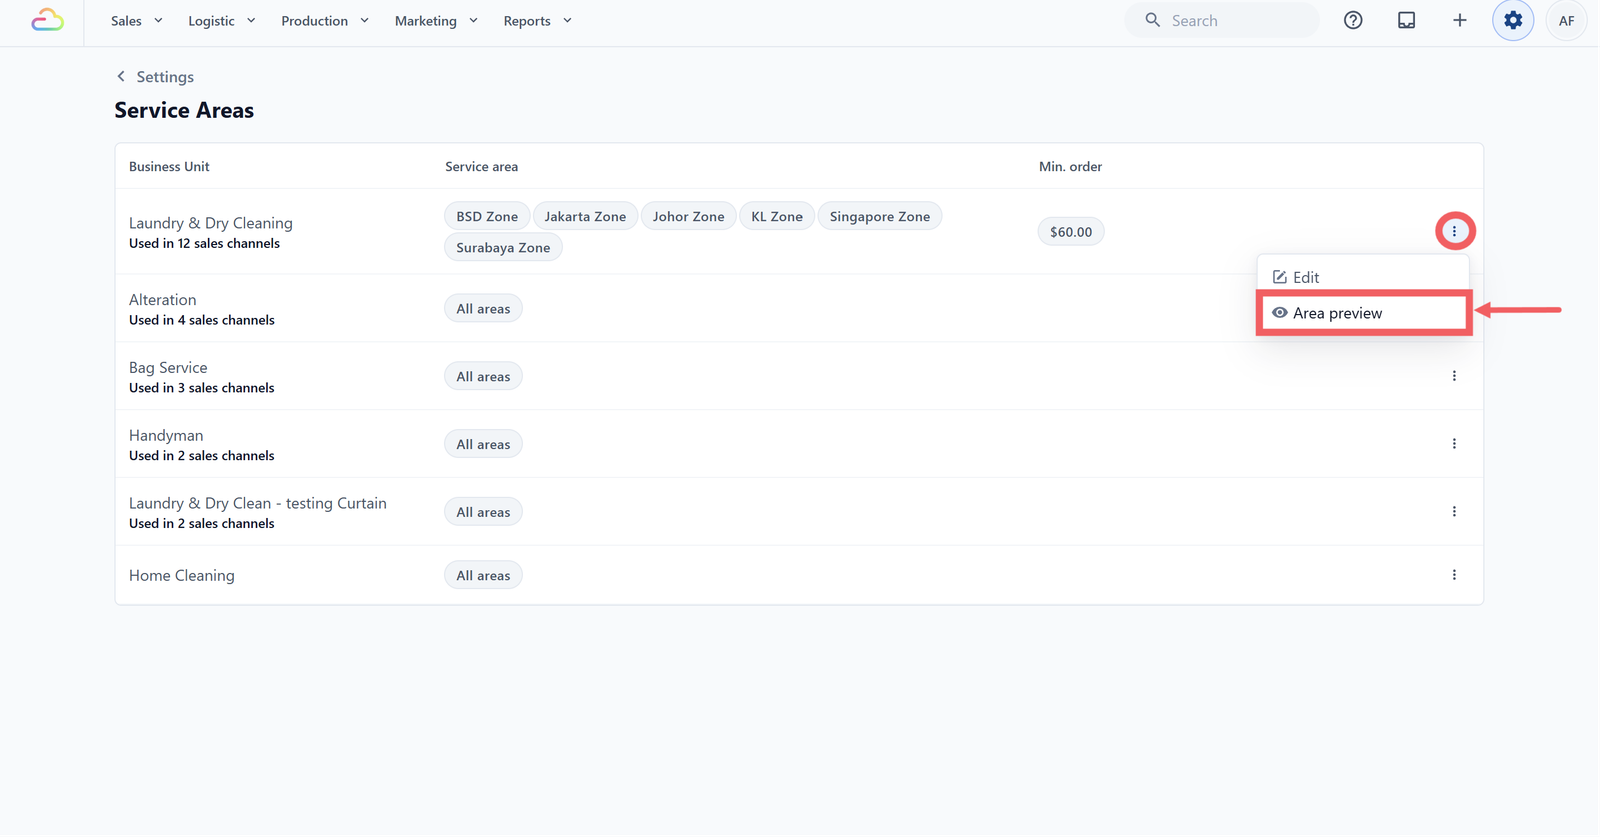
From the Service Areas list, click the ⠇ three-dot button on a row and choose Area preview to see that business unit's coverage on a map without entering the edit page. This is useful for spot-checks before going live.
FAQs
Can I add a new service area row?
No. The list is fixed to your existing business units. Each business unit has one service-area record. To "create" coverage rules, edit a row that currently shows All Areas.
Can I delete a service area?
No. To reset coverage, open the row, remove all Custom Zones, clear the minimum order, and save. The row will show All Areas again.
How is the minimum order enforced at checkout?
If a customer's order subtotal is below the minimum for their zone, EasyBiz automatically adds a top-up charge to bring the order up to the minimum. The customer is not blocked.
Does this affect orders that are already in progress?
Yes. The update warning makes this explicit. The new rules apply to every order from the moment you save, including ongoing checkouts. Avoid editing during peak hours if you can.
Why does the row caption say "Used in N sales channels"?
This counts the sales channels that use the business unit. It helps you understand how wide the impact of your edit is before you save.
What's Next
Now that your service areas are set, continue to Time Slots to control when customers can book pickup and delivery in each area.
Give feedback
Up next
Service OptionsSet up the choices your staff and customers pick from when they book a service, so each choice flows through into pricing and orders.
Read more