Setting Up Product Catalog
In this article
Your Product Catalog is the foundation of how your business runs on EasyBiz. It's where you store everything your team sells or services — from bags, shirts and shoes your customers bring in for repair, to care kits and accessories you sell at the counter. Once your catalog is set up, your staff can create orders faster, prices are applied automatically, and nothing gets missed. This guide walks you through everything step by step.
Contents
Contents
Why Set Up Your Product Catalog
Your Product Catalog is where you add everything your business sells or services. Once it's set up, your staff can find items quickly, prices apply automatically, and every order is consistent.
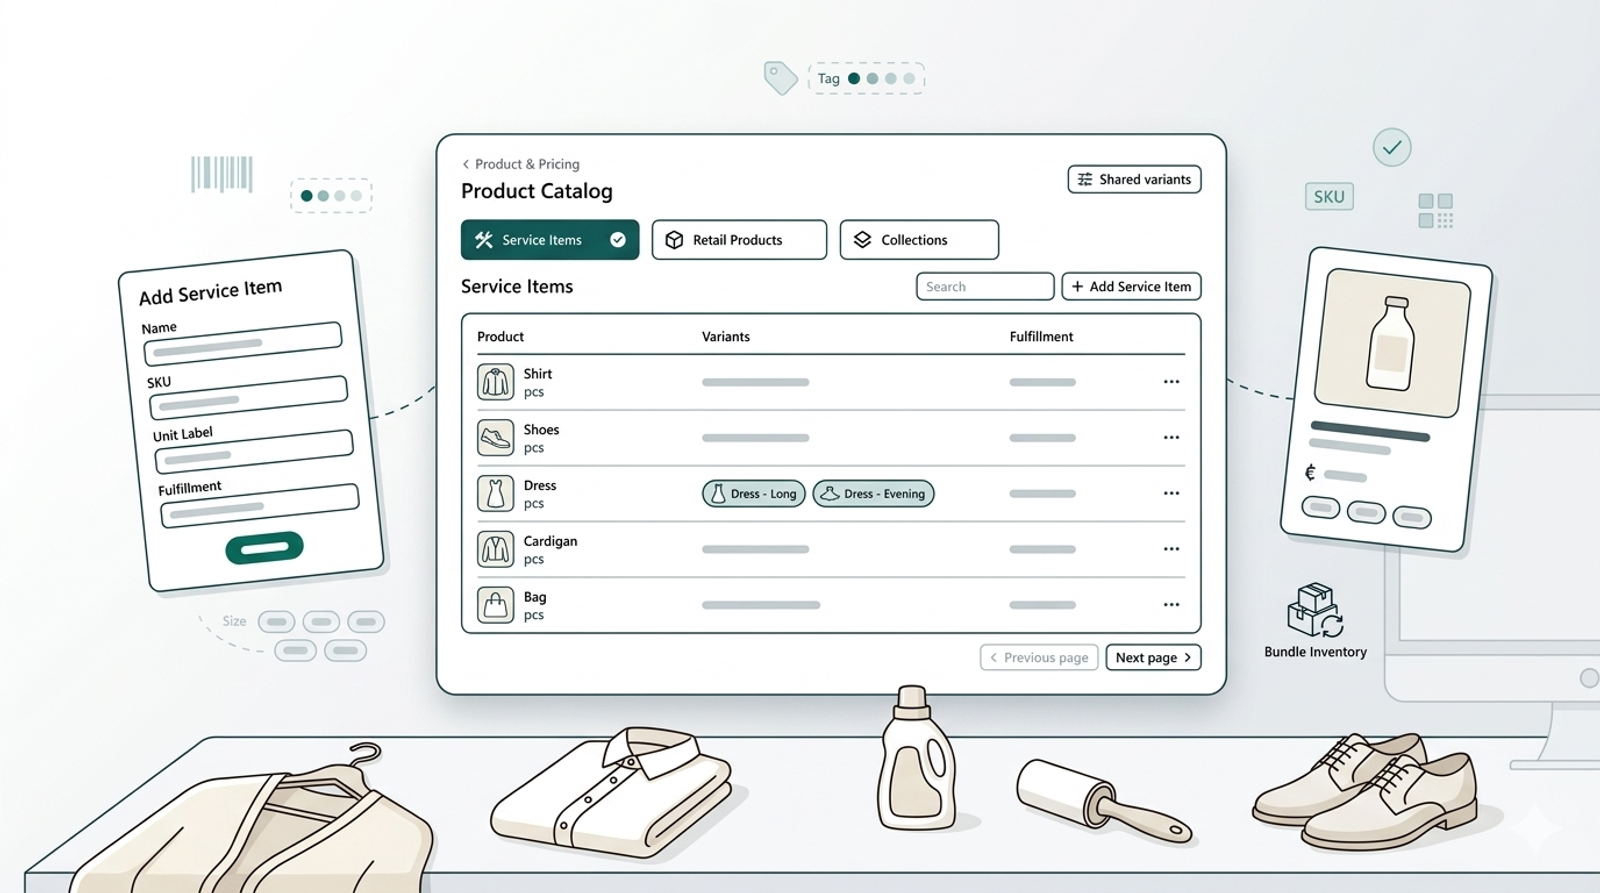
How to Access Your Product Catalog
- Click the Settings icon from the top navigation bar
- Under the Products & Pricing section, click Product Catalog
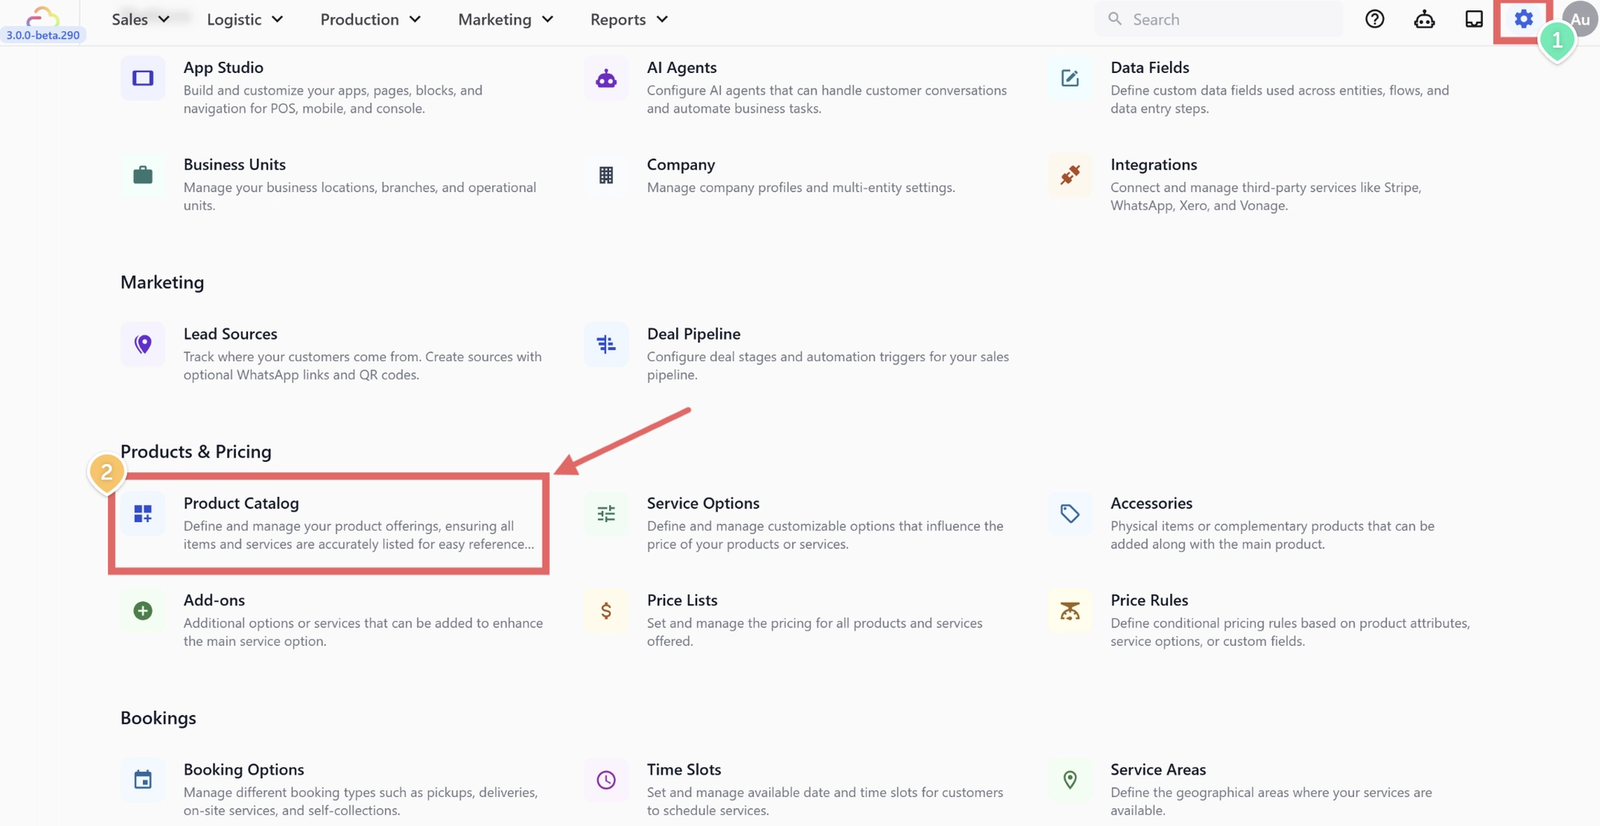
Once inside, you will see three sections at the top:
- Service Items
- Retail Products
- Collections
You will also see a Shared variants button at the top right — more on that later.
Understanding the Two Product Types
Before adding anything, it helps to understand the difference between the two types of products. Choosing the right one affects how your staff creates orders.
Service Items
Service Items are things your customers bring to you — like bags, shoes, shirts, curtains, or any item that needs a service. The price is usually not fixed upfront because it depends on what the item needs. A light clean costs less than a full restoration, so the final price is confirmed after your staff assesses the item.
Retail Products
Retail Products are items you sell at a fixed price — cleaning kits, care products, accessories, dust bags, and so on. When your staff selects one at the POS, the price is added immediately with no extra steps.
Adding a Service Item
Step 1 — Open the Add Service Item form
- Click the Service Items tab
- Click + Add Service Item on the right side of the page
A popup will appear with several fields. Here is what each one means.
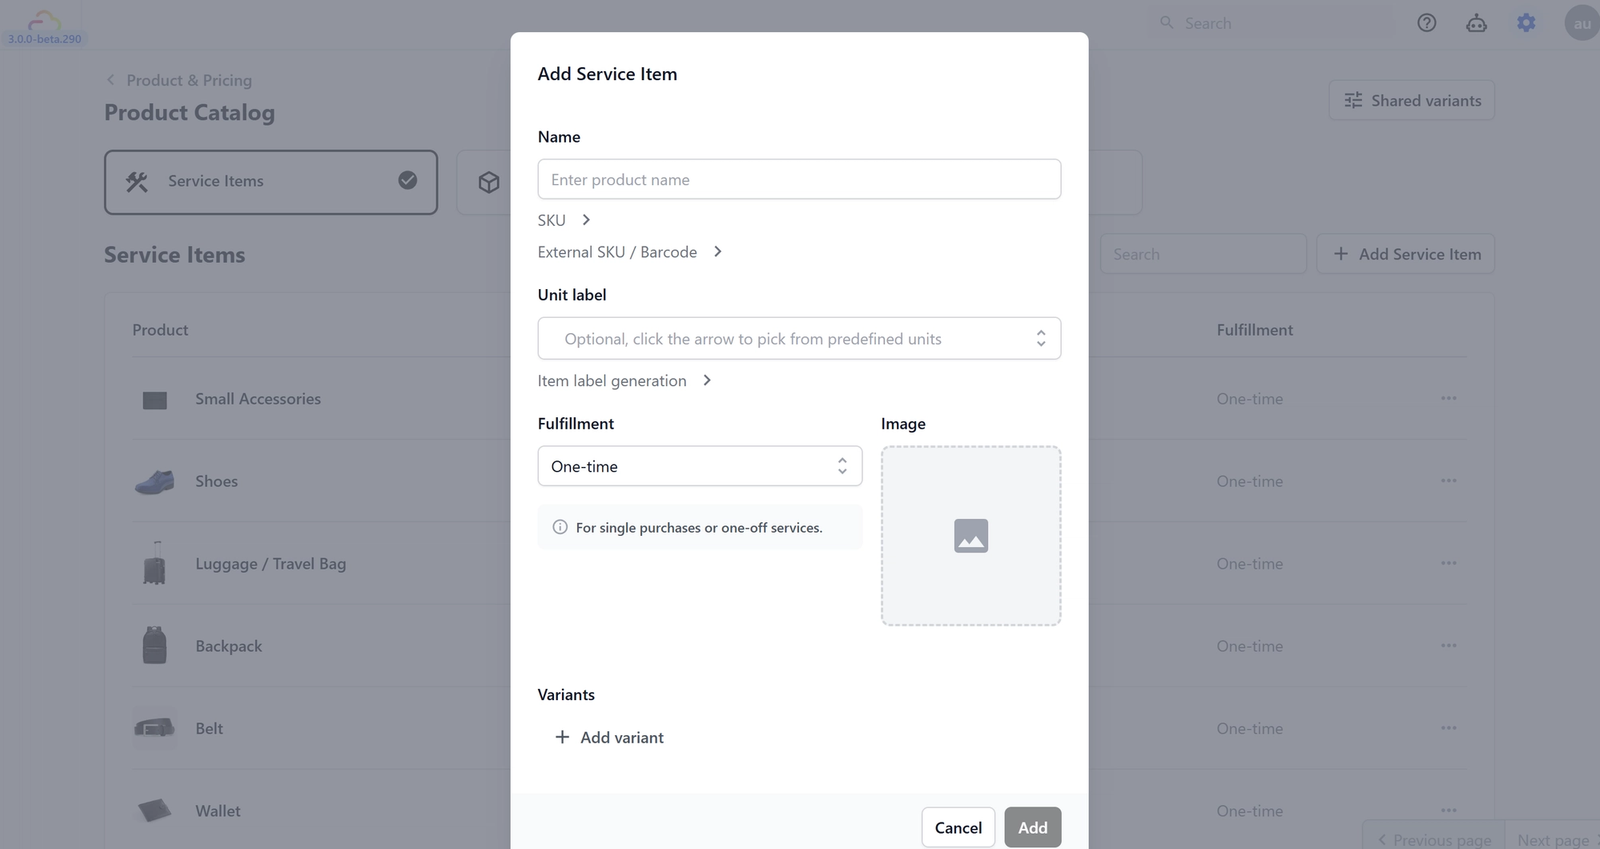
Step 2 — Fill in the details
- Name: The name your staff will see on the POS when creating an order. Keep it simple — for example: Bag, Shoes, Shirt, Curtain. Make it something your team will recognise instantly.
- SKU: A unique product code. Leave it on Auto generate SKU — EasyBiz will create one for you. If you want to use your own, click the arrow next to SKU to type it in.
- External SKU / Barcode: If your business uses a barcode scanner at the counter, enter the product's barcode here. Leave it blank if you don't use barcodes.
- Unit label: This is how you measure this item — for example, pcs means pieces, pair means a pair of shoes. Click the arrow on the right to pick from predefined units. For most businesses pcs is the right choice.
- Item label generation: This controls how many label get printed for this one item when it's added to an order. Leave it at the default — most businesses don't need to change this.
- Fulfillment: Leave this set to One-time. This is the correct setting for most service businesses.
- Image: Upload a photo of the item. Optional, but helps your staff identify items quickly at the POS.
Step 3 — Add Variants (if needed)
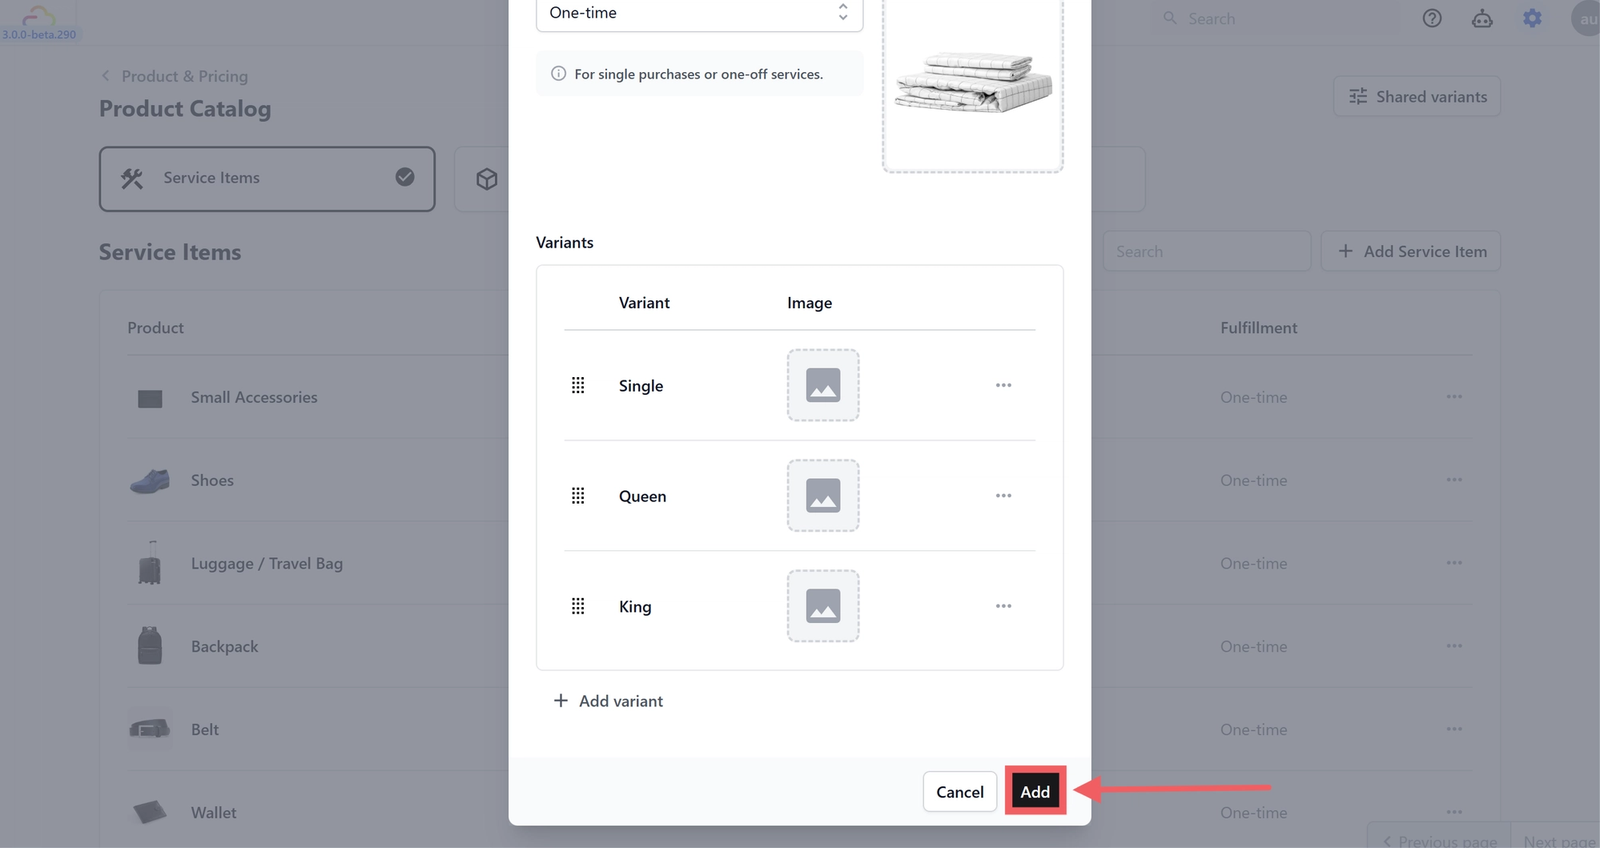
A variant is a different version of the same item. For example, your Bag service item might have:
- Handbag
- Backpack
- Clutch
- Wallet
Each variant can have its own name and image. Adding variants means your staff can be specific when creating an order — so your workshop knows exactly what came in.
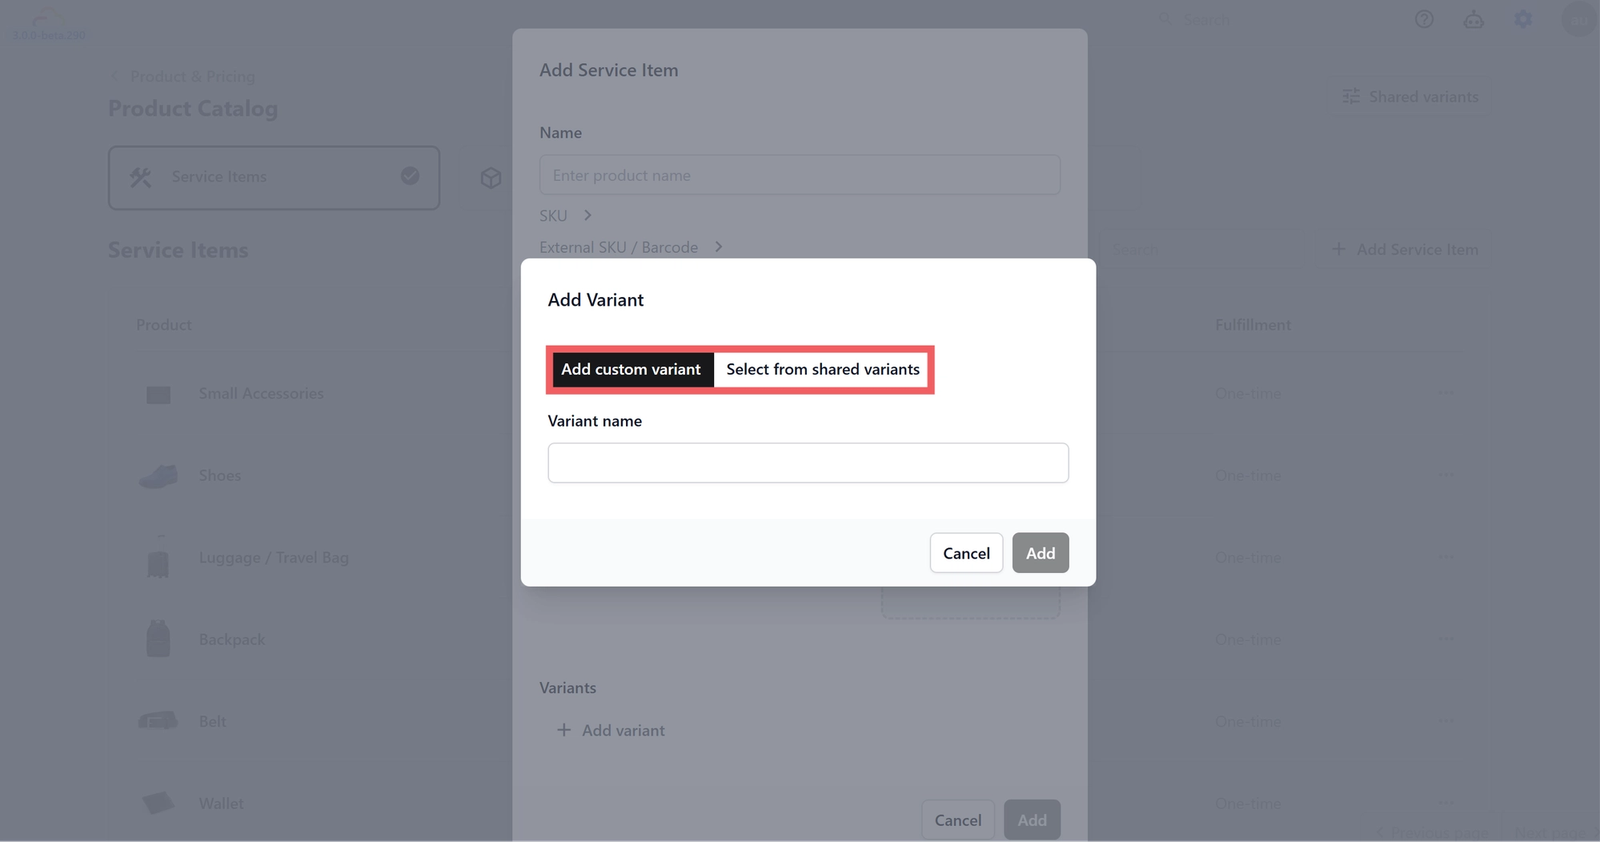
To add a variant:
- Click + Add variant
- A popup will appear with two options: Add custom variant and Select from shared variants
- For a one-off variant, choose Add custom variant and enter the variant name
- Click Add
Step 4 — Save
Click Add to save your service item. It will now appear in your Service Items list.
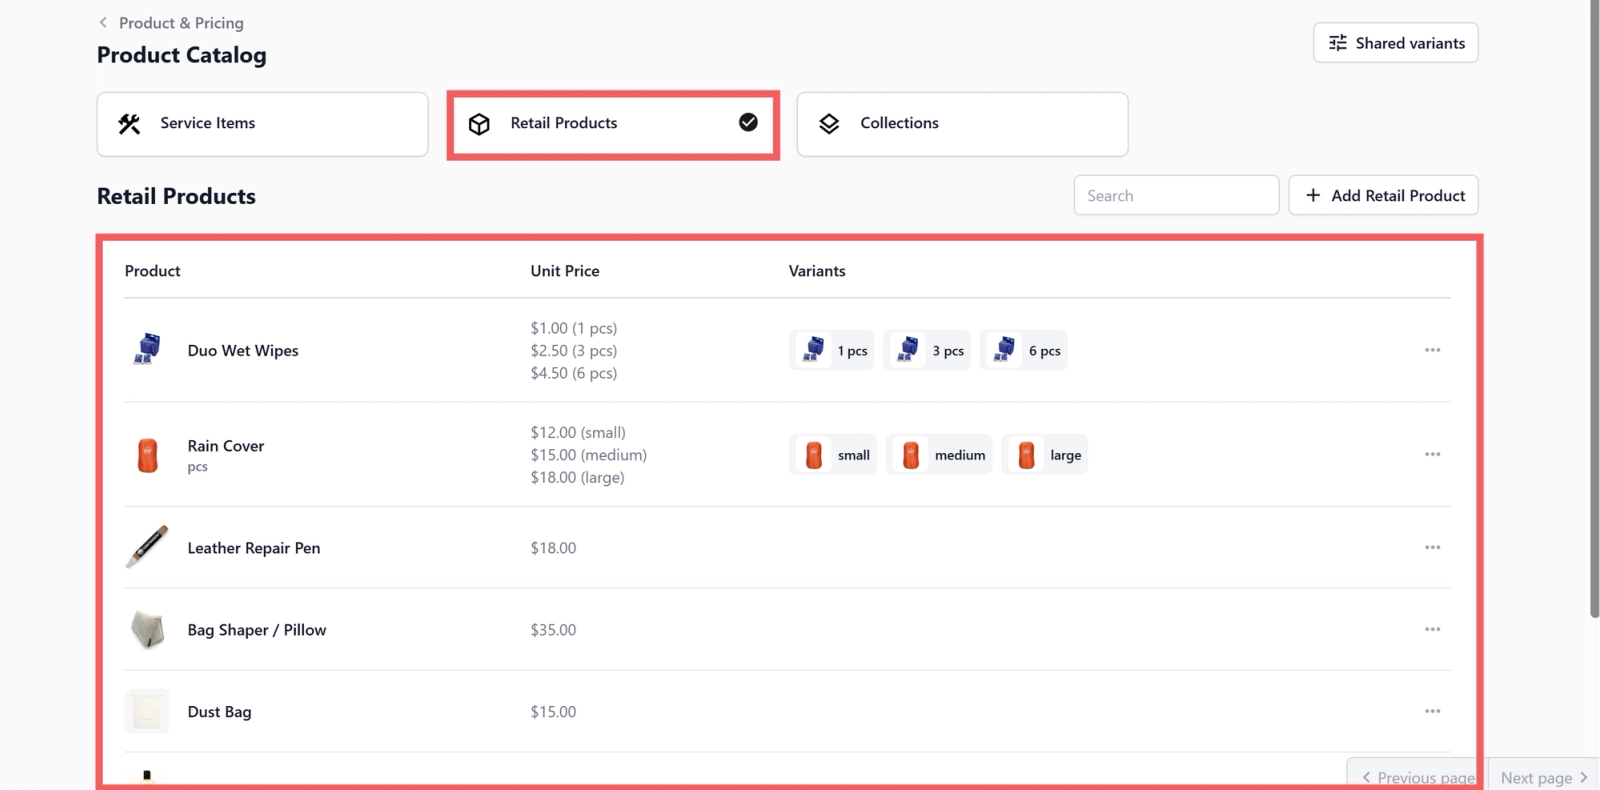
Adding a Retail Product
Step 1 — Open the Add Retail Product form
- Click the Retail Products tab
- Click + Add Retail Product on the right side of the page
The popup is very similar to Add Service Item — with one important difference: instead of Fulfillment, Retail Products have a Unit Price.
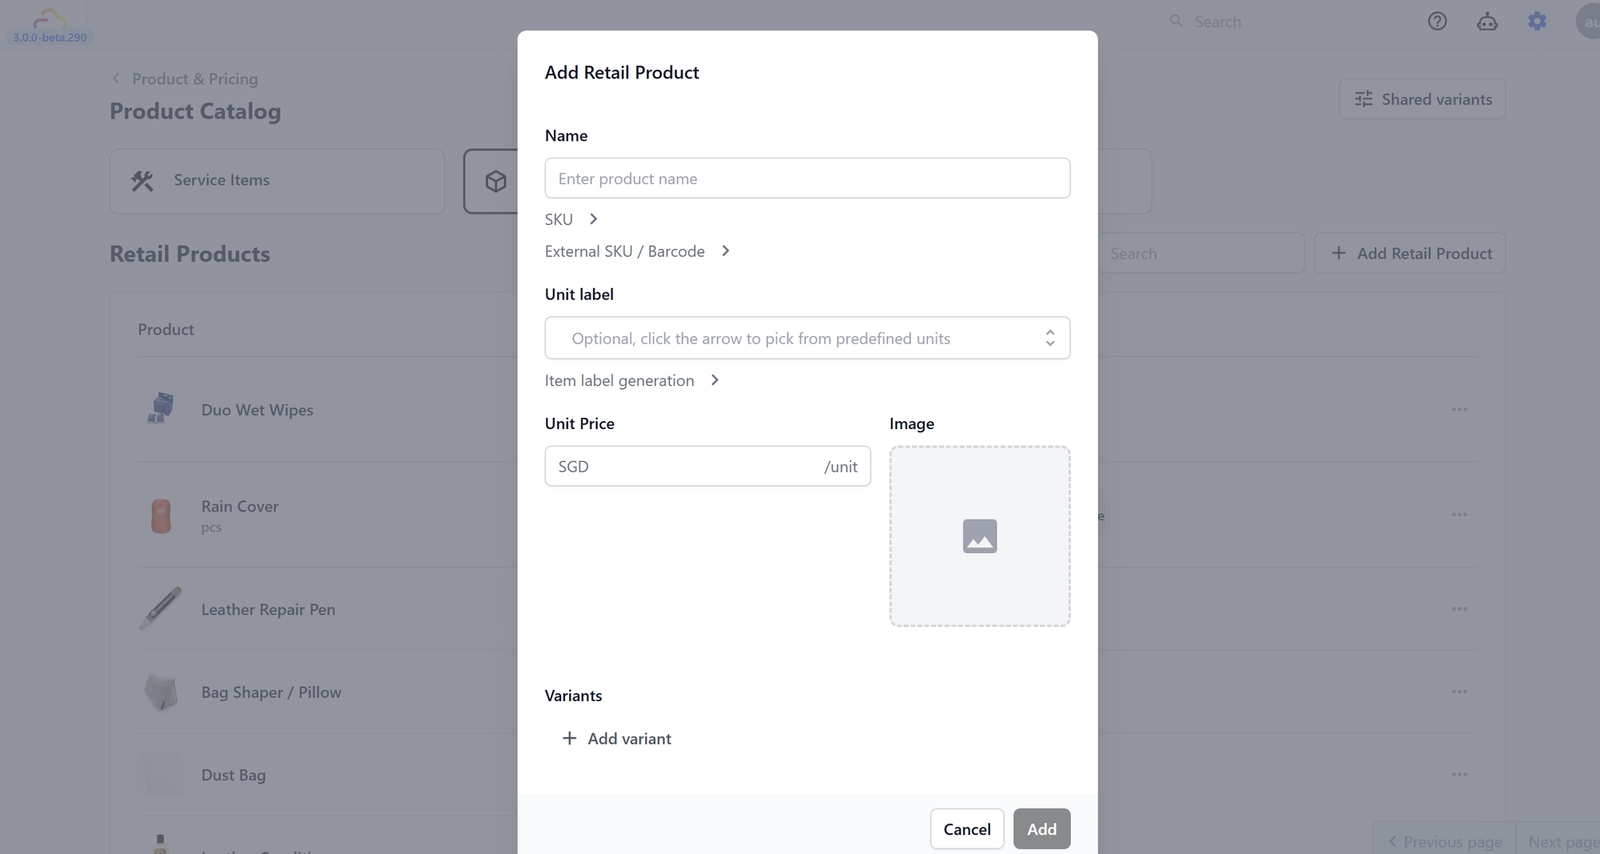
Step 2 — Fill in the details
For Name, SKU, External SKU / Barcode, Unit Label, Item Label Generation, Image, they work exactly the same way as for Service Items — refer to the section above.
For Unit Price, enter the selling price per unit in SGD. This is the price that will be applied automatically when your staff selects this product on the POS. No extra steps, no manual entry — it just goes straight into the order total.
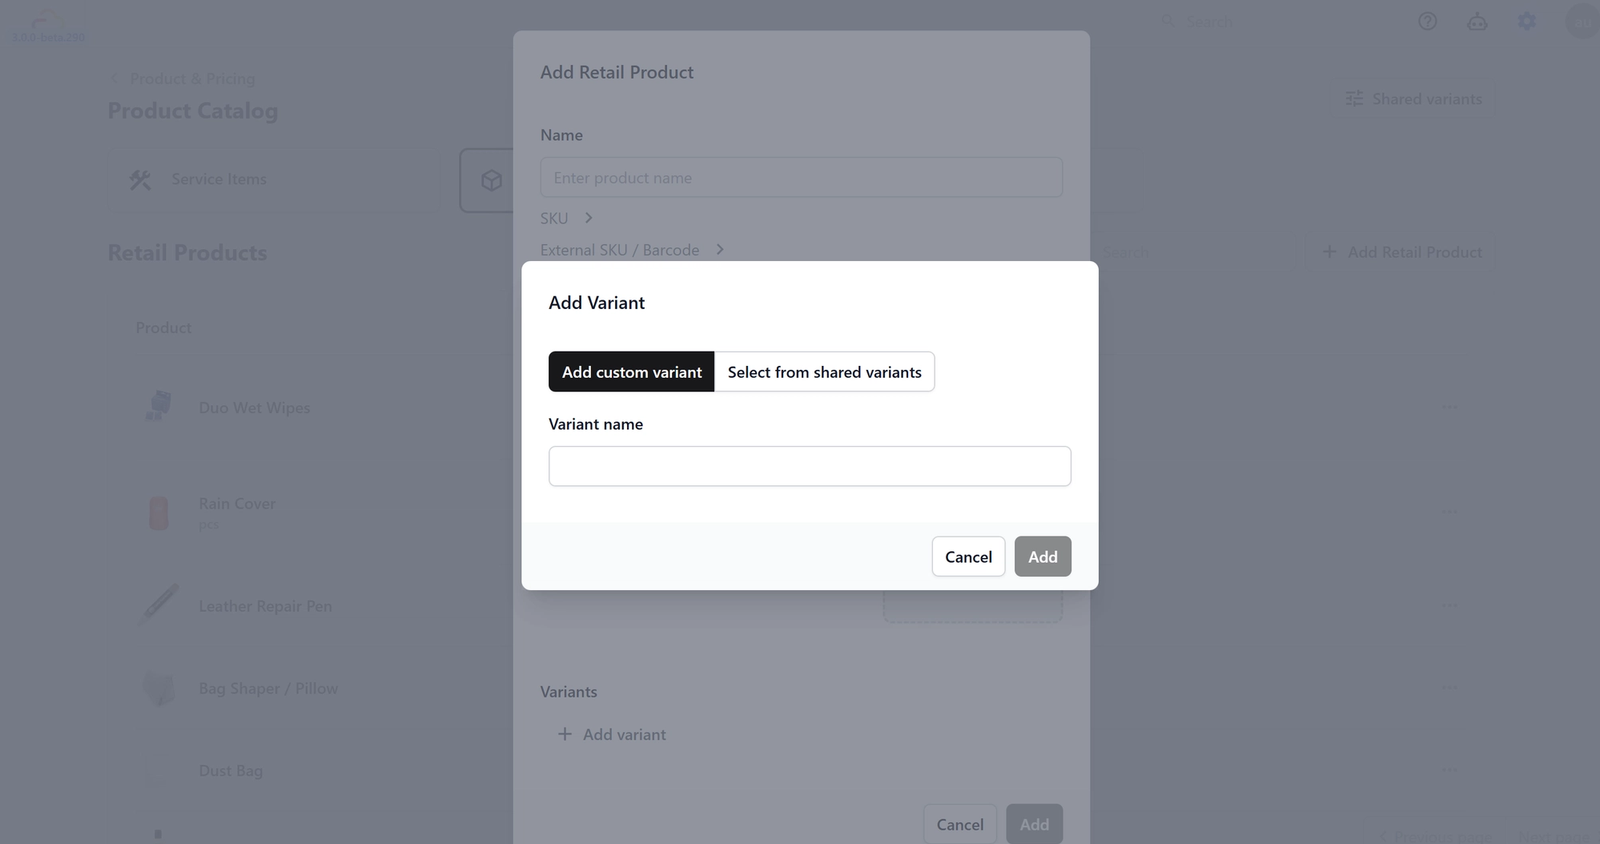
Step 3 — Add Variants (if needed)
Retail Products support variants the same way as Service Items. For example, a Rain Cover might have Small, Medium, and Large variants each with their own price.
To add a variant, click + Add variant and follow the same steps as described in the Service Items section above.
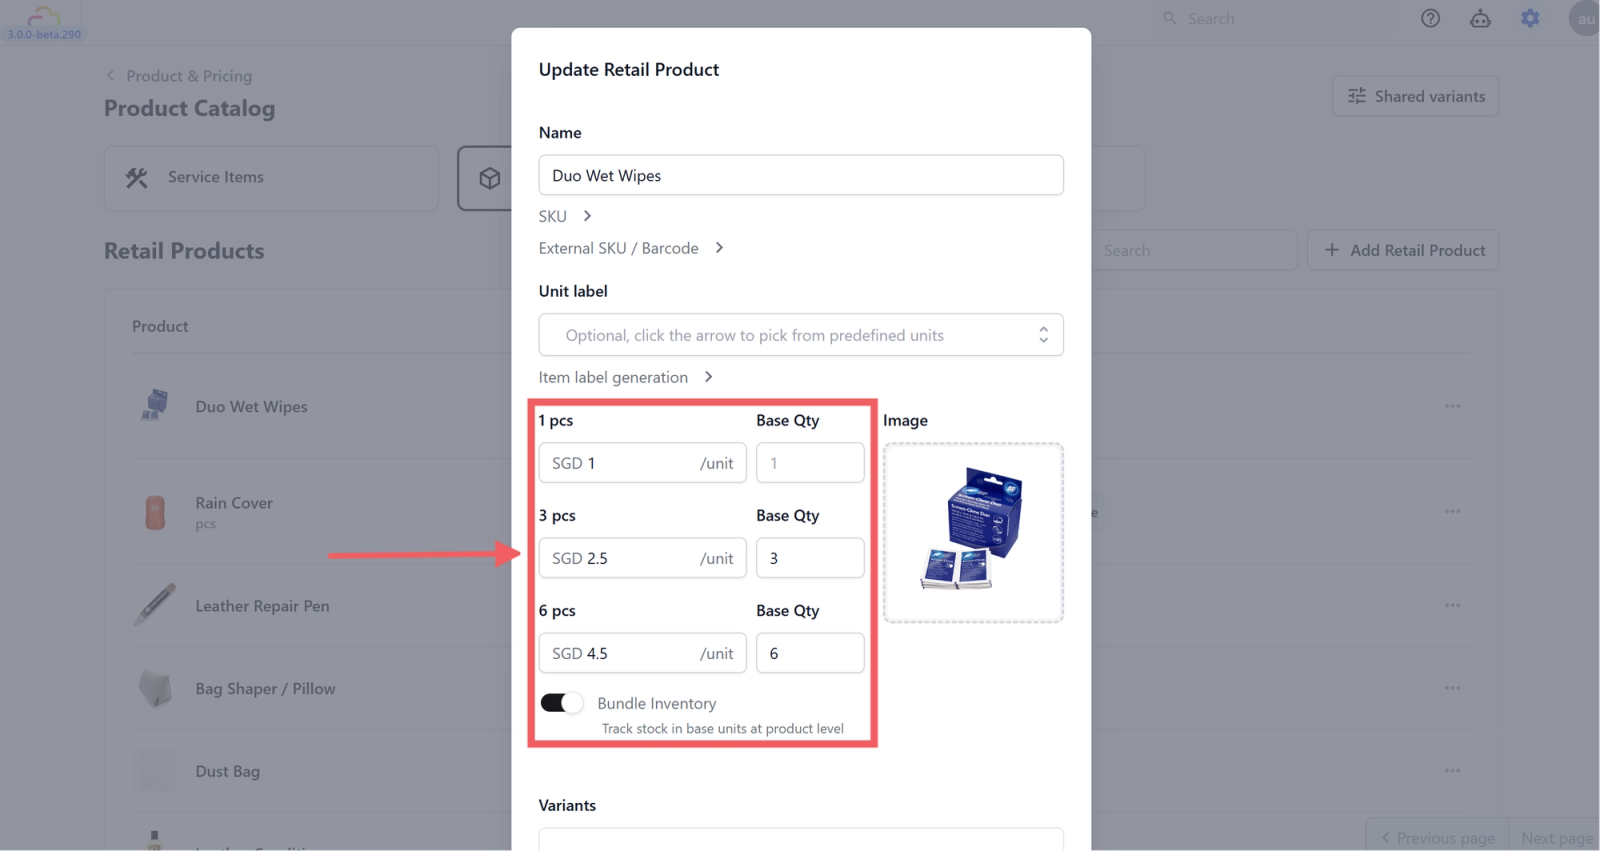
Step 4 — Enable Bundle Inventory (Optional for tracking stock by base unit)
When you add variants to a Retail Product, a Bundle Inventory toggle will appear with the description "Track stock in base units at product level."
Use this when you sell the same product in different quantities at different prices
Each of these is a separate variant. The Base Qty field on each variant is what tells the system how many units to deduct from your inventory when that variant is sold. So you would set it up like this:
| Variant | Price | Base Qty |
|---|---|---|
| 1 pc | $1.00 | 1 |
| 3 pcs | $2.50 | 3 |
| 6 pcs | $4.50 | 6 |
So if a customer buys the 3 pcs bundle, the system deducts 3 units. If they buy 6 pcs, it deducts 6. Your stock count stays accurate regardless of which bundle size is sold.
Step 5 — Save
Click Add to save. Your retail product will now appear in the Retail Products list
Using Shared Variants
If you sell products that all come in the same sizes or options — for example multiple clothing items all available in Small, Medium, Large, Extra Large — you can create a Shared Variant once and reuse it across all products instead of recreating it manually each time.
How to access Shared Variants
Click the Shared variants button at the top right of the Product Catalog page.

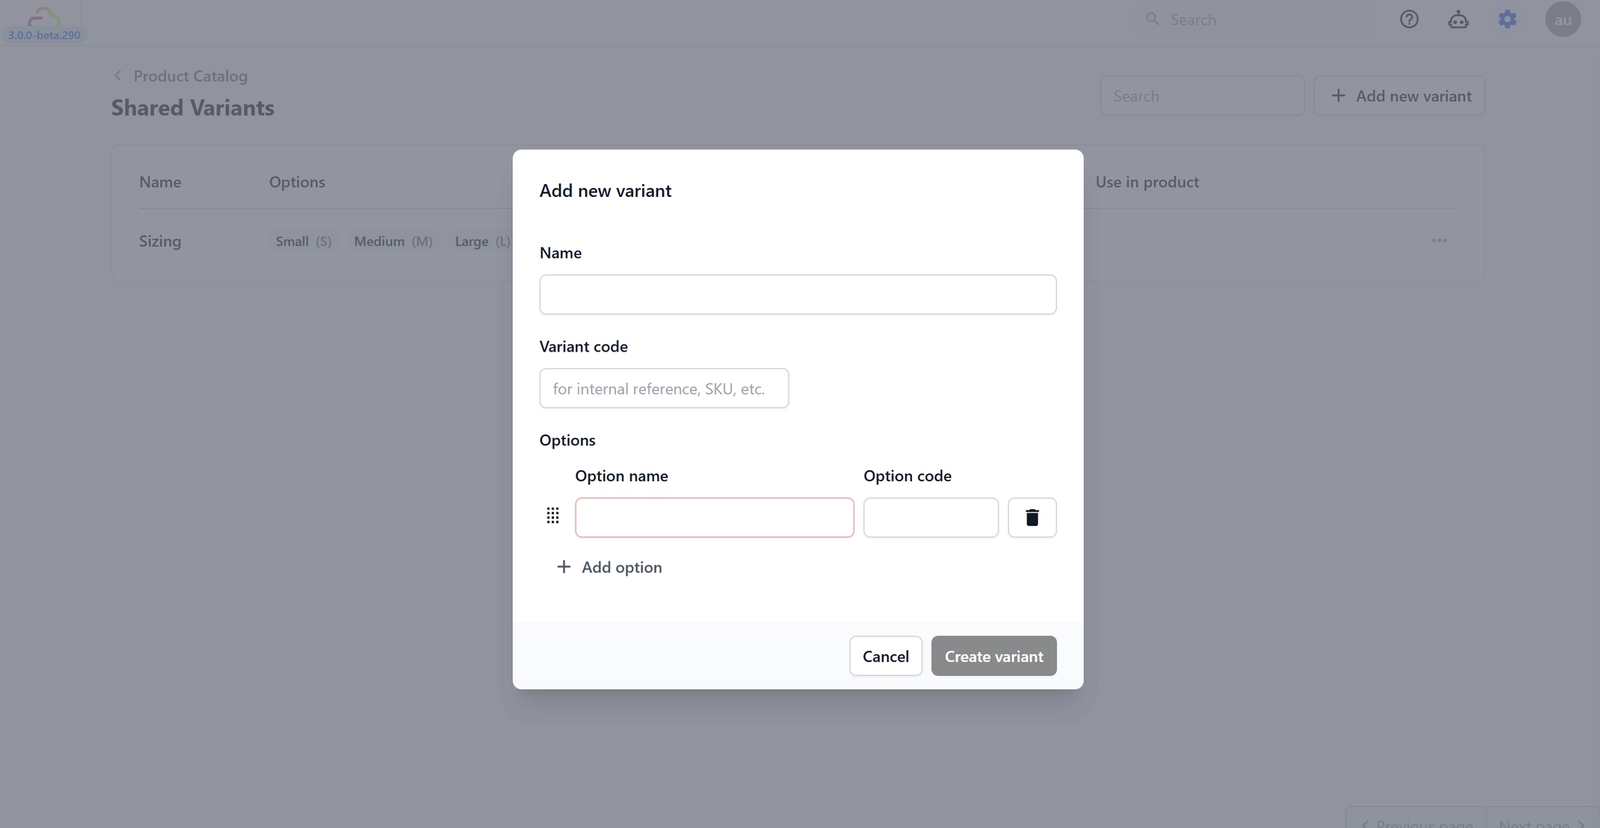
How to create a Shared Variant
- Click + Add new variant
- Enter a Name for the variant set — for example: Sizing, Colour, or Bag Type
- Enter a Variant code if you want one (optional — for internal reference only)
- Under Options, enter each option name and its code — for example: Small / S, Medium / M, Large / L
- Click + Add option to add more options
- Click Create variant when done
How to use a Shared Variant on a product
When adding or editing a product, click + Add variant and then choose select from shared variants. Pick the variant set you created and it will be applied to that product automatically.
Organising Your Catalog with Collections
Once you have added your service items and retail products, you can group them into Collections. Think of each Collection as a category tab on your POS — when your staff creates an order, they tap the tab to see only the items in that group instead of scrolling through everything at once.
You can organise your Collections however makes sense for your business. For example:
- A bag repair shop might have a Bag Services collection (all repair and cleaning service items) and a Bag Retail collection (accessories, care products, dust bags) — two separate tabs on the POS so staff can switch between services and retail quickly
- A business with many retail products might split them into multiple collections — for example Cleaning Supplies and Accessories — so staff don't have to scroll through one long list
Collections are also the only way to show both service items and retail products on the POS at the same time.
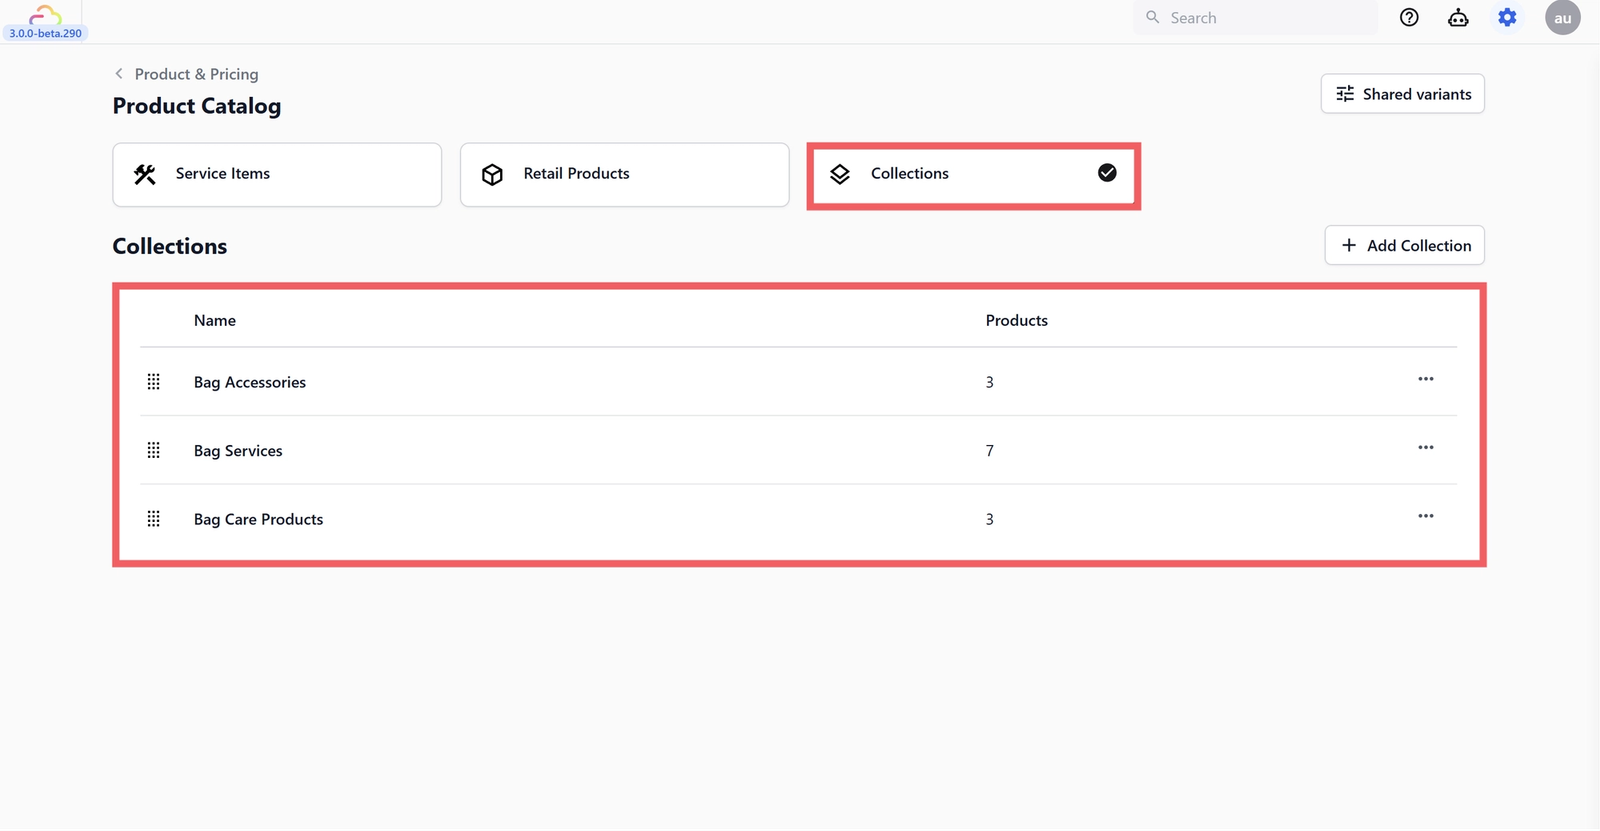
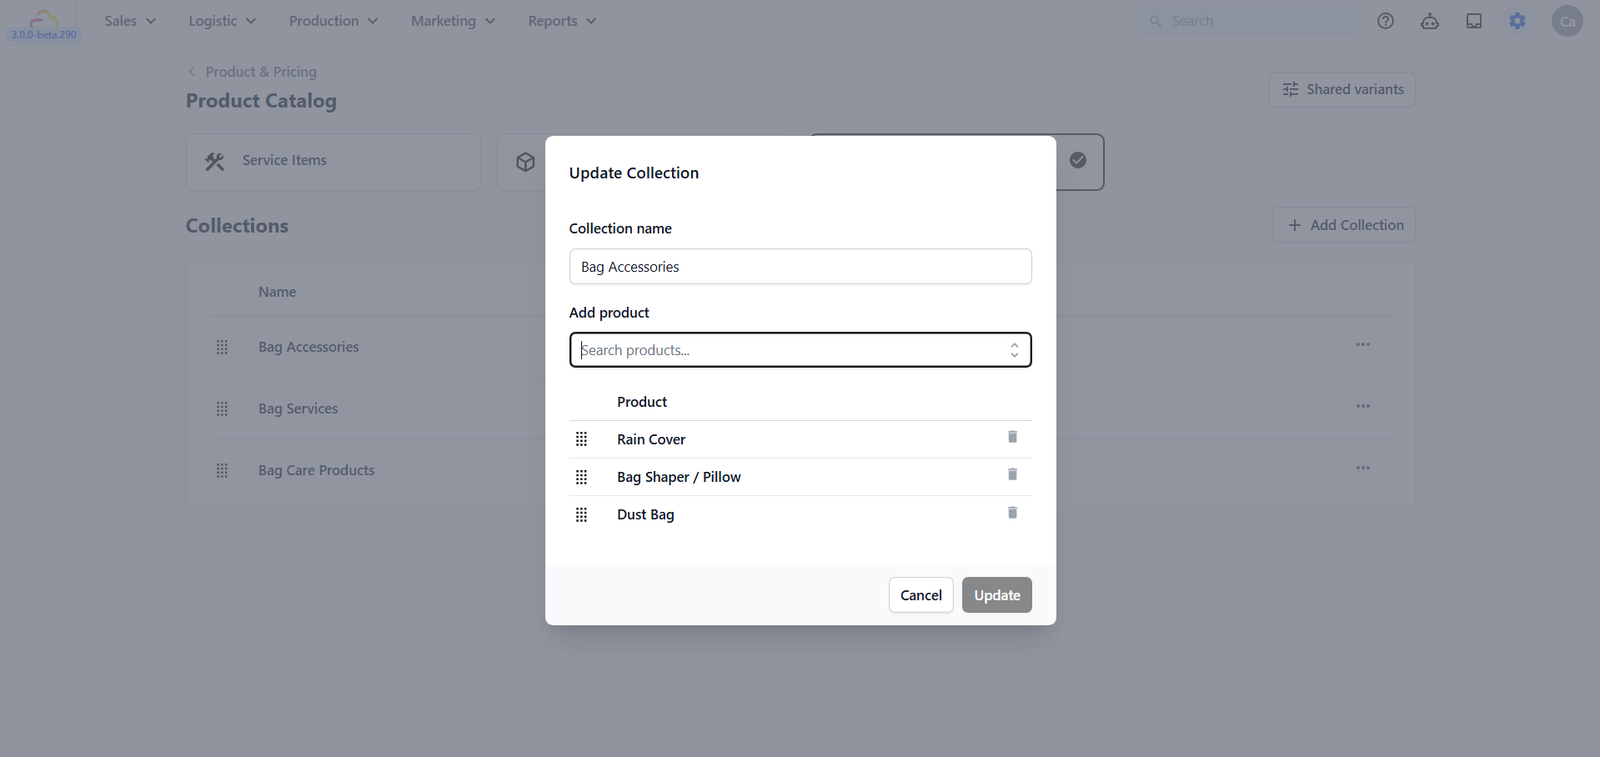
How to add a Collection
- Click the Collections tab
- Click + Add Collection
- Enter a Collection name — for example: Bag Services, Laundry Services, Cleaning Accessories
- Under Add product, search for and select the items you want to include
- Click Add to save
Managing Your Catalog
Searching for a Product
Once your catalog grows, use the search bar at the top right of the page to quickly find any item by name. Each section has its own search bar at the top right. Use it to quickly find items by name within that section.
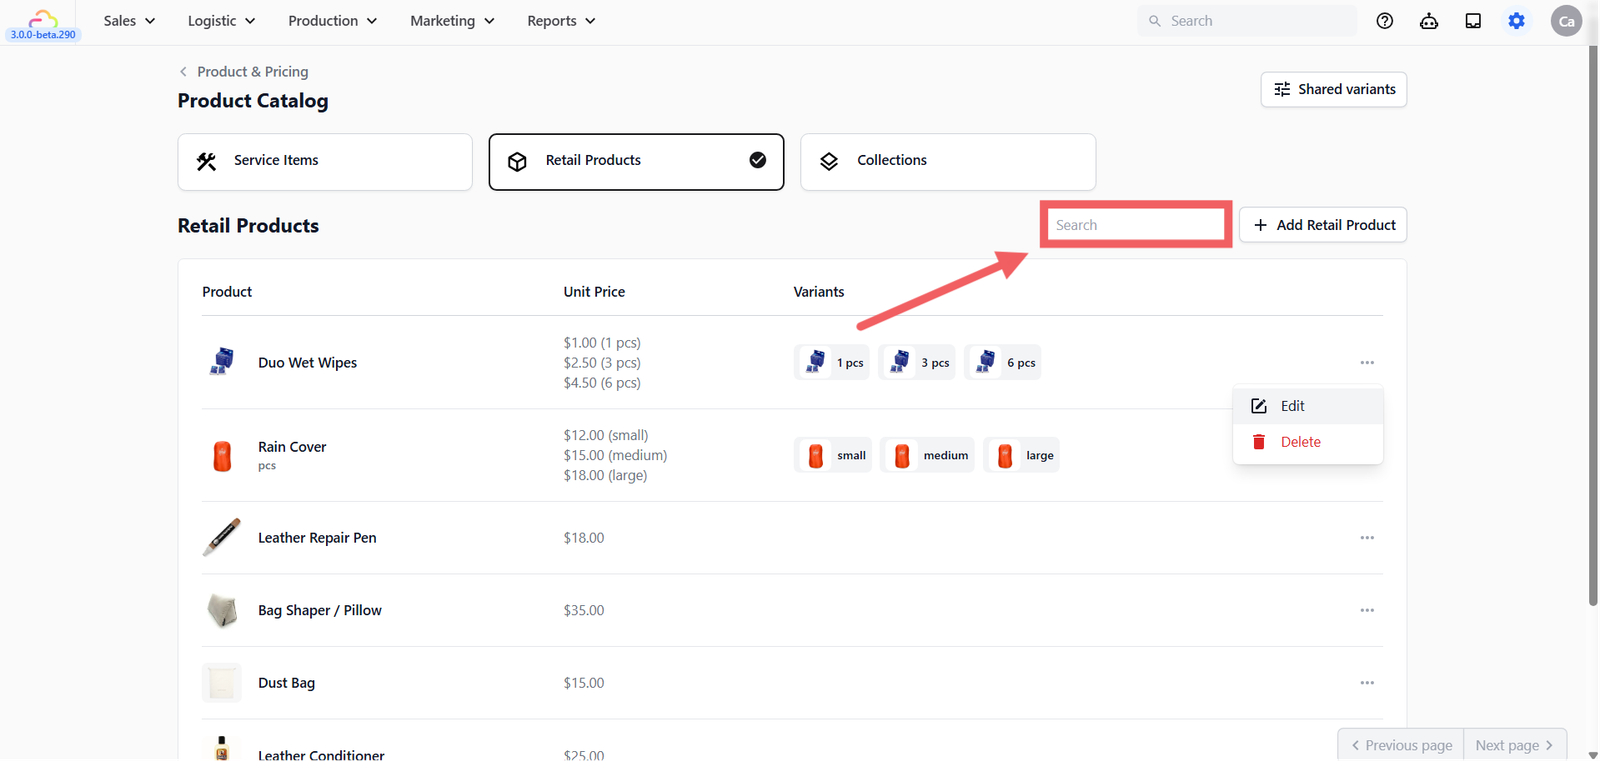
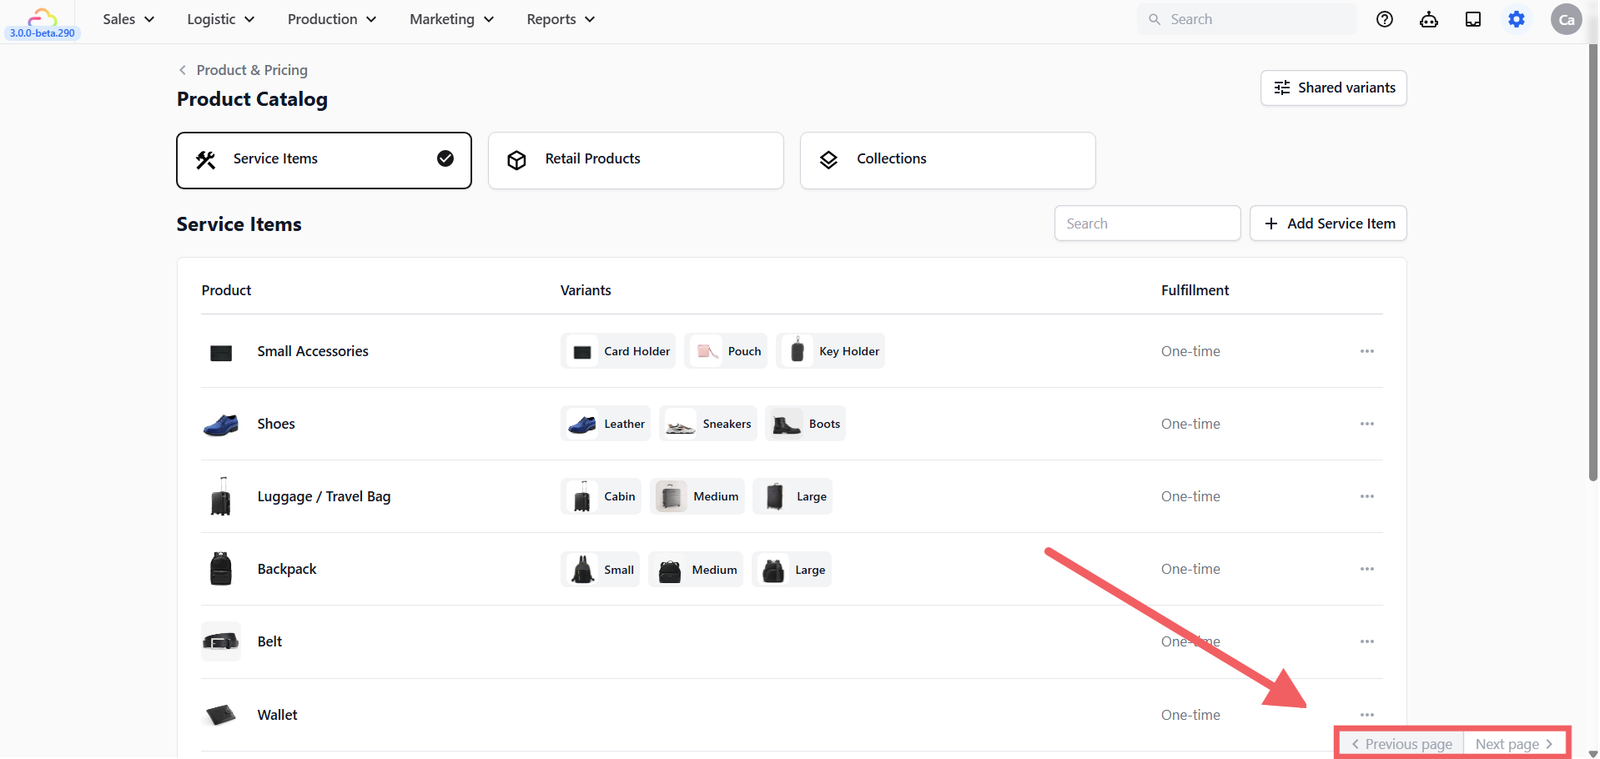
If you cannot find an item in the list, it may be on another page. The Product Catalog displays items in pages — if you have many products, use the Previous page and Next page buttons at the bottom right of the list to browse through them.
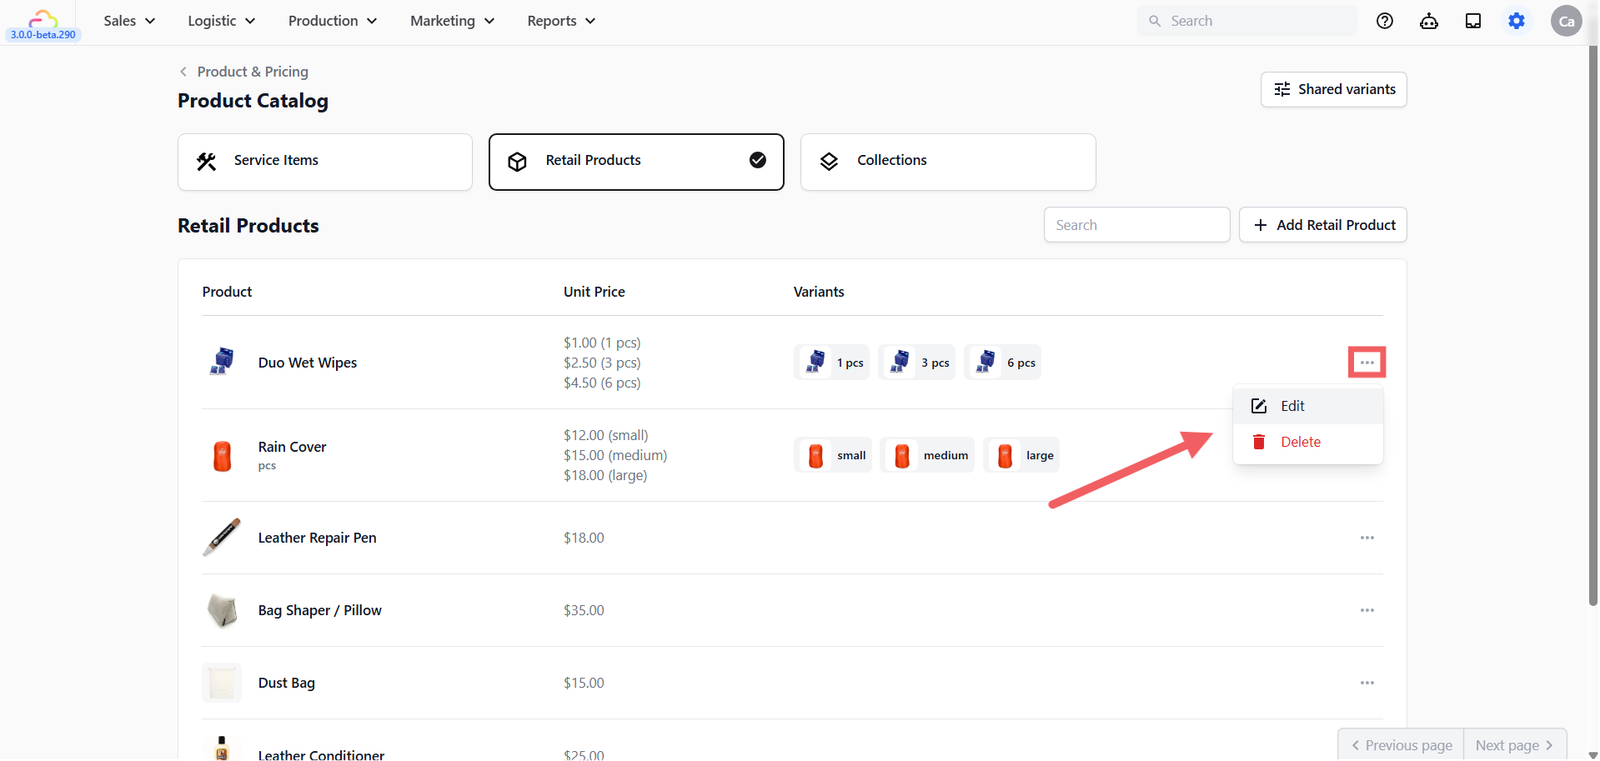
Editing or Deleting a Product
To edit or delete any item in your catalog:
- Find the item in the list
- Click the ⋯ (three dots) button on the right side of that row
- Select Edit to update the item's details, or Delete to remove it
Give feedback
Up next
Setting Up Service OptionsTell EasyBiz what services you offer and how each one is priced — so your staff always picks the right service and the price calculates itself.
Read more