
What is a Business Unit?
Your Business Unit is the operating blueprint for one line of business in EasyBiz. Use it when the work follows a different end-to-end procedure, such as Laundry and Garment Care versus Home Cleaning or Bag Repair. It controls everything your POS needs: what services and products are available, how orders are priced, what your receipts look like, and how orders flow from drop-off to completion.
How to Open Your Business Unit
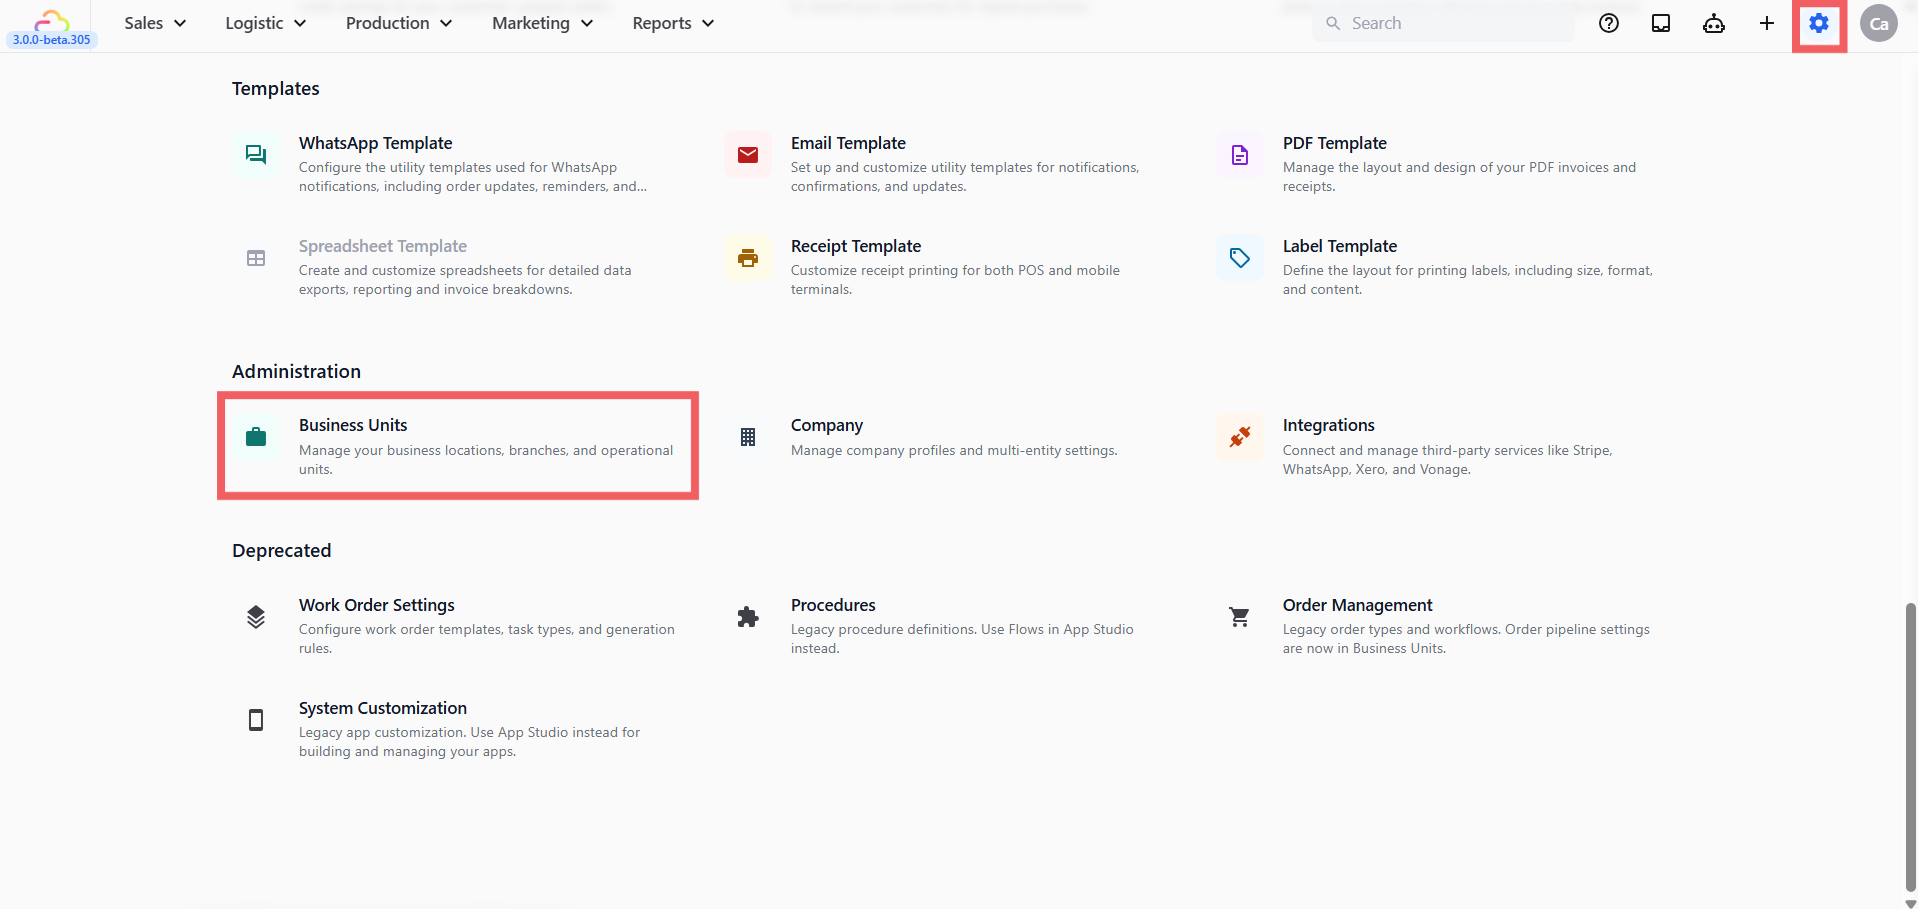
Go to Settings from the top navigation bar
Under Company & business structure or Administration, click Business Units
Select the business unit you want to configure
Its settings are split into tabs: Catalog, Selling, Pipeline, Production and Documents.
Creating a New Business Unit
You can create business units directly in the console:
On the Business Units page, click the New Business Unit button. (If you have no business units yet, the same button appears in the middle of the page.)
In the dialog, enter a Display name for the business unit (e.g. "Laundry & Garment Care"). Use 120 characters or fewer.
Click Create. The new business unit opens, ready to configure.
To change a business unit's details later, click the ⋮ menu next to its name and choose Edit — you can update the Business unit name, Business unit code, and Business unit icon, then click Update.
Catalog
The Catalog tab controls what items appear on screen when staff create an order.
This is where you choose what appears when staff tap "New Order." It has two sections. You can use one of them, or both together:
Price list
Use a price list when you sell many items at published prices and update them together (best for laundry).
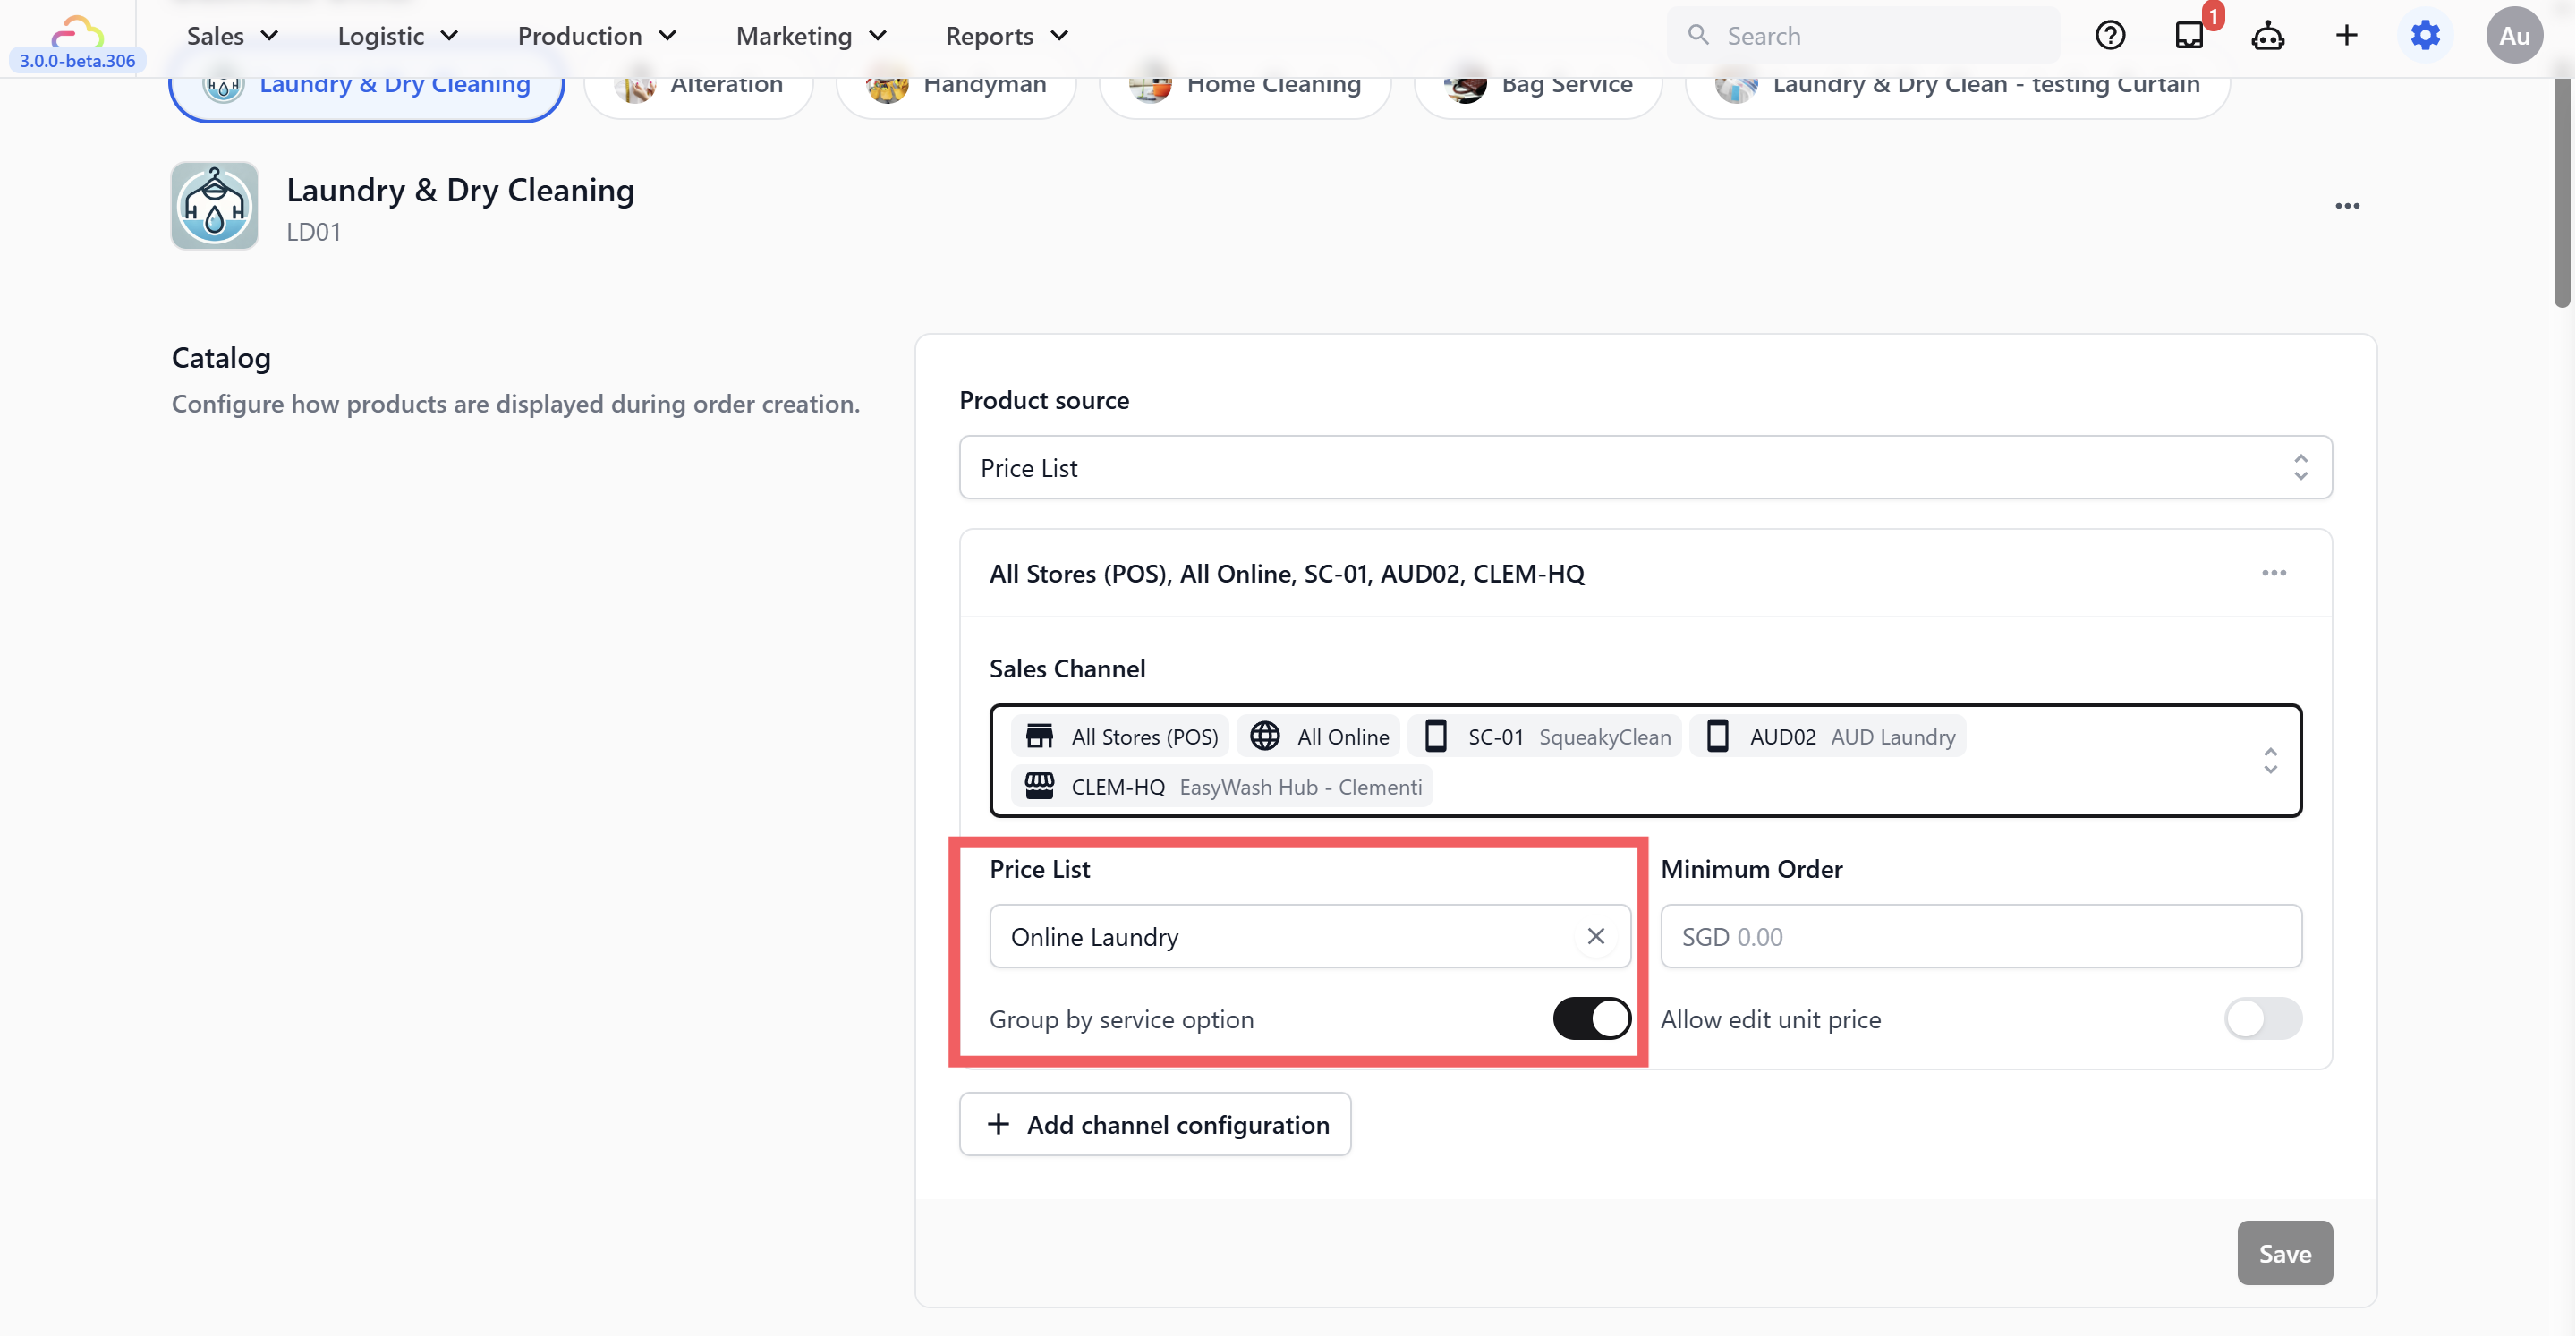
Click Add price list to choose the published price list for a market. Add another when a sales channel needs its own price list.
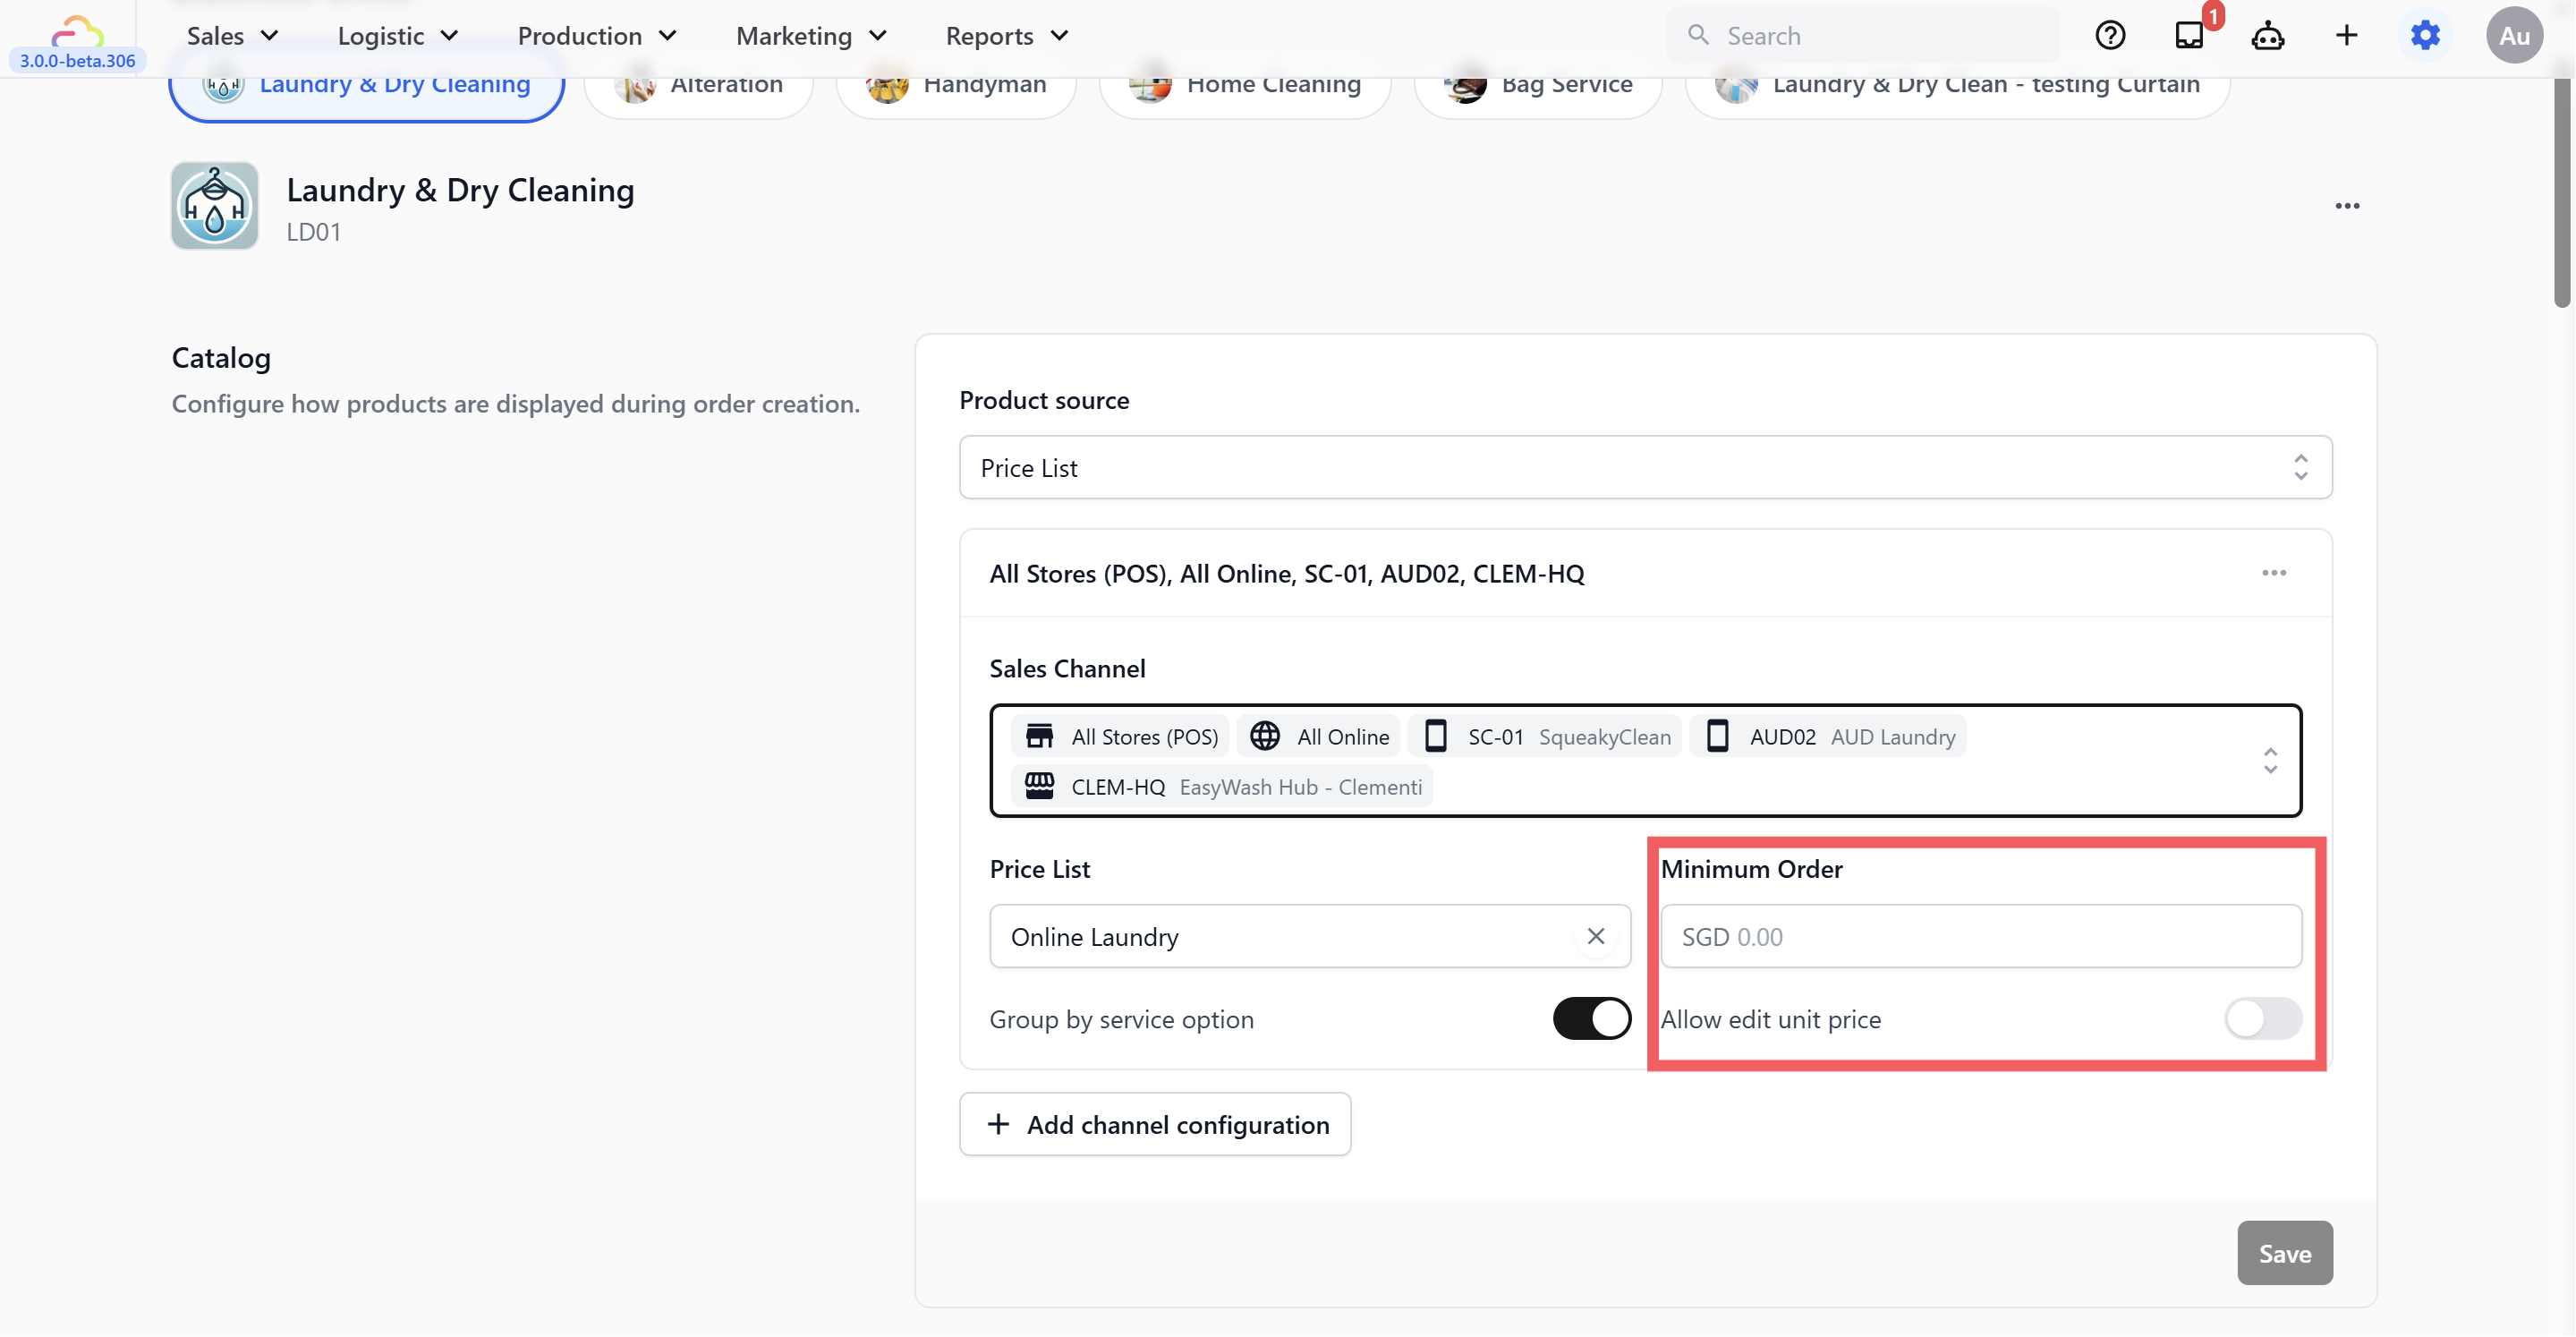
Click Add minimum order to set a minimum order value. Skip it if you don't want one.
Turn on Group by service option to group items by service type on the catalog screen.
Turn on Allow edit unit price if staff sometimes need to change an item's price when adding it to an order. Staff also need permission to override prices.
Click Save when you're done. If you haven't created a price list yet, see Create Price Lists.
Product Collections
Use collections when you sell a small range and set each product's price on the product itself. Each collection is a tab, shown after the price list. Click Add Collection to add one.
Line Item Steps
Extra steps when adding an item to the cart.
Line item steps are a small checklist that opens when staff add an item they apply to — for example, "Take a photo of the bag", "Record the fabric weight", or "Note the item condition." You decide what steps are included and whether each one is required or optional.
You'll find them on the Selling tab, under Staff checkout. Click Add line item steps, choose which items they apply to in Apply To, add the steps with Add Step, and click Save. Each item uses one set: the one for its product, else the one for its unit, else the one for all items.
Most laundry shops don't need this — staff just tap to add and the price is already set. For bag repair and specialist service businesses, this is where line item steps become essential, since prices vary per item and staff often need to capture extra details.
💡 For more use cases, see Introduction to Line Item Steps.
Checkout Steps
Extra steps before the order is confirmed.
Checkout steps run after your staff finishes adding items to the cart — right before the order is officially created. Think of them as a short checklist your staff follows every time, built into the screen so nothing gets missed.
For example, if your shop offers home delivery, checkout steps can prompt staff to collect the customer's delivery address and preferred time slot. For online orders, customers can be asked to select a pickup date and time.
They are on the Selling tab. There are three:
POS checkout — runs when staff create a new order at the POS counter.
Console checkout — runs when staff take an order in Console, for example by phone.
Customer checkout — runs when a customer orders on your Online Store website or app. Click Edit in Online Store to set it up on the Checkout page of the Online Store editor.
POS checkout and Console checkout are under Staff checkout. Click Edit steps below one to add its steps, then click Save.
Leave POS checkout and Console checkout empty if all your customers walk in and collect at the counter — with no steps, checkout is instant.
💡 For a general introduction to how flows work, see Introduction to Process Flows.
Order Pipeline
The stages every order moves through.
Your Order Pipeline defines the journey of an order from the moment it's created until it's collected.
This lets you and your staff see at a glance where every order is right now. It's optional, but very useful once your order volume grows — especially when multiple staff are handling different stages.
Without a pipeline, orders are still created and paid normally — but there are no status stages. Everything shows as an open order until it's closed. You can skip this for now and add it later at any time.
The pipeline is set on the business unit's Pipeline tab, in three parts:
Pre-Production — steps before production begins, set separately for Online orders and POS orders.
Production — turn on Orders go through production when orders are worked on before they go back to the customer.
Completion & Handover — how orders get back to the customer: Store pickup, Home delivery and On-Site Service. Every method switched on is offered online and at the POS.
Switch on the parts you use and set their steps. Each part has its own Save.
💡 To learn how to build a pipeline, see Designing Your Workflow. For more on order types, see Configuring Order Types.
Packing Flows
Per-item steps during preparation.
Packing Flows run per line item during prep, before a fulfillment is confirmed — for example, photographing each garment before it is packed, or checking items off against the order.
They are on the Production tab, where you pick flows made on Process Flows. These are not the line item steps staff see when they add items to the cart.
Skip this if your team doesn't need guided packing steps.
Completion & Handover Flows
What happens at pickup, delivery, and on-site handover.
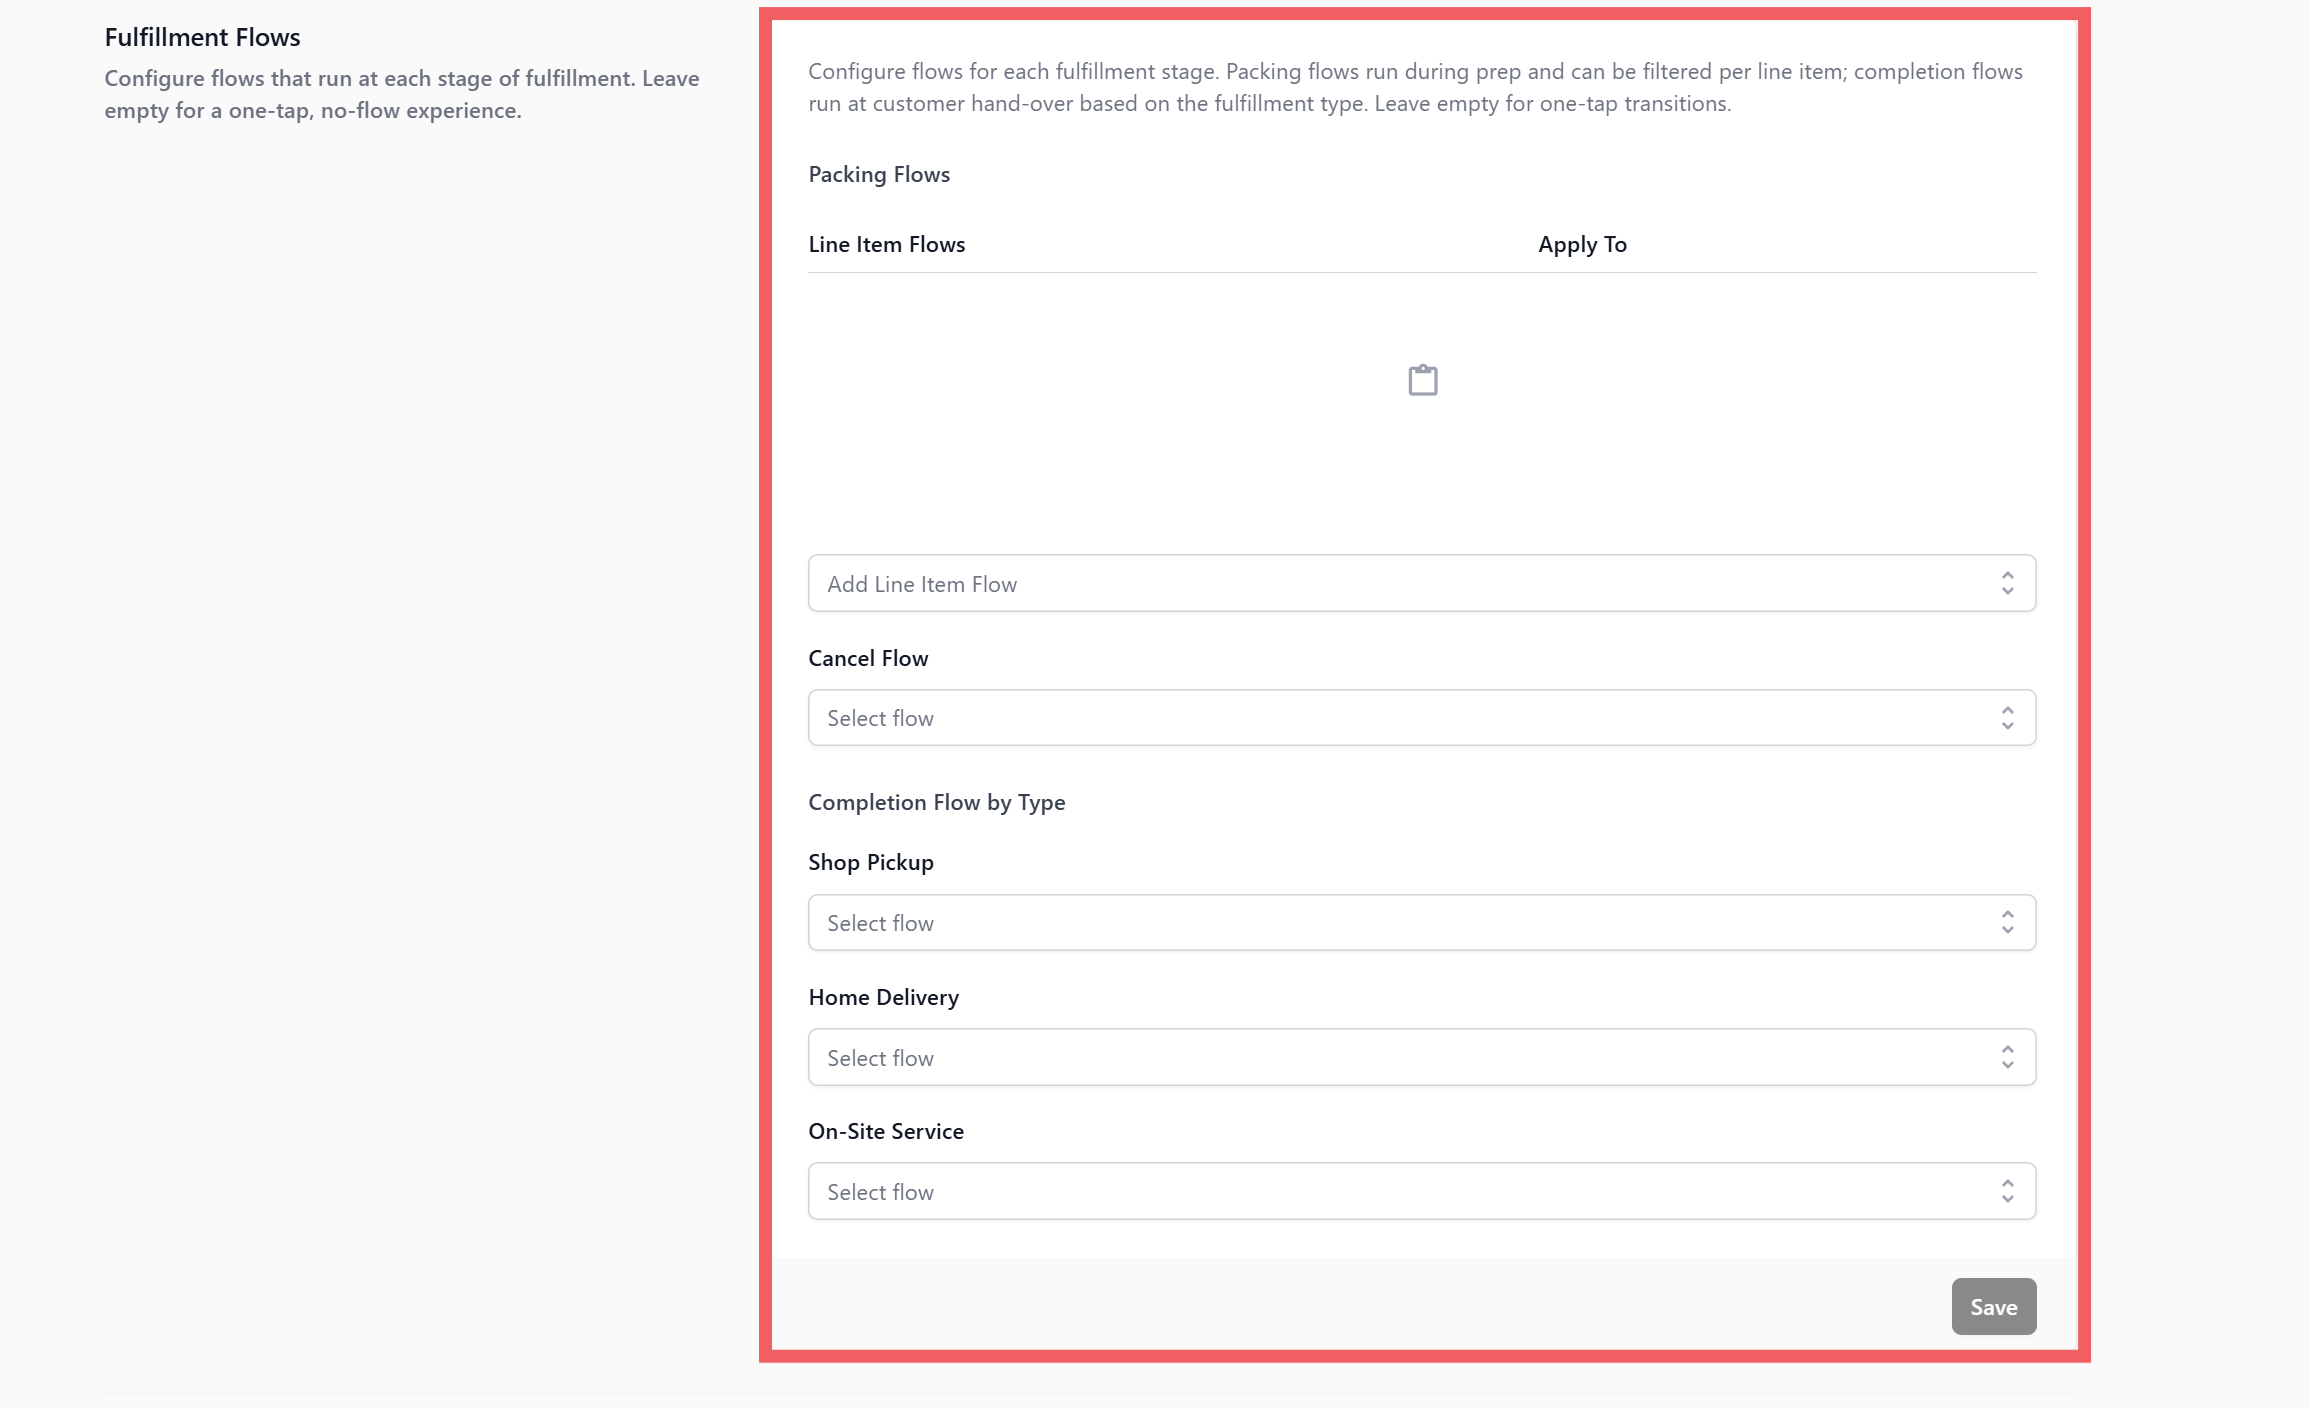
Completion & Handover Flows control the steps your staff follow when completing an order — for example, confirming a customer's identity at counter pickup, or capturing a signature for home delivery.
They are on the Production tab. You can set up separate flows for different handover types:
Shop Pickup — steps for when the customer collects at the counter.
Home Delivery — steps for when your driver delivers to the customer.
On-Site Service — steps for services completed at the customer's location.
There are also driver flows: Driver Pickup, Unable to Collect and Unable to Deliver.
Skip this if your shop only does counter drop-off and collection with no special steps required.
Work Orders
Printed job sheets for your back-of-house.
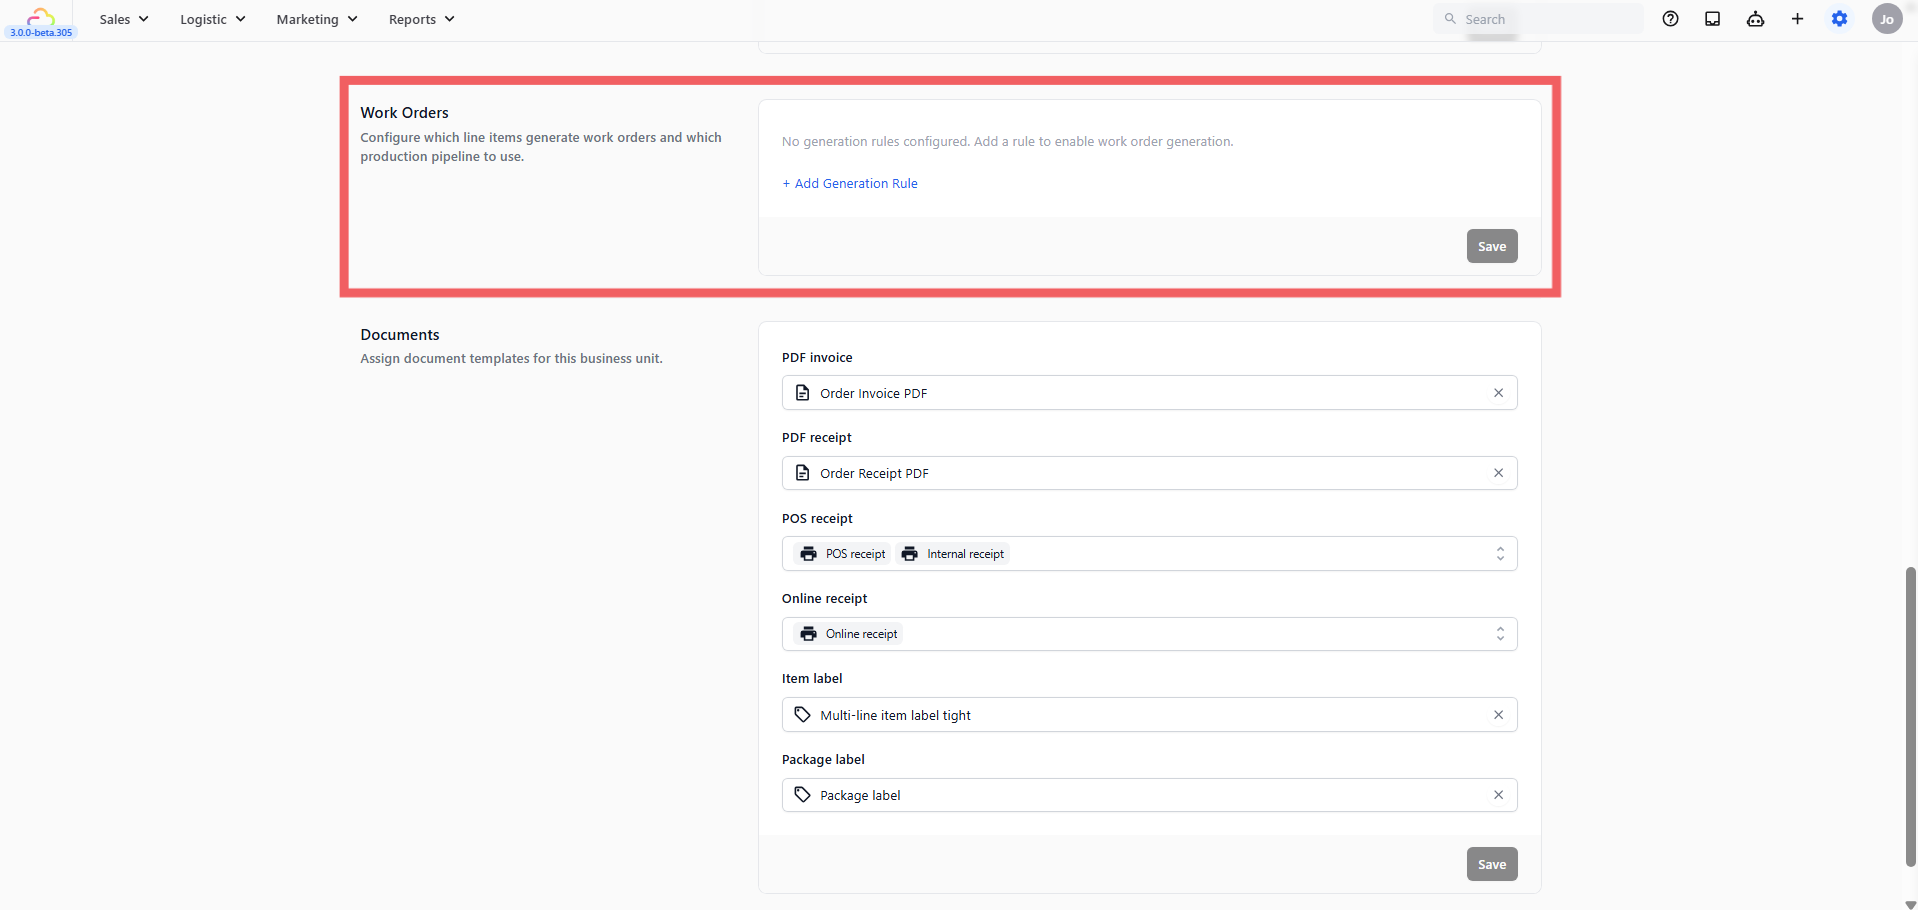
A Work Order is a printed sheet or digital record that your processing team works from. When a customer drops off clothes, the staff creates the order at the counter. Later, the garments are sent to your processing plant — and the Work Order tells them exactly what's in each batch, what services are needed, and any special instructions.
When to use it:
You have a central plant or workshop that processes orders from your counter.
You want a printed production sheet for plant staff to follow through each stage.
When to skip it:
- If all work is done at the same counter by the same staff, leave this empty for now.
Documents
Receipts, invoices, and labels.
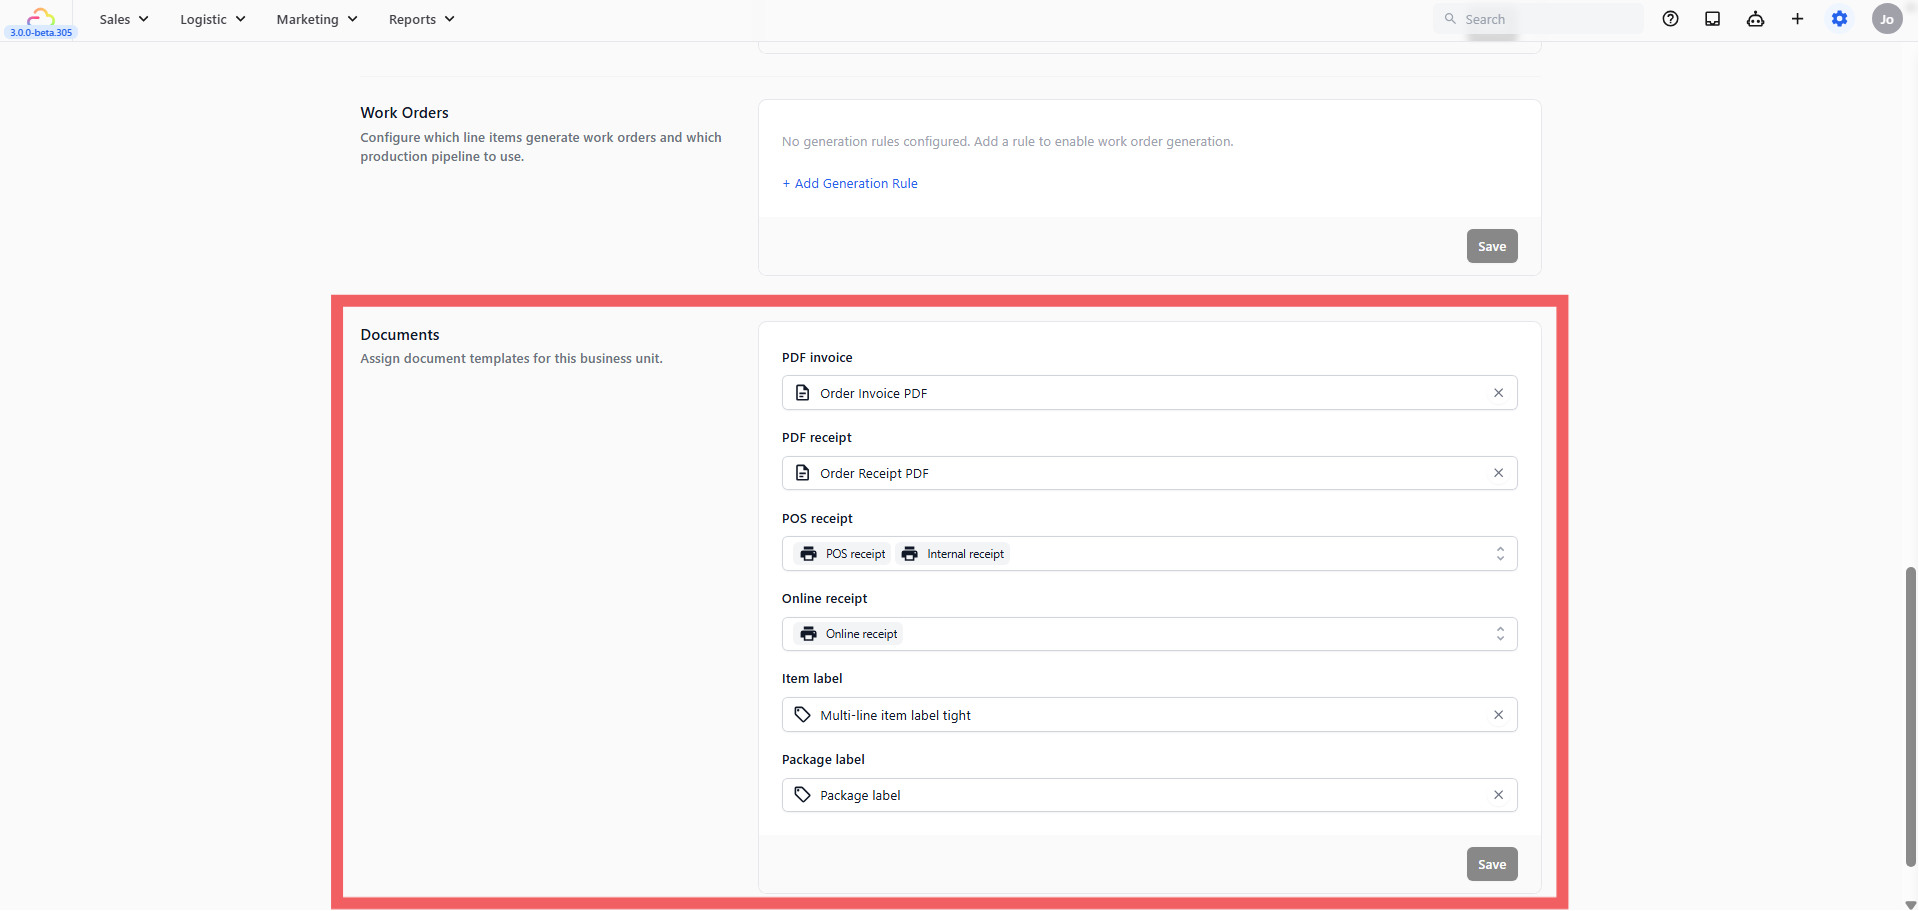
The Documents tab is where you link your Business Unit to its print and digital templates. Without this, orders can still be created, but no receipts or labels will be generated.
Here are the document types you can assign, in three sections: Terminal receipts, PDF documents and Labels:
| Document | What it does |
|---|---|
| POS receipt | Prints or appears when an order is created at the counter |
| Online receipt | Printed for orders taken in Console or on your Online Store |
| PDF receipt | A printable receipt in PDF format, for record-keeping or emailing |
| PDF invoice | A professional invoice for corporate or bulk orders |
| Item label | A small label for individual items (e.g., a tag attached to a garment at drop-off) |
| Package label | A label for the entire order package |
Each document type needs a published template before it can be assigned here. Templates are created in Settings under Library (or Library & templates) — see the Receipt template, PDF Template, and Label Template cards there. For B2B agent invoices, see Customize Invoice Templates.
FAQs
What's the difference between a price list and product collections?
Think of it like choosing how your menu is set up. A price list works like a printed price menu where every item already has a fixed price, and staff just tap to add it. Best for laundry shops. Product collections work like a product catalogue where you group individual items (like a leather bag or canvas tote) into tabs, and each product has its own price. You can use both: collections show as tabs after the price list. If you're not sure, laundry shops almost always use a price list.
What if I sell both laundry and bag repair at the same counter?
You can set up two separate Business Units — one for Laundry, one for Bag Service — each with its own catalog and settings. When staff create an order, they pick the business unit at the top of the catalog. Switching business units empties the cart, so each order belongs to one business unit.
What if I skip the pipeline — will orders still be created?
Yes, absolutely. Orders are still created, paid, and completed normally without a pipeline. You can set it up later at any time.
Do I need to set up Documents before going live?
Not required to take orders, but strongly recommended. At minimum, set up a POS Receipt before opening. Everything else can be added as you need it.