Customize Store Advanced Settings
In this article
The "Advanced Settings" menu is the control center for your POS behavior. While standard settings handle the basics, this section allows you to define strict operational rules to protect your business.
Contents
Contents
It covers three critical areas:
- Marketing (what customers see on the screen),
- Data Privacy (how much customer data staff can access)
- Action Controls (preventing fraud and mistakes).
Why Configure Advanced Settings?
- Free In-Store Marketing: Upload digital posters to your customer-facing screen to promote deals while the register is idle.
- Protect Sensitive Data: Prevent data theft by limiting staff visibility. For example, you can restrict them to viewing only "Max 3 records" or "Same day" orders instead of your entire database.
- Prevent Revenue Leakage: Enforce strict rules like "Block Collection if Unpaid" or "Require Approval for Refunds" to stop operational errors before they happen.
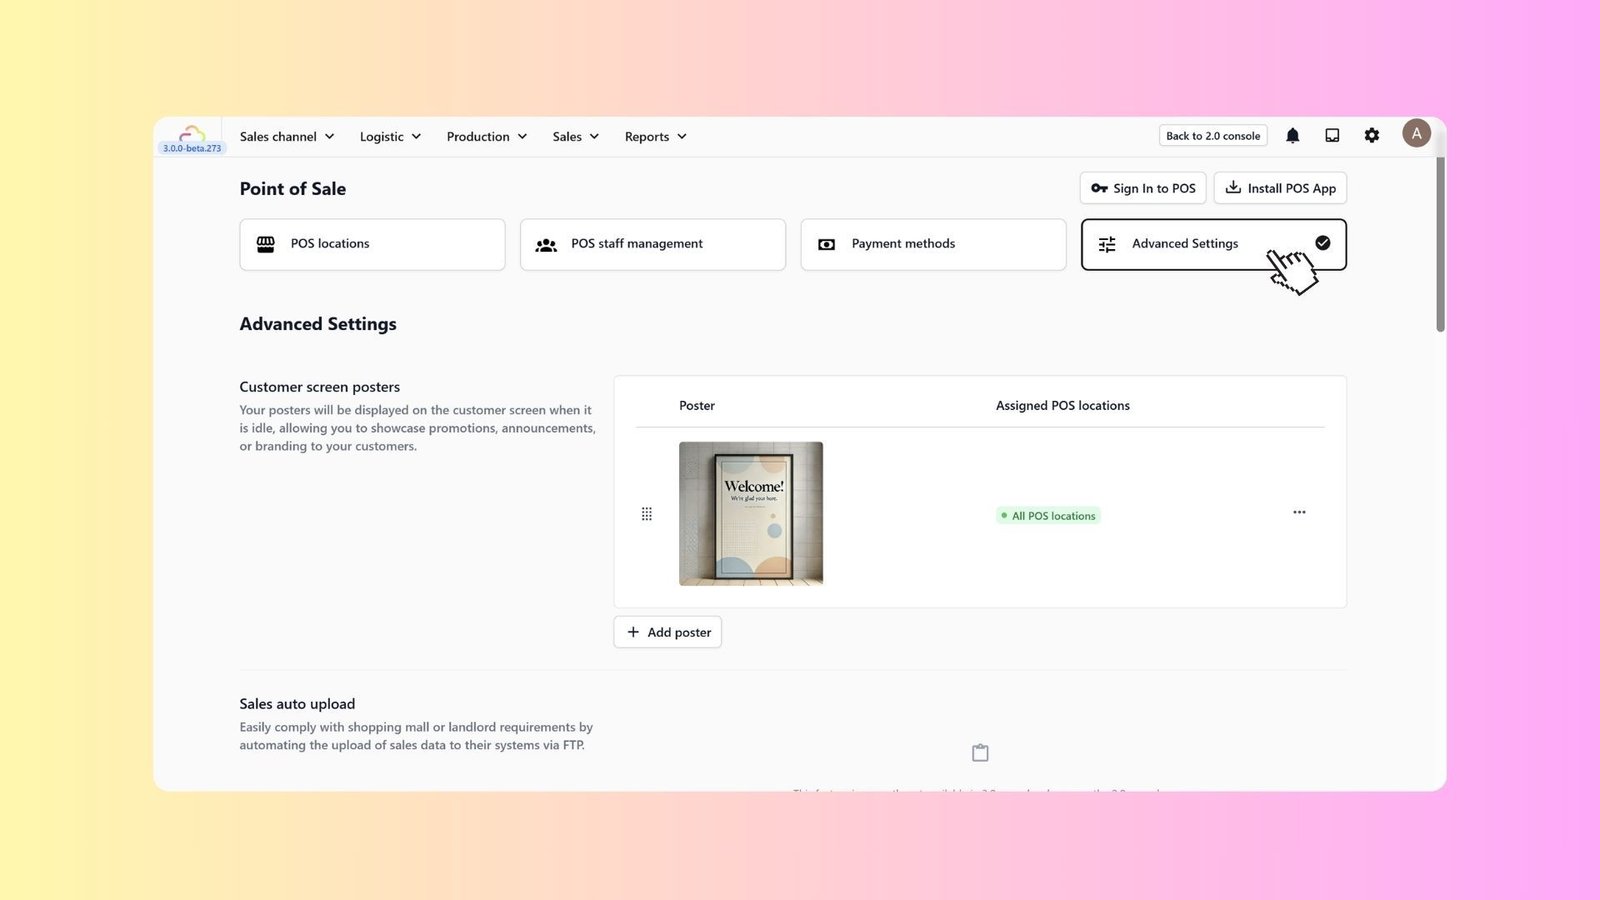
Customer Screen Posters
Utilize your customer-facing display to market your business even when the register is idle.
- Go to Sales Channel > Point of Sale > Advanced Settings.

2. In the Customer screen posters section, click + Add poster.

3. Upload promotional images (e.g., "Welcome" banners or "Seasonal Sale" ads).
4. Assign them to specific POS locations or all locations.
Customer Account Registration
Control what information staff must collect when registering a new customer at the POS.

- Scroll to Customer Account Registration.
- Review fields like Name, Phone number, or Email.
- Set their requirement level:
- Required: Staff cannot save the profile without this info.
- Optional: Staff can skip this field.
Configure Handover Receipts
For service-based businesses, define the templates used when items move across the counter.
- Batch check out/in receipt: Select the appropriate "Handover receipt" template to track items sent out for servicing or received back.
Set POS Data Access
Control exactly what data your staff can view. Most categories offer Unrestricted, No Access, or specific limits.

- Customer Data:
- Amount based access: Limit visibility to a specific number (e.g., "Max 3 records") to prevent data theft.
- Order Data:
- Time based access: Restrict viewing to "Same day only" or "Limit to past [x] days" (you can define the number of days).
- Cross-store: Toggle "Allow access to orders from other stores" if your staff works across multiple branches.
- Sales Channels:
- Restrict access to specific channels (e.g., "Online Store only") or grant Unrestricted access.
- Sales Data:
- Hide sensitive revenue figures by selecting No Access, or limit visibility using Time based access (e.g., "Same day only").
Define POS Action Controls

Prevent fraud by restricting high-risk actions. You can set these to Unrestricted, No Access, or apply specific conditions.
- Cancel Order / Edit Order / Cancel Payment:
- Time based access: Allow these actions only within a specific window (e.g., "Same day only" or "Limit to past [x] days").
- Discharge Items (Pickup):
- Security: Toggle "Enforce QR code scanning" to ensure staff scan the physical ticket before releasing items.
- Payment: Select "Paid Only" to prevent releasing unpaid items.
- Issue Sales Returns:
- Select Requires Approval to force staff request for approval before processing a refund.
- Apply Discounts / Price Overwrites:
- Set to No Access for staff to prevent unauthorized price changes.
Inventory Configuration
Link your store to the correct digital warehouse.
- Pending Service Inventory: Select the default storage location (e.g., "Vinz Storage") for items received at the counter.
[Go to Inventory Management Settings]
Give feedback

Up next
Products & PricingLearn how to organize your items, manage service options, and apply dynamic pricing rules to streamline your sales process.
Read more