Sending Your Mini Apps to Customers
In this article
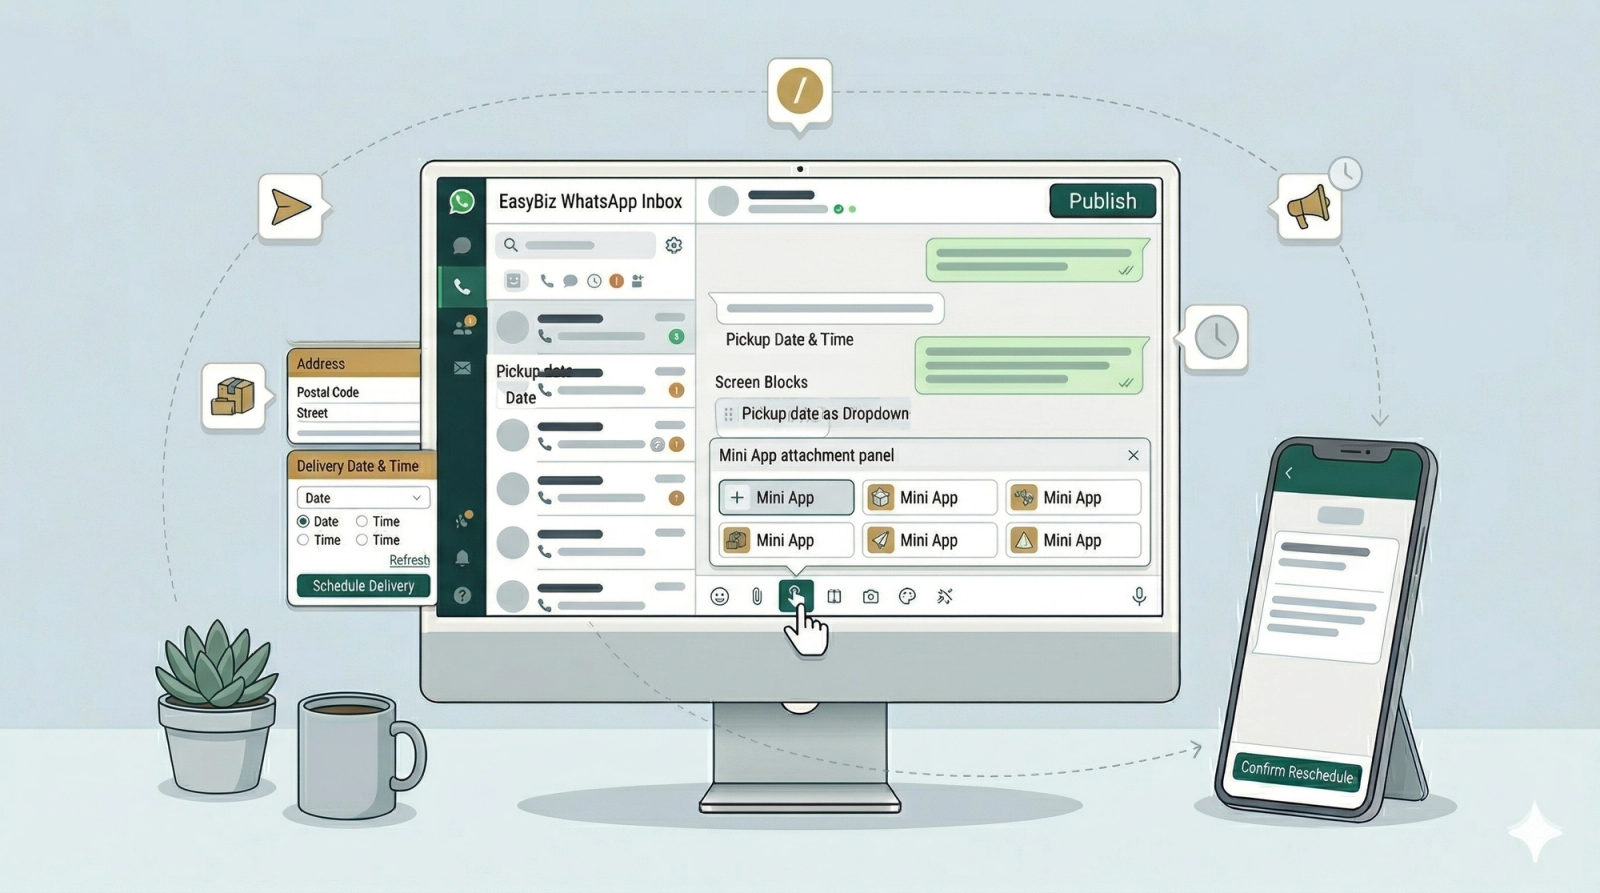
You have built your Mini App, and now it is time to use it! Depending on whether you are actively chatting with a customer or reaching out to them after a few days, there are different ways to send your Mini App. This guide will walk you through three easy methods so your team can start capturing bookings instantly.
Contents
Contents
Before You Send
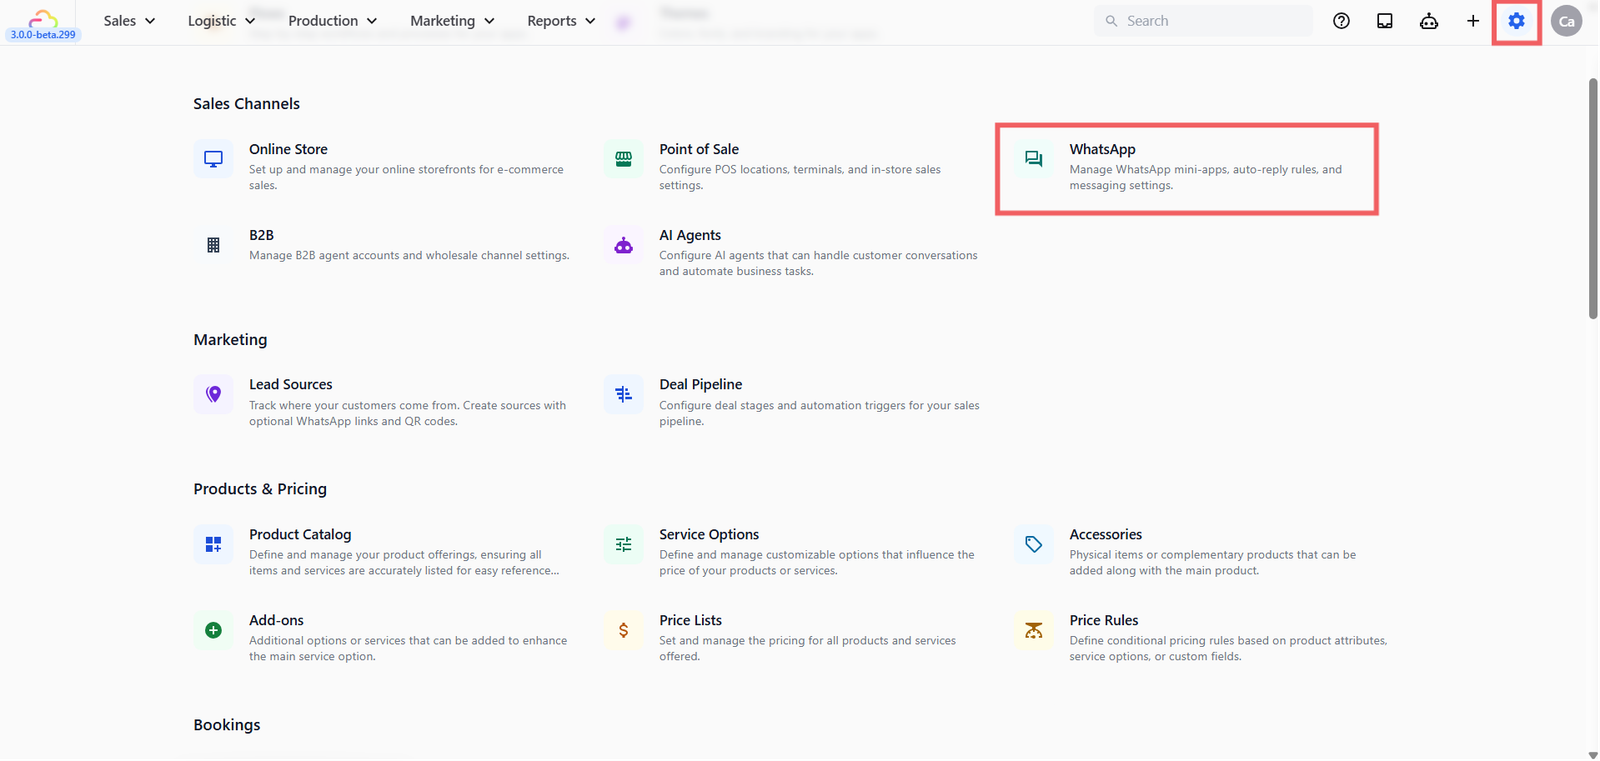
Check Your Mini App Status -> you need to make sure it is active and published.
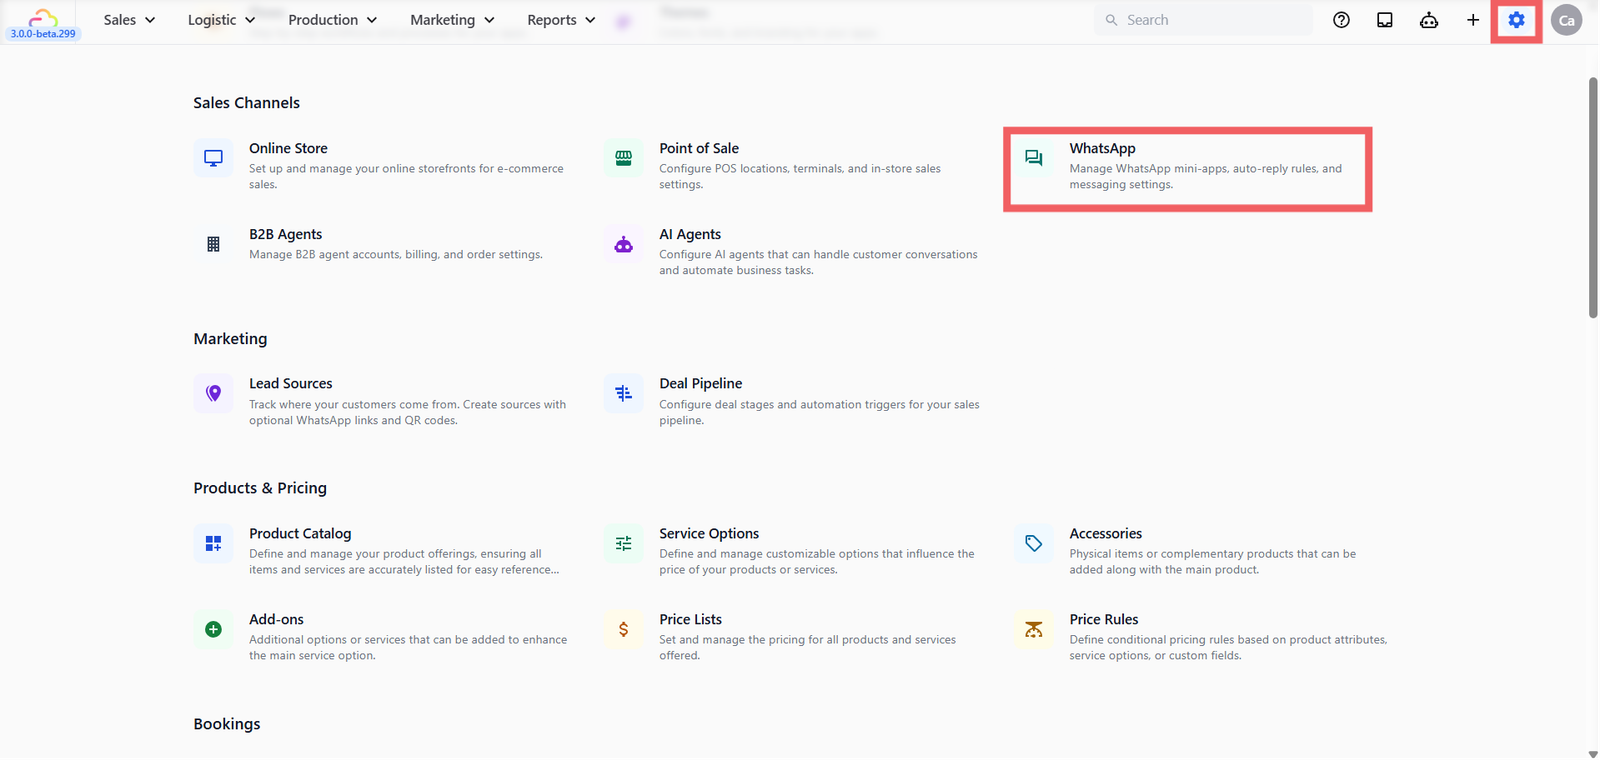
- Go to Settings from the top navigation bar.
- Under the Sales Channels section, click the WhatsApp card.
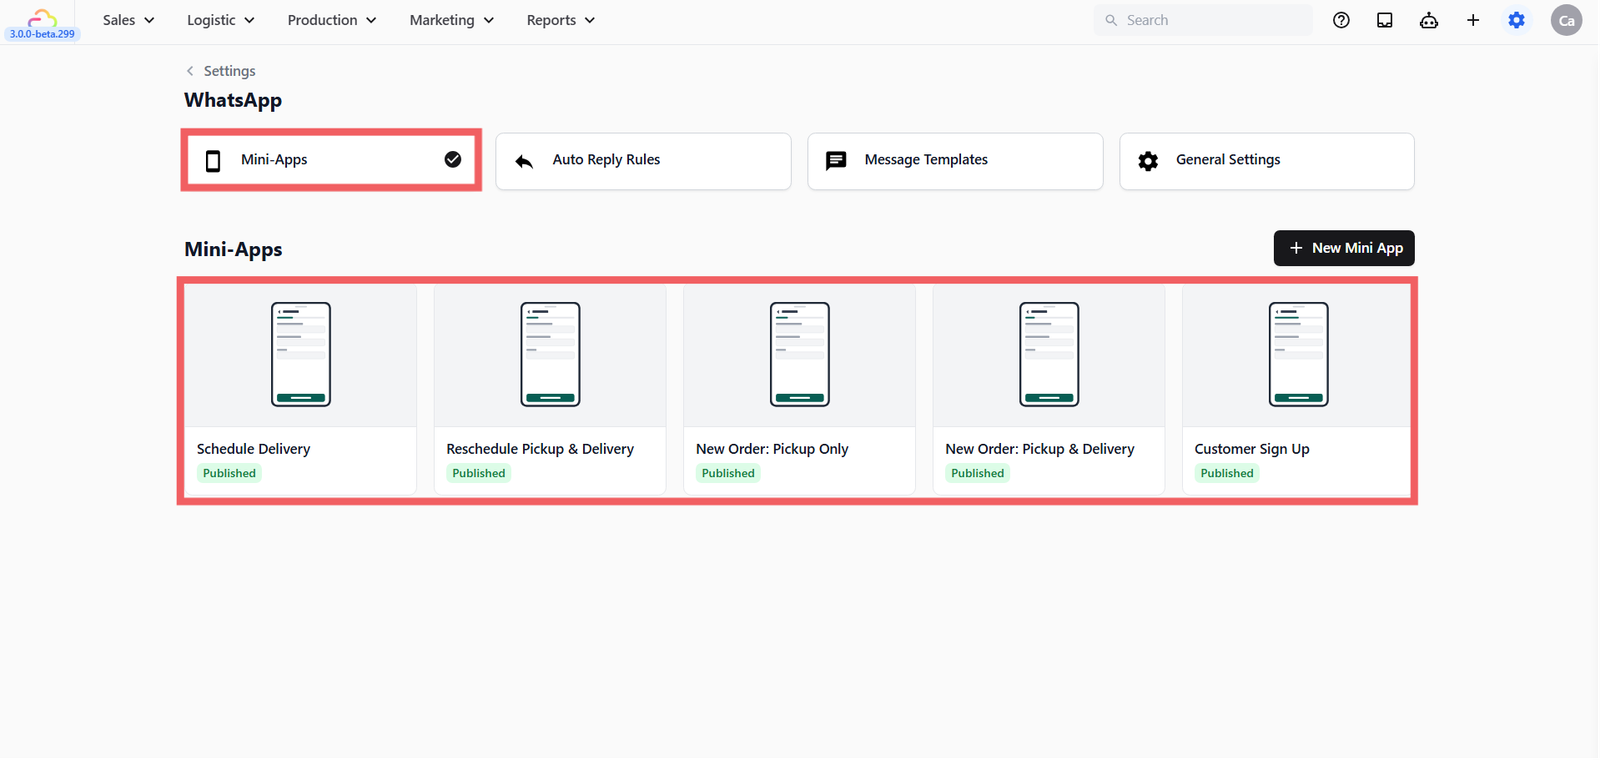
- Click the Mini-Apps tab.
- Check that your Mini App appears in the list with a green Published status.
If you haven't set up your Mini Apps yet, please refer to our step-by-step guides first:
Method 1 — Send Directly from the Inbox
Best for: When a customer is already messaging you and you want to send them the booking form right away.
This is the simplest way to send a Mini App while you are having a conversation with a customer.
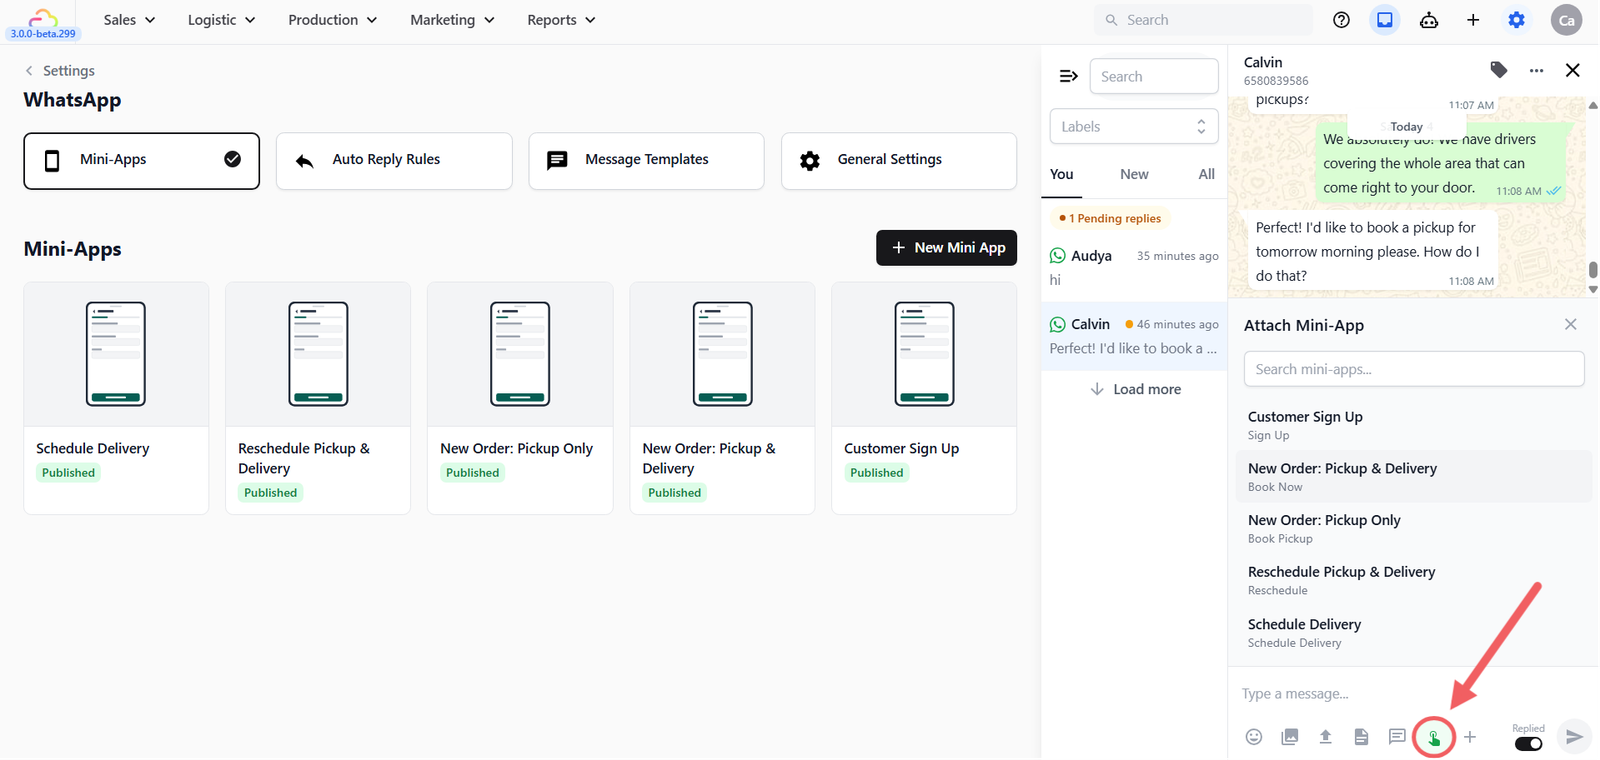
- Open your WhatsApp Inbox and select the customer's chat.
- Look below the message typing area and click the Mini App icon (👆).
- A list of your available Mini Apps will appear — select the one you want to send.
- A popup will appear to confirm the details before sending:
- For pickup bookings or customer sign-ups: You will see a Select Customer field. EasyBiz will automatically link it to the person you are currently chatting with, but you can search for a different name if needed.
- For delivery bookings: You will see a Select Order field. You must select the specific order number tied to this delivery.
- Click Send (or hit Enter).
Method 2 — Quick Reply Shortcut (While in a Chat)
Best for: Fast, repeat sends for customers who are actively messaging you. Instead of clicking through menus, your staff can send the form in two keystrokes.
Create your Quick Reply template
You only need to do this once. By setting this up, you create a shortcut for your team.
- Go to Settings > Sales Channels section > WhatsApp card.
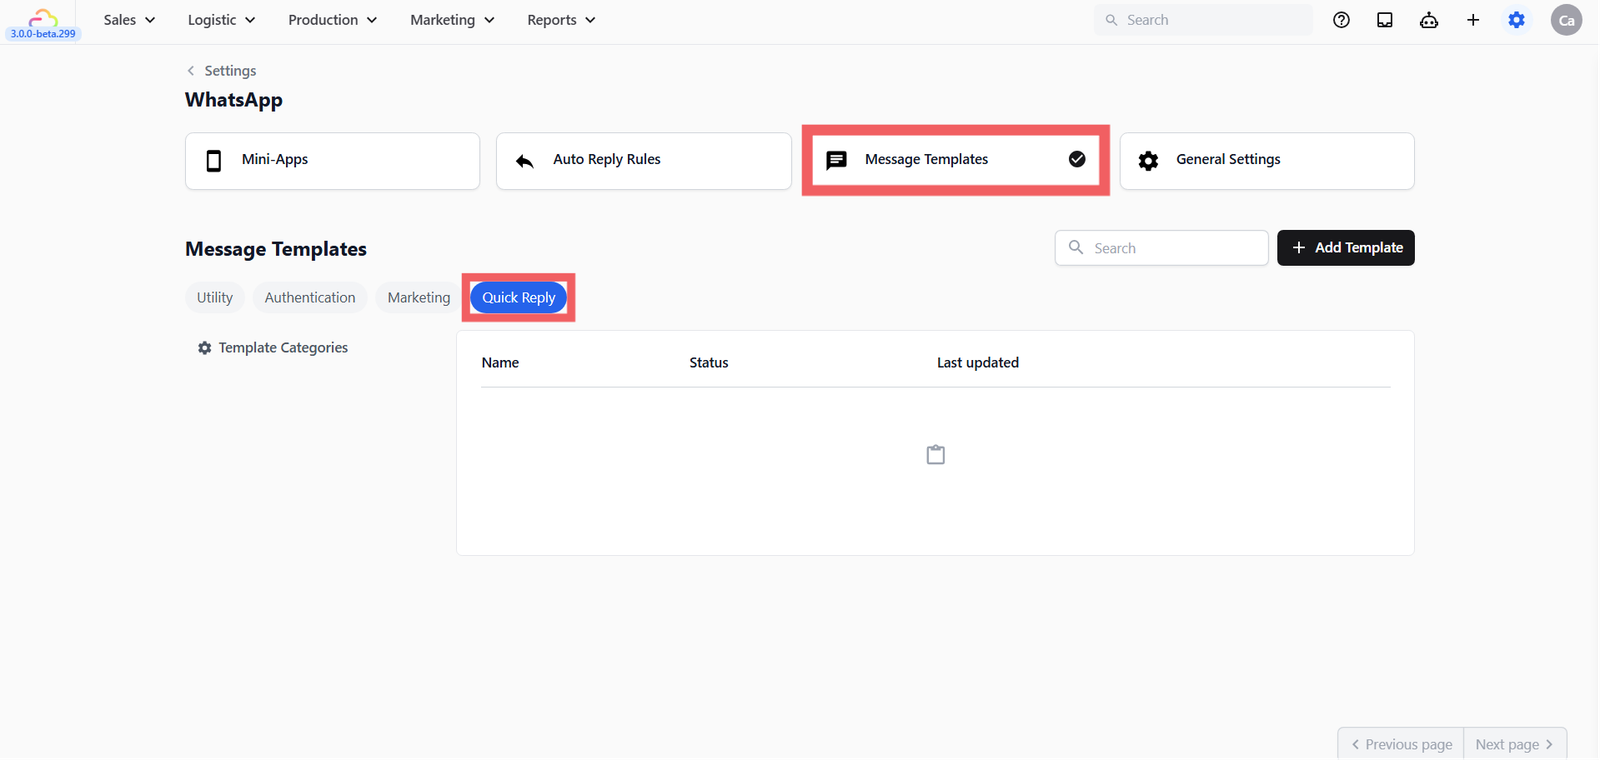
- Go to the Message Templates tab, select the Quick Reply bubble,
- (Optional) Organize with Template Categories if you have many templates, you can group them using categories.
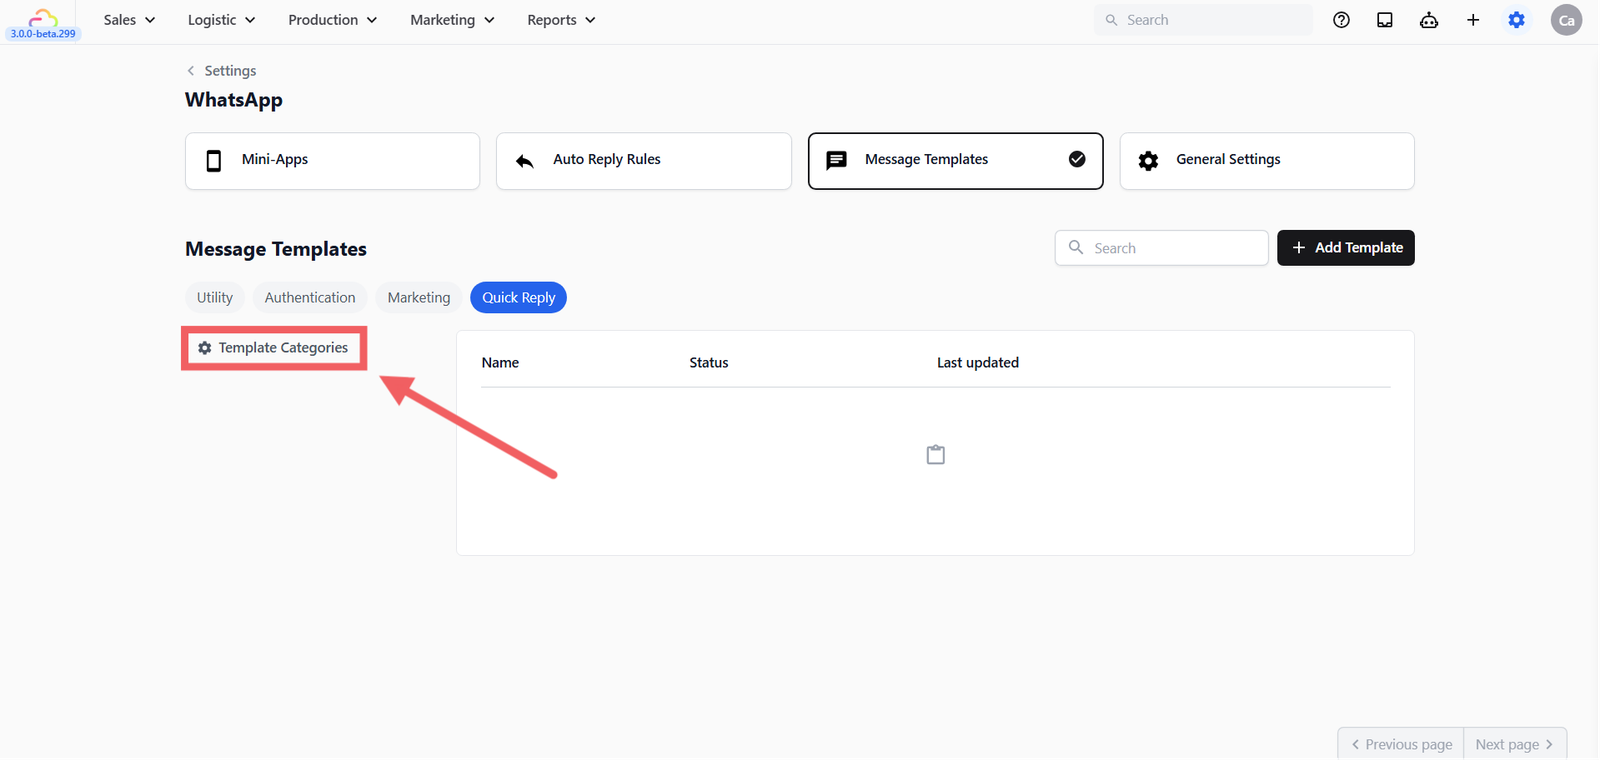
- On the left sidebar, click the Template Categories gear icon.
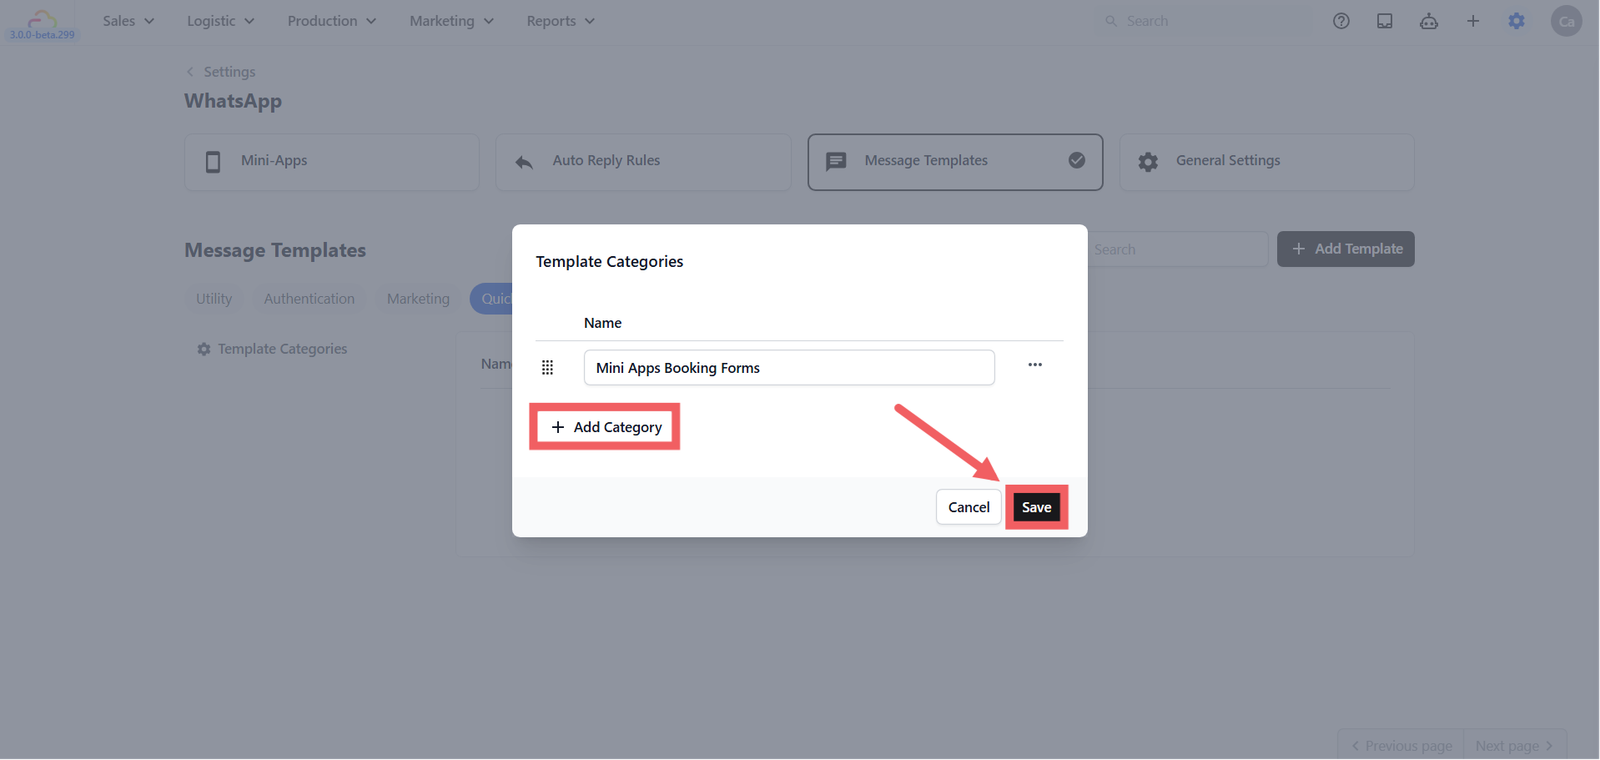
- Click + Add Category, enter a name (e.g., "Mini Apps Booking Forms"), and click Save
- Click + Add Template at the top right.
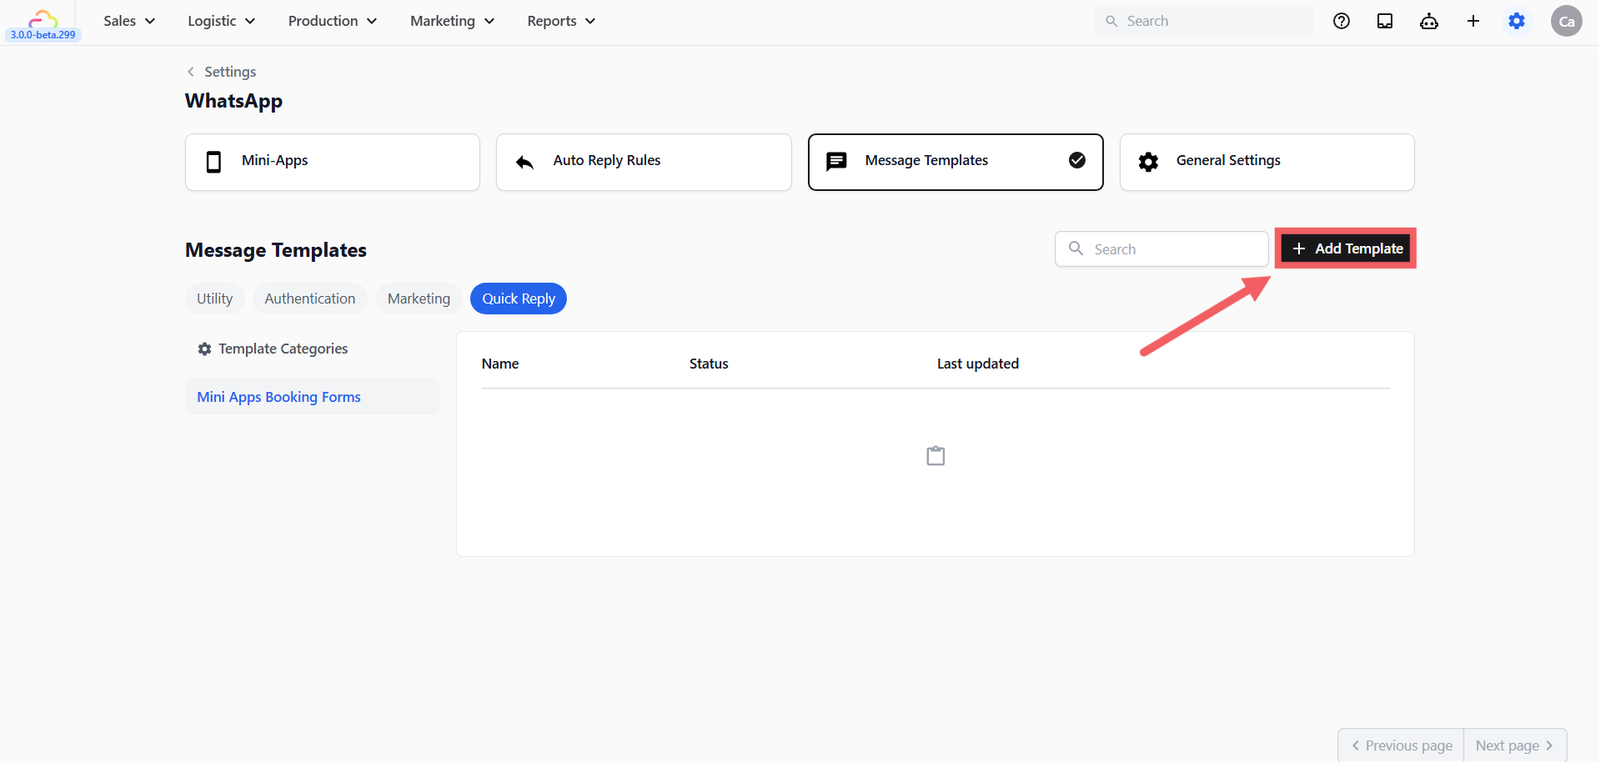
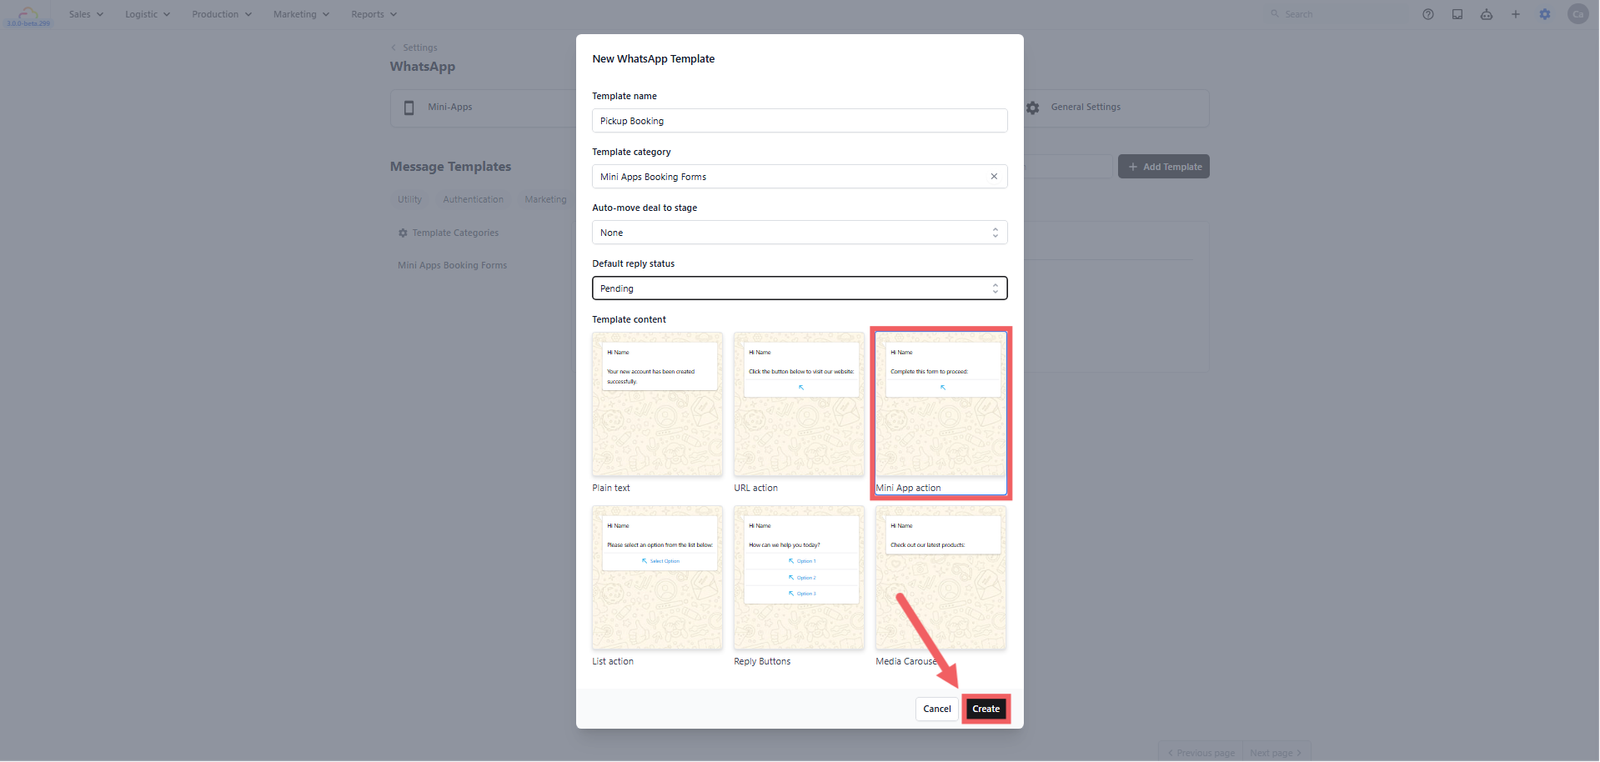
- Enter a Template name.
- (Optional) Set Auto-move deal to stage if you are tracking sales pipelines. This feature will automatically move a deal to a specific stage when the template is sent — for example, moving a deal to "Quoted" when you send a booking form. This is not available yet but is coming in a future update. For now, you can skip this field and move deals manually from the Deal Pipeline.
- Set the Default reply status:
- Replied — The conversation is marked as done and moves out of your Pending list.
- Pending — The conversation stays in your Pending list so your team remembers to follow up later.
- Under Template category, select the category you just created from the dropdown (or leave it empty/None if you are choosing not to use categories).
- Under Template Content, click the Mini App action card, then click Create.
Connecting your Mini App
Just like building a Mini App, clicking "Create" opens an editor where the screen is divided into two parts: a Live Preview on the left (showing what the customer sees) and your Editor tabs on the right.
- Scroll down to the Buttons section. The Action type is already set to Open Mini App.
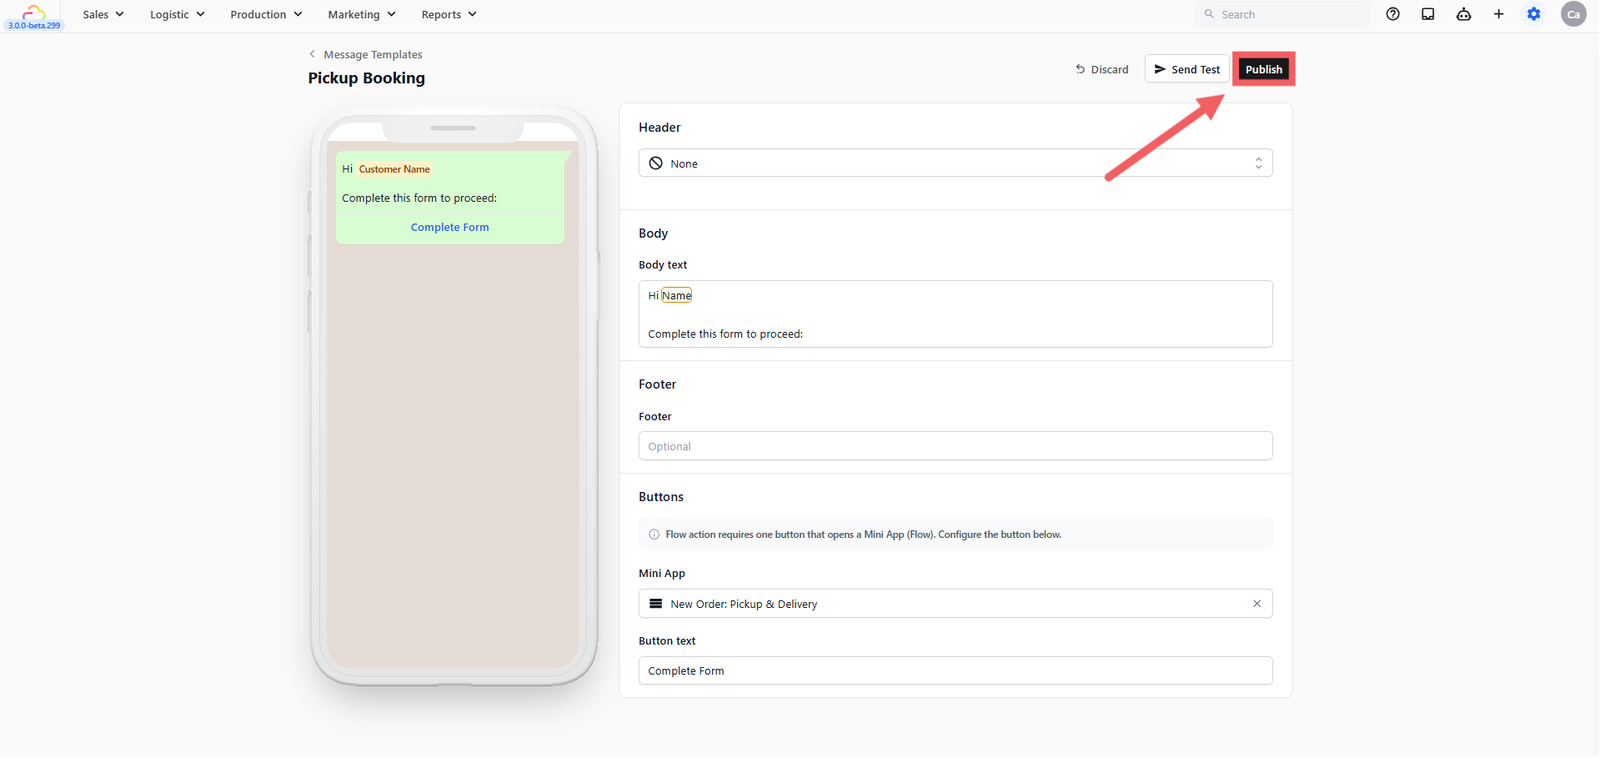
- Under Mini App, simply click the dropdown and choose the booking form you want to attach.
- The Button text will fill in automatically (e.g., "Book Pickup", "Sign Up", or "Reschedule"), but you can type whatever you want!
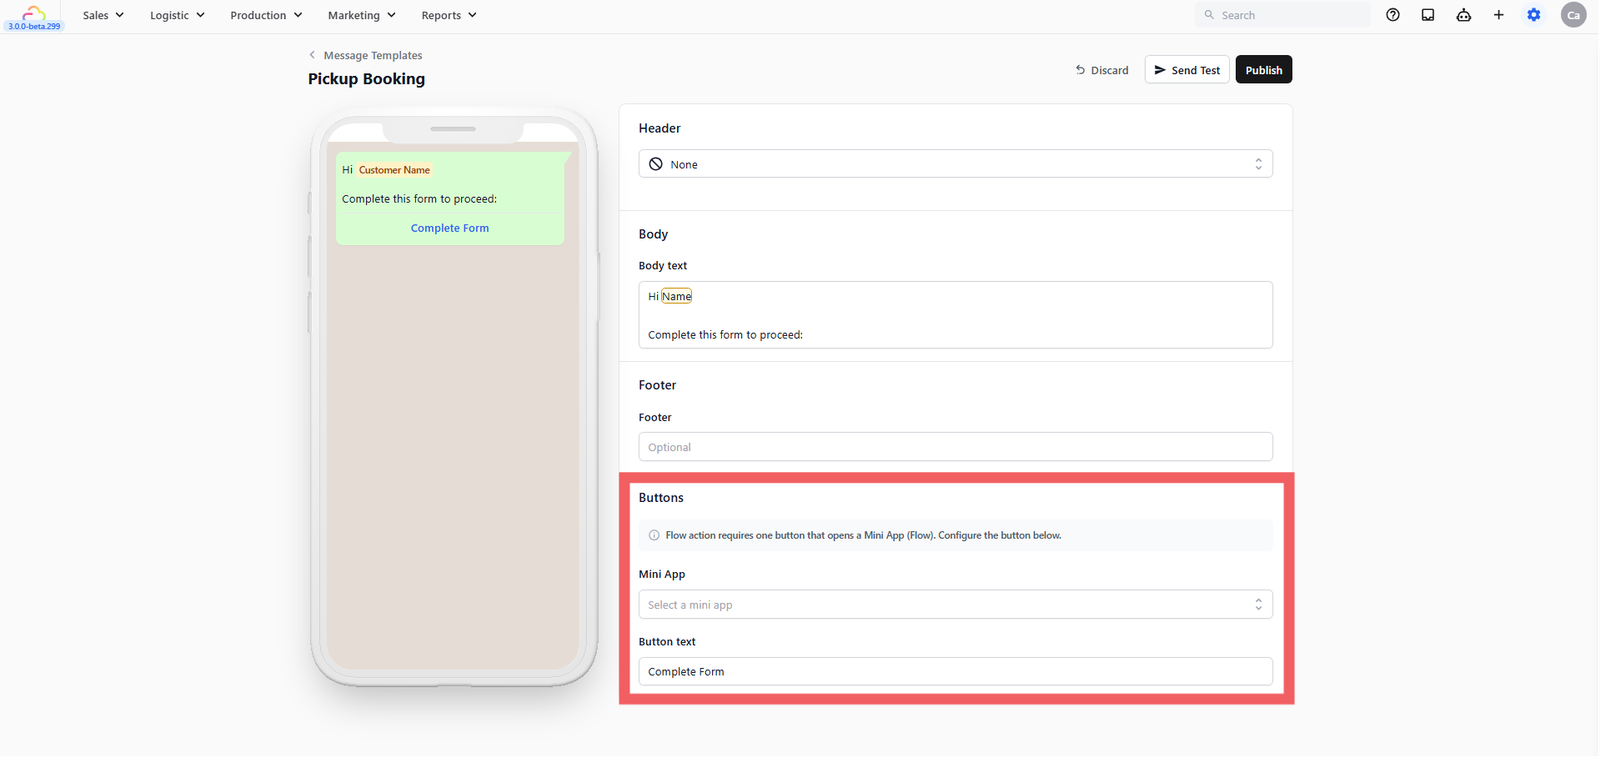
- (Optional) In the Body section, you can change the message text. Type
@to easily insert the customer's name automatically (e.g., "Hi @Customer Name, click the button below to book your pickup!"). - Click Publish.
How to send your Quick Reply
- Open the customer's chat in your WhatsApp Inbox.
- In the message text box, simply type
/(a forward slash). - A list of your Quick Reply templates will pop up — select the one you want.
- Confirm the customer or order link if prompted, then click Send.

Understand the 24-hour rule
WhatsApp only allows you to send Quick Replies and free-form messages within 24 hours of a customer's last reply.
- Window open: The customer replied to you recently. You can type / and send Mini Apps freely.
- Window closed: The customer hasn't replied in over 24 hours. The text box will be locked. To reach them, you must use Method 3 below.
Method 3 — Utility or Marketing Templates
Best for: Reaching out to customers who haven't messaged you in more than 24 hours (like sending a special promotion or reminding them to book a delivery).
Because the 24-hour window is closed, WhatsApp requires you to use a pre-approved template to contact the customer. You can easily attach a Mini App button to these templates!
How to set it up
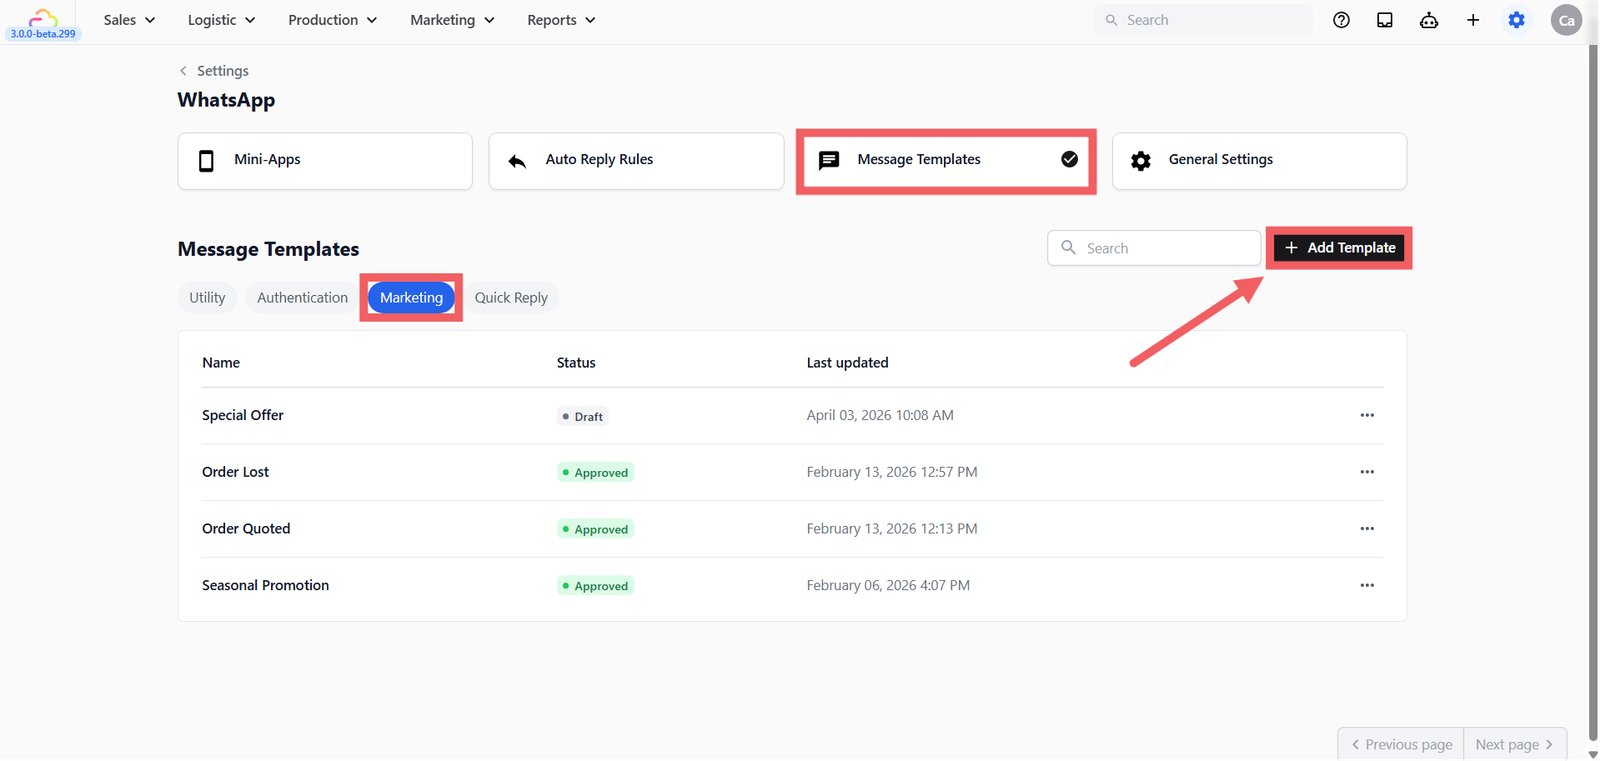
- Go to your Message Templates just like in Method 2, but this time select either the Utility (for order updates/delivery reminders) or Marketing (for promotions and offers) bubble.
- Click + Add Template at the top right.
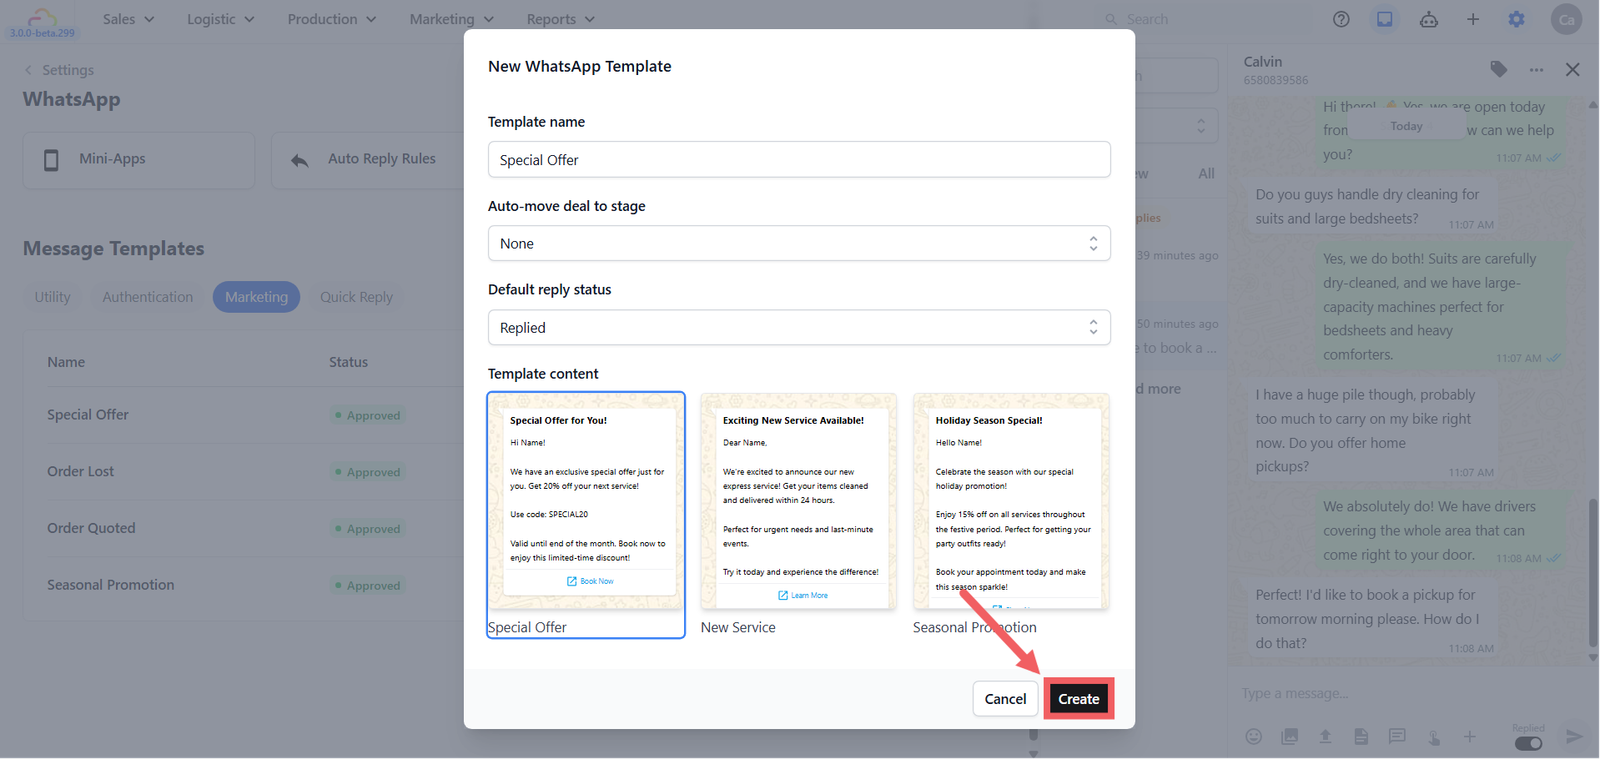
- Enter a Template name.
- Just like with Quick Replies, you can set the Default reply status (Replied or Pending) and optionally Set Auto-move deal to stage if you are tracking sales pipelines. This feature will automatically move a deal to a specific stage when the template is sent — for example, moving a deal to "Quoted" when you send a booking form. This is not available yet but is coming in a future update. For now, you can skip this field and move deals manually from the Deal Pipeline.
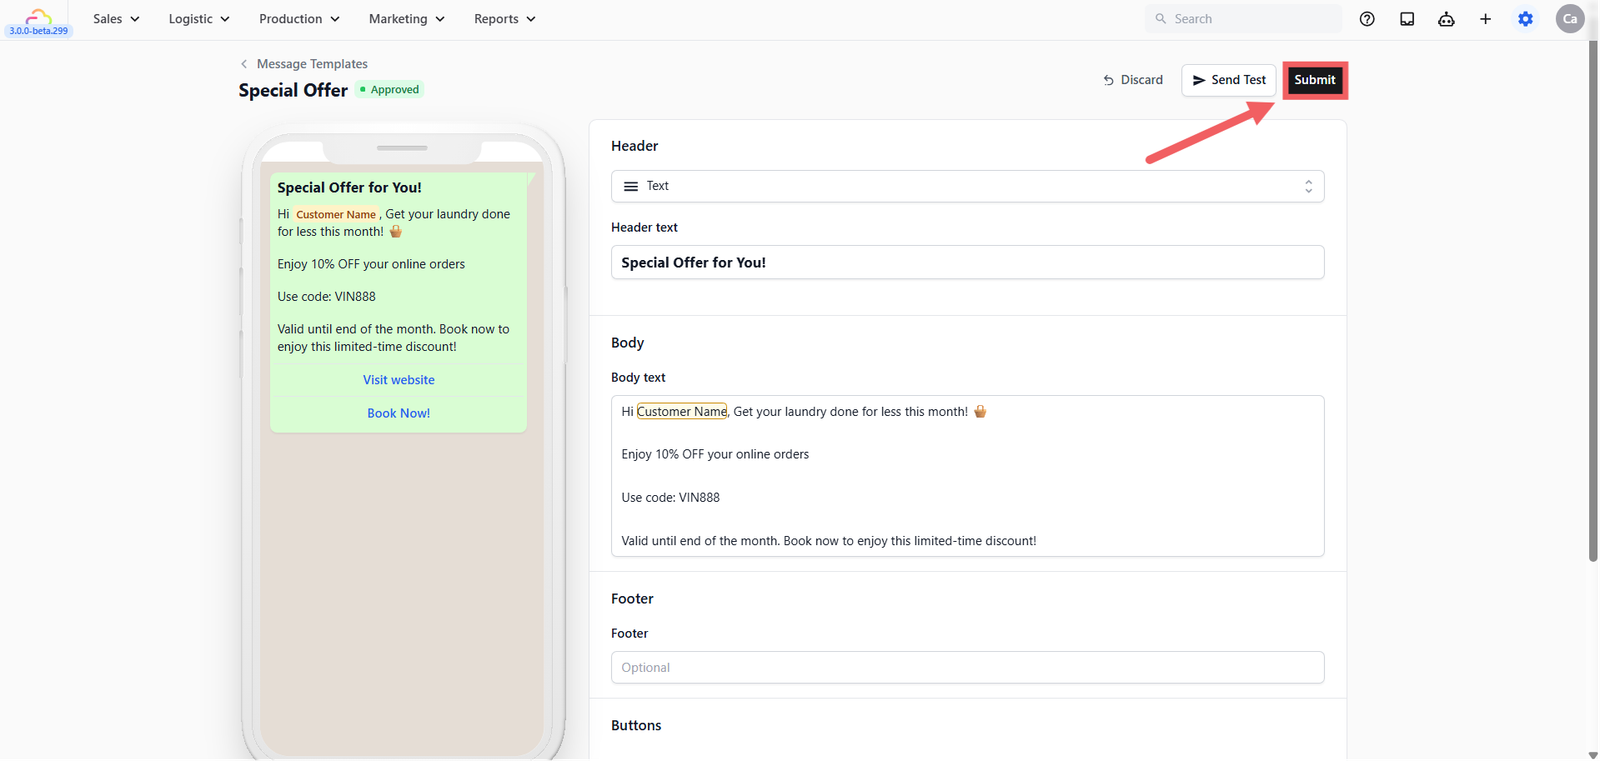
- Under Template Content, choose a design. For example, if you have a promo code, you might pick the Special Offer marketing template, then click Create.
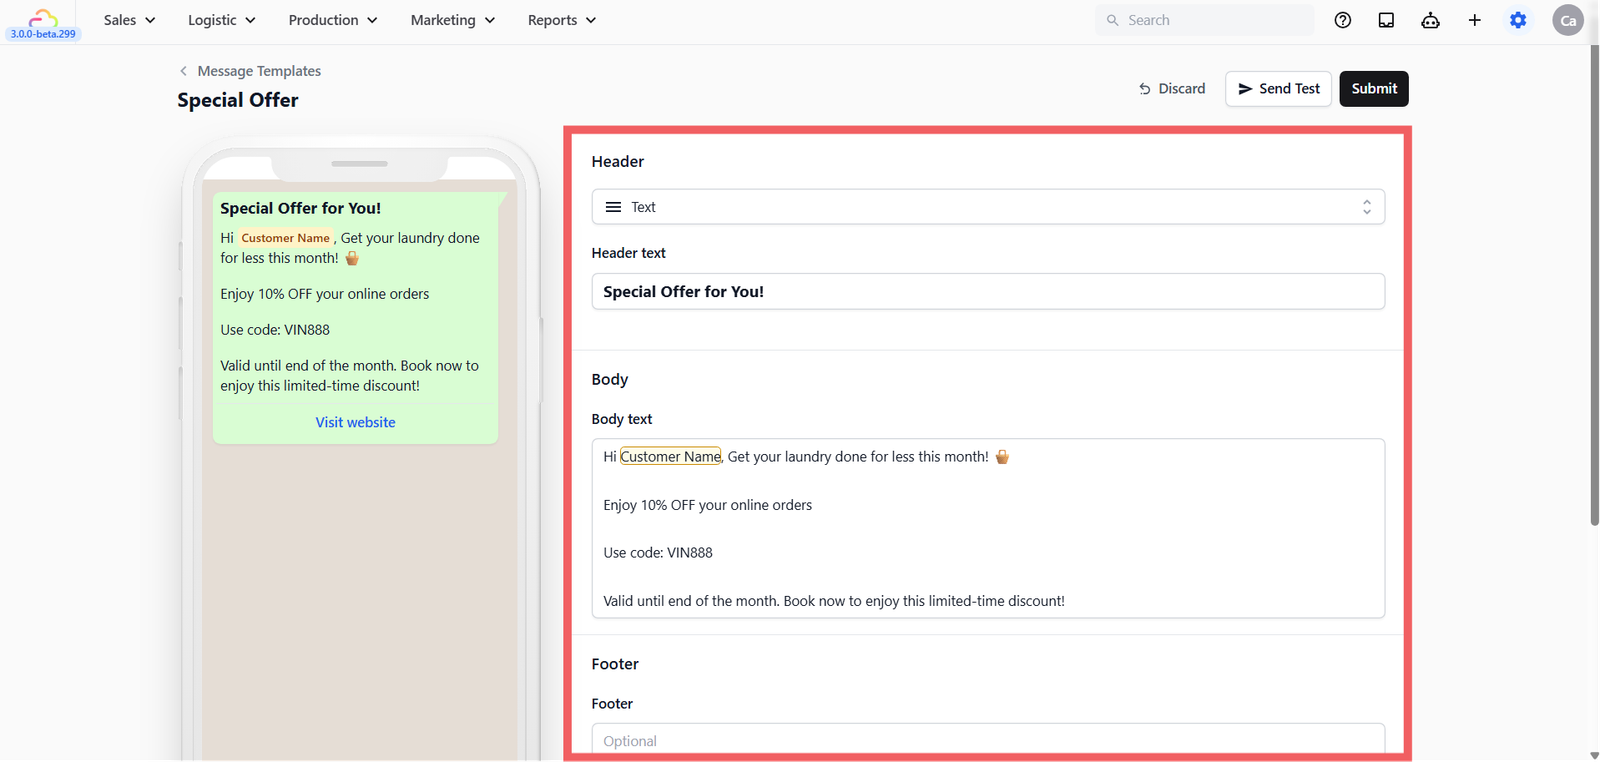
- Just like the Quick Reply template, clicking "Create" opens an editor where the screen is divided into two parts: a Live Preview on the left (showing what the customer sees) and your Editor tabs on the right.
- Edit your message in the Body (e.g., "Hi @Customer Name, get 10% off laundry this month! Book below."). You can also edit the Header or add a Footer note
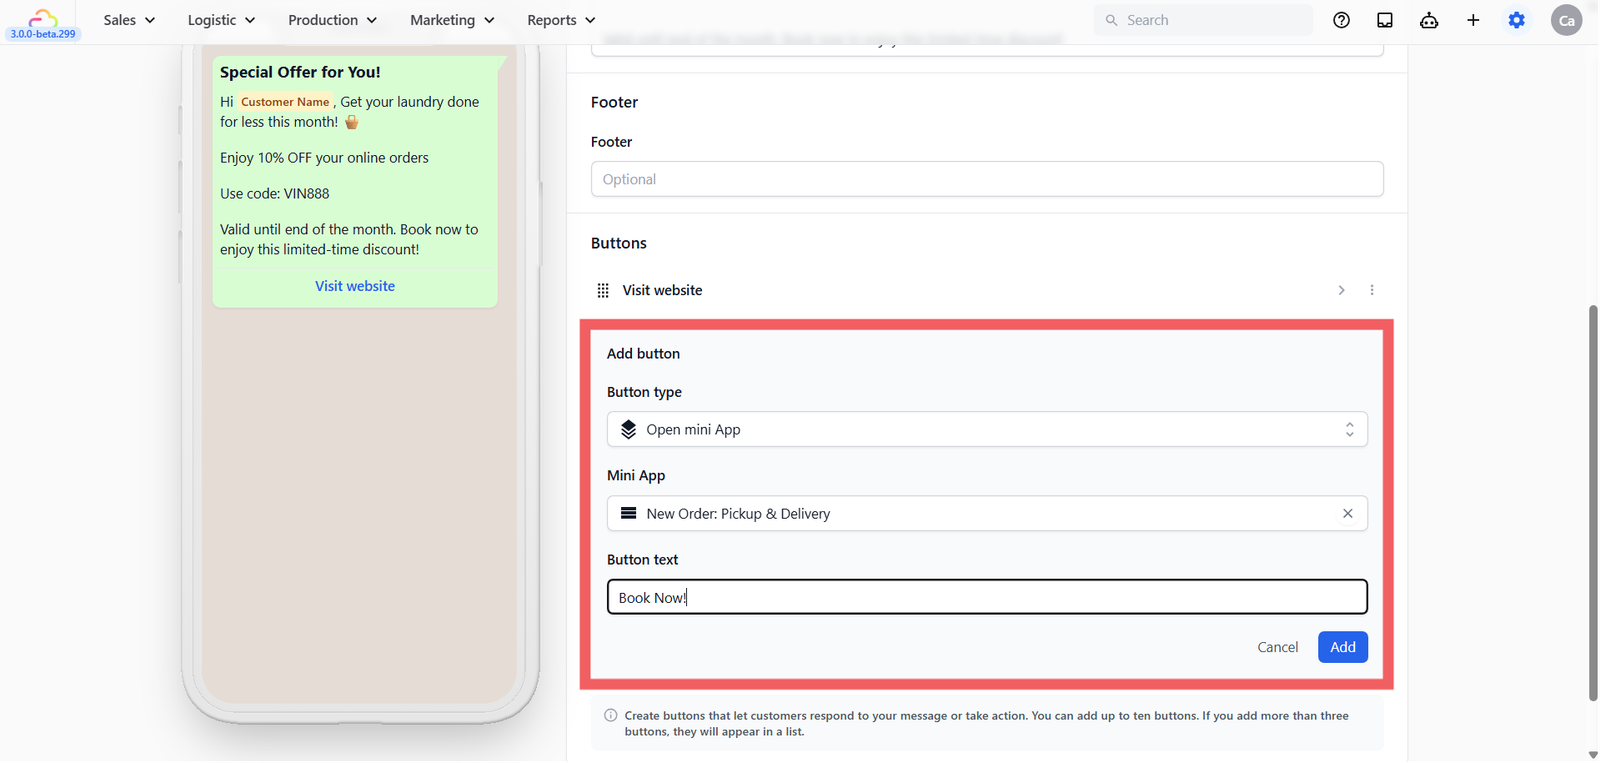
- Scroll down to the Buttons section. Many Marketing templates come with a "Visit Website" button by default. You have a few options here:
- Keep both buttons: You can leave the website button and simply click + Add button, select Open mini App, and choose your Mini App. Give it an attractive text like "Book Now!"
- Rearrange them: If you decide to keep both buttons, you can click and drag them up or down to choose which one appears on top.
- Delete the original: If you only want the Mini App button, click the three dots ⋮ next to the original "Visit Website" button and click Delete, then add your new Mini App button.
- Click Submit on the top right.
⏳ Meta Review Process

Unlike Quick Replies, WhatsApp requires every Utility and Marketing template to go through a review process to prevent spam. A box will pop up asking you to Submit for META review. Click Submit. Meta review usually takes anywhere from a few minutes to a few hours.
How to send it
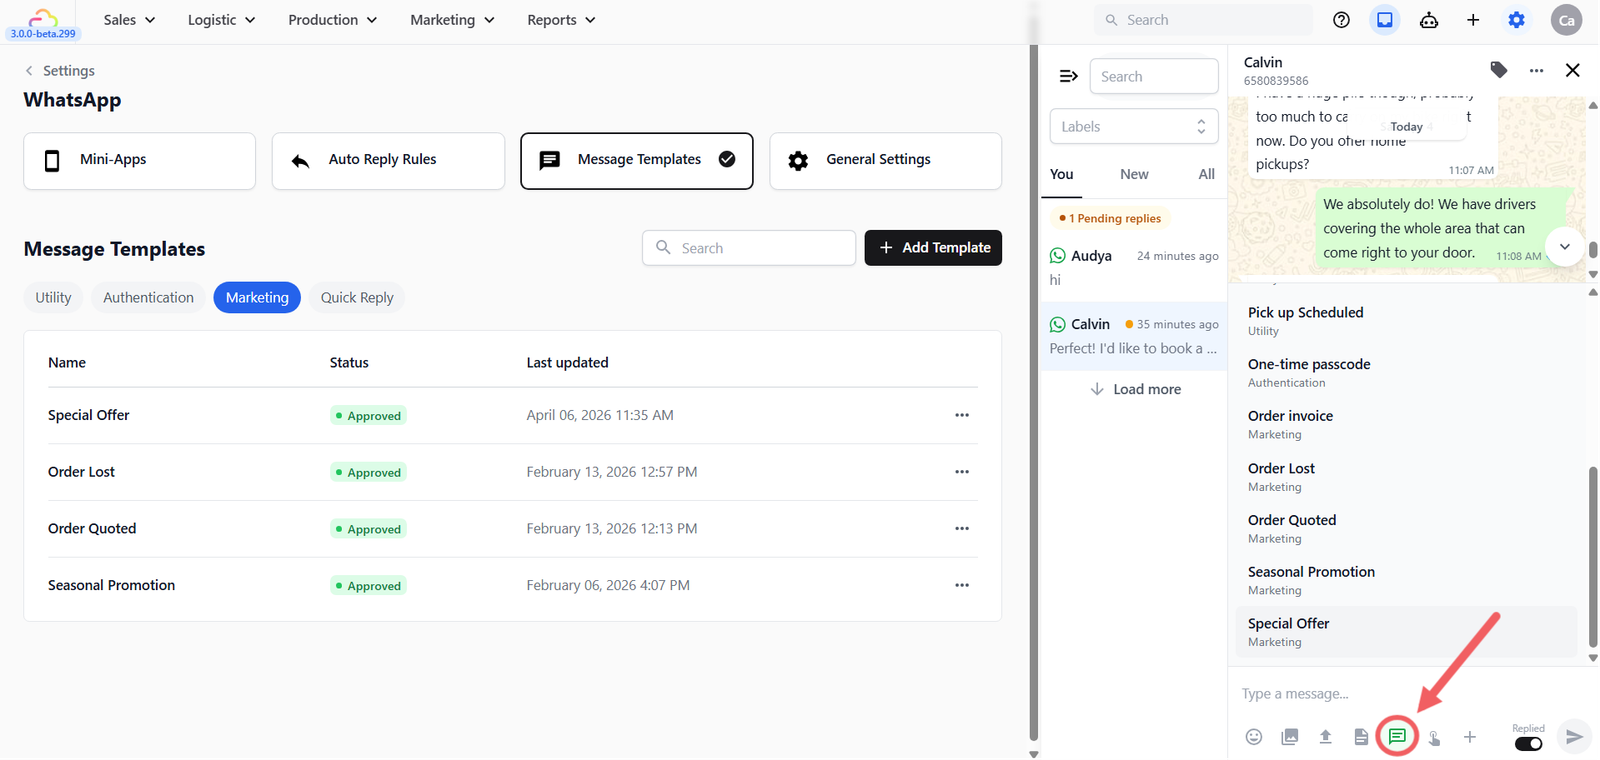
Once Meta approves your template, you can send it to anyone, anytime!
- Open your WhatsApp Inbox and select the customer.
- Below the typing area, click the Template icon (it looks like a message bubble 💬).
- Select your approved Marketing or Utility template.
- Click Send. Your customer will receive your message with a button that opens the Mini App instantly!
What's Next?
Now that your mini app is configured, continue to [Sending Your Mini Apps to Customers] to learn the different ways to share each mini app and get customers using them.
Give feedback
Up next
Online StoreBuild a professional digital storefront that turns visitors into confirmed bookings and automatically syncs them with your system.
Read more