Setting Up Paid Programs
In this article
Everyone loves to feel special. The Paid Program allows you to create membership tiers that offer exclusive privileges. Unlike a one-time coupon, a membership creates a long-term psychological bond between the customer and your brand. You can set these memberships to be free (based on spending milestones) or paid (subscription-based), giving you flexibility in how you define your VIPs.
Contents
Contents
Why Use Paid Programs?
- Create Exclusivity: Customers love status. A "Gold Member" badge makes them feel valued and more likely to promote your brand.
- Automate Discounts: No more manual calculations at the counter. The system automatically recognizes a member and applies their specific 10% or 20% discount instantly.
- Generate Recurring Revenue: If you sell memberships (e.g., $50/year for VIP benefits), you create an additional revenue stream unrelated to operations.
Accessing Loyalty Settings
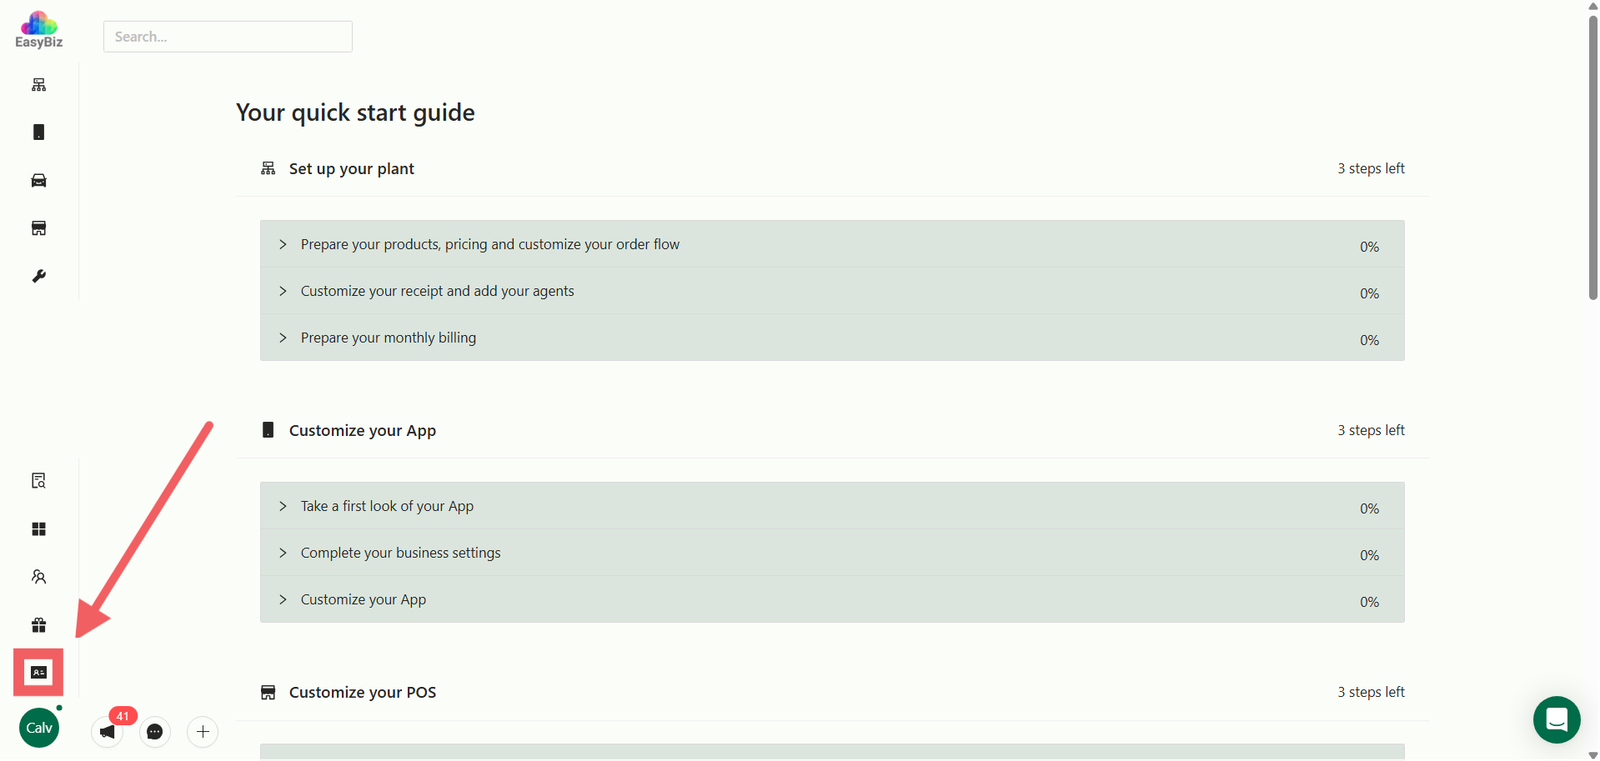
To configure memberships, you must be in the 2.0 Console.
- Navigate to the Loyalty tab at the bottom left of the sidebar.
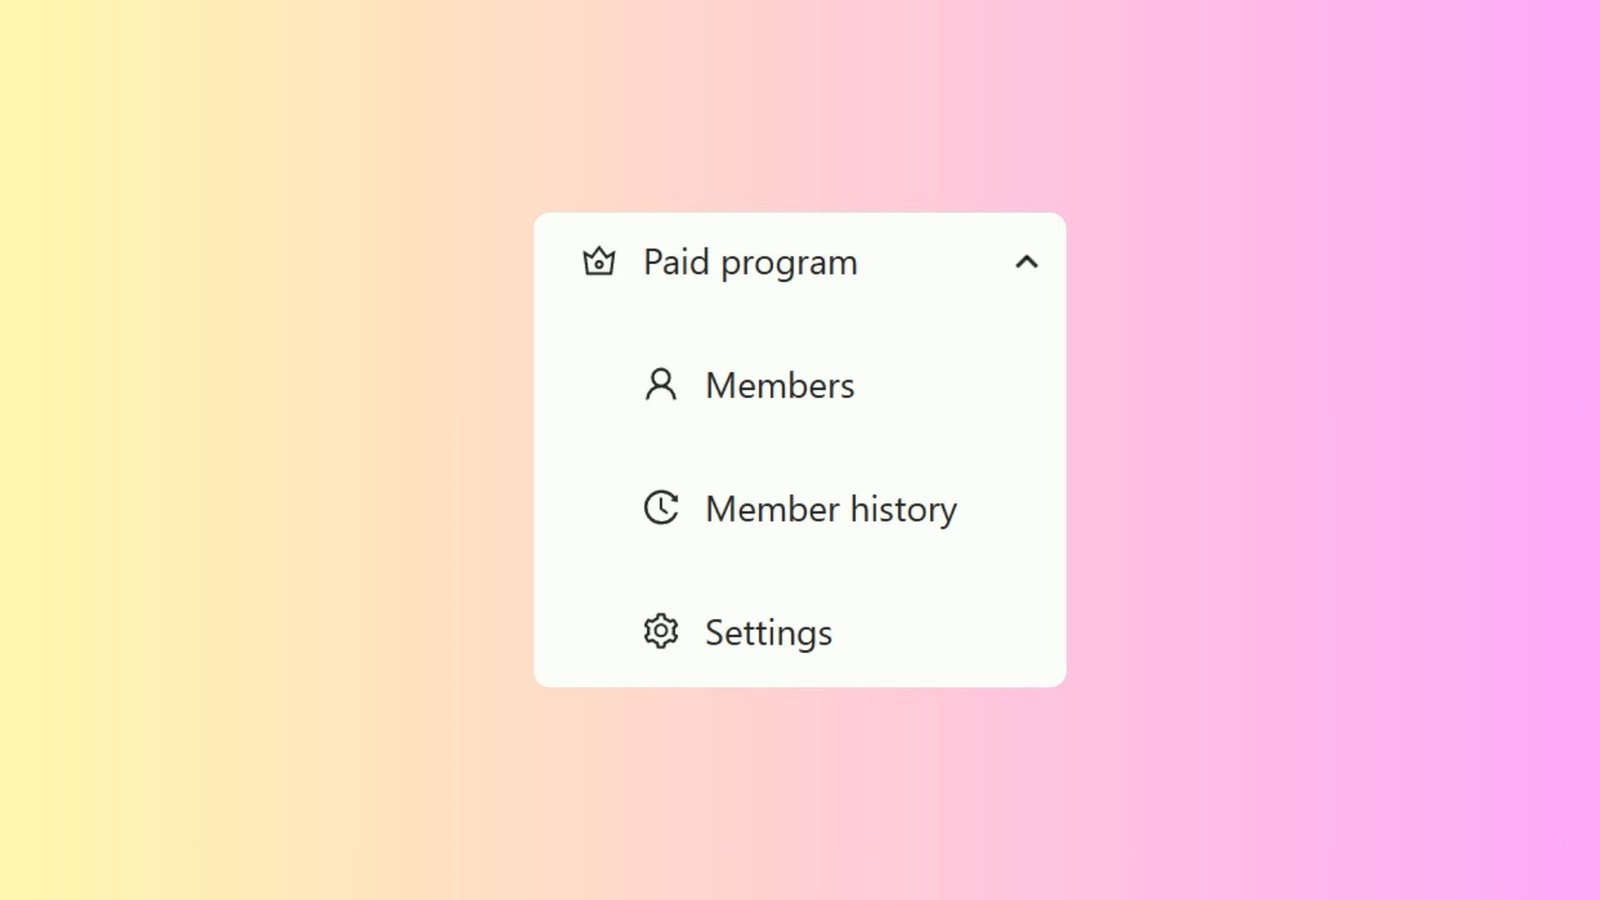
- Click on Paid Program. A dropdown or sub-menu will appear.
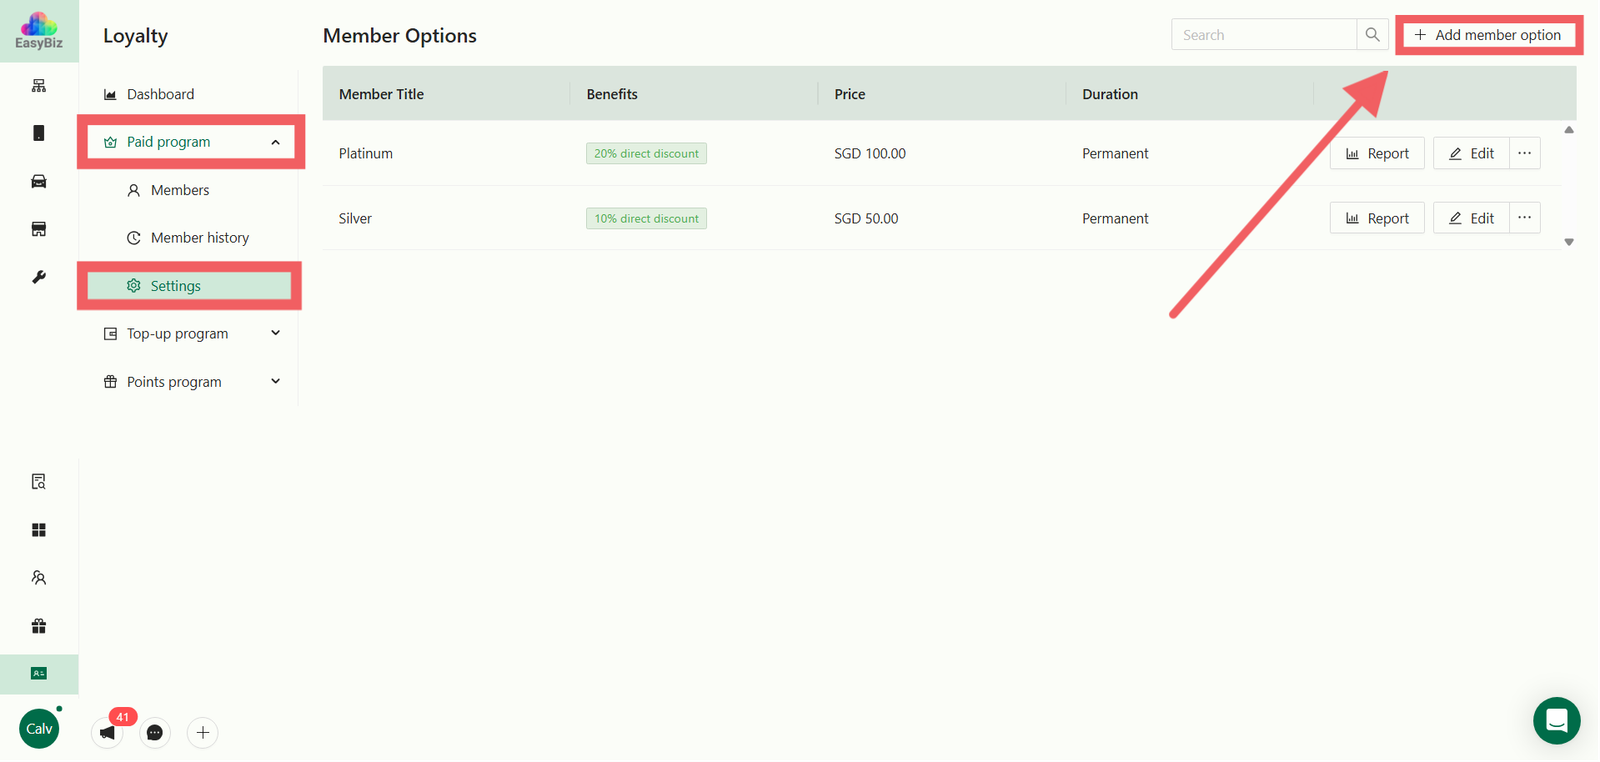
- Select Settings from the list.
- Click the + Add Member Option button to create a new membership tier.
Configure Membership Basics
In the pop-up window, define the core details of the tier:
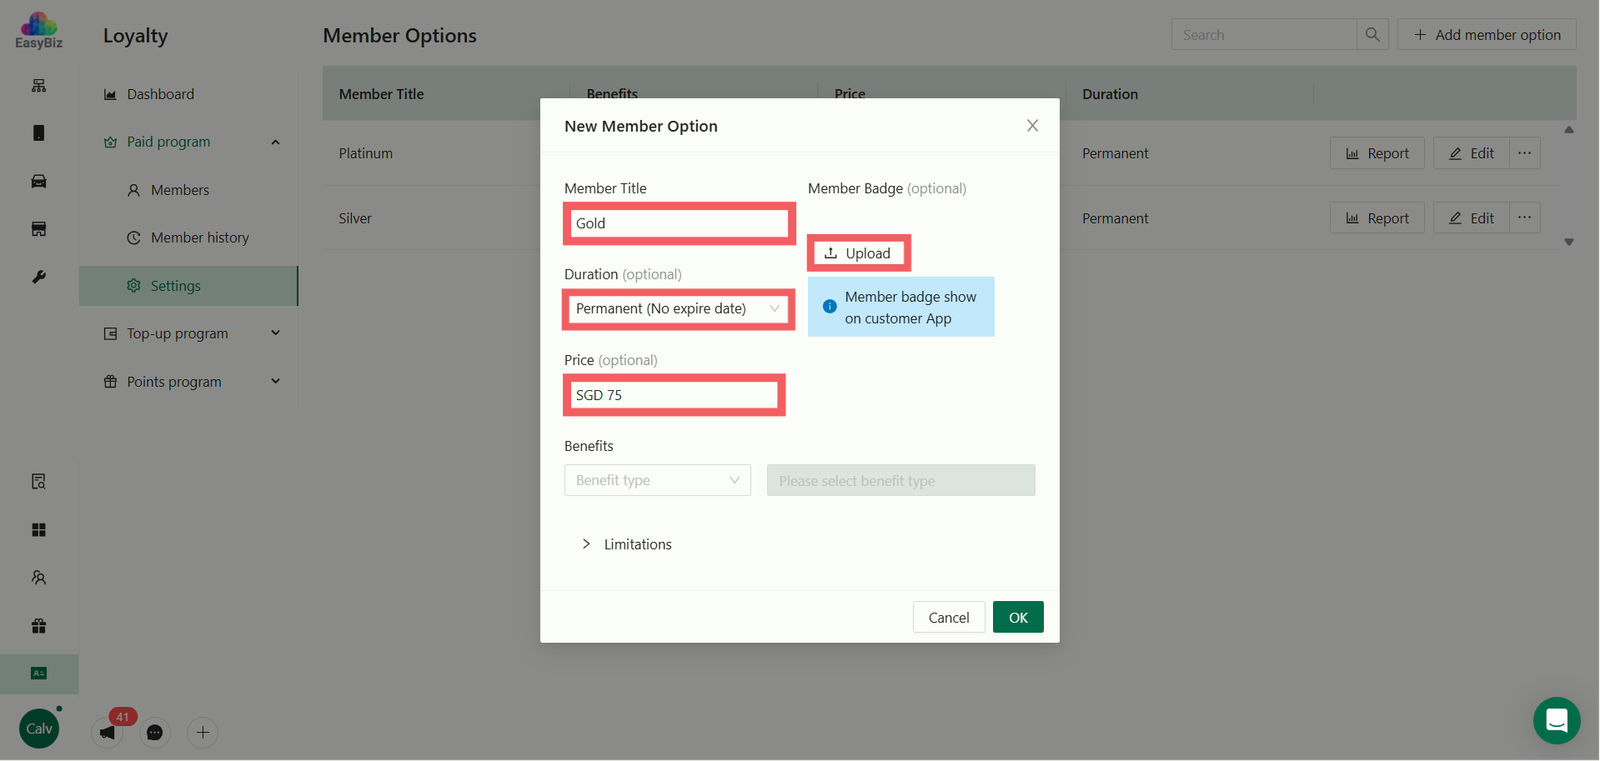
- Title: Enter the name of the tier (e.g., "Gold Member" or "VIP").
- Duration: Set how long the membership lasts (e.g., 12 months).
- Member Badge: Upload an icon or image to represent this tier (e.g., a Gold Shield icon). This badge will appear on the customer's profile.
- Price (Optional): Enter the selling price for this membership package. Leave it blank if you want to offer it for free.
Define Benefits
Choose one of the three benefit types for this membership tier. This determines the primary perk for the member.

A. Direct Discount (% off)
Provides an immediate percentage discount on the total bill when an order is created.
- Example: 10% off every transaction.
- Usage: Best for customers who want instant gratification.
B. Cash Back (To top-up credit)
Instead of a discount, a percentage of the order value is returned to the customer as Store Credit.
- How it works: If the cashback rate is 10% and the customer pays $100, they receive $10 in credit after the order is completed.
- Benefit: This credit can only be used for future transactions.
C. Points Multiplier
Allows members to earn reward points faster than regular customers.
- Options: Double, Triple, or Quadruple Points.
- Context: A "Double Points" member earns 2 points for every $1 spent (assuming the base rate is 1:1).
Set Limitations & Save
You can restrict where and when these benefits apply to protect your margins:
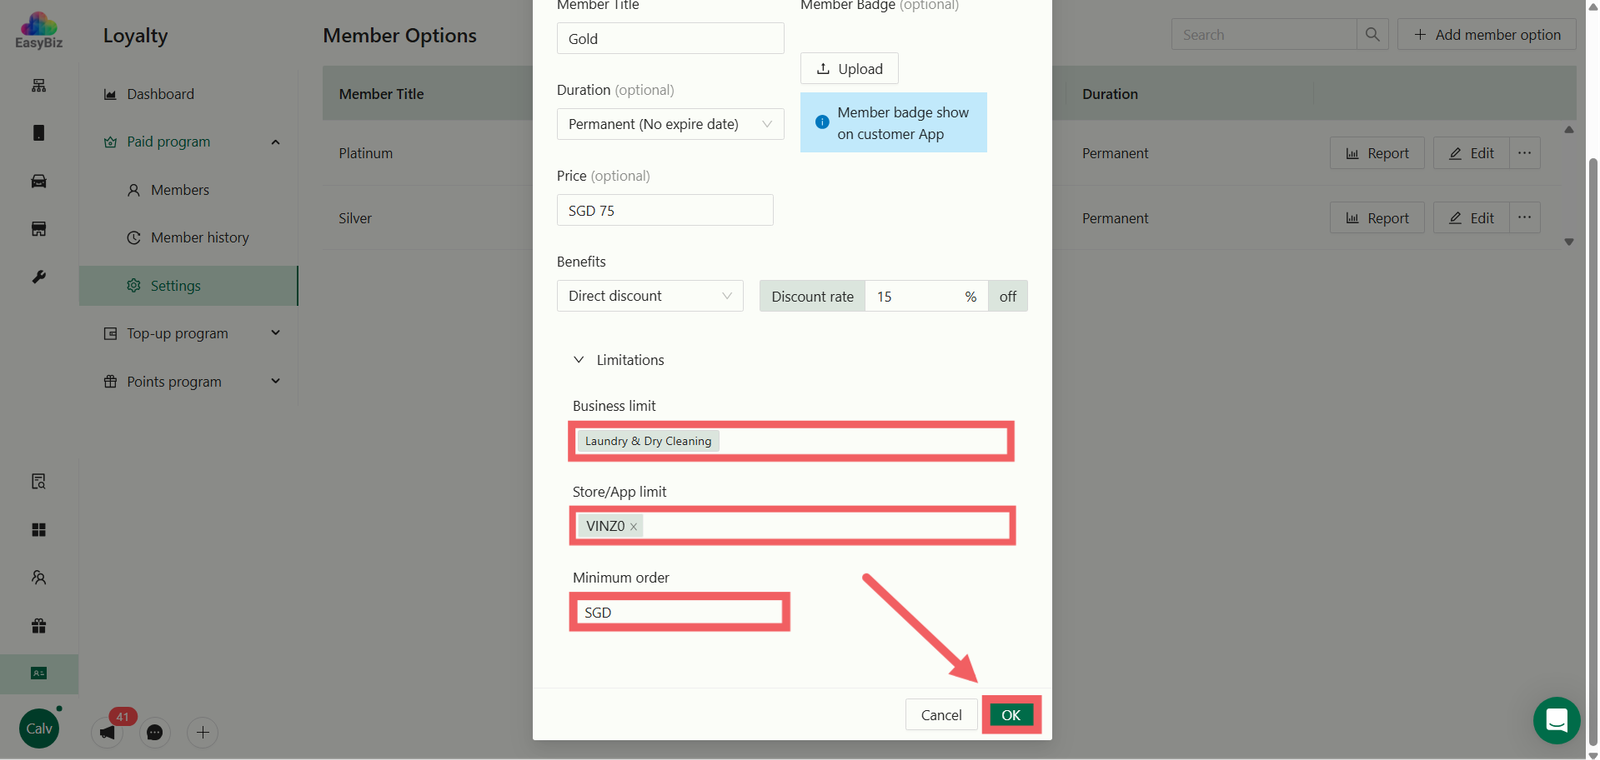
- Business Limit: Restrict benefits to specific services (e.g., apply to "Laundry" but exclude "Alterations").
- Store/App Limit: Limit the membership to specific outlets or online orders only.
- Minimum Order: Require a minimum spend amount (e.g., SGD 20) before the discount or cashback activates.
Click OK to save your changes.
Managing Members & Reports
Once your program is live, you can monitor your member base and track revenue through the dedicated menus on the left sidebar.
A. Viewing & Exporting Member Lists
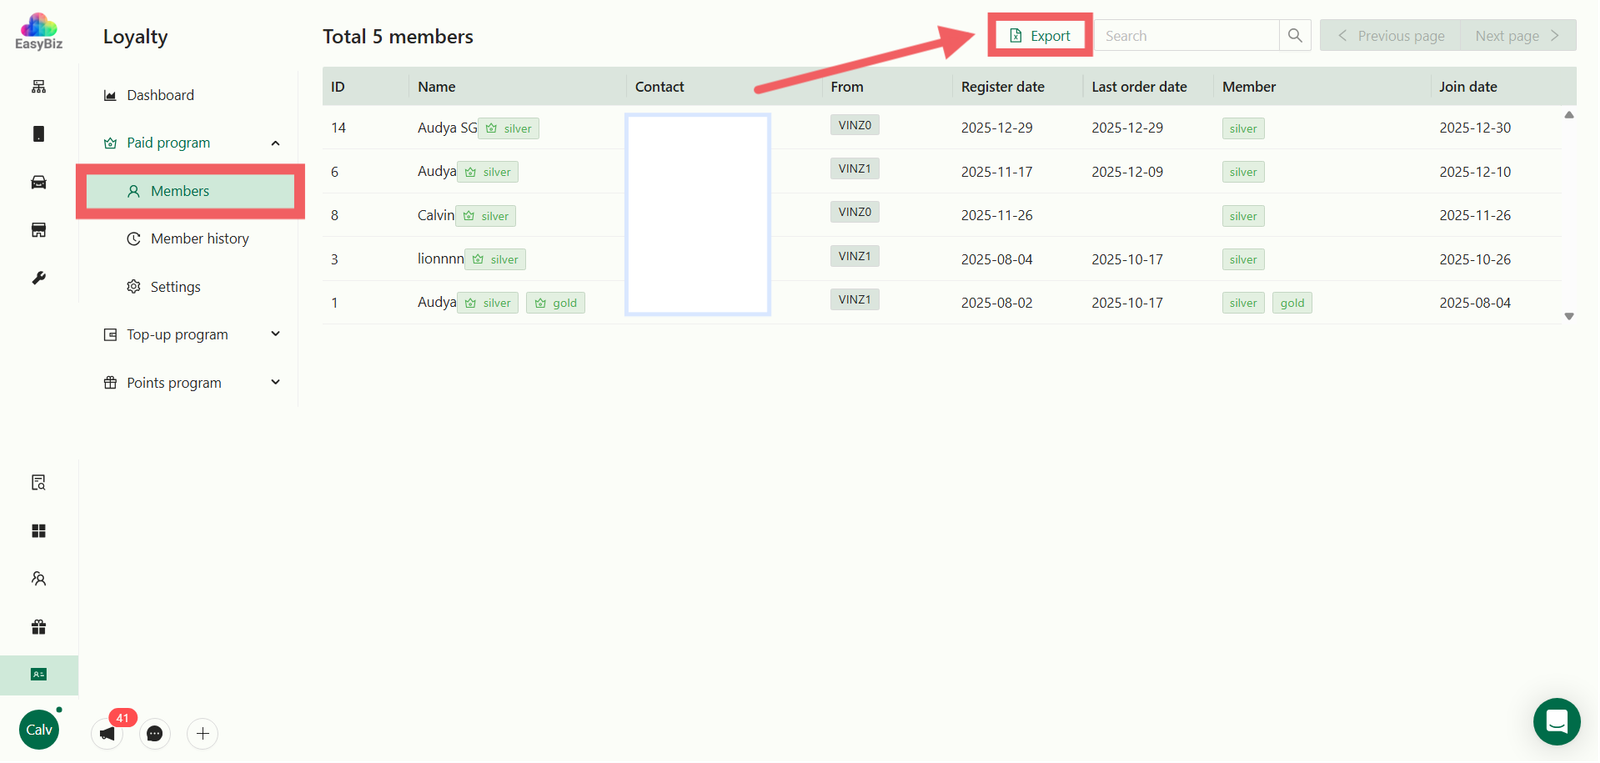
To see who has signed up for your membership tiers:
- Click on Members in the left sidebar (under the Paid Program section).
- The main view lists all members with their details, including Member Title (e.g., Gold Member), Join Date, and Expiry Date.
- Export Data: Click the Export button at the top right corner to download the list as a CSV/Excel file.
B. Viewing Member History (Transaction Logs)
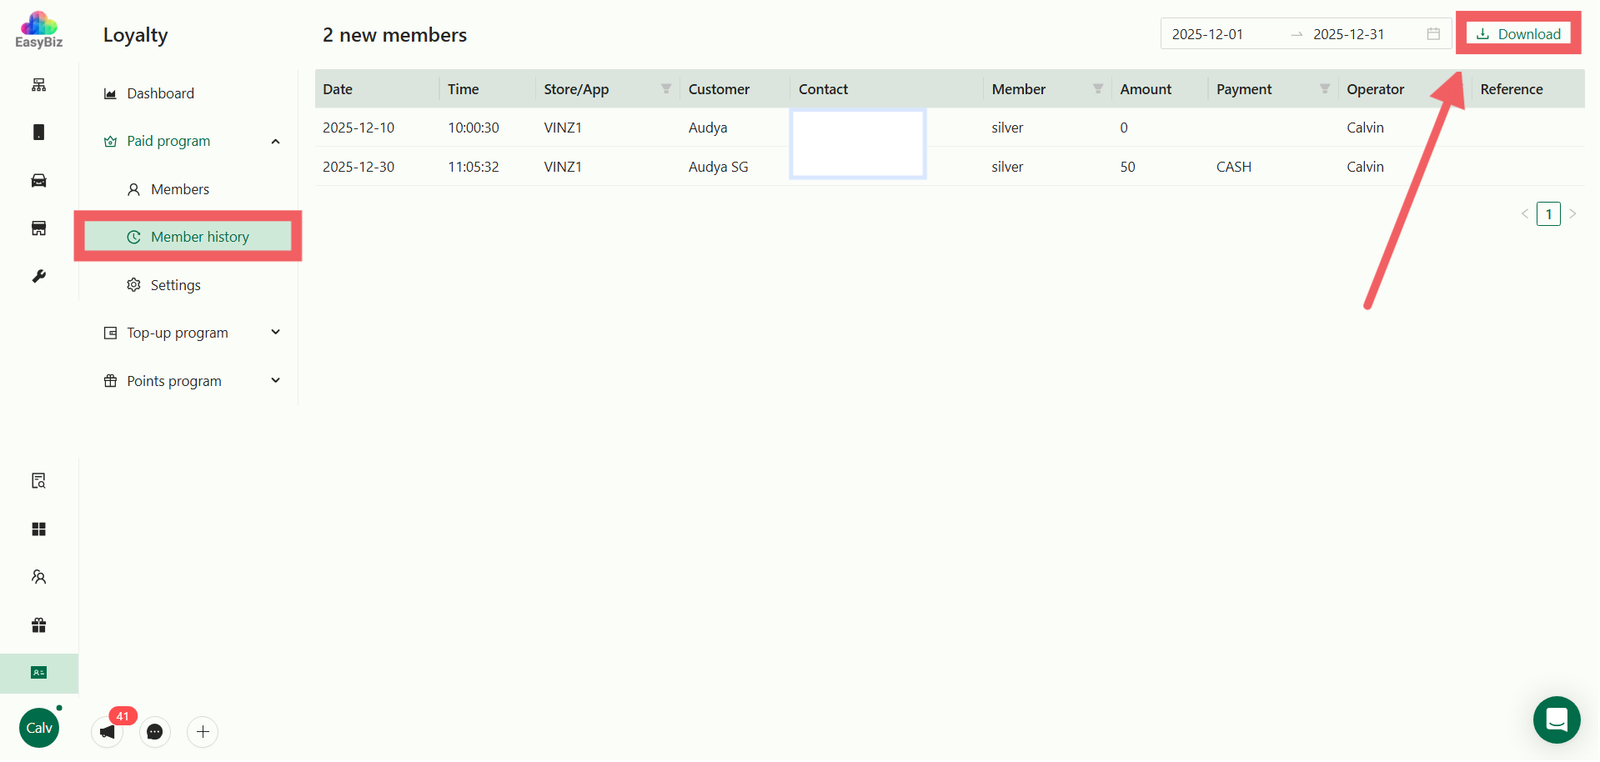
To track specific membership actions (like new registrations, renewals, or fees paid):
- Click on Member History in the left sidebar.
- This log details every event, including the Date, Action Type (e.g., Member Register), Amount Paid, and the Operator who handled the transaction.
- Download Report: Click the Download button at the top right corner to generate a detailed transaction report.
Assigning a Membership to a Customer
Once your membership tiers are set up, you need to assign them to your customers. This can be done directly from the 2.0 Console.
1. Navigate to Customer Profile
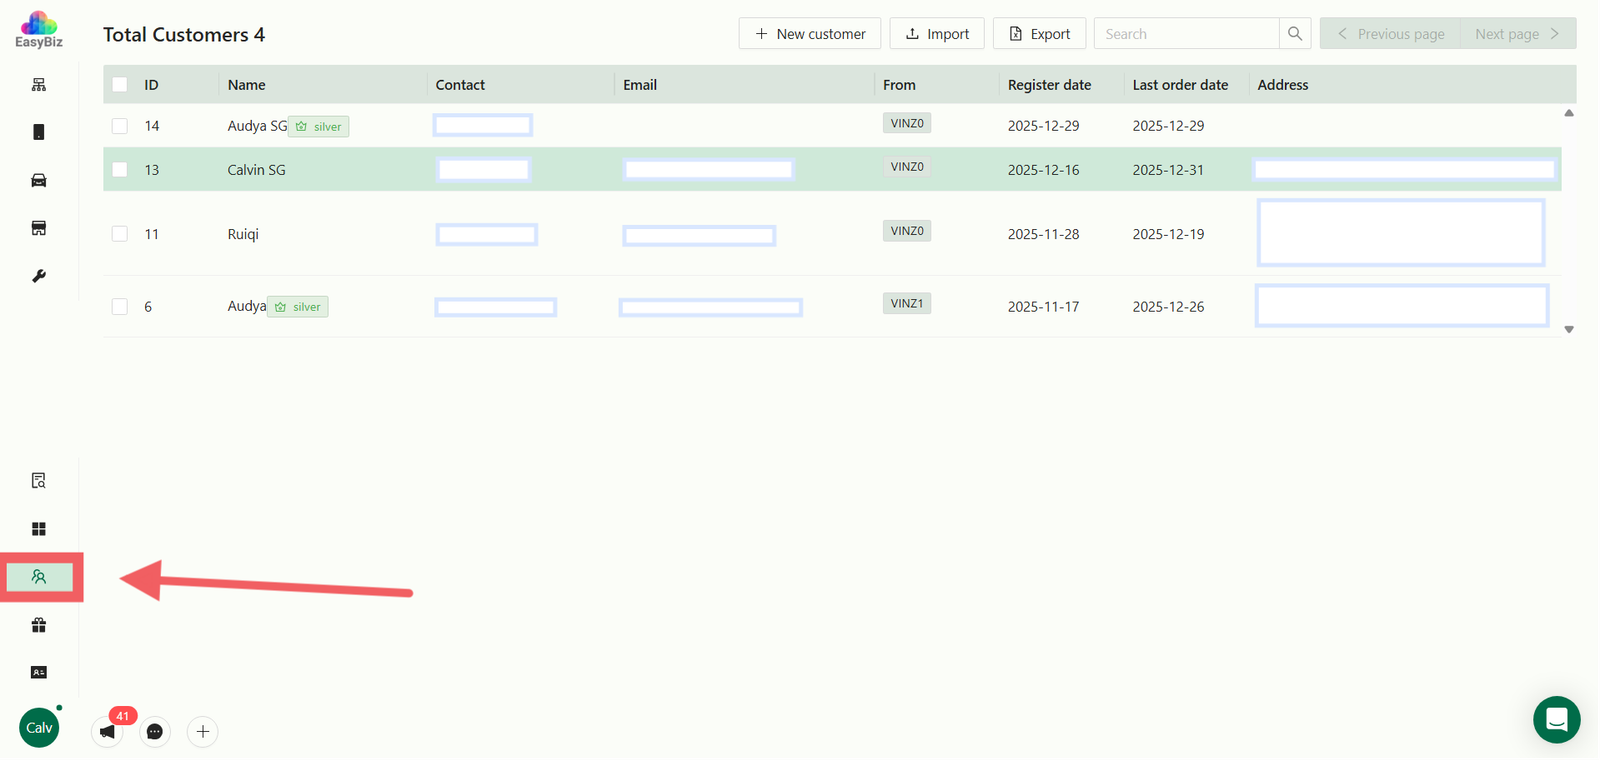
- Go to the Customers menu on the left sidebar and select the specific customer from the list.
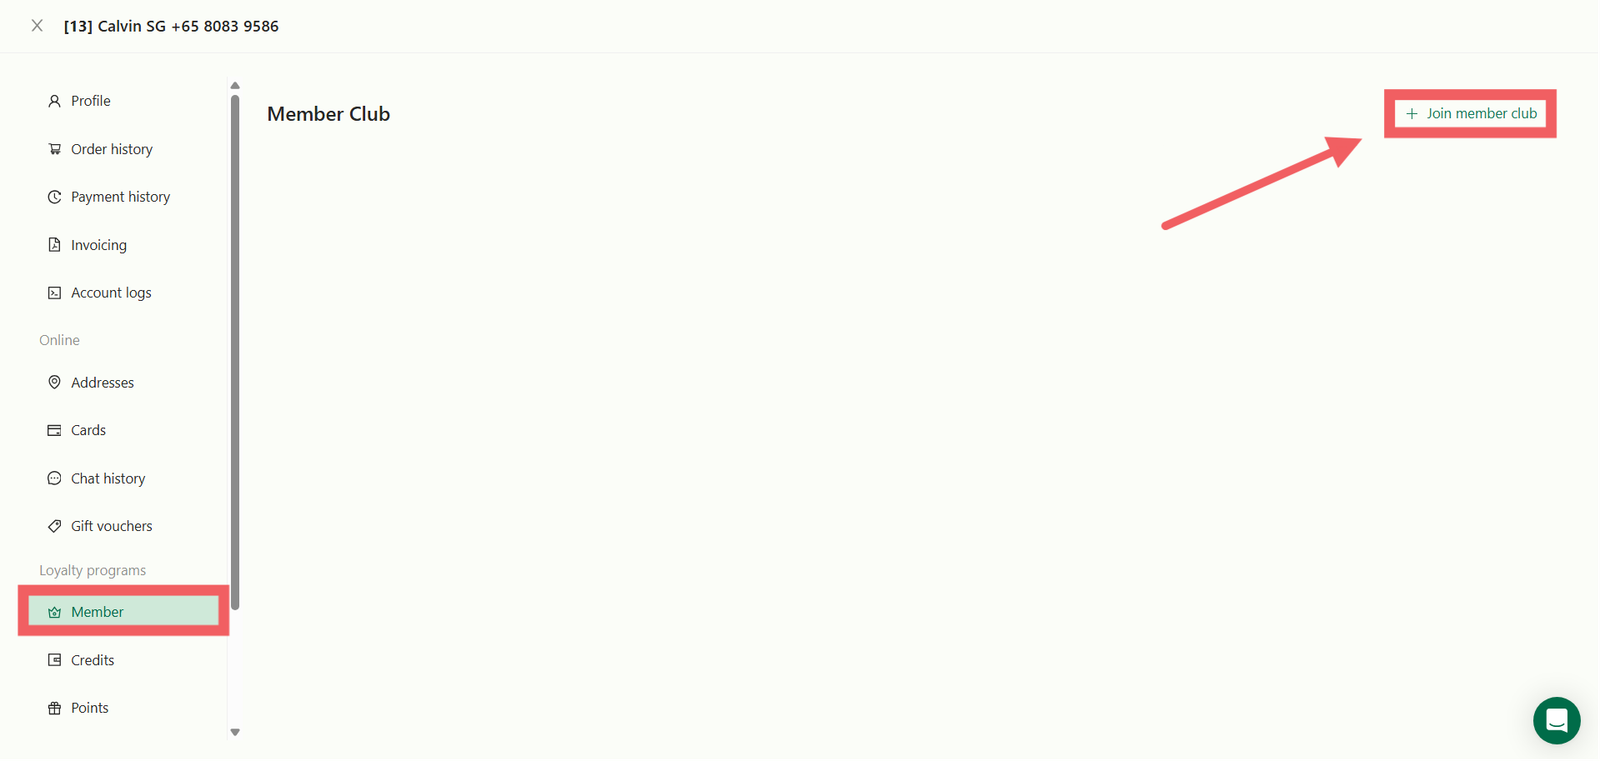
- In the profile, click on Member (under Loyalty programs) on the left sidebar.
- Click the + Join member club button.
2. Configure Enrollment
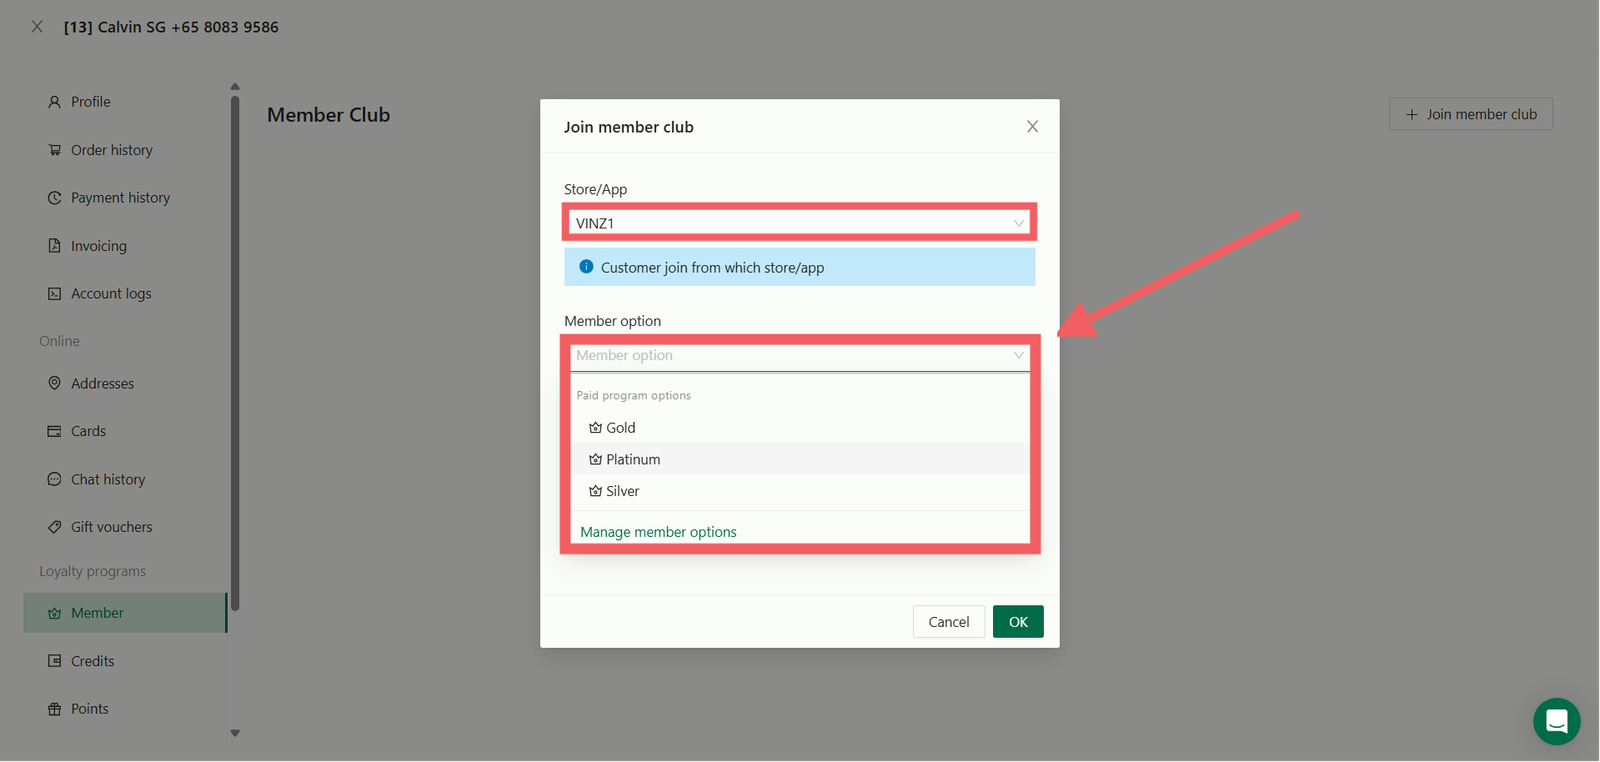
- Store/App: Select which store or app the customer is joining from.
- Member Option: Choose the desired tier (e.g., Silver) that you created in the previous steps.
- Member Expire Date (Optional): Select a date only if you need a custom expiry.
3. Process Payment
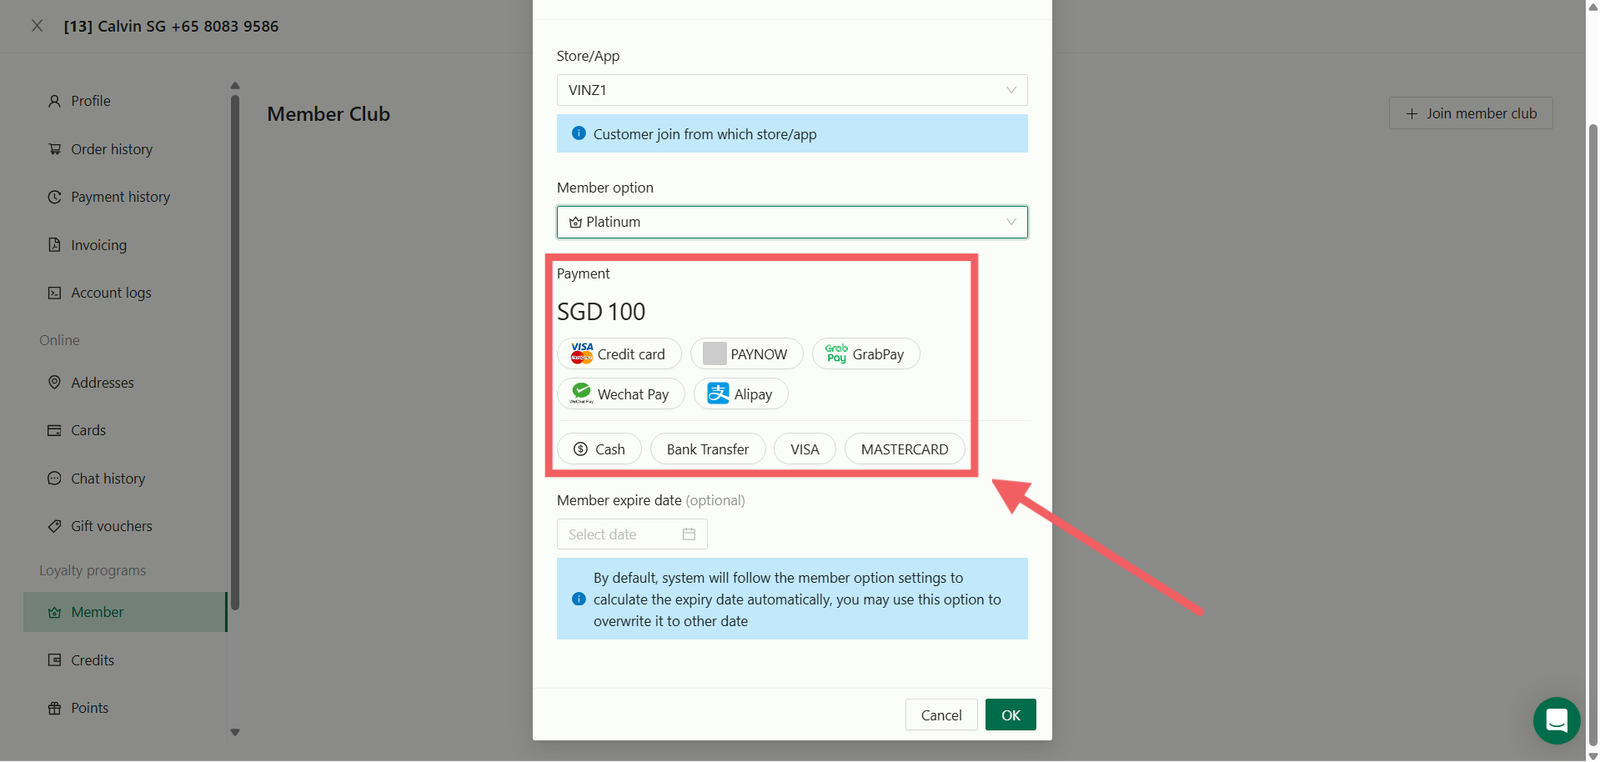
- If the membership has a price tag, the system will prompt for payment. Select the method (e.g., Cash, PayNow) and click OK.
4. Verification
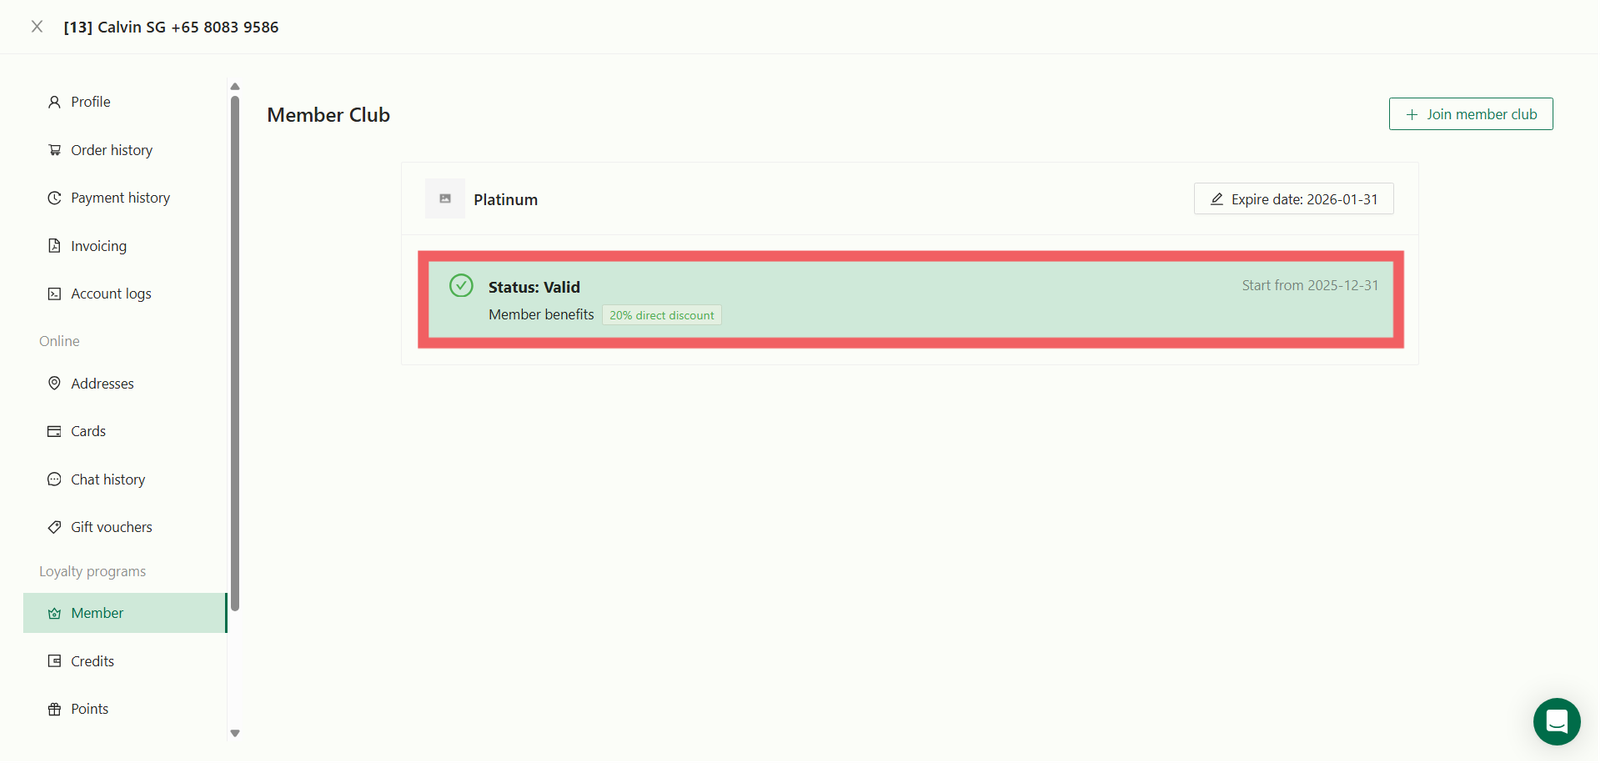
- Once saved, the status will change to Valid and the active benefits will be listed.
Give feedback
Up next
Setting Up Top-Up ProgramsGet paid before you work. Learn how to sell prepaid store credit packages with bonus incentives to secure immediate cash flow and lock in future sales.
Read more