How to create your Driver Account
In this article
The goal of creating your driver account is to coordinate all your assigned movements, including pickups, deliveries, and on-site services. It features customizable flows that will be adapted to fit the specific reality of your routes and operations.
Contents
Contents
Why is configuring your driver account important?
Setting up this account is the vital link between dispatch and delivery. It provides drivers with the secure login required to receive job assignments, view accurate locations on the map, and mark tasks as complete in real-time—giving admins full visibility into job progress as it happens.
Before You Begin: Check Prerequisites

1.Before setting up a driver account, there is one important check to make. Click on your profile icon and head to the "Billing" section.
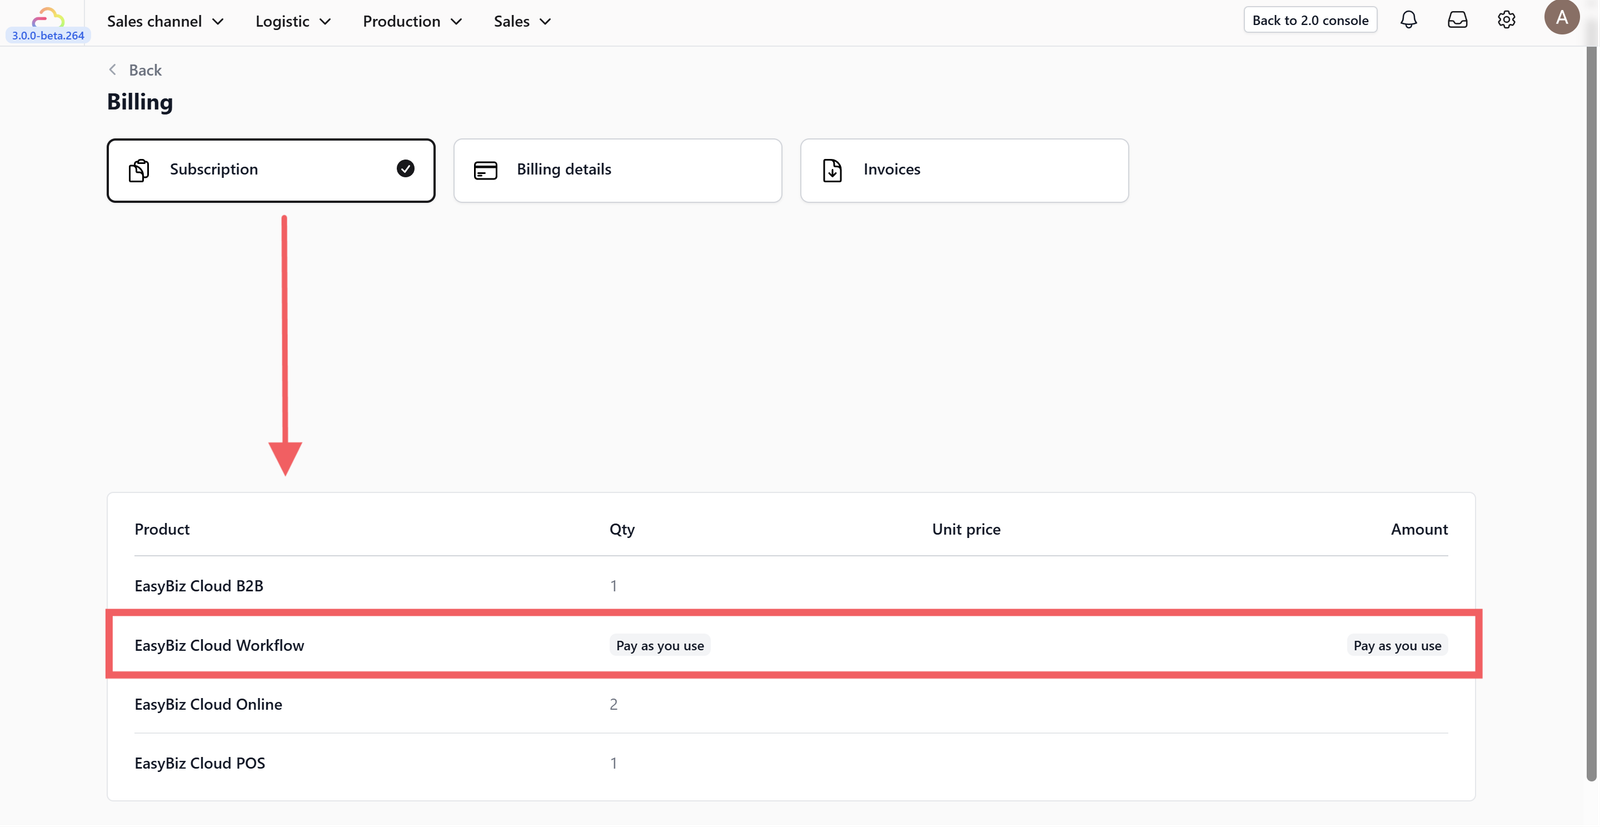
2.Click on your subscription details and ensure you are currently subscribed to the Easybiz Workflow plan.
Part 1: Setting Up a New Driver Account

3. Click on your profile icon again and head to the "Teammates" section. (You can also view existing coworker accounts on this page).

4.To create a new driver account, click the + Add Teammate button.

5. Enter the new driver's email address and the display name you want to appear within the Easybiz system.
Part 2: Configuring Credentials and System Access

6. Once added, the system will redirect you to the settings page for that new account. You need to send a sign-in email so the driver is notified of their credentials and initial password. Also, add the driver's phone number here.

7. You can reset the password, as the initial one is system-generated. When you click "Reset Password," you can directly input a new password in the field provided.

8. Once reset, the new password will be displayed.

9. Scroll down to find the "System Access" section. Since this guide is for creating a driver account, select Driver App from the dropdown menu.

10.Click the Add Access button.
Part 3: Assigning Jobs to Drivers (Admin View)

11.Navigate to your home screen, click on the "Logistics" navigation menu, and select the Job Table dropdown.

12.Under the "Assigned Worker" column, you can assign each order to an available worker using the dropdown options shown.
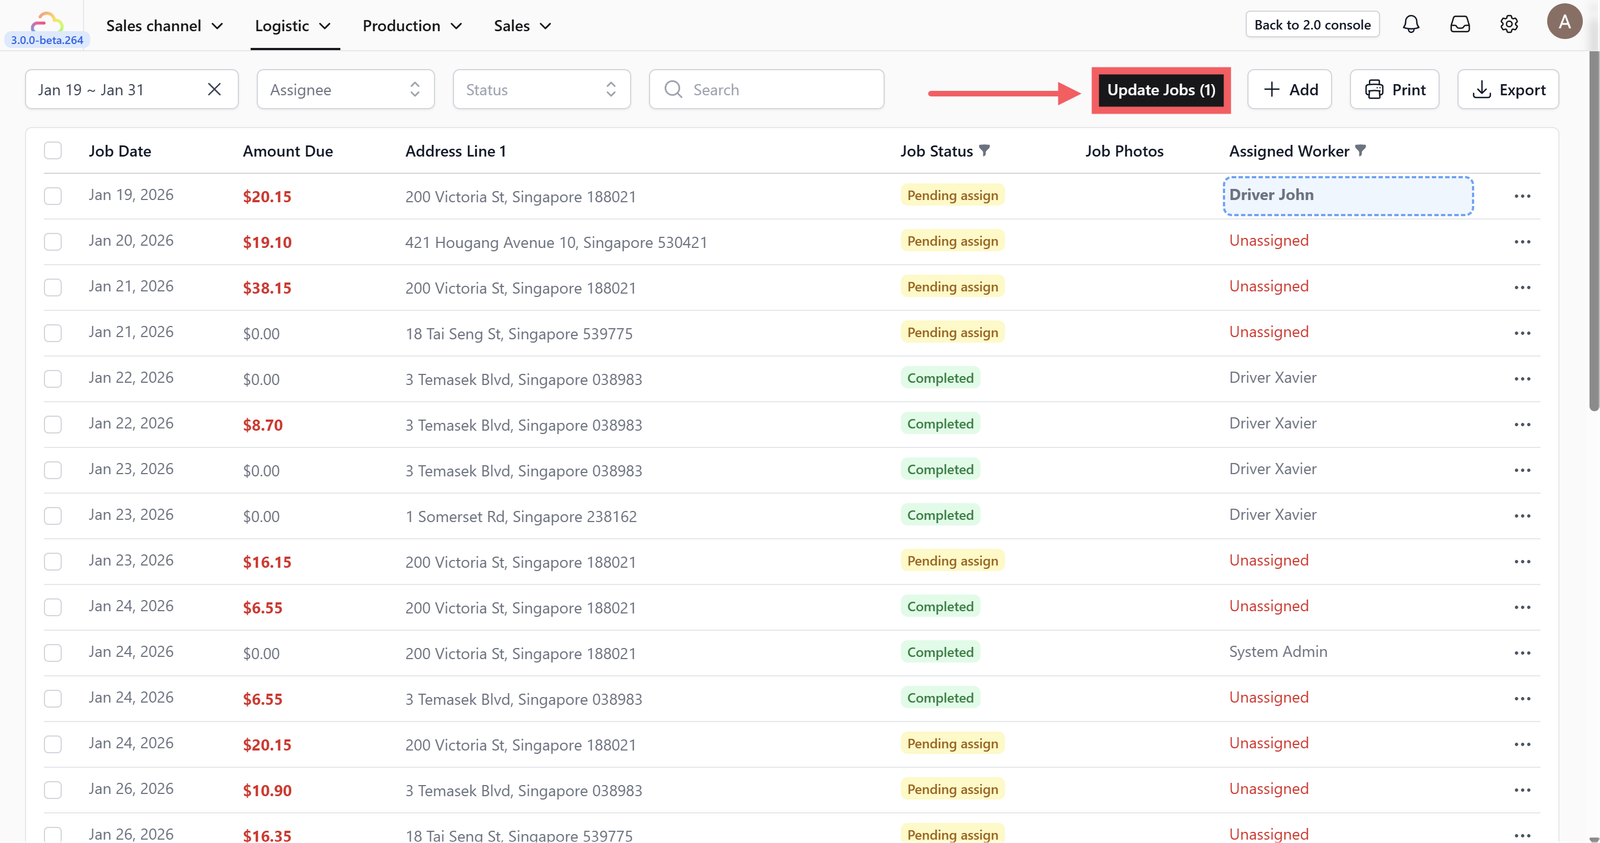
13.Don't forget to click Update Jobs to save your assignments.
Part 4: Driver Guide-Using the Mobile App

14. For the driver's workflow, they need to install the Easybiz Workflow mobile app, available on the Google Play Store or Apple App Store.
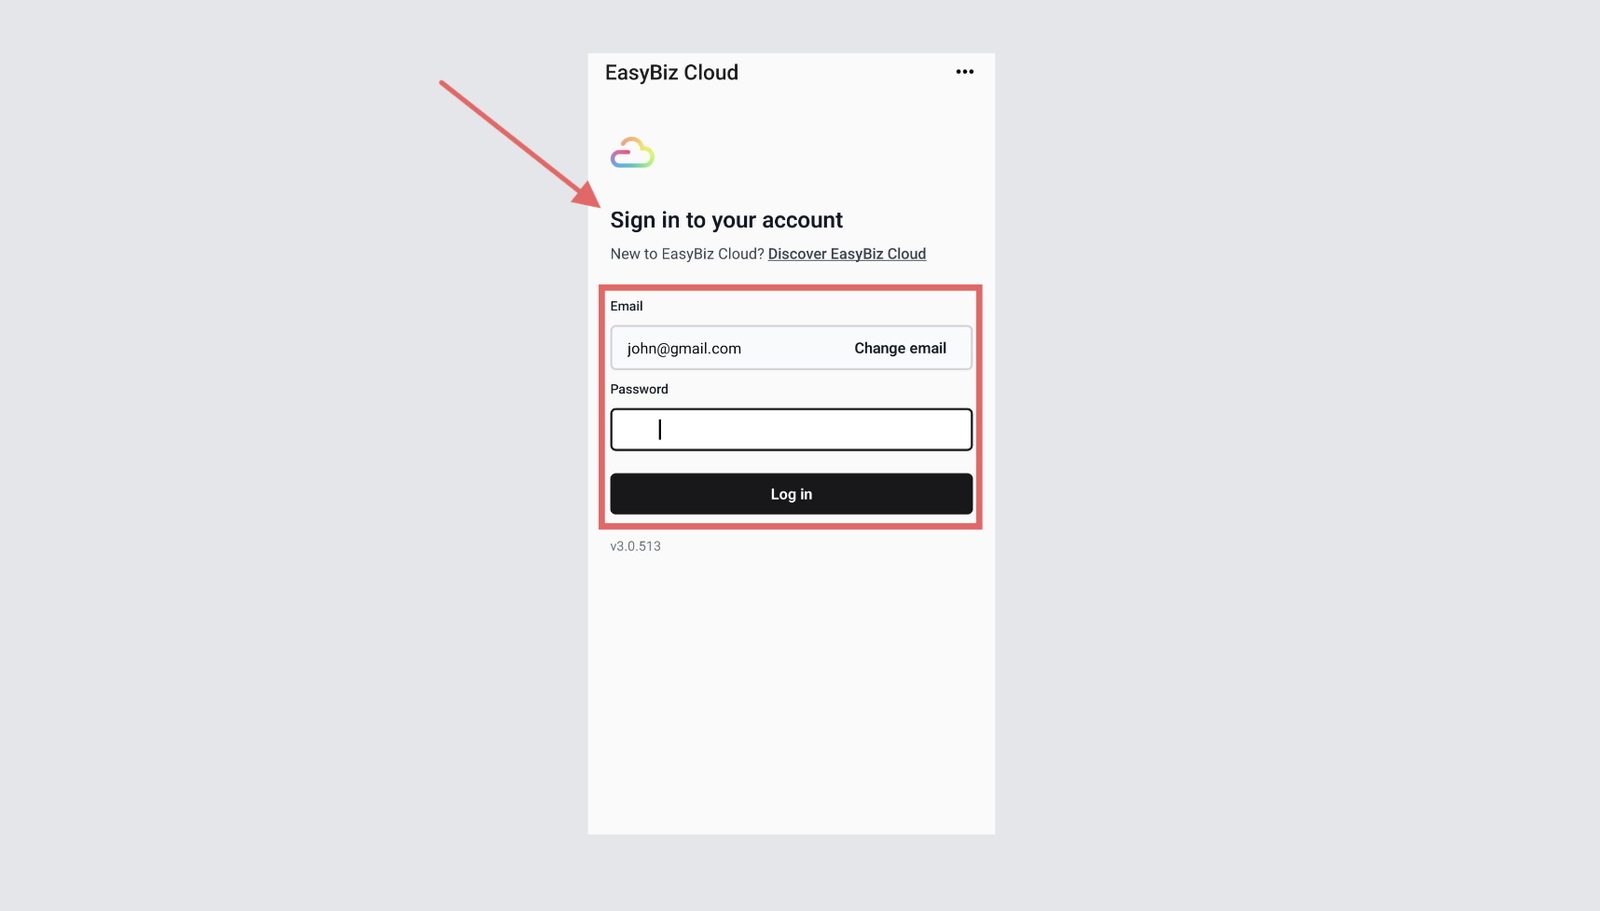
15. Once installed, the driver must sign in using the credentials set up in Part 2 above.

16. After signing in, the driver can select a date to see the jobs scheduled for them. When a job is picked up or delivered, they should tap the green checklist icon to complete it.
Part 5: Tracking Job Status (Admin View)

17. Back on the 3.0 web console, admins can check job status by clicking the "Sales" navigation menu and choosing the Orders dropdown.

18.Click on the specific order number under the "Order Number" column.

19.Scroll down within the order details to find the status of the pickup and delivery.
Give feedback

Up next
Loyalty & RewardsA quick tour of EasyBiz's three loyalty tools so you can pick the right one and get started today.
Read more