Create an Agent Price List
In this article
Different agents may have different rates depending on what was agreed upon. An Agent Price List lets you set the exact pricing for each agent, so when an order is created under them, the system uses the correct rates automatically, no manual calculations needed. This guide walks you through how to create a price list and link it to your agents.
Contents
Contents
What is an Agent Price List?
An Agent Price List is a list of your services and/or products with the rates you have agreed on with a specific agent. Once you link a price list to an agent, every order created under them will automatically use those rates. This saves your team from having to look up or manually enter prices each time.
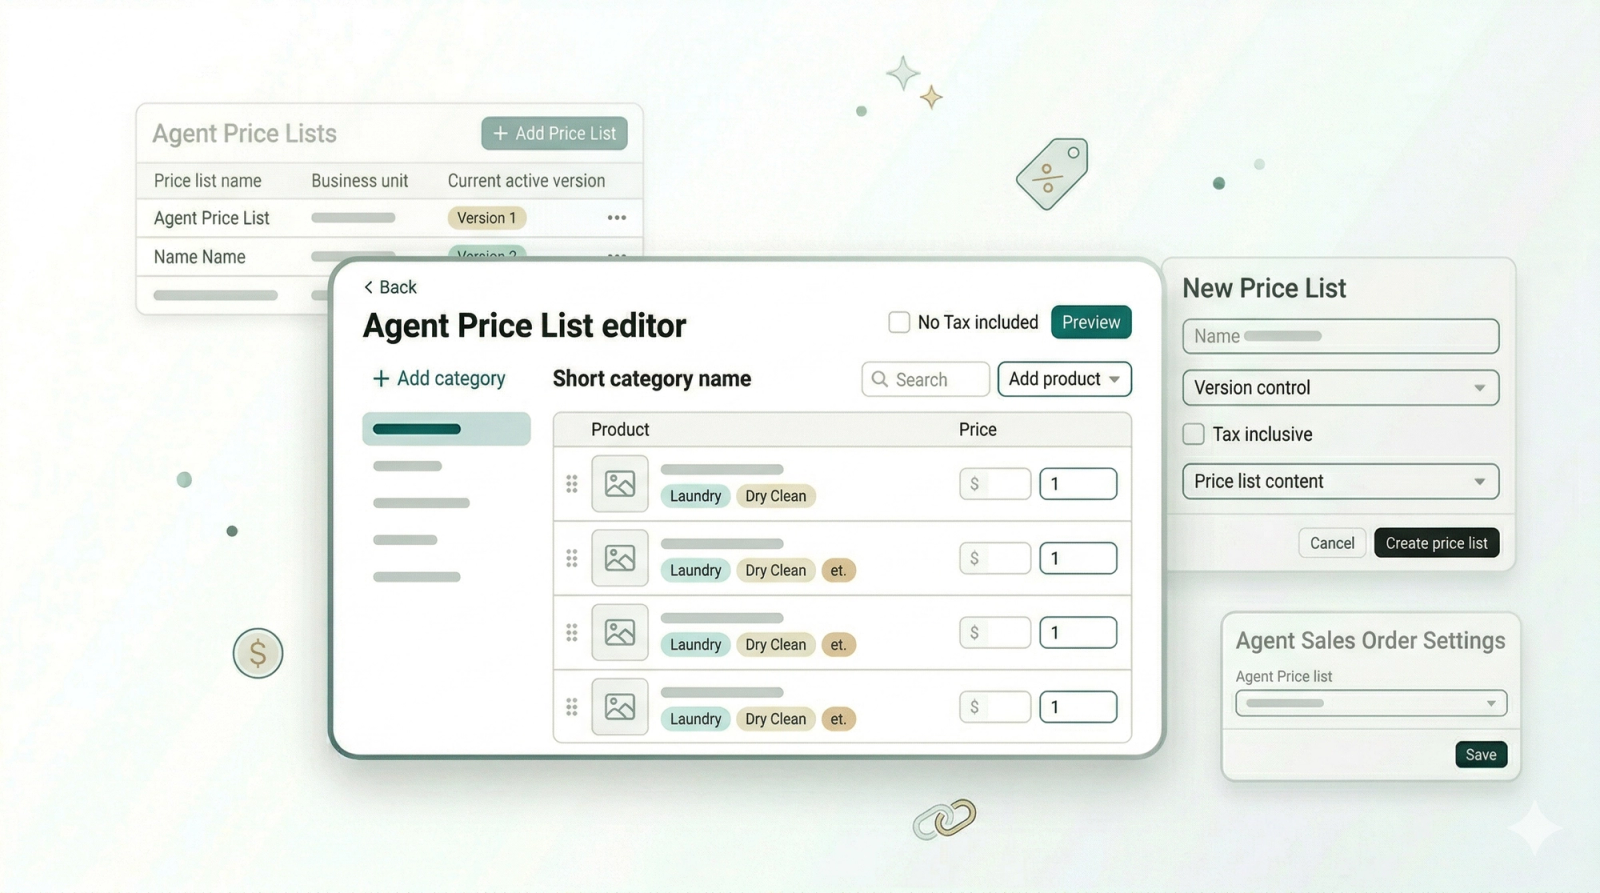
Create a new Agent Price List
There are two ways to navigate to the price list:
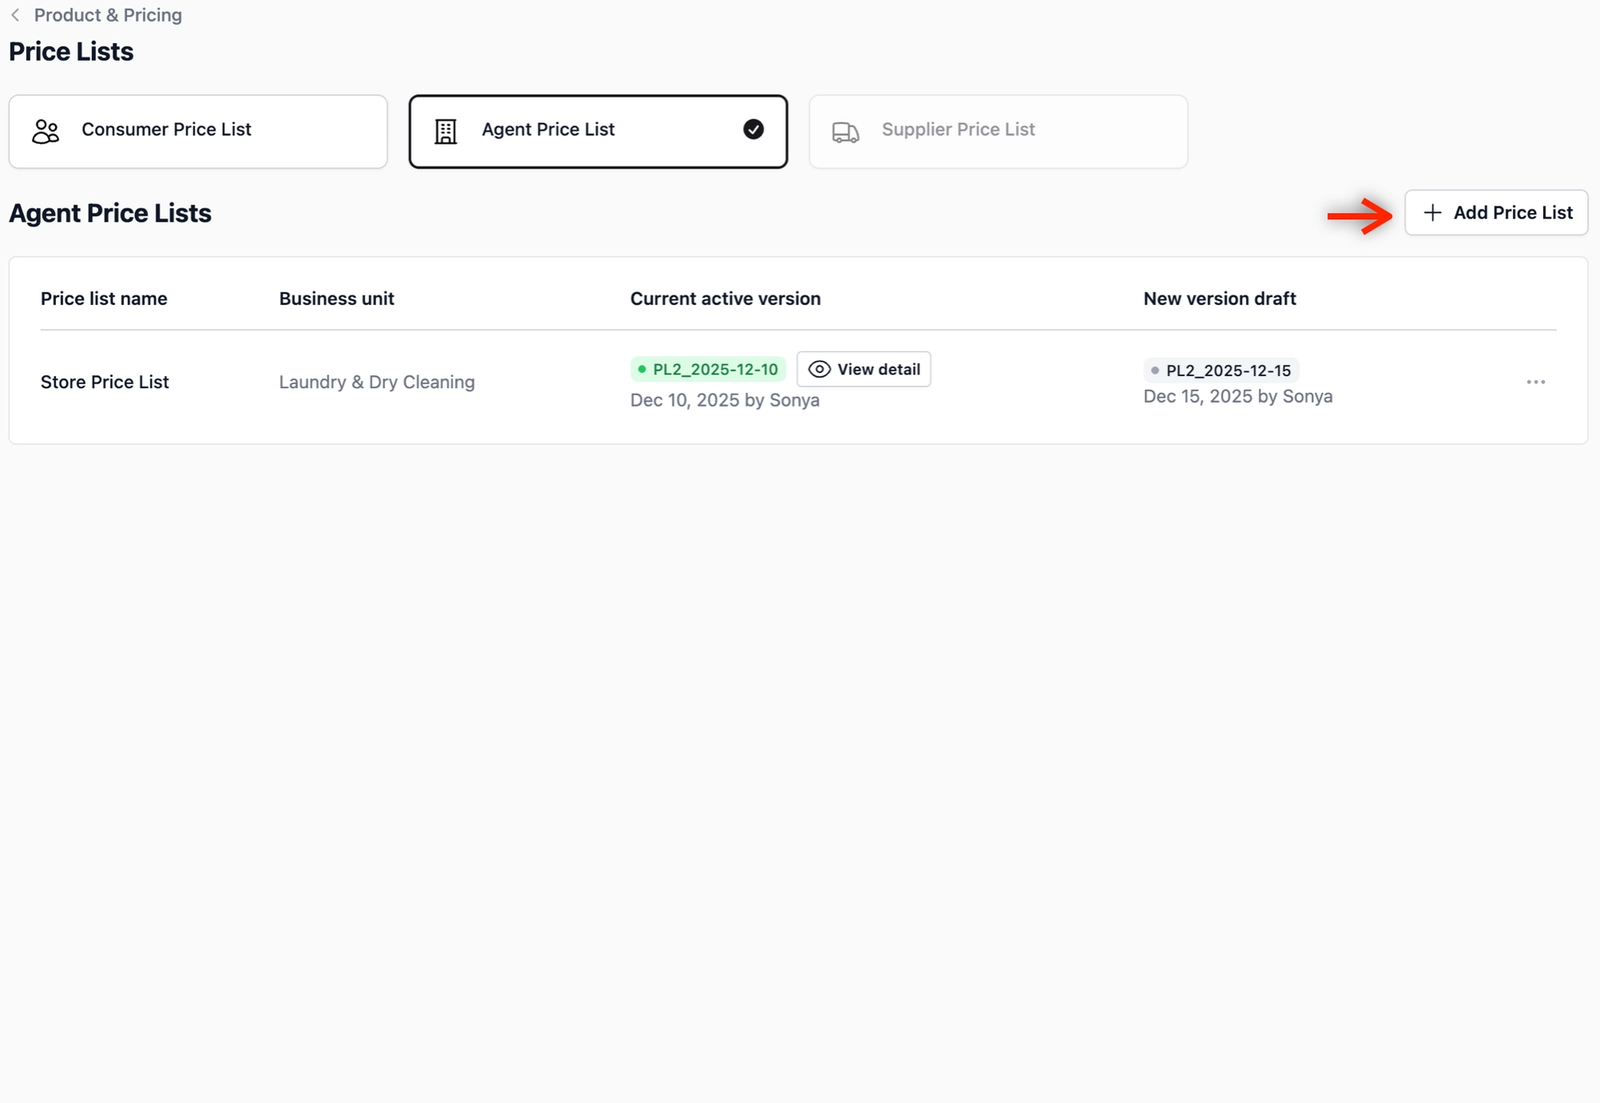
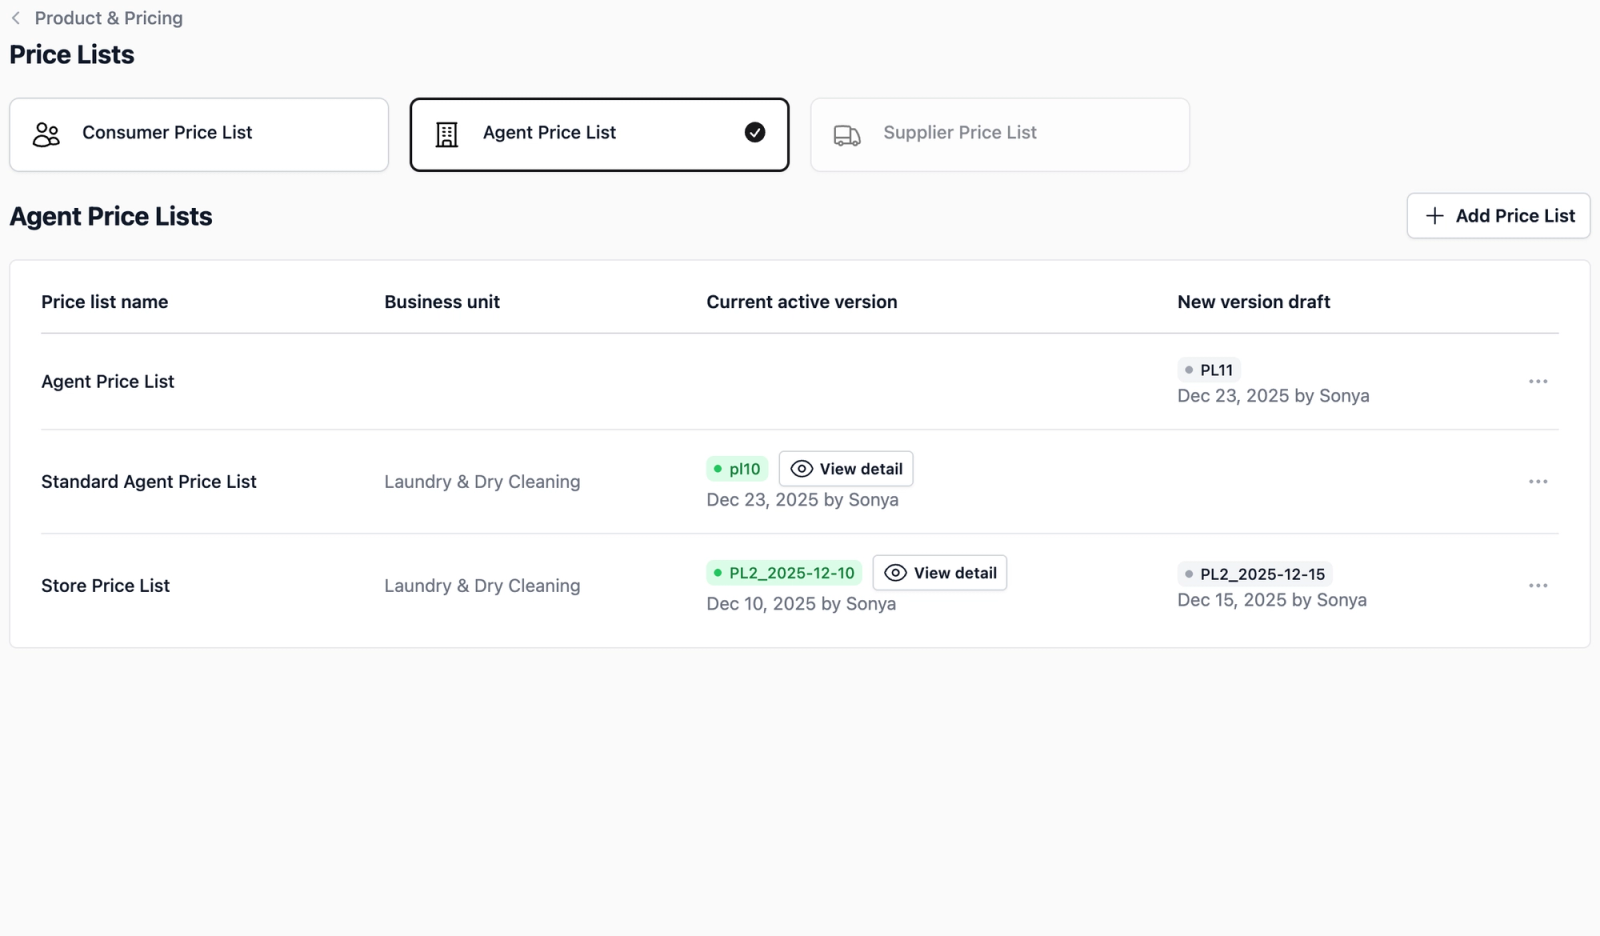
- From home screen: Click the Gear Icon → Products & pricing → Price Lists. This will open a new page. Click on the Agent Price List tab.
- From B2B: Click on Agent Price List located at the top right of your screen.
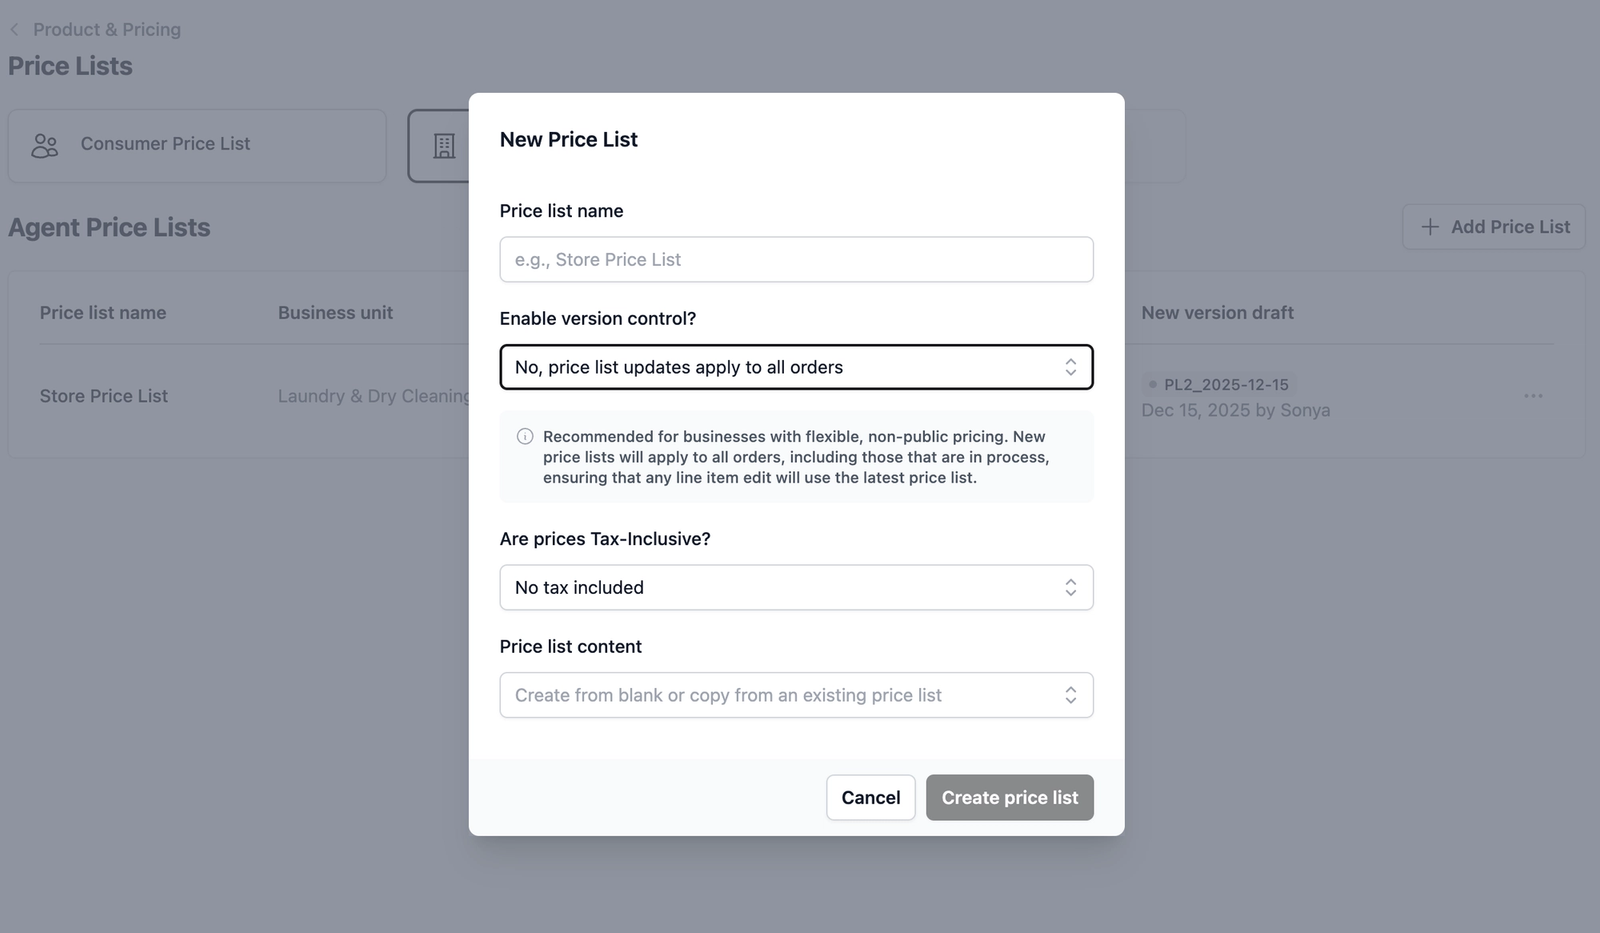
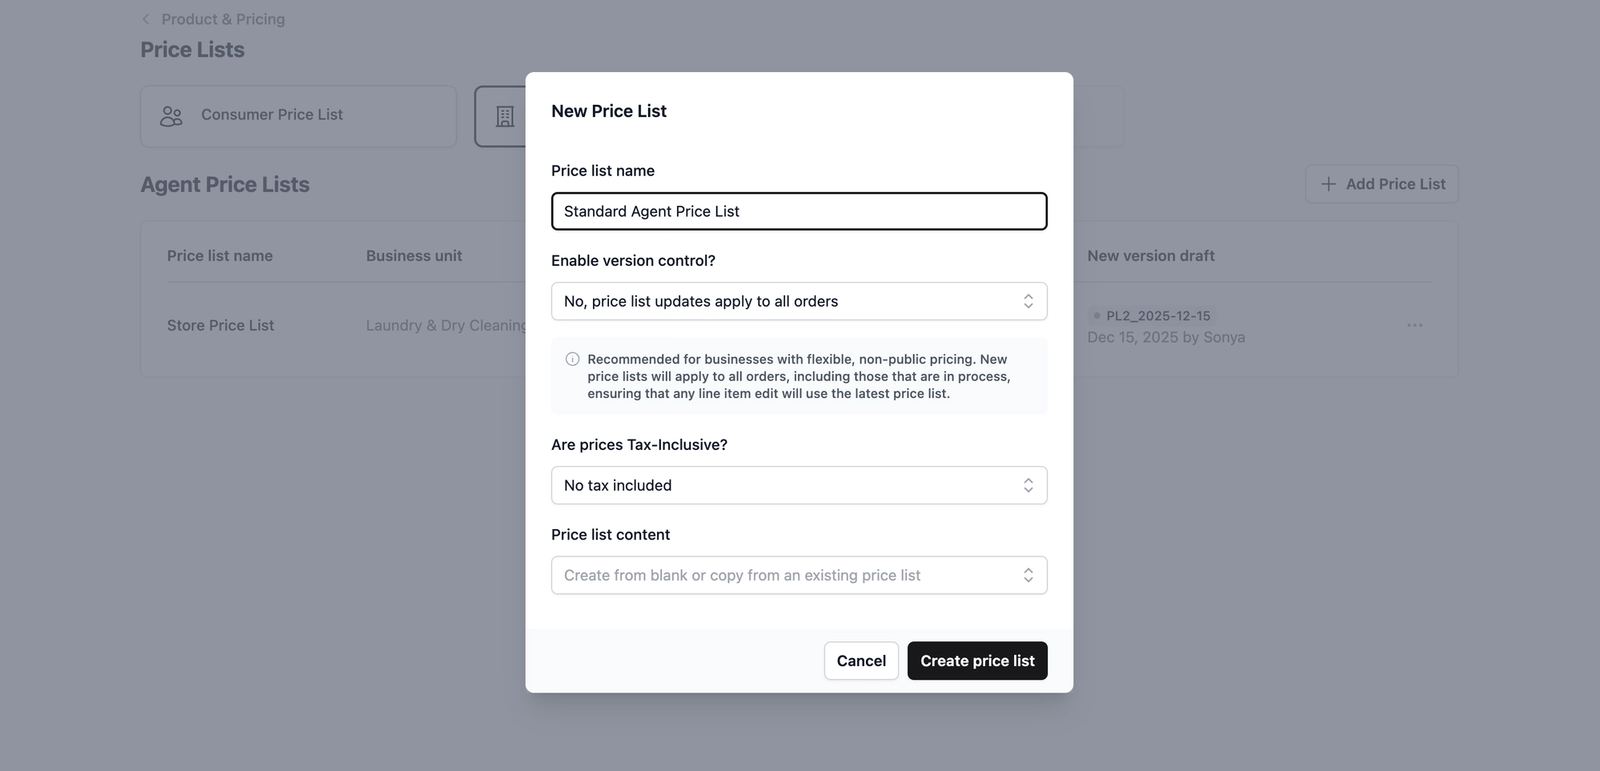
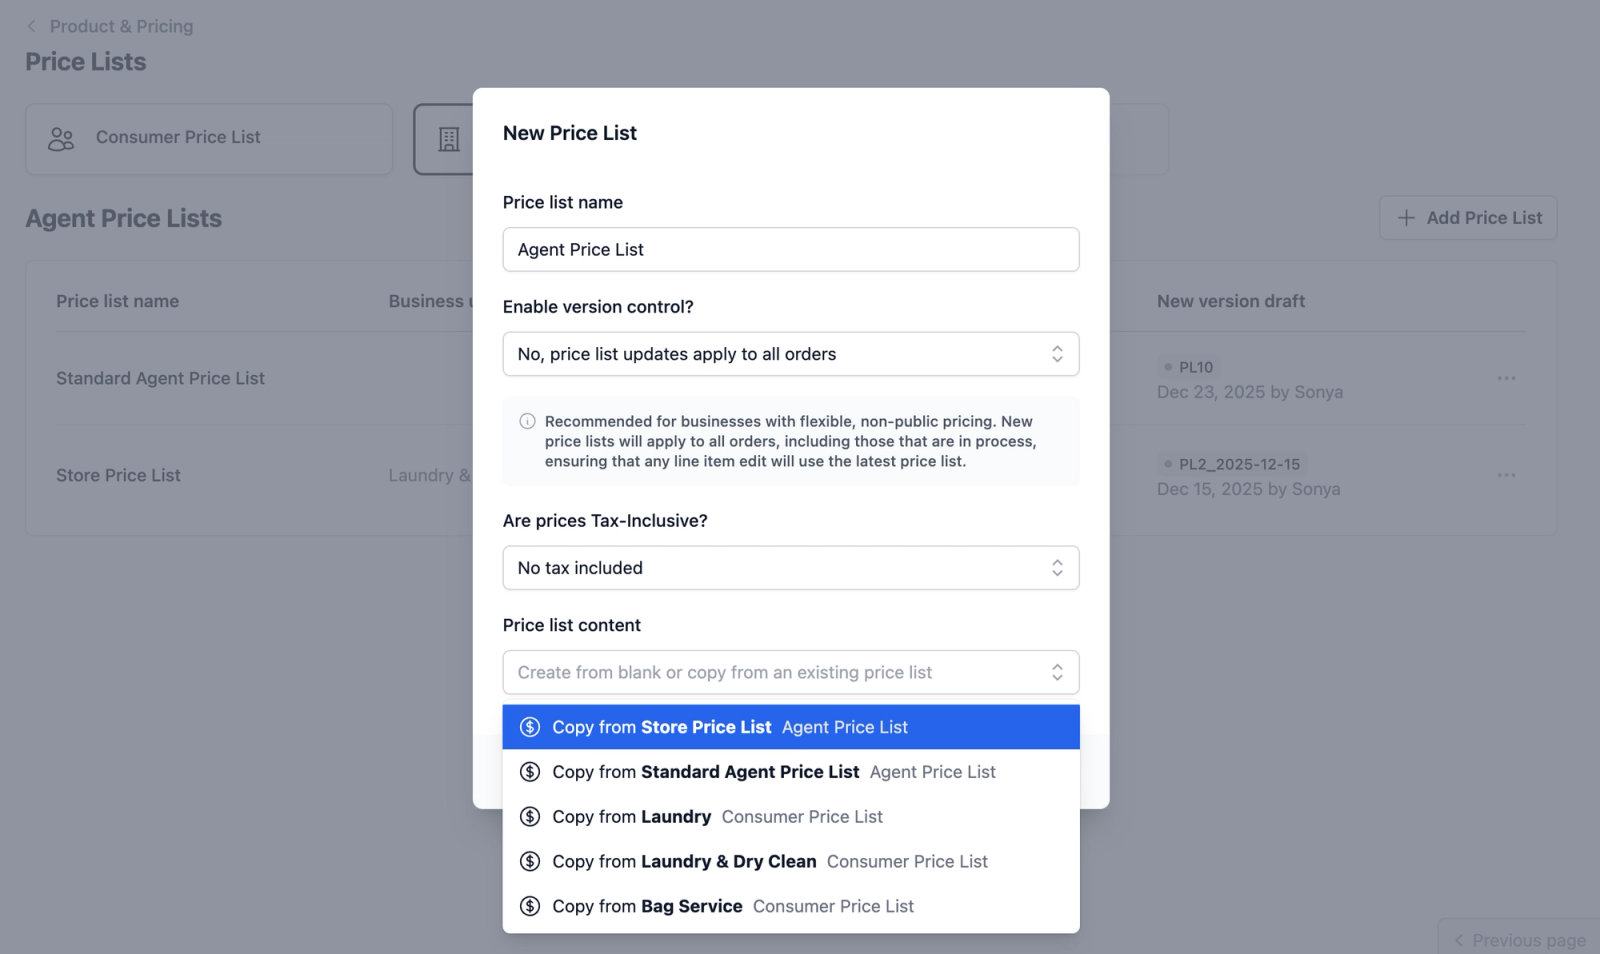
To create a new agent price list in EasyBiz Cloud, click on the + Add Price List button. A pop-up will appear for you to configure the initial setup of your list.
Here is how to set up your fields in the pop-up form:
- Price list name: Enter a name that helps you identify this price list (e.g., "Standard Agent Price List").
- Enable version control?: Choose whether you would want the price list update to apply to all orders or only subsequent orders.
- Are prices tax inclusive?: Select your tax structure from three options: No tax included, Goods and Services Tax (GST) included, or Value-Added Tax (VAT) included.
- Price list content: To save time, select an existing list to copy its items. Leave this empty to build a brand-new price list from scratch.
Select Your Setup Path
Path A: Building a New Price List from Scratch
Ideal for setting up a completely new pricing structure.
- Configure the Form: In the New Price List form, fill in the Price list name field and give it a meaningful name (e.g., "Standard Agent Price List"). We will leave the rest of the fields empty for now, but you can fill in any others needed for your specific use case.
- Create price list: Click the Create price list button. This will open up the editor where you are able to add your service items/products.
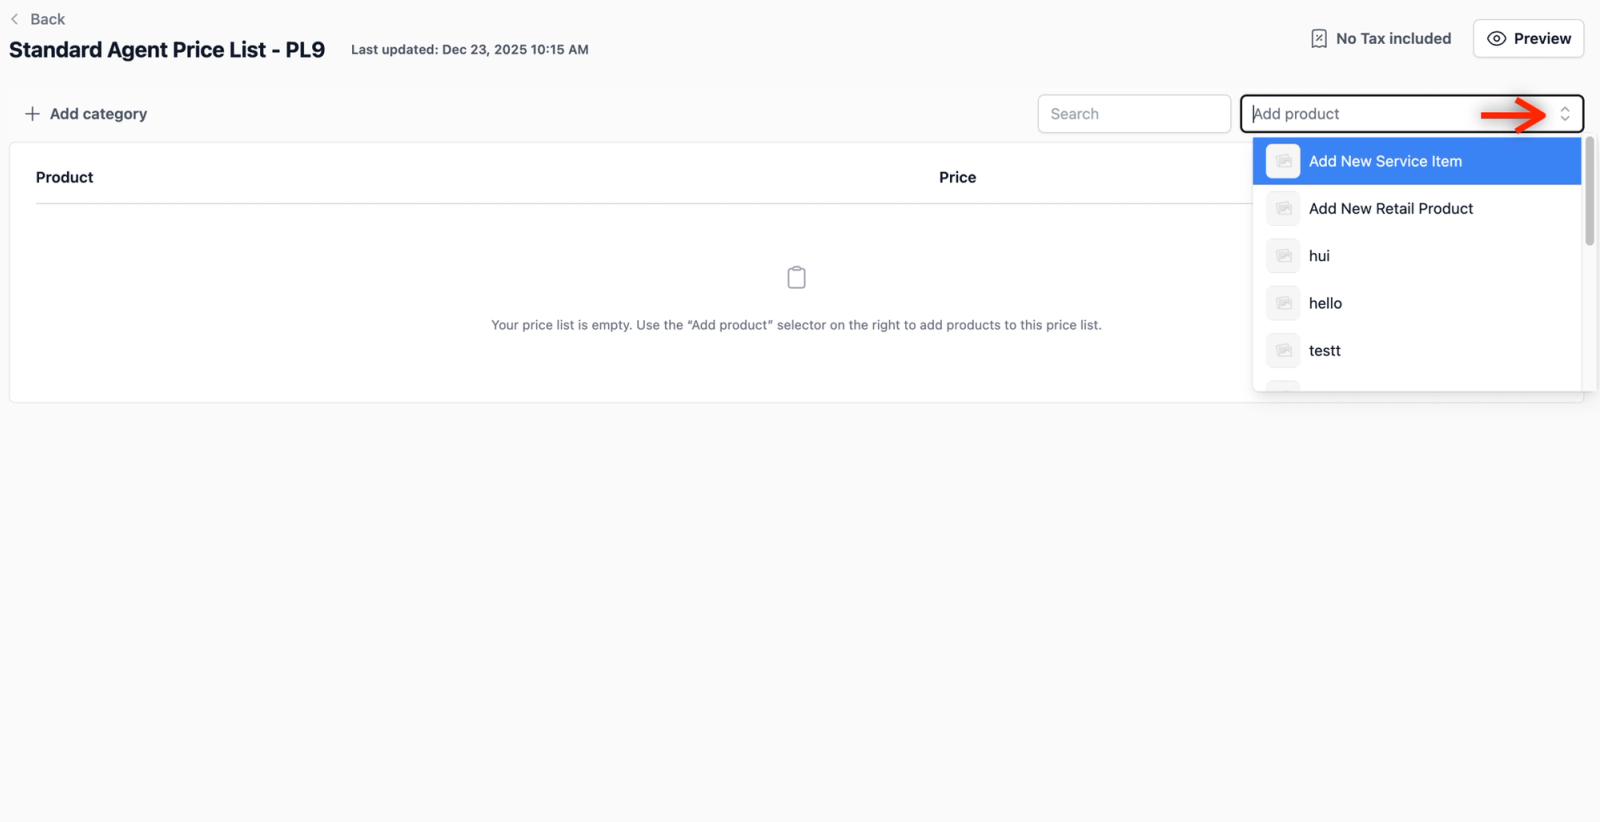
- Select Item Type: In the editor, click the dropdown button to choose your item. You can select a new service item, new retail product, or an existing product.
- Configure Item Details: Click on your preferred option. If you select a new service item or product, a pop-up form will appear for you to configure the details of your new product. For this example, we will add a new item.
Here is how to fill in the fields for your new item:
- Name: Enter the service item name.
- Unit label: Select the appropriate unit from the dropdown (e.g., pcs, pair, set, etc.).
- Fulfillment: Select one-time or recurring based on your specific use case.
- Image: You are able to upload an image of the product for easier identification.
- Variants: Use this to add a variant of your service item. For example, a "Dress" item might have different types such as long or evening.
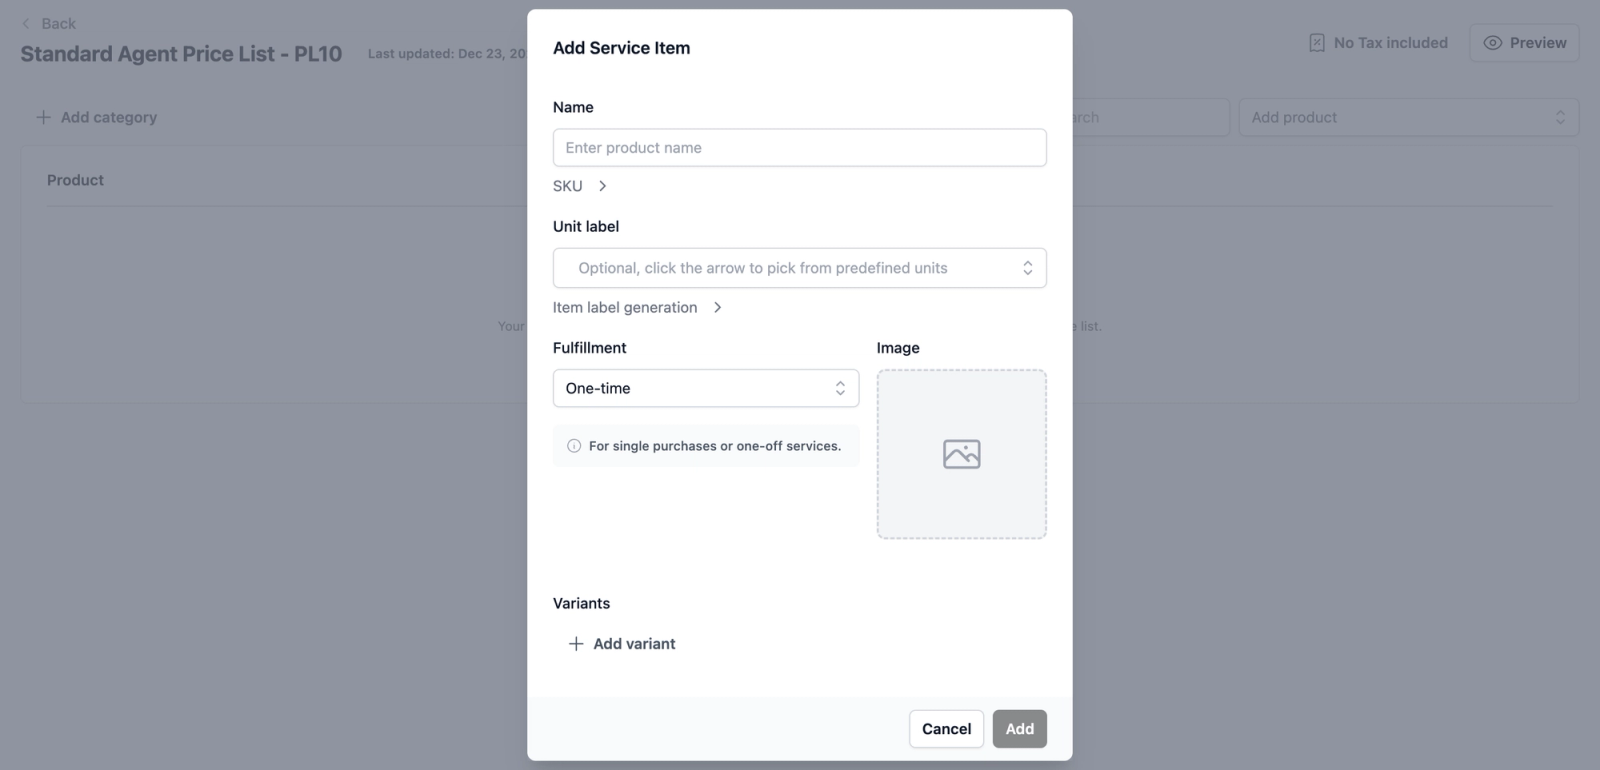
Once you have finished entering the details, click the Add button on the bottom right of the form to add your service item. It should now appear as a new item in your price list.
Path B: Creating a New List by Duplicating
The fastest way to create a new list when rates are similar to an existing one.
- Configure the Form: Similar to Path A, give your new list a unique Price list name.
- Select Content to Copy: In the Price list content field, select the existing price list you wish to use as a template.
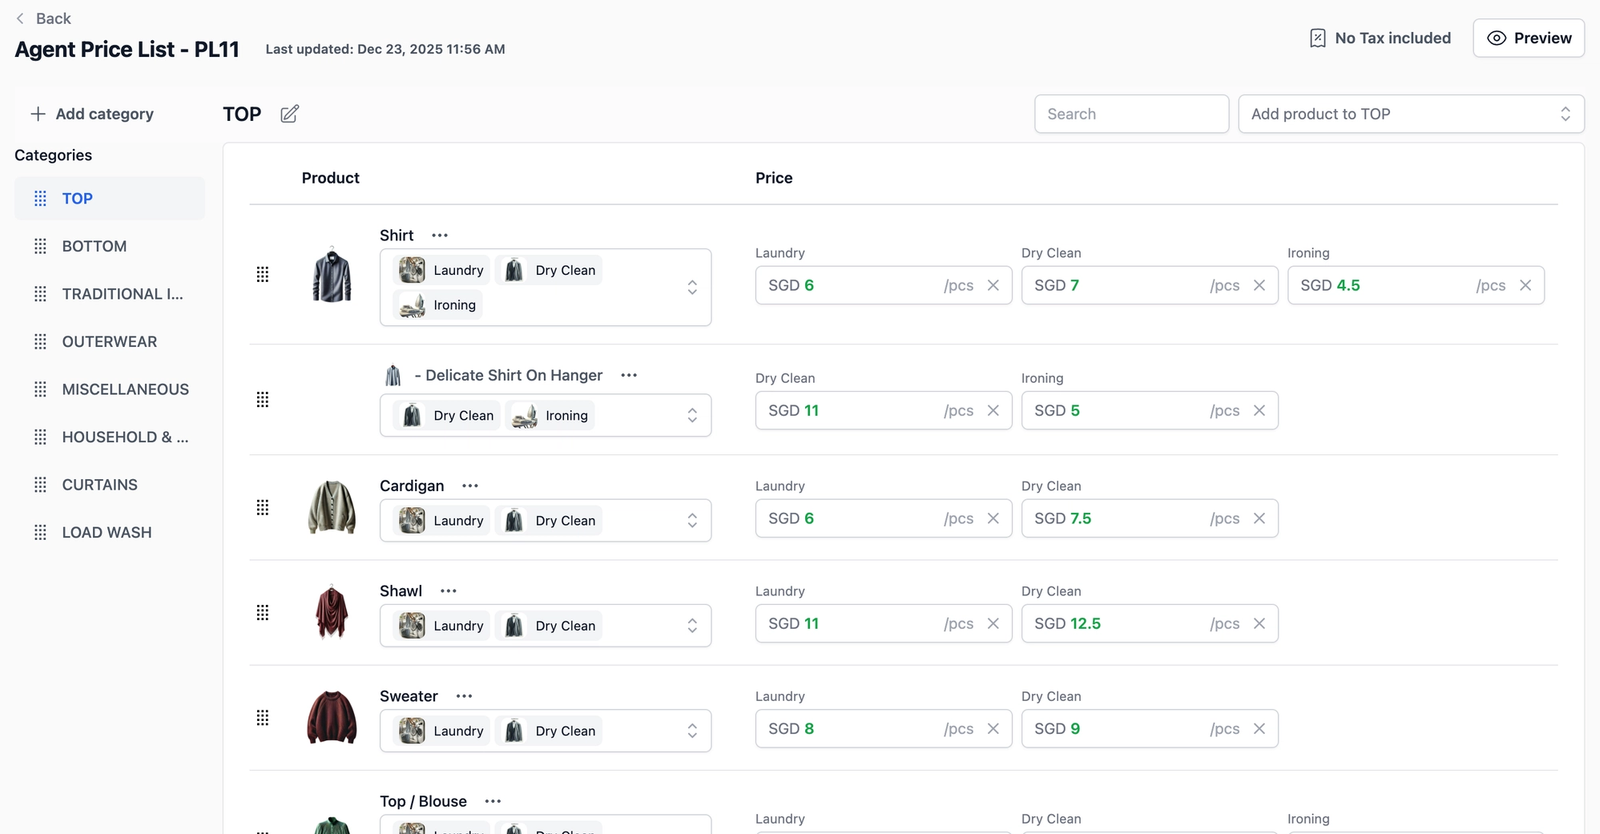
Quick Adjustments: Once you click the Create price list button, the editor opens with all items and rates pre-filled. Simply tweak the specific rates that differ for this new list to match with your agent rates.
Publishing Your Agent Price List
Once you have finished adding items and adjusting rates in the editor, your price list is still saved as a Draft. To make these rates available for use in orders, you must publish the list.
First, click on the Preview button. This allows you to review the list and ensure all product or service items appear exactly as intended.

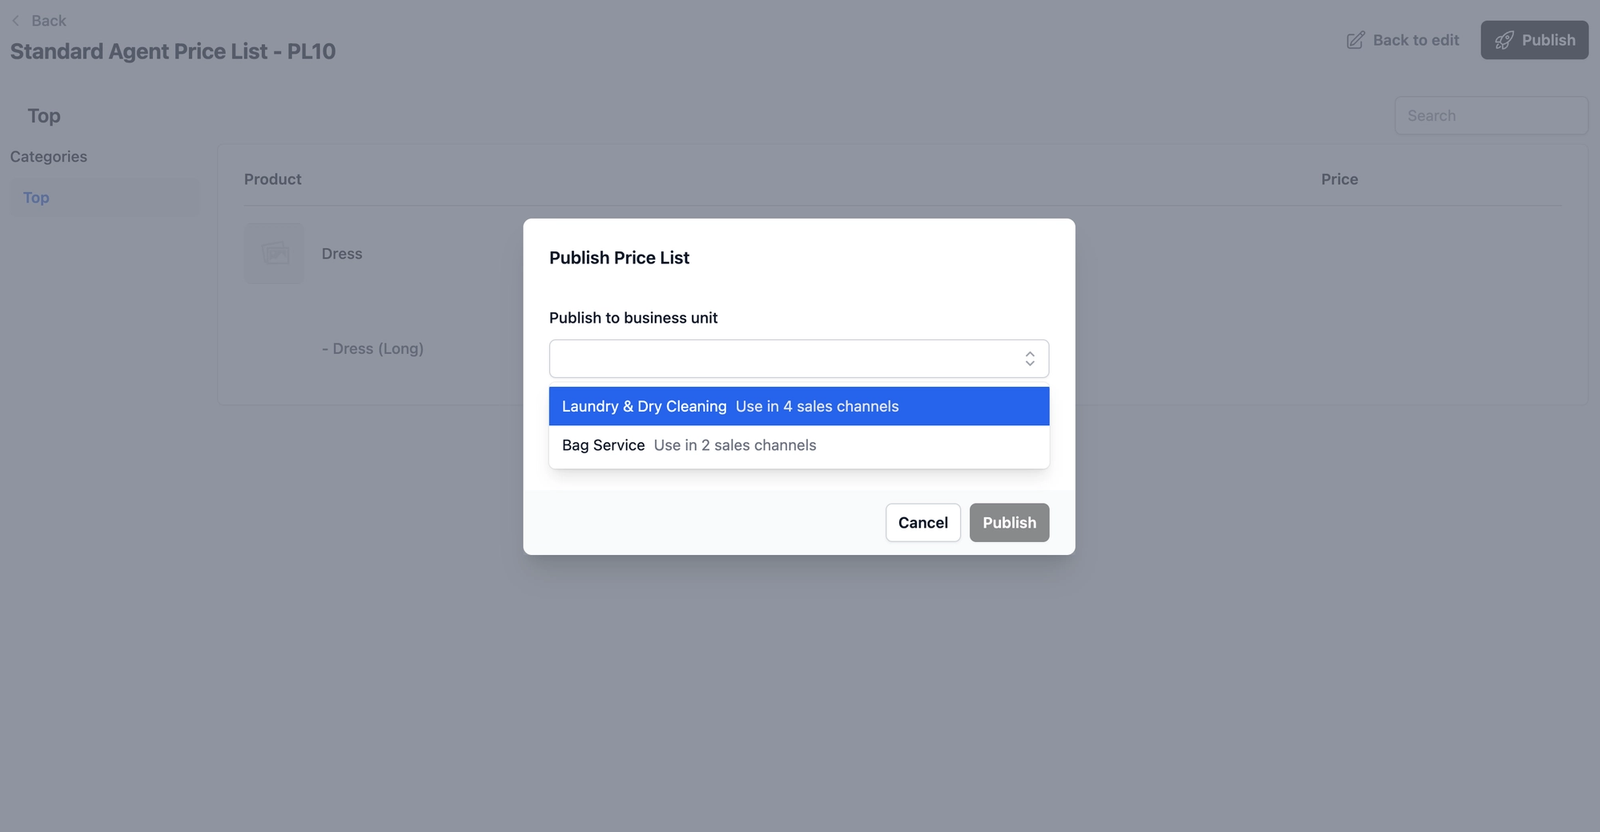
When you are satisfied with how the new agent price list looks, click on the Publish button.

A small pop-up form will appear. Select which Business Unit(s) you would like this agent price list to be published at. This ensures the pricing is applied to that specific business unit.
Once selected, click the Publish button again to confirm the publication.
Your price list is now active and ready to be linked to your agents.
Assigning Price Lists to Agents
Linking a price list to an agent ensures that whenever an order is created for them, the system automatically pulls the correct negotiated rates.
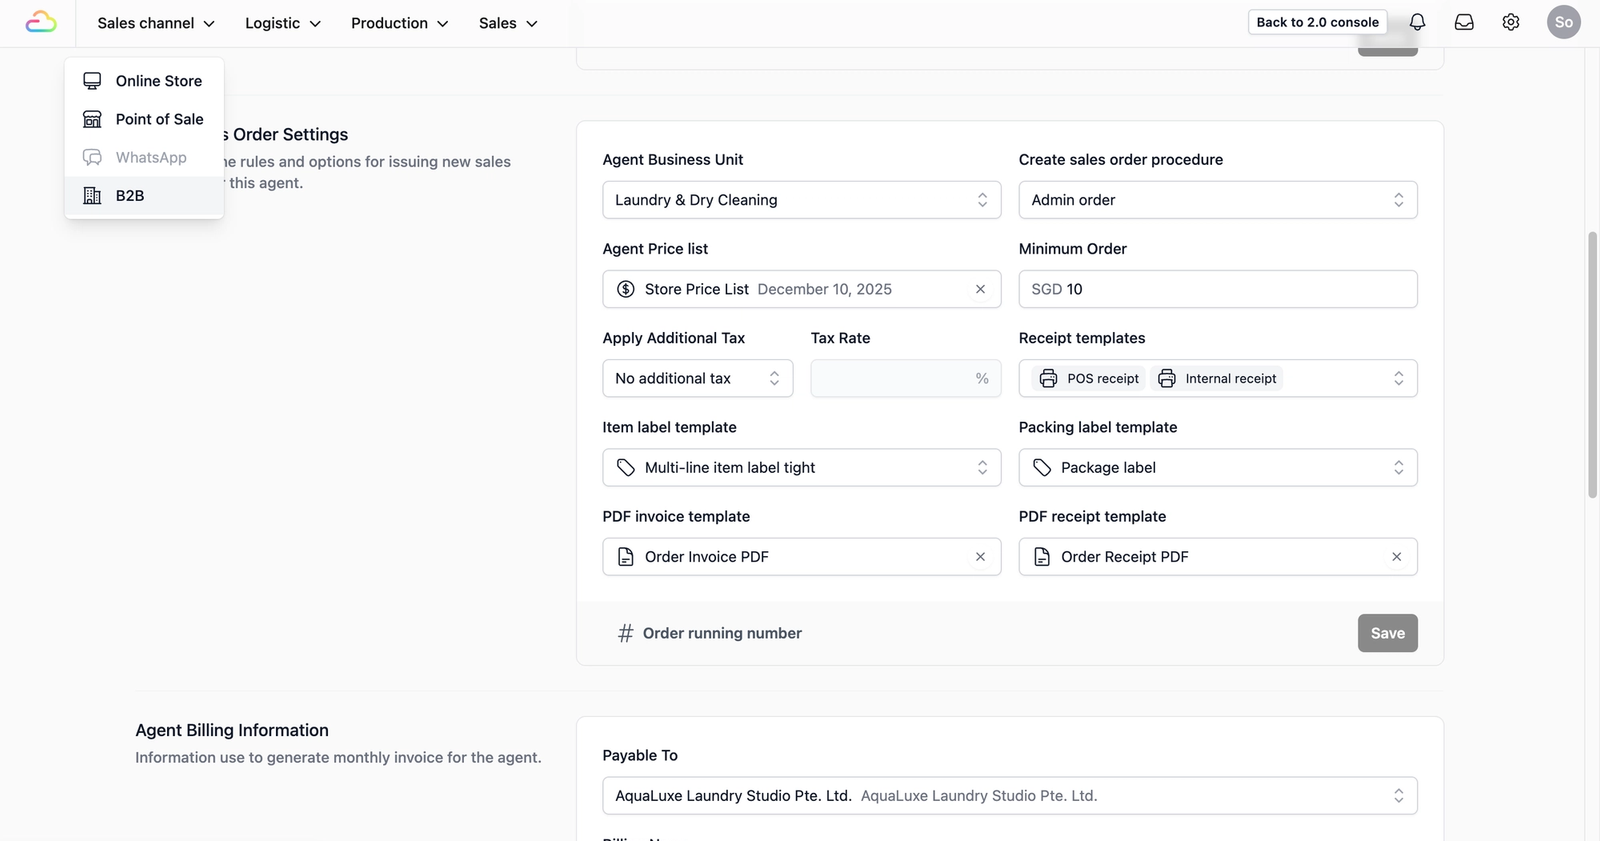
Head back to the B2B page by clicking on Sales Channel on the top navbar. From the dropdown that appears, click on B2B.
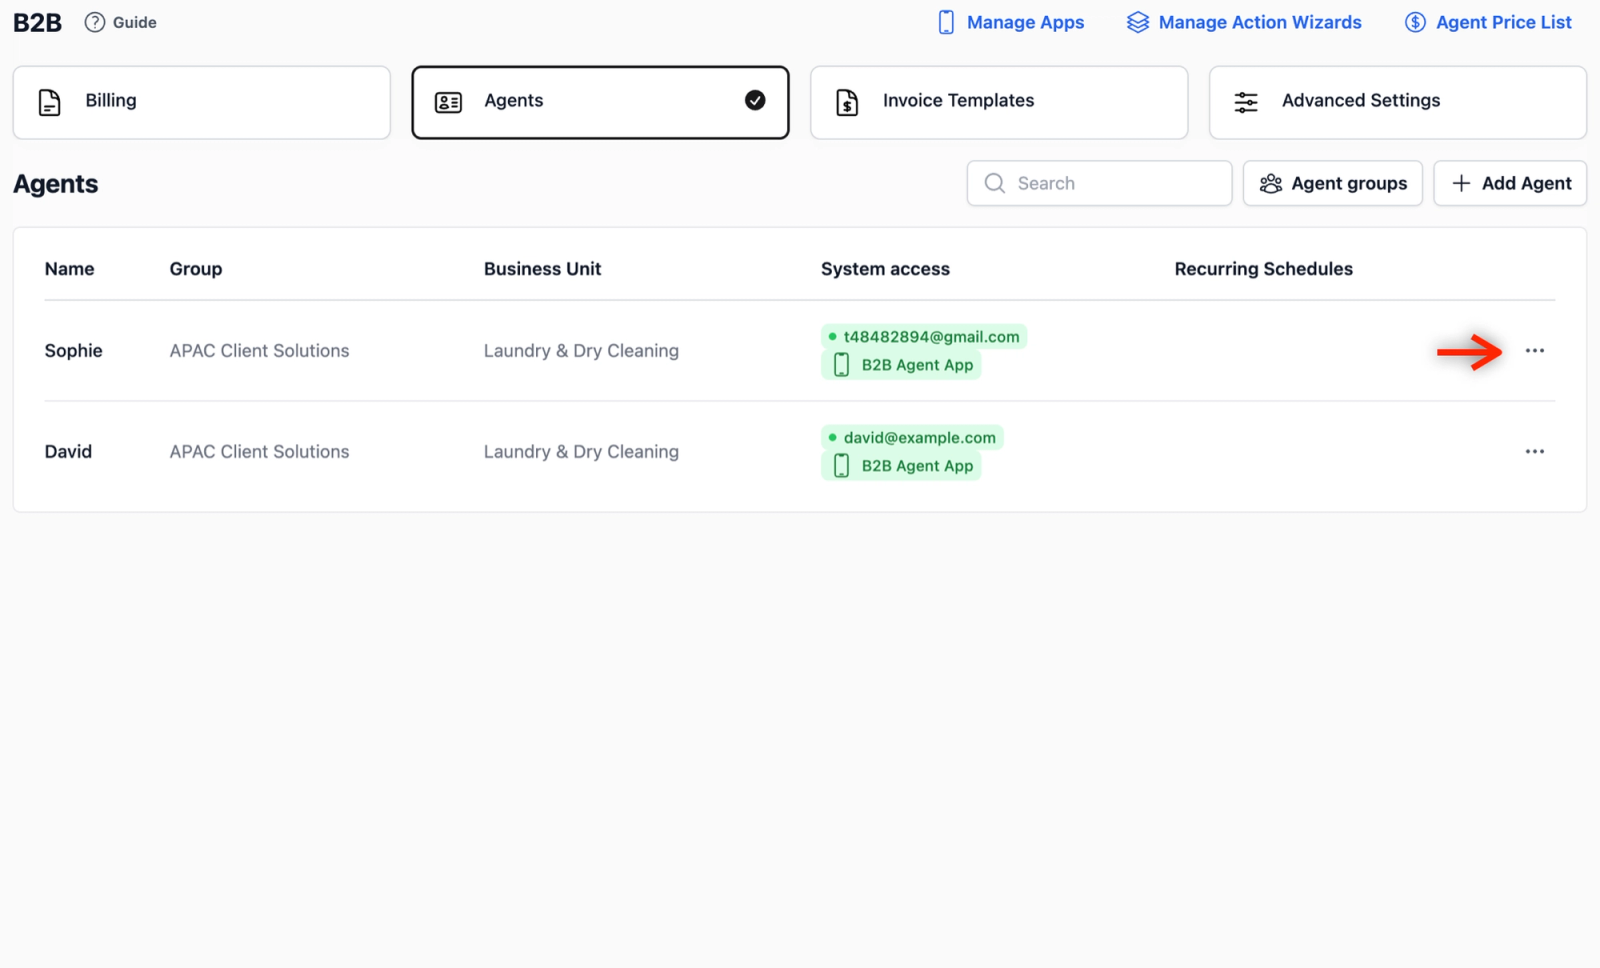
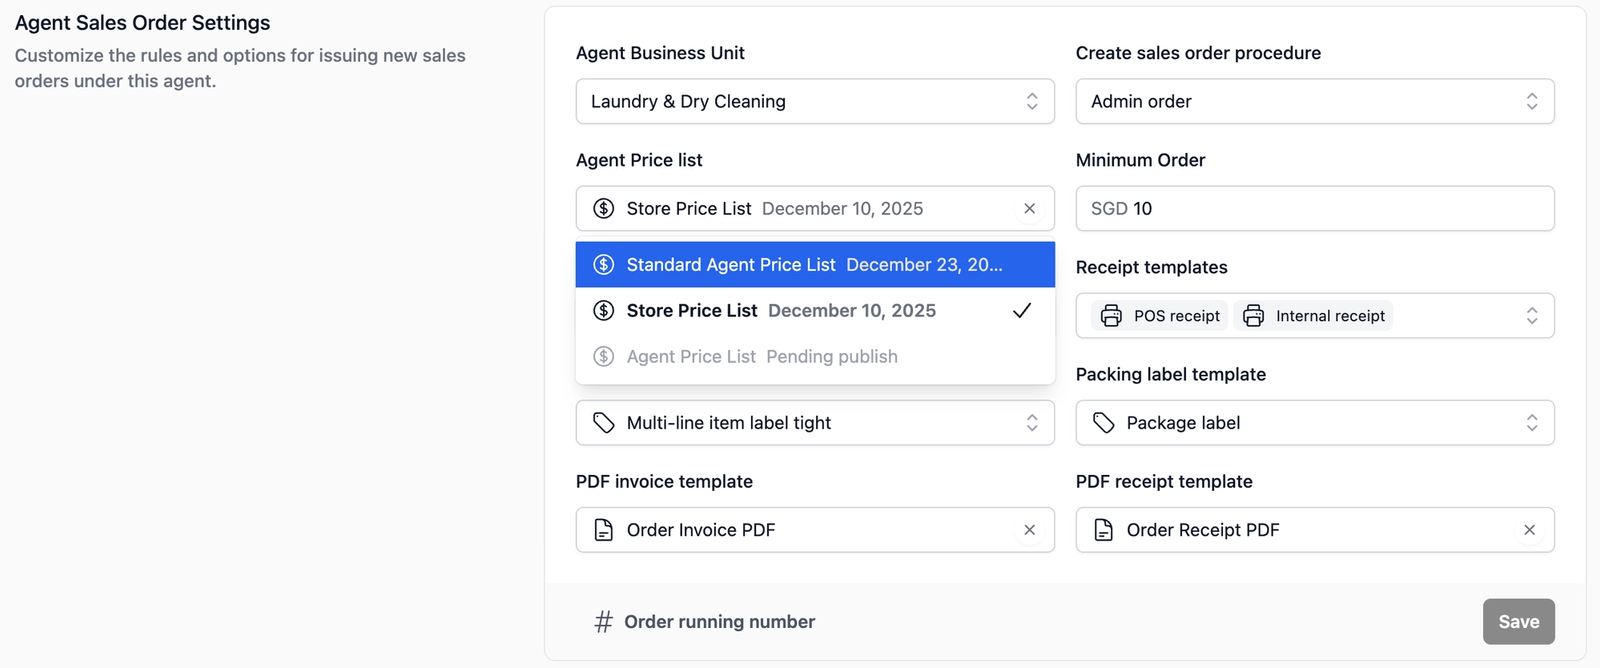
Once you are on the B2B page, click on the Agents tab to view your full list of registered agents. In the table view, locate the agent you want to apply the new agent price list to and click on the ••• (Action Menu) on the far right, and select Edit.
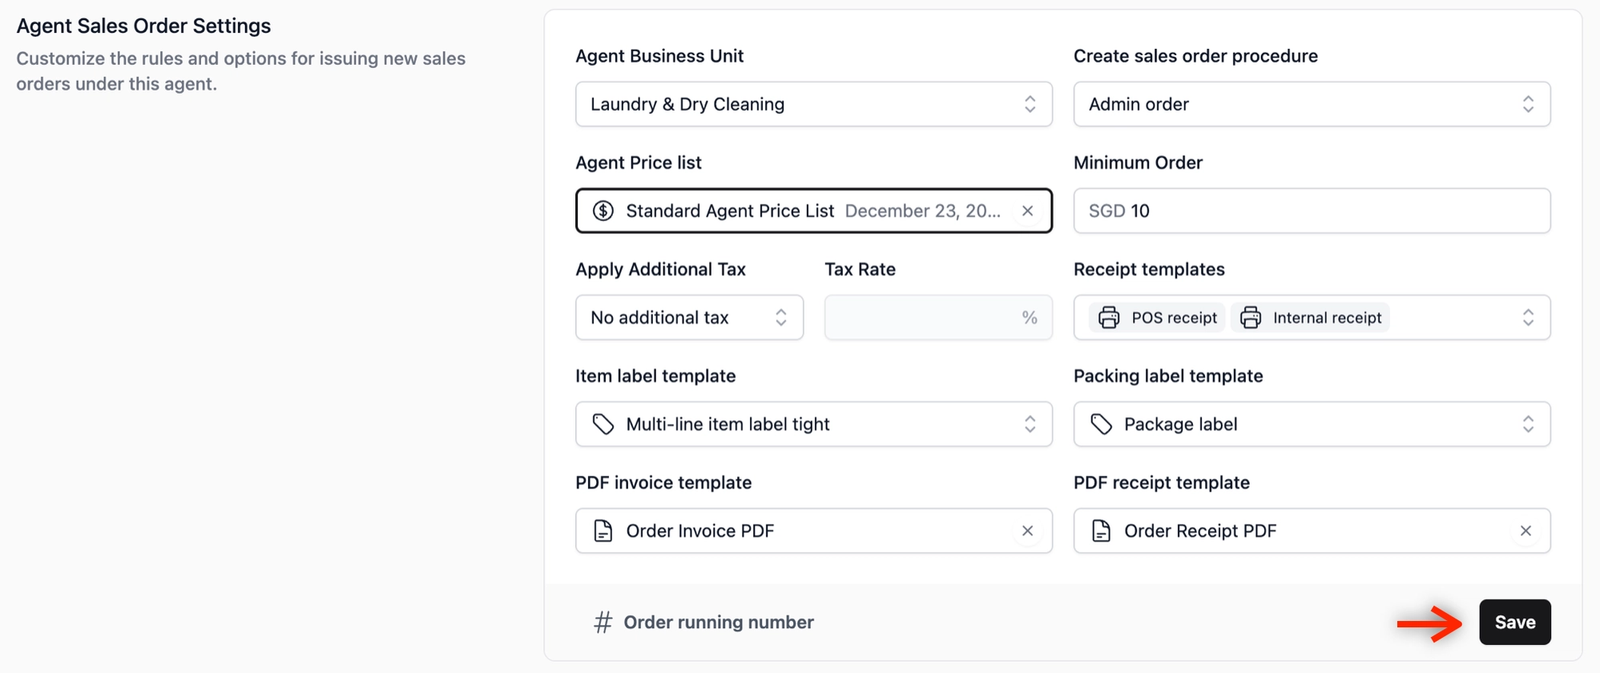
Scroll down the profile page until you locate the Agent Sales Order Settings section. Under the Agent Price List field, click the dropdown box and select your newly created agent price list.
Click on the Save button at the bottom right of the section to apply the change.
Give feedback
Up next
Set Up Order ProceduresSet up the steps your team or agents follow when creating an order, so every order comes in with the right information.
Read more