Bill Your Agents
In this article
This is the final step in the B2B process, paying your agents. Once your agents have brought in orders throughout the month, you can review their performance from the Billing dashboard, generate invoices using the templates you set up earlier, and send them out. This guide walks you through how to review, issue, and track invoices for your agents.
Contents
Contents
Billing Your Agents
At the end of each billing cycle, you will need to review the orders each agent has brought in and pay them accordingly. The Billing dashboard gives you a clear view of every agent's performance and lets you issue invoices directly from the system.
Access the Billing Dashboard
To begin the monthly billing process for your agents, navigate to the billing area in B2B.
How to navigate there:
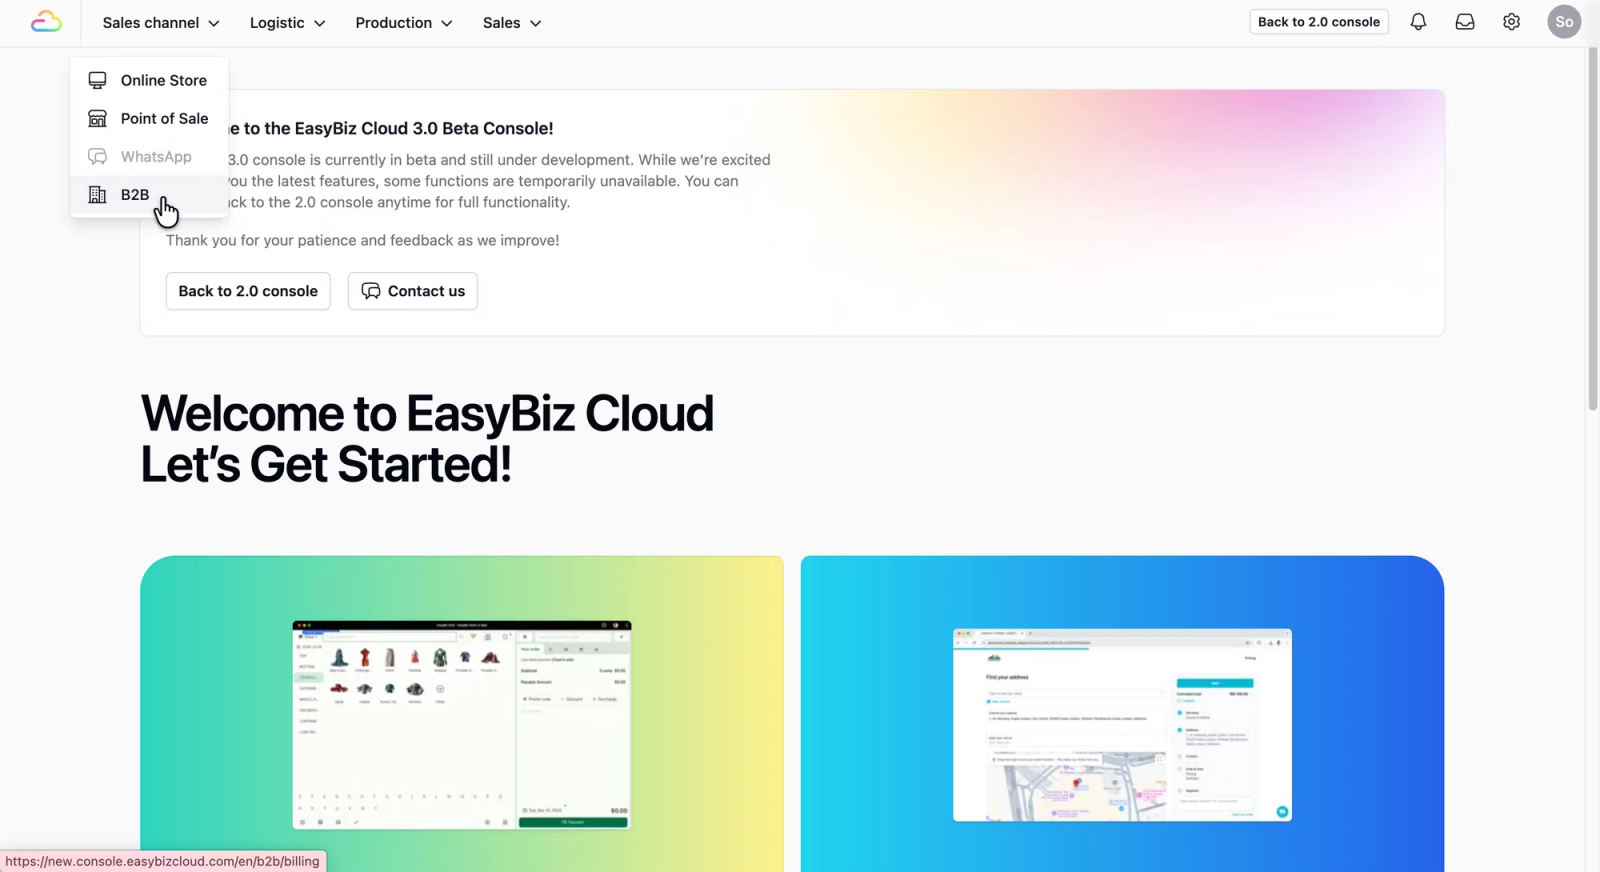
- On the top navigation bar, click on Sales Channel. Select B2B from the dropdown menu.
Click on the Billing tab; this will show the billing dashboard.
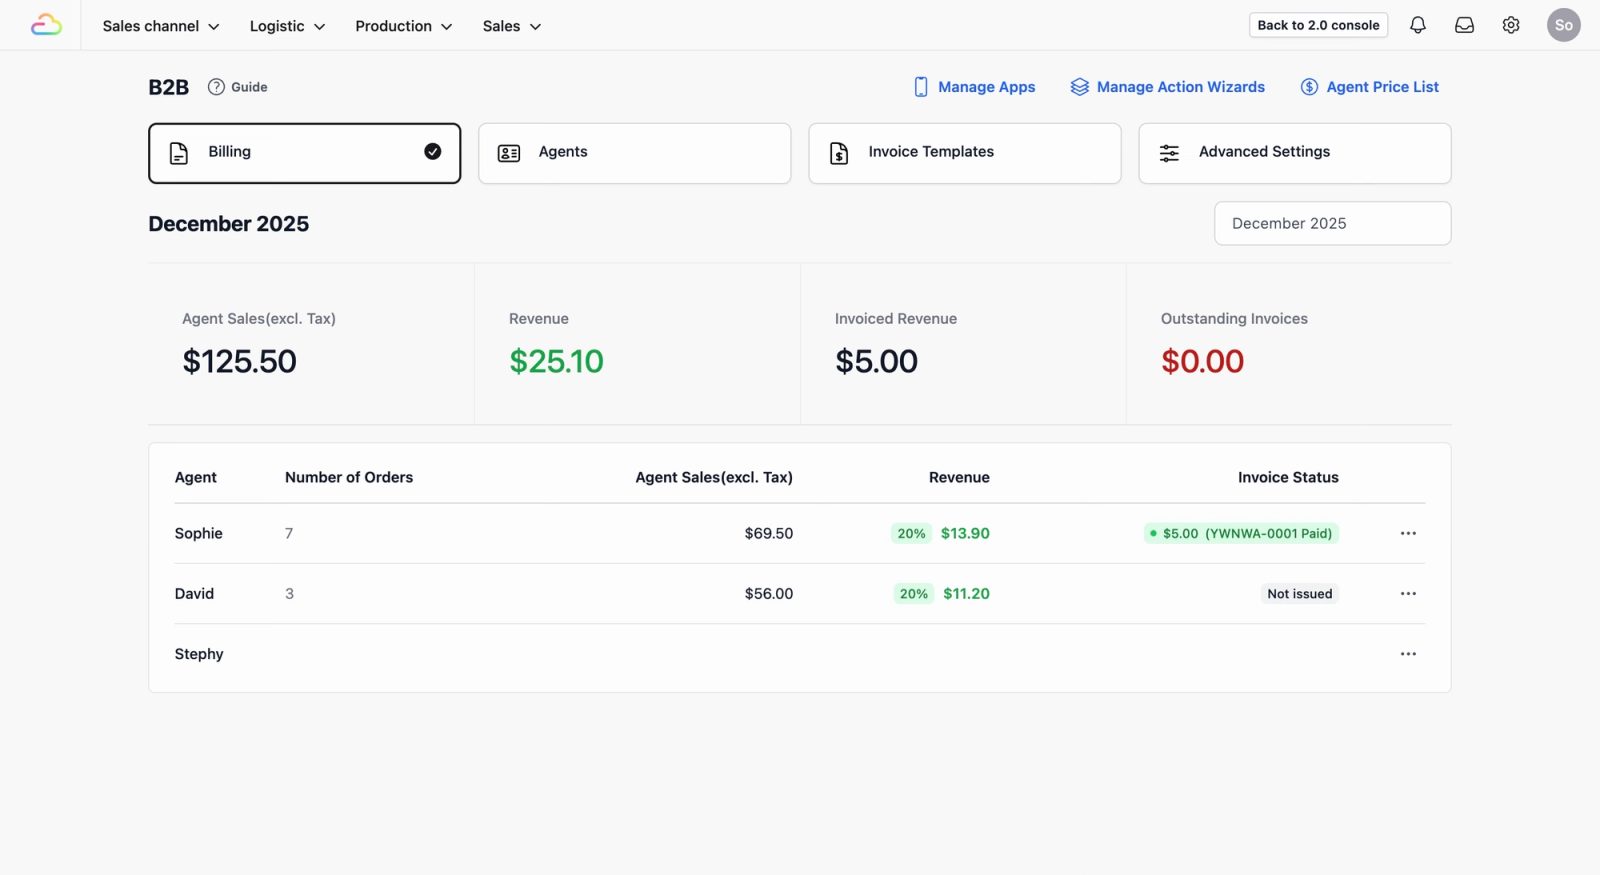
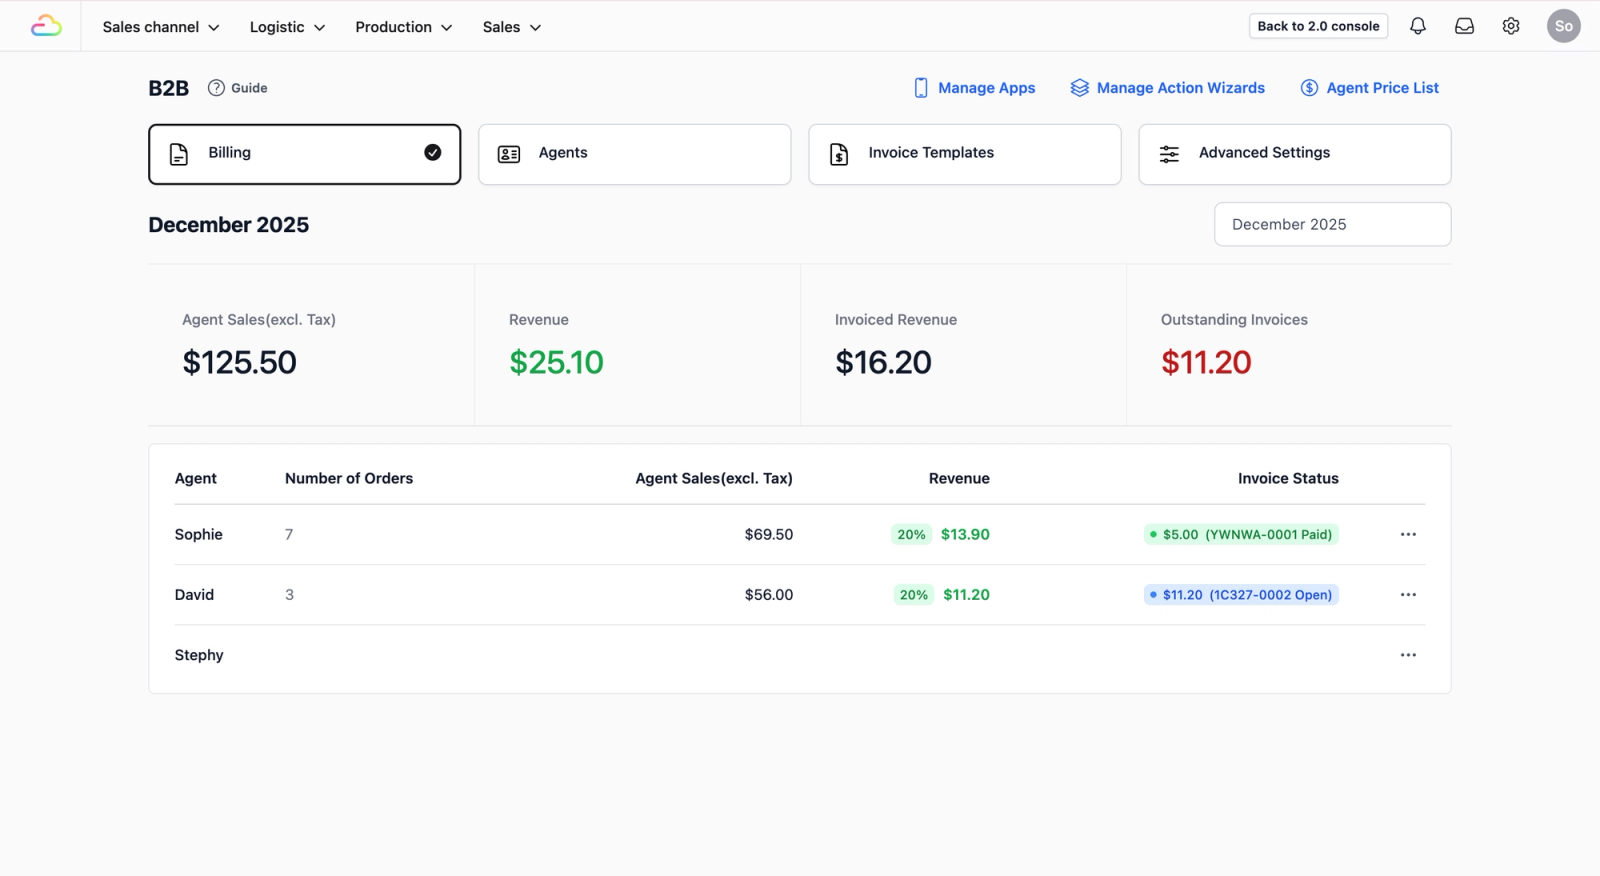
Understanding the Billing Dashboard
The dashboard gives you visibility into your agents' monthly activity, so you can track sales and see which agents are ready to be billed.
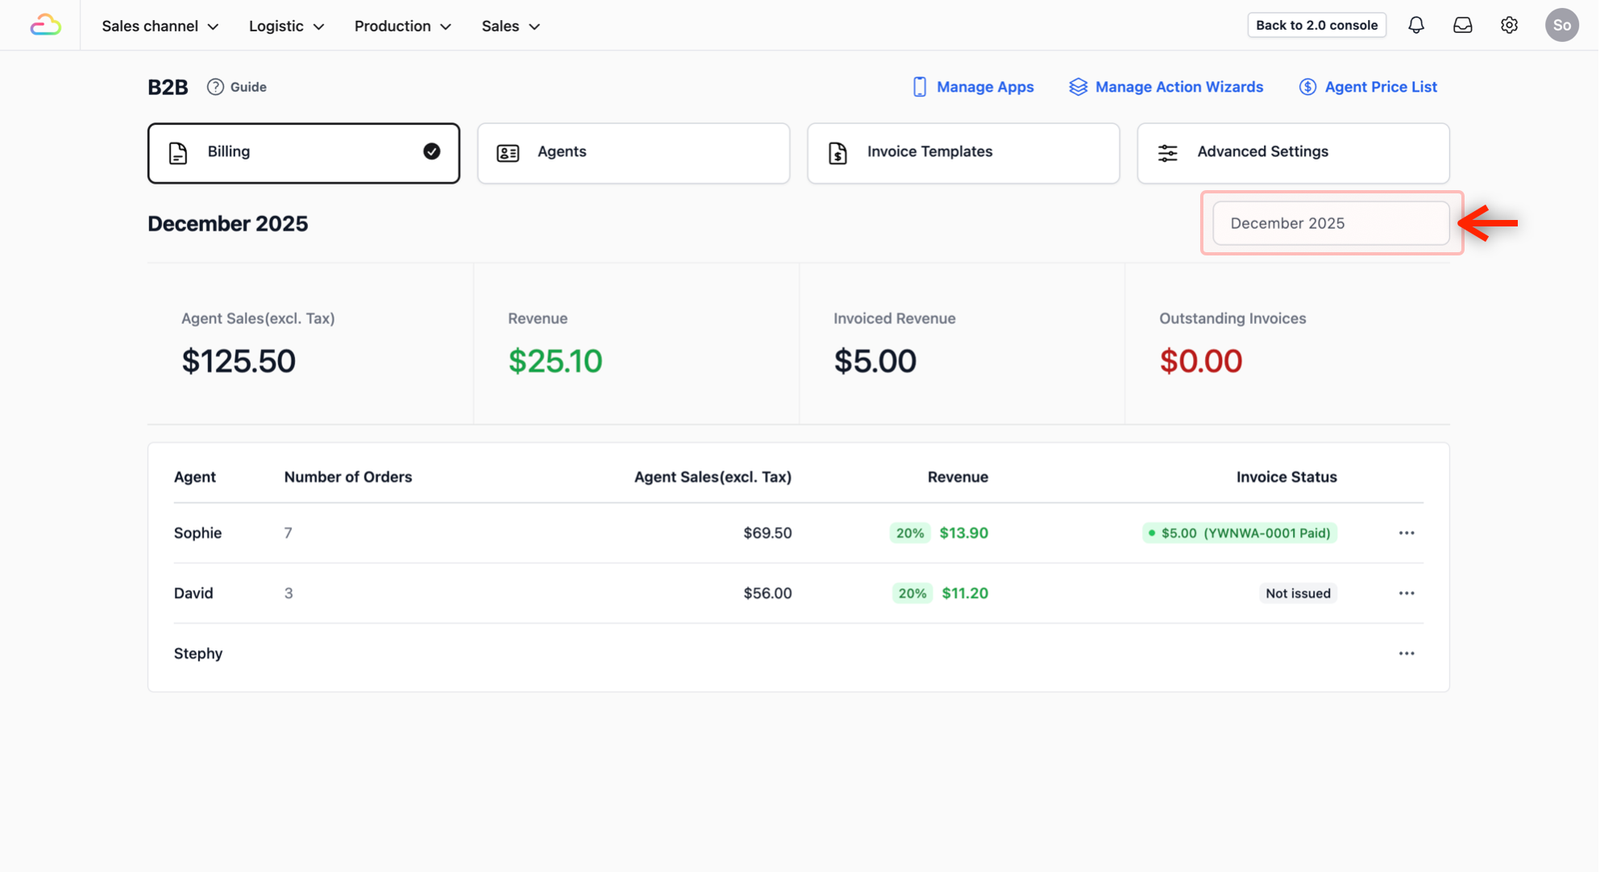
Filter by Month
The Month Filter allows you to toggle between different billing cycles. You can easily adjust this to view last month’s data, providing a clear history and full transparency of your previous billing records.
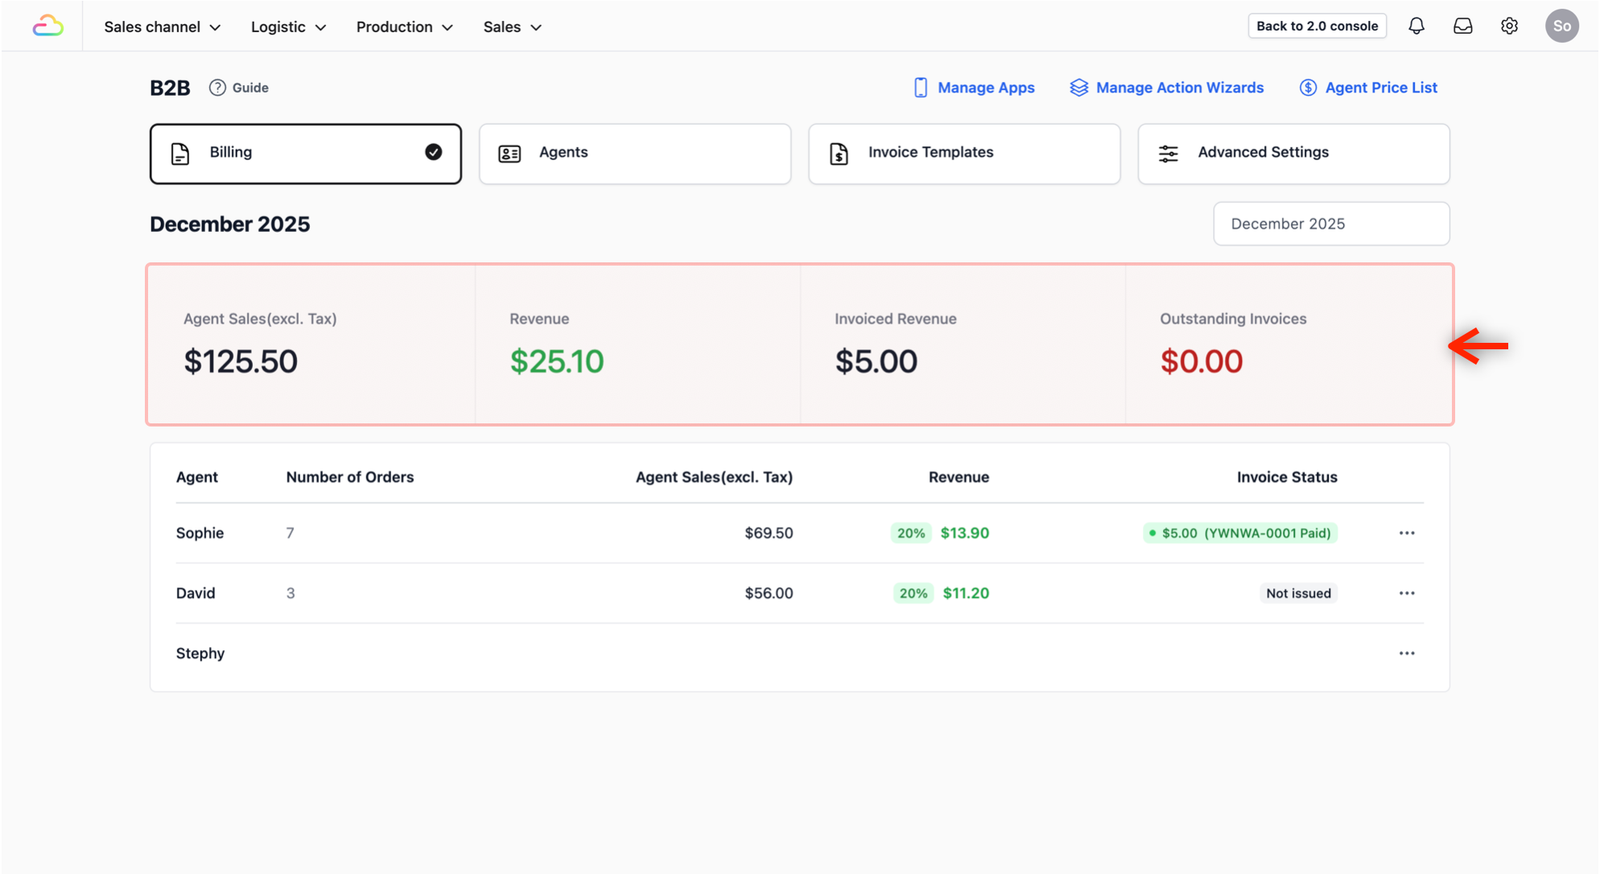
Monitor Agents Sales Performance
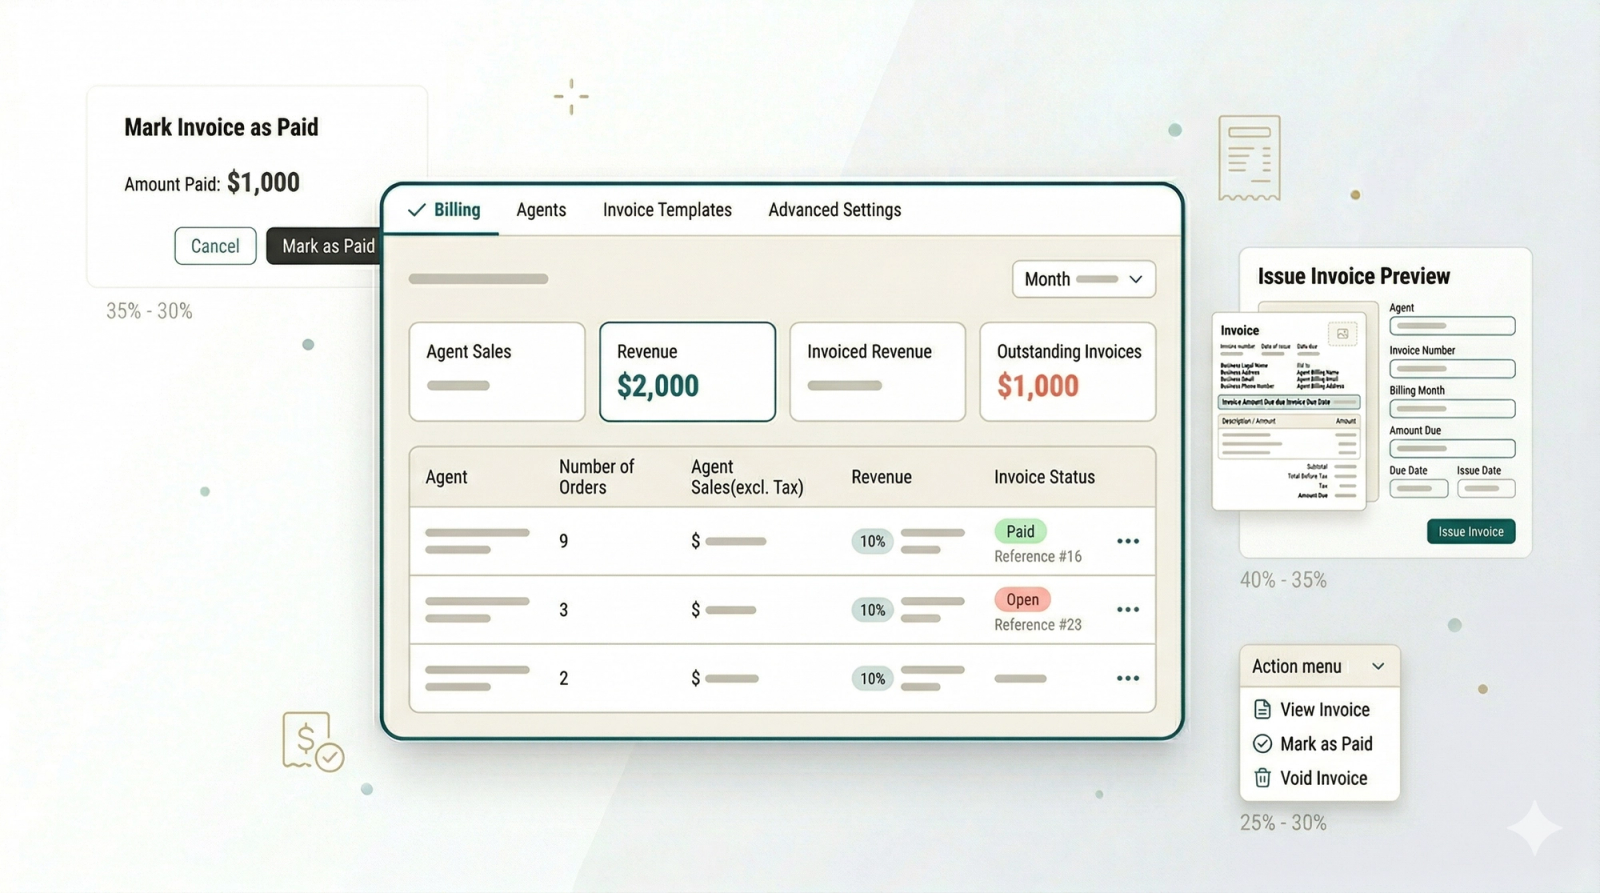
These four metrics provide a high-level summary of your agents performance for the selected month:
- Agent Sales: The total sales volume the agents brought to your business.
- Revenue: The total agents revenue.
- Invoiced Revenue: The total agents revenue that has already been successfully invoiced.
- Outstanding Invoices: The total amount from invoices that have been issued but remain unpaid.
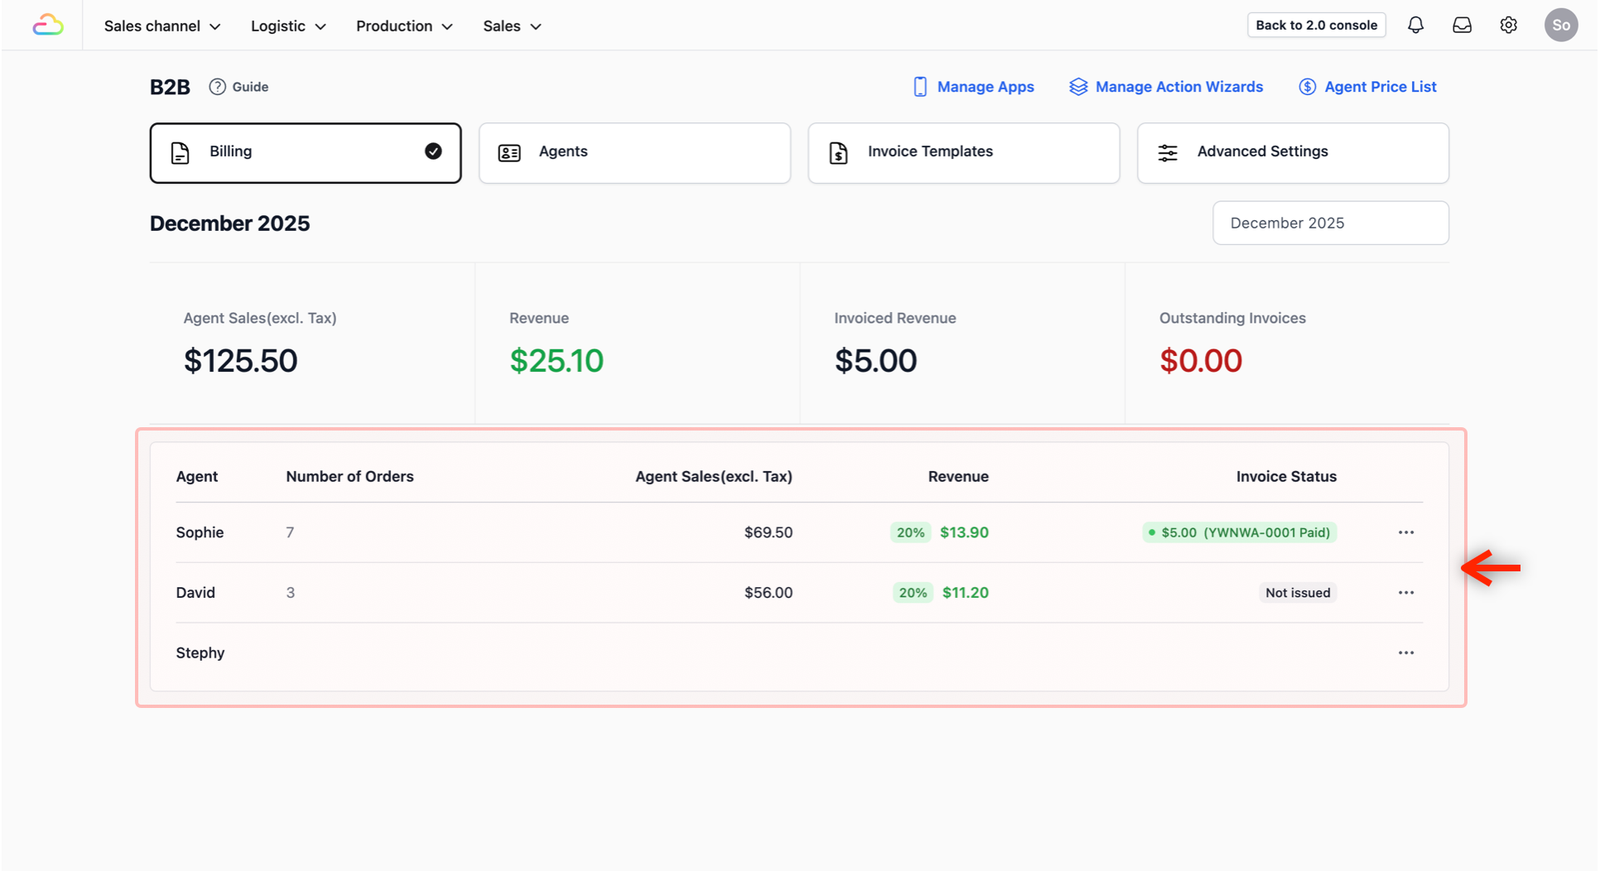
Review the Agent Table
This table shows all the agents to be invoiced for the period and provides visibility into their individual performance:
- Agent: The name of the agent.
- Number of Orders: How many orders the agent created during the month.
- Agent Sales: The specific sales volume brought in by that agent.
- Revenue: Displays the agent billing model (the amount you charge the agent for their orders) and the total revenue generated by this agent.
- Invoice Status: Shows whether you have already issued the invoice to the agent.
Issue Agent Invoice
Follow these steps to generate and send an invoice to an agent:
- In the agent table, locate the agent you want to bill.
- Click on the ••• (Action Menu) and select Issue Invoice.
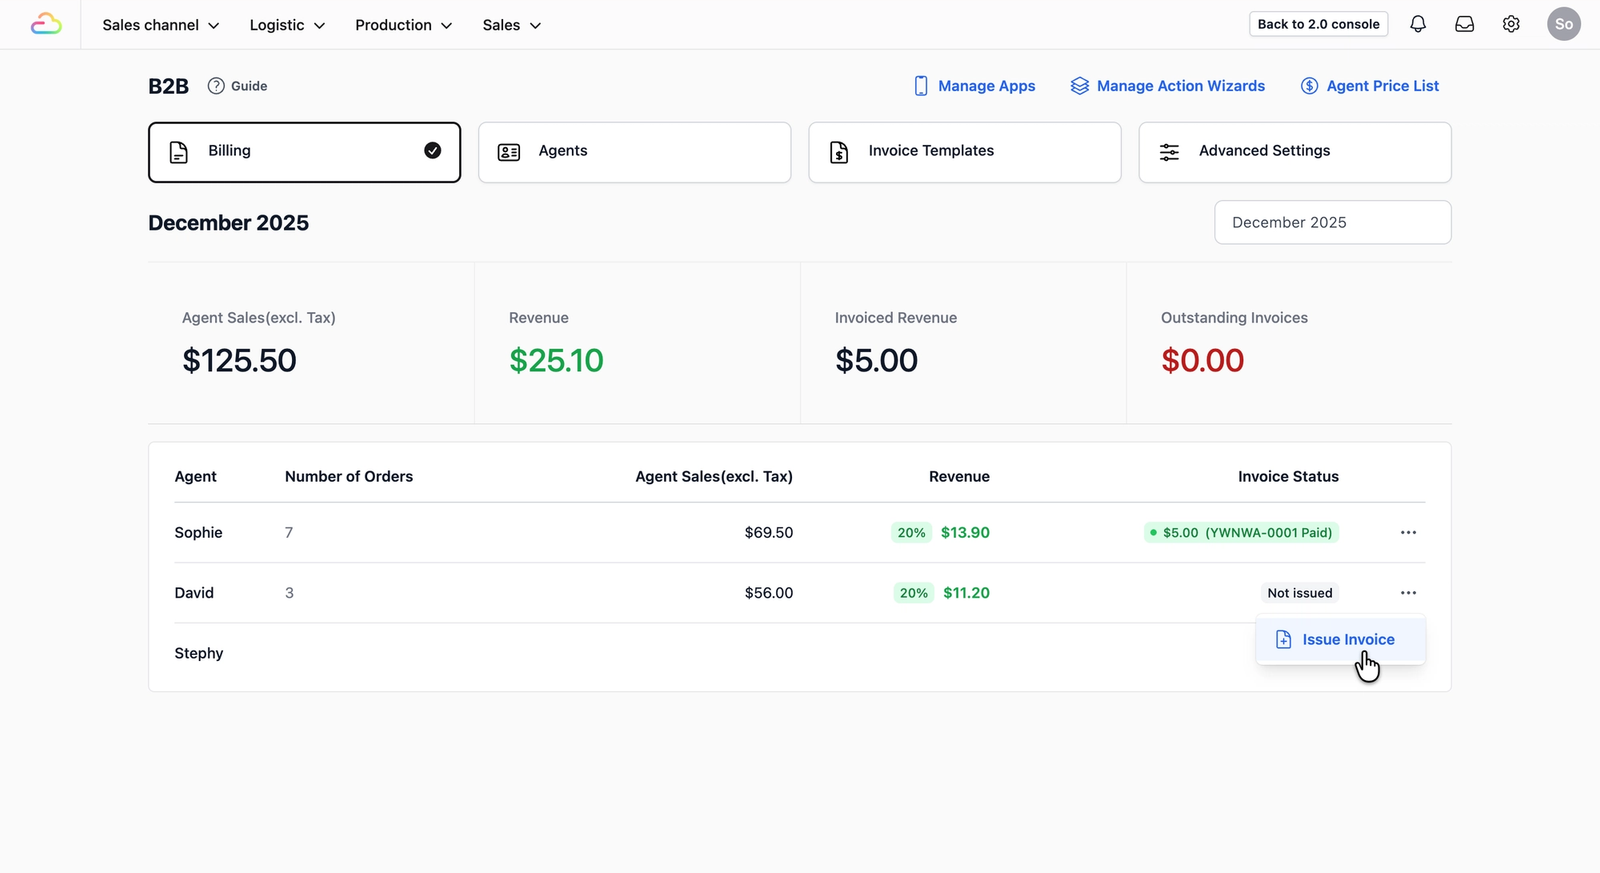
- This opens the Invoice Preview window.
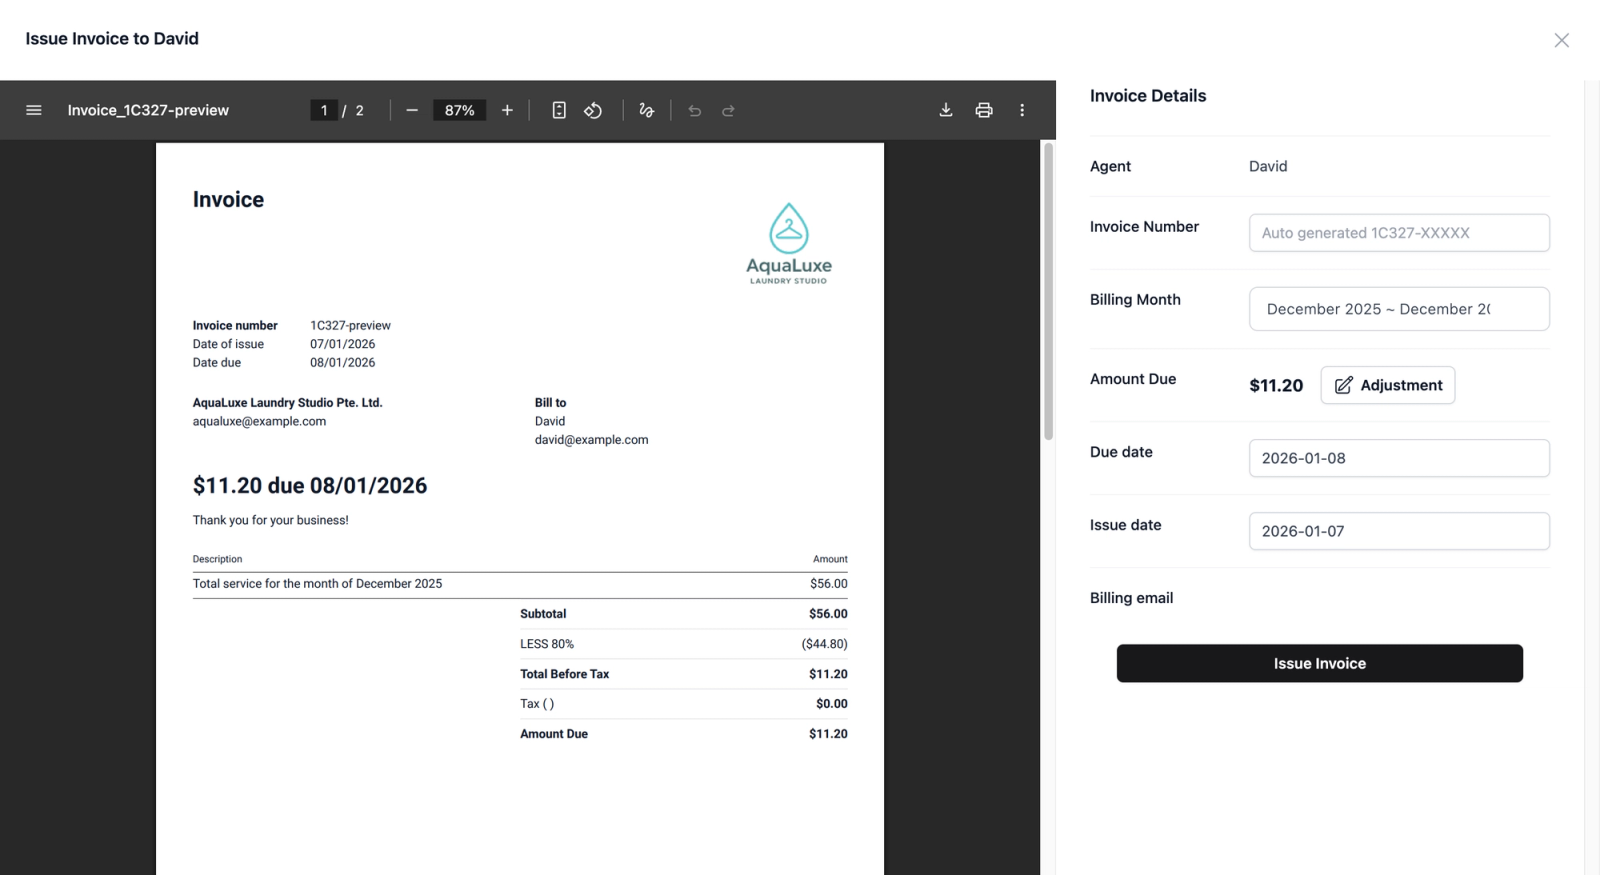
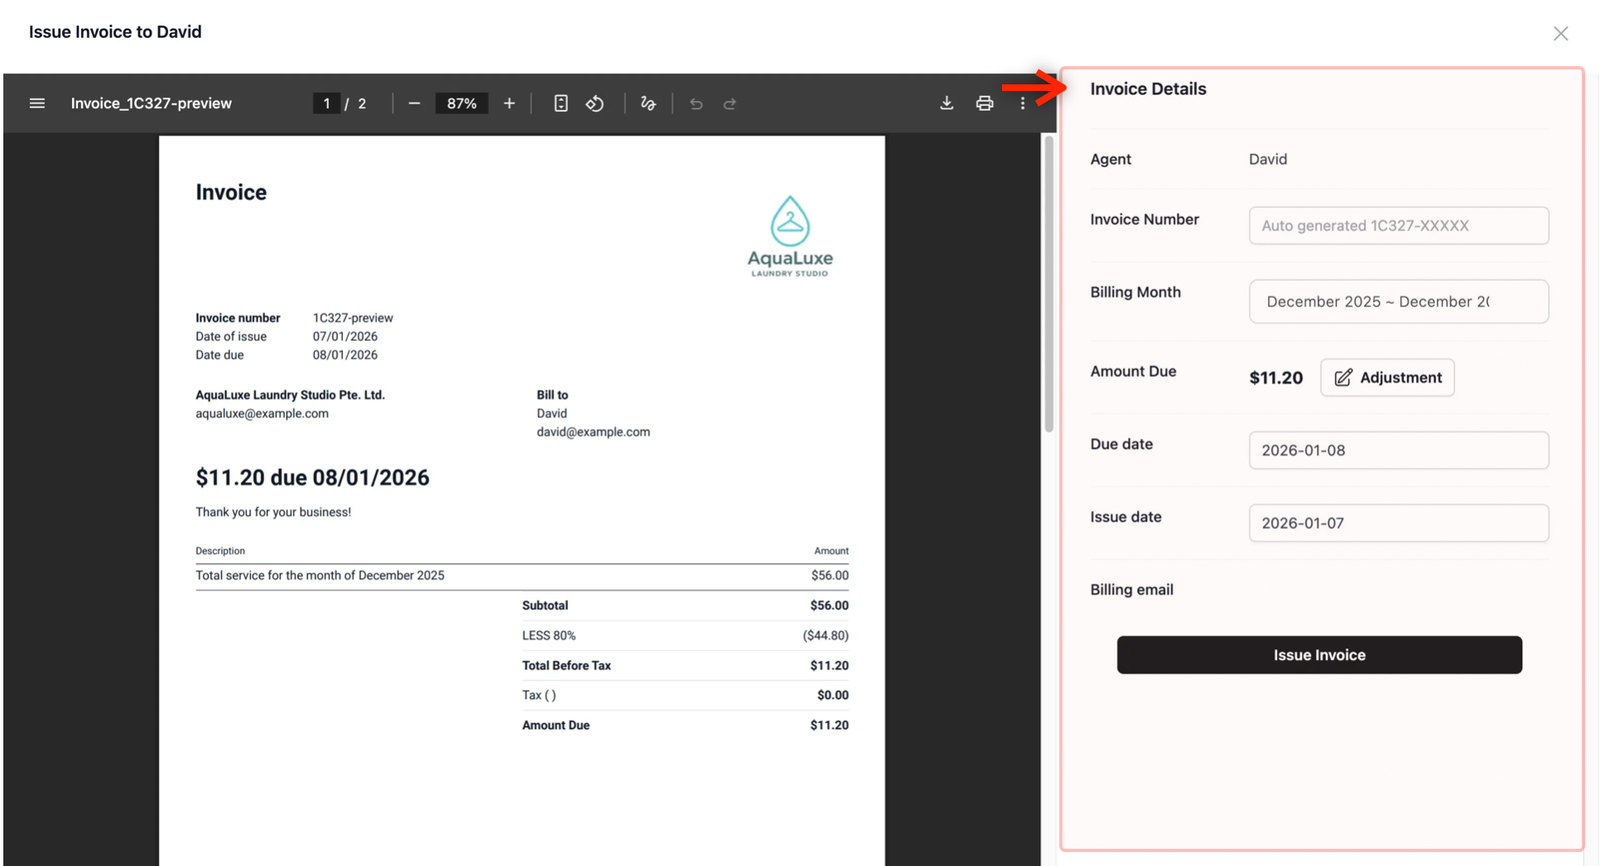
Review Invoice Details
In this preview, you will see the PDF Preview on the left and the Invoice Details on the right.
By default, the system fills these fields for you, but you can modify them if needed:
- Agent: The name of the agent being billed.
- Invoice Number: Auto-generated by default.
- Billing Month: Defaults to the current billing month.
- Amount Due: Calculated automatically based on your agent billing model.
- Due Date: Pre-filled but can be adjusted as needed.
- Issue Date: Pre-filled but can be adjusted as needed.
- Billing Email: Displays the registered billing email of the agent.
Finalise and Issue Agent Invoice
For this example, we will leave all invoice details as the default settings.
Click on the Issue Invoice button to send the invoice to the agent.
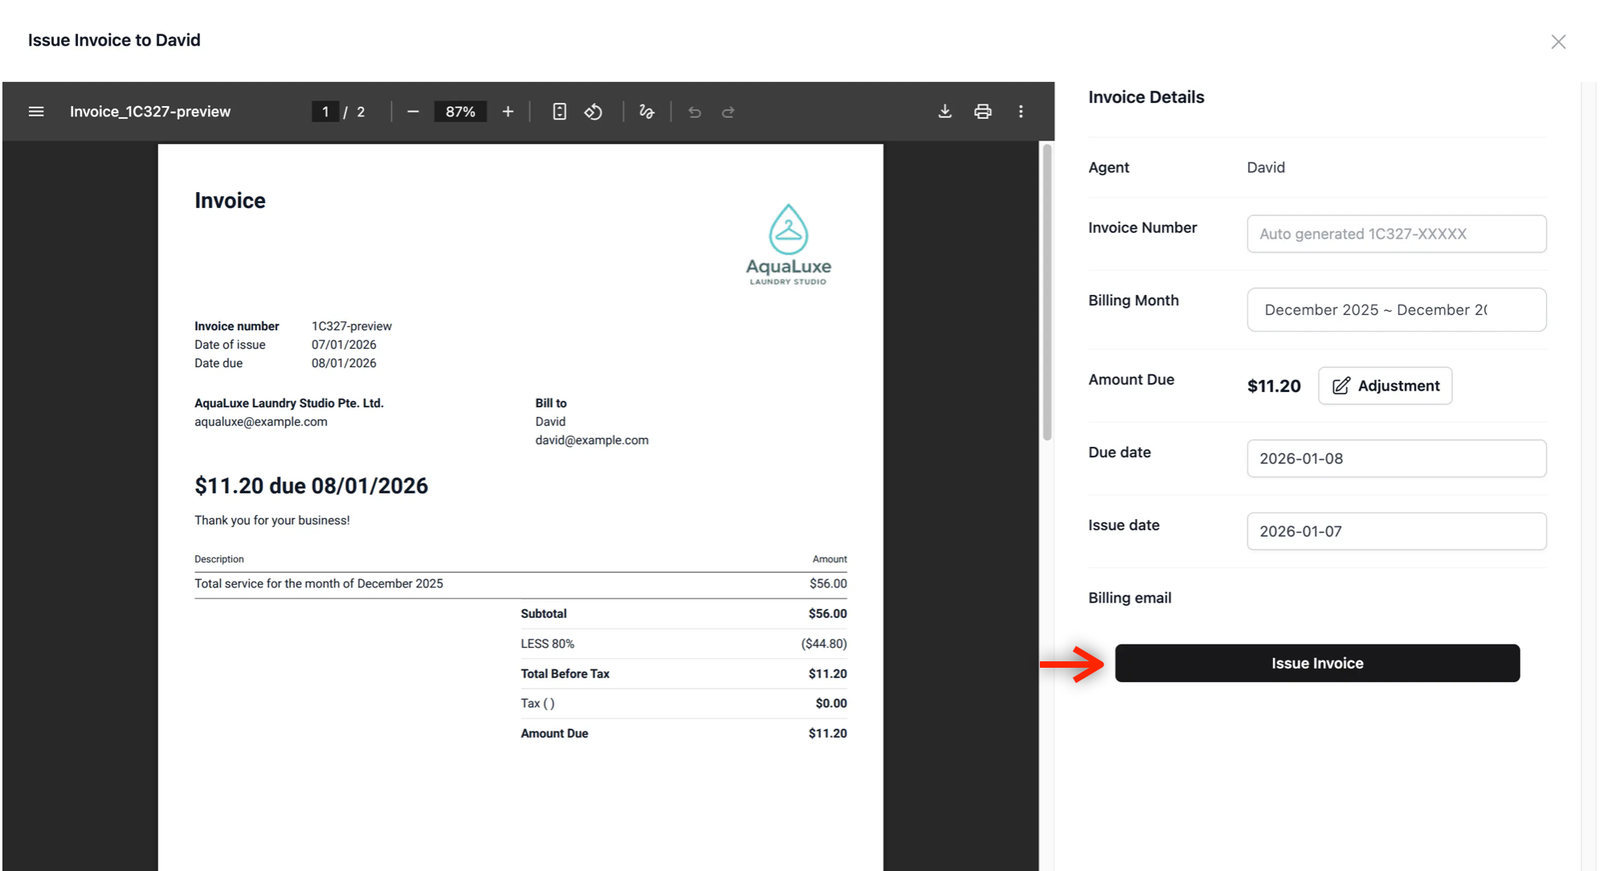
Once it issues out the invoice to the agent, the page will automatically update to display the successfully issued invoice and a success message "Invoice Issued" will appear at the bottom right of your screen.

Verify and Record Payment to Agent
Once you have issued the invoice, you can verify its status and record when you have paid the agent.
Confirm the Status
Head back to the Billing Dashboard. Click on Sales channel at top of the navigation bar, and select B2B. Click on the Billing tab. Locate the agent you just billed in the table.
- The Invoice Status should now say Open, meaning the invoice is issued but not yet paid.
- This amount will appear under the Outstanding Invoices as one of the metrics in your agents sales performance section of your dashboard.
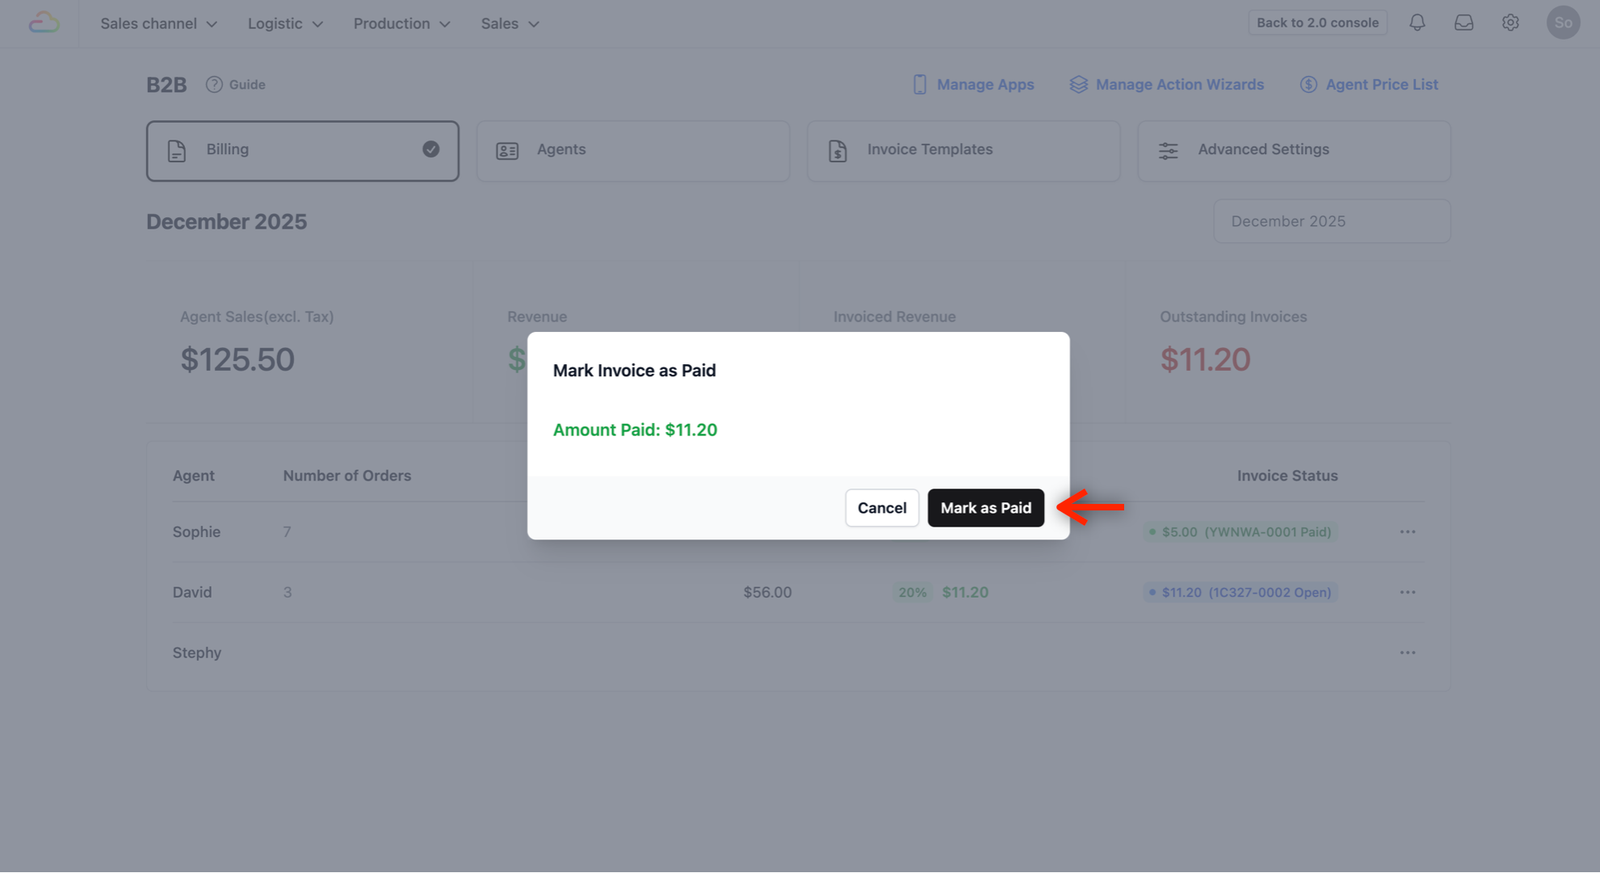
Mark the Agent as Paid
Once you have verified that you have paid the invoice on your end, you can record this in the system:
- Locate the agent in the table which you want to mark as paid.
- Click the ••• (Action Menu) on the far right.
- Select the Mark as Paid option.
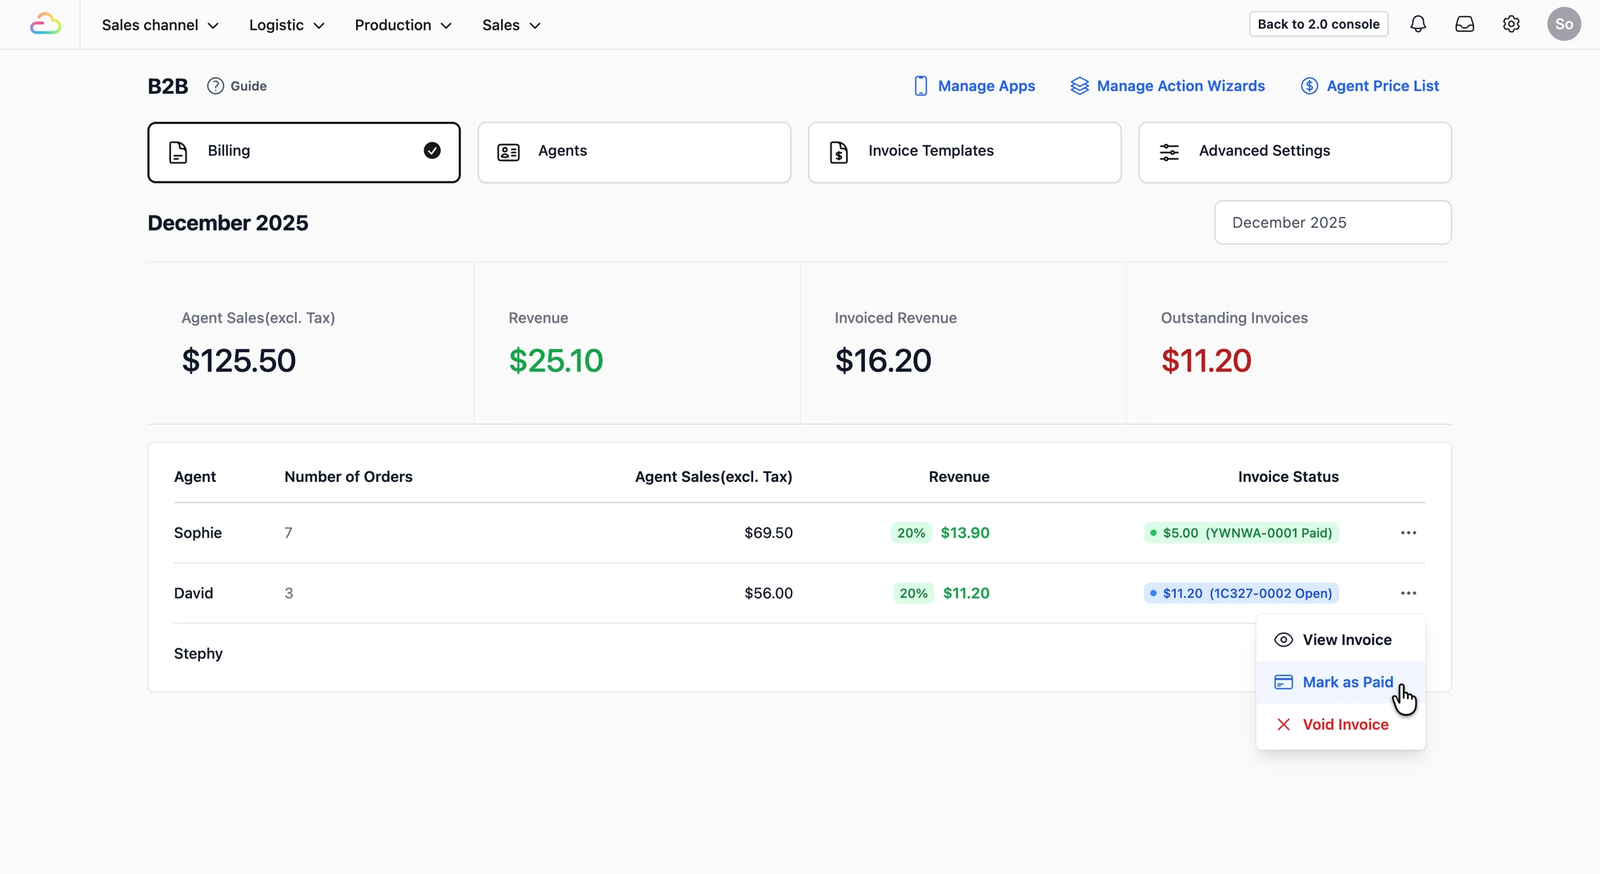
- A pop-up window will appear prompting you to confirm. Click on the Mark as Paid button.
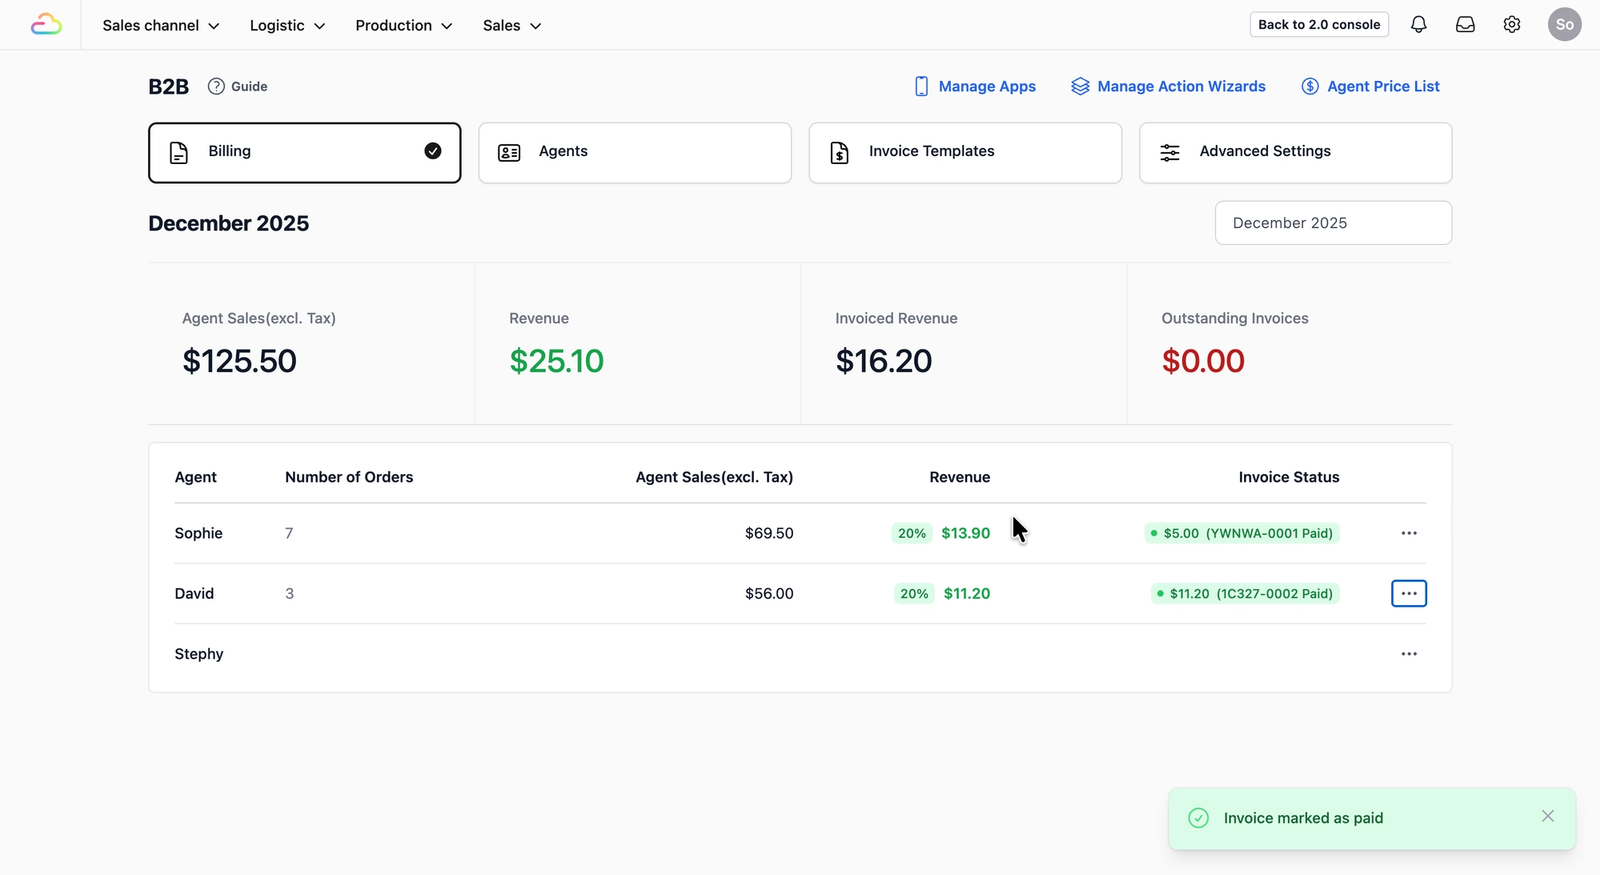
- Once clicked, the pop-up window disappears and the bottom right of your screen will display "Invoice marked as paid".
- The Invoice Status in the table will update to Paid, and the amount under Outstanding Invoices will reflect the change.
Give feedback
Up next
Blocking RulesQuickly close days or pause specific customers/date without touching the rest of your booking setup.
Read more