Create Agent Apps
In this article
If your agents need to create orders on their own, you can set up a dedicated app for them. The Agent App is a simplified, mobile-friendly portal where agents can manage their customers and submit orders without needing access to your full system. This guide walks you through how to create the app and give your agents access to it.
Contents
Contents
What is an Agent App?
An Agent App is a dedicated portal for your agents to manage their customers and create orders. It connects the pricing and order procedures you set up earlier into a simple, easy-to-use app that your agents can access from their phone.
Access the App Settings
Before you can link the app to an agent, you need to set up the app itself. There are two ways to reach the page where you can create the agent app:
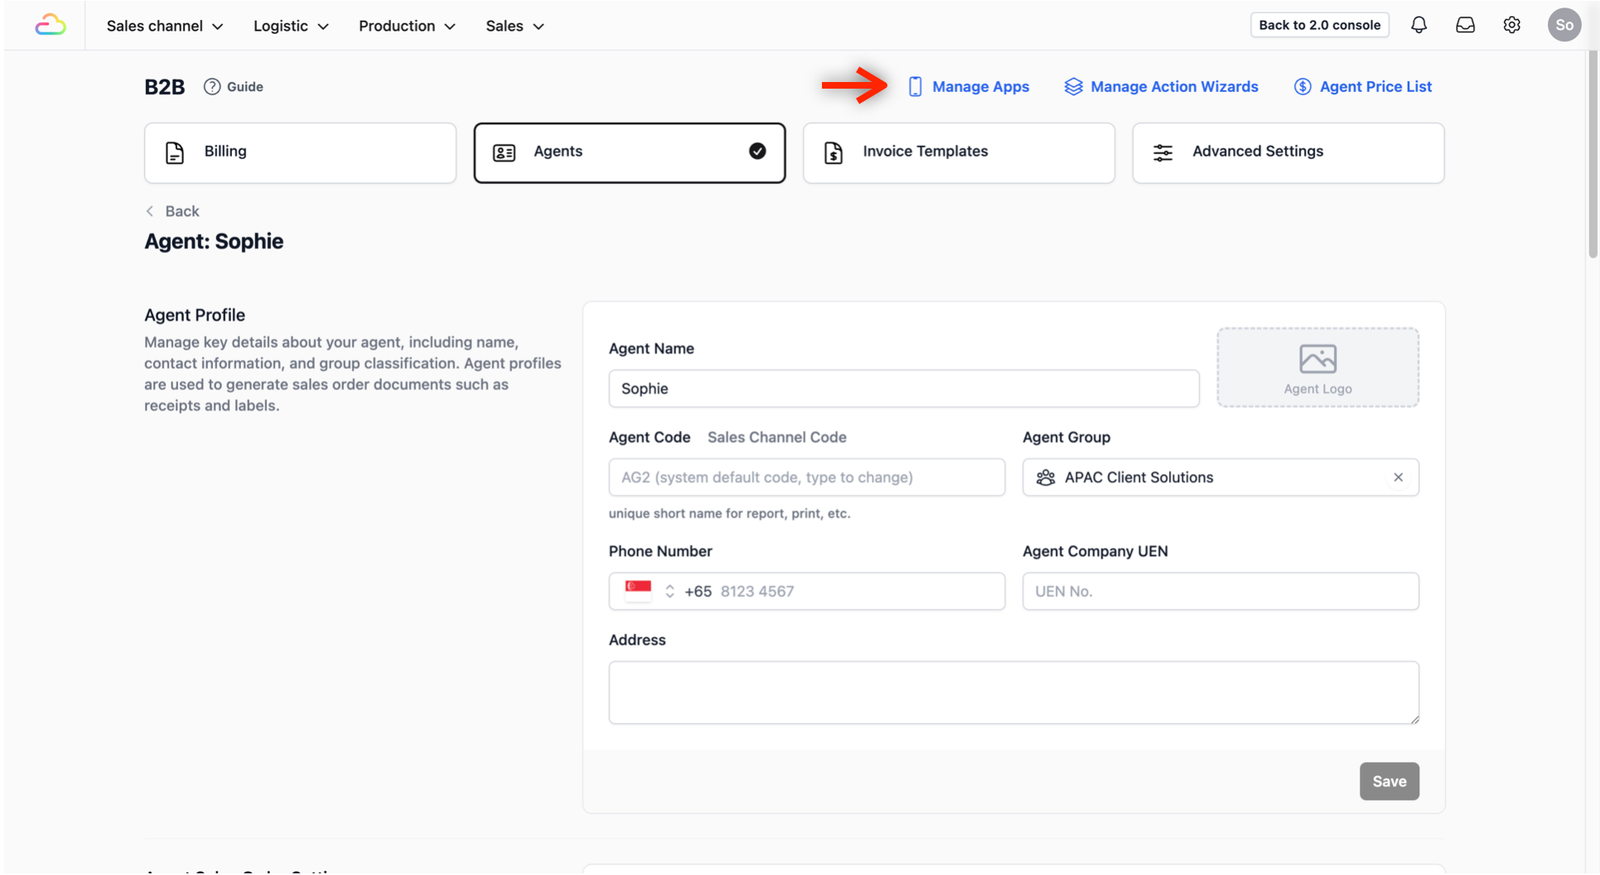
- If you are already on the B2B page: Simply click the Manage Apps button.
- From any other screen: Click the Gear Icon (Settings) → Operations → System Customization. From there, ensure you are on the Mobile App tab.
Create the Agent App
Once you are on the Mobile App tab, you can select the specific type of app your agents will use.
Click the + Add New Mobile App button.
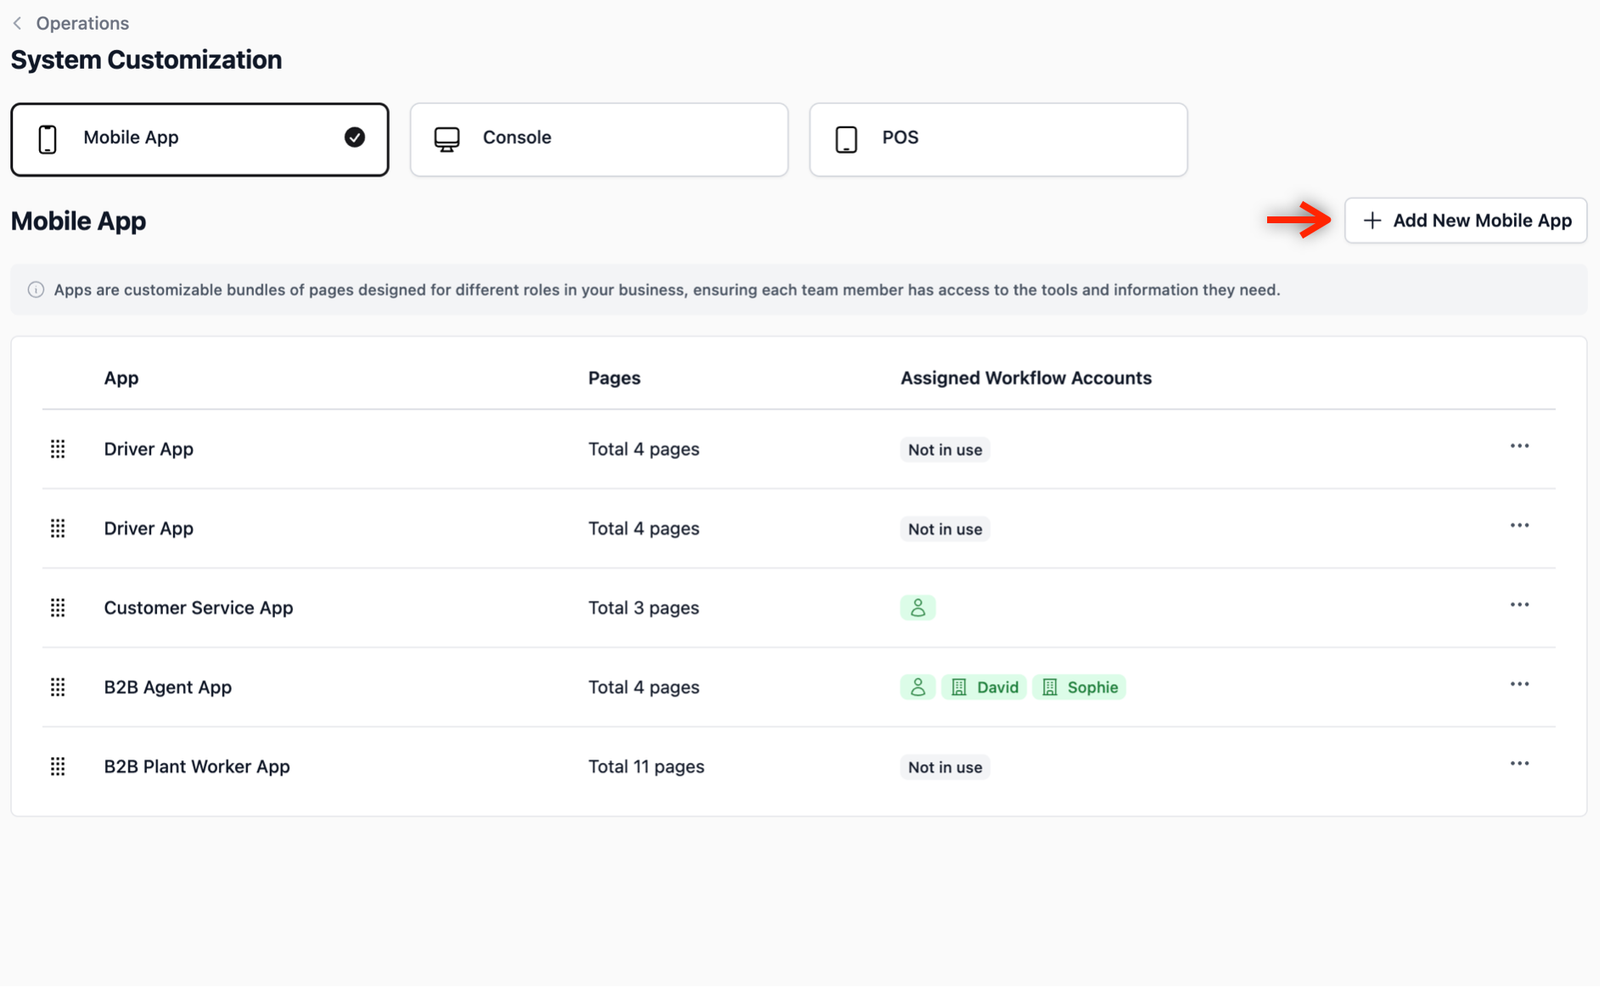
This will open a page showing various app templates for different business use cases, such as logistics, counter staff and many more.
For this example, click on the B2B Agent App template. This will open up a pop-up field for you to change the name of your new agent app.

In the pop-up field, the name defaults to "B2B Agent App," but feel free to change it here to match your own business use case. When you are done, click on the Create App button.

Grant Agent Access
Now that the app is created, you must head back to the B2B page to grant the agent access to the newly deployed app. Without this step, the agent will not be able to log in.
- Navigate back: On the top navbar, click on Sales Channel and select B2B from the dropdown menu.

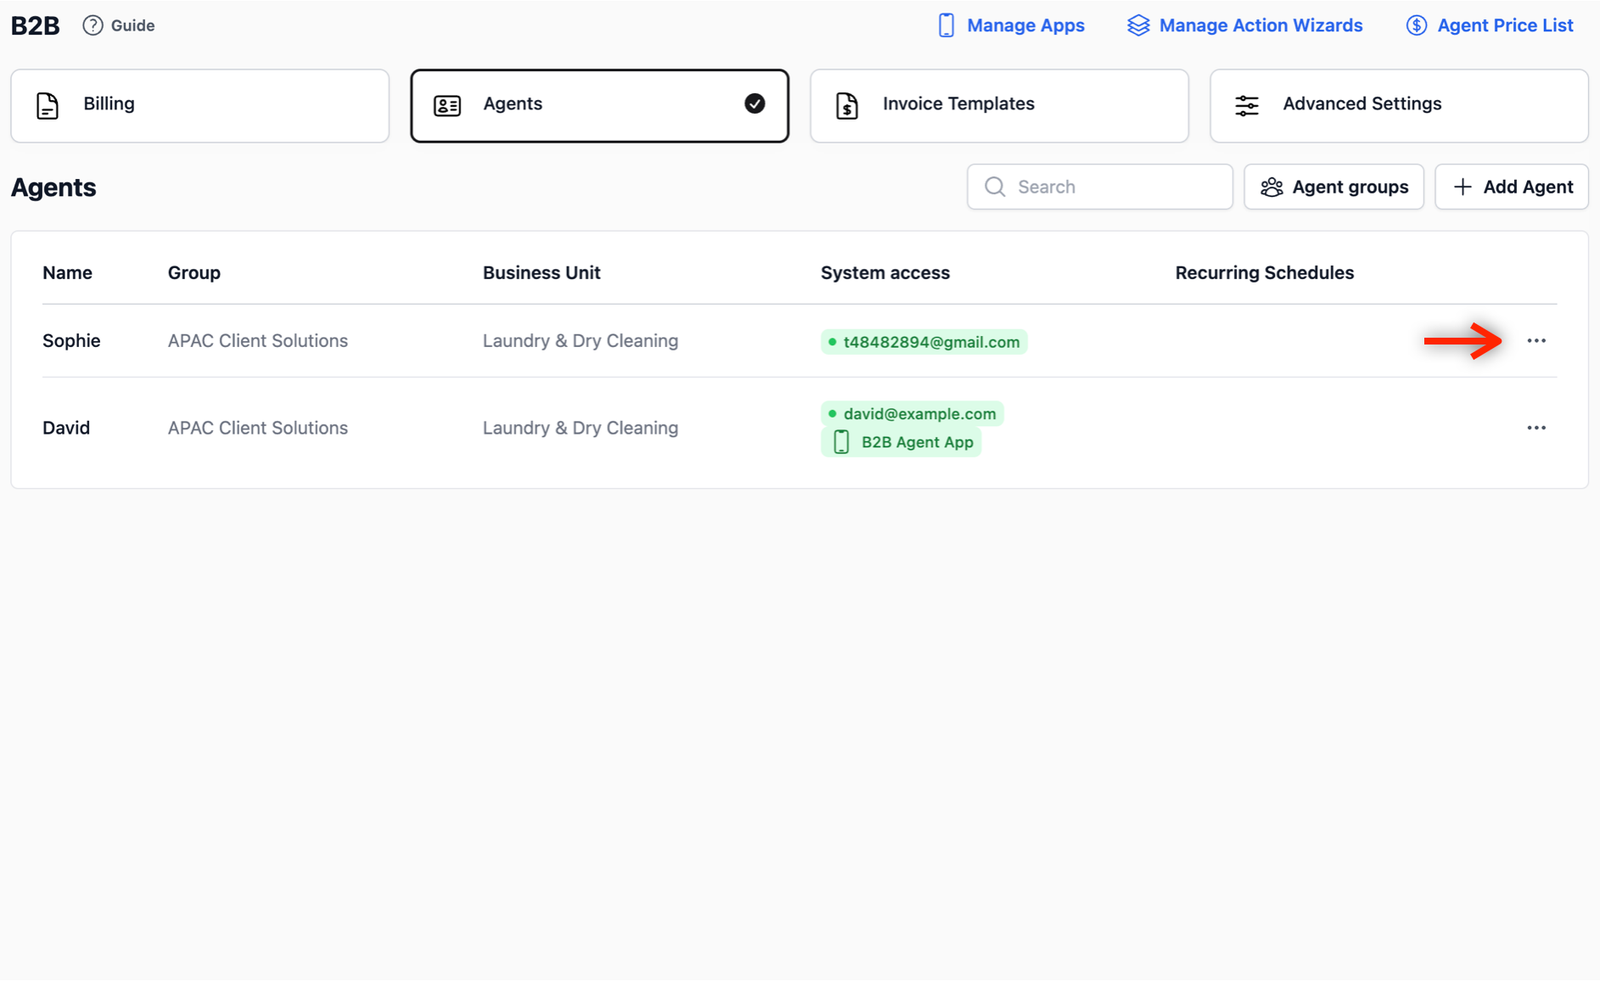
- Select the Agent: In the B2B page, click on the Agents tab. In the table view, locate the agent you want to grant access to the newly created agent app. Click on the ••• (Action Menu) on the far right, and select Edit.
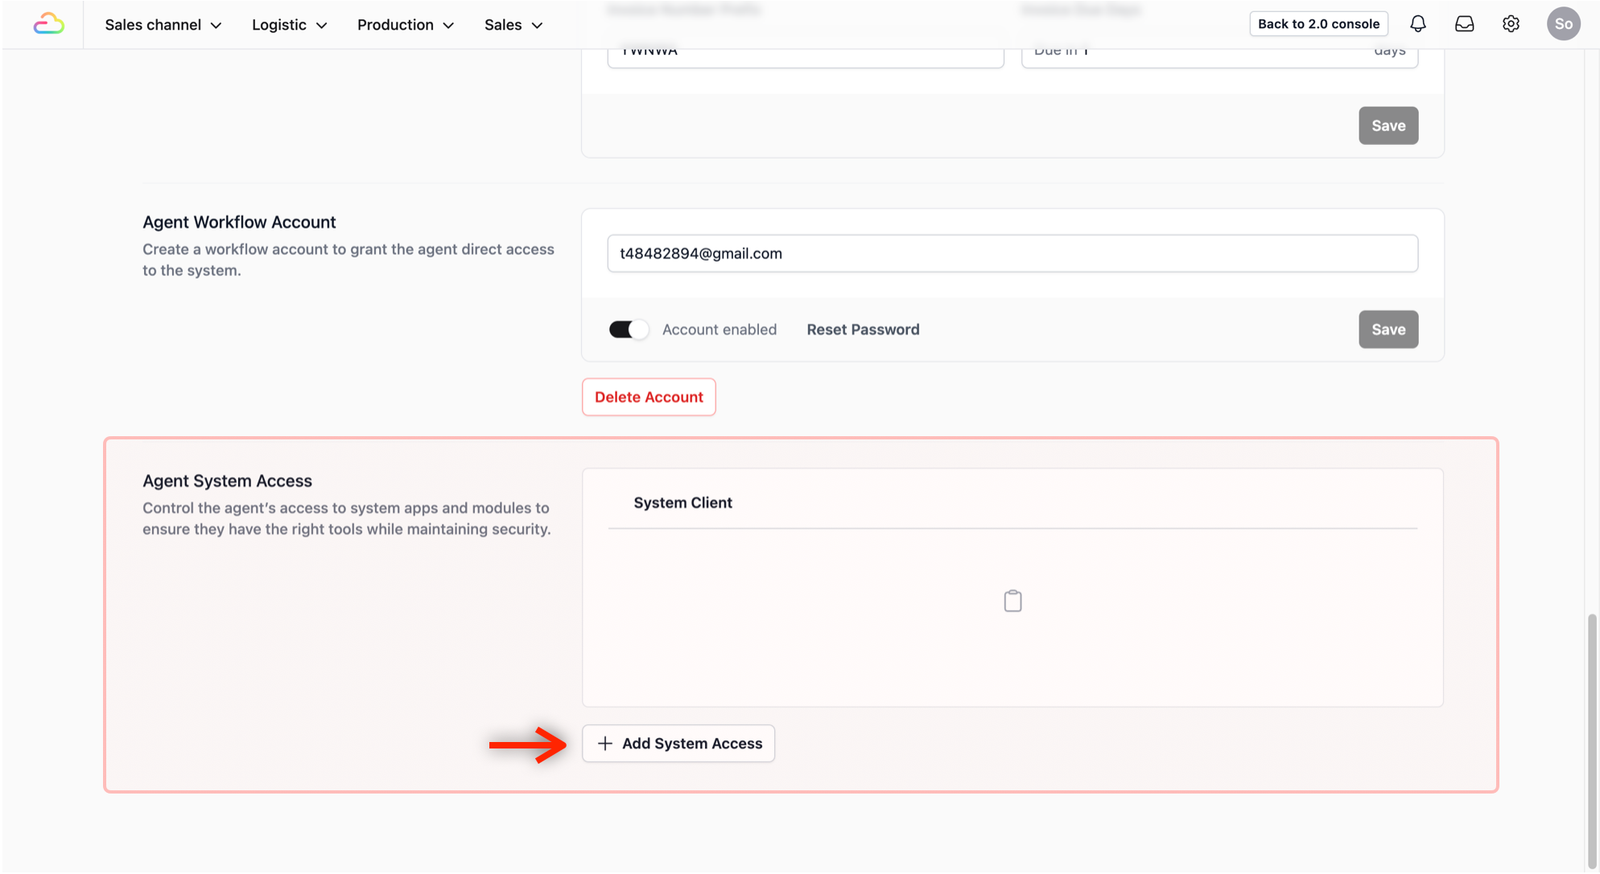
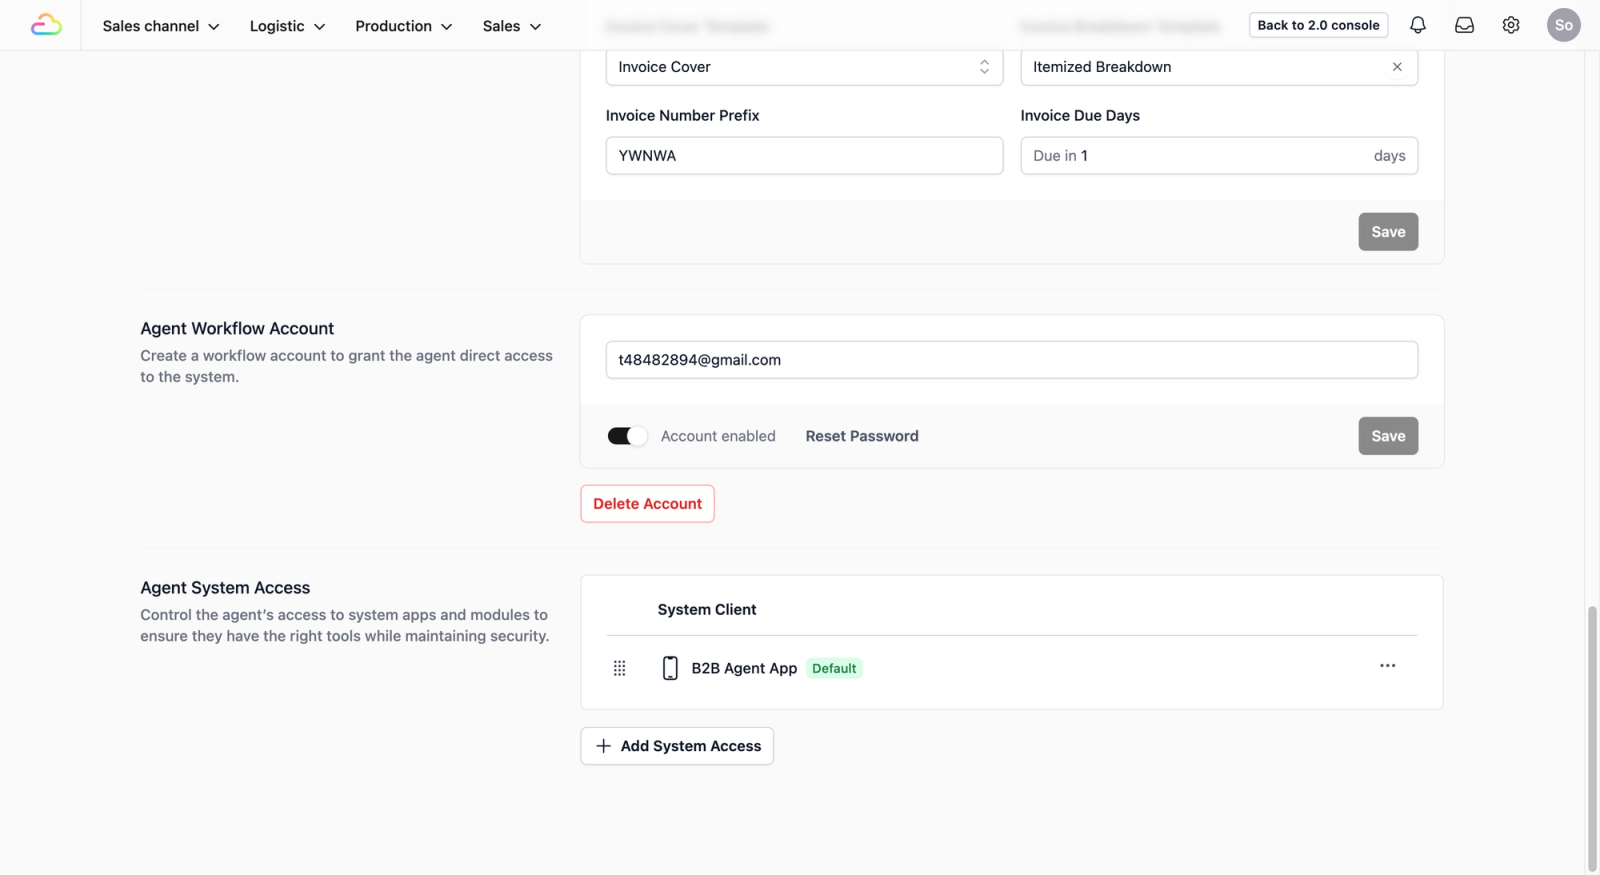
- Find Access Settings: Scroll all the way down to the Agent System Access section and click the + Add System Access button.
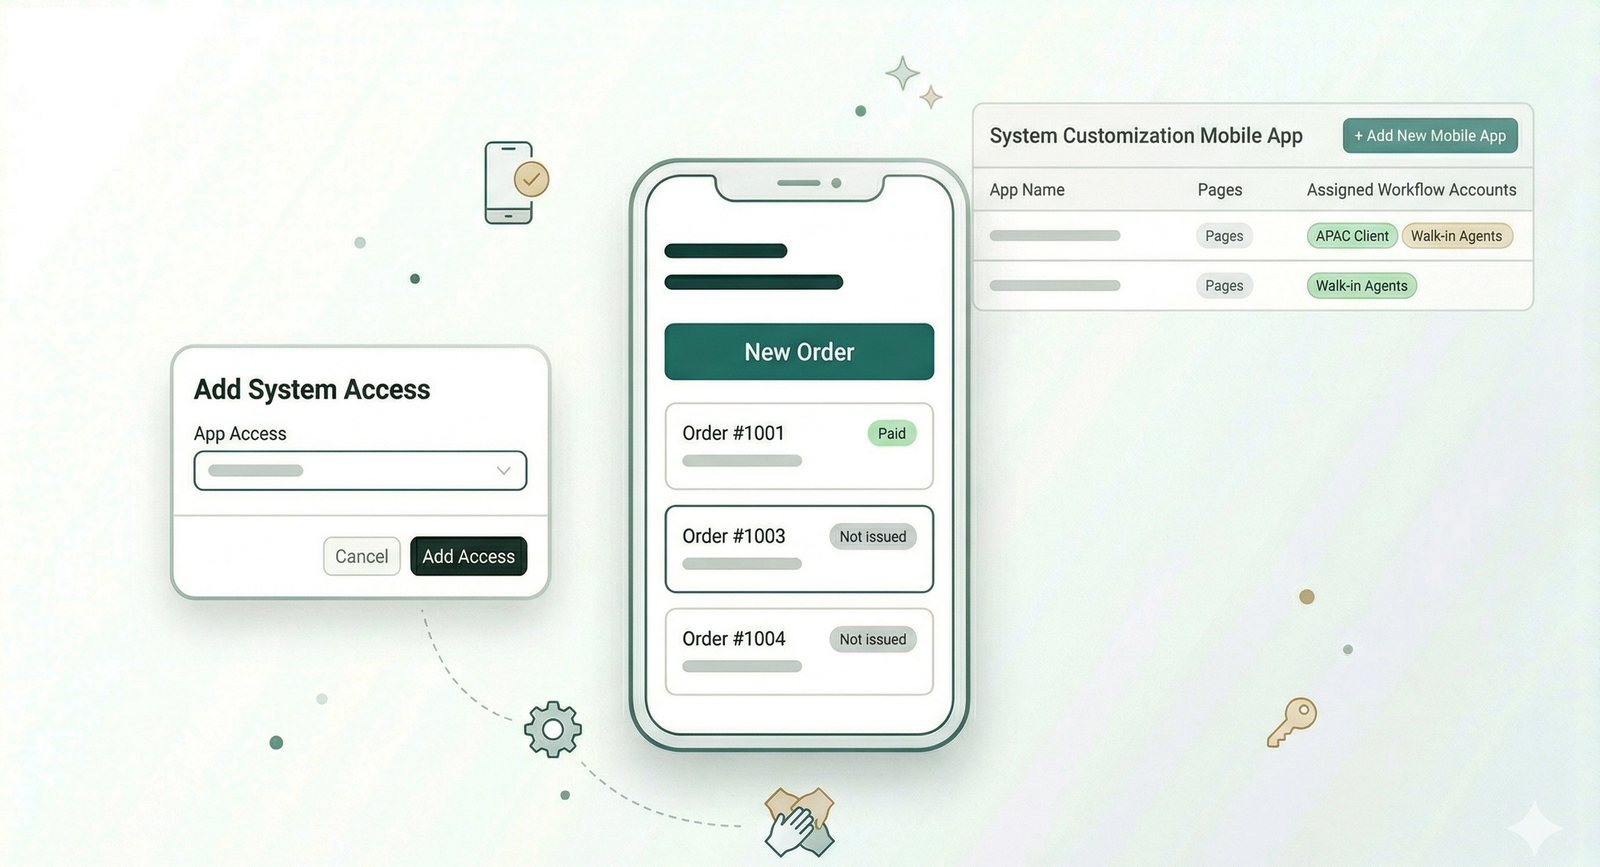
- Selection Pop-up: A pop-up field will appear for you to select which app to give access to the agent.
- Assign the App: Under the App Access dropdown field, click the dropdown icon and select the newly created agent app that you just deployed.
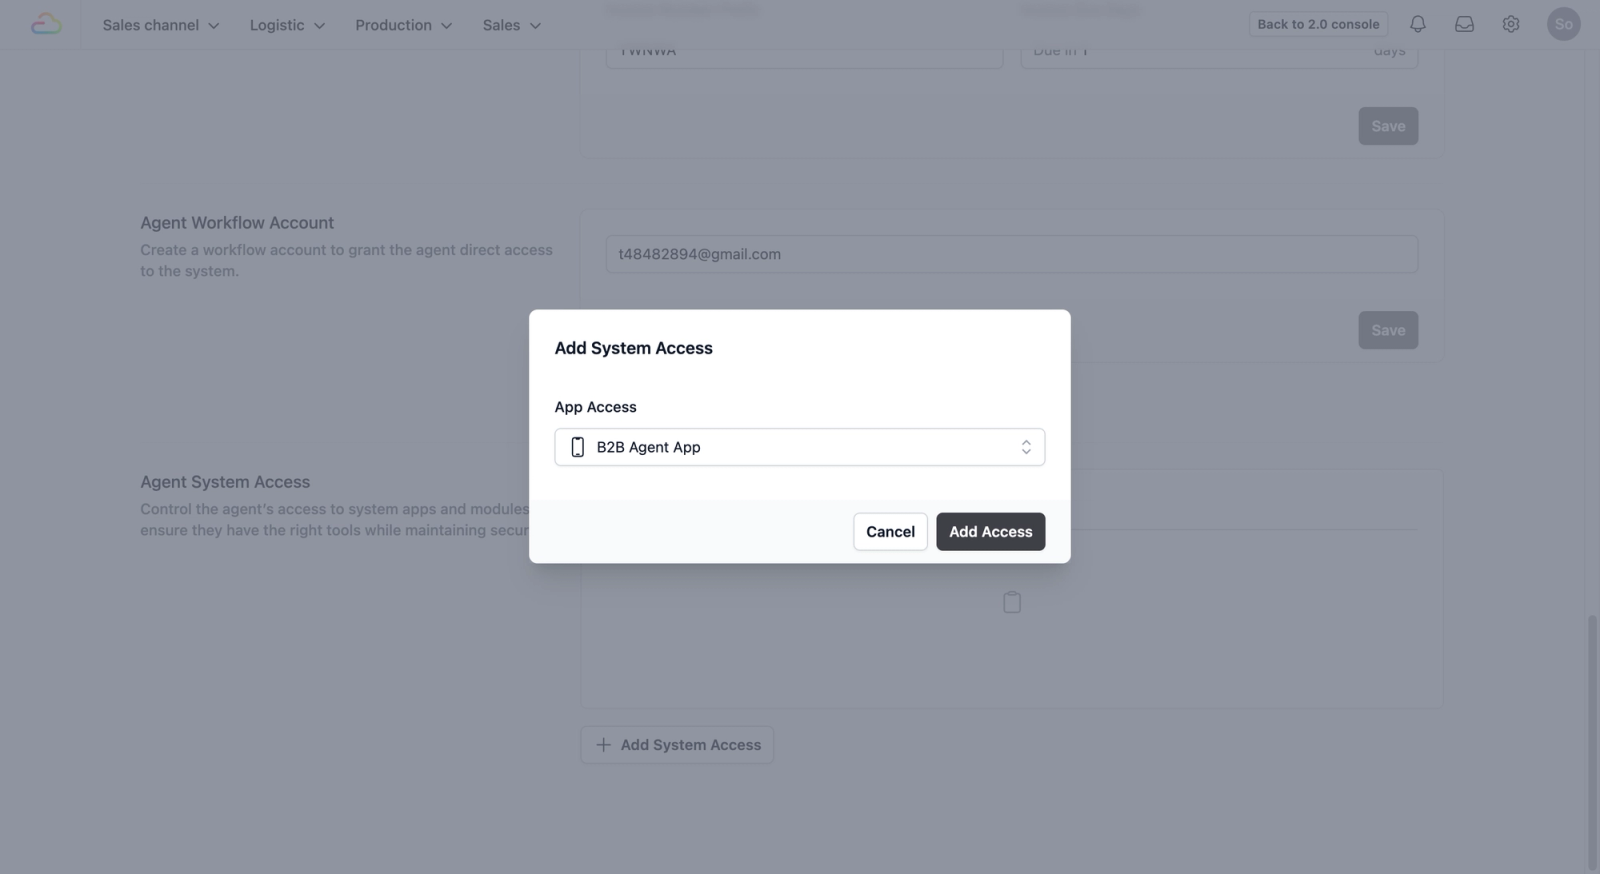
- Finalize: Once selected, click the Add Access button. You should now see the new app granted access to the agent.
Confirm the Assignment
It is always a good idea to double-check that the agent is correctly linked to the app.
Return to Settings: Scroll back up and click on the Manage Apps link. This should bring you to the Mobile App tab.
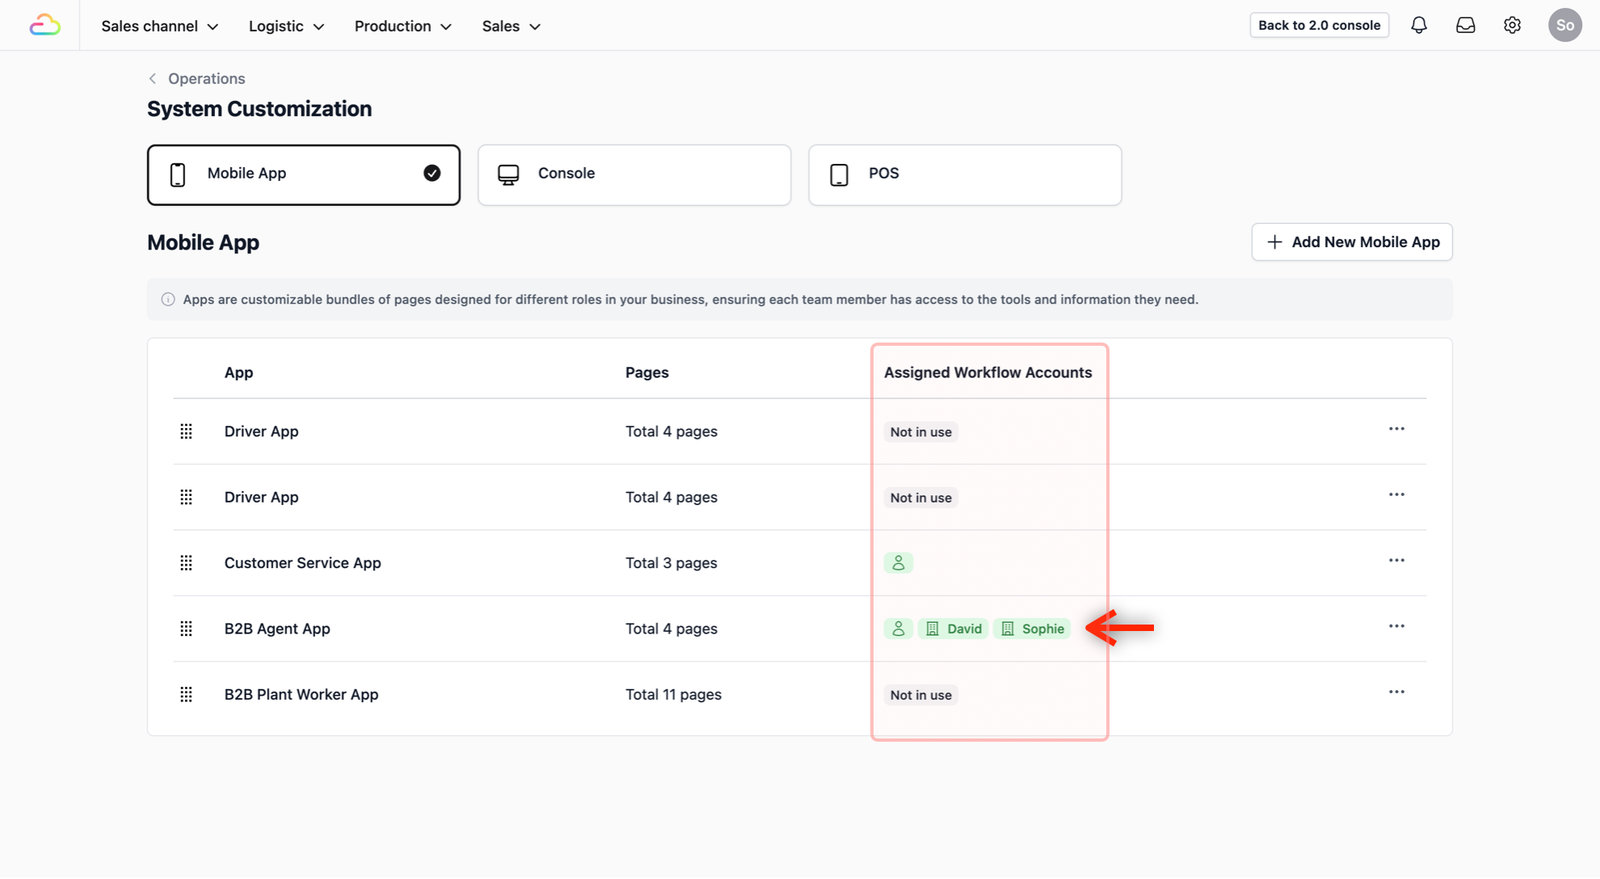
Verify the App: Locate the app that you have just given access to the agent.
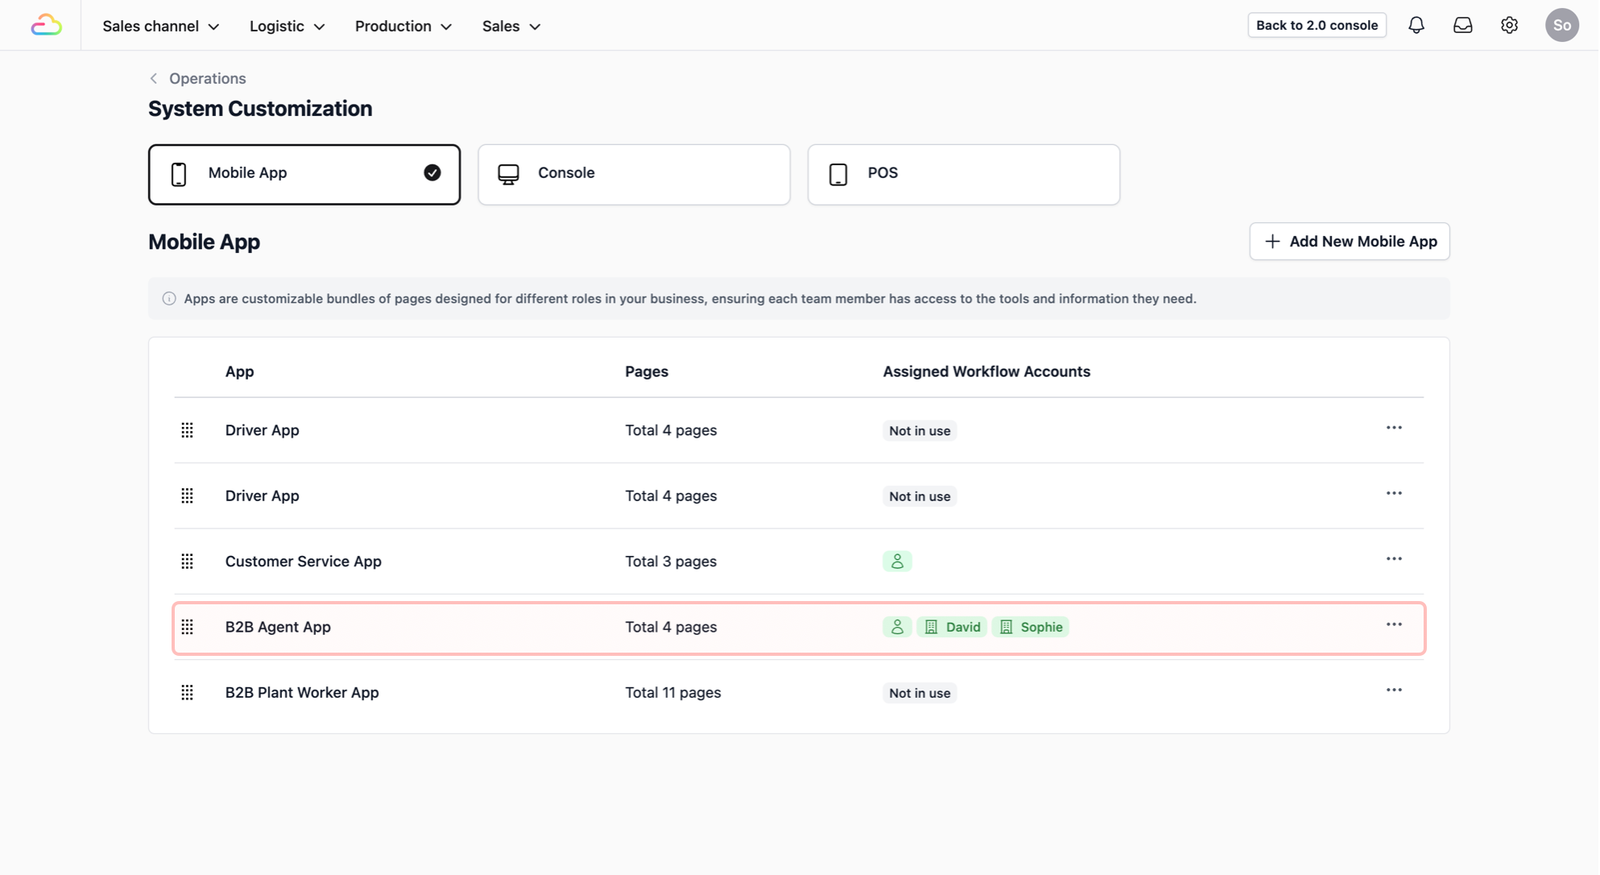
Check the Agent Name: Look at the Assigned Workflow Accounts column. You should see your agent’s name appearing there. This confirms they are ready to start creating new orders.
See the Full Workflow in Action
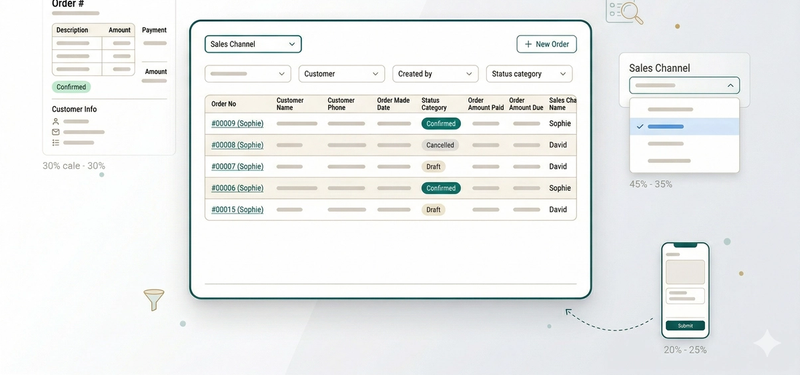
Watch this video to see how an agent logs in and uses the app you just created to submit a real-time order.
The workflow: Agent logs in → Taps a customer to start a new order → Completes the Procedure → Order submitted → Order will appear instantly in the Admin Console.
Give feedback
Up next
Track Agent OrdersFind and review the orders your agents bring in, all from one dashboard.
Read more