Setting Up Event Notifications

In this article
In the modern service industry, customers expect to be updated at every step, just like when they order a ride or food delivery. "Silence" makes customers anxious. Event Notifications allow you to bridge this communication gap automatically. By linking specific system events (like "Order Finished") to instant messages (WhatsApp/Email), you create a transparent and professional experience.
Contents
Contents
Why Use Event Notifications?
- Build Customer Trust: When a customer receives an instant "Order Confirmed" or "Driver on the way" message, they feel reassured that their service is being handled professionally.
- Reduce "Where is my order?" Calls: By proactively updating customers, you drastically reduce the number of support calls and messages inquiring about status.
- Streamline Internal Ops: Don't just notify customers—notify your team. Automatically alert your driver when an order is packed, or alert the manager when a refund is processed.
The Notifications Dashboard
Navigate to Settings > Automation > Event Notification. Here, the dashboard is divided into two distinct tabs:
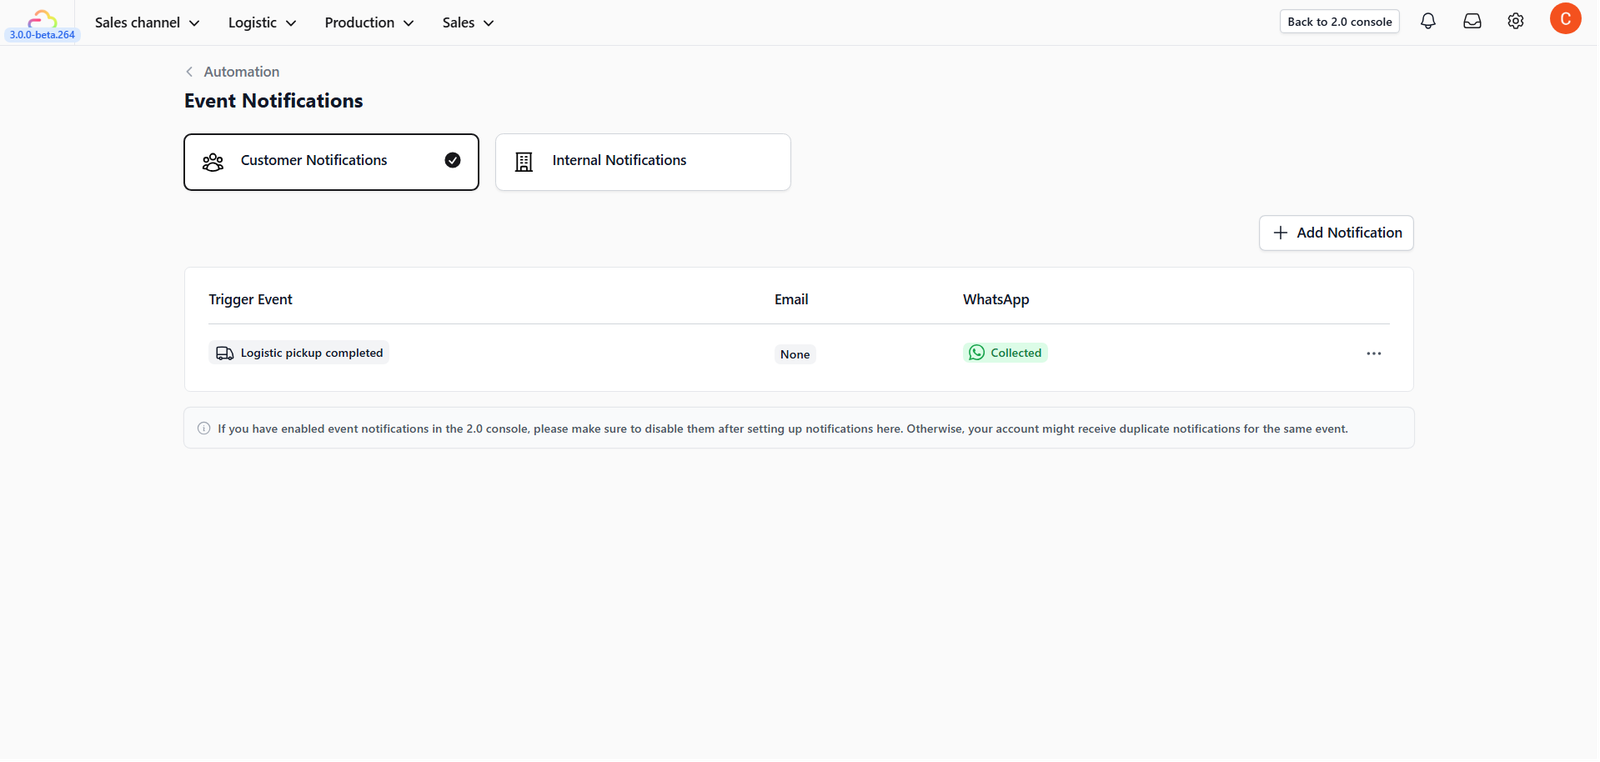
- Customer Notification: Alerts sent to the client (e.g., Order Confirmation).
- Internal Notification: Alerts sent to your staff or admin (e.g., New Order Alert).
Adding a Customer Notification

To automate messages for your clients:
- Ensure you are on the Customer Notification tab.
- Click the + Add Notification button.
A. Select the Trigger Event
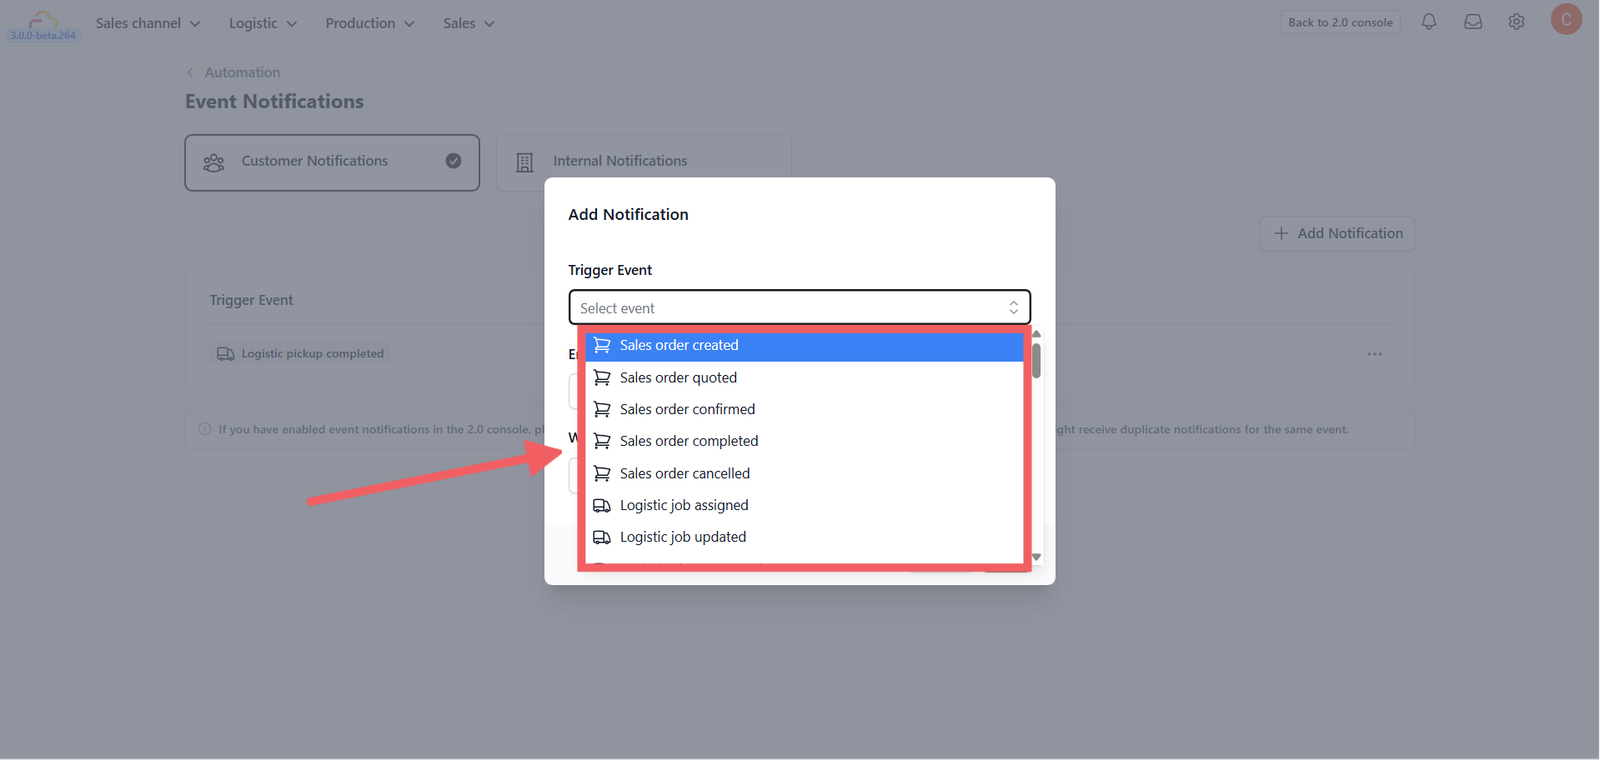
A pop-up will appear. First, choose the Trigger Event. This is the specific action that causes the message to send. Common triggers include:
- Order: Order Created, Order Cancelled.
- Payment: Payment Successful, Refund Issued.
- Logistics: Ready for Collection, Driver Assigned, Order Completed.
- Membership: Member Registered, Points Top-up.
B. Select Message Templates
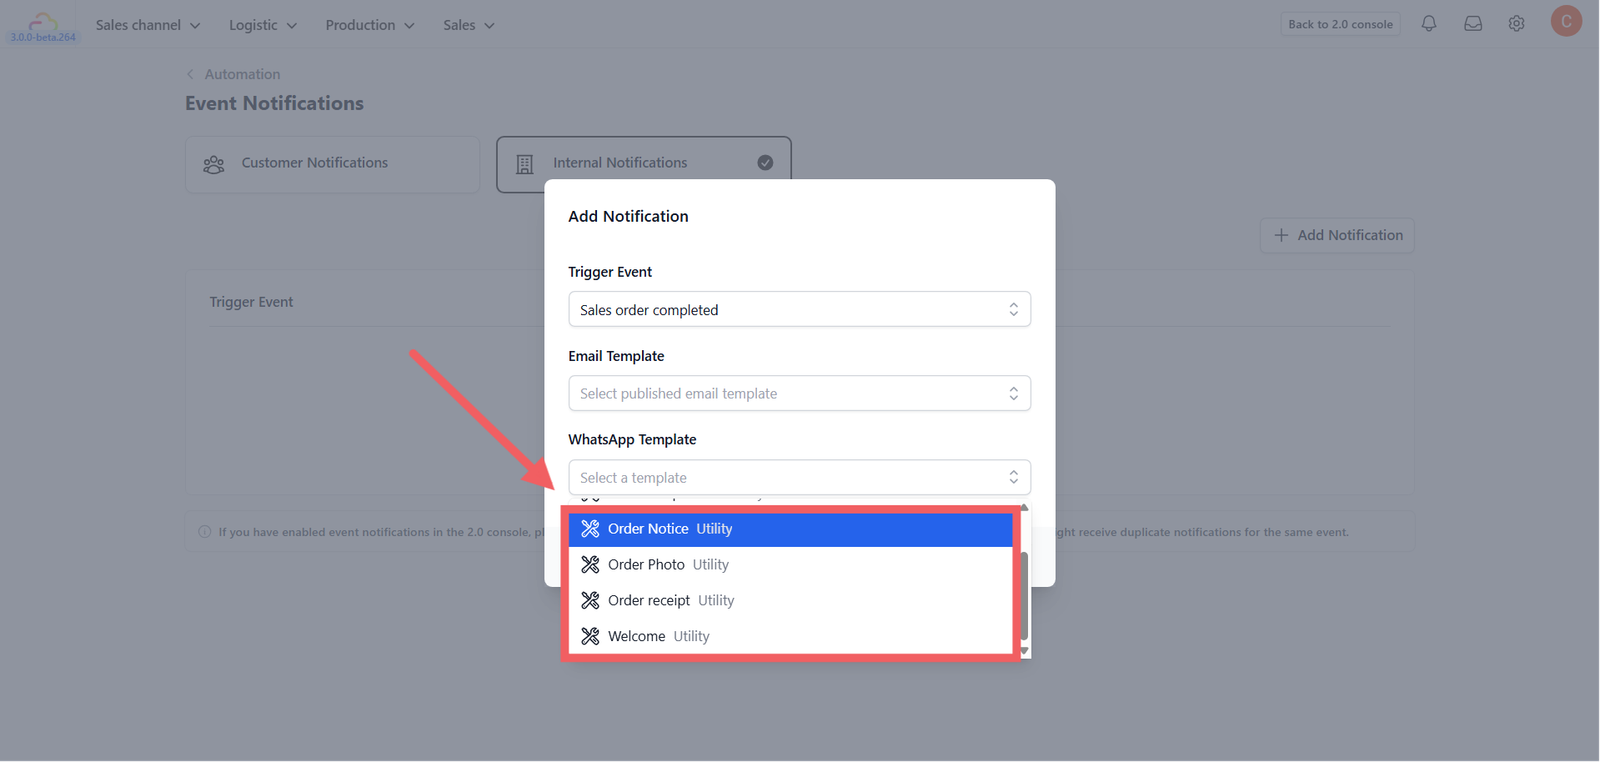
Once the trigger is set, choose the content to send:
- Email Template: Select a pre-designed email.
- WhatsApp Template: Select an approved WhatsApp template.
Adding an Internal Notification
If you want your staff to be alerted when important things happen:
- Switch to the Internal Notification tab.
- Click + Add Notification.
- The process is the same: Select a Trigger (e.g., "Order Created" - so the kitchen knows to start preparing) and choose the notification method.
Save & Activate
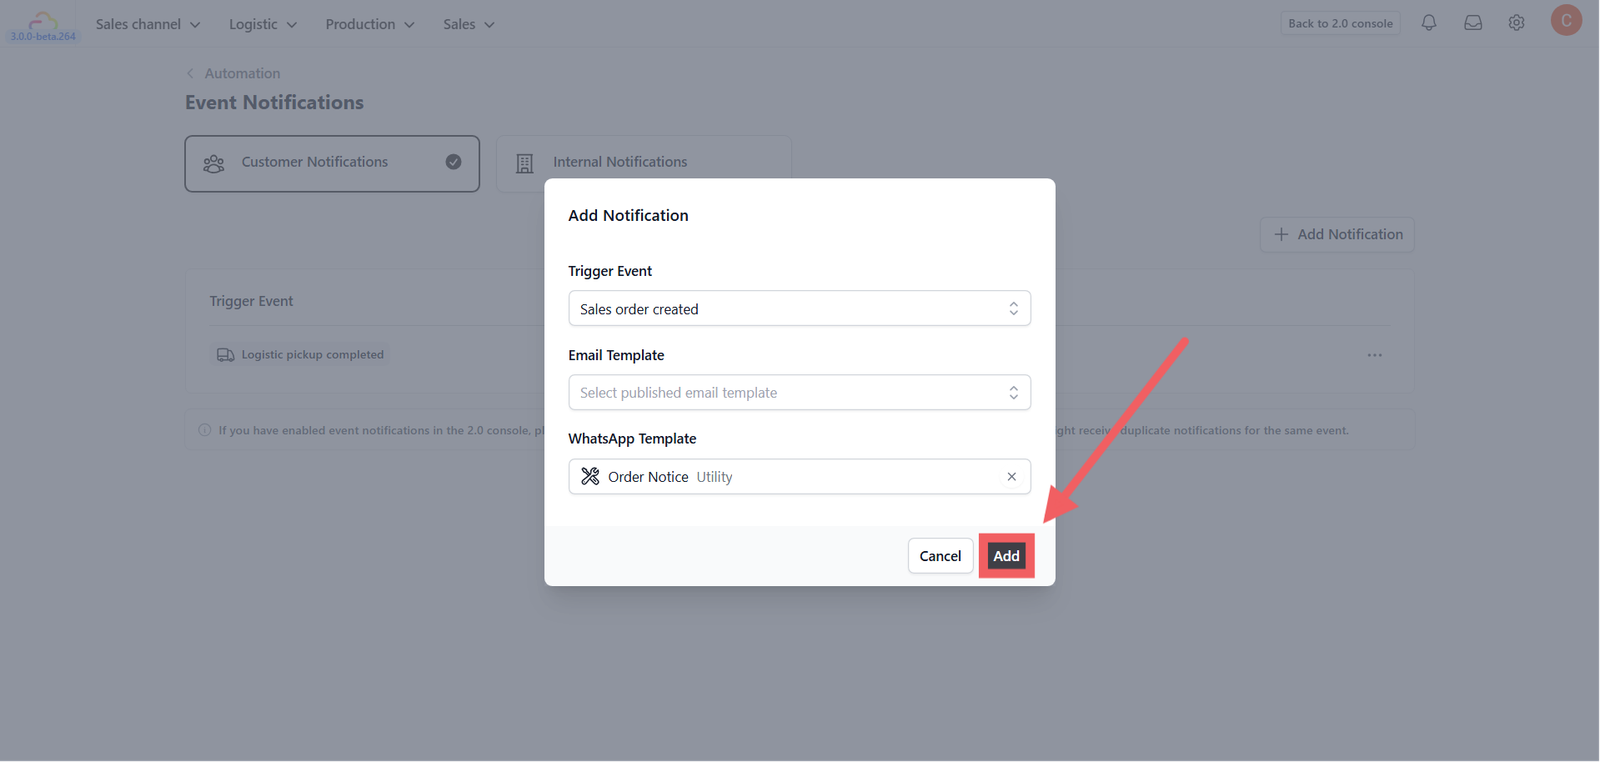
Click Add (or Save) to finish.

Your new automation will appear in the list. Delete or Edit anytime using Three-dot Menu (⋮) on the right of each row.
Give feedback
Up next
B2B OperationsA complete system to onboard Agents, standardize their Orders, and manage monthly Billing and payments.
Read more