
Set Up Your Products and Pricing First
Before your POS can show anything at checkout, your products and prices need to already exist in EasyBiz. Without this, your staff won't have anything to select when creating an order at the counter.
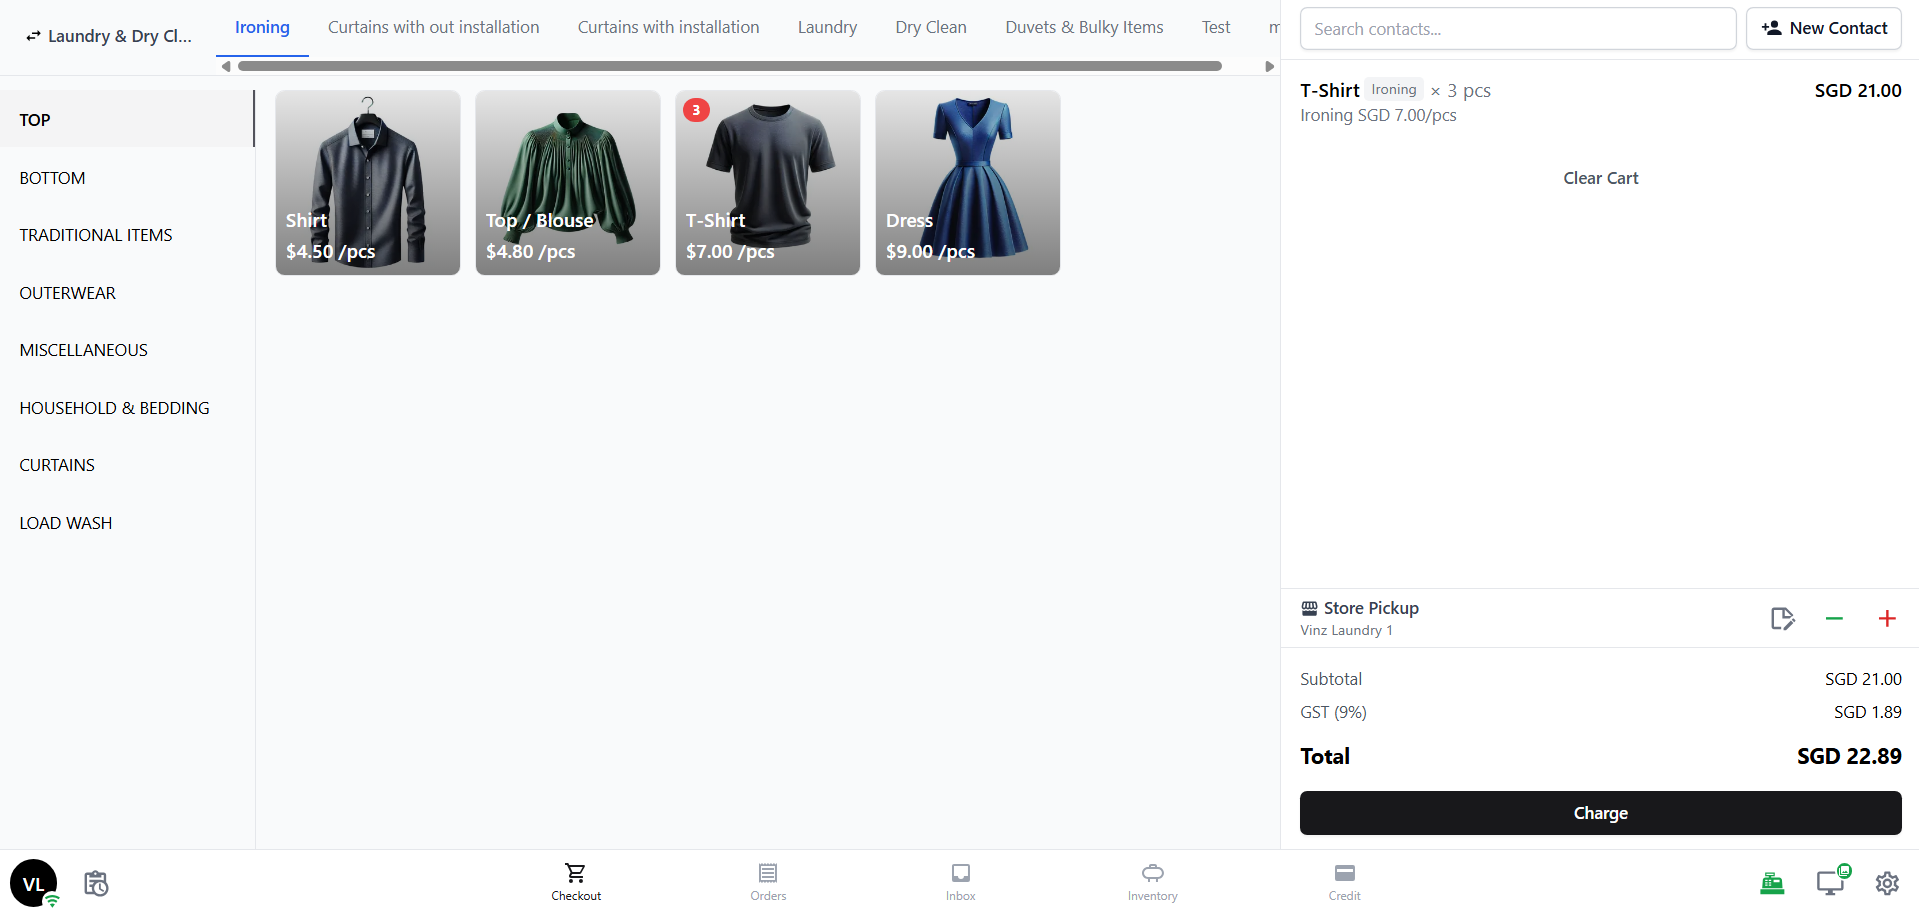
What you need to set up depends on your business type:
Laundry businesses — set up a Price List with fixed prices (e.g. Shirt $2.50, Pants $4.00). Each item has a set price, so counter staff just taps and goes.
Bag repair businesses — set up Collections. Since prices vary by item and condition, services are grouped into named collections that your staff can browse at the counter.
Not sure where to start? See Introduction to Products and Pricing for the full walkthrough.
Set Up Your Business Unit
Your Business Unit tells EasyBiz which operating model the POS is serving — for example, Laundry and Garment Care, Home Cleaning, or Bag Repair. It controls everything your POS needs: what items appear on the order screen, how orders are priced, what your receipts look like, and how orders flow from drop-off to completion.
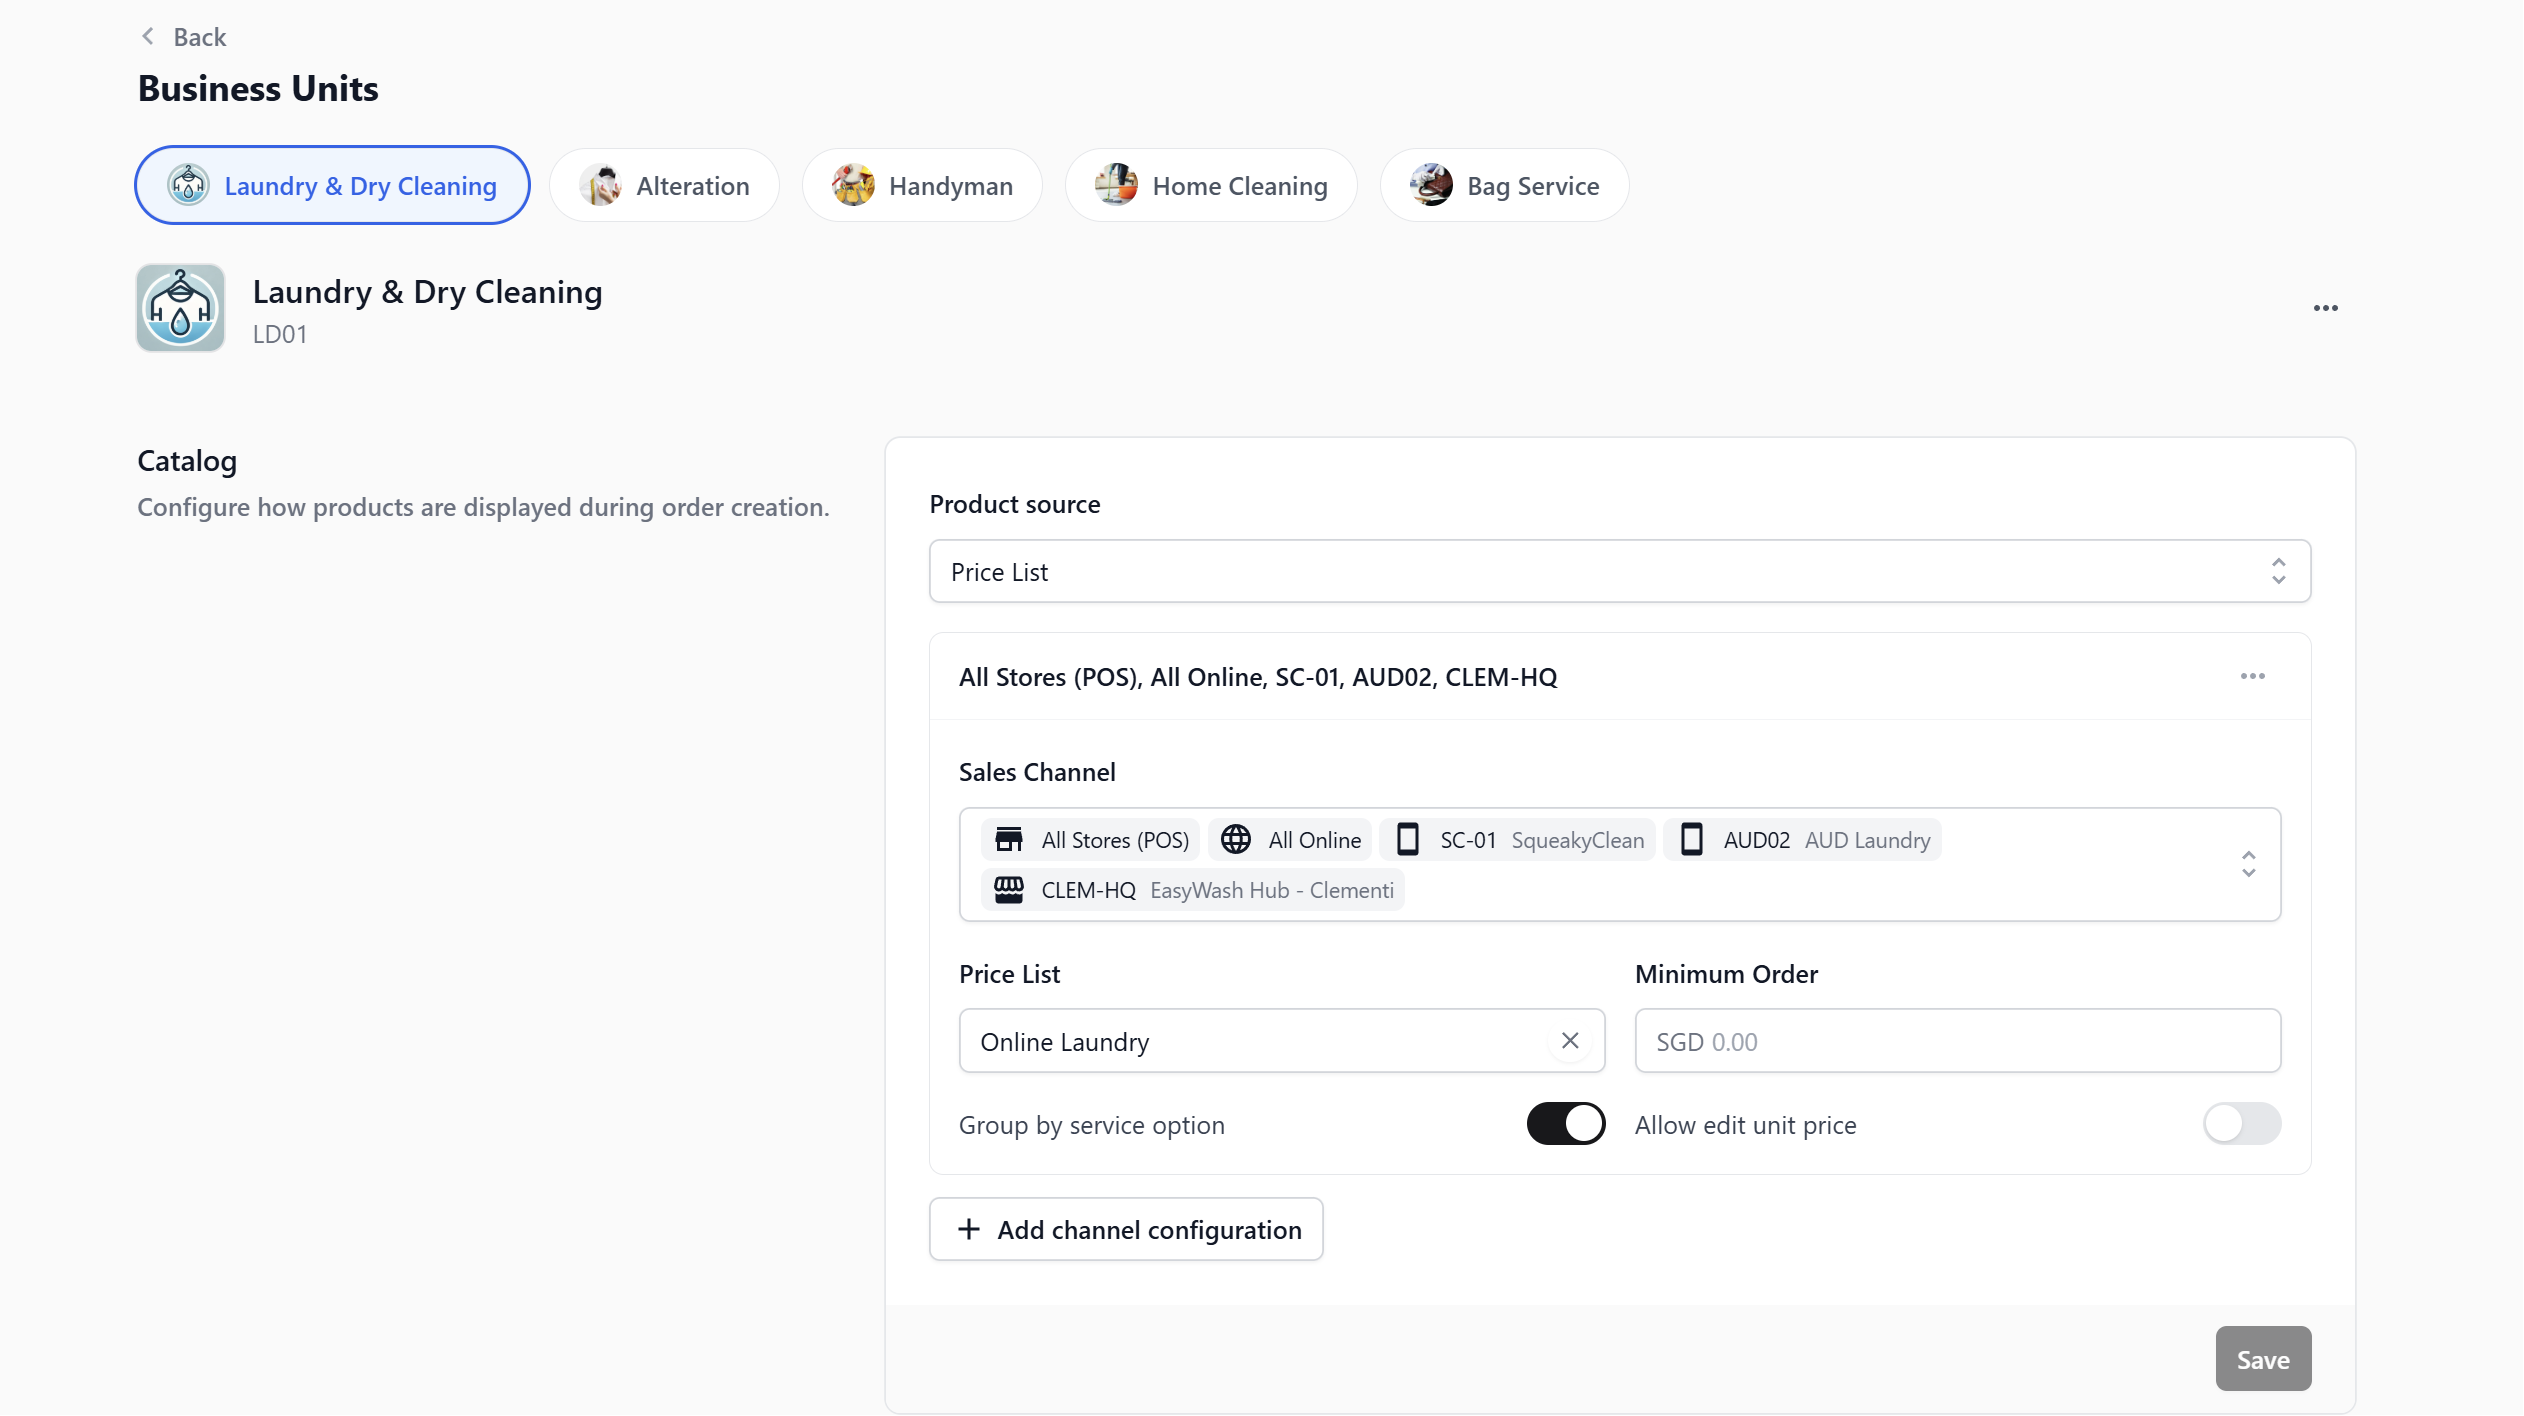
Your POS app pulls its catalog, pricing, and document templates directly from your Business Unit. If this isn't set up first, your counter will have nothing to sell.
For the full setup guide, see Setting Up Your Business Unit.
Set Up Your Market & Location
Before creating your POS location, make sure your Market and Location are already set up in EasyBiz. Your Market represents the country your business operates in, such as Singapore or Malaysia, and controls the currency, dial code, locale, and numbering used on receipts, invoices, and customer-facing pages.
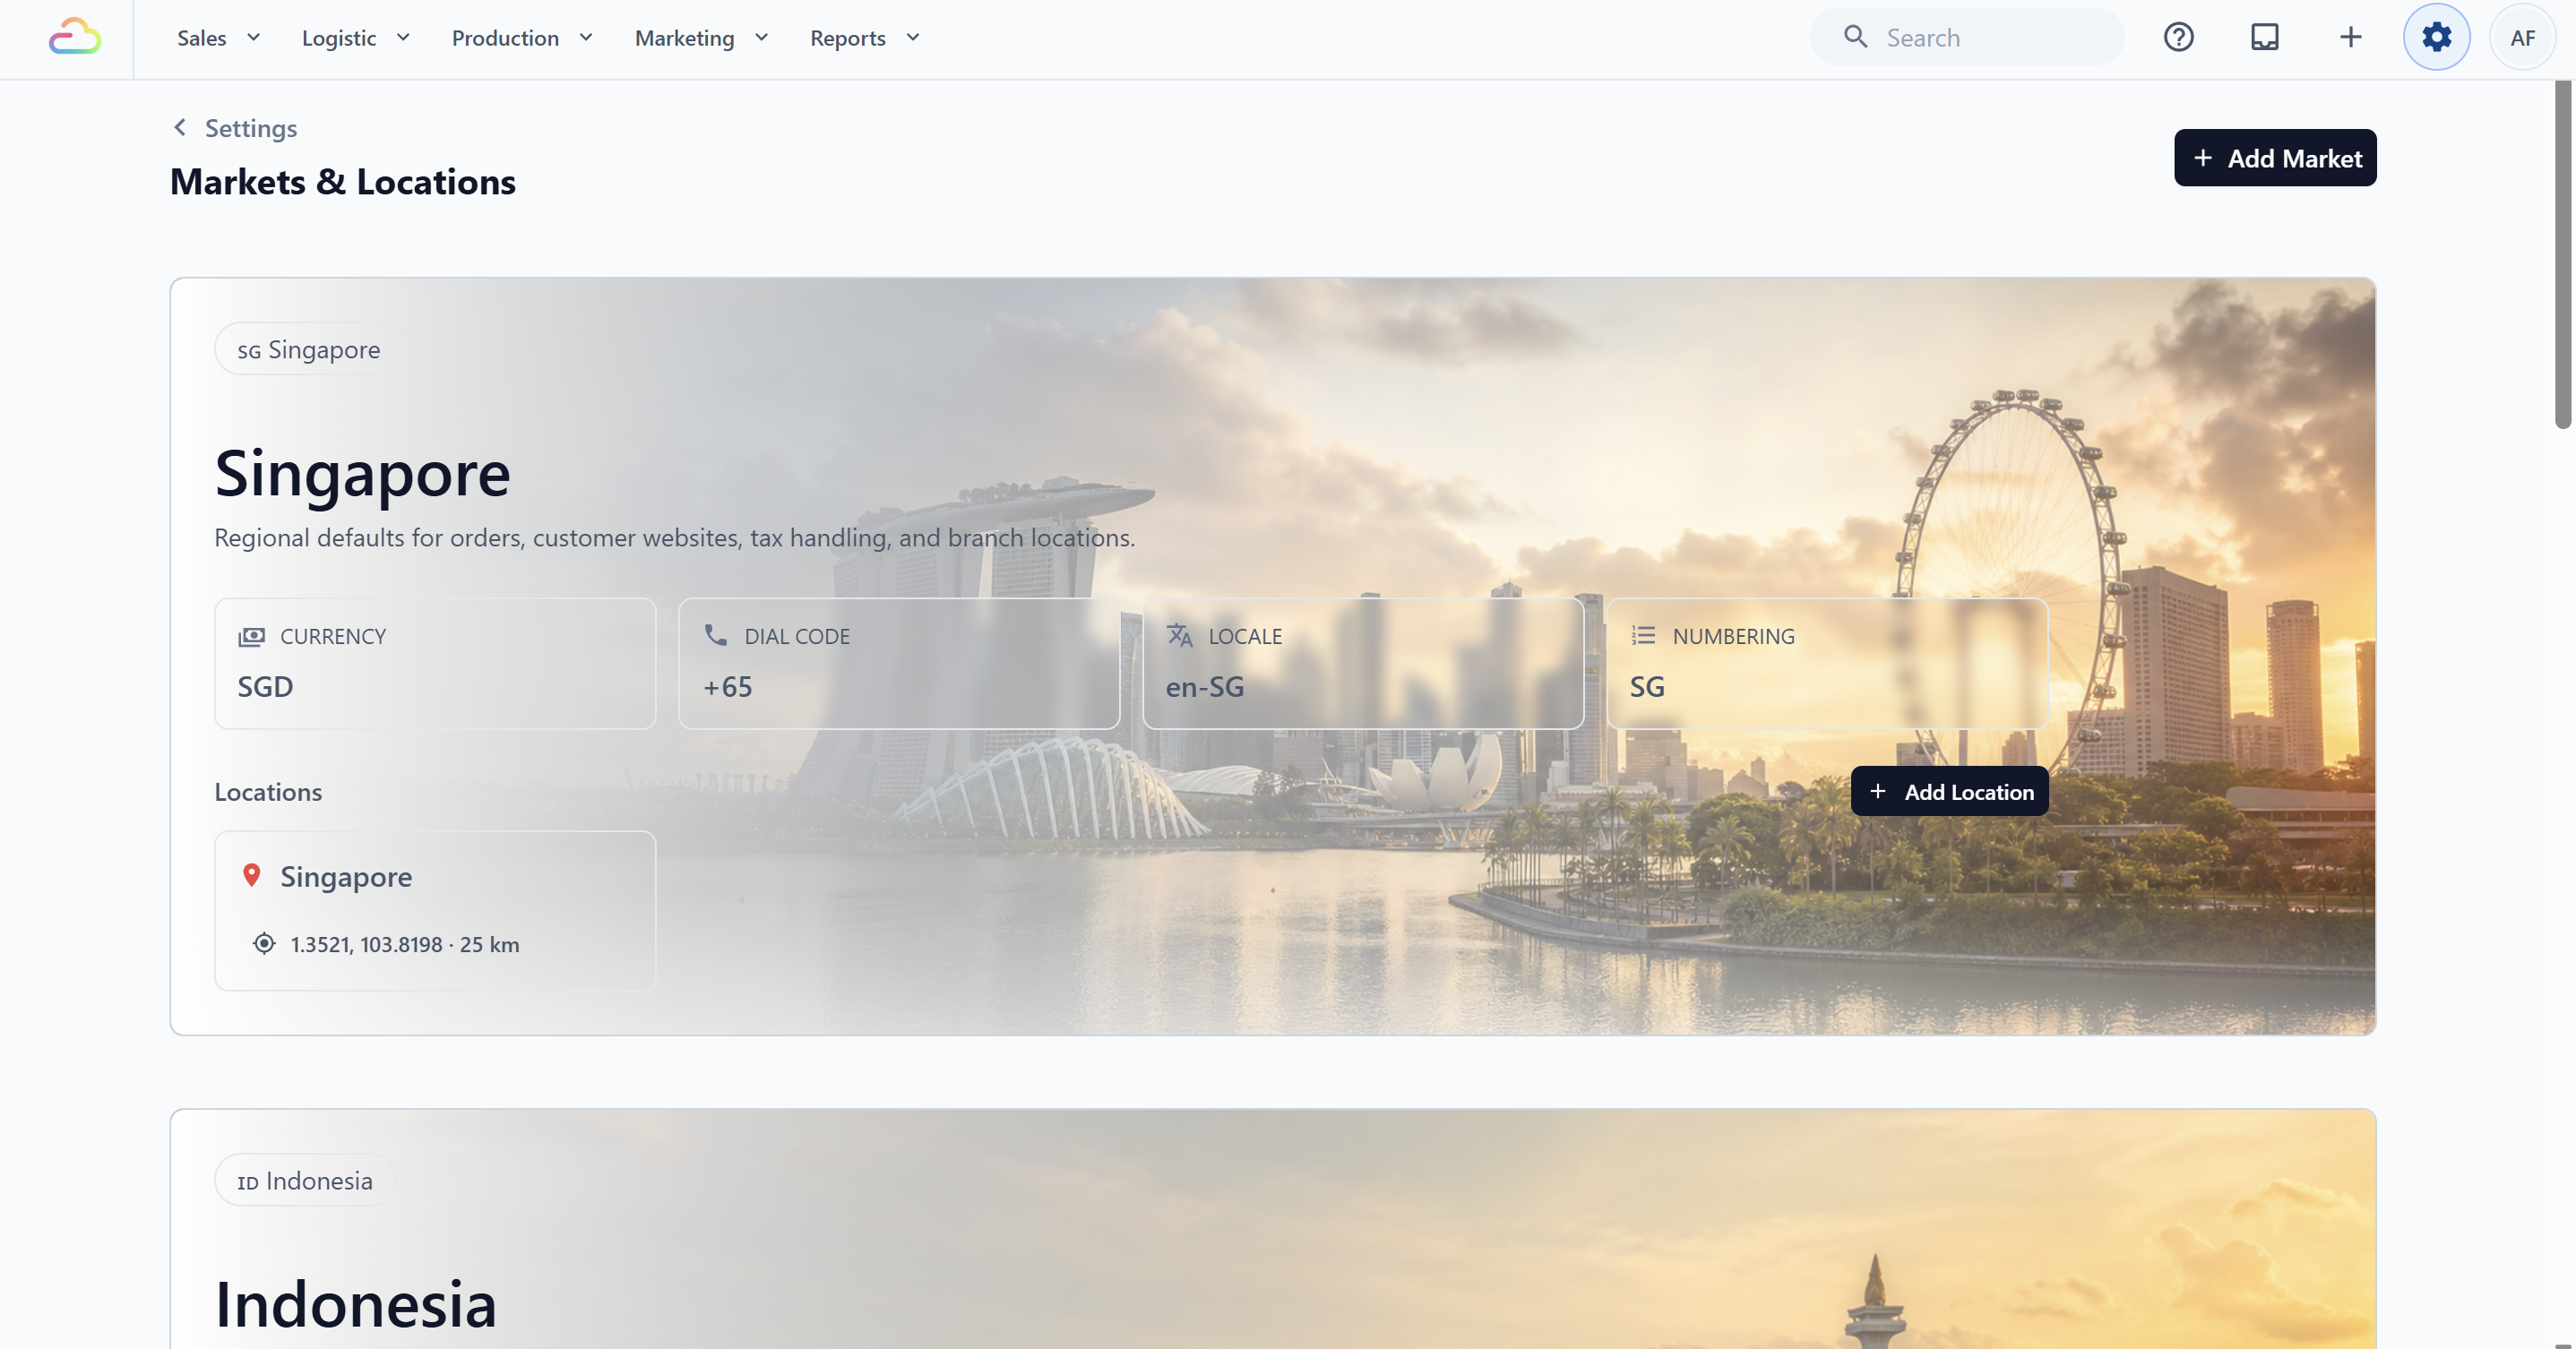
Your Location represents the city or operating area inside that market. This helps EasyBiz know where the POS outlet belongs, which timezone to use, and how delivery or dispatch coverage should be handled. Most businesses only need one market and one location to start, but if you operate in multiple countries or cities, set those up first before adding your POS location.
You also need a Company for that market. When you add the POS location, EasyBiz asks which Company its orders, invoices, tax and reporting belong to. See Creating and Configuring a Company.
For the full setup guide, see Introduction to Markets & Locations.
What You Need on Setup Day
Your POS device
This is the screen your staff will use at the counter. Use a Windows PC or Mac running Chrome or Edge, or an Android tablet with a screen of 10 inches or larger. On a computer, EasyBiz POS runs in the browser at newpos.easybizcloud.com, so there's nothing you have to install — just open it, sign in, and you're ready to go. On an Android tablet, you can also use the EasyBiz POS app and choose POS Terminal. A phone or an iPad is not a supported POS counter, and an iPad can't connect to receipt or label printers in any browser. Either one can still be paired to your counter for scanning or photos, and an iPad can be a customer-facing display.
Internet connection
A stable internet connection is required at all times. EasyBiz POS does not support offline mode — every transaction is processed and synced in real time. We recommend making sure your counter has reliable Wi-Fi or a wired connection before going live.
Hardware (optional but recommended)
You don't need any extra equipment to complete setup. Printers are optional at this stage and are paired inside the POS after you sign in, so you can add them later.
EasyBiz does not require a proprietary printer brand, but that does not mean every thermal printer will work. Compatibility depends on the exact printer model, command language, connection type, POS device and operating system, and browser or app.
Receipt printer: Must support the ESC/POS command language. After a compatible printer is paired, it prints your customer receipts.
Label printer: Must support TSPL or confirmed TSPL emulation. A brand name or product series alone is not proof of compatibility. After a compatible printer is paired, it can print item labels and package sticker labels.
USB connection: Works in Chrome or Edge on a Windows PC or Mac (through WebUSB), and in the EasyBiz POS app on an Android tablet. If your browser does not support WebUSB, such as Safari or any browser on an iPad, the printer cannot be paired over USB.
Bluetooth connection: The current web pairing flow requires compatible Bluetooth Low Energy (BLE) hardware that exposes a writable GATT service and characteristic. Bluetooth Classic/SPP-only printers are not supported by this browser flow, or by the EasyBiz POS app. Your POS device and browser must also support Web Bluetooth. Closing or reopening the POS page ends the Bluetooth connection, so you must manually select and reconnect the printer.
Cash drawer: A physical drawer must connect through a compatible receipt printer's DK port, not to the POS device, and the printer port, drawer, cable, voltage, and pinout must all match. After the receipt printer is paired, turn on Cash drawer connected under Printer in the POS settings. The POS then opens the drawer after cash payments, cash refunds and cash in/out. Open it once from the POS to confirm it works.
Customer-facing display: A spare iPad or Android tablet with the EasyBiz POS app, opened as a Paired Device. It pairs with a 6-digit code that the tablet shows and you type on the POS. It shows the order summary for the customer to check and sign, a form for their details, the payment QR, or your poster when no order is in progress.
Set Up Your POS Staff [Optional]
If you'd like your staff to clock in before using the counter, or if you want to track who handled each transaction, you can give your counter staff clock-in PINs. This is entirely optional — your POS is fully functional without it.
Add each counter staff member in Settings → Users & Access and give them a 4-digit PIN under POS clock-in. Counter staff who only clock in on the POS need no Console seat. In Settings → Point of Sale → POS App, the Time Clock feature block's Clock-in Mode can be Optional or Required. When it is Required, the POS shows a clock-in screen until a staff member enters their PIN on the on-screen keypad.
For the full setup guide, see Set Up POS Staff Management.
FAQs
What if I haven't set up my price list yet?
No problem — you can complete your price list or collections first, then come back to continue with POS setup. Go to Settings → Catalog & Pricing to get started, or follow this guide Introduction to Products & Pricing.
What's the difference between a price list and collections?
A price list is for businesses with fixed, standard prices — like laundry shops where a shirt is always $2.50. Collections are for businesses where prices vary per item — like bag repair, where the cost depends on what work is needed.
What devices can I use as my POS screen?
A Windows PC or Mac running Chrome or Edge, or an Android tablet with a screen of 10 inches or larger. A phone or an iPad is not a supported POS counter, and an iPad can't connect to receipt or label printers. On a computer there's nothing you have to install — just open the POS in your browser and sign in.
Is staff clock-in mandatory?
No. By default, the POS can be used without a PIN. Staff must clock in only if your POS app's Time Clock is set to Required. See Set Up POS Staff Management for details.
What's Next?
Now that you have everything you need, continue to Setting Up a New POS Shop to register your first physical POS location in EasyBiz.