
What is Auto Sync
Auto Sync is designed to run in the background without you touching it. Once you enable it, every new sale you make is pushed to Xero automatically.
Where to find this setting?
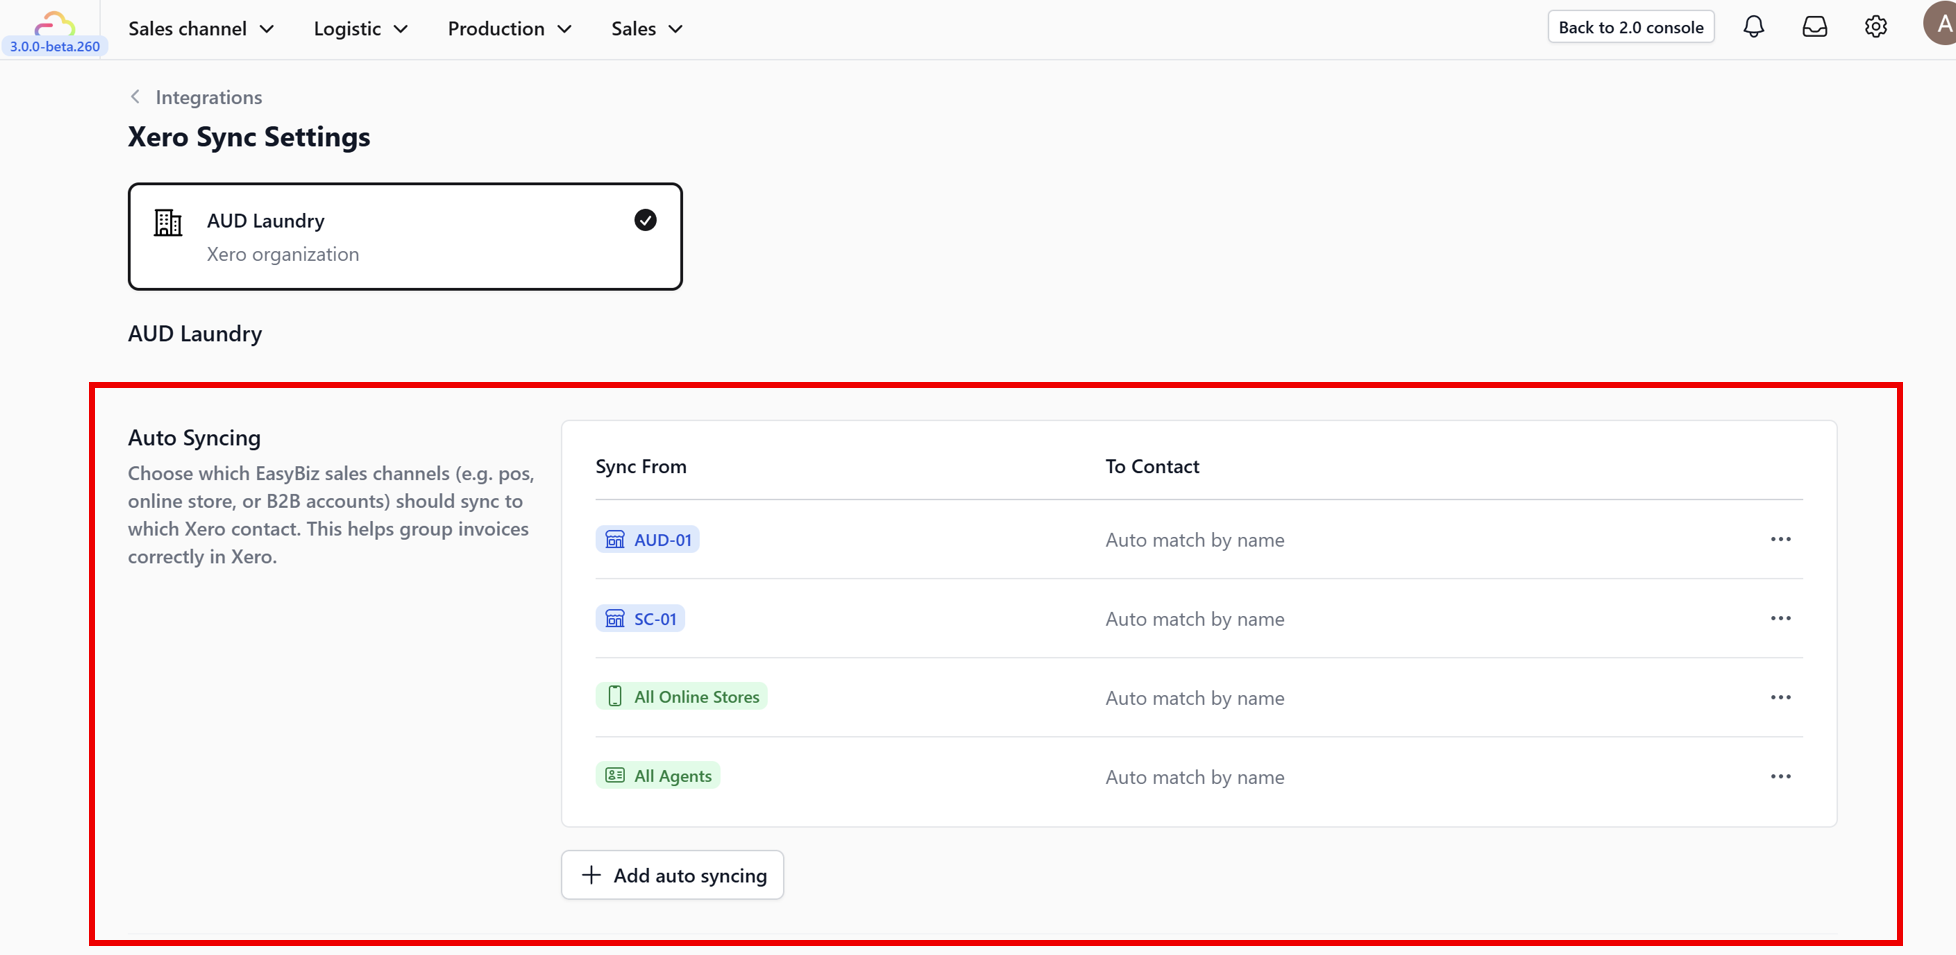
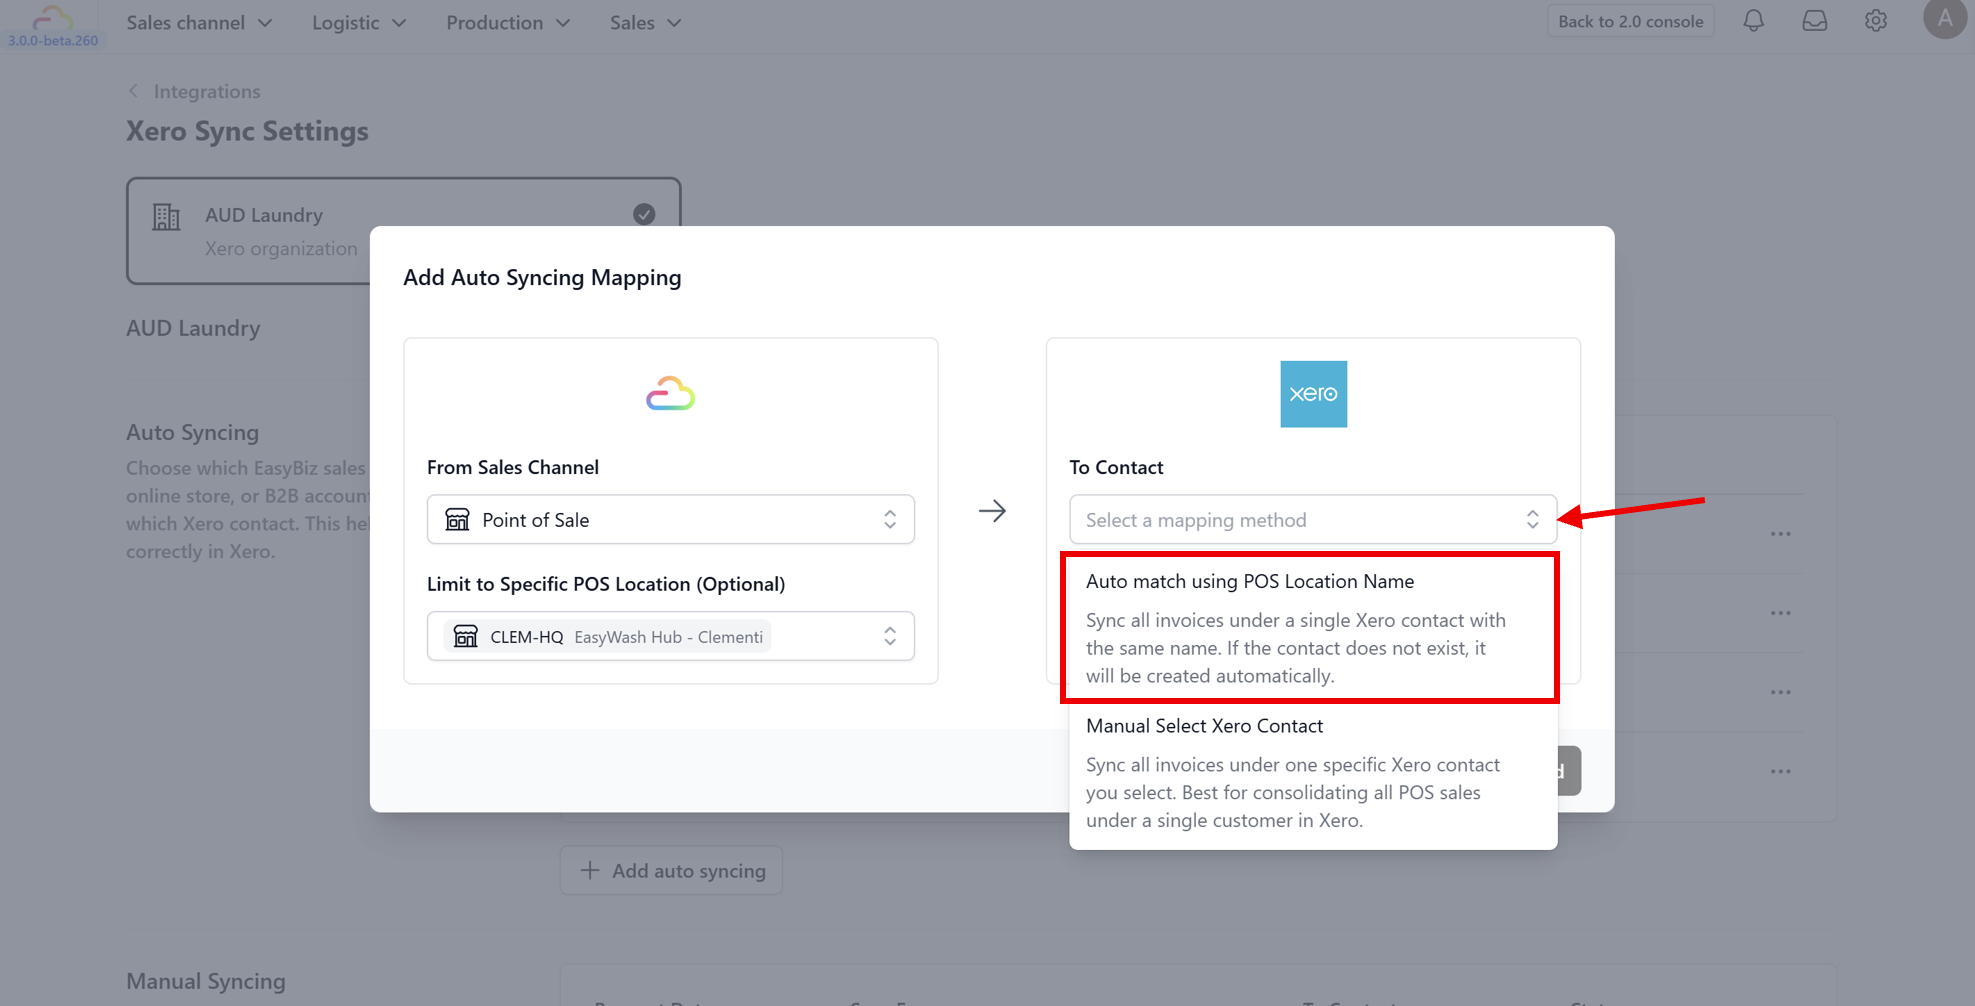
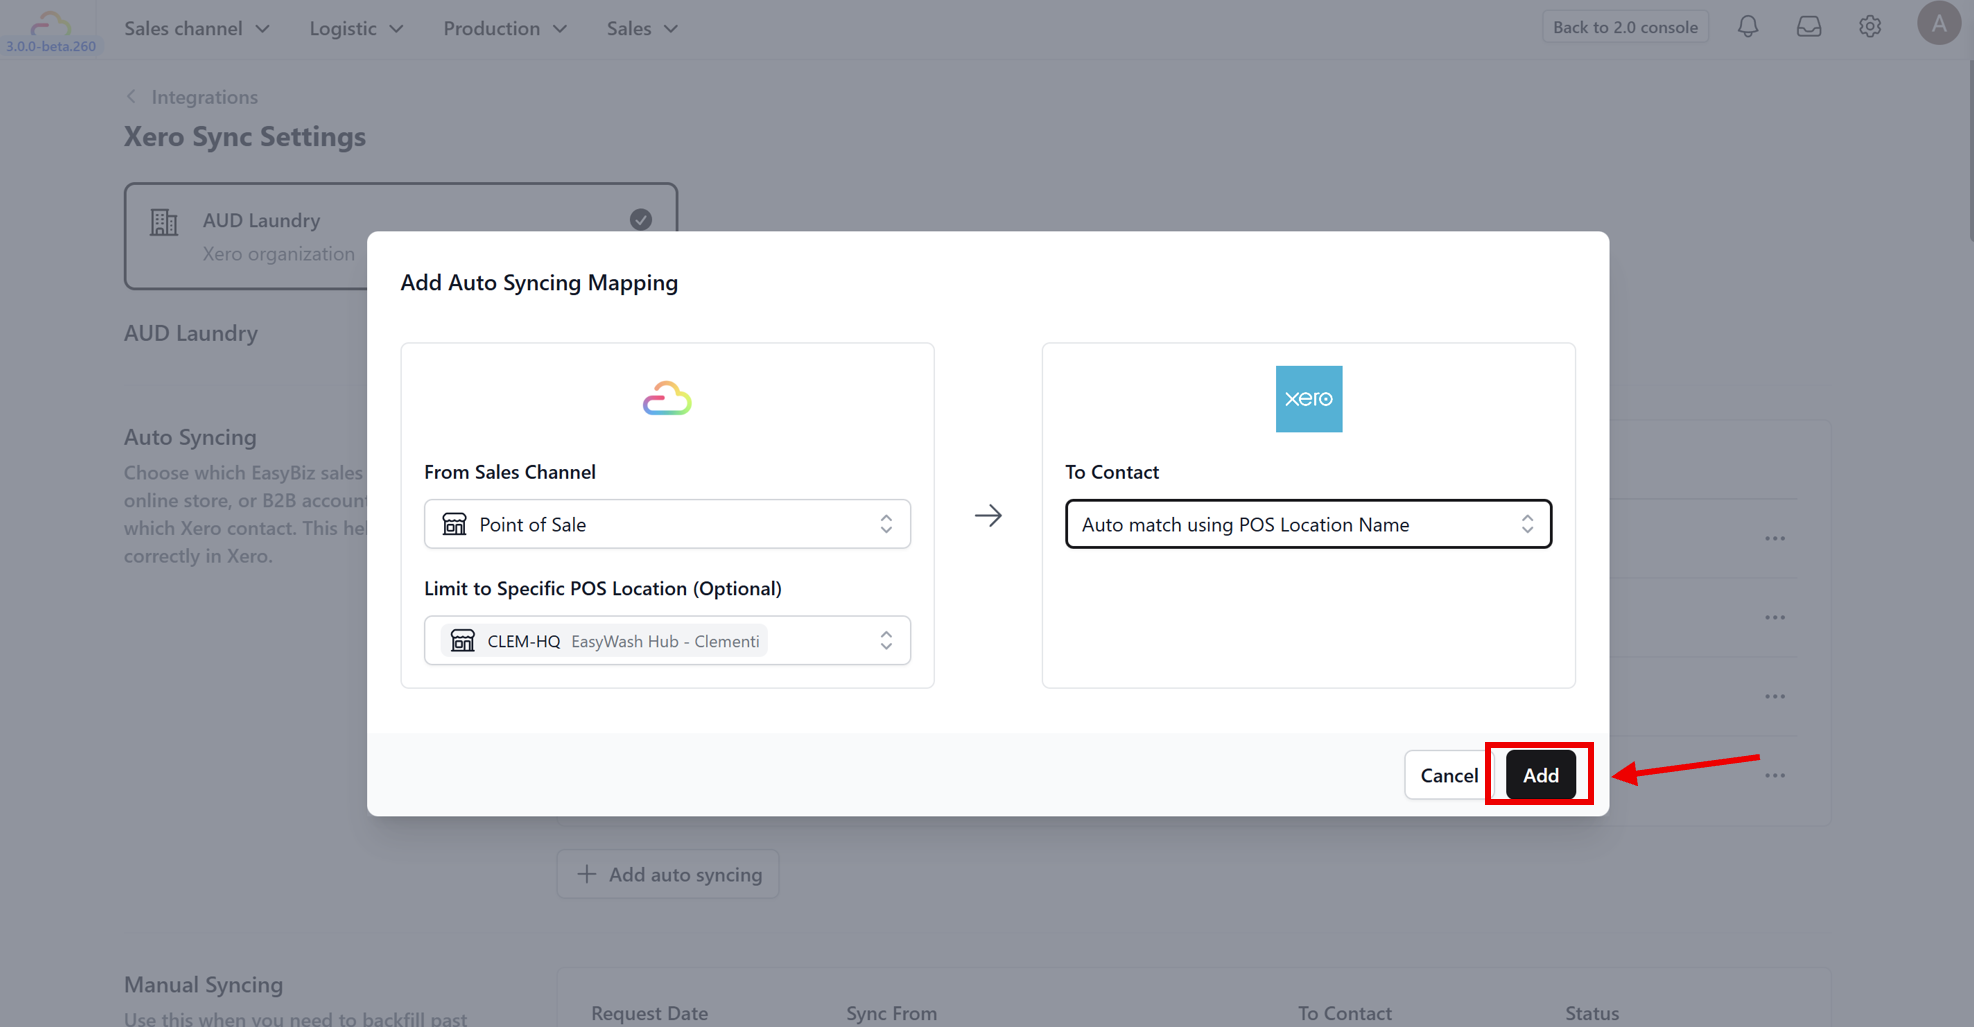
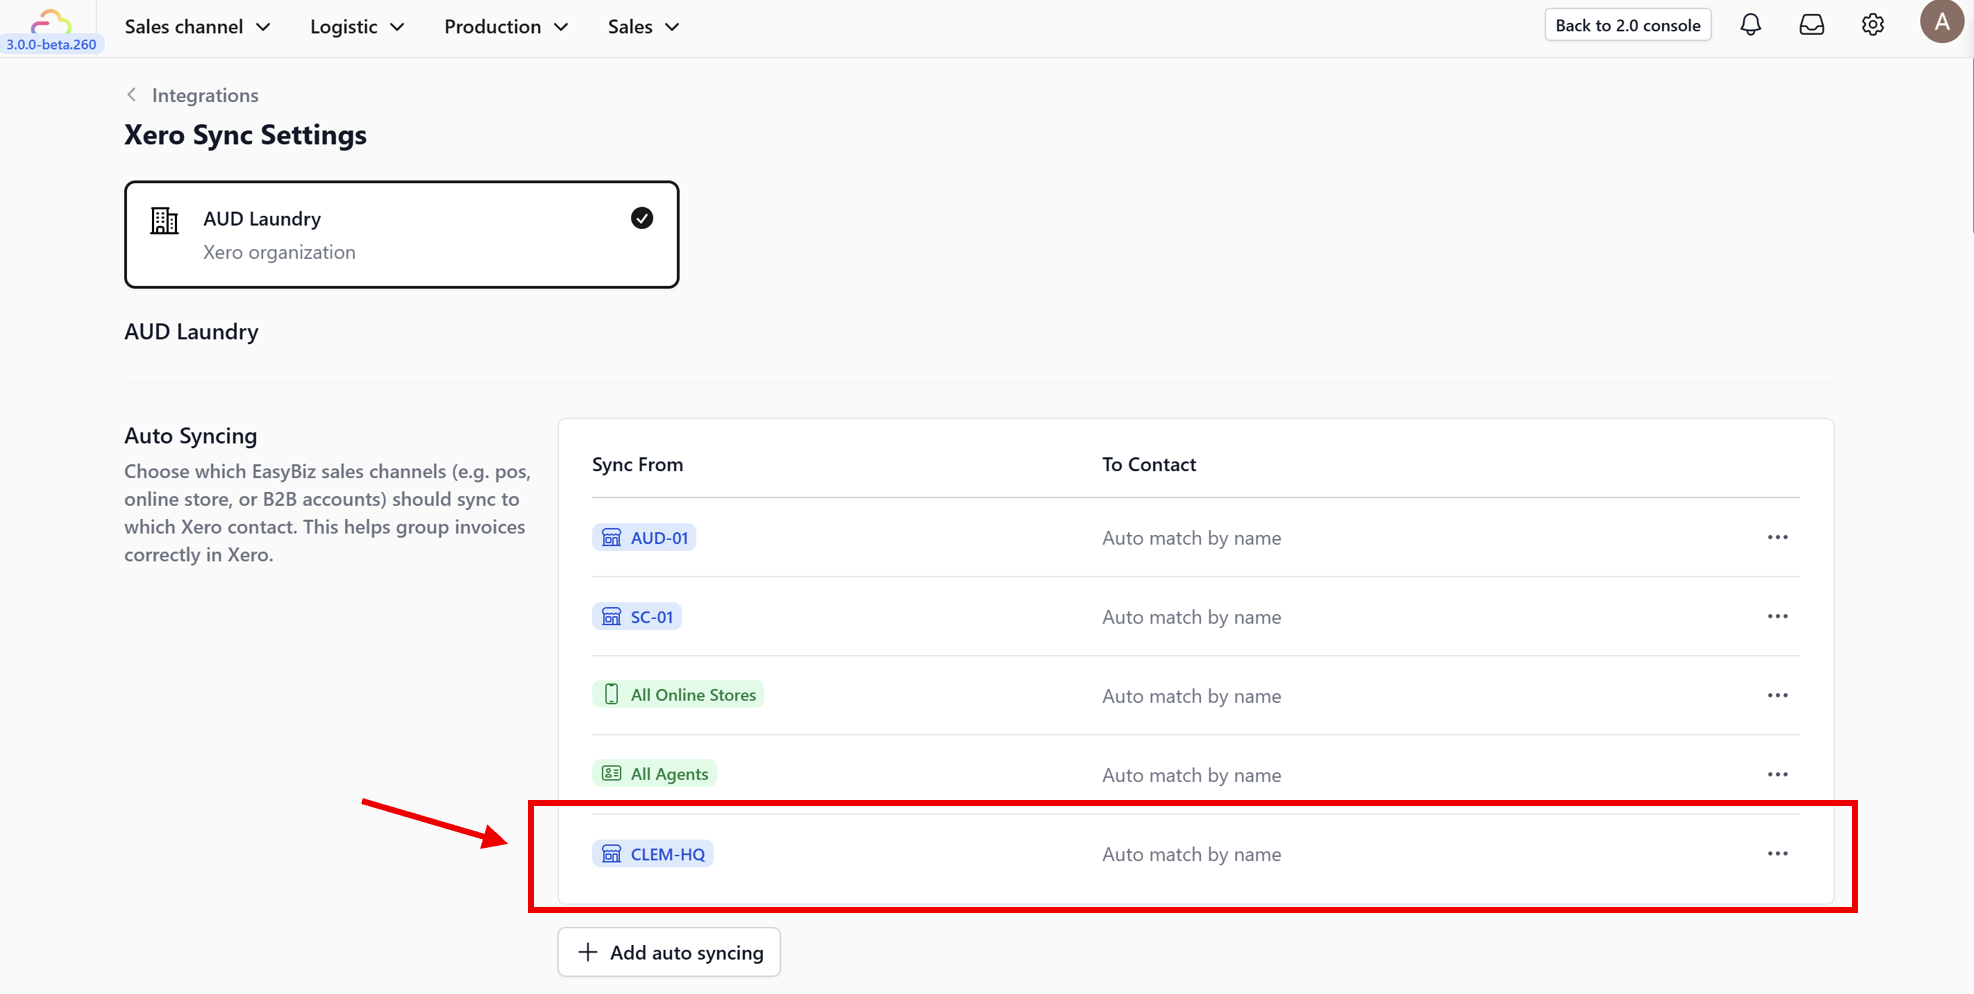
Go to Settings → Integrations. On the Xero card, click Settings. Scroll down to the Auto Syncing section.
Understanding Contact Mapping
When setting this up, you have two choices for how these invoices appear in Xero:
1. Auto-Match (Dynamic)
The system looks for a contact in Xero with the exact same name.
For Online Stores/B2B: It looks for the online store's name or the B2B agent's name (e.g., "John Doe"). If no contact has that name, it creates one.
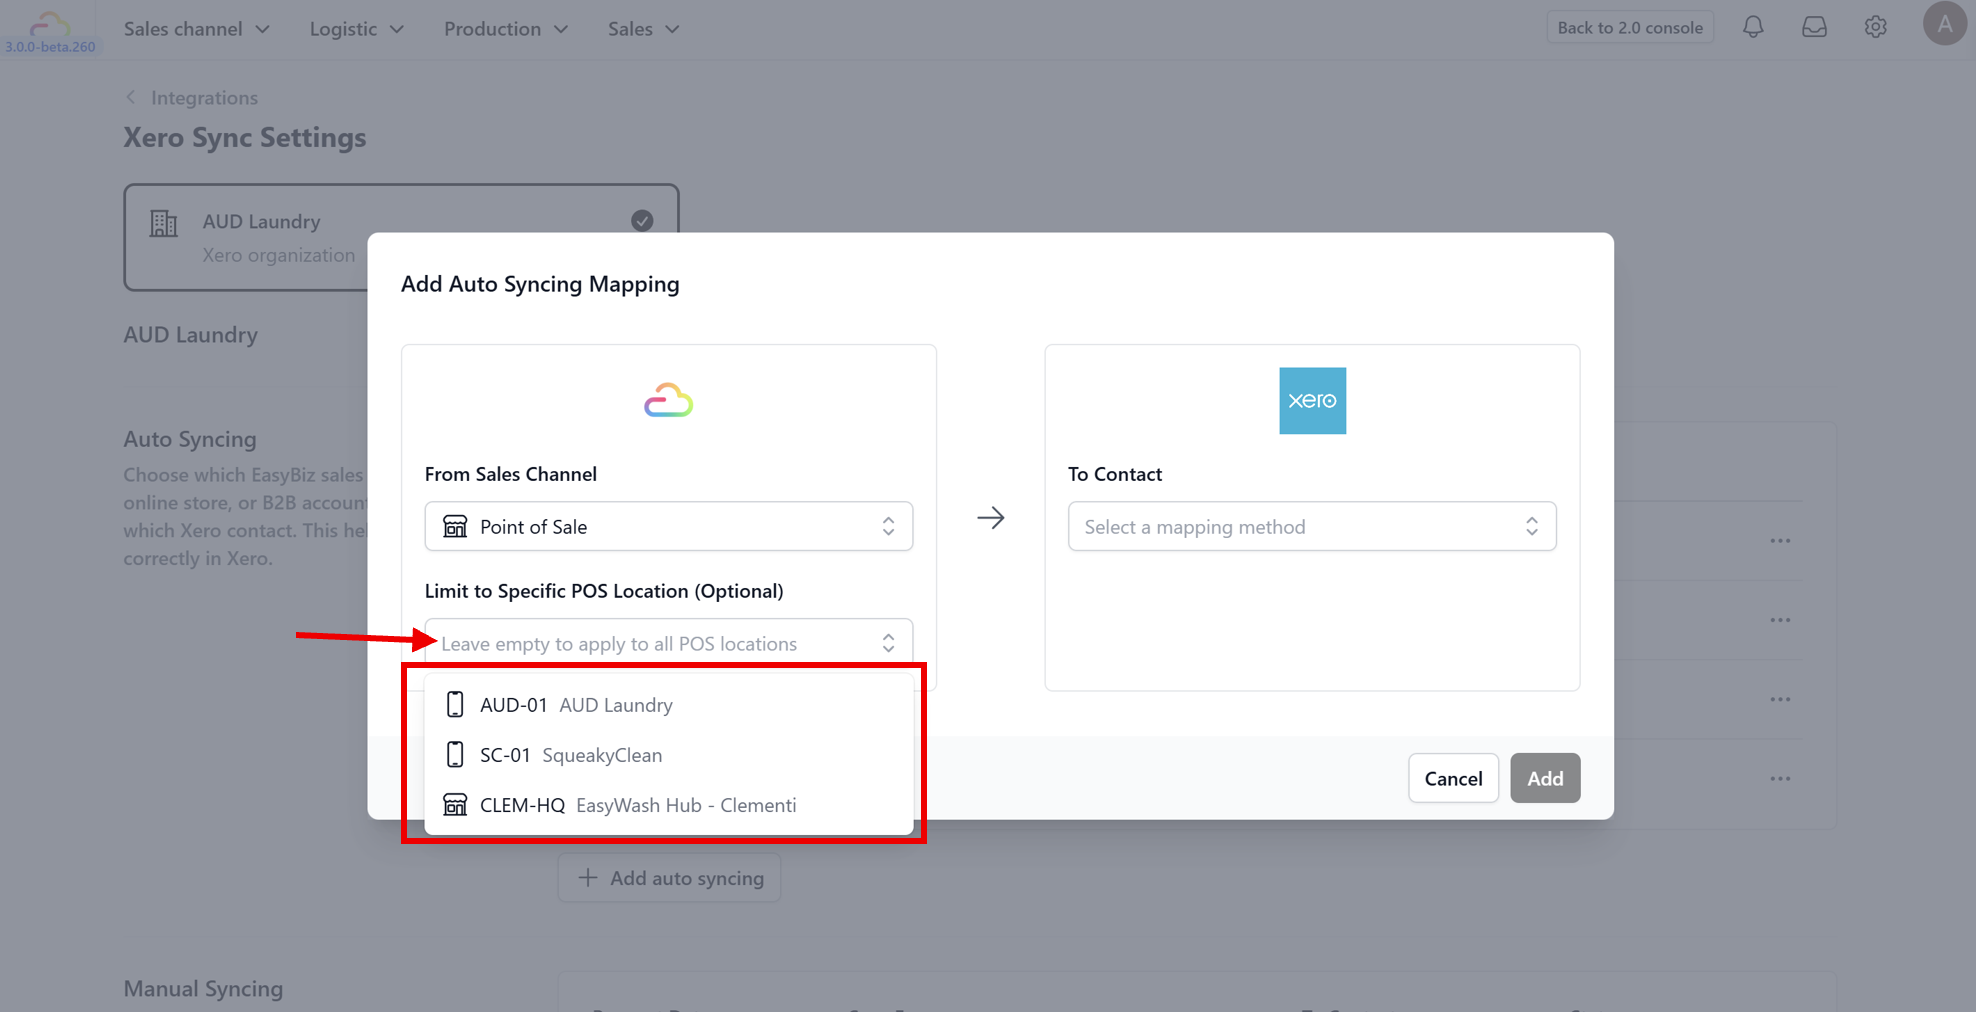
For POS: It looks for the POS location's name (e.g., "Clementi Branch"). This groups all sales from that store under one Xero contact.
By name with phone: A separate Xero contact will be created for each customer using their phone number as a unique identifier. This means two customers with the same name but different phone numbers will become separate contacts in Xero. This is useful if your customers share common names and you need a reliable way to tell them apart.
By name with ID: A separate Xero contact will be created for each customer using their customer ID (e.g., 1001) as a unique identifier. This is best for B2C businesses that use a customer index system.
2. Manual Select (Generic Contact)
This acts as a "Catch-All." You force all sales from a specific channel to go into a single, generic Xero contact of your choice.
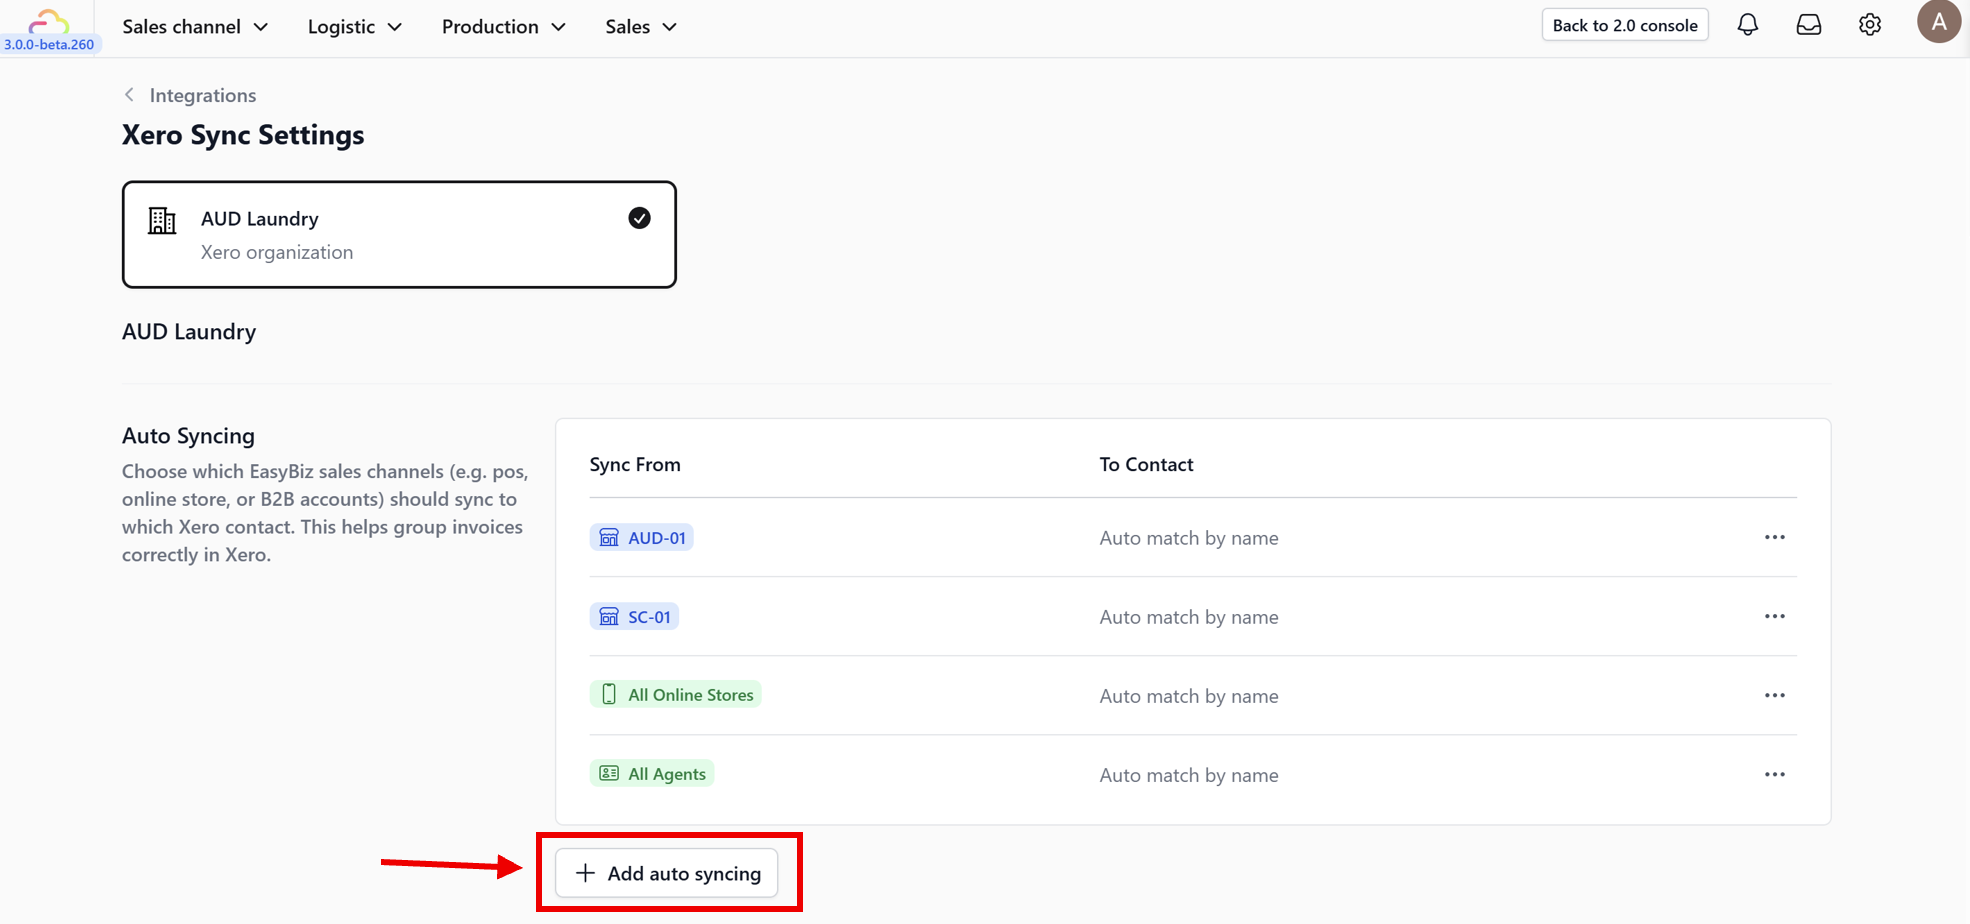
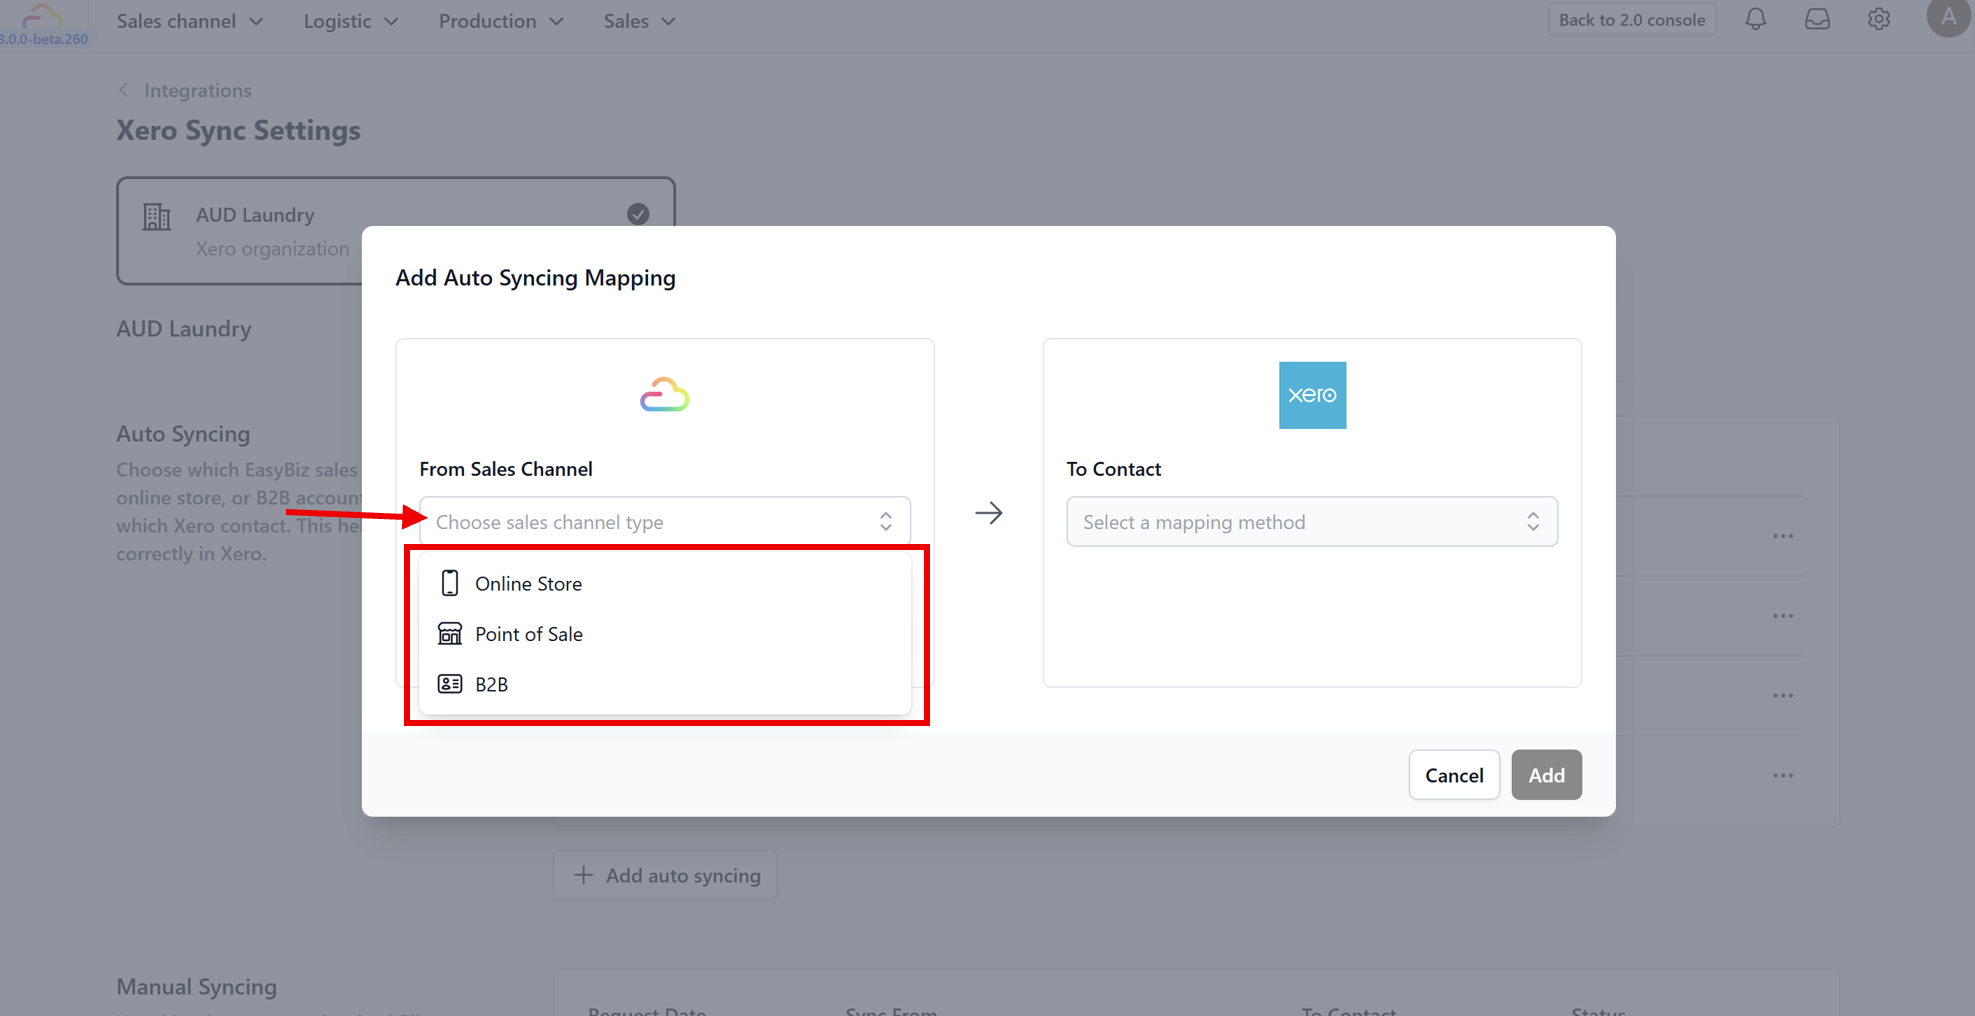
How to set up Auto Sync
The Workflow
Once active, the process is seamless:
Create an order on your sales channel. (In the video guide above, we demonstrated this using the POS).
Wait up to a minute.
The order appears in Xero automatically.
What's Next?
Now that auto sync is running, continue to Manual Sync to learn the manual fallback for re-pushing or correcting individual records when needed.