Configuring Email Templates
In this article
The Email Utility feature allows you to create and manage standardized templates for essential updates, such as order invoices and delivery notifications. This ensures that every automated message your customers receive maintains a professional appearance and consistent brand identity.
Contents
Contents
Why configure your email templates?
A default email might send, but a customized template improves your customer experience:
- Consistent Branding: Personalize the message and design so every notification matches your brand identity.
- Clearer Communication: Organize key details like invoices and passcodes so customers find exactly what they need instantly.
- Automated Updates: Define messages for specific statuses like "Delivery complete" or "Pick up failed" to keep customers informed without manual work.
Accessing Email Templates
Go to Settings > Templates and select the Email card. By default, EasyBiz provides pre-made templates:

Click + Add to create a new Email template based on standard layouts.

Here, you can find several email templates designed to streamline your communication:
- Welcome: Send a warm greeting to new subscribers.
- Order invoice: Provide payment details for pending customer orders.
- Order receipt: Confirm successful payment with a transaction summary.
- Pick up failed: Notify customers when a pickup attempt fails.
- Pick up rescheduled: Inform customers of their new pickup time.
- Pick up complete: Confirm that an order has been picked up.
- Delivery failed: Alert customers about unsuccessful order delivery attempts.
- Delivery rescheduled: Update customers on their new delivery schedule.
- Delivery complete: Notify customers that their order arrived safely.
- Order collected: Confirm the customer has collected their order.
- Order cancelled: Inform customers that their order was cancelled.
- One-time passcode: Send a secure code for account verification.
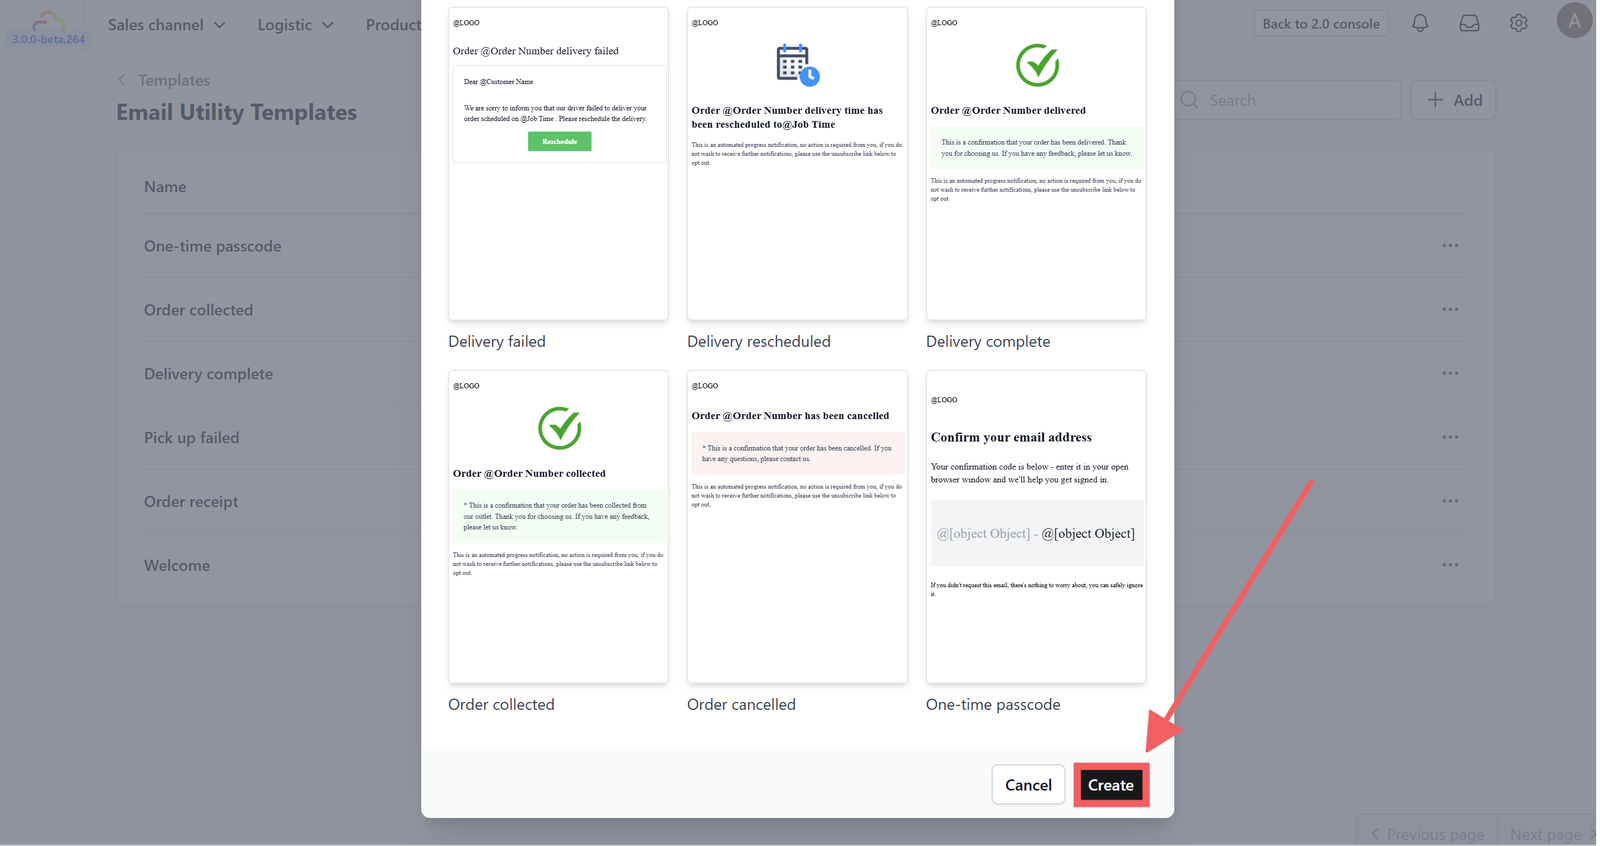
Once you have chosen the template, don't forget to click Create.
Layout Configuration

Use the left-side panel to configure the core settings of your email template.
- Email Group: Select the category this template belongs to, helping you keep your templates organized.
- Subject: Write the main title the customer sees. You can use variables (like
order_no) to make it specific to each transaction. - Preview Text: Add a short summary that appears in the inbox before the email is opened. Keep it under 90 characters for the best result.
- Attachment: Select a published PDF template (such as an invoice or receipt) to automatically attach to this email.
Customizing the Design

You can insert dynamic data that changes for every order by typing the @ symbol. This reveals a dropdown list of common variables, including:
- Line Item Name: The main name of the product or service.
- Service Option Name: The specific service type selected (e.g., Dry Clean).
- Add-ons: Extra services added to the main item.
- Accessories: Physical attachments included with the item.
- Item Note: Special instructions or remarks regarding the item.
- Unit Price: The cost per single unit.
- Quantity: The total count of items ordered.
- Unit: The measurement type (e.g., kg, pcs).
- And others...: Scroll down the dropdown list to access many more variables.
Block Settings

Business Logo
This block displays your company logo at the top of the email to ensure brand recognition.
You can customize the logo's appearance using the settings on the left panel:
- Block Size: Modify the logo's width and height to fit the header layout.
- Padding: Adjust the internal spacing between the logo and its border.
- Margin: Control the external spacing to distance the logo from other elements.
- Background: Set a specific background color behind the logo.
- Rounded: Smooth the corners of the logo block for a softer look.
- Border: Add a visible outline around the logo block.

Text
This block allows you to insert written content, including dynamic variables to personalize the message for each customer. It serves as the primary container for displaying details like order lists, descriptions, and notes within your layout.
Select this block to adjust its layout using the standard Block Settings panel on the left (Block Size, Padding, Margin, etc.).

Container
This block groups multiple elements together to structure your layout, such as stacking line item details vertically for a clean list view. It controls the flow and alignment of the content inside it, ensuring your design remains organized and responsive.
In addition to the standard settings, this block includes unique layout options on the left panel:
- Content Layout: Choose between Vertical or Horizontal to determine how items stack inside the container.
- Content Align: Adjust the alignment (Top, Center, Bottom) of the elements within the container.
- Etc: You can also adjust standard options like Block Size, Padding, Margin, Background, Rounded, and Border.
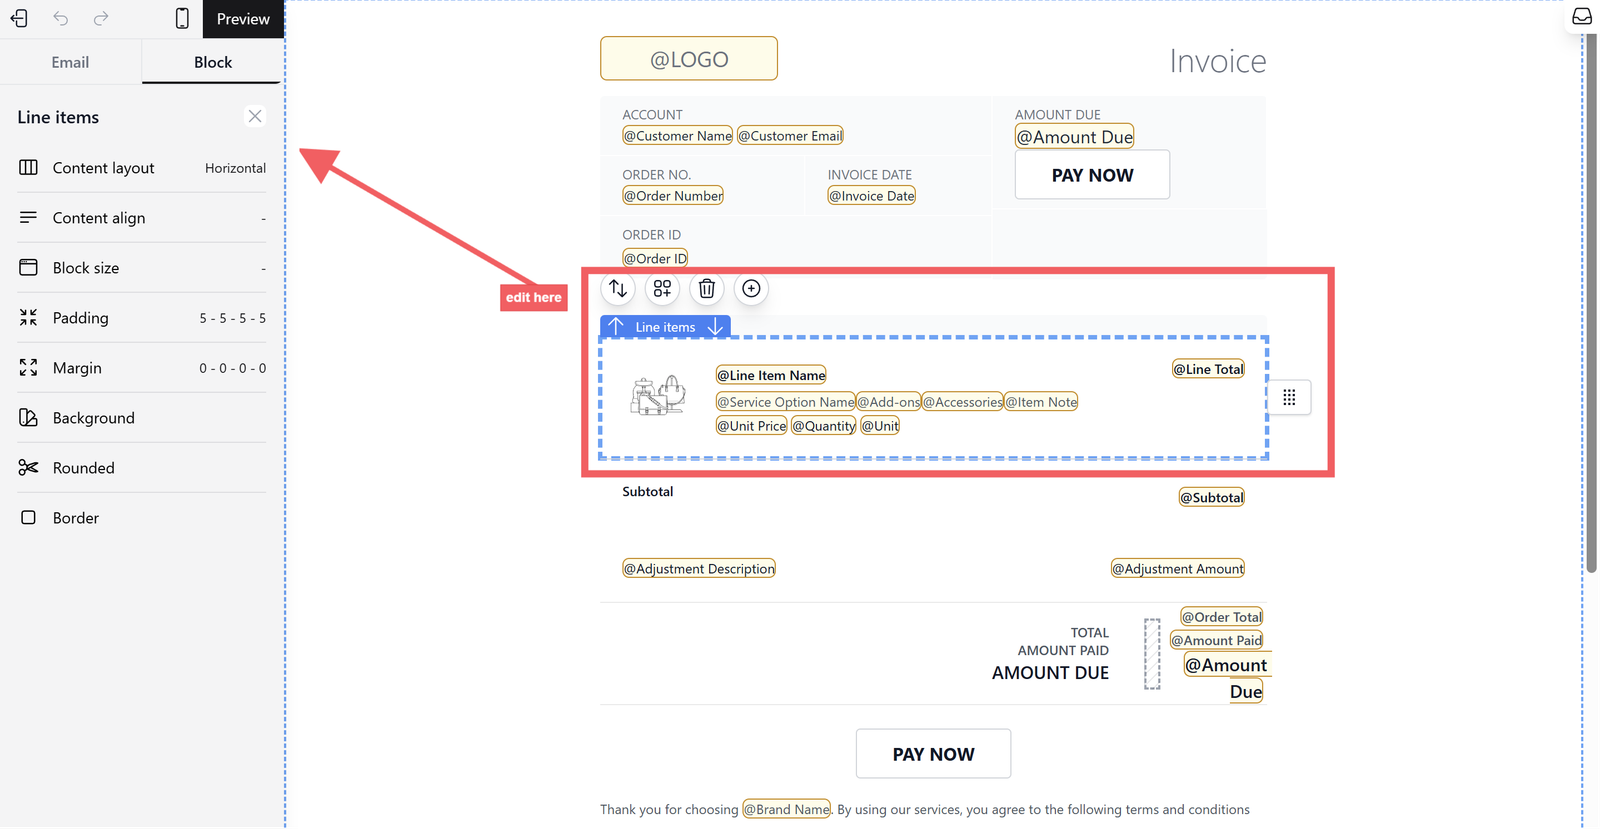
Line Items
This specialized block acts as a dynamic row that repeats for every item in an order, organizing details like product names and prices into a clear list. It ensures that whether a customer orders one item or ten, the receipt remains structured and easy to read.
Since this block functions like a container for your item variables, it includes specific layout controls:
- Content Layout: Toggle between Horizontal or Vertical to arrange the item details (like the icon vs. text) side-by-side or stacked.
- Content Align: Adjust the alignment (Top, Center, Bottom) of the elements within the container.
- Etc: You can also adjust standard design settings like Block Size, Padding, Margin, Background, and Border.

Button
This block inserts a clickable call-to-action, like "PAY NOW," to guide customers toward key steps such as completing a payment or viewing their order details. It ensures your most important links stand out visually from the rest of the text.
Quick Actions Toolbar

When you select a block, a floating toolbar appears above it for fast adjustments.
- Duplicate: Create an exact copy of the selected block instantly.
- Move block: Shift the block up or down to rearrange the layout.
- Add child block: Insert a new component inside the selected container.
- Delete block: Permanently remove the block from the template.
- Insert sibling below block: Add a new element directly underneath the current block.
Previewing and Publishing the Template
Before finalizing your template, ensure that dynamic data appears correctly.

Click the Preview bar at the top and select a real order to test how your layout handles actual data.

The system will generate a realistic preview, showing exactly how the email looks to the customer.

When ready, click the Rocket Icon to publish your draft version.

Your template is now Active on the main list; click the three dots (...) menu to edit, rename, duplicate, or delete it.
Give feedback
Up next
Configuring PDF TemplatesCustomize the layout, branding, and details of your digital invoices and receipts to leave a lasting impression.
Read more