Configuring Work Orders

In this article
Work Orders are the central hub for your service requests. They help you track exactly what needs to be done, who is assigned to it, and the current status of the job.
Contents
Contents
Work Orders
The Work Orders tab is where you define the structural "rules" for your services. Instead of manually assigning tasks every time, you create templates that automatically tell the system how to handle specific items.
Why use Templates?
Think of templates as blueprints for your work orders. Instead of setting up a job from scratch every time, you can define a standard structure once—like "Item Condition Inspection"—and reuse it instantly.
Work Orders Template
When you look at your list of templates, here is what each column controls:

An example of how a fully configured Work Order list looks. Your actual templates will define your specific business needs.
1. Template Name
This is the identifier for your process.
- Examples: "Item Condition Inspections", "Item Checkout", or "Laundry & Dry Cleaning".
2. Generation Rule
This setting controls granularity. It tells the system when to trigger a new work order.
- One work order per service item: This is the most common setting. It ensures that every single item (like a shirt or a laptop) gets its own individual tracking ID and set of tasks.
3. Workflow
This connects the template to a specific status lifecycle.
- It defines the stages the job will pass through, such as Service Start.
- If a template is marked Not in use, it is currently inactive and won't generate tasks.
4. Linked Procedures
These are the actual "to-do" items inside the work order. You can chain multiple procedures together.
- Example: A single template might trigger "Inspect item's condition" followed by a "Photo Record" task.
- Example: A checkout template might trigger "Service Center Check-out" followed by "Quality Control".
How to create a work order template:

1.Click the + Add Work Order Template button.
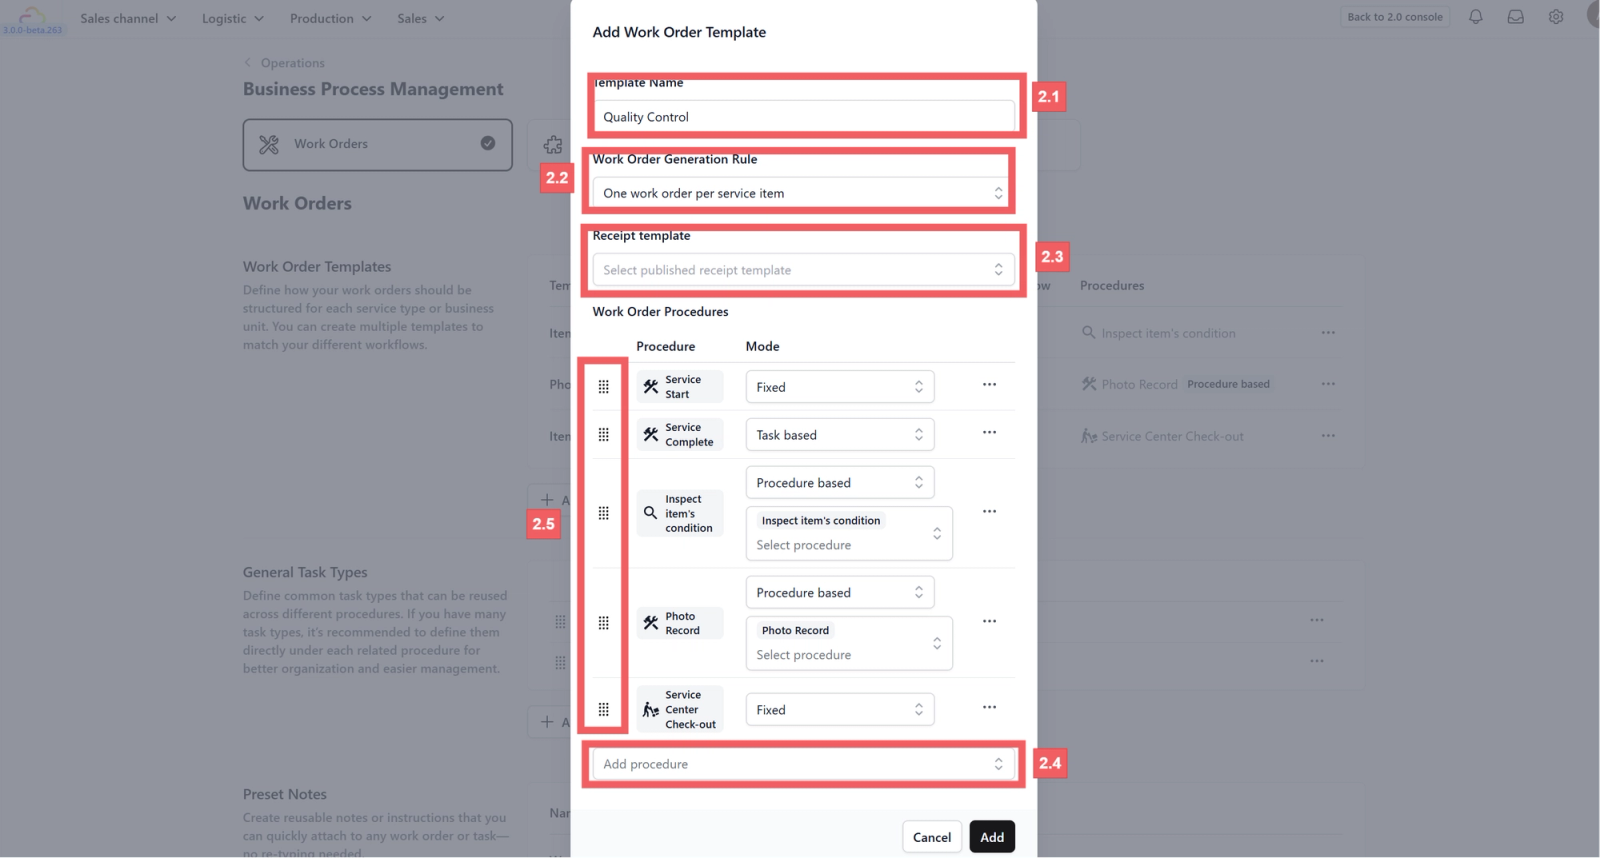
2.Fill in the template details:
- 2.1 Template Name: Give it a clear title.
- 2.2 Generation Rule: Define how one work order is created (e.g., per service item).
- 2.3 Receipt Template: Select the layout for the customer receipt.
- 2.4 Procedure: Choose the standard procedure to follow.
- 2.5 Mode & Sequence: Adjust these settings to fit your operational flow.

3. Click Add.
4. Link to a Business Unit:

- 4.1 Click the ••• menu and select Link Workflow.

- 4.2 Toggle on the specific business unit and hit Save.
Quality Control Task Generation Rules

Use this feature to automatically create tasks based on specific triggers within a Work Order.
5. Quality Control Task Generation Rules

- 5.1 Initiate New Rule Click the +Add Task Generation Rule button to open the setup modal.

- 5.2 Define Conditions In the When section, click +Add Condition.
- 5.3 Configure Frequency & Scope ("Per") Select an option from the Per dropdown menu. This determines how many tasks are generated relative to the data.
- Work Order: Generates one single task for the entire Work Order.
- Every Matched Service Option: Generates a separate task for every service option that fits your condition.
- 5.4 Set Urgency Define the Task Urgency level (e.g., Standard Intake Processing, Urgent Repair) to prioritize the generated task.
- 5.5 Save Click the Create button to finalize the rule.
General Task Types
Overview
Define common tasks once and reuse them across multiple procedures. This keeps your workflow consistent and saves you from repetitive setup.
How to add a task type:

- Click +Add task type.
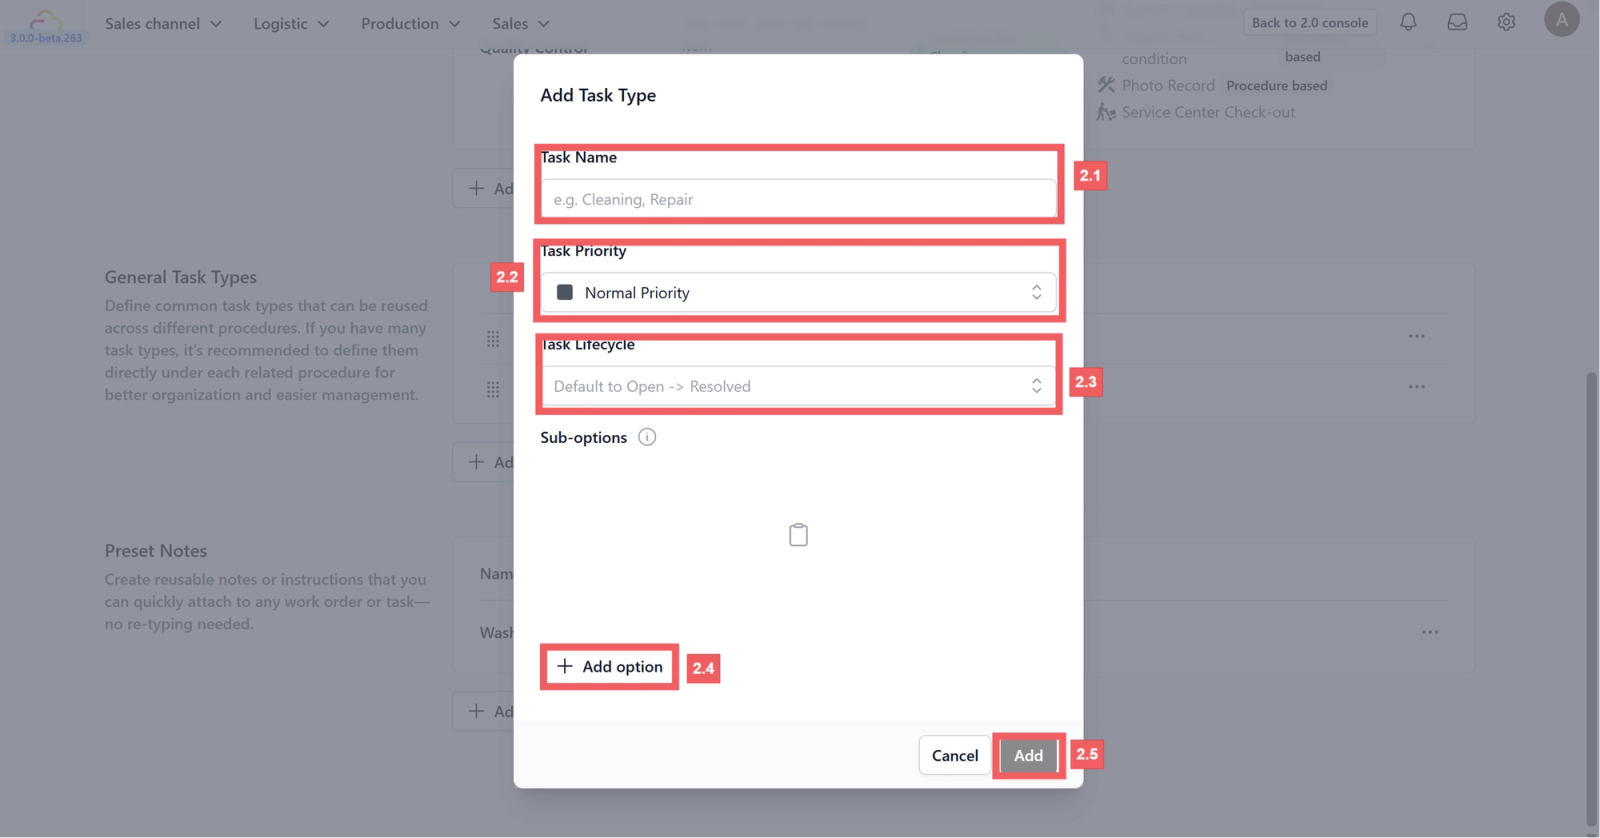
2. Configure the task settings:
- 2.1 Task Name: Enter a descriptive name (e.g., "Standard Intake").
- 2.2 Priority: Set the urgency level.
- 2.3 Lifecycle: Select the valid statuses for this task.
- 2.4 Suboptions: Click the (i) icon to explore and add detailed sub-options if needed.
- 2.5 Click Add.

3. Optional: You can drag to reorder tasks or edit them later using the ••• menu.
Preset Notes
Overview
Speed up your workflow by saving frequently used instructions. Create a note once, and your team can attach it to any order without re-typing.
How to create a note:

- Click +Add preset note.
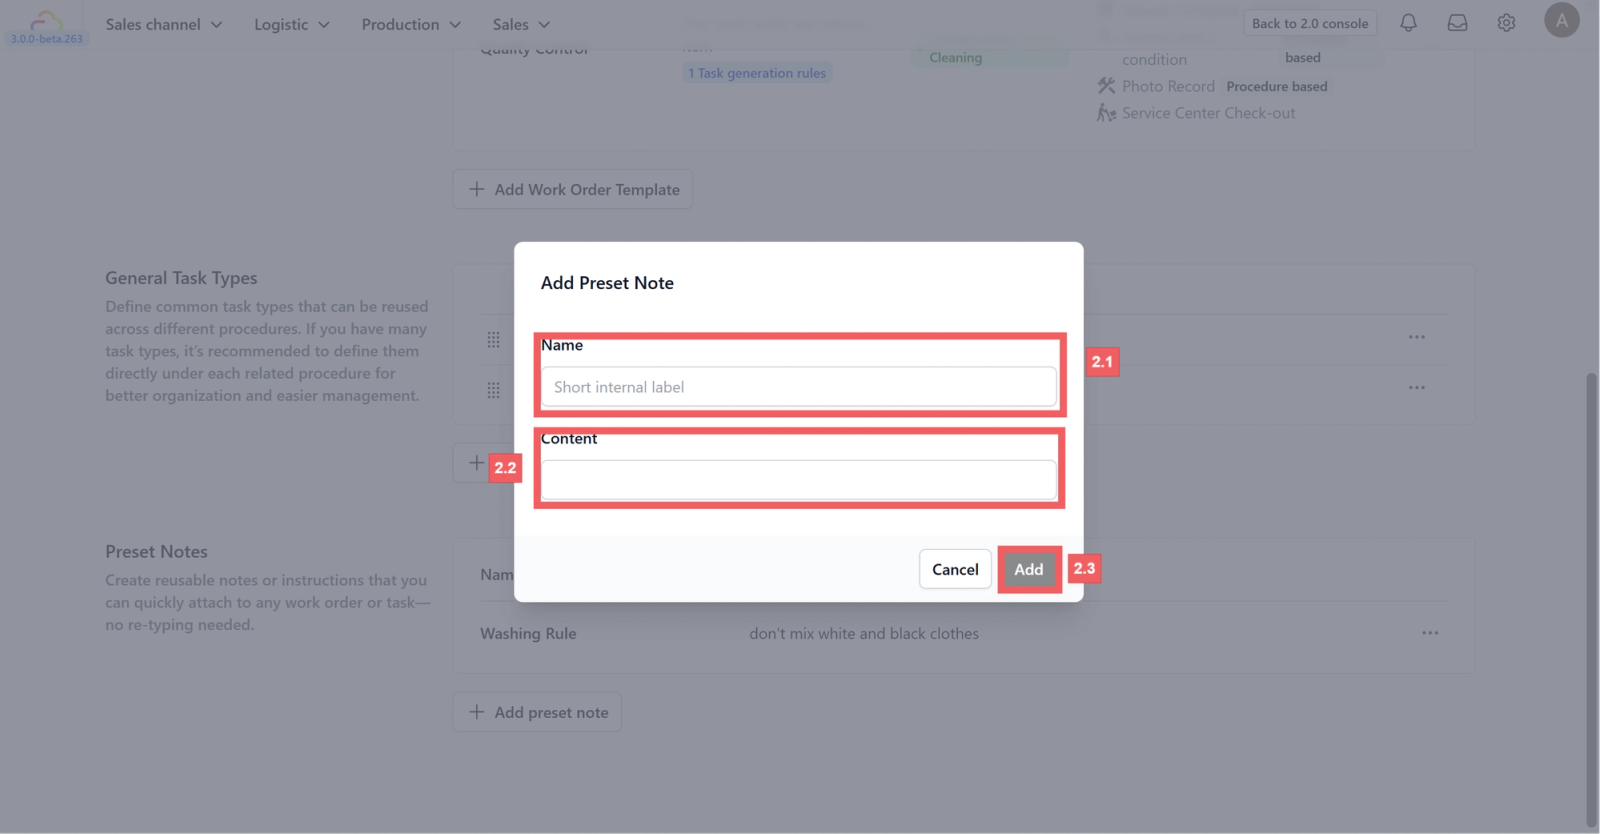
- 2.1 Name: Give the note a label (e.g., "Washing Rule").
- 2.2 Content: Type the full instruction (e.g., "Don't mix white and black clothes").
- 2.3 Click Add.
Give feedback
Up next
Configuring ProceduresBuild clear, step-by-step procedures with customizable actions and smart settings so every workflow stays clean, consistent, and impossible to mess up.
Read more