How to Create and Send a Campaign
In this article
Once you have accessed the Campaigns tab, you are ready to launch your first promotion. The process involves selecting your message template, choosing the right audience, and reviewing the costs before hitting send.
Contents
Contents
Create a New Campaign
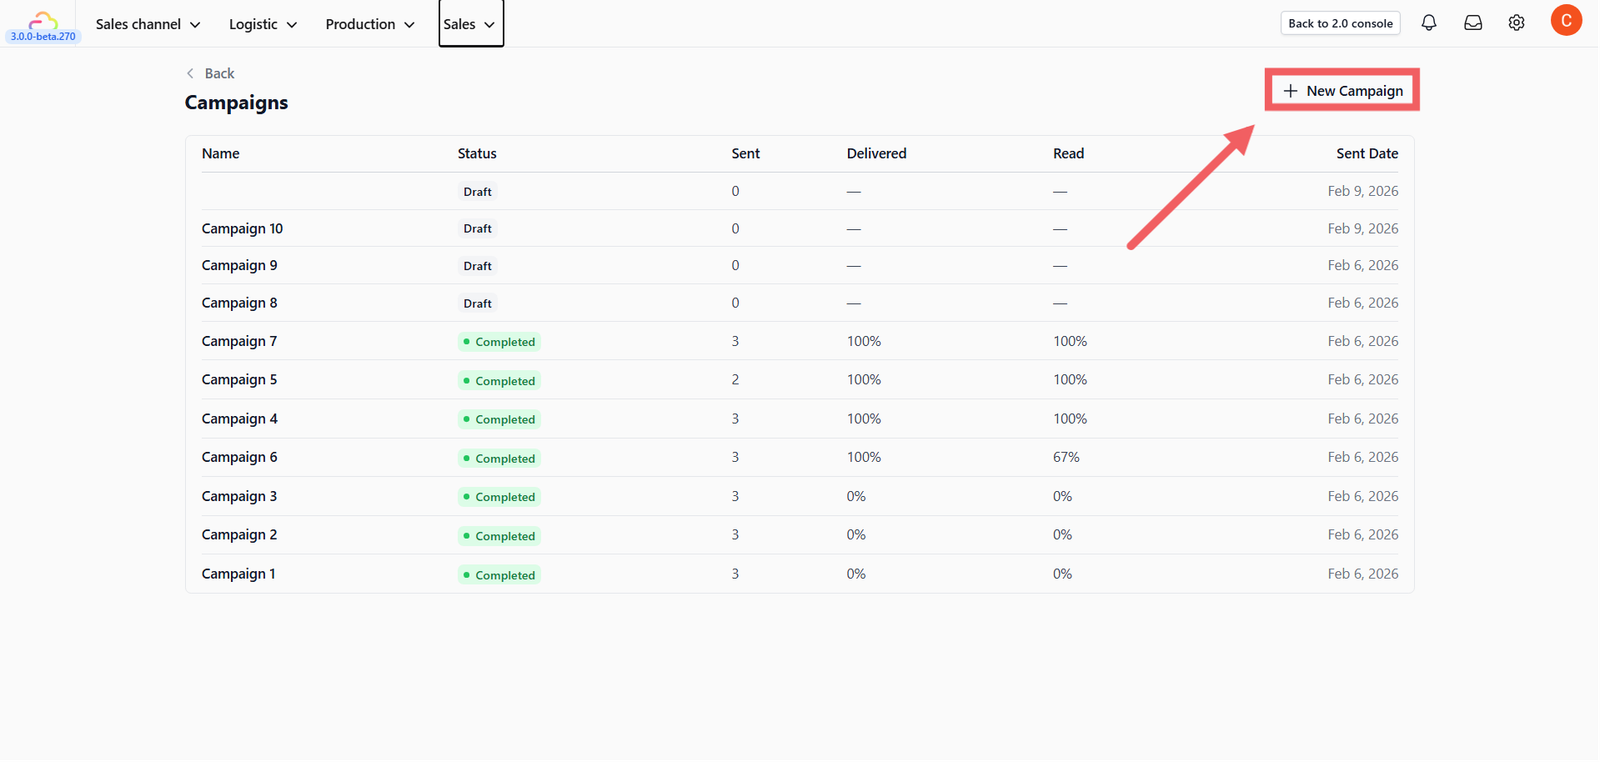
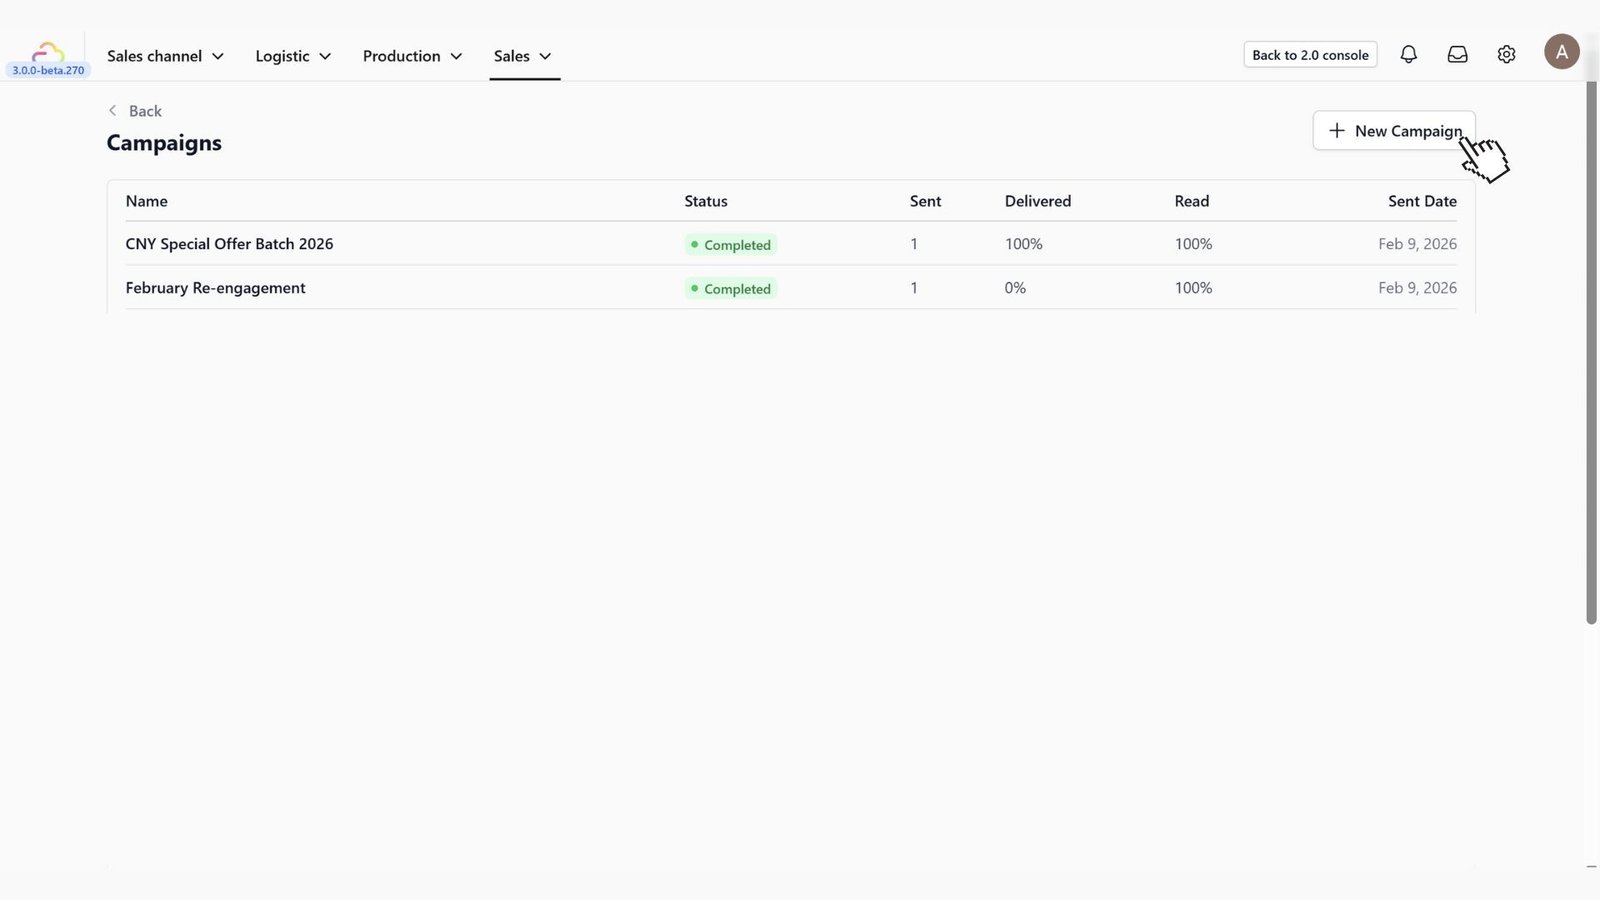
On the main Campaigns dashboard, you will see a list of your past campaigns. To start a fresh one, simply click the + New Campaign button located at the top right corner of the screen.
Setup and Template Selection
You will be directed to the Setup page. Here, you need to define the basics of your campaign.
Campaign Details
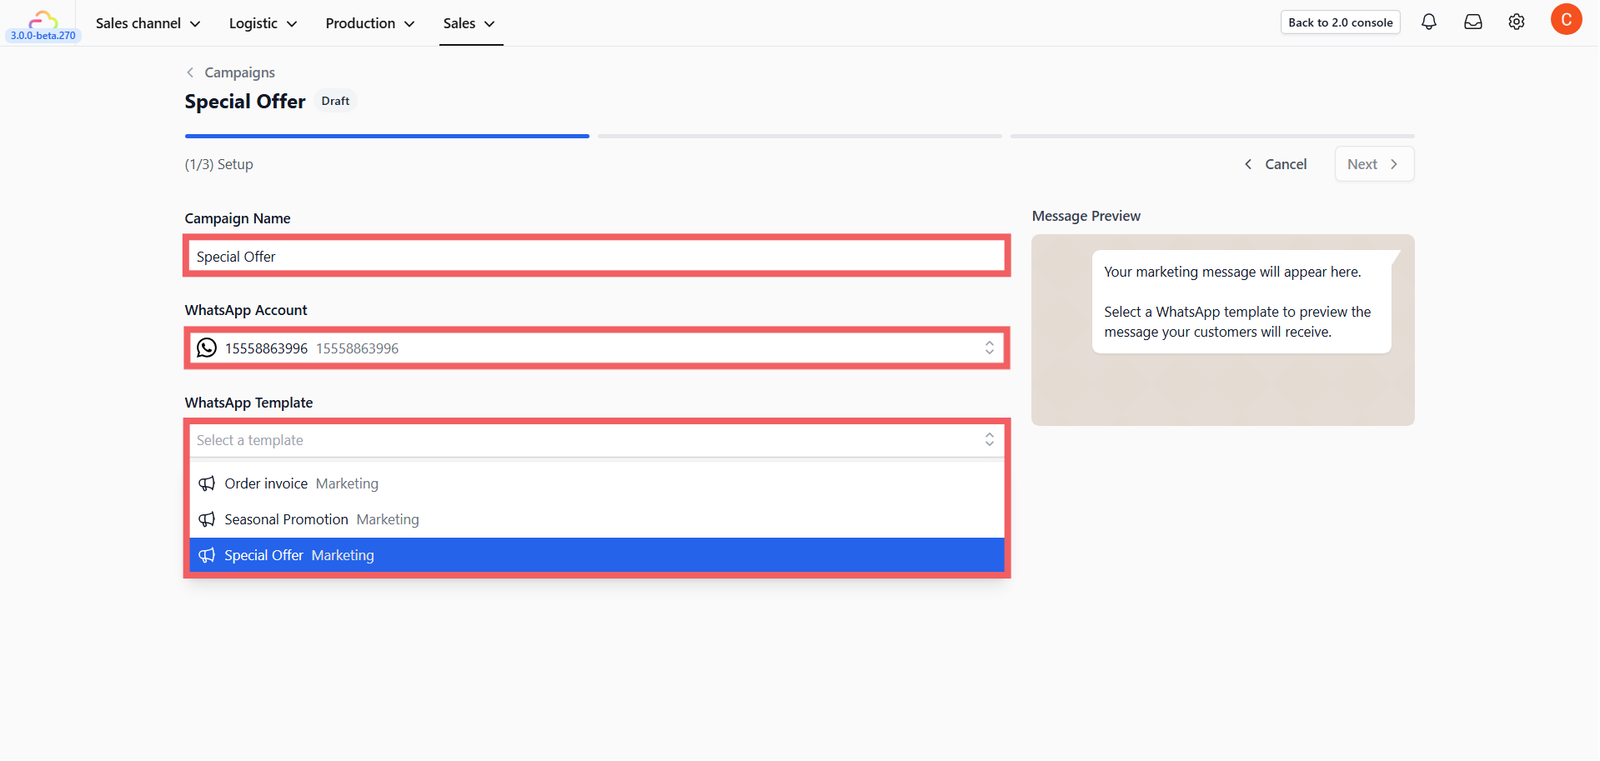
- Campaign Name: Give your campaign a recognizable name (e.g., "Feb 2026 Promo").
- WhatsApp Account: Select the connected business number you want to send from.
If you haven't connected your WhatsApp number yet, please refer to our guide on Connect and Configure WhatsApp.
Select Your Template
Choose the Marketing Template you wish to send (e.g., "Special Offer" or "Seasonal Promotion").
You must have a pre-approved Marketing Template before you can create a campaign. If you haven't created one yet, please read Creating Message Templates to learn how to set up your templates first.
Preview and Test
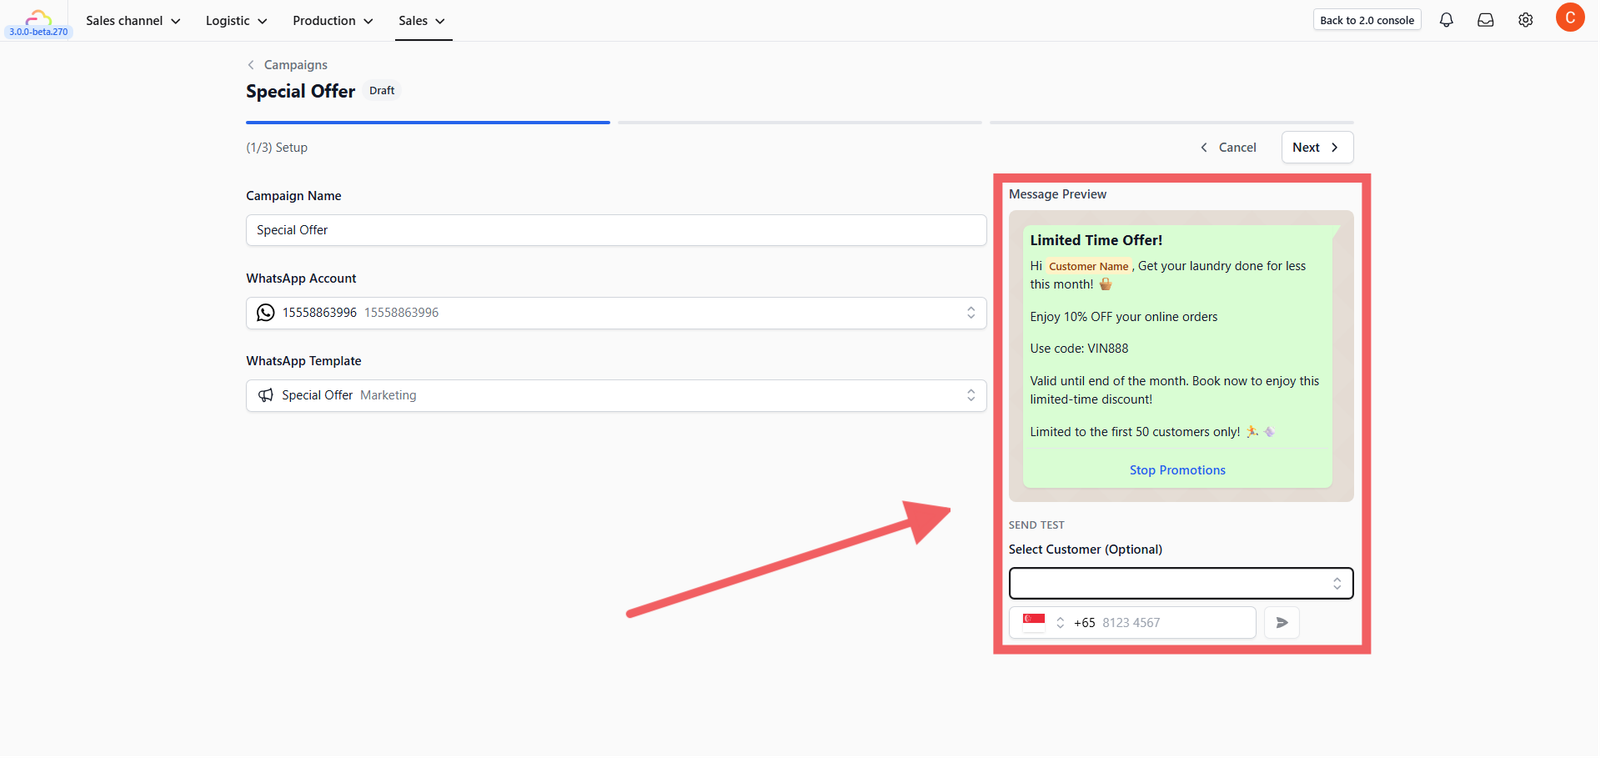
Once a template is selected, you will see a live preview of how the message looks on a customer's phone.
- Send Test: Before blasting it to everyone, you can send a test message to your own number.
- Simply enter your phone number in the box below the preview and click the Send icon to verify everything looks perfect.
Select Your Audience
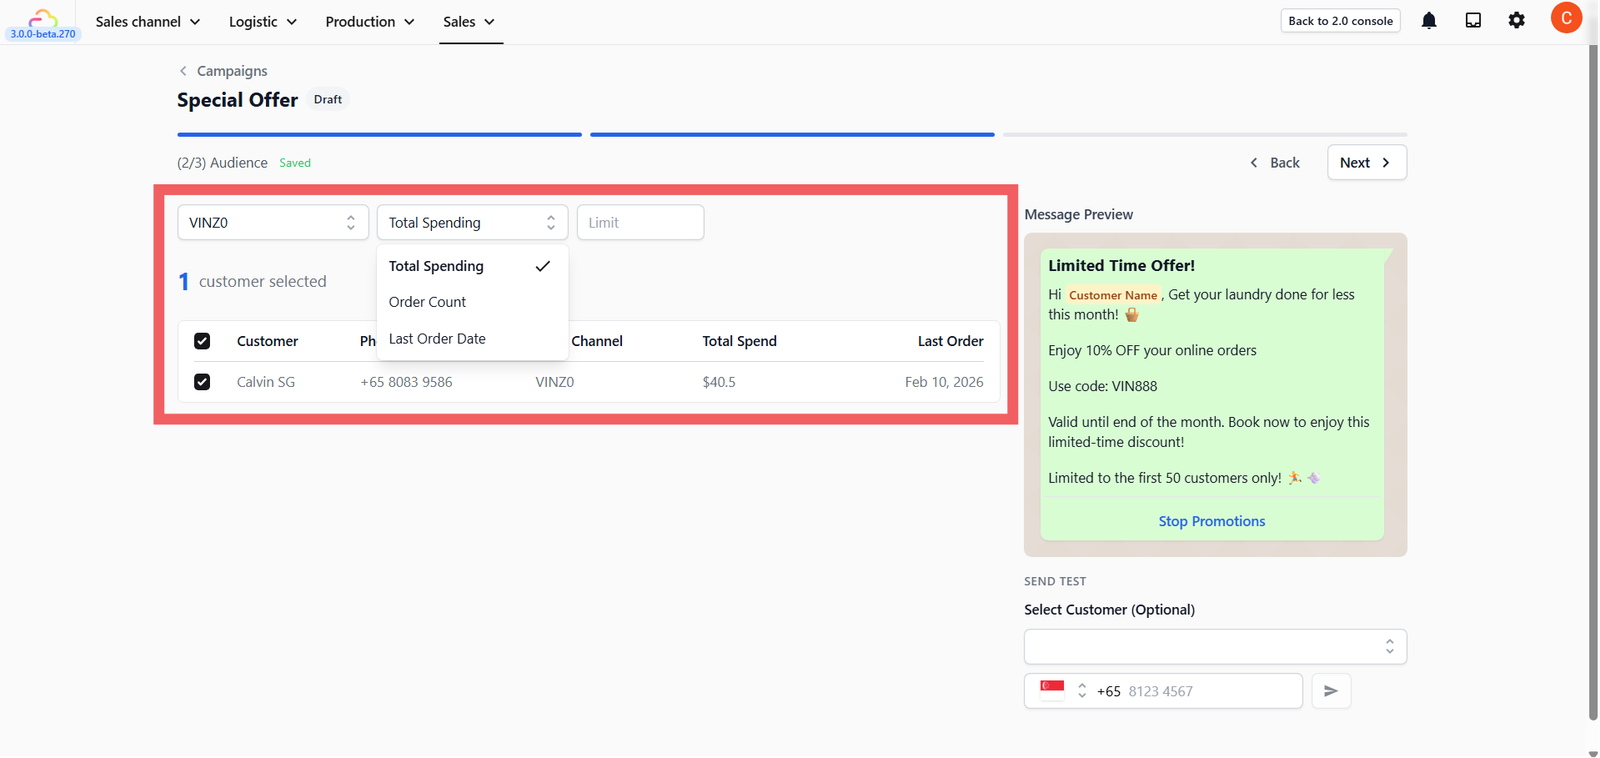
After clicking Next on the top right corner, you will enter the Audience selection stage. This is where you decide who receives your promotion.
Filter Your Customers
1. Filter by Channel
Choose to target customers from specific sources, such as your Online Store or POS (Walk-in).
2. Filter by Behavior
Next to the channel selector, use the dropdown menu to target customers based on their history:
- Last Order Date: Best for re-engagement (e.g., finding customers who haven't visited in 3 months).
- Total Spending: Best for rewarding your high-value customers.
- Order Count: Best for rewarding your most frequent/loyal visitors.
3. Set a Limit (Target Top Customers)
You will see a Limit box next to the date picker. This feature allows you to cap the number of recipients based on your ranking.
- How it works: If you select Total Spending and enter 50 in the Limit box, the system will automatically select your Top 50 highest-spending customers.
- Why use this? This is perfect for running exclusive campaigns where you want to send a special offer only to your most valuable customers.
Manual Selection
The system will generate a list based on your filters. You can manually check or uncheck specific customers from the list if you want to exclude certain individuals.
Review and Launch
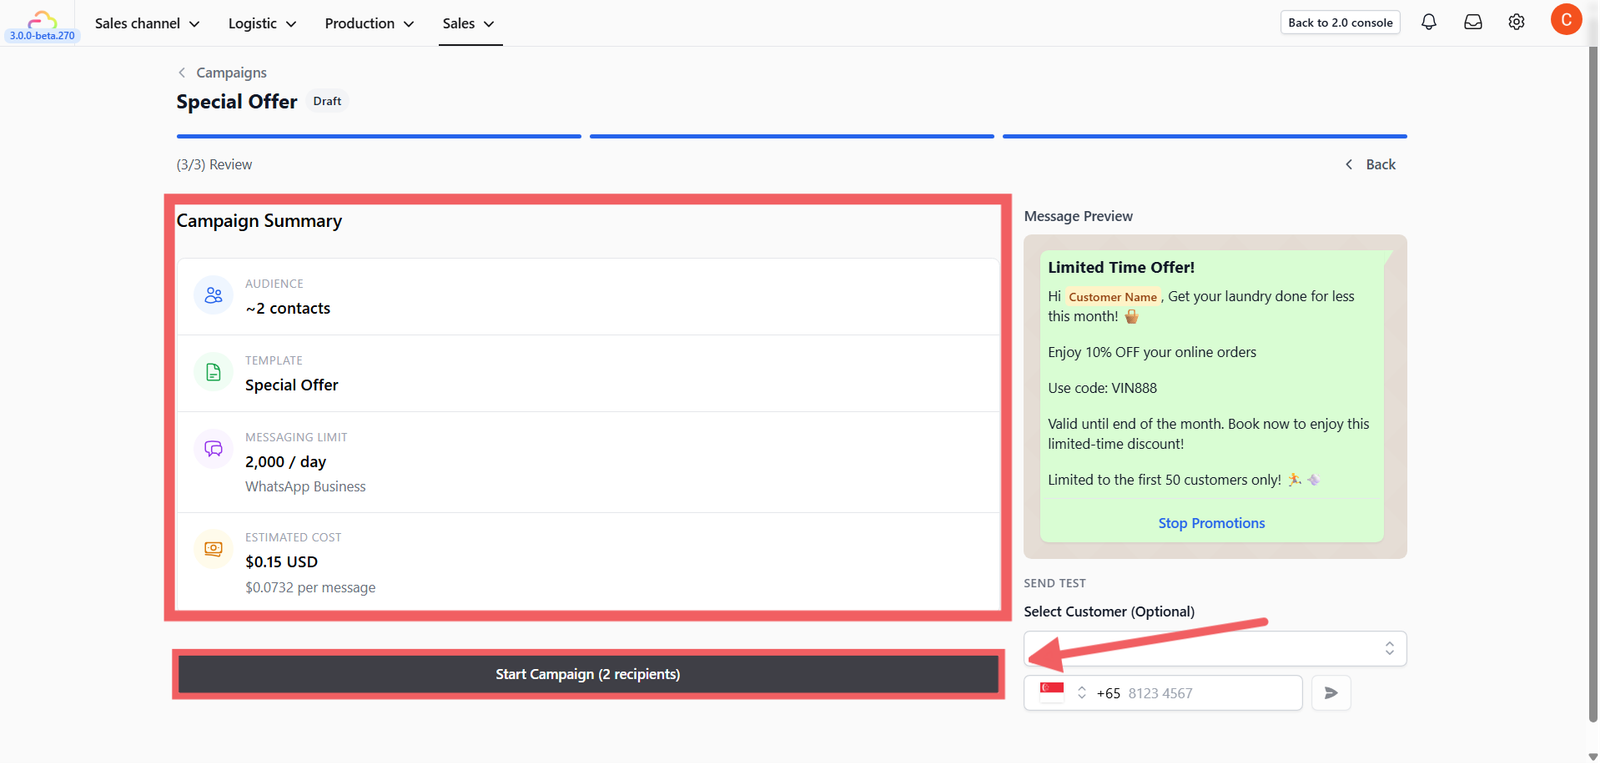
Click Next to proceed to the Summary page. This acts as your final checkpoint. You will see a Campaign Summary box containing:
- Total Audience: The number of people who will receive this message.
- Template: The message template you selected.
- Messaging Limit: Your current daily limit (e.g., 2,000 messages/day).
- Estimated Cost: The projected cost for sending this broadcast.
The Estimated Cost is based on Meta's published messaging rates and the number of recipients in your audience. This is only an estimate, actual charges may vary depending on each recipient's country. EasyBiz Cloud does not charge you for sending campaign messages. All fees are billed directly by Meta to your linked payment method. To manage your payment method, visit Meta Business Manager → Payment Settings. To view Meta's rates, visit WhatsApp Business Platform Pricing.
Start the Campaign
Once you are ready, click the Start Campaign button at the bottom. The system will begin sending the messages to your selected audience immediately.
Track Performance
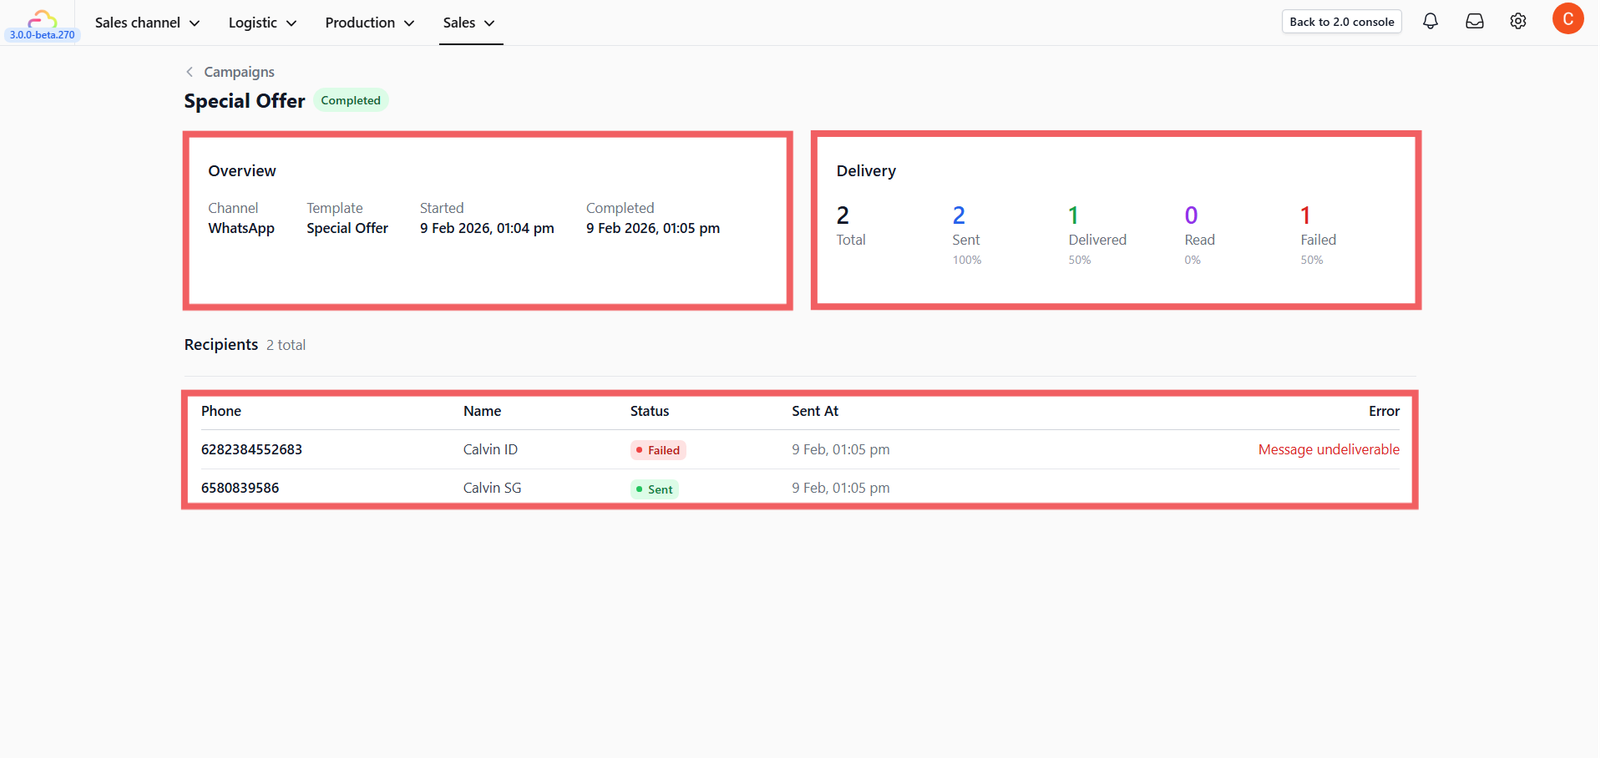
After the campaign starts, you will be taken to the Statistics Dashboard. Here you can monitor the results in real-time:
- Sent: How many messages were successfully pushed from the system.
- Delivered: How many messages actually reached the customers' phones.
- Read: How many customers opened and viewed your message.
- Failed: Messages that could not be delivered (usually due to invalid numbers).
Messages that fail to deliver (e.g., invalid numbers or unregistered contacts) are generally not charged by Meta. You will only be billed for messages that are successfully delivered.
You can view a summary list of all your past campaigns on the main Campaigns page. Clicking on any campaign name in the list will take you back to this detailed statistics view.
Managing Customer Opt-Outs (Stop Promotions)
It is crucial to give your customers the choice to stop receiving marketing messages. If a customer replies "Stop", they should be automatically removed from future campaigns to prevent spam complaints.
How to set up the "Stop Promotion" button
You need to add this button directly to your Marketing Template before using it in a campaign.
- Go to Settings > Templates.
- Select the WhatsApp card and go to the Marketing tab.
- Find the template you want to use, click the three dots (•••), and select Edit template.
- In the editor, look at the left panel and find the Buttons section.
- Click + Add Button and select Quick Reply as the button type.
- Enter the text Stop Promotions in the button text field.
- Click Update and then Submit the template for approval.
How it works for the customer:
- When a customer clicks the Stop Promotions button, they will automatically receive a system message: "You've been unsubscribed from promotional messages. You'll still receive order updates and receipts."
- The system will automatically exclude them from your future marketing campaigns.
- If they change their mind, they can simply reply with "START" to re-subscribe to your offers.