## Adding a new POS shop
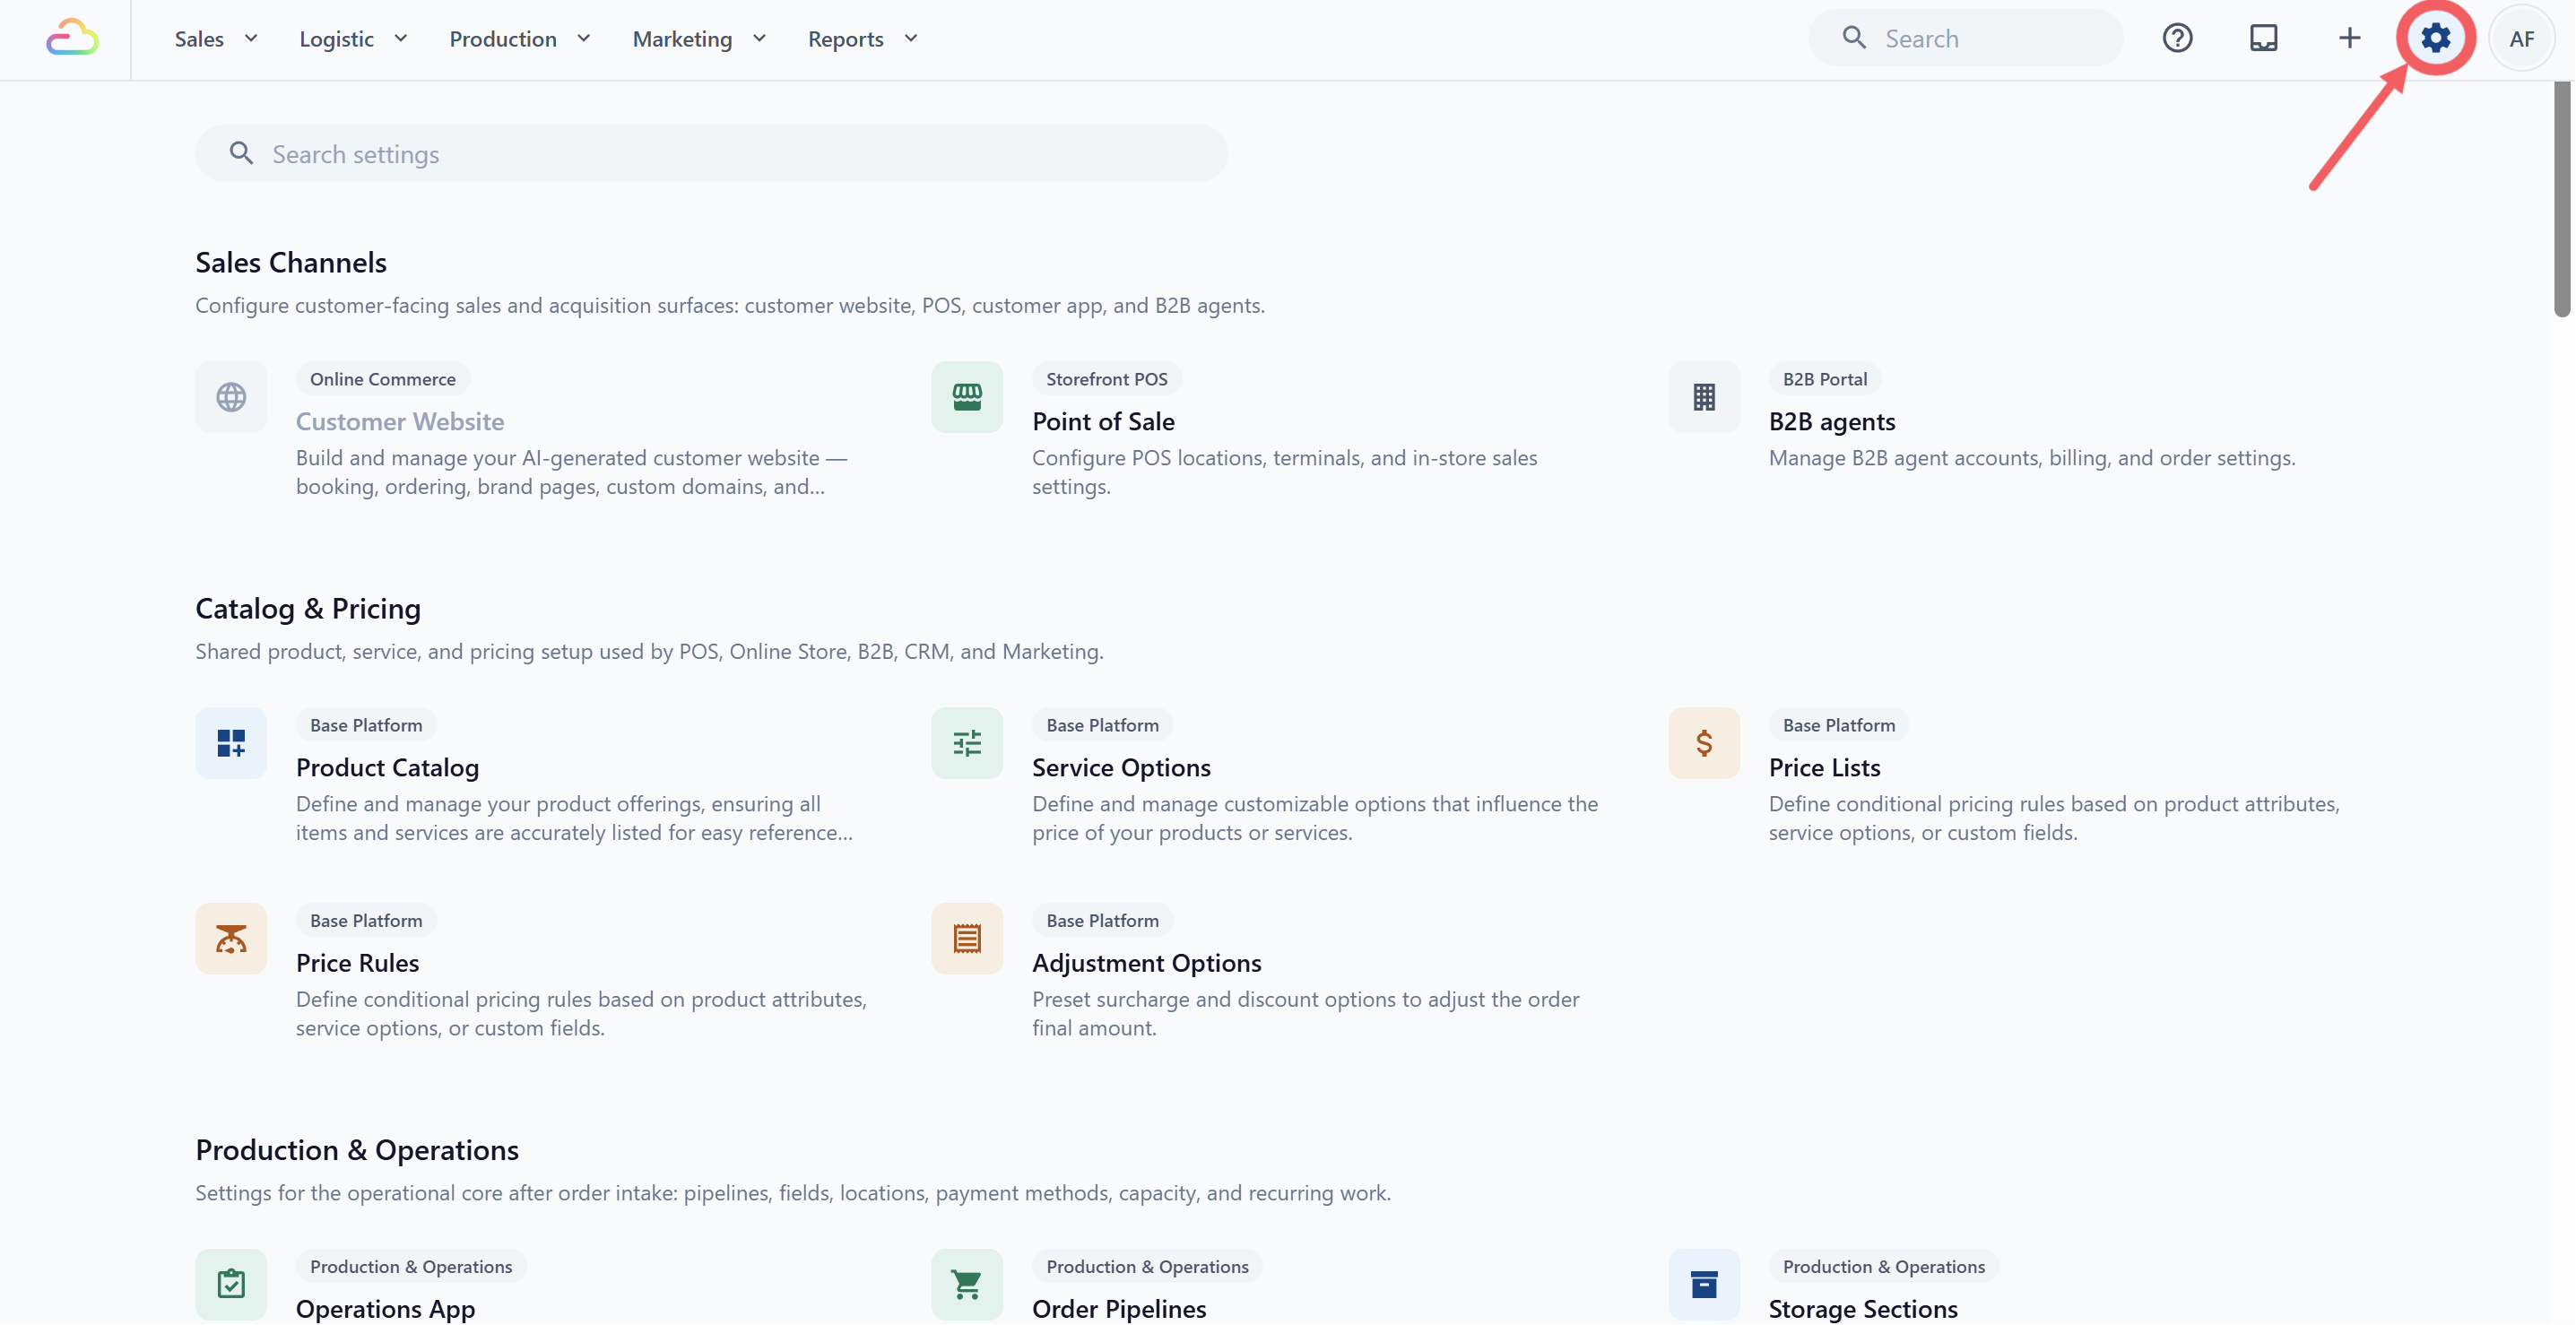
1. Click the ⚙️Settings icon in the top-right corner.
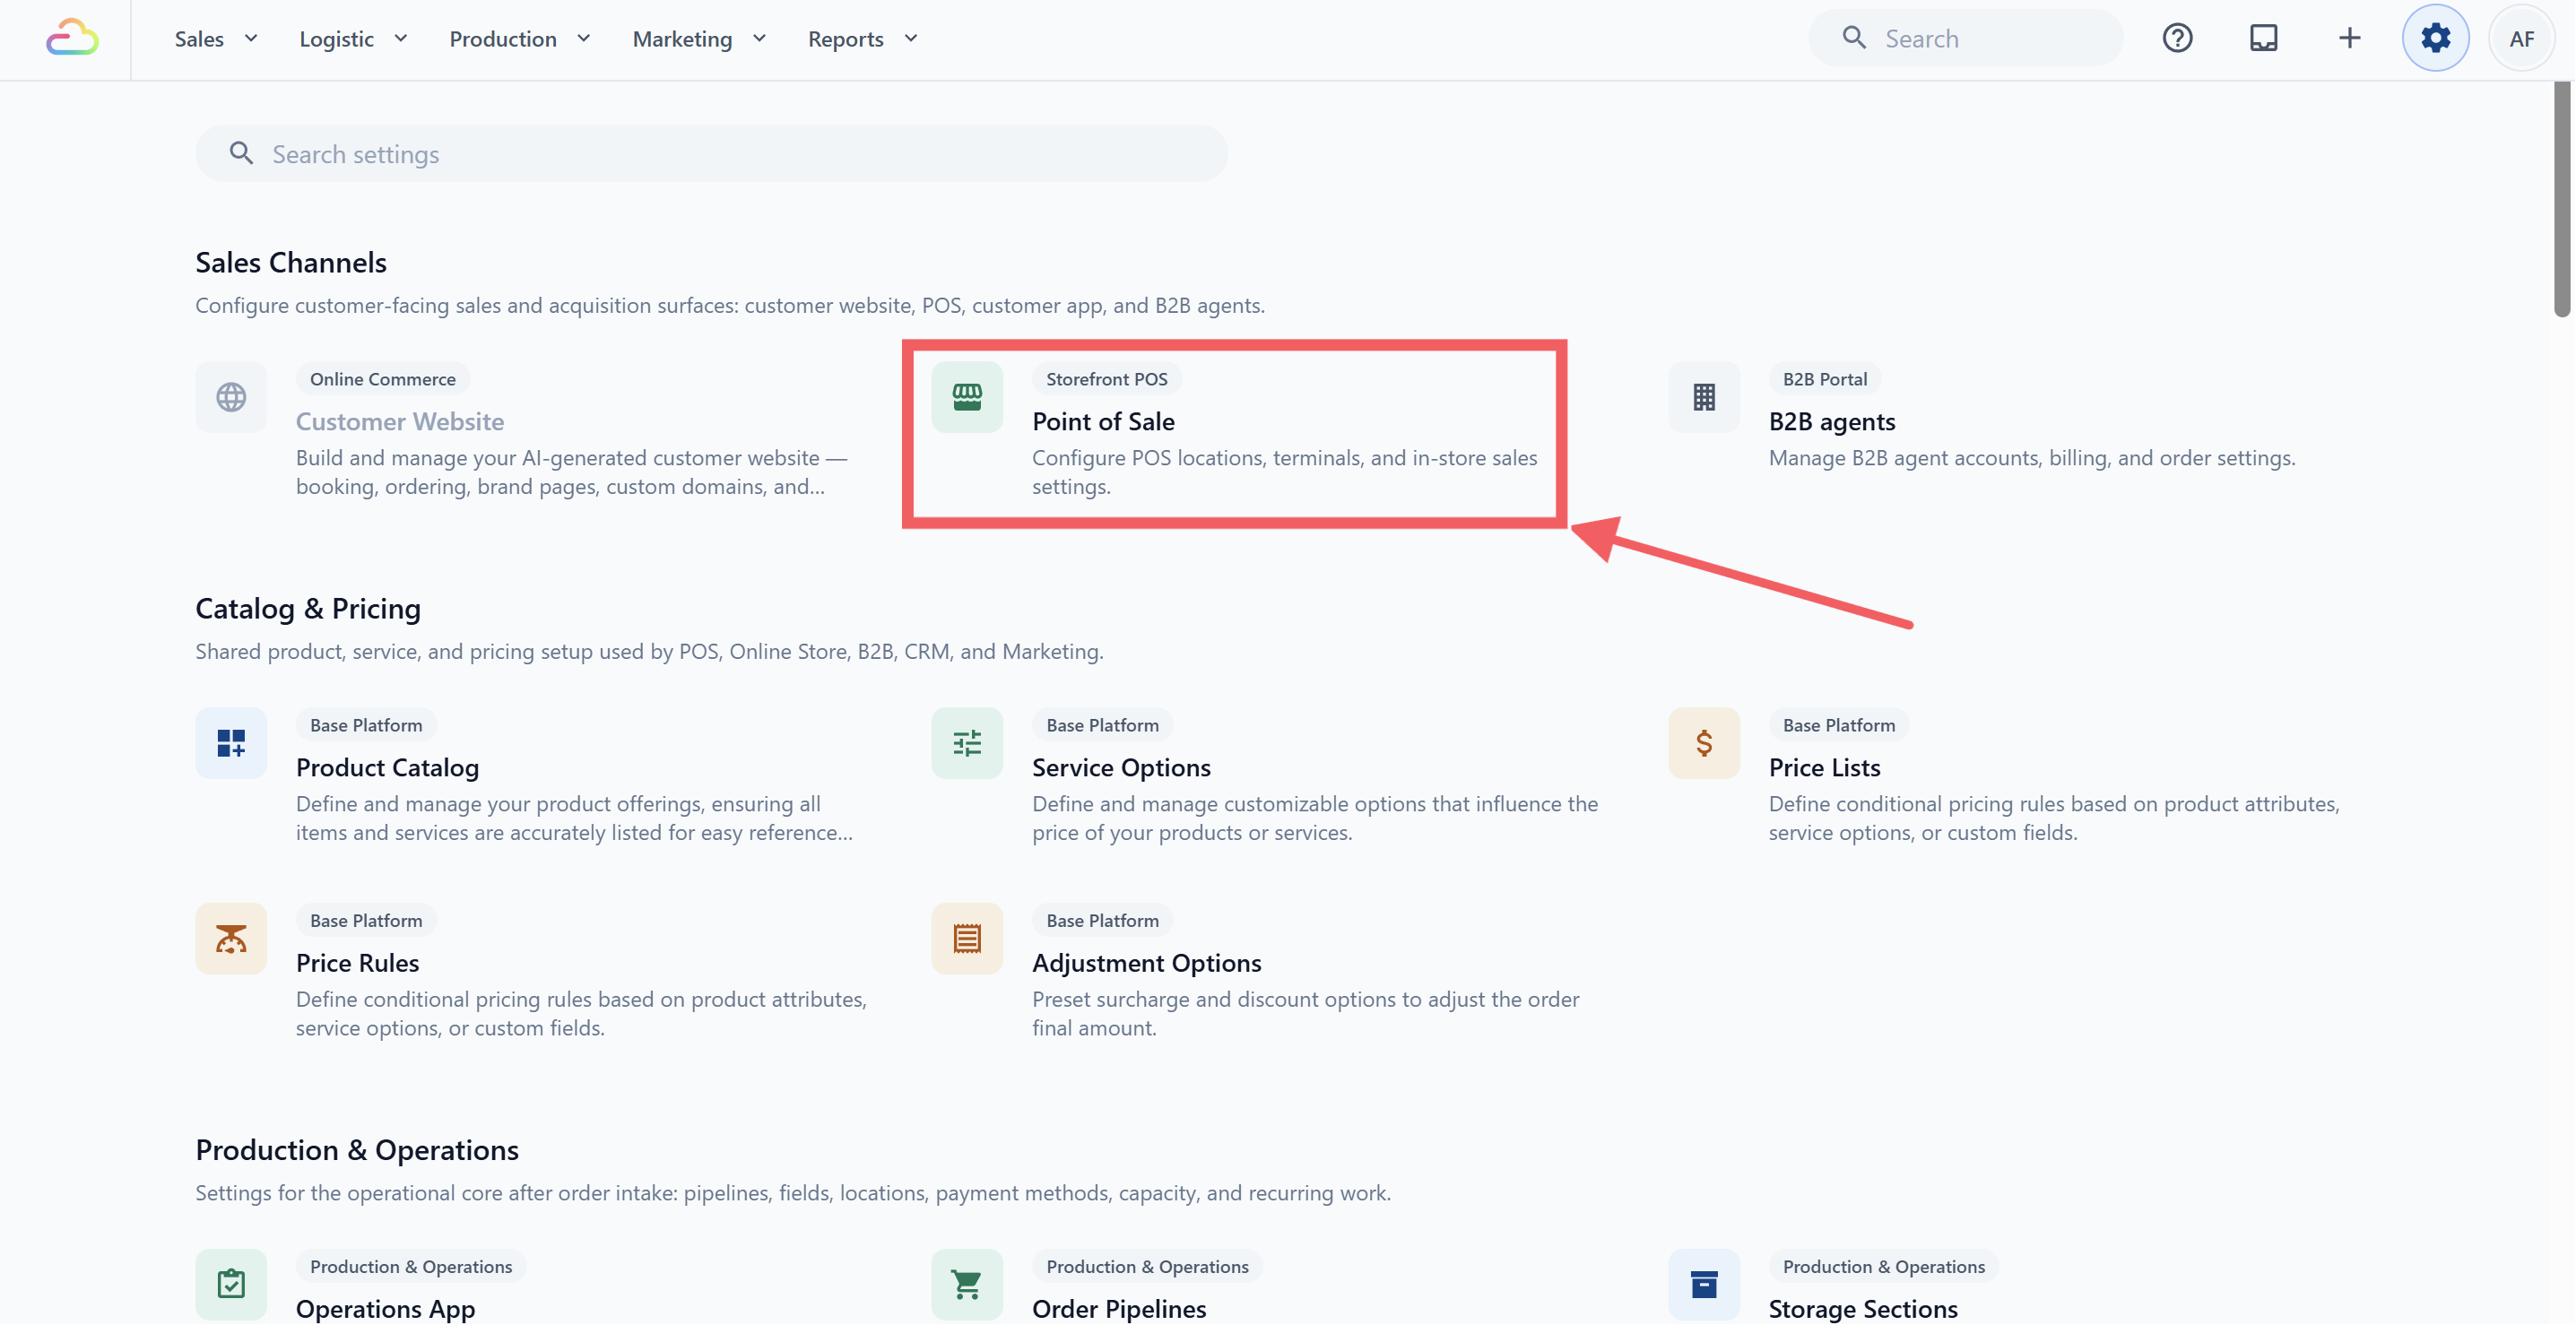
2. Under the Sales Channels section, click Point of Sale.
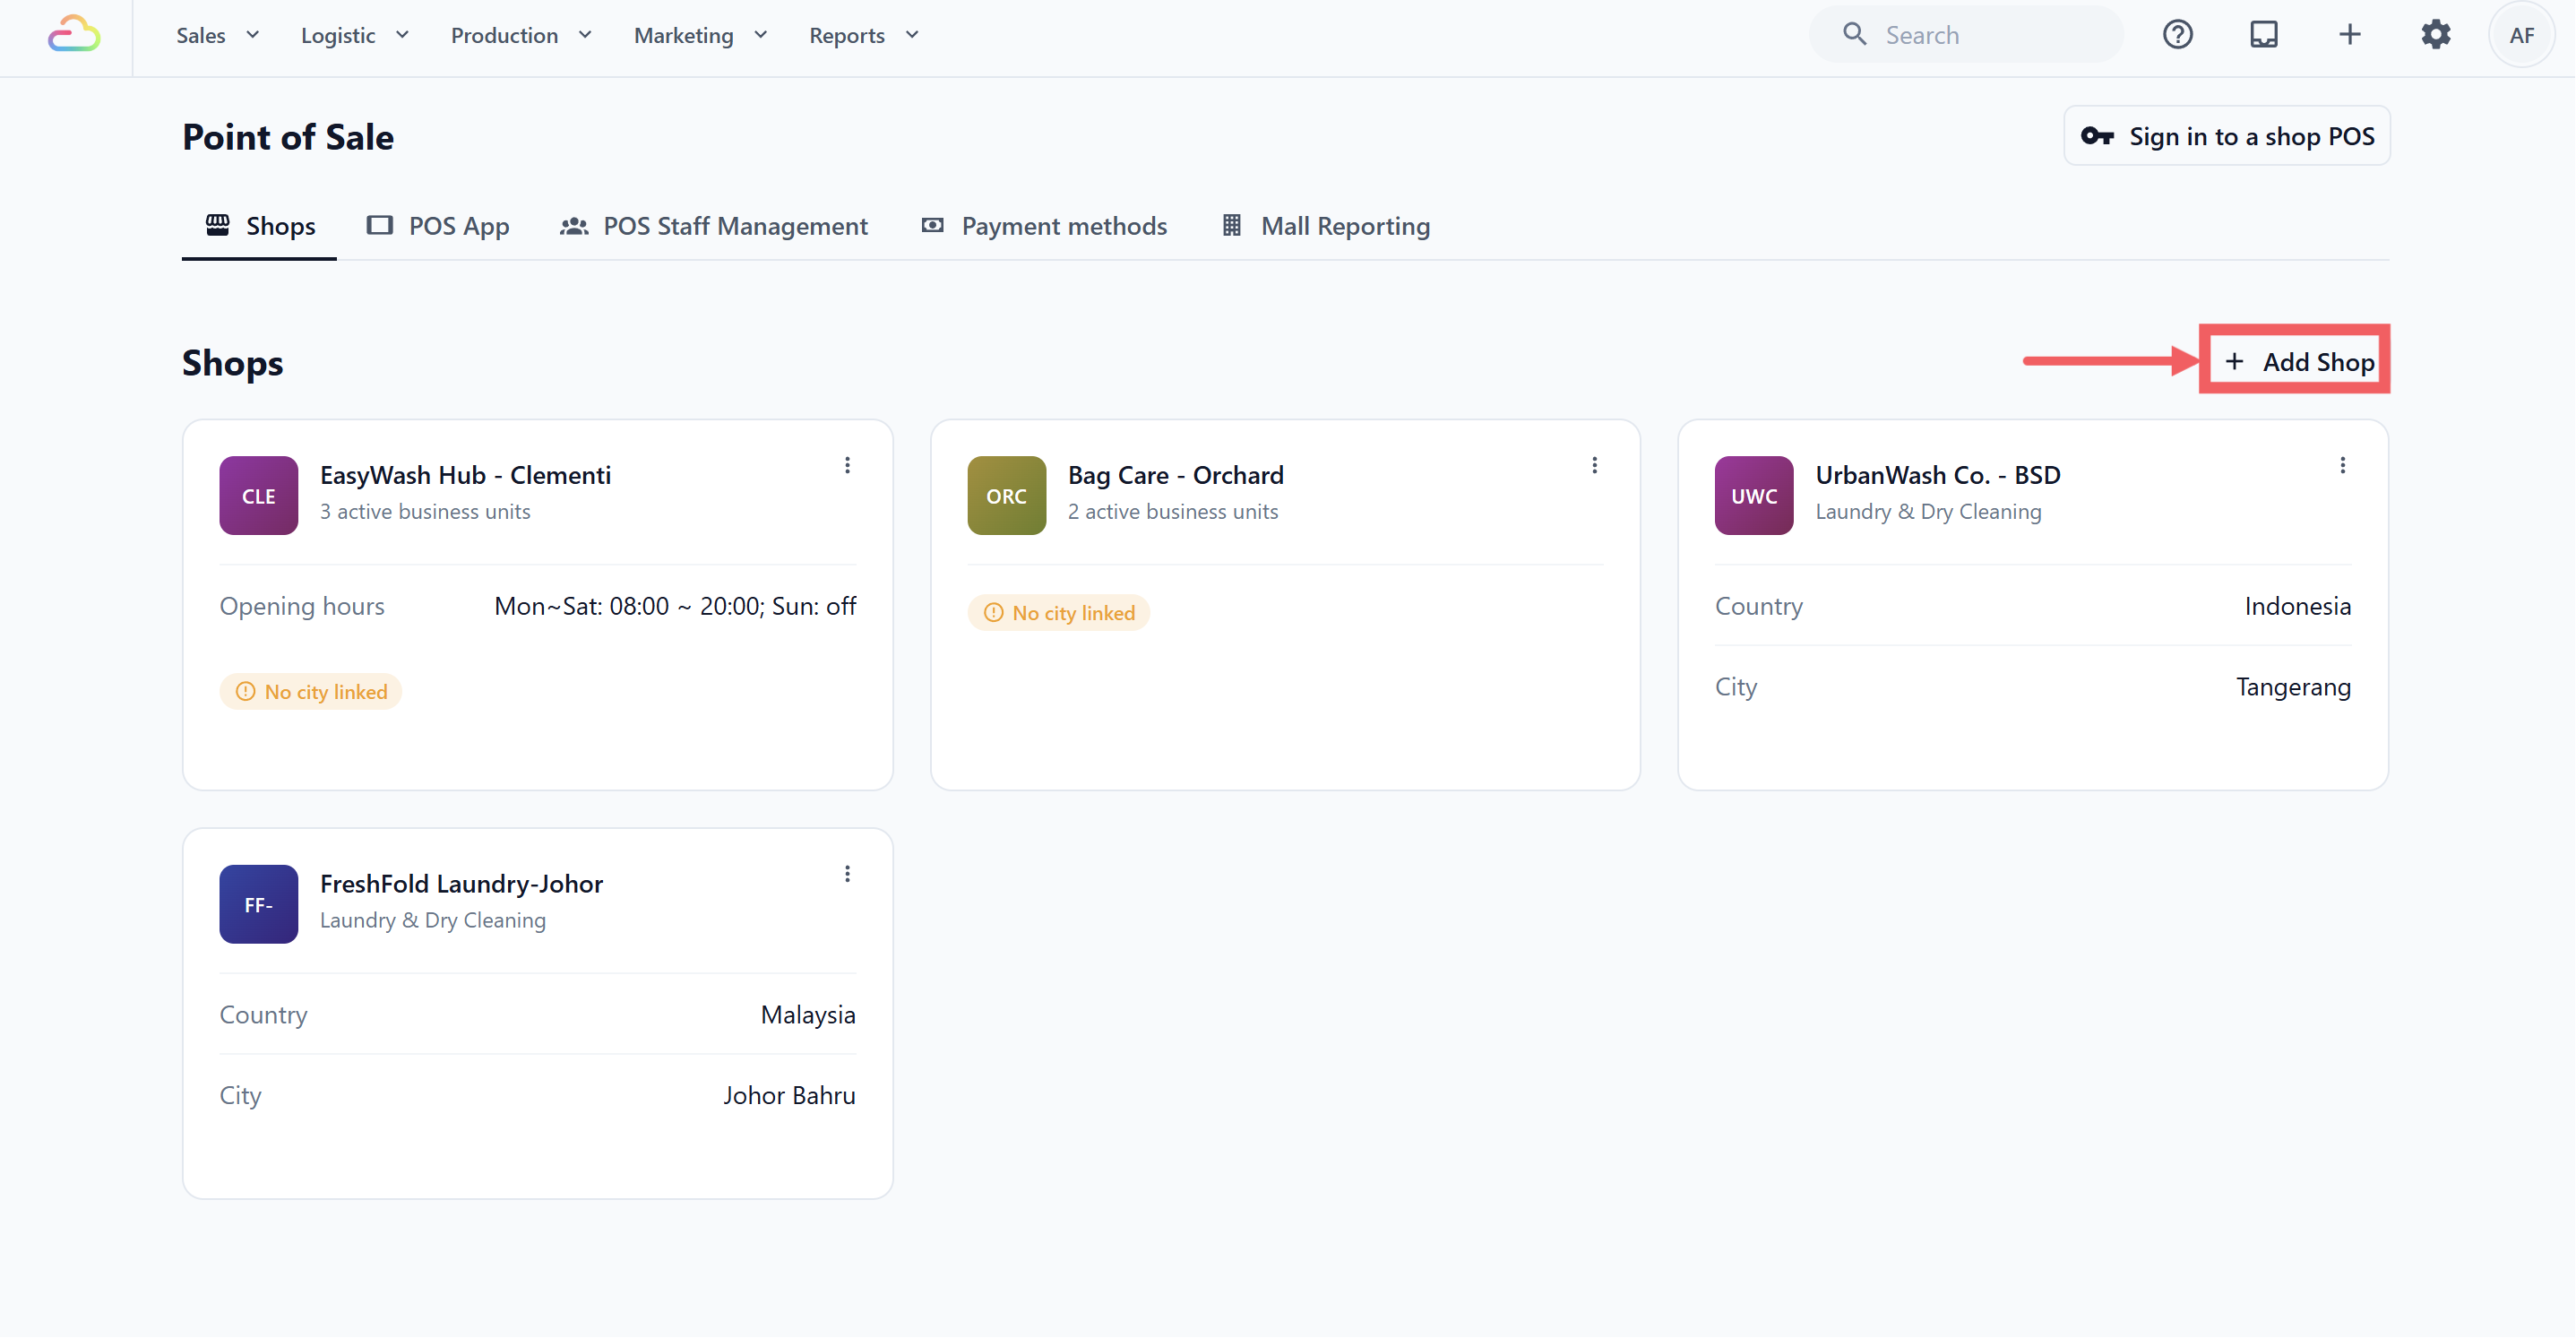
3. Open the Shops tab, then click Add Shop.
This opens a separate Add Shop page. Choose the correct Country and City first, because these cannot be changed after the shop is created.
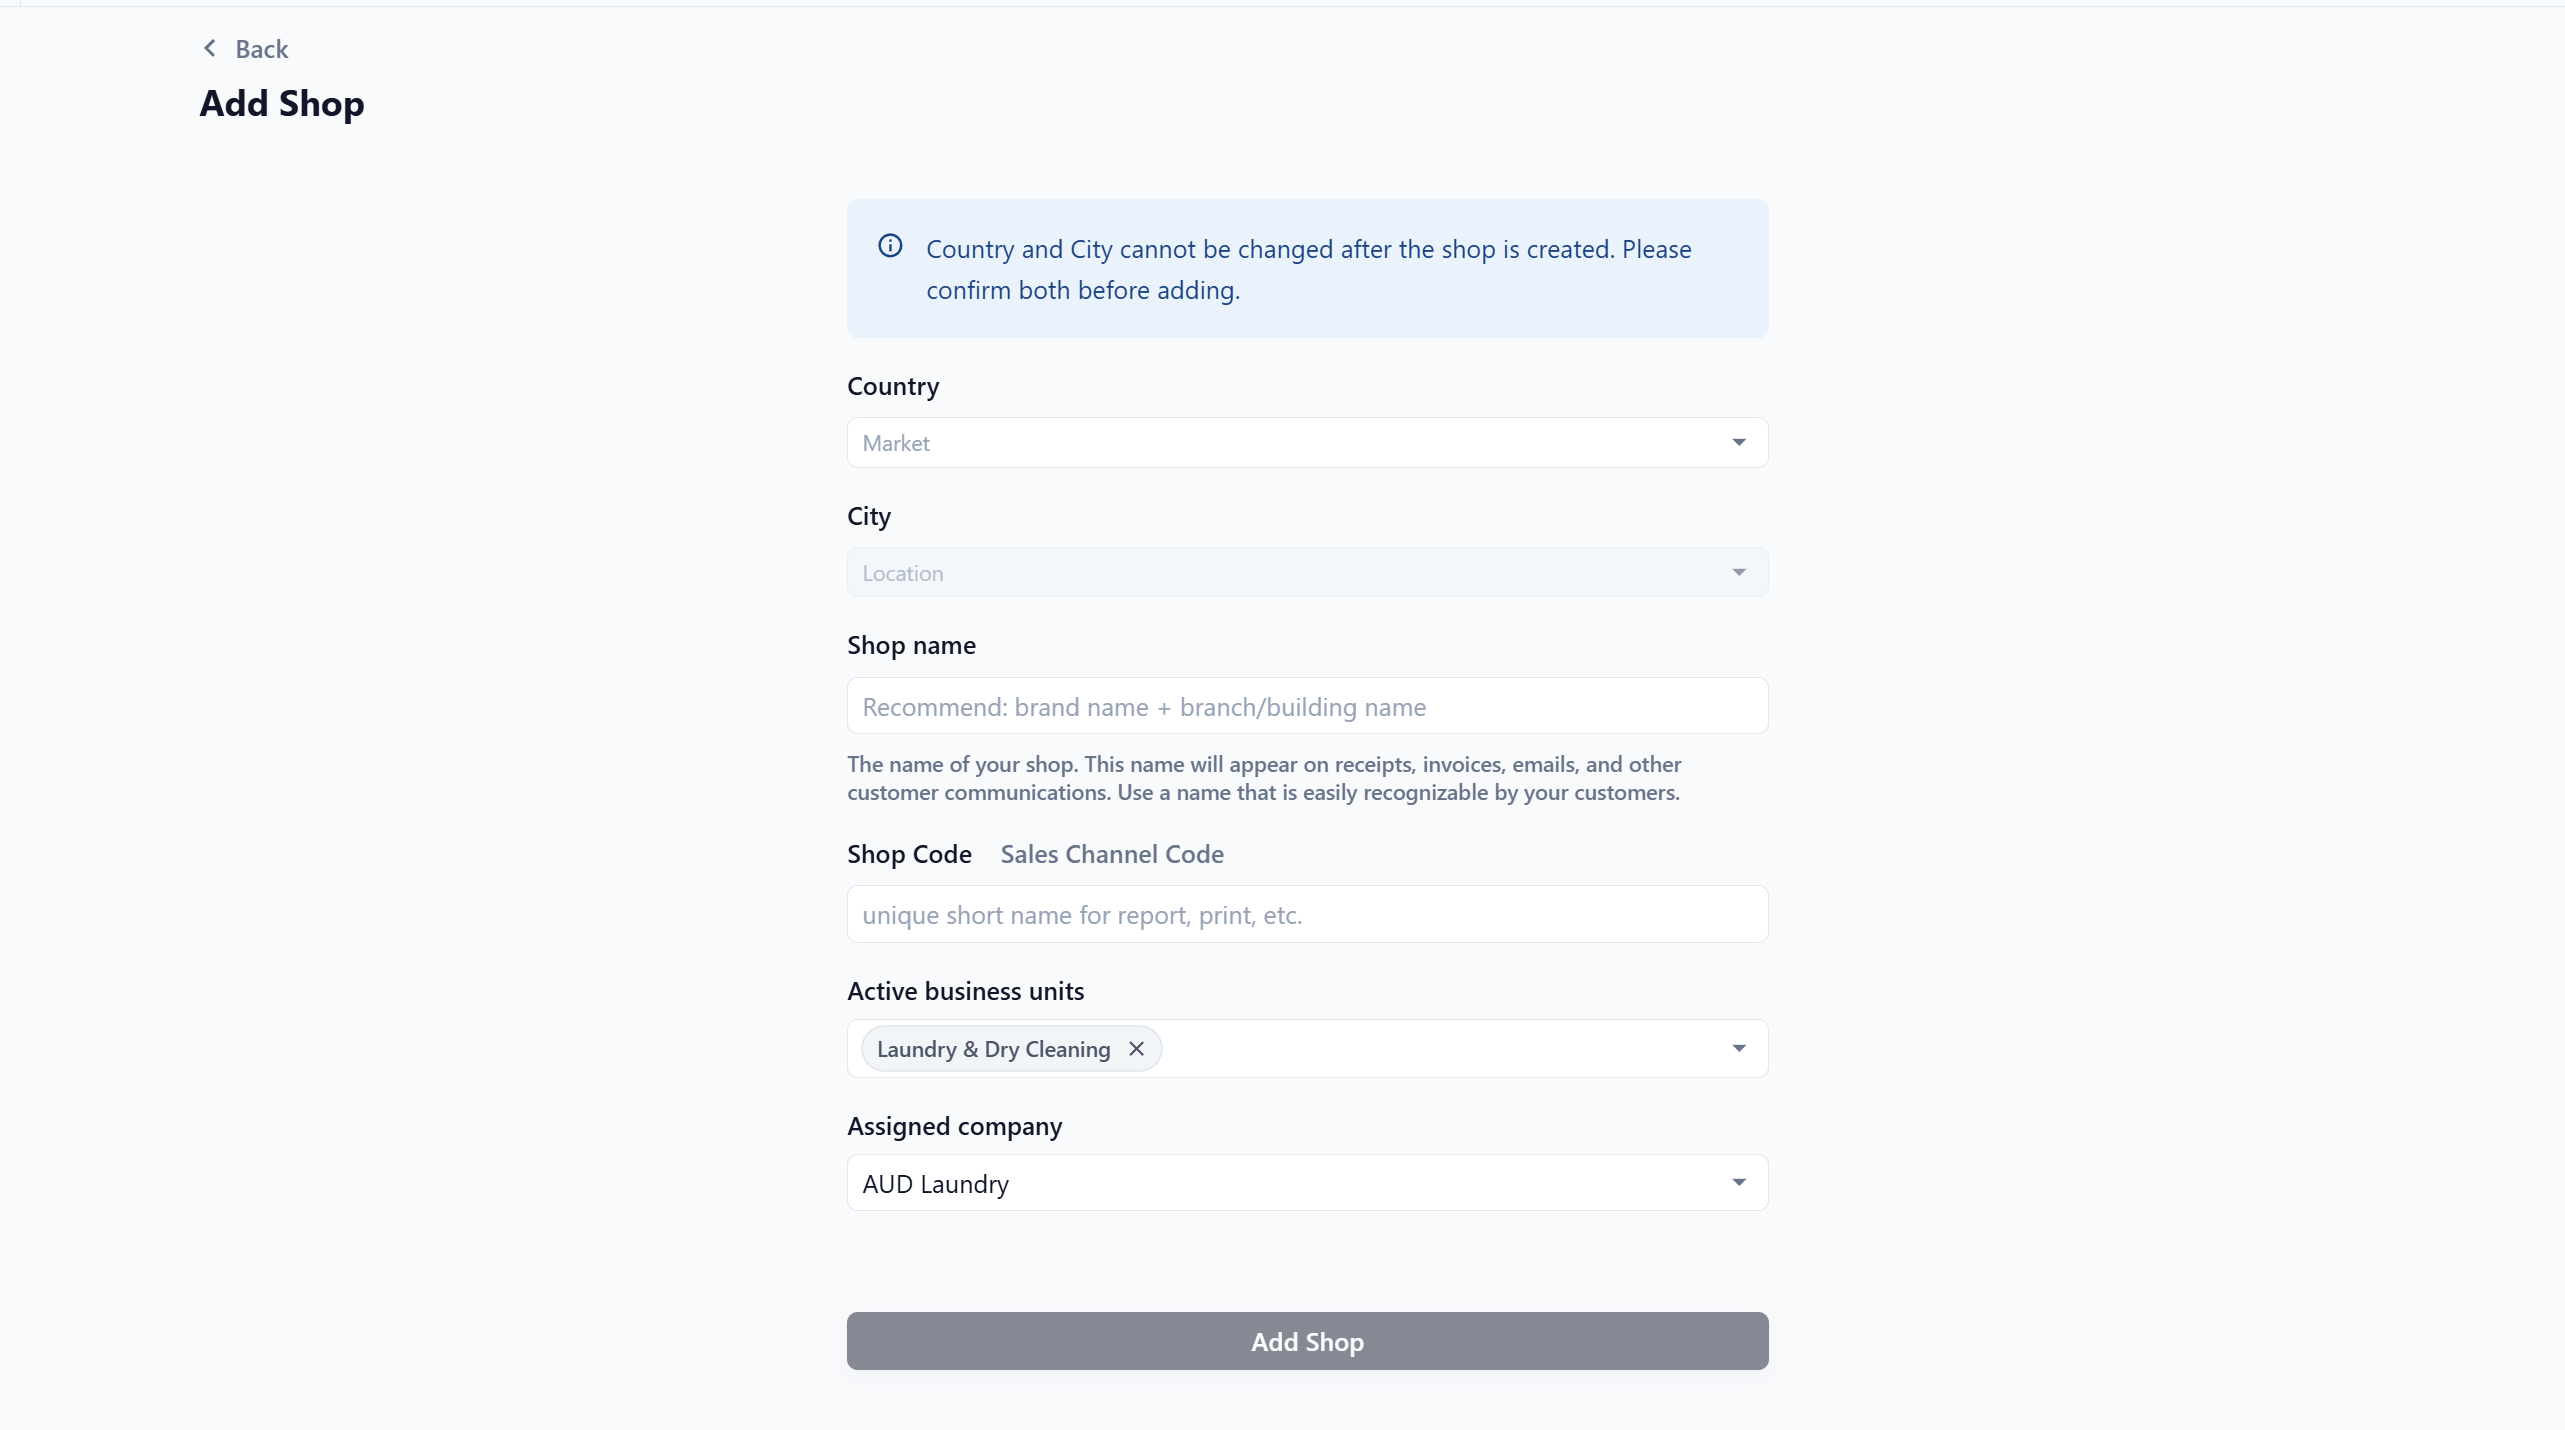
**Country**
> Choose the market for this shop. The market controls country-level settings such as currency and locale. Available countries depend on the markets configured for your account, and each country shows its currency and locale.
**City**
> Choose the shop's city. This field stays inactive until you select a Country.
**Shop name**
> Enter the customer-facing outlet name. This appears on receipts, invoices, emails, and other customer messages, so use a name your customers will recognise.
**Shop Code**
> Enter a short code used in reports and printing. If you leave it blank, EasyBiz uses a system default code.
**Active business units**
> A business unit is a distinct line of business in your shop, such as Laundry and Garment Care or Bag Repair. Choose which ones can take orders from this shop.
| Pick this | Result |
| --- | --- |
| One business unit | Only that service can take orders at this shop |
| Mix and match | Select any combination of your business units for this shop |
**Assigned company**
> Select the company this shop belongs to.
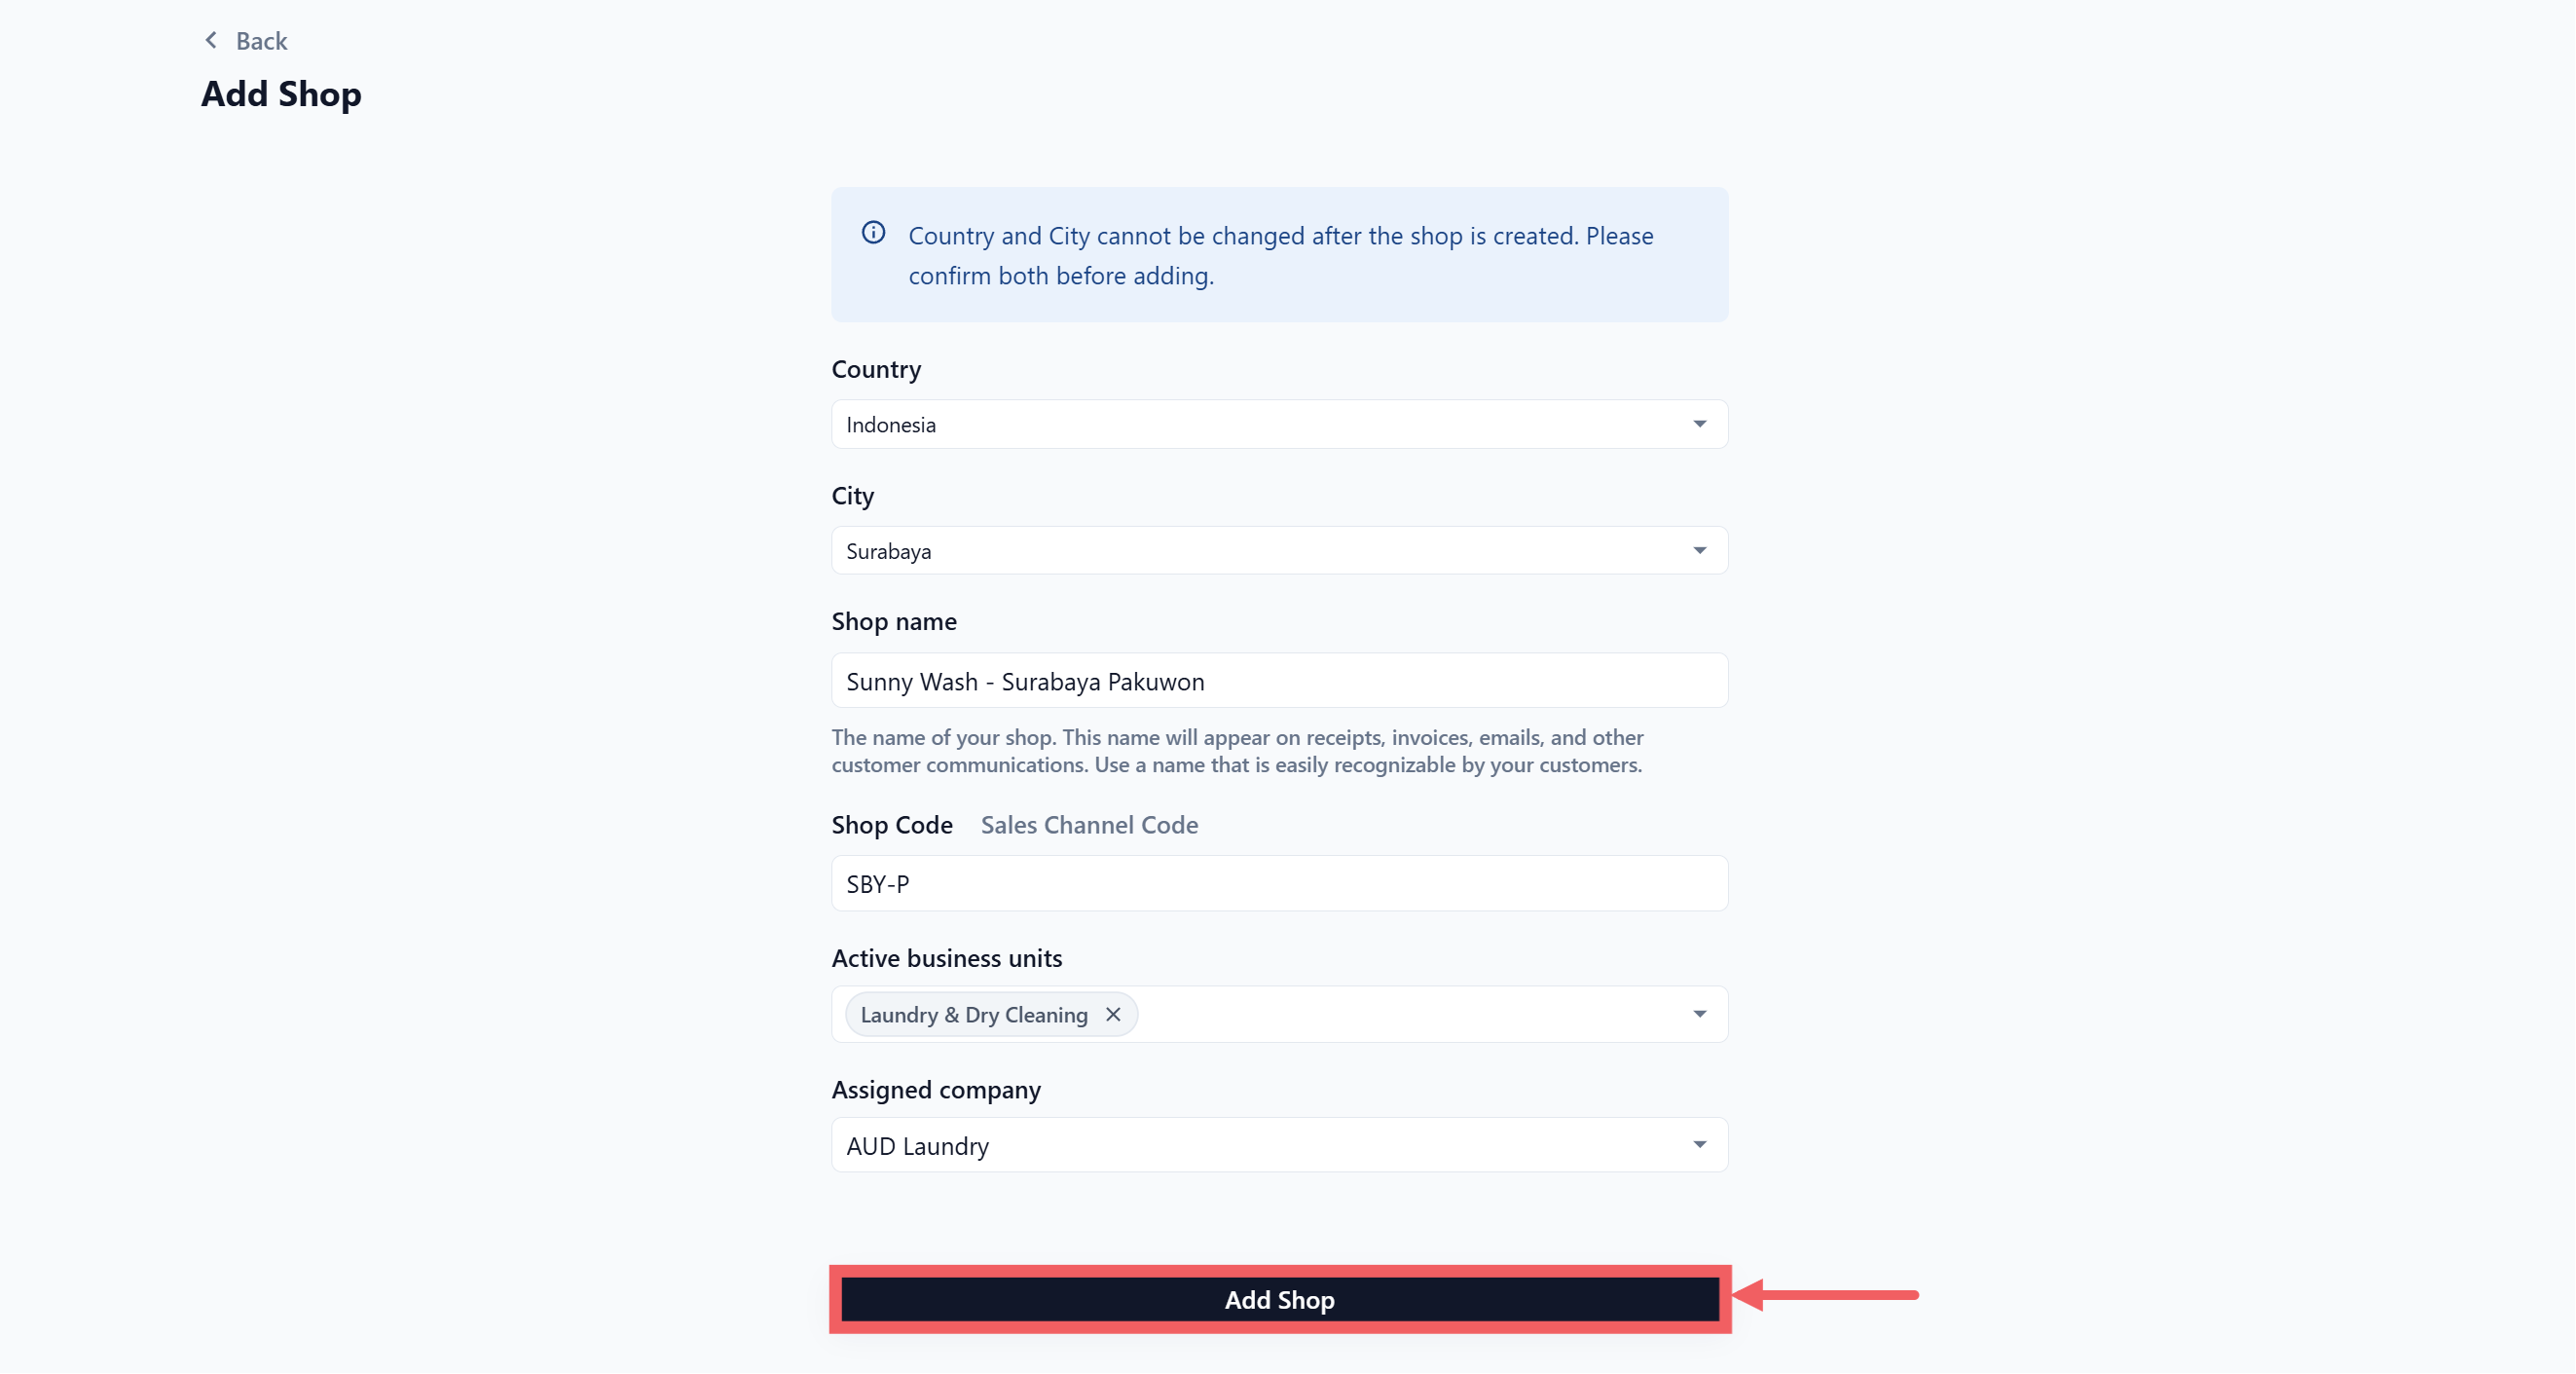
Click Add Shop once the required details are complete.
Country and City are locked once the shop is created, and there is no edit path to add or change them later. Confirm both before clicking Add Shop.
---
## Understanding the Shops page
The Shops page shows your POS shops as clickable cards. Each card shows the shop name, the shop code badge, and the active business unit information.
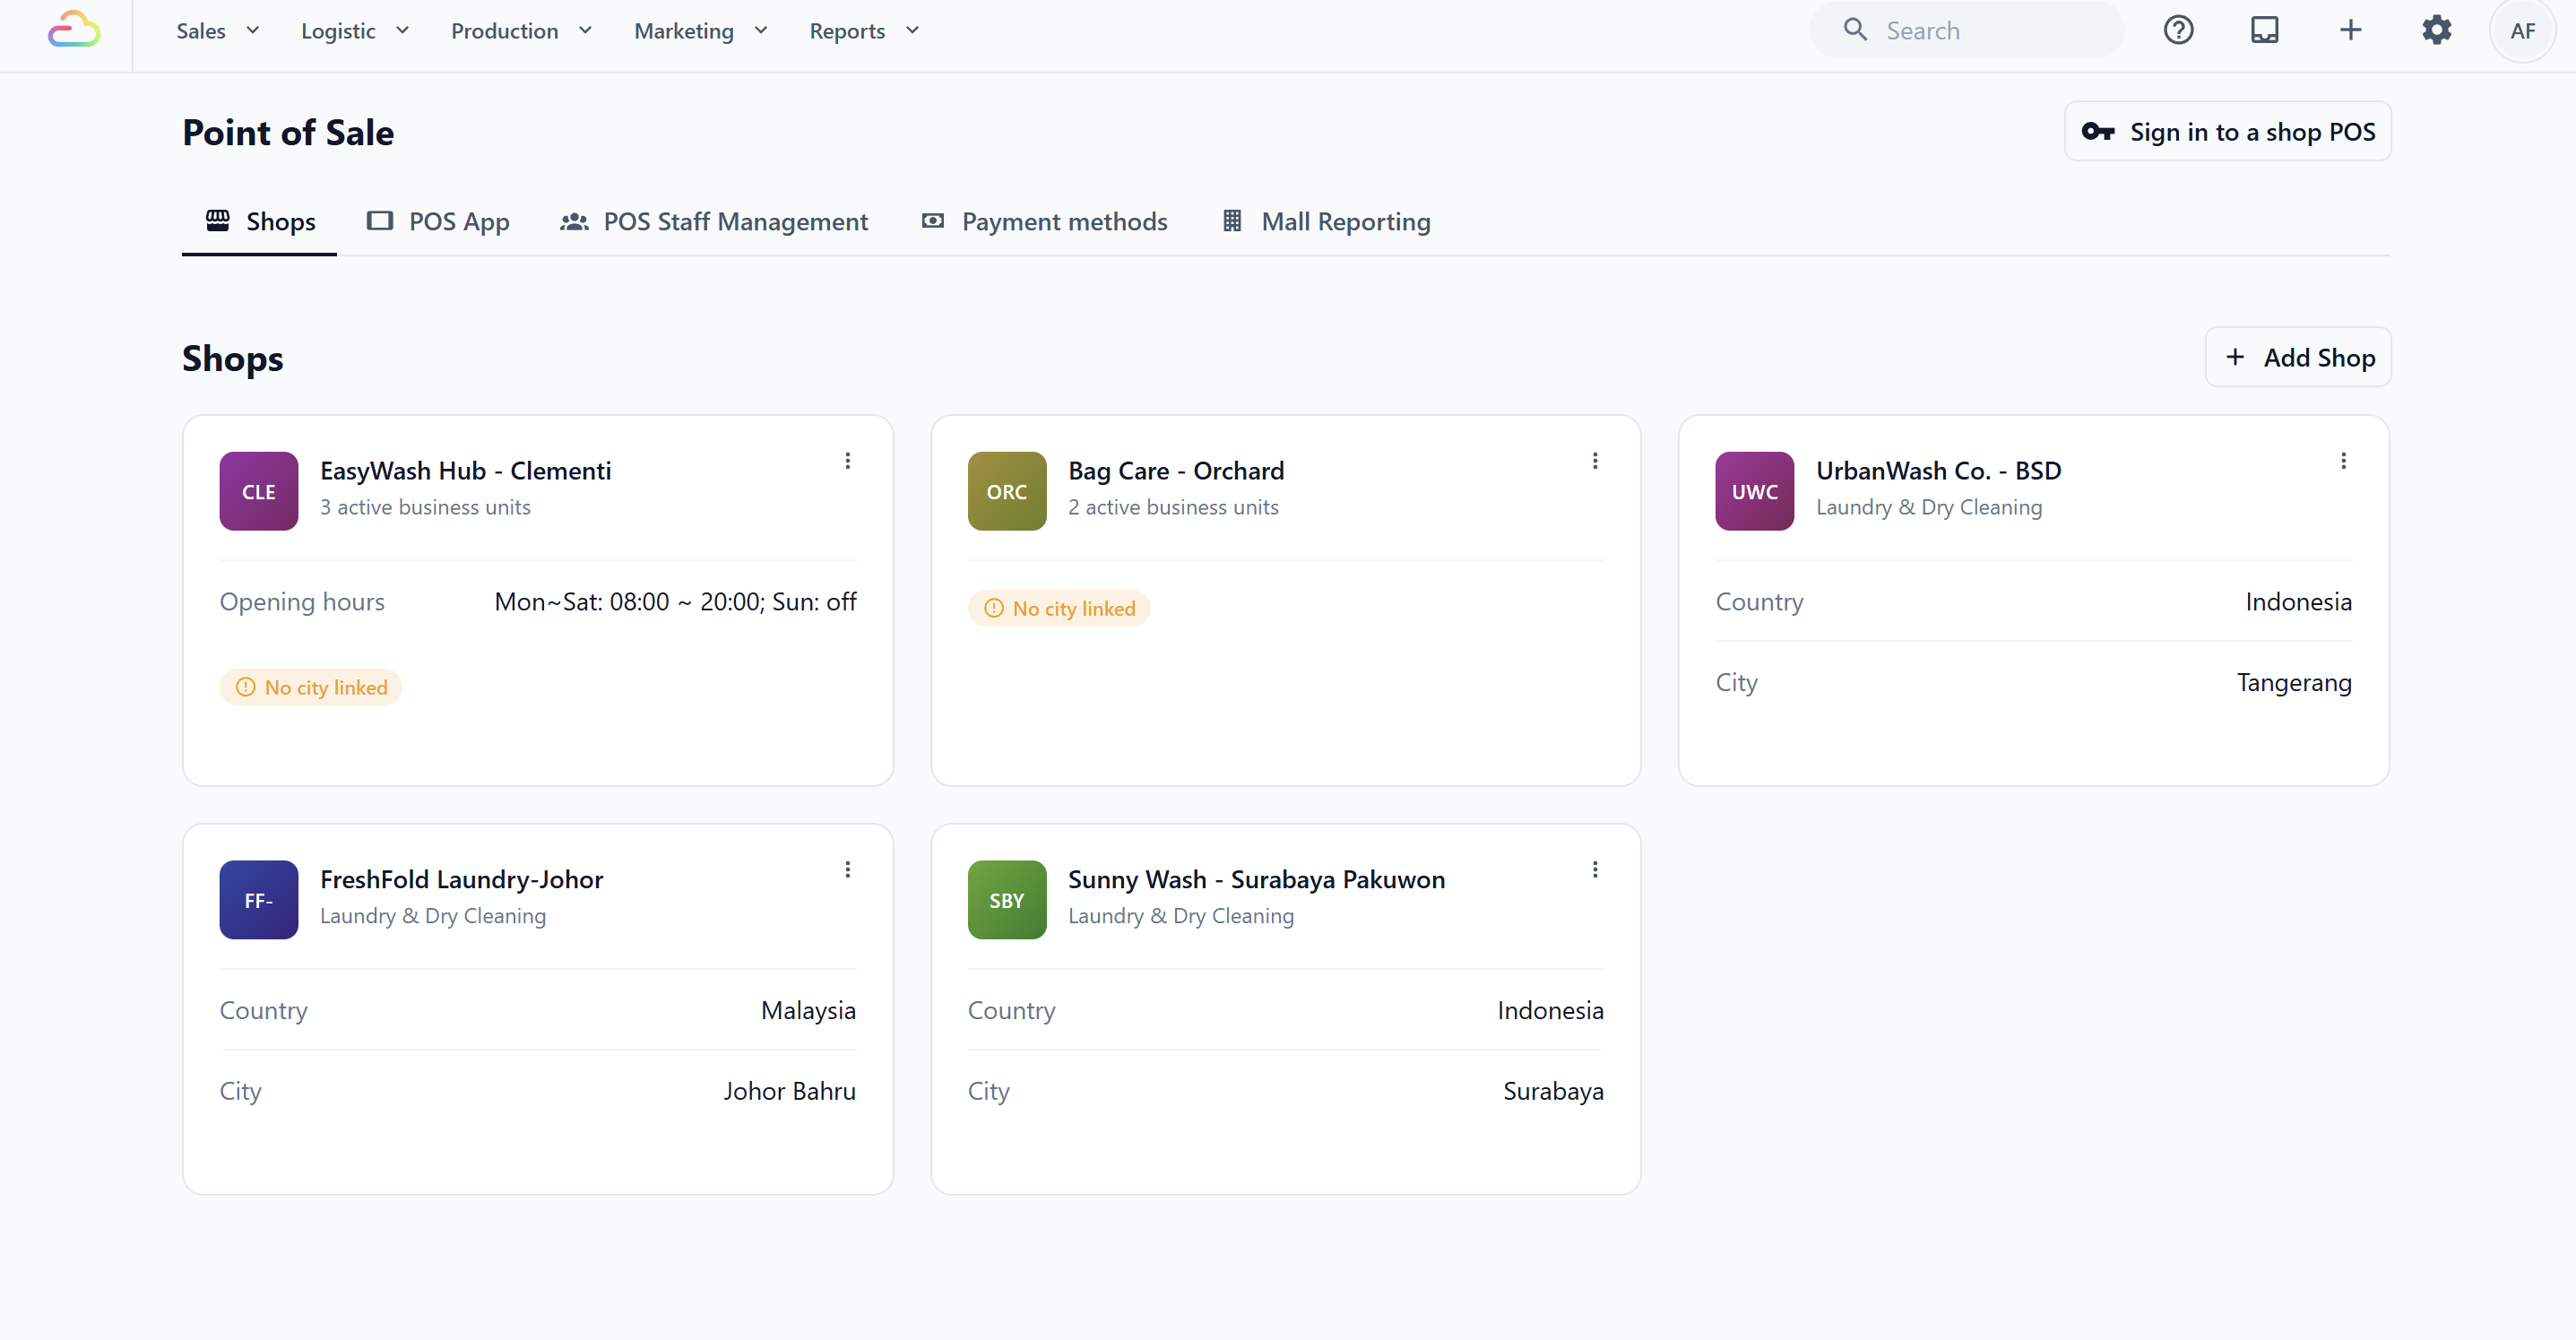
- The shop address may also show on the card when it is configured.
- Country and City may appear when they are linked and relevant for your account.
- If opening hours are set, they show on the card in a compact format such as Mon to Sat, 08:00 to 20:00, Sunday off.
- If a shop has no linked city, it shows a "No city linked" badge. This is display only and is not clickable.
---
## Using the shop menu
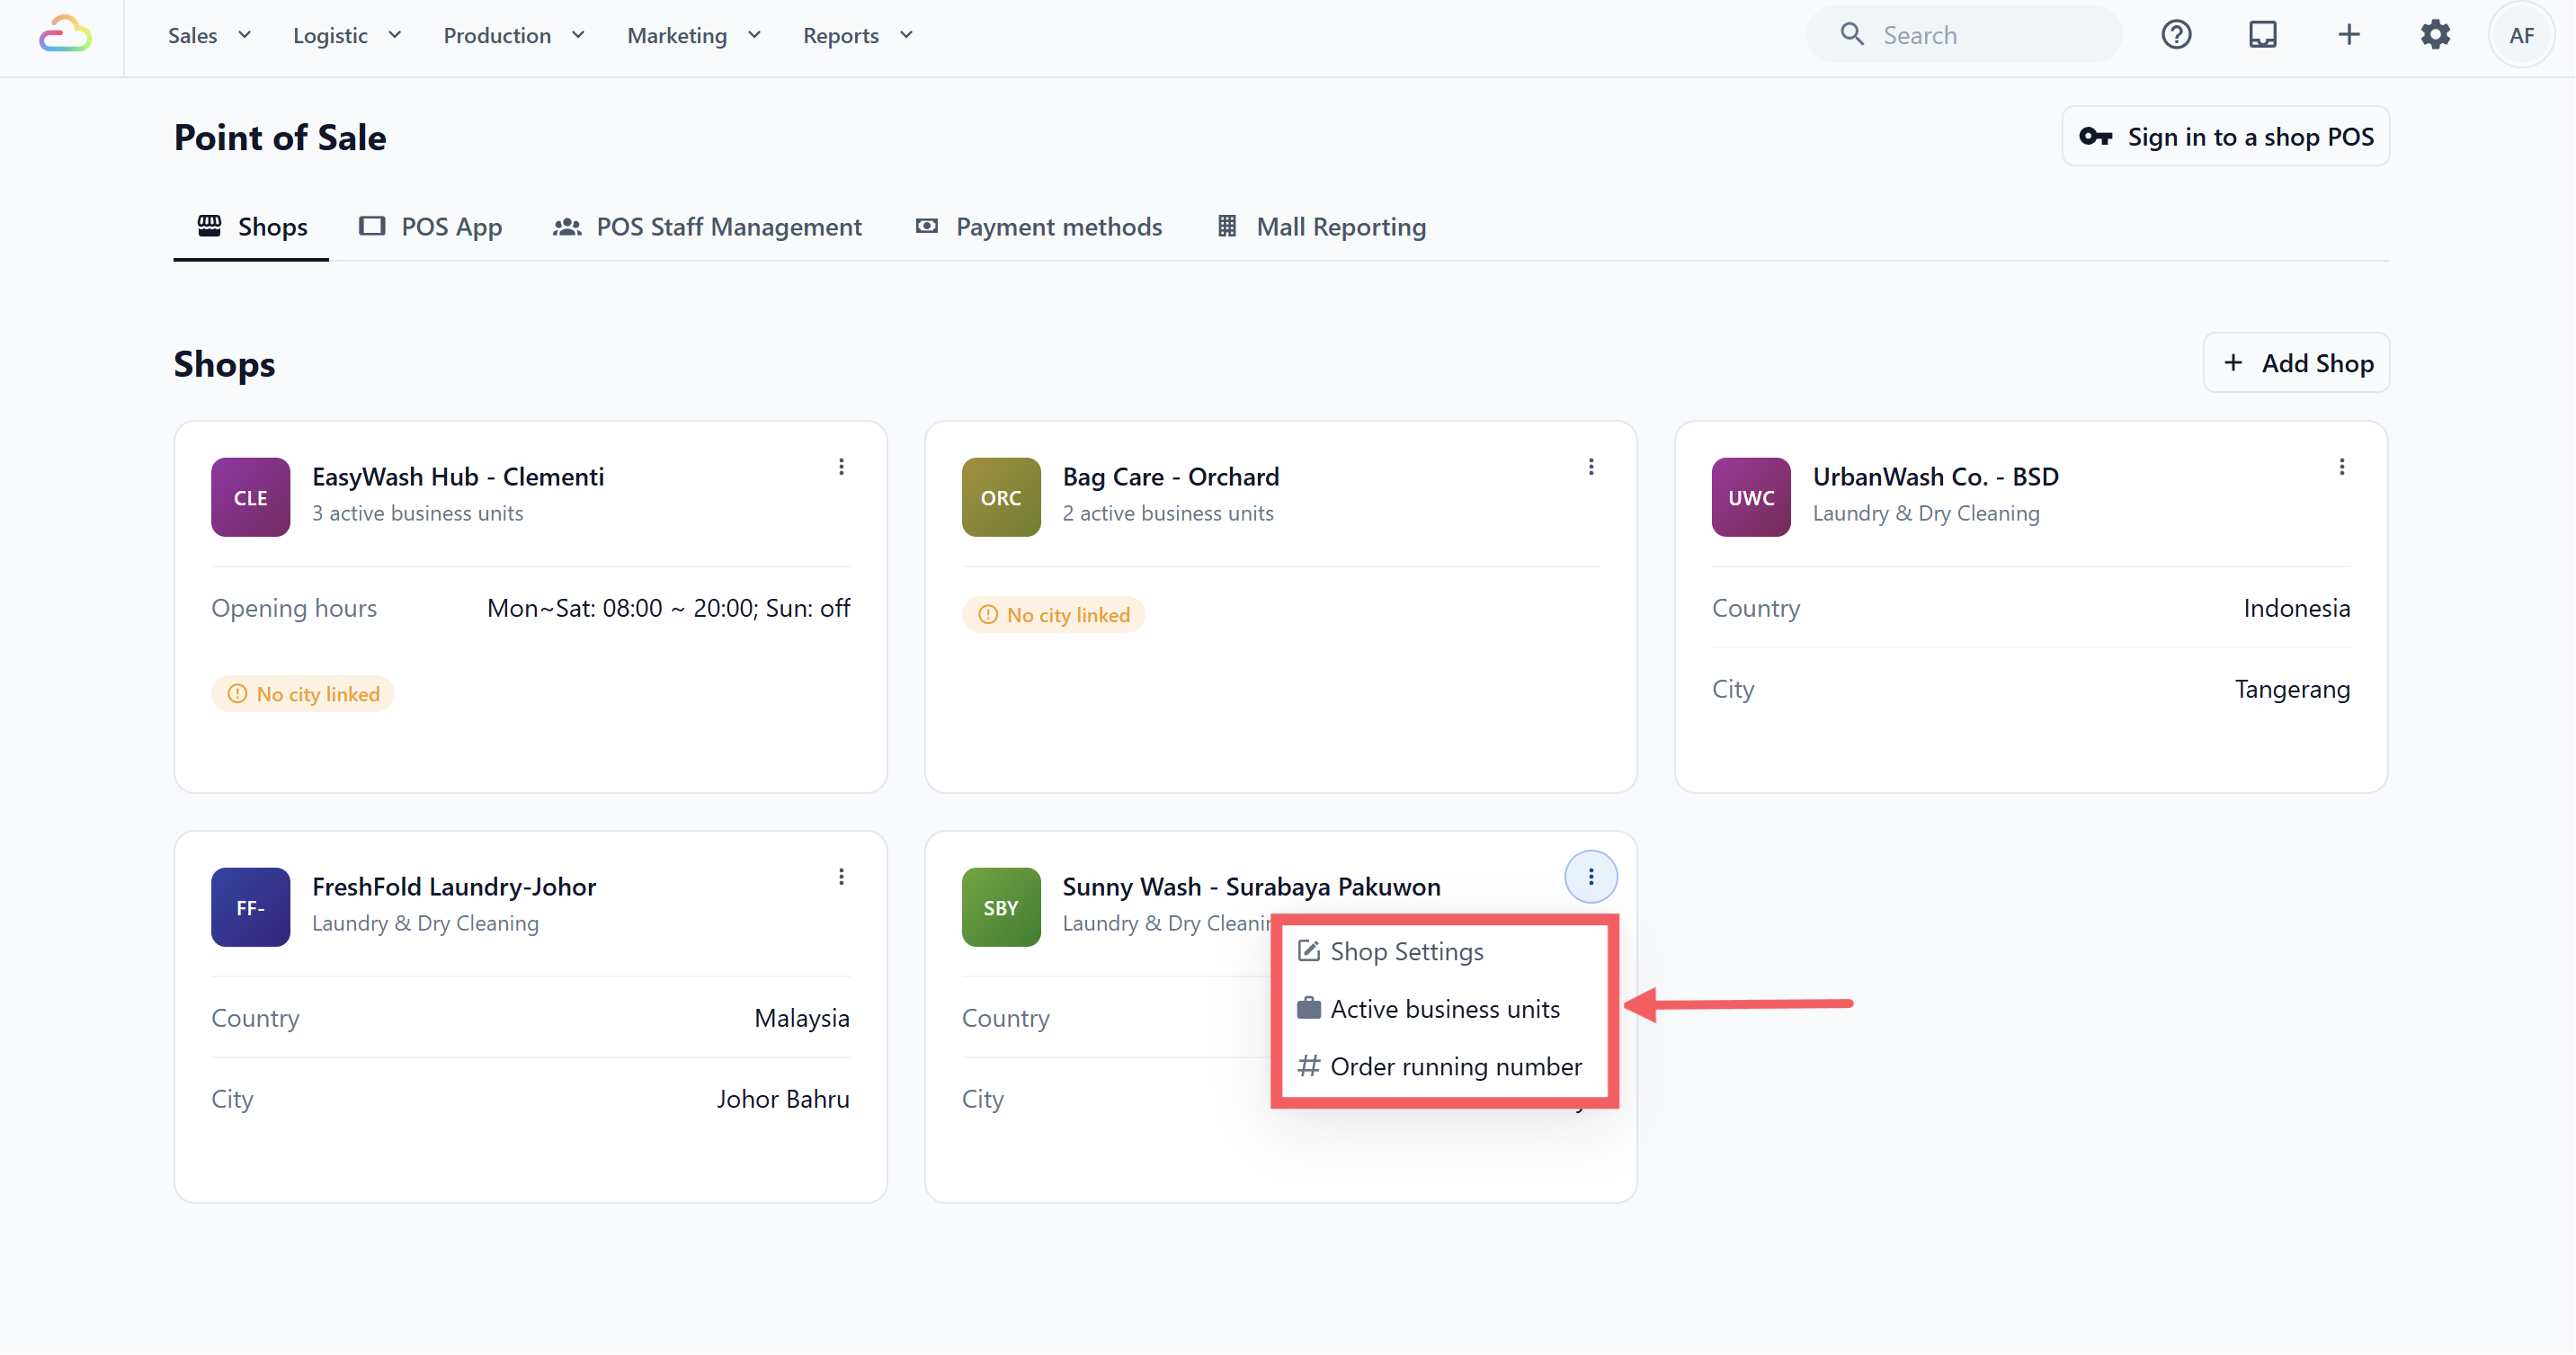
Each shop card has a three-dot menu with three options.
| Option | What it does |
| --- | --- |
| Shop Settings | Edit the shop profile, opening hours, and advanced settings |
| Active business units | Choose which business units are active for this shop |
| Order running number | Set the running number used for orders from this shop |
---
## Completing Shop Settings
Open Shop Settings to finish setting up the shop. The page has three sections, each with its own Save button.
### 1. Shop profile
Manage the shop's main details here.
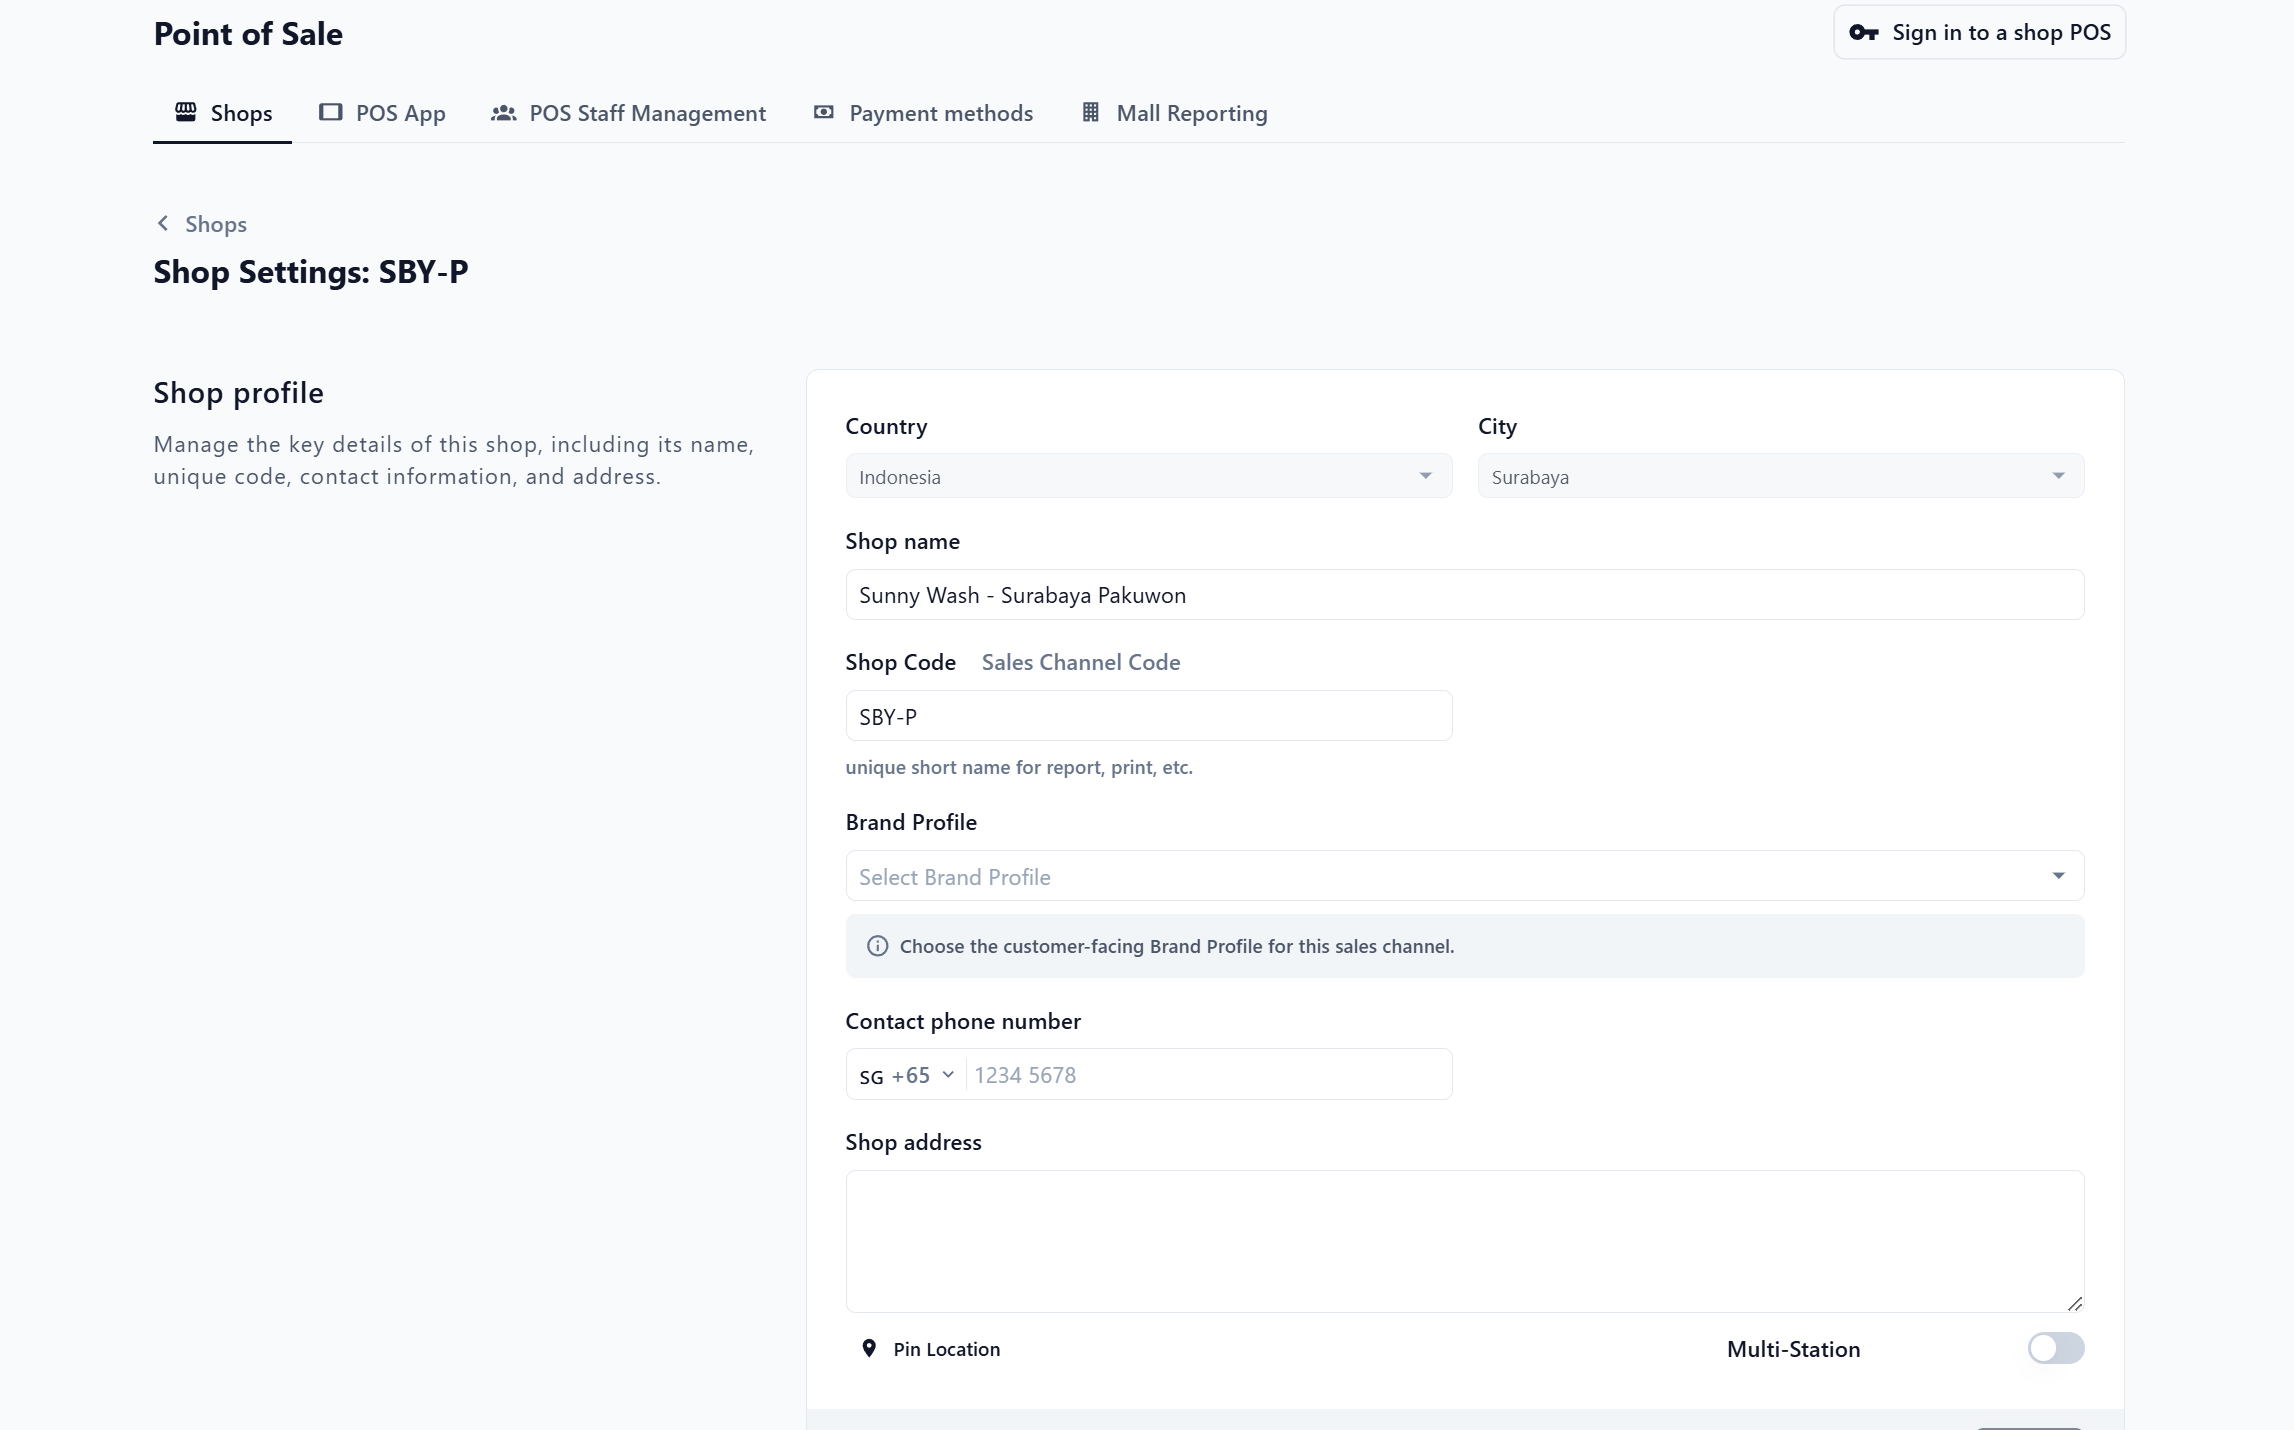
- Country and City → Shown as read-only after the shop is created.
- Shop name and Shop Code → Edit the outlet name and short code.
- Brand Profile → Choose the customer-facing brand identity for this shop.
- Contact phone number and Shop address → Add the outlet's contact details.
- Pin Location → Pin the outlet's location on the map.
- Multi-Station → Turn this on only if more than one POS device will run at this shop at the same time.
Multi-Station needs the shop location to be pinned first. When it is on, POS devices may need location permission for verification.
### 2. Opening hours
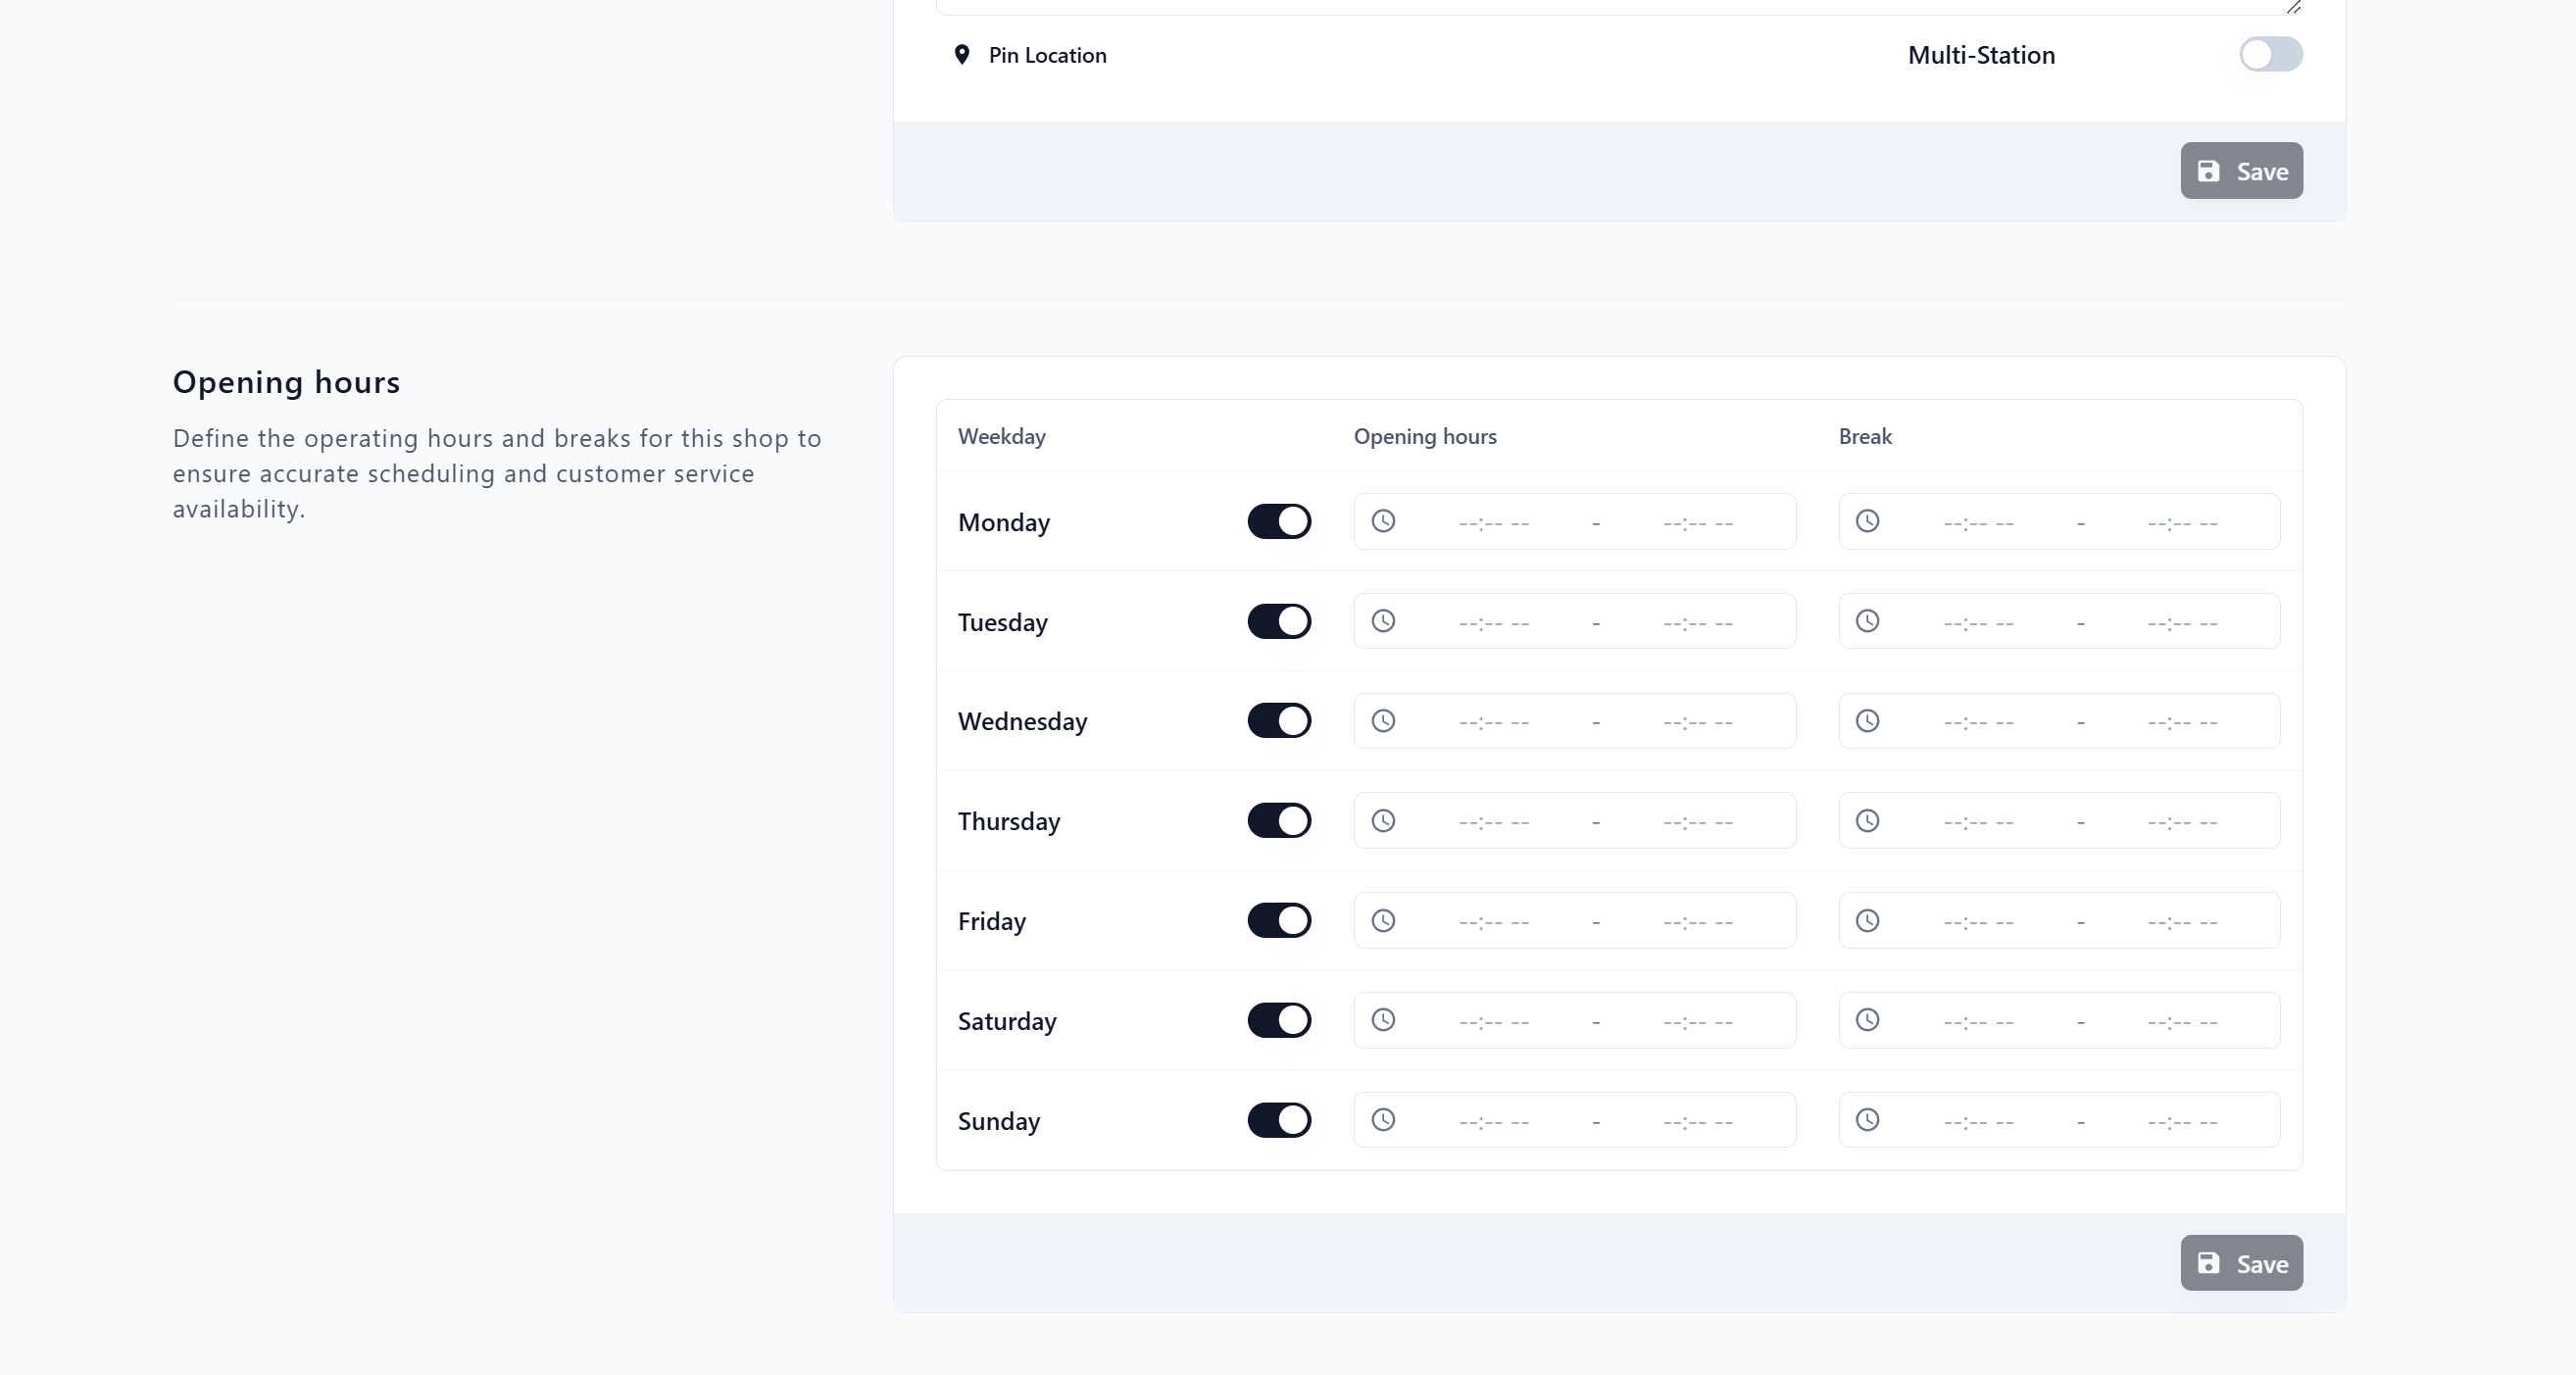
Set the days and times the shop is open. For each weekday:
1. Toggle the day on or off.
2. Set the opening and closing time.
3. Add an optional break time, such as a lunch break.
4. Click Save.
Opening hours describe the shop's trading times. This is exactly what they do:
- They show on the shop card in the Shops list, in a compact format such as Mon to Sat, 08:00 to 20:00, Sunday off.
- They are available to receipt and notification templates that include an opening-hours placeholder.
- They complete the opening-hours step in the POS setup checklist once the hours are filled in.
Opening hours do not open or close the POS counter. Staff can take orders at any time, including outside these hours and during a break.
The opening, closing, and break times are also not customer booking windows. They never become selectable times at checkout.
Customer-facing scheduling is set up elsewhere:
- [Booking Options](/docs/setting-up-booking-options) → the lead time and which days a customer can pick.
- [Time Slots](/docs/setting-up-time-slots) → the exact time windows a customer can pick.
- [WhatsApp General Settings](/docs/whatsapp-general-settings) → a separate Business Hours setting, used only by WhatsApp auto replies.
One older behaviour still applies on some booking setups: a weekday you toggle off here can also show as an off day on the customer's date picker. Days you leave toggled on are never restricted by the times you set.
### 3. Advanced settings
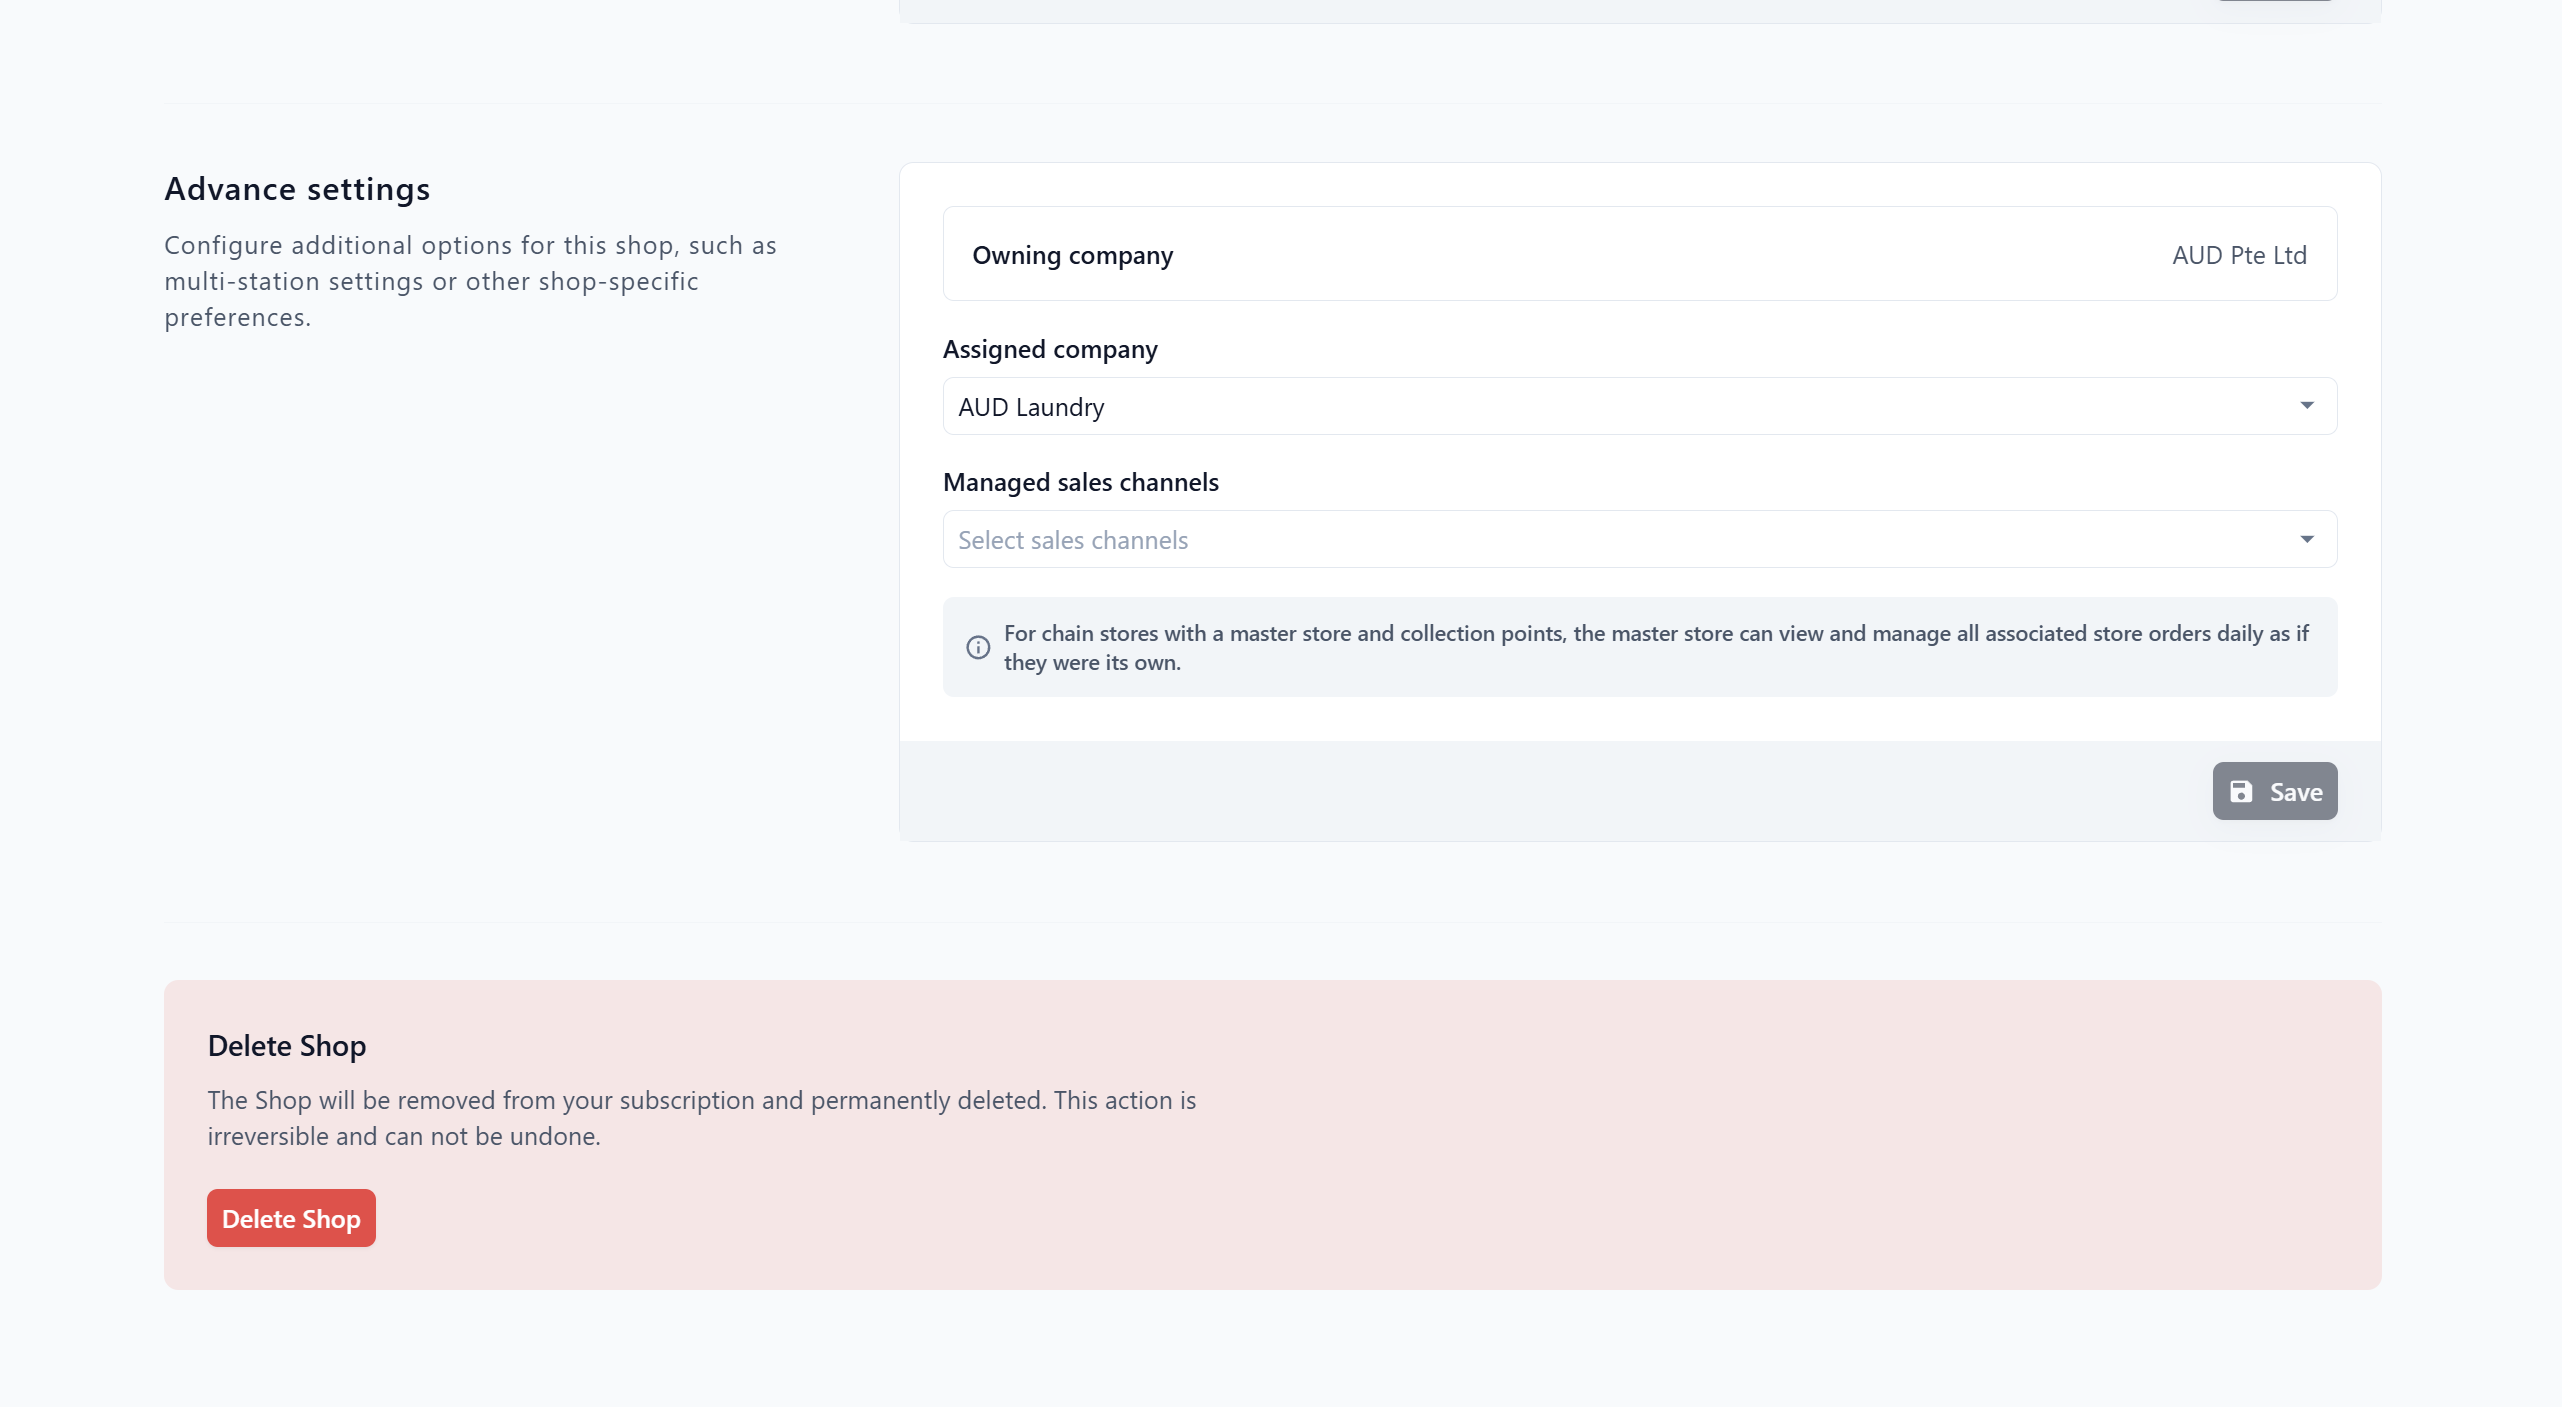
Use this section for company and chain-store setup.
- Owning company. Shows the current company linked to the shop.
- Assigned company. Change which company this shop belongs to, if needed.
- Managed sales channels. Use this when a master shop needs to manage orders from other shops, collection points, or online channels.
Click Save after making changes in each section.
---
## Deleting a POS shop
To delete a shop, scroll to the bottom of the Shop Settings page. The Delete Shop section is shown separately in red because deletion is permanent.
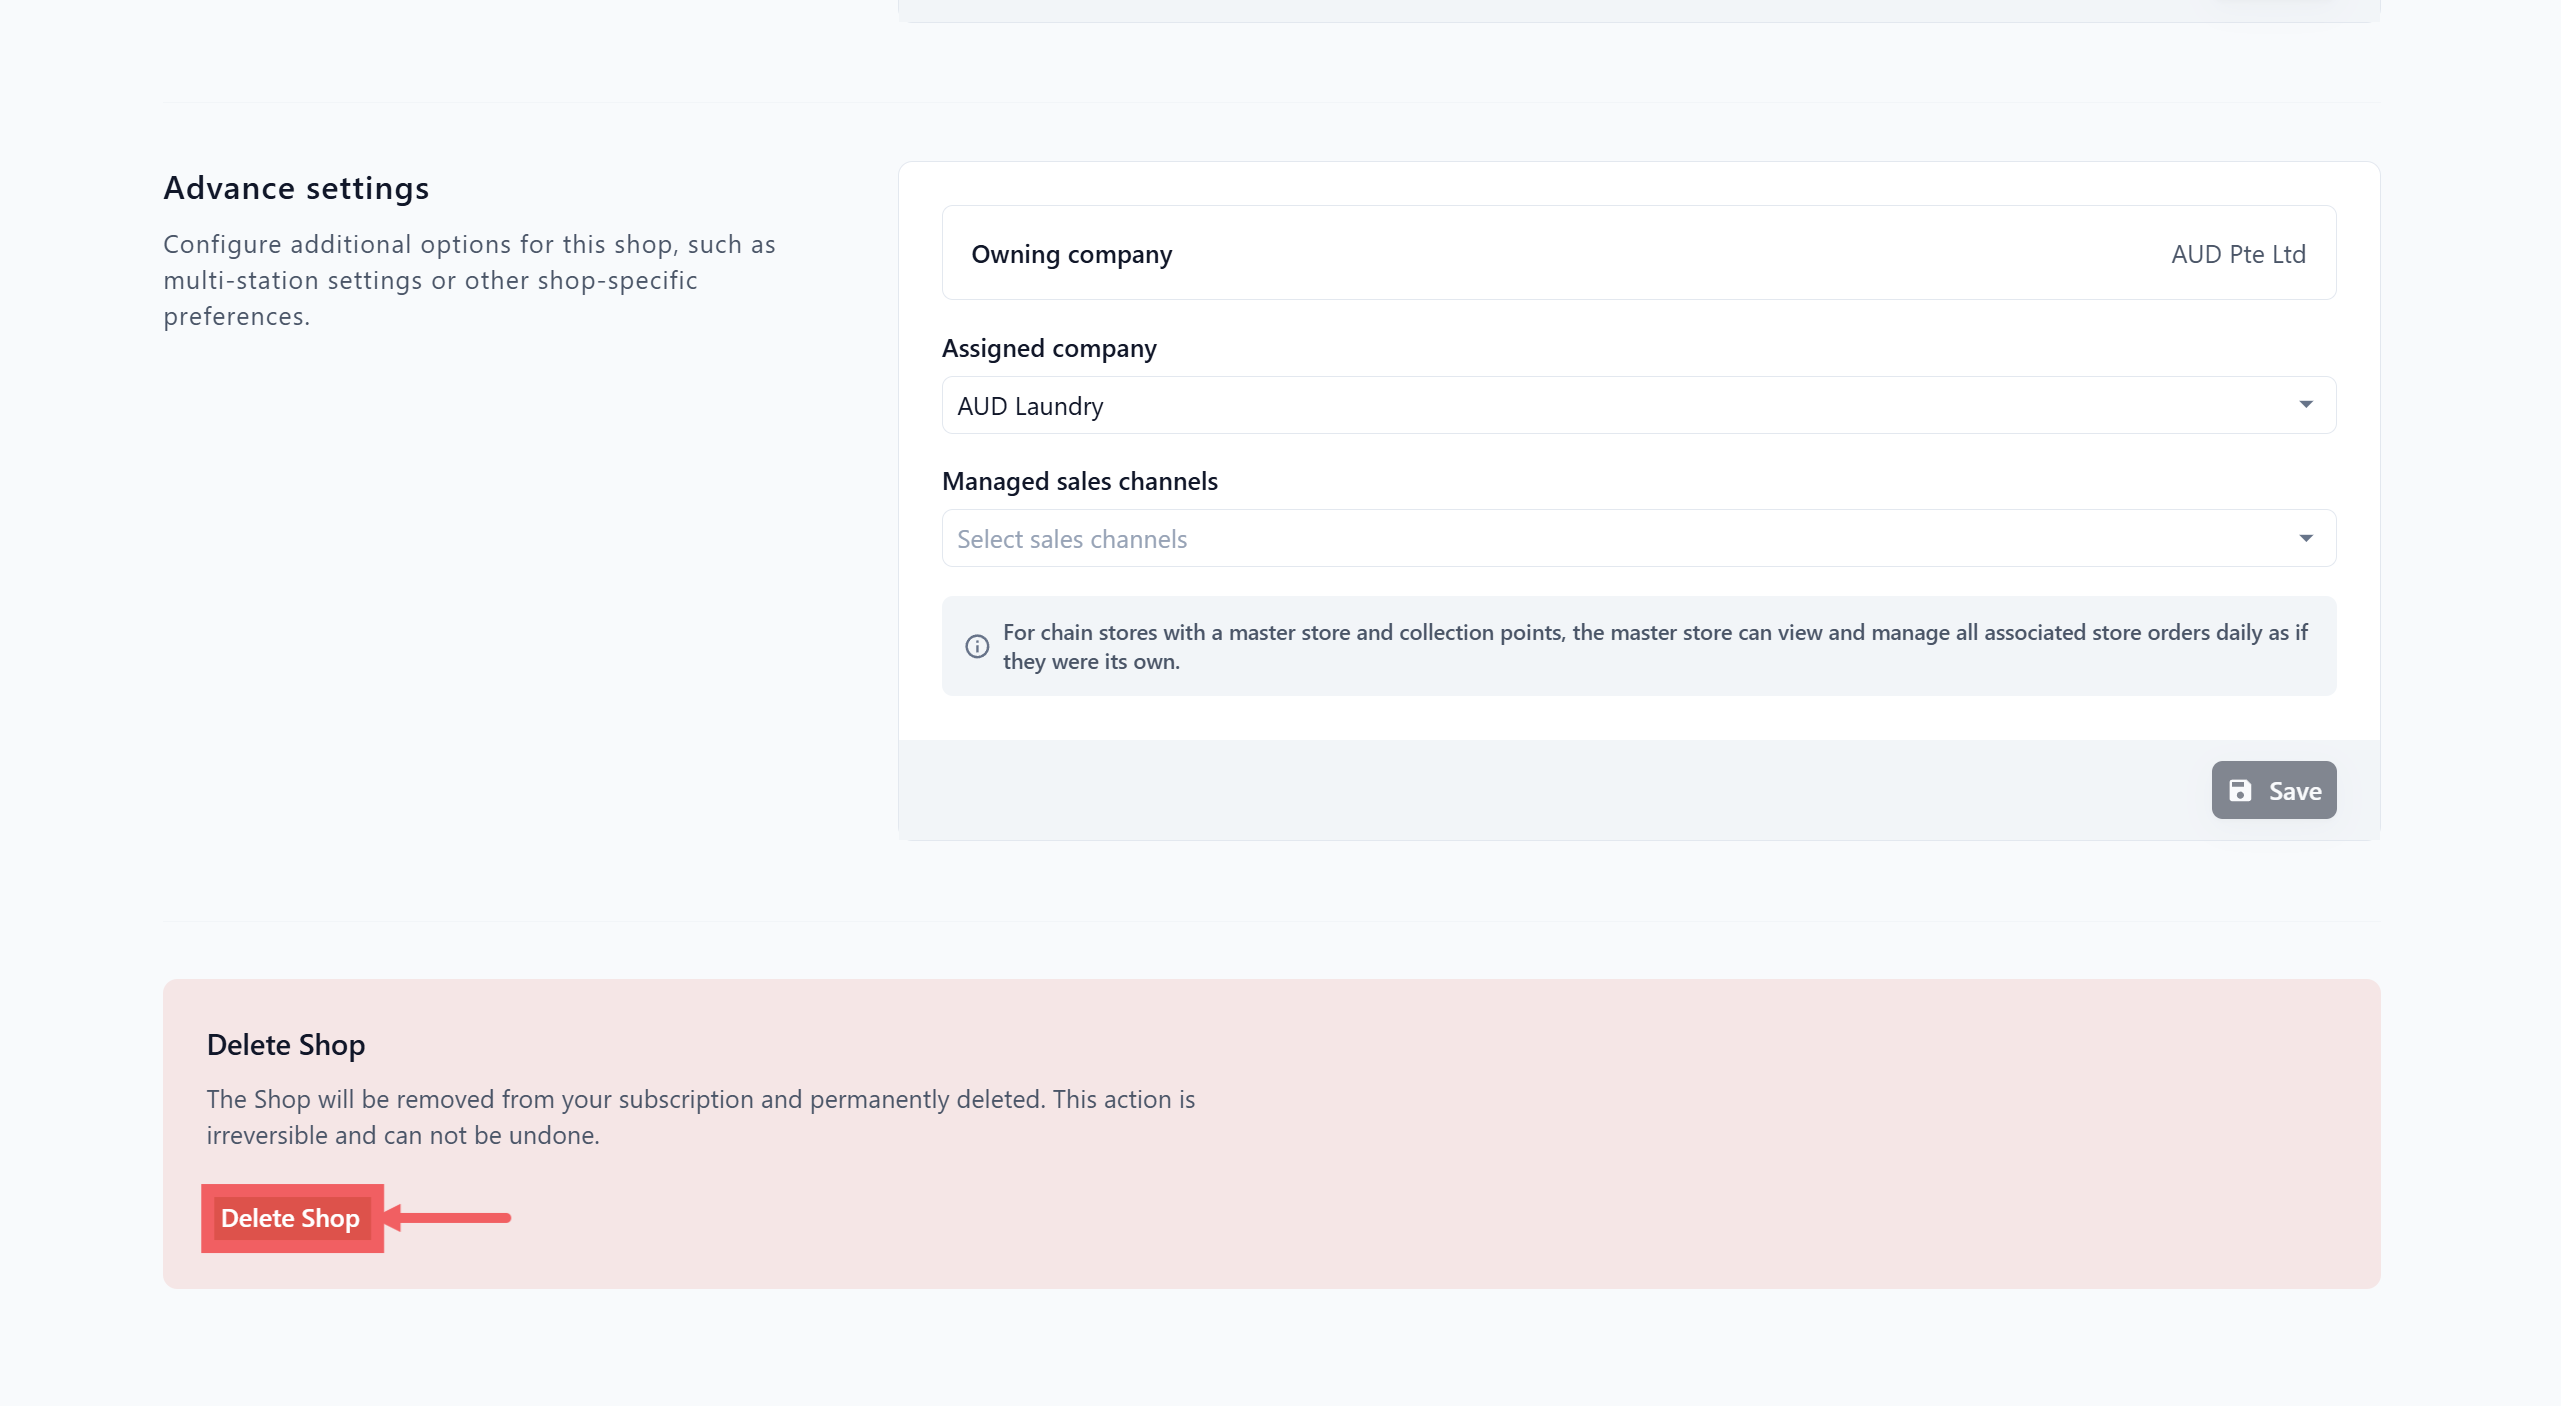
1. Click Delete Shop.
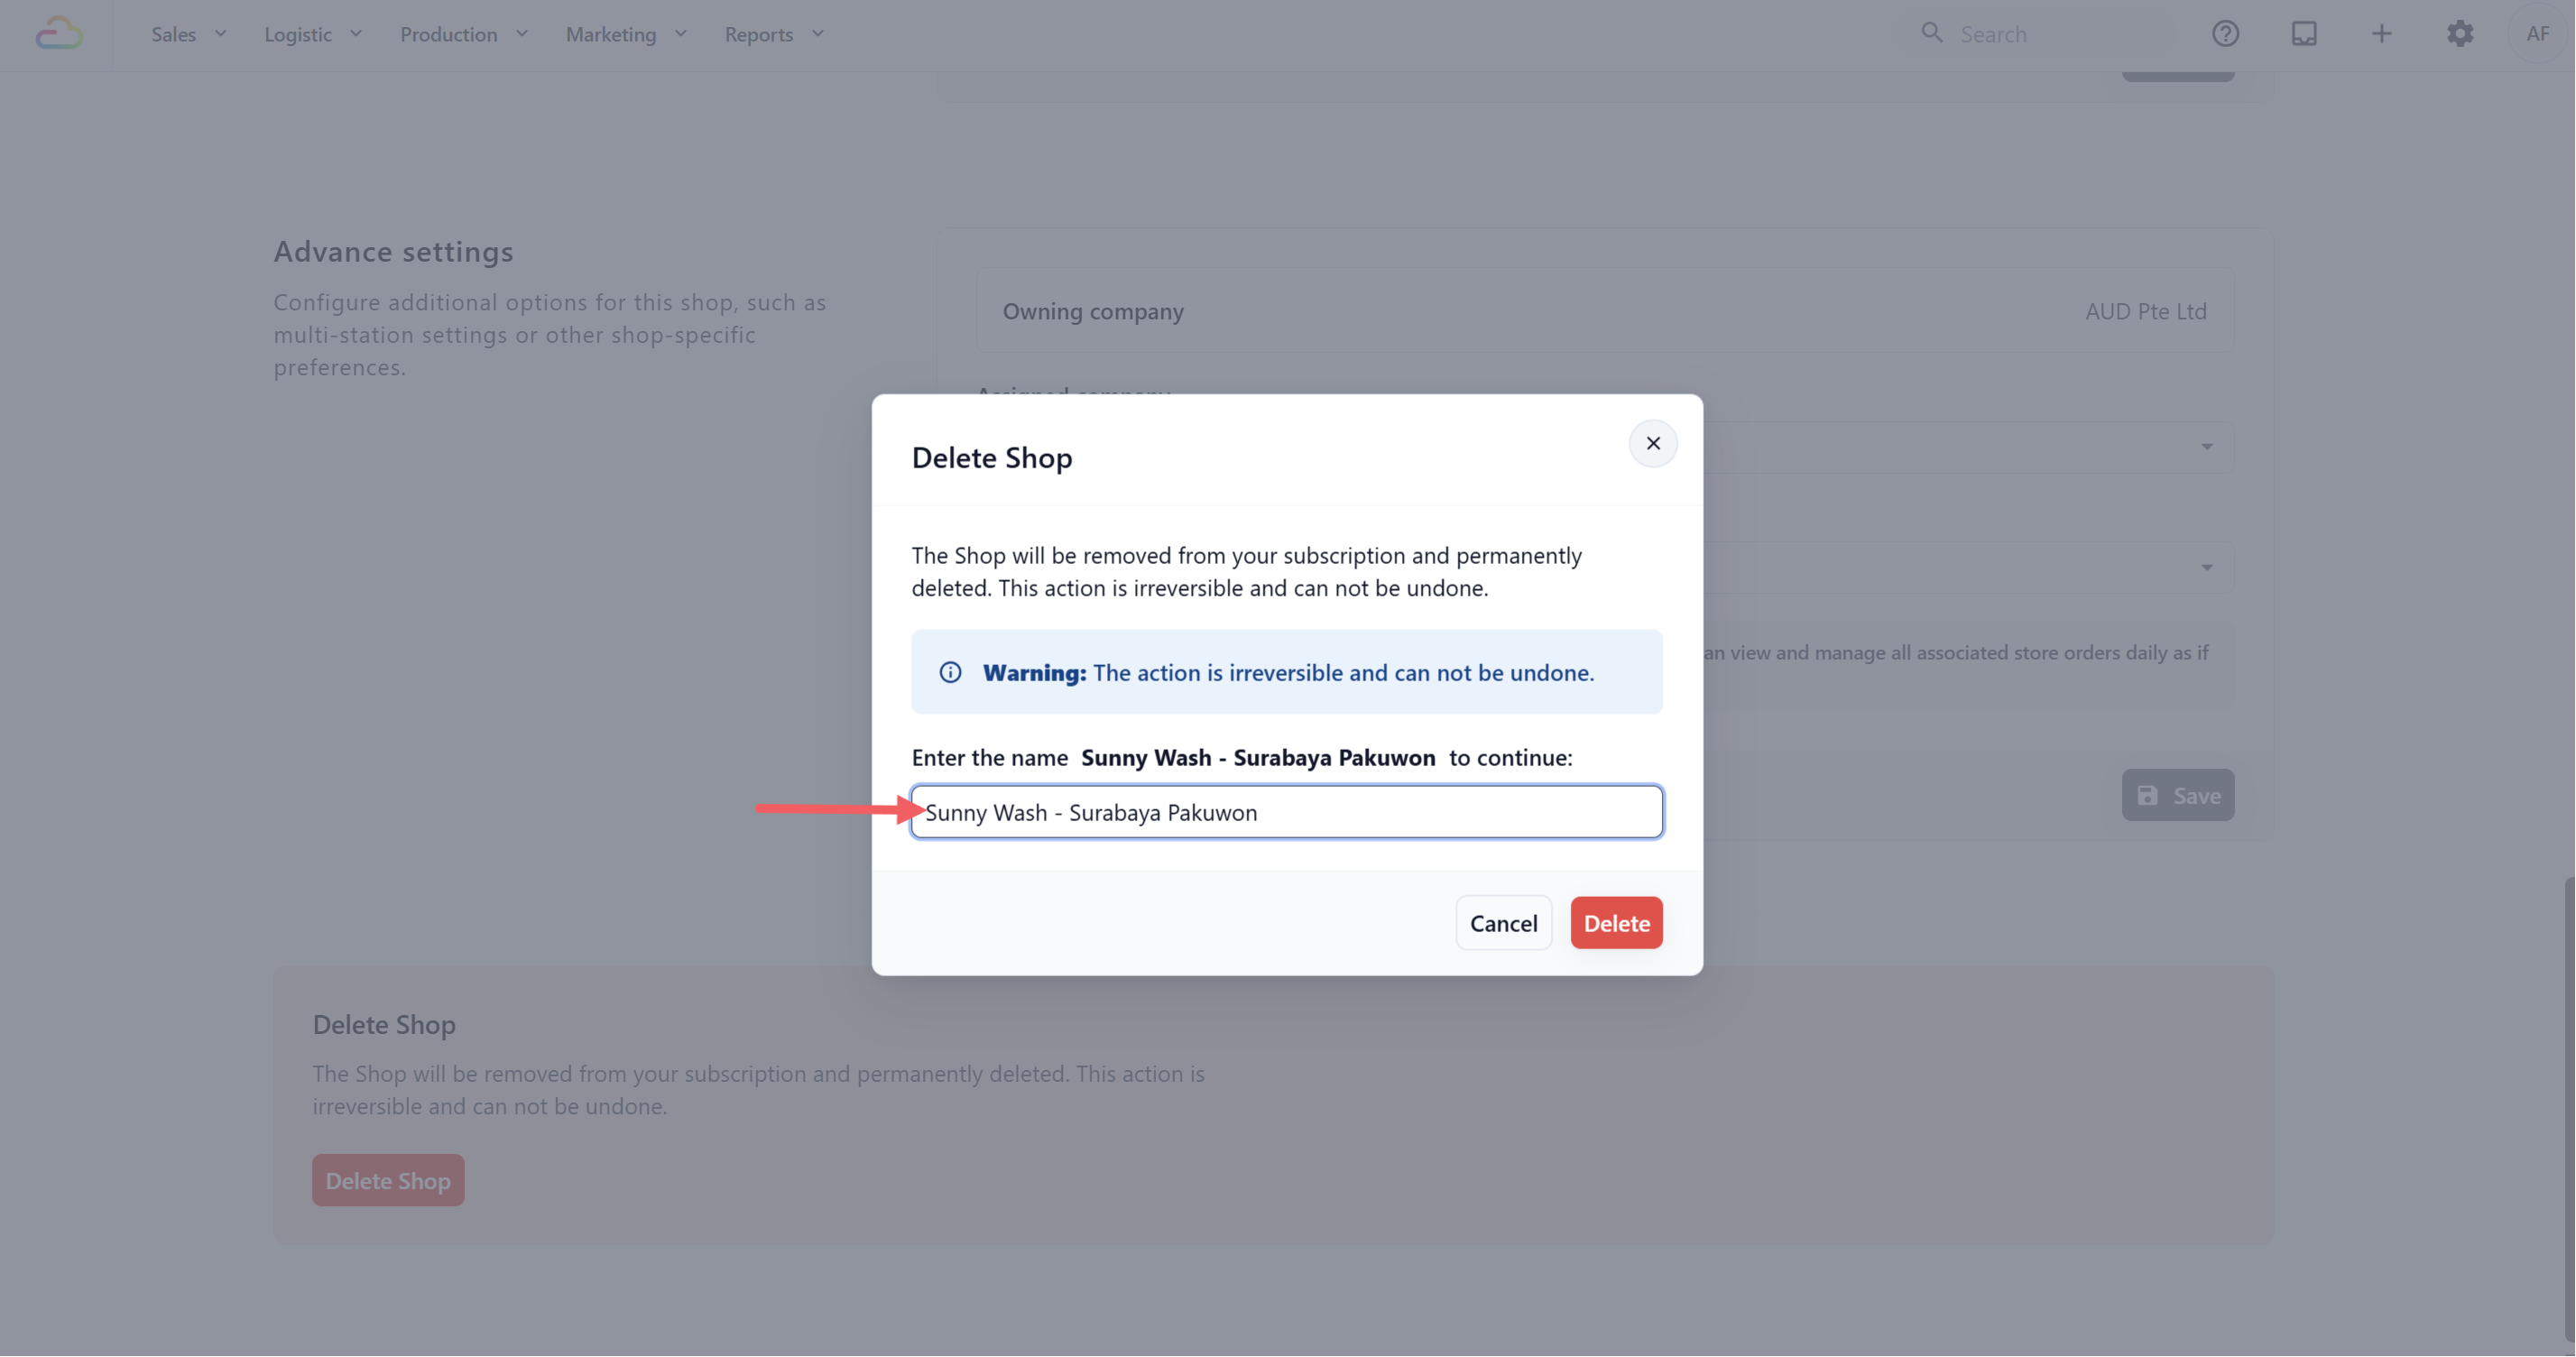
2. Type the exact shop name in the confirmation box to turn on the final Delete button.
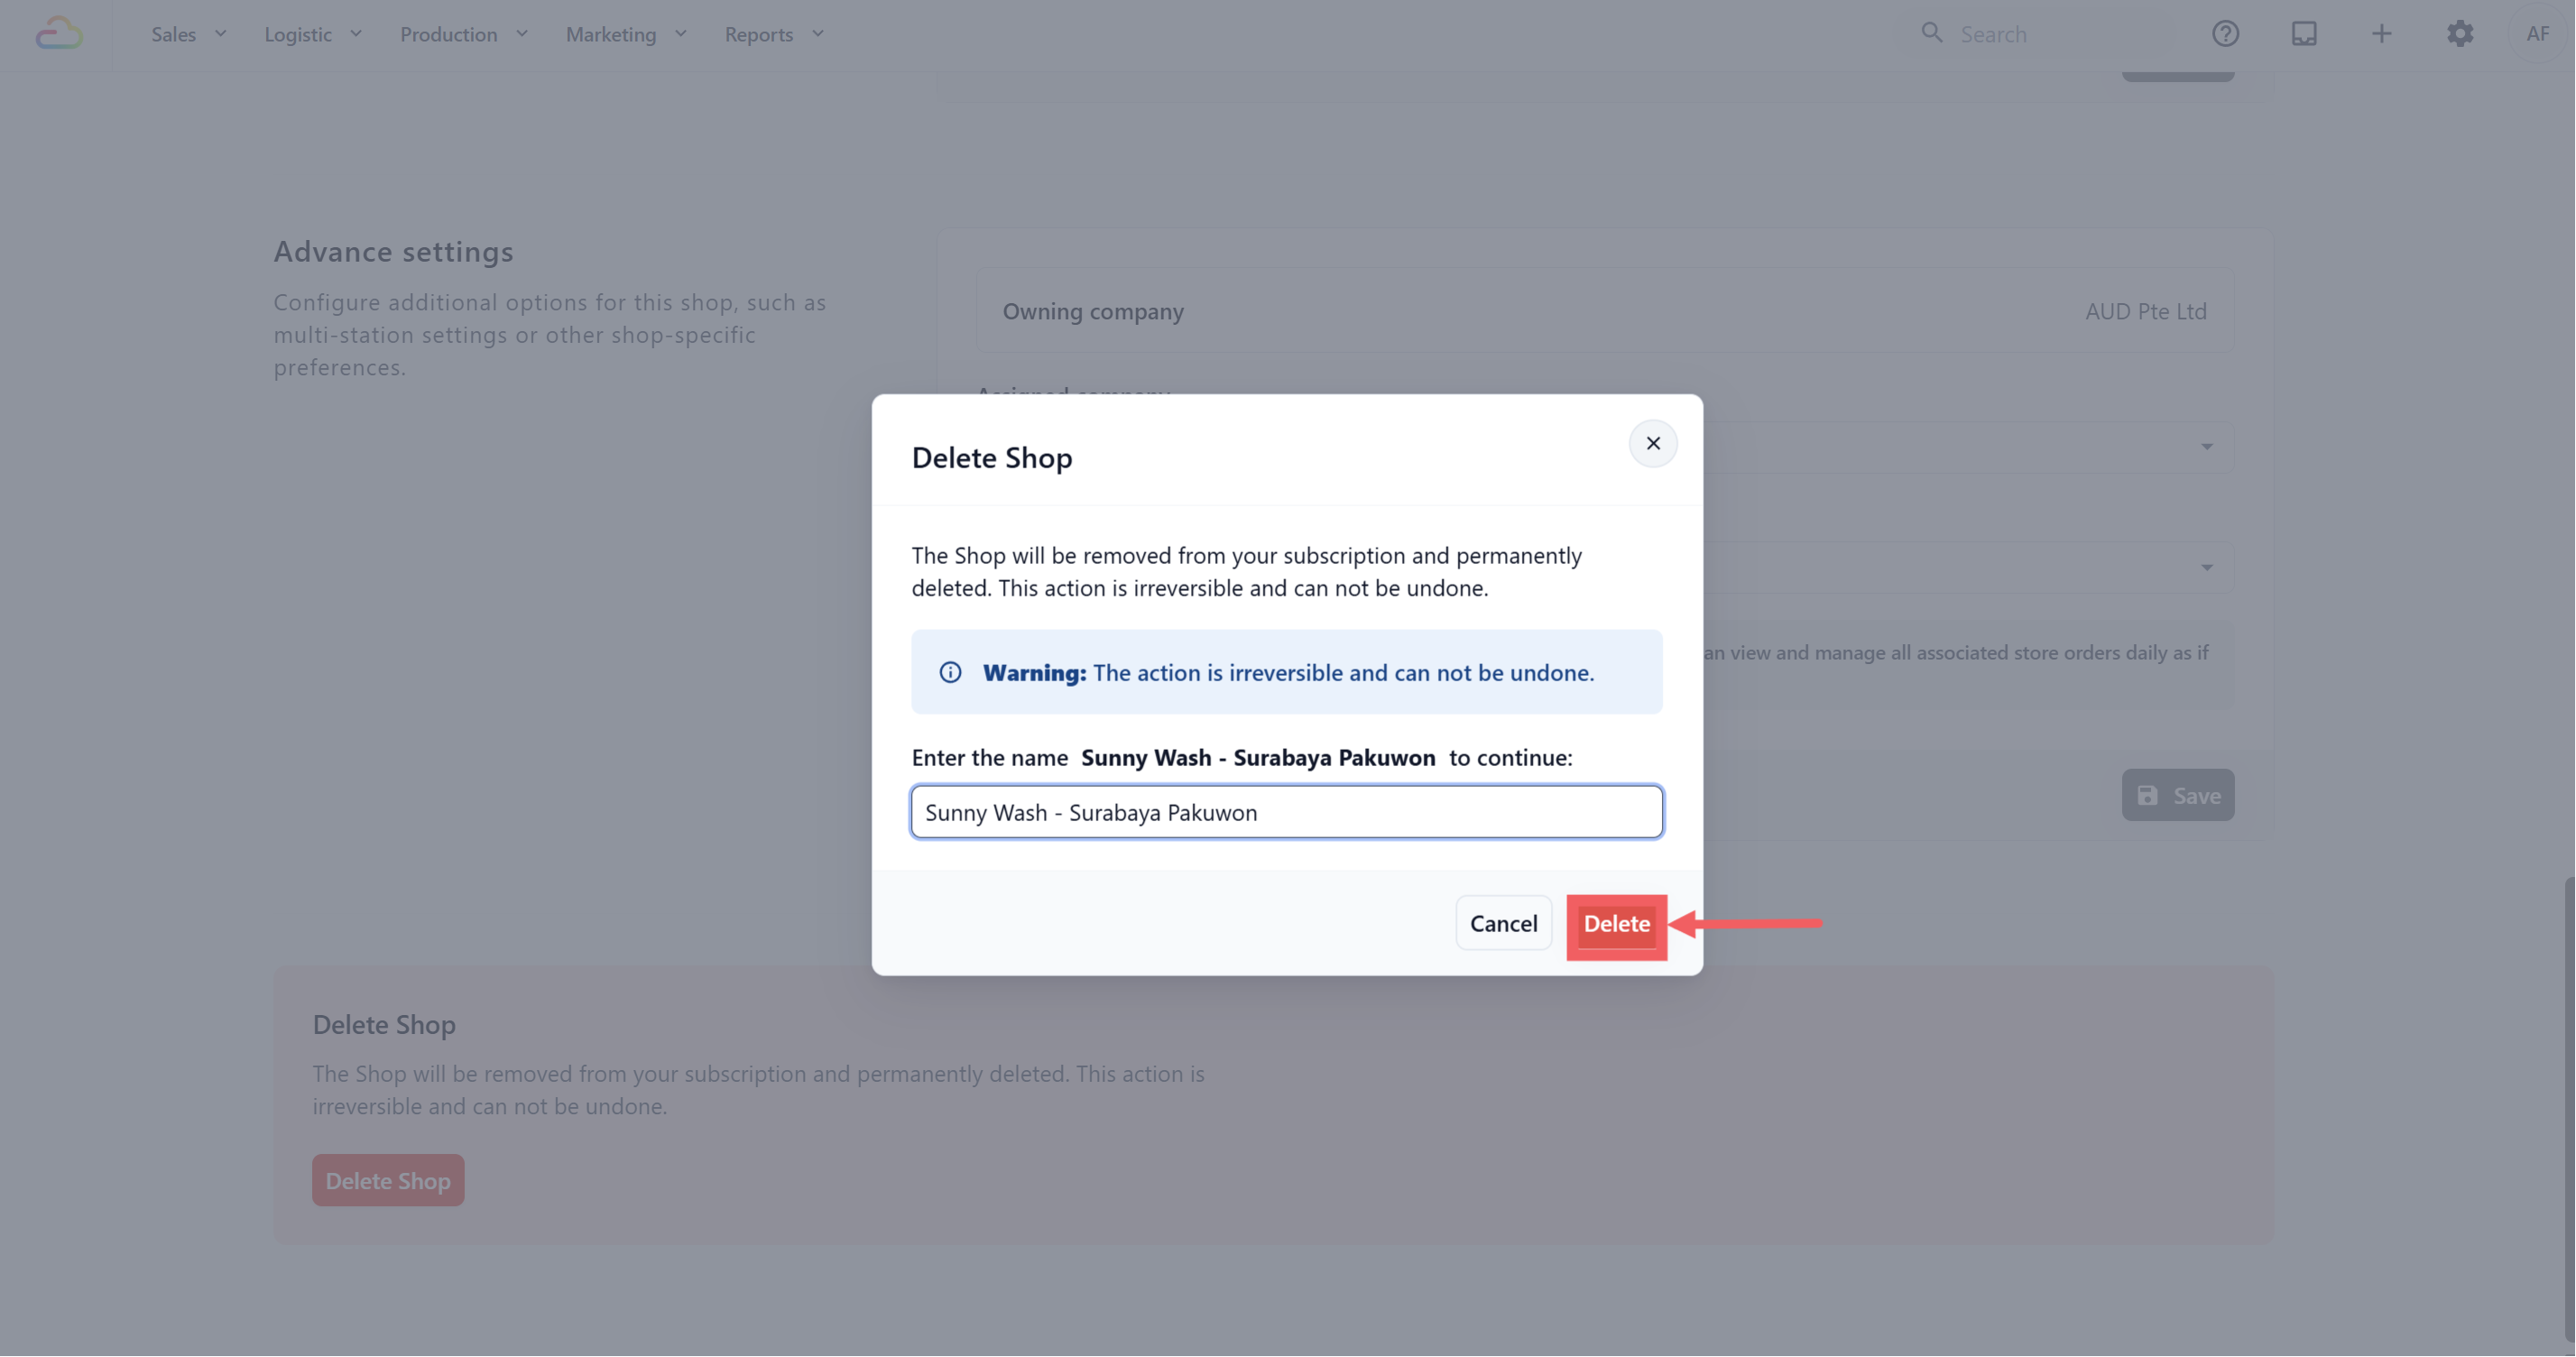
3. Click Delete to confirm.
Deleting a shop removes it from your subscription and cannot be undone.
---
## FAQs
**Can I change the Country or City after creating a shop?**
> No. Country and City are locked after creation. Choose them carefully before clicking Add Shop.
**What happens if a shop shows No city linked?**
> This can happen for older shops created before the Country and City requirement. The shop shows a No city linked badge on the Shops page, and the Shop Settings page does not currently give a way to link the city later.
**Do I need to enter a Shop Code?**
> It is recommended but not required. If you leave it blank, EasyBiz uses a system default code for the shop.
**When should I turn on Multi-Station?**
> Turn it on only when more than one POS device needs to run at the same shop at the same time. For a single counter, leave it off. Remember to pin the shop location first.
**Can I recover a deleted shop?**
> No. Deleting a shop is permanent, so only delete it when you are sure it is no longer needed.
---
## What's Next?
Now that your POS shop is registered, continue to [Create Your POS App](/docs/create-your-pos-app) to build the app your counter staff actually open every day.