This guide describes the older POS 2.0 (pos.easybizcloud.com), which has the Calendar Date near the Payment button and the Logistics, Collection, Photo and Progress tabs on the order. If you use the current EasyBiz POS (newpos.easybizcloud.com, or the EasyBiz POS app on an Android tablet), see [How to Get Around Your POS Screen](/docs/how-to-get-around-your-pos-screen) instead. It covers taking orders, choosing store pickup or home delivery, payment and the Orders screen.
## Staff Login & Shift Entry
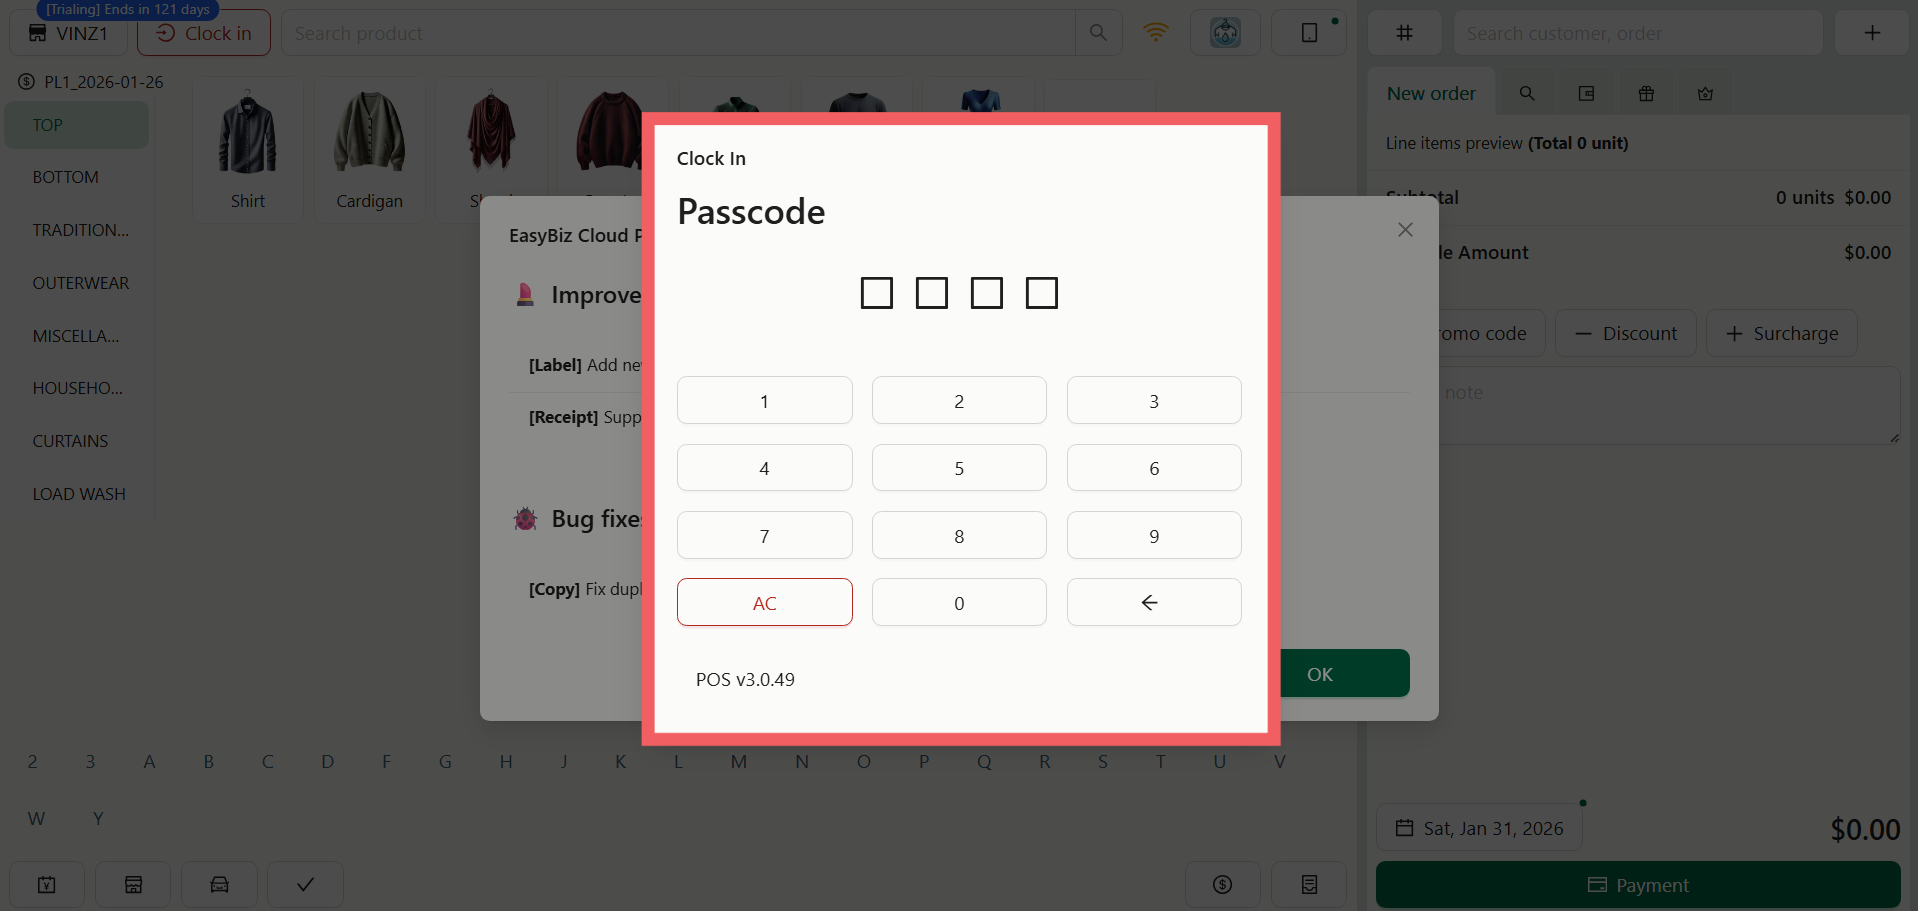
If you have enabled security settings, the POS will lock automatically to prevent unauthorized access. When you approach the screen, enter your unique 4-digit PIN to clock in or unlock the terminal.
If you haven't assigned PINs yet, you can configure them in the [Set Up POS Staff Management](/docs/set-up-pos-staff-management) section.
---
## Assigning a Customer
Every transaction starts with "Who is this for?". You can find the customer management tools in the top right corner of the screen.
### Searching for Customers
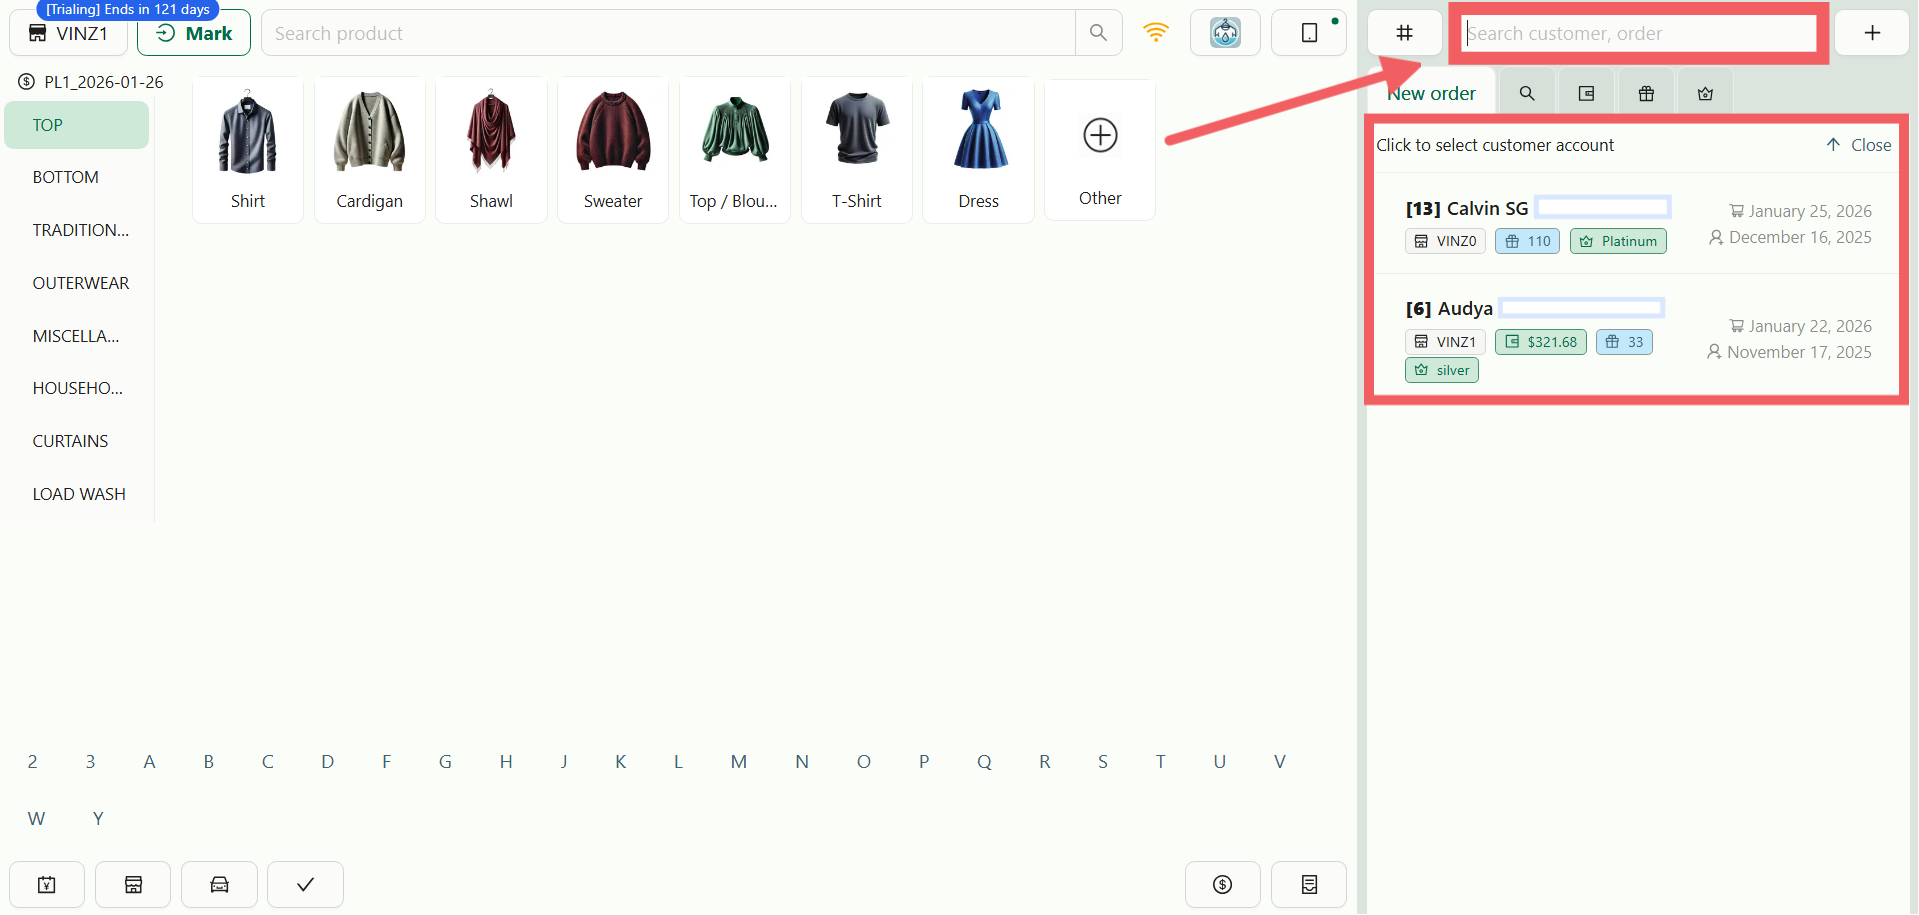
Tap the **Search Bar** to find an existing profile. You can search by **Name**, **Phone Number**, or **Customer ID**.
### Adding a New Customer
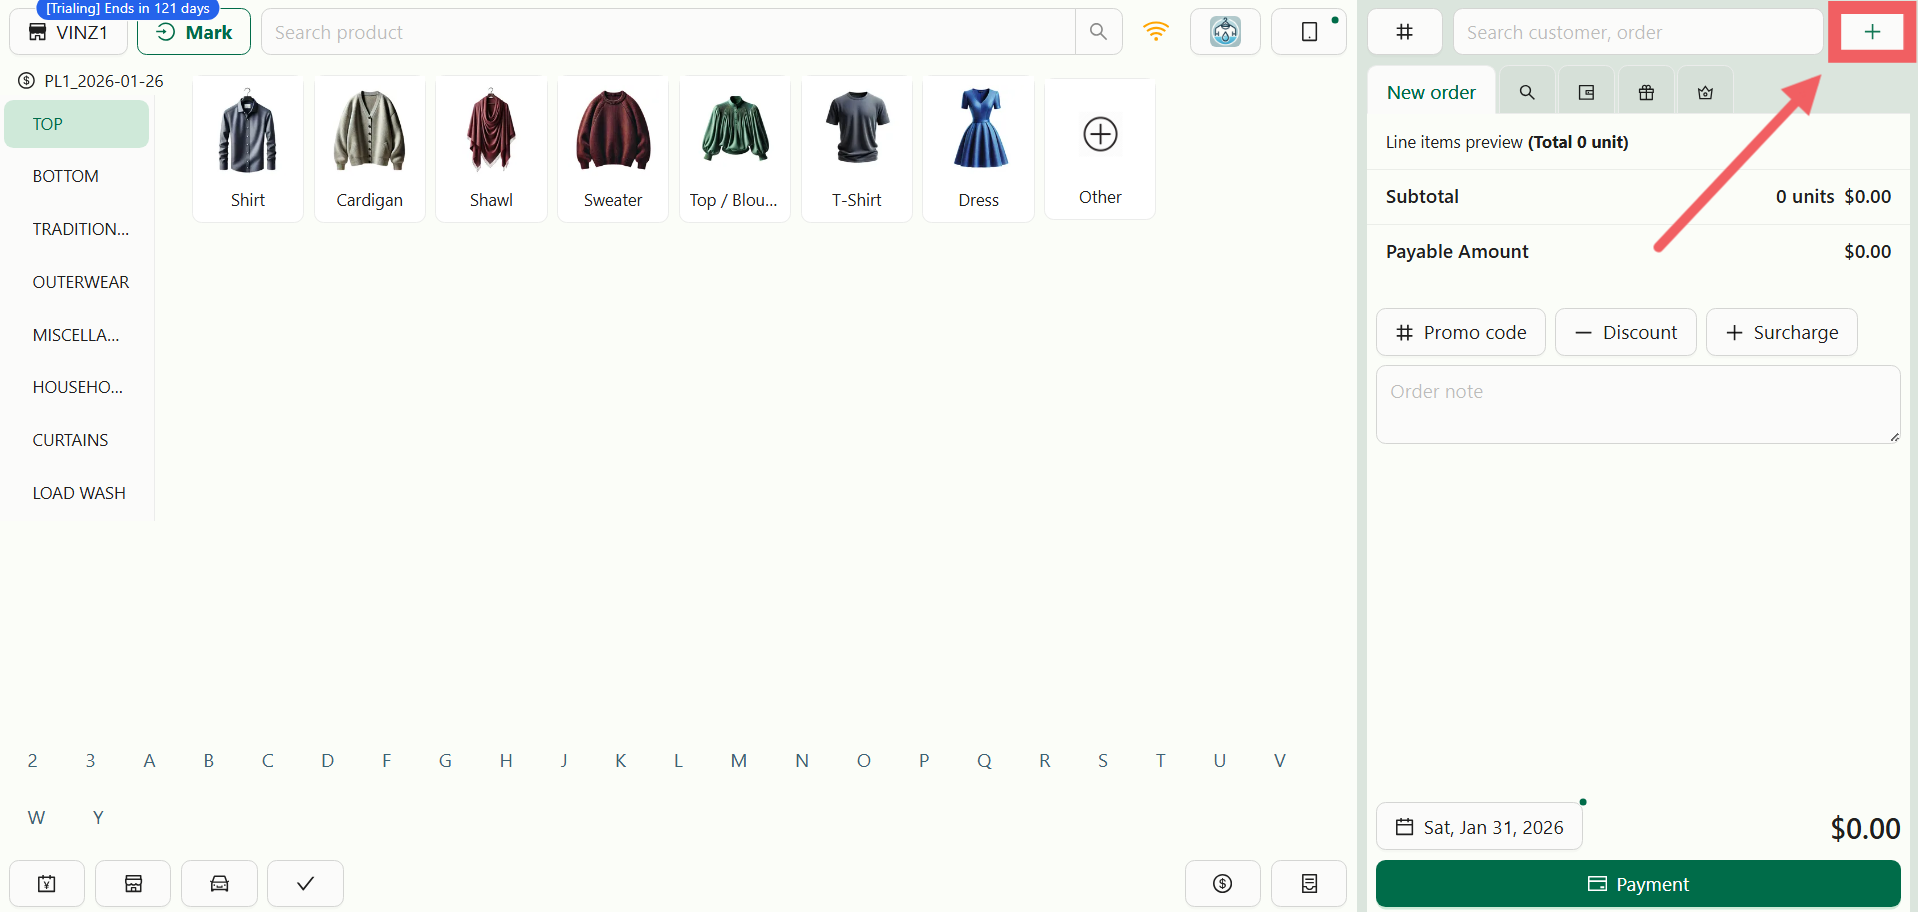
If the customer is not in the system, click the + button.
Fill in the necessary details. The specific fields you see here (e.g., whether Email is mandatory or optional) are controlled by your **Customer Account Registration** settings.
---
## Building the Order
Once a customer is assigned, their profile will appear on the top right. You can now start adding items to the cart.
### Standard Items
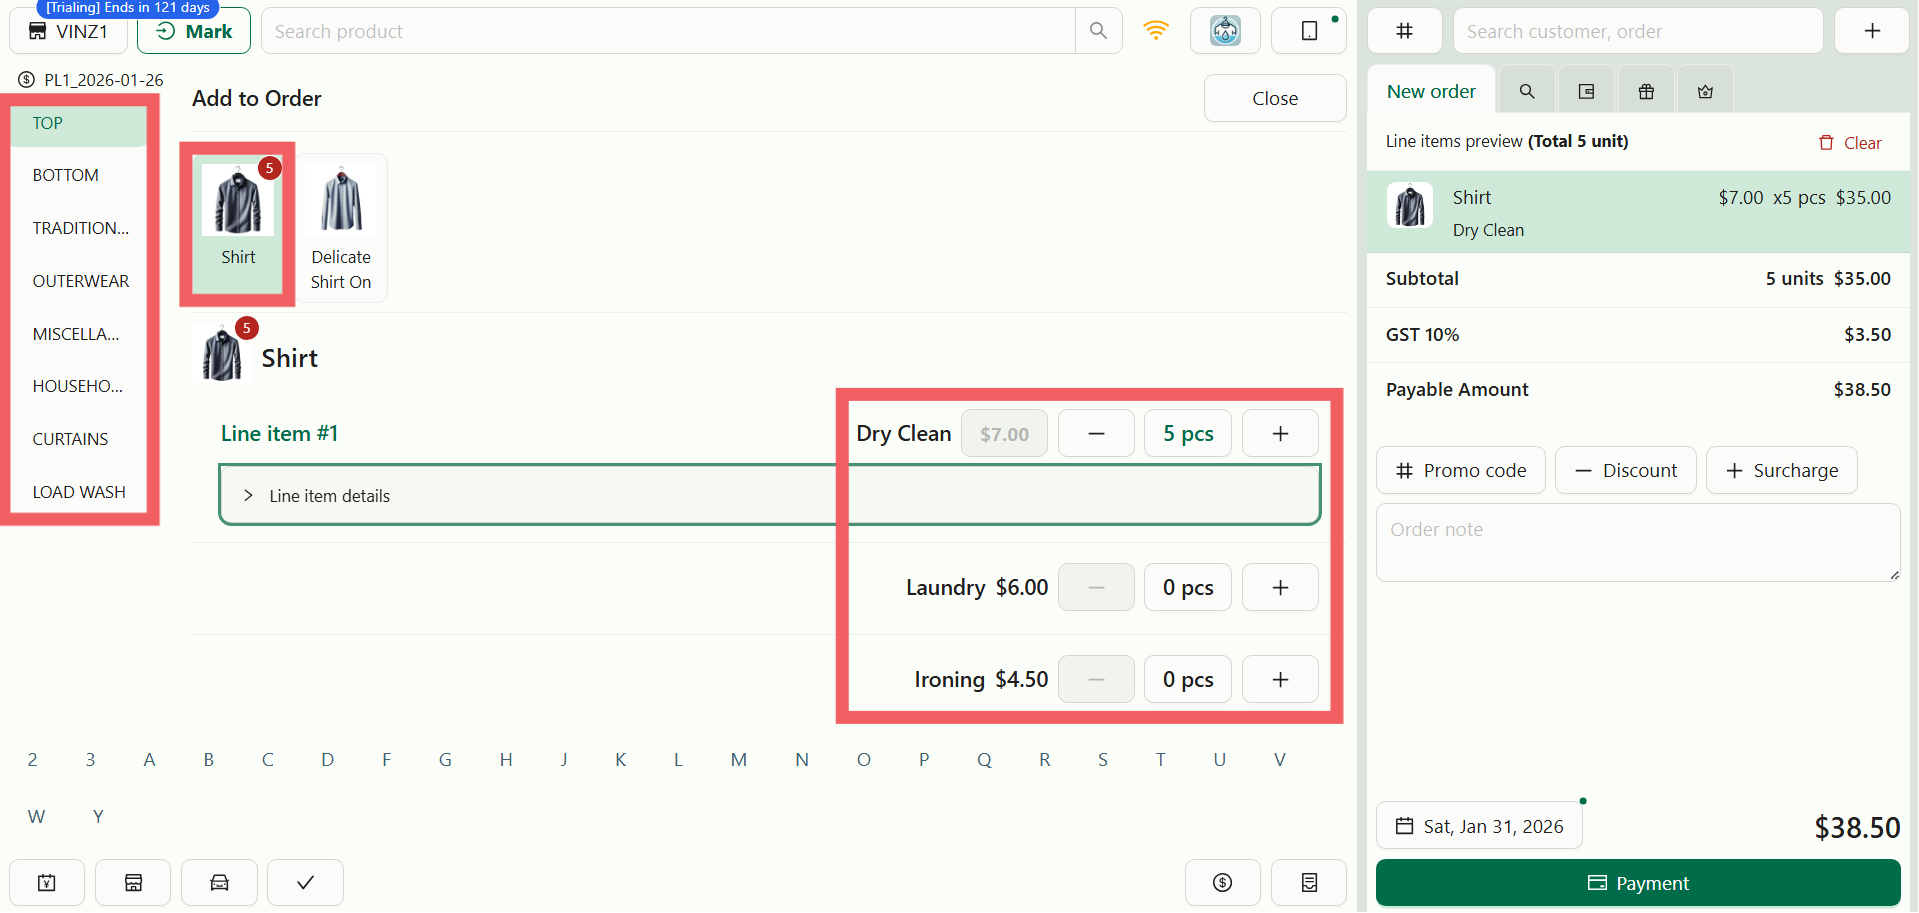
- **Select a Category** on the left sidebar.
- **Tap an Item** (e.g., _Shirt_ or _Trousers_).
- **Select the Service Type** (e.g., _Laundry_, _Dry Cleaning_, or _Press Only_).
- **Adjust the Quantity** (pcs).
If you need to update service prices or create new items, please refer to the [Introduction to Products & Pricing](/docs/introduction-to-products-and-pricing) guide.
### Custom Items (Others)
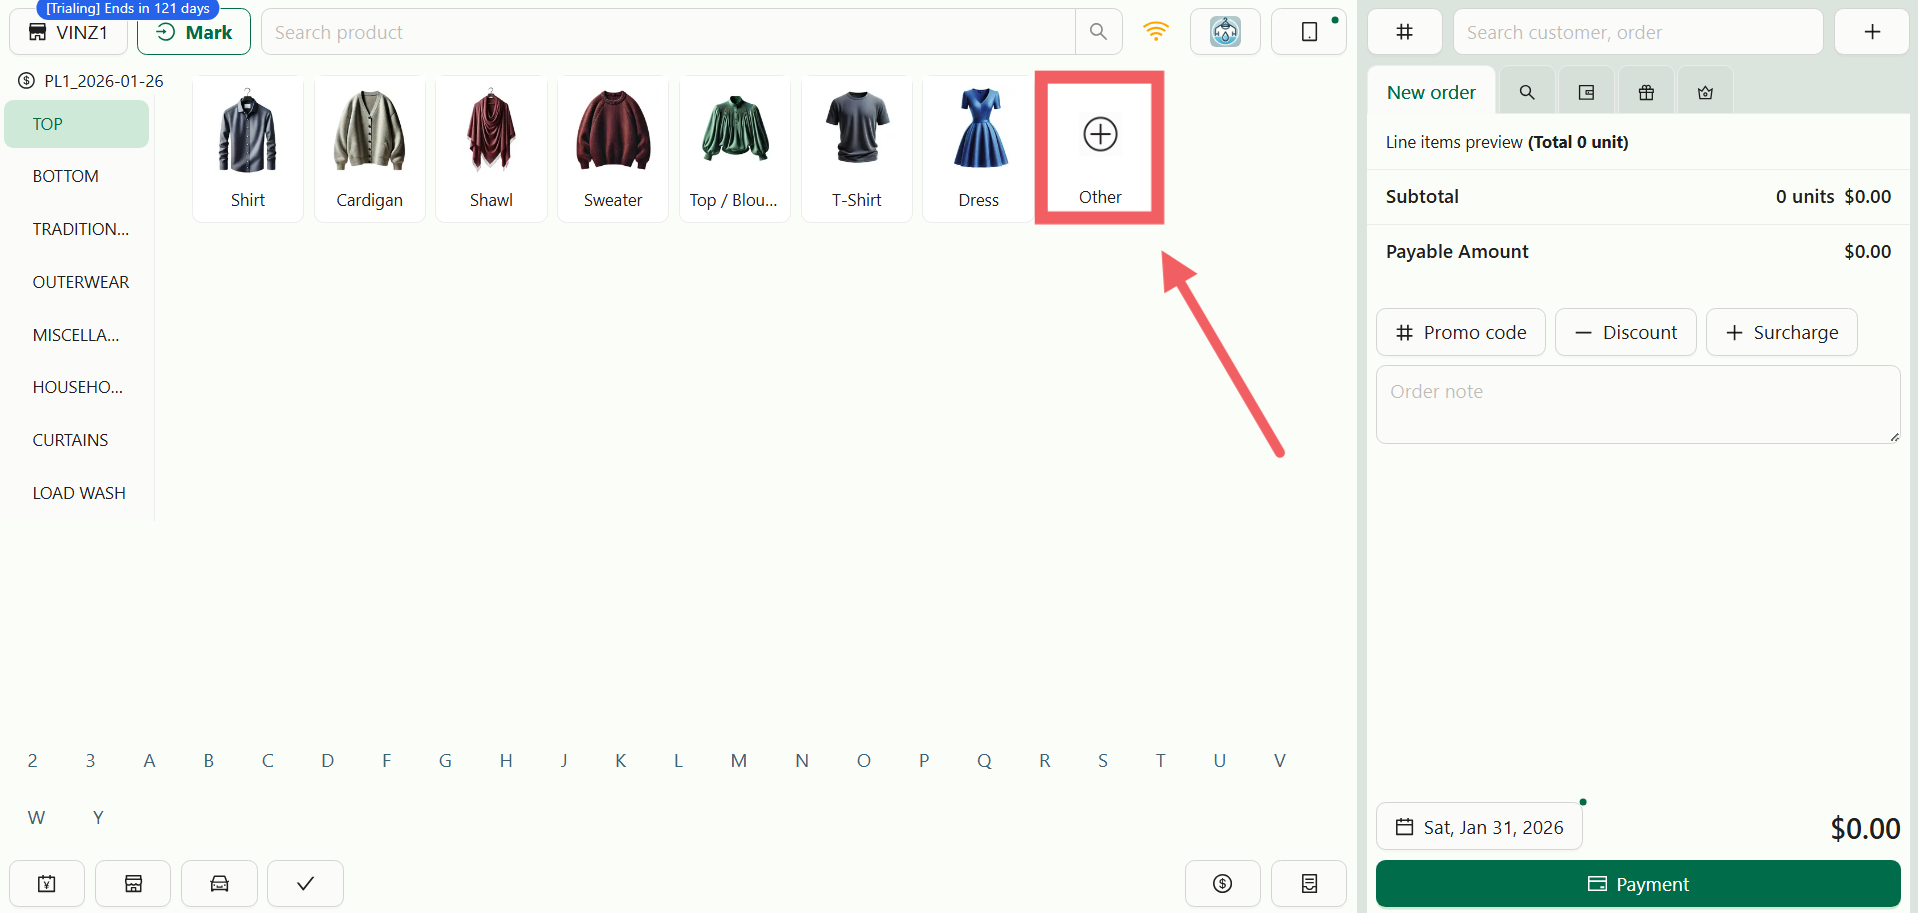
If a customer brings an item that is not in your preset menu (e.g., a "Vintage Doll"), use the Custom Item function.
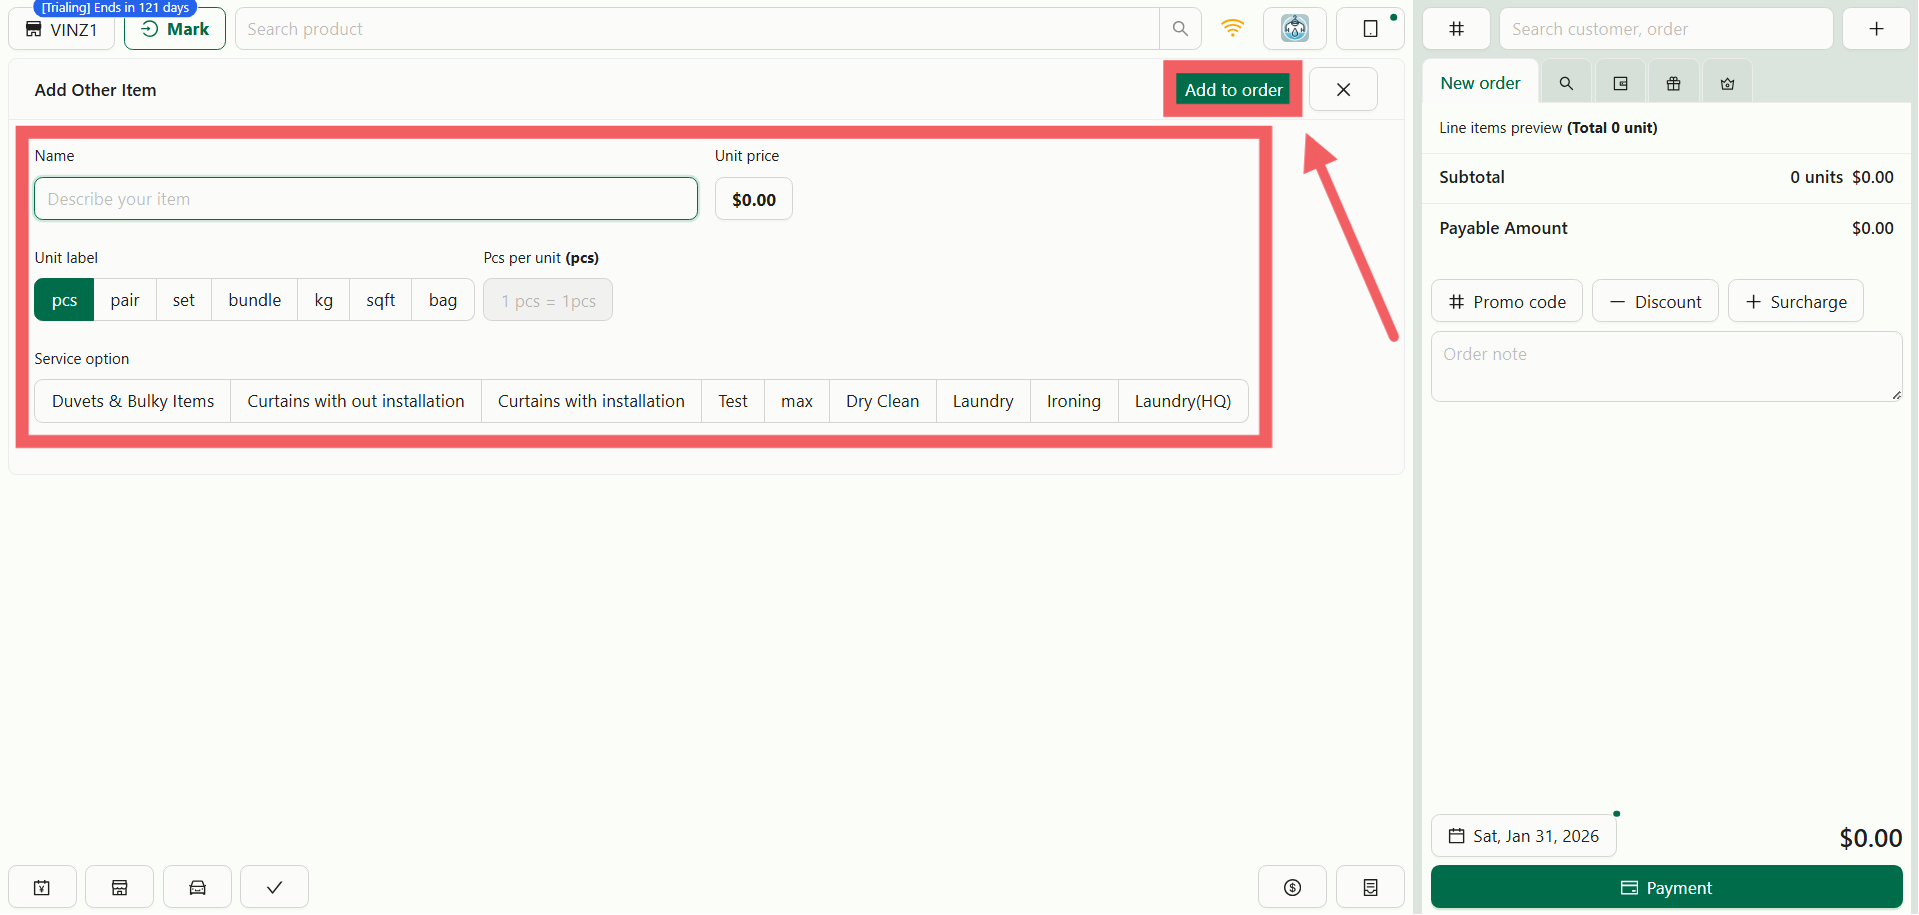
- Click the Others button
- Fill in the manual details:
- **Item Name**
- **Unit Price**
- **Unit Label** (e.g., "kg" or "pcs")
- **Pcs per unit**
- Select the **Service Option**.
- Tap Add to Order to add it to the cart.
---
## Membership Discounts
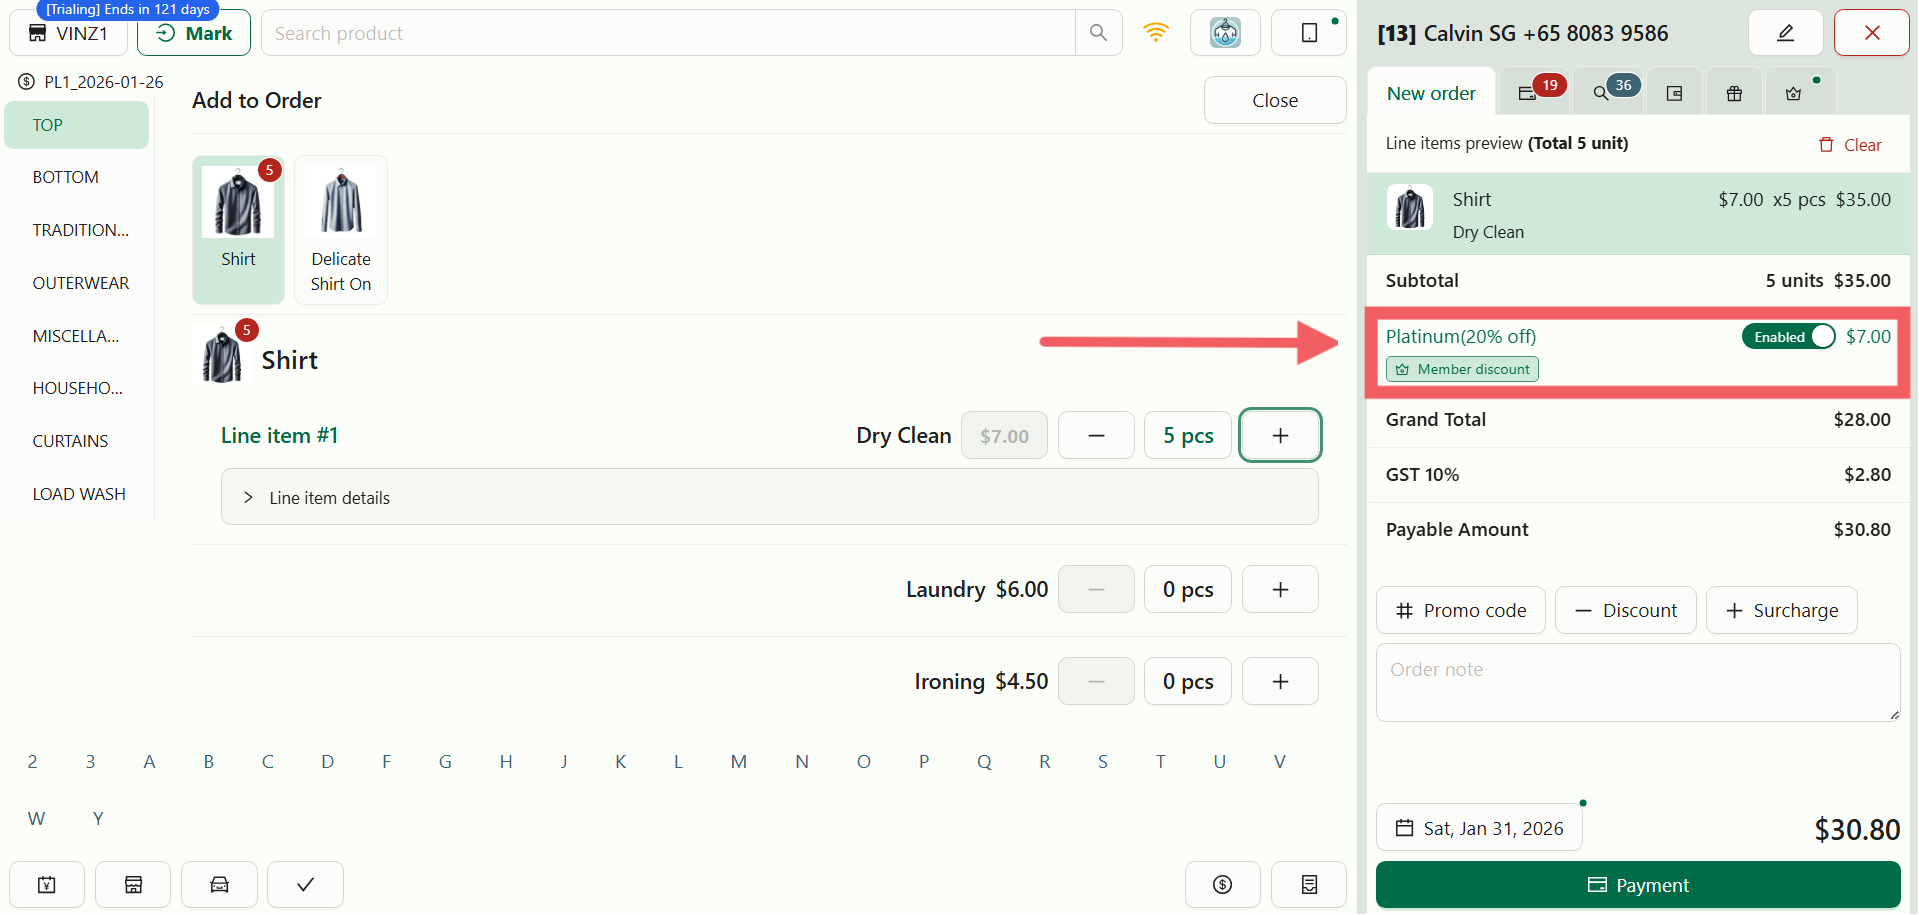
If the customer already has an active or migrated membership, the POS shows that status and applies its existing benefits to eligible orders. New membership setup and enrollment are not currently available; see [Introduction to Loyalty & Rewards](/docs/introduction-to-loyalty-and-rewards) for the supported day-to-day behavior.
---
## Customizing Line Items
Sometimes, a standard "Shirt" isn't enough detail. You can add specific instructions or extra charges to each item in the cart.
### Add-ons & Accessories
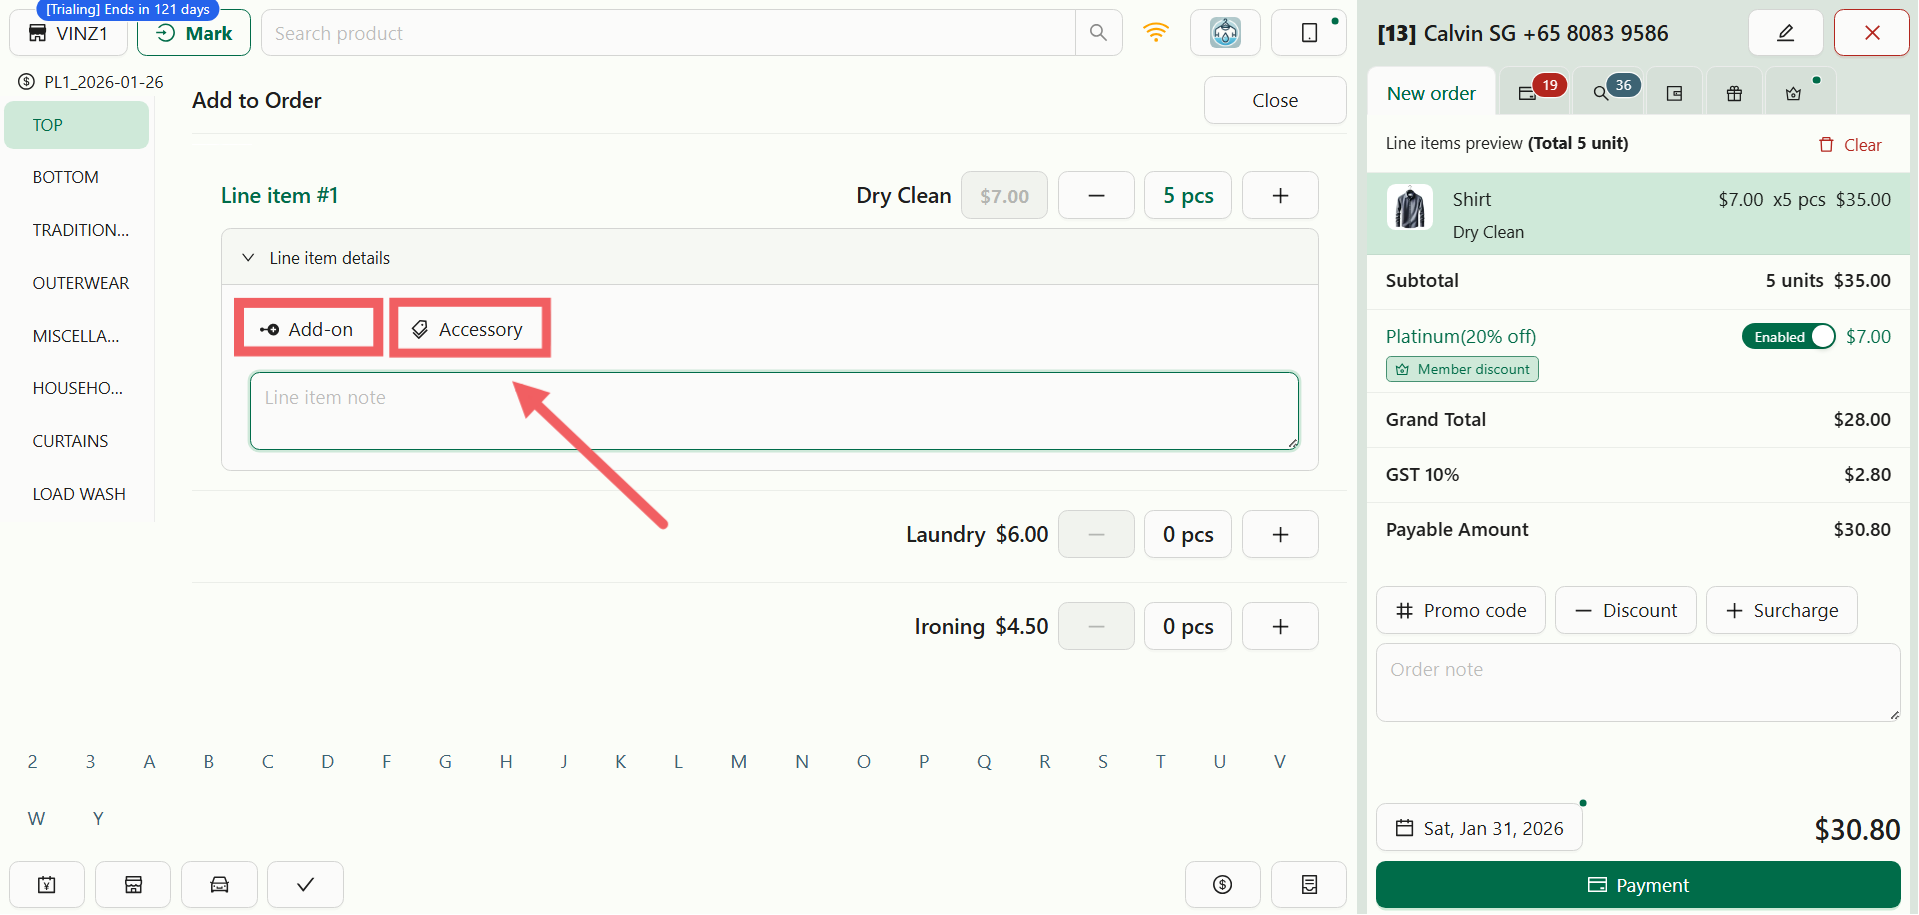
- **Add-ons:** Use this for extra services (e.g., _Starch_, _Stain Removal_).
- **Accessories:** Use this to track physical items attached to the garment (e.g., _Belts_, _Hoods_, _Liners_).
### Order Note vs. Line Item Note
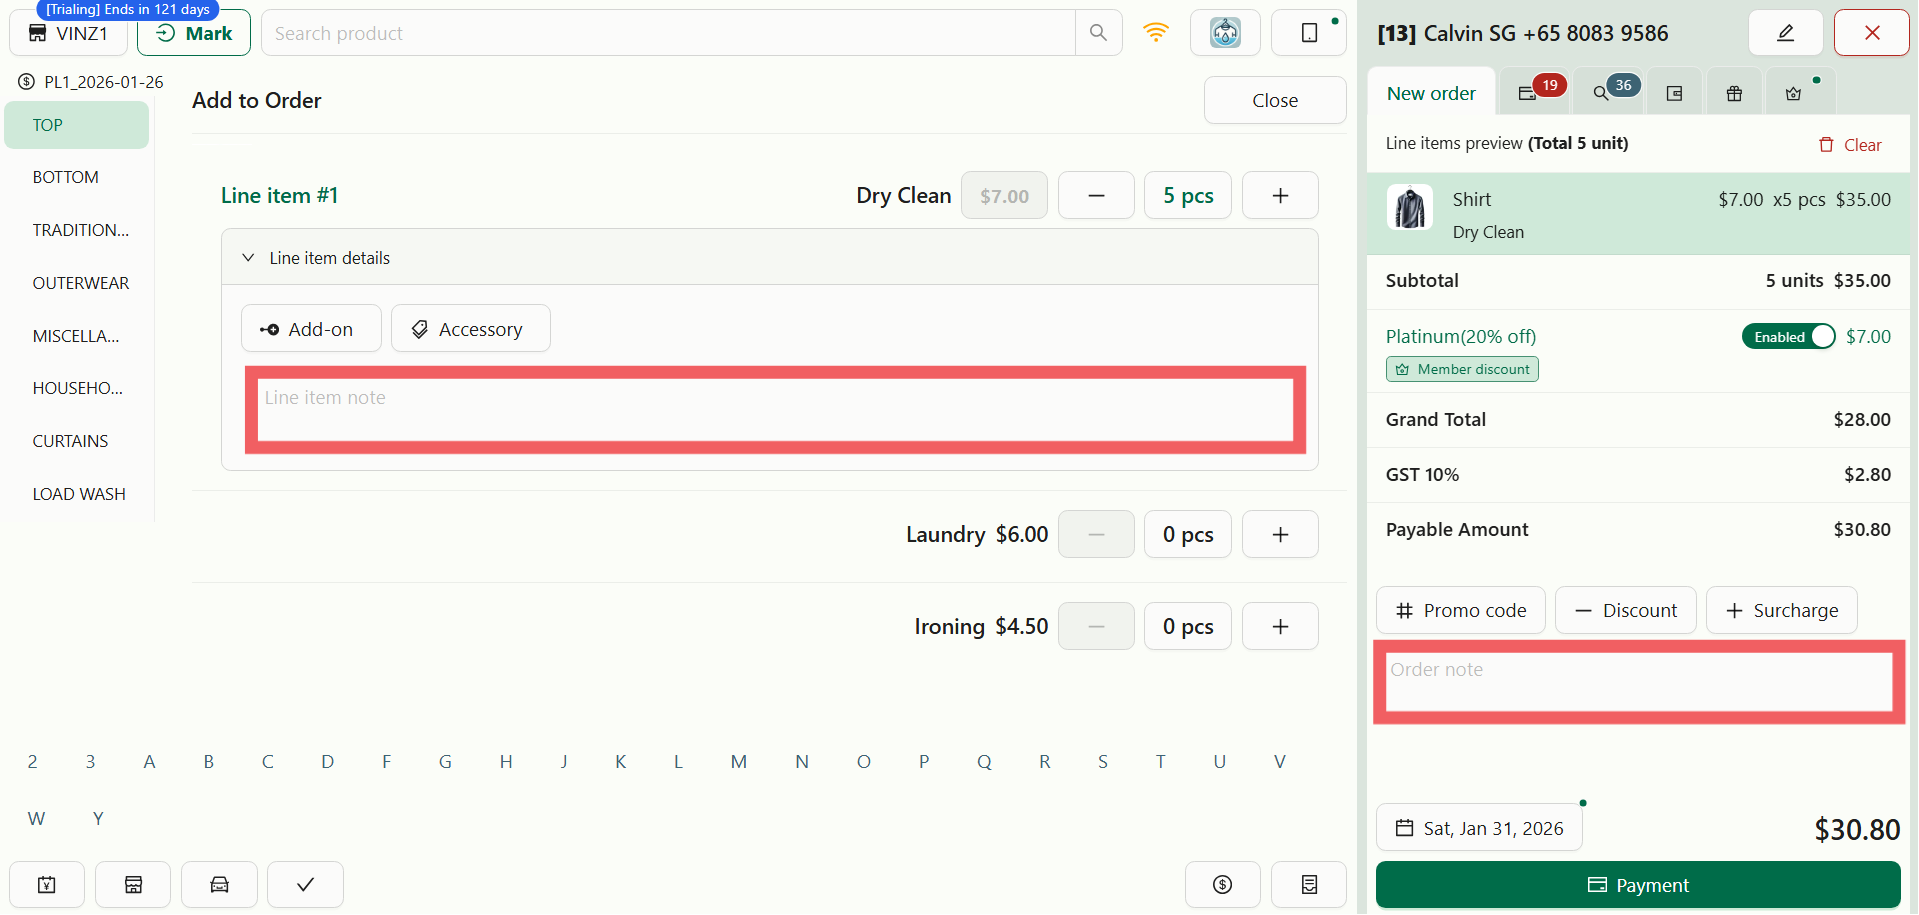
There are two places to leave comments, and they serve different purposes:
- **Line Item Note:** Attached to a specific shirt (e.g., _"Check button on cuff"_). This prints on the item tag.
- **Order Note:** A general instruction for the whole transaction (e.g., _"Customer is flying out on Friday"_). This appears on the main invoice.
---
## Scheduling (Pickup & Delivery)
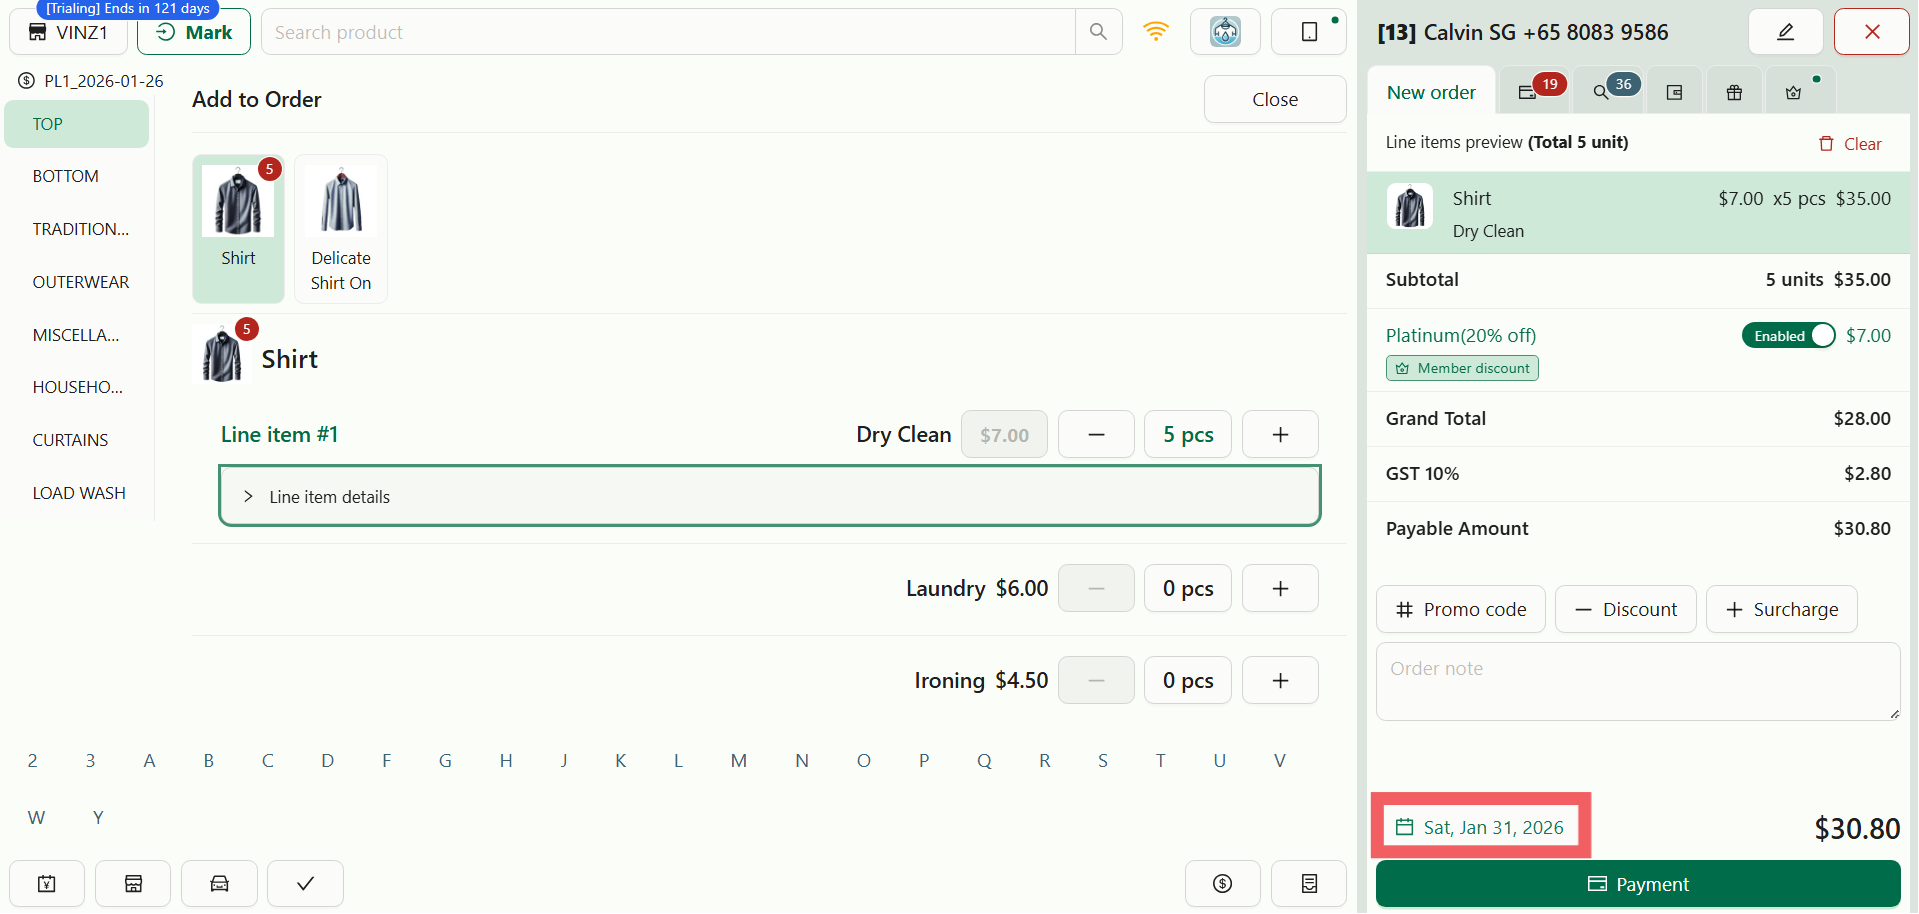
By default, the system assigns a standard Due Date. To customize this, tap the Calendar Date near the Payment button bottom right.
This opens the **Fulfillment Menu** where you can choose:
- **Store Pickup:** Select the date and time the customer will collect their items.
- **Delivery:** If your store offers logistics, select a delivery slot.
The available dates, times, and lead times shown here are determined by your [Scheduling & Dispatch](/docs/introduction-to-scheduling-and-dispatch) settings.
---
## Finalizing Payment
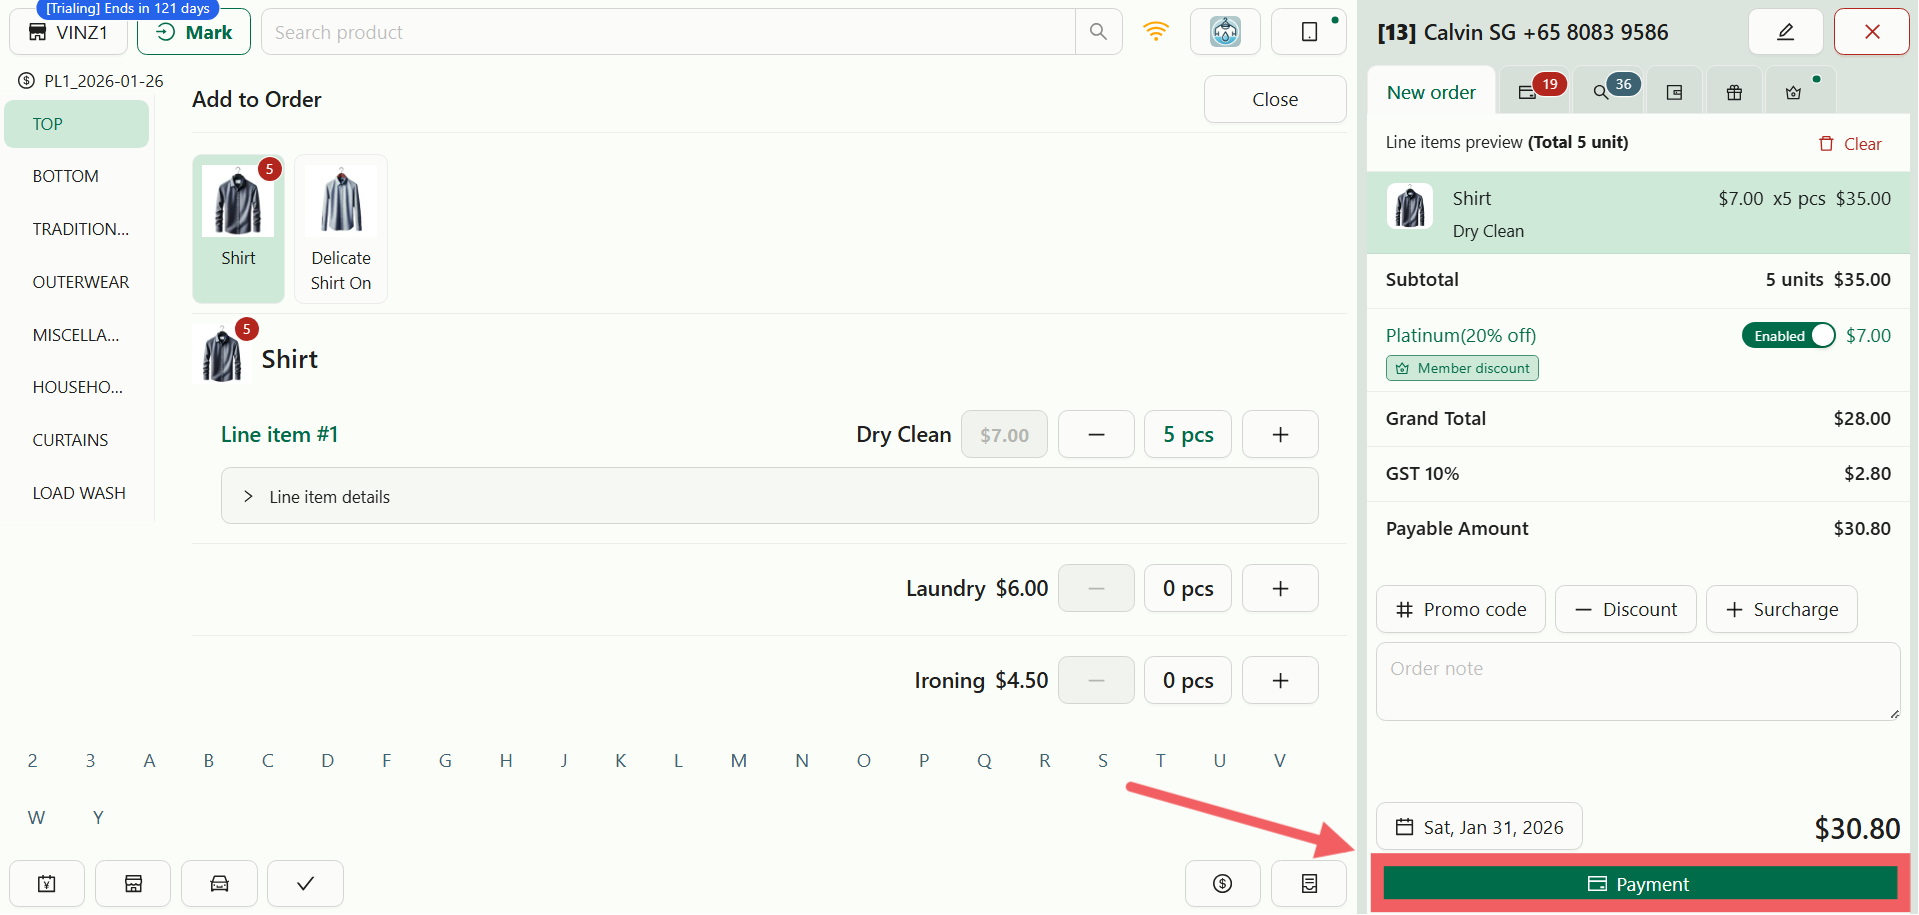
Click the Payment button at the bottom of the screen.
You will see a list of payment options (e.g., Cash, Card, or PayNow). Select the method the customer is using to complete the sale.
The options displayed here depend on your store configuration. To add or modify methods, refer to the [Setting Up Your Payment Methods at POS](/docs/setting-up-your-payment-methods-at-pos) guide.
---
## Managing the Order (Tabs)
After checking out, you are directed to the **Order Details** screen. This acts as the control panel for the transaction, split into several tabs:
### The Receipt Tab
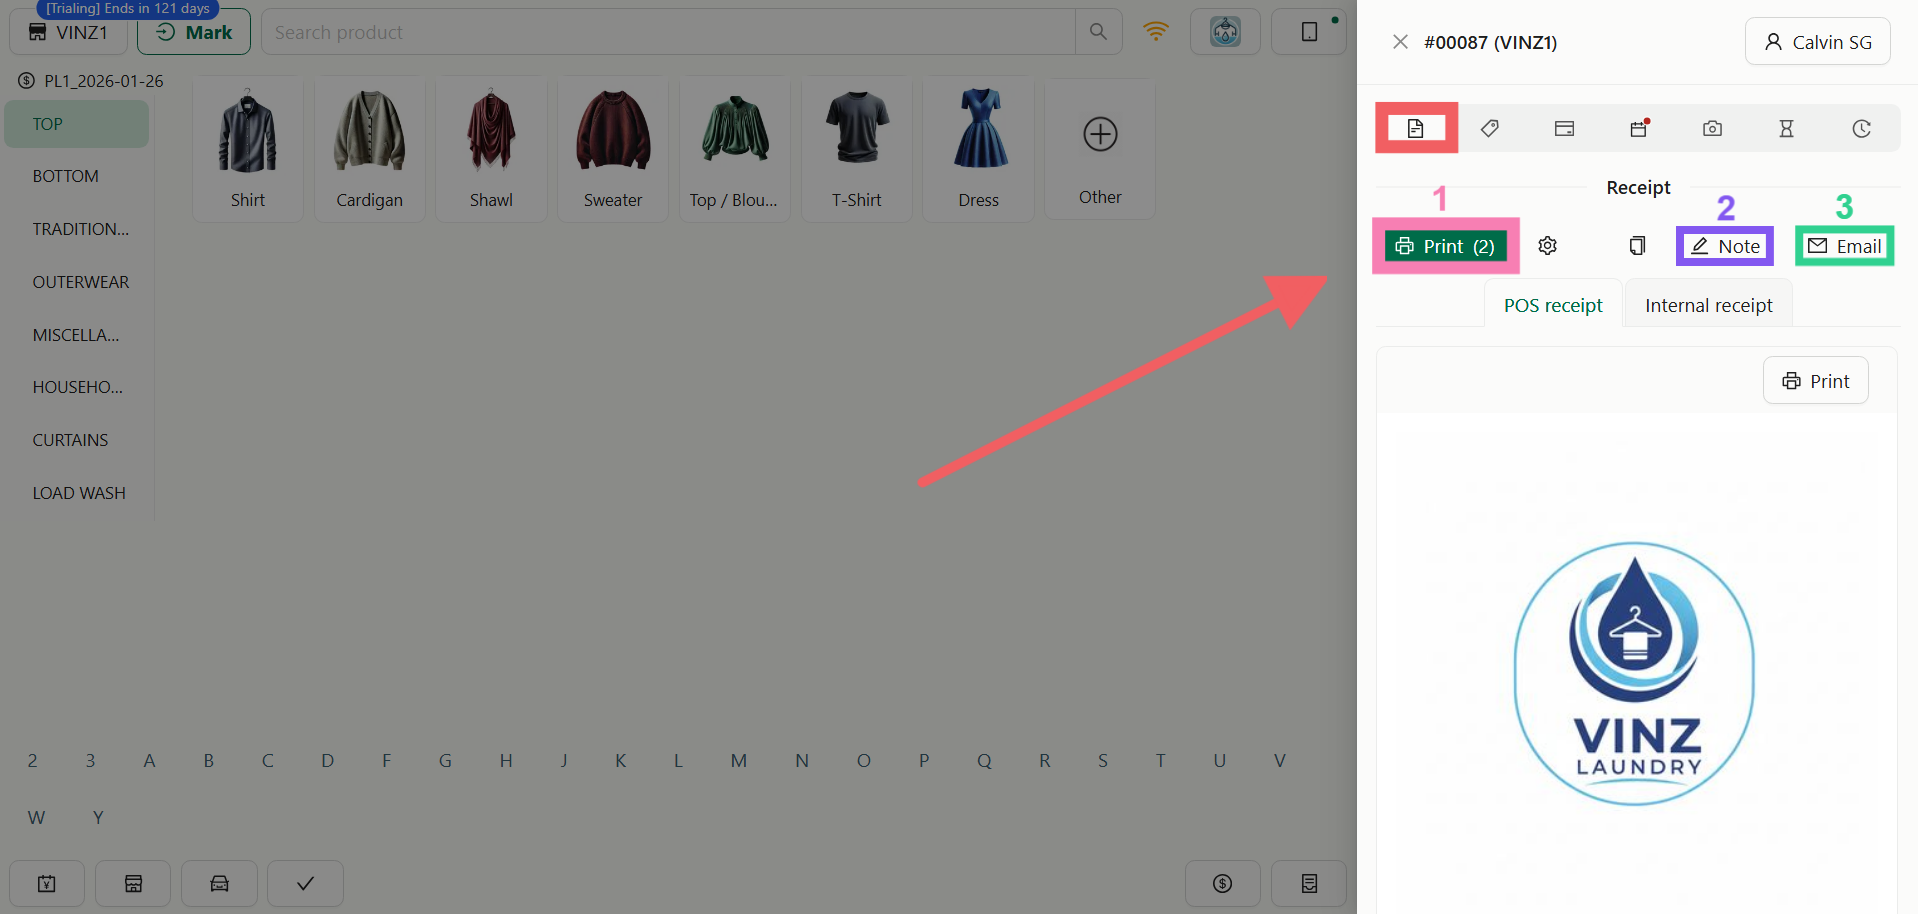
This tab manages the official documentation.
1. **Print Receipt:** Click the Print icon to generate a thermal receipt.
2. **Update Order Note:** Click the Pencil Icon next to the note section to edit general instructions.
3. **Email Receipt:** Send a digital copy directly to the customer’s registered email.
### The Label Tab
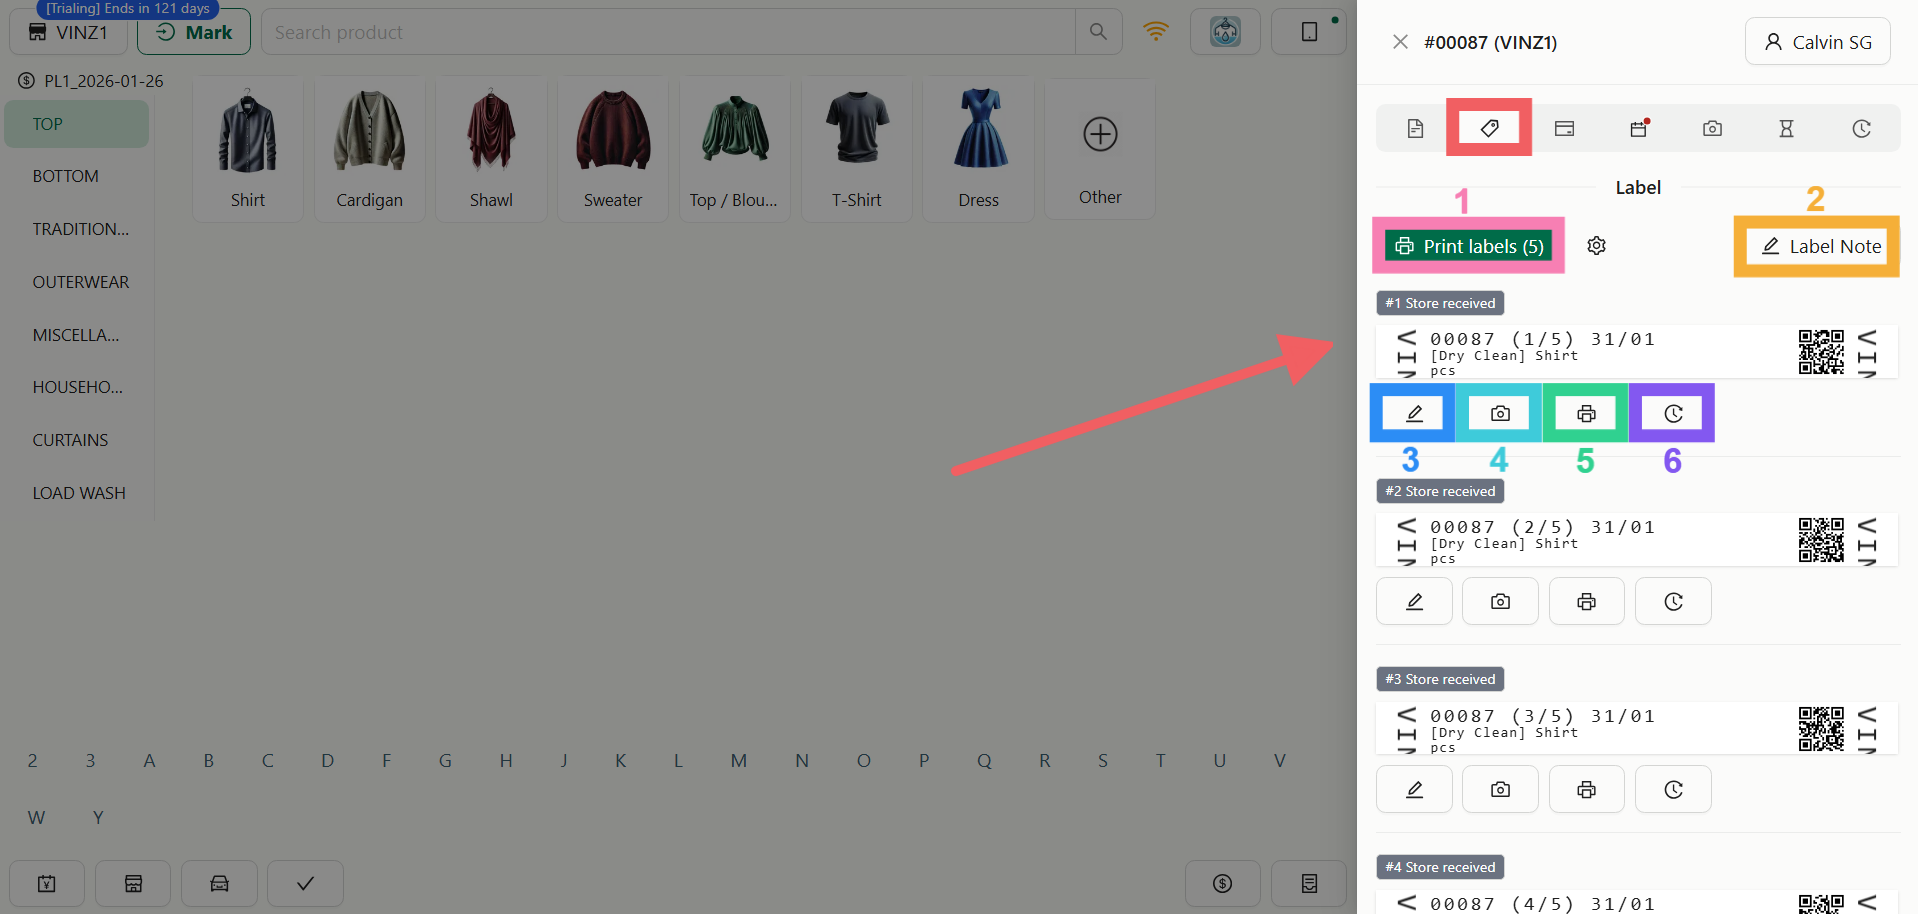
This is the most critical tab for operations. The visual layout of these tags is controlled by your **Label Templates** settings.
1. **Print All:** Click the large Green Print Label button to print tags for every item at once.
2. **Bulk Note:** Click the Label Note button in the top right to apply a note to multiple items.
3. **Individual Note:** Click the Pencil Icon under a specific item to add a unique note.
4. **Intake Photos:** Click the Camera Icon on an item row to document the item.
5. **Print Specific Label:** Click the Printer Icon on a specific row to reprint a single tag.
6. **Label History:** Click the Clock Icon on a specific row to view the full tracking timeline of that item.
### The Payment Tab
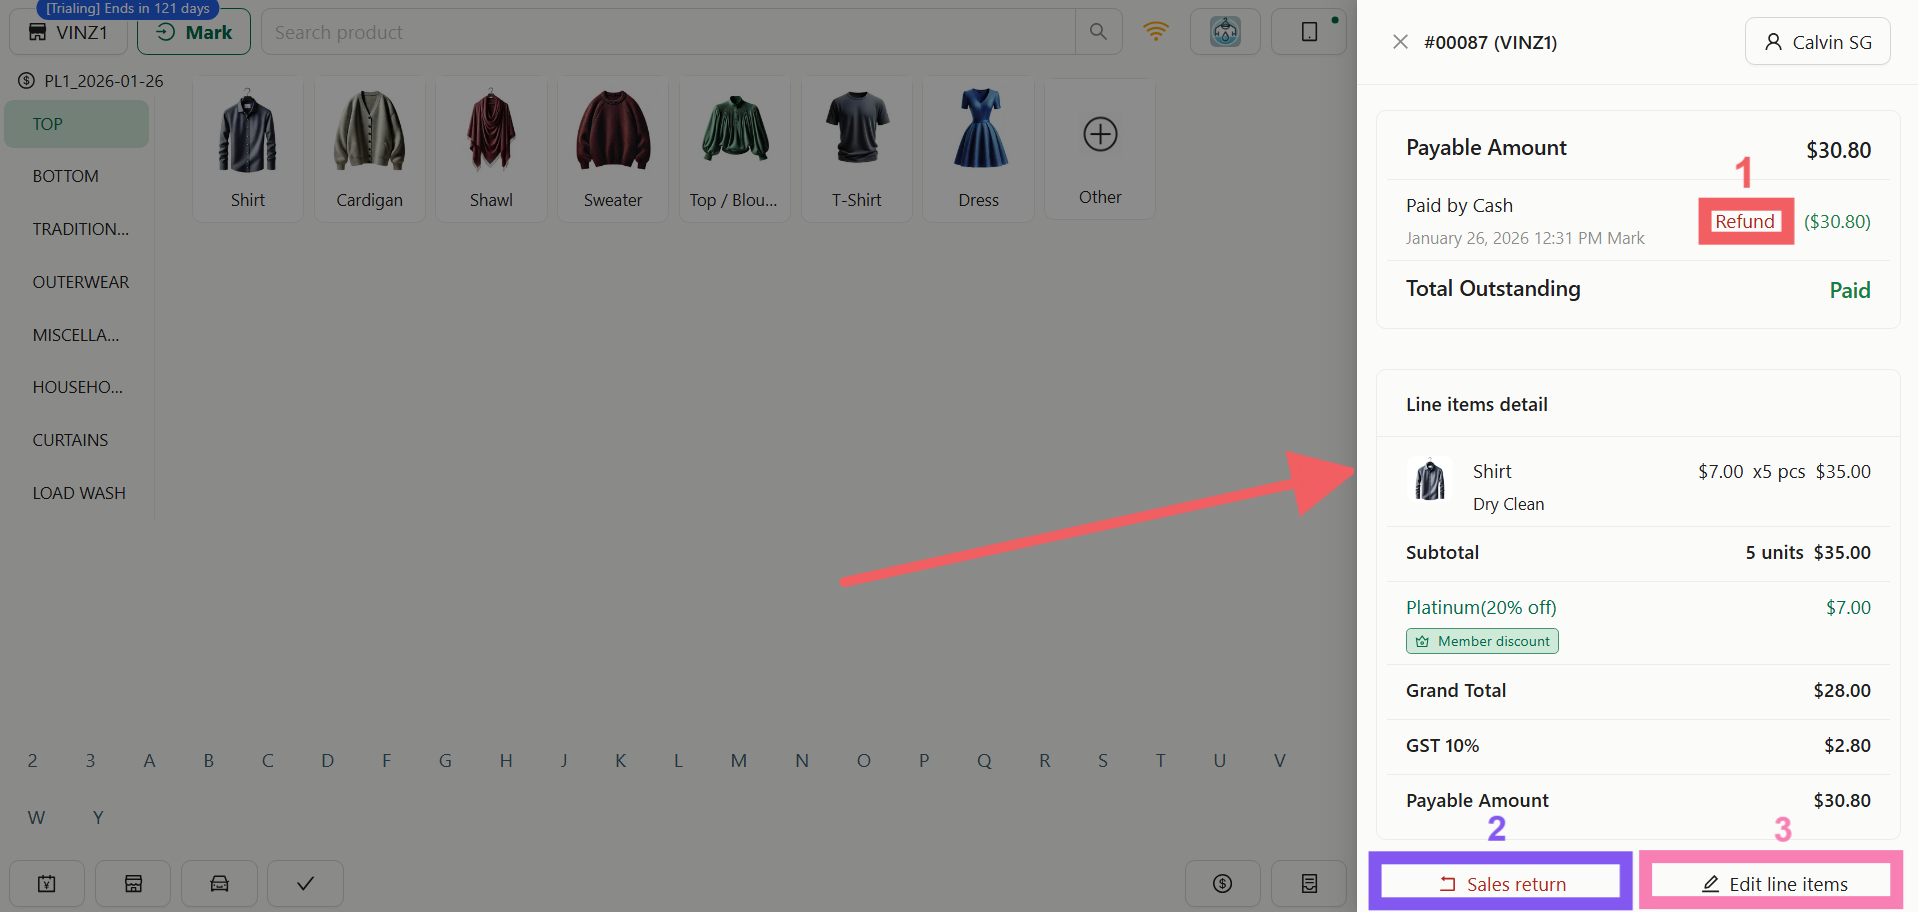
Manage the financial status of the order. You can view the Payable Amount and check if the status is PAID or UNPAID.
1. **Refund:** Return payment to the customer.
2. **Sales Return:** Initiate a return either **By Amount** (flat value) or **By Line Item** (returning specific garments).
3. **Edit Line Items:** If the order is still open, you can modify the items directly here.
### The Logistics / Collection Tab
This tab changes depending on your initial scheduling choice:
**If Store Pickup was selected (Collection Tab):**
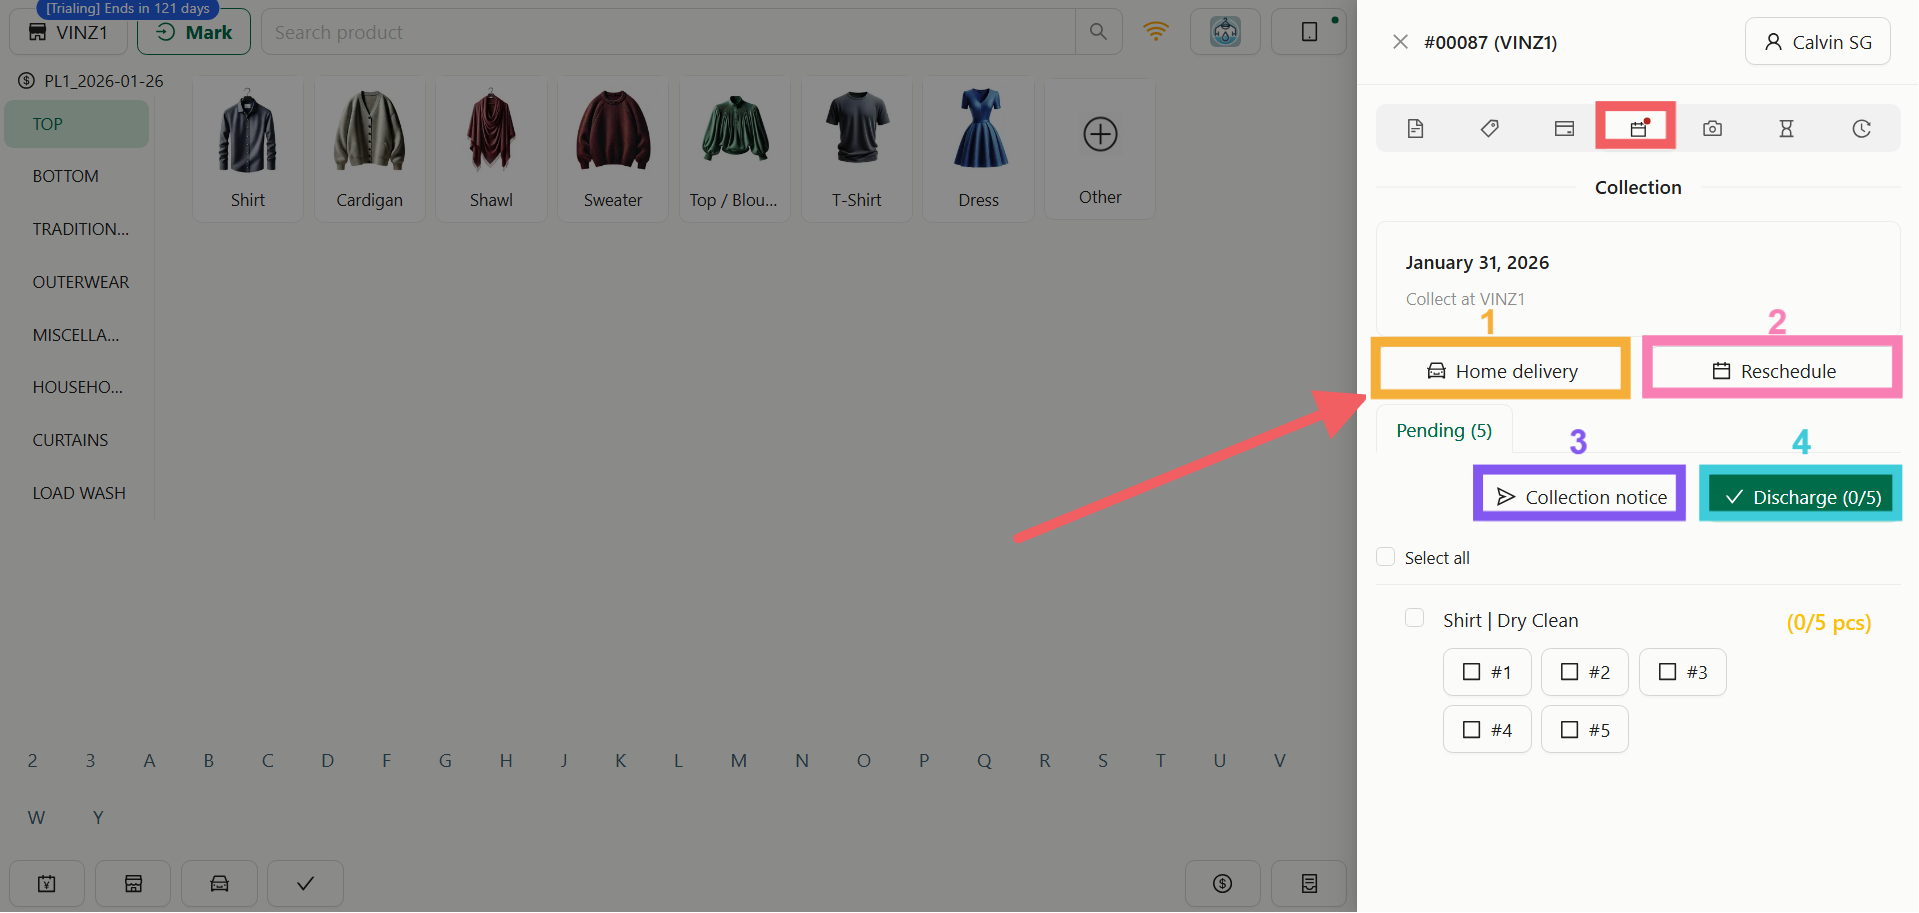
1. **Set Home Delivery:** Switch the order to delivery mode if the customer changes their mind.
2. **Reschedule:** Move the collection date to a different day.
3. **Collection Notice:** Send an email notification that the order is ready.
4. **Discharge Items:** The final step to mark items as "Picked Up" by the customer.
**If Home Delivery was selected (Logistics Tab):**
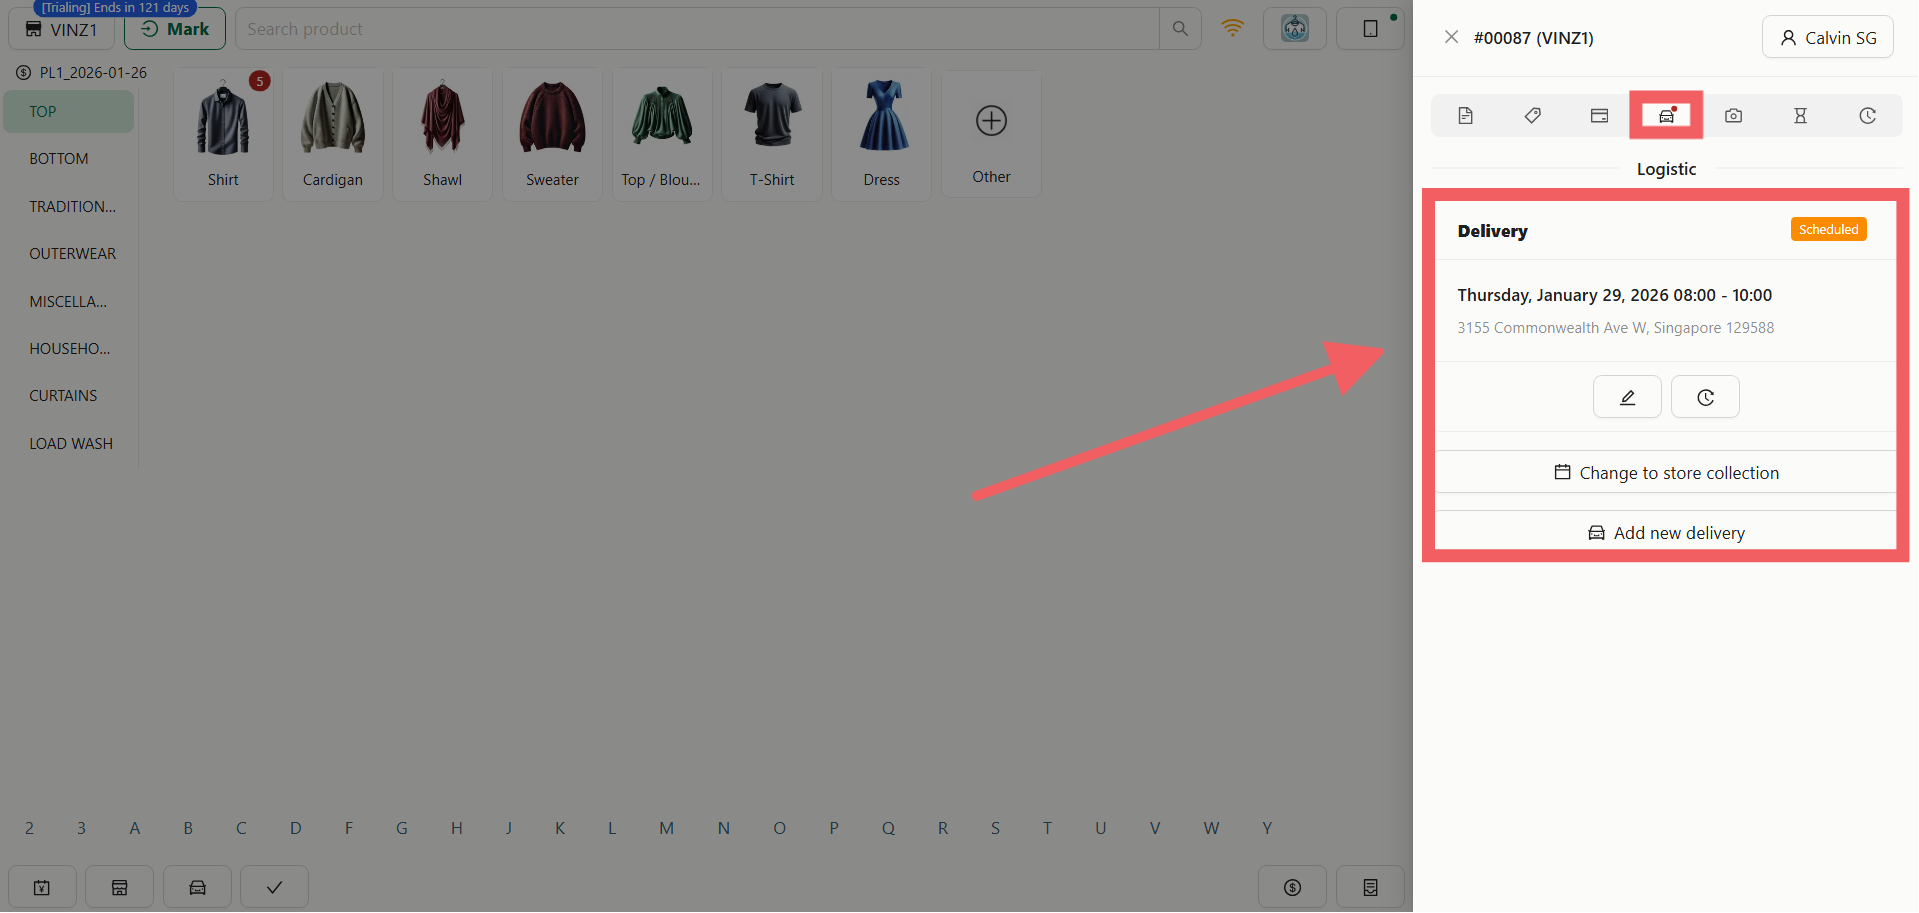
5. **Change to Store Collection:** Switch the order to self-pickup.
6. **Add New Delivery:** Split or arrange additional delivery tasks.
### The Photo Tab
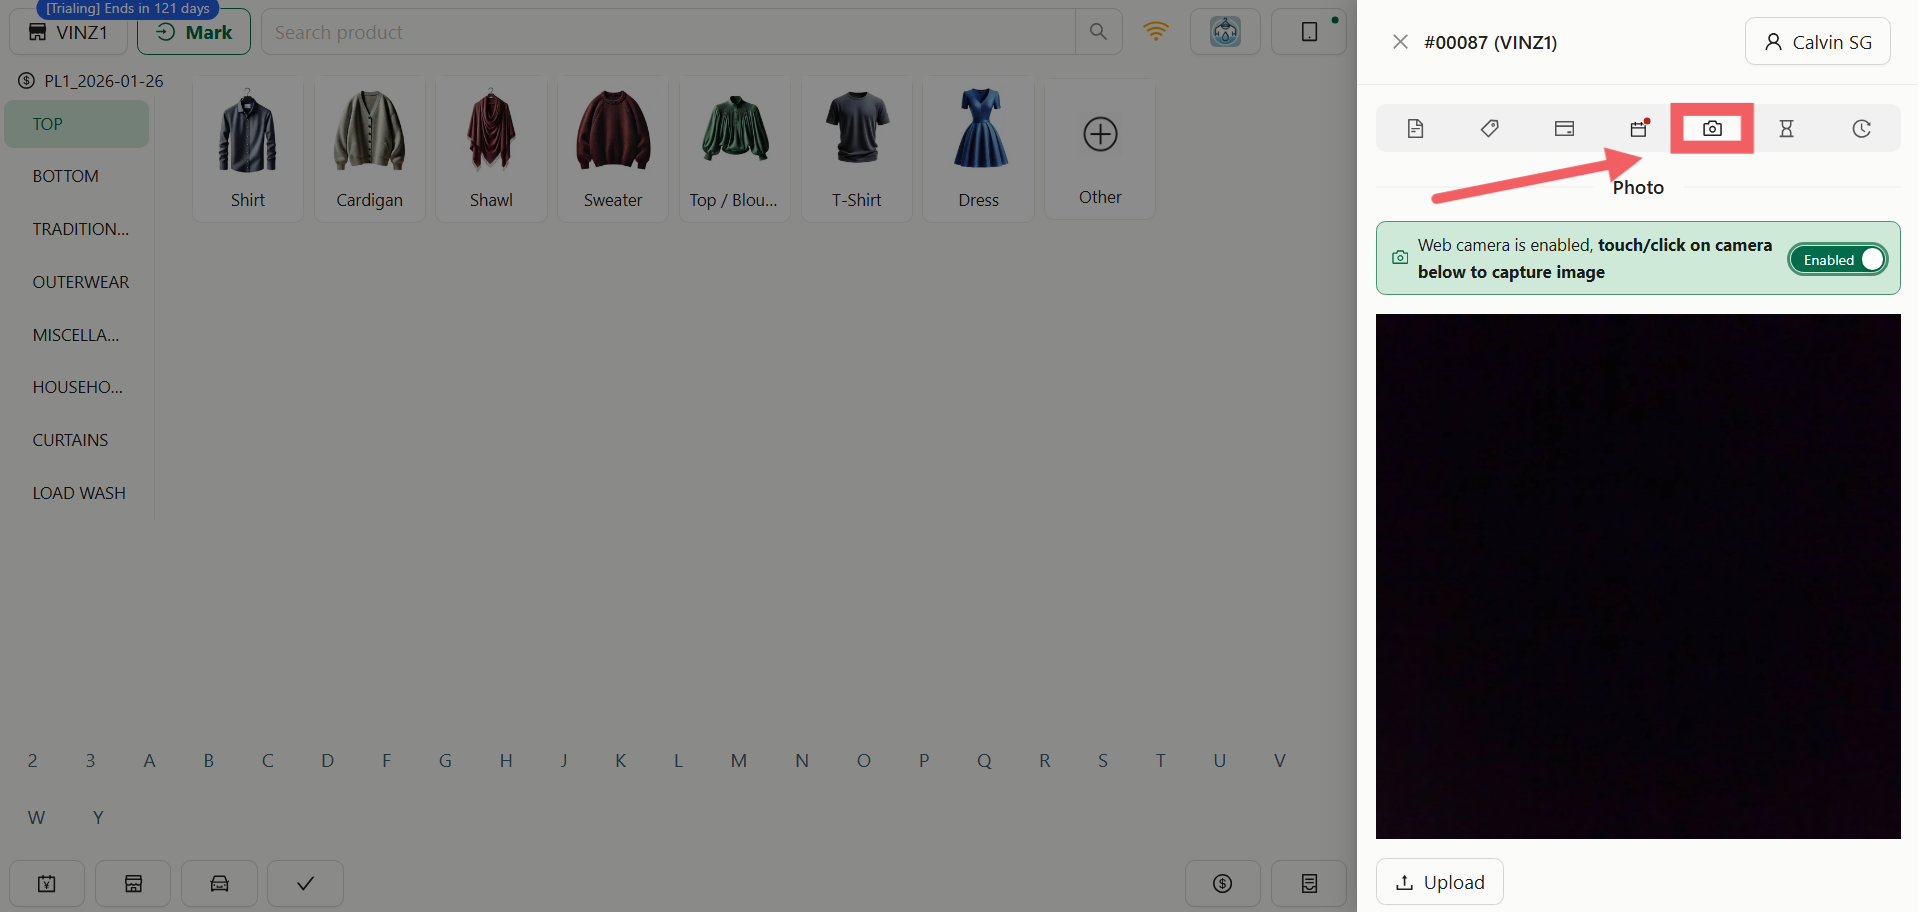
View general photos attached to the overall order (e.g., a photo of the laundry bag or receipt).
### The Progress Tab
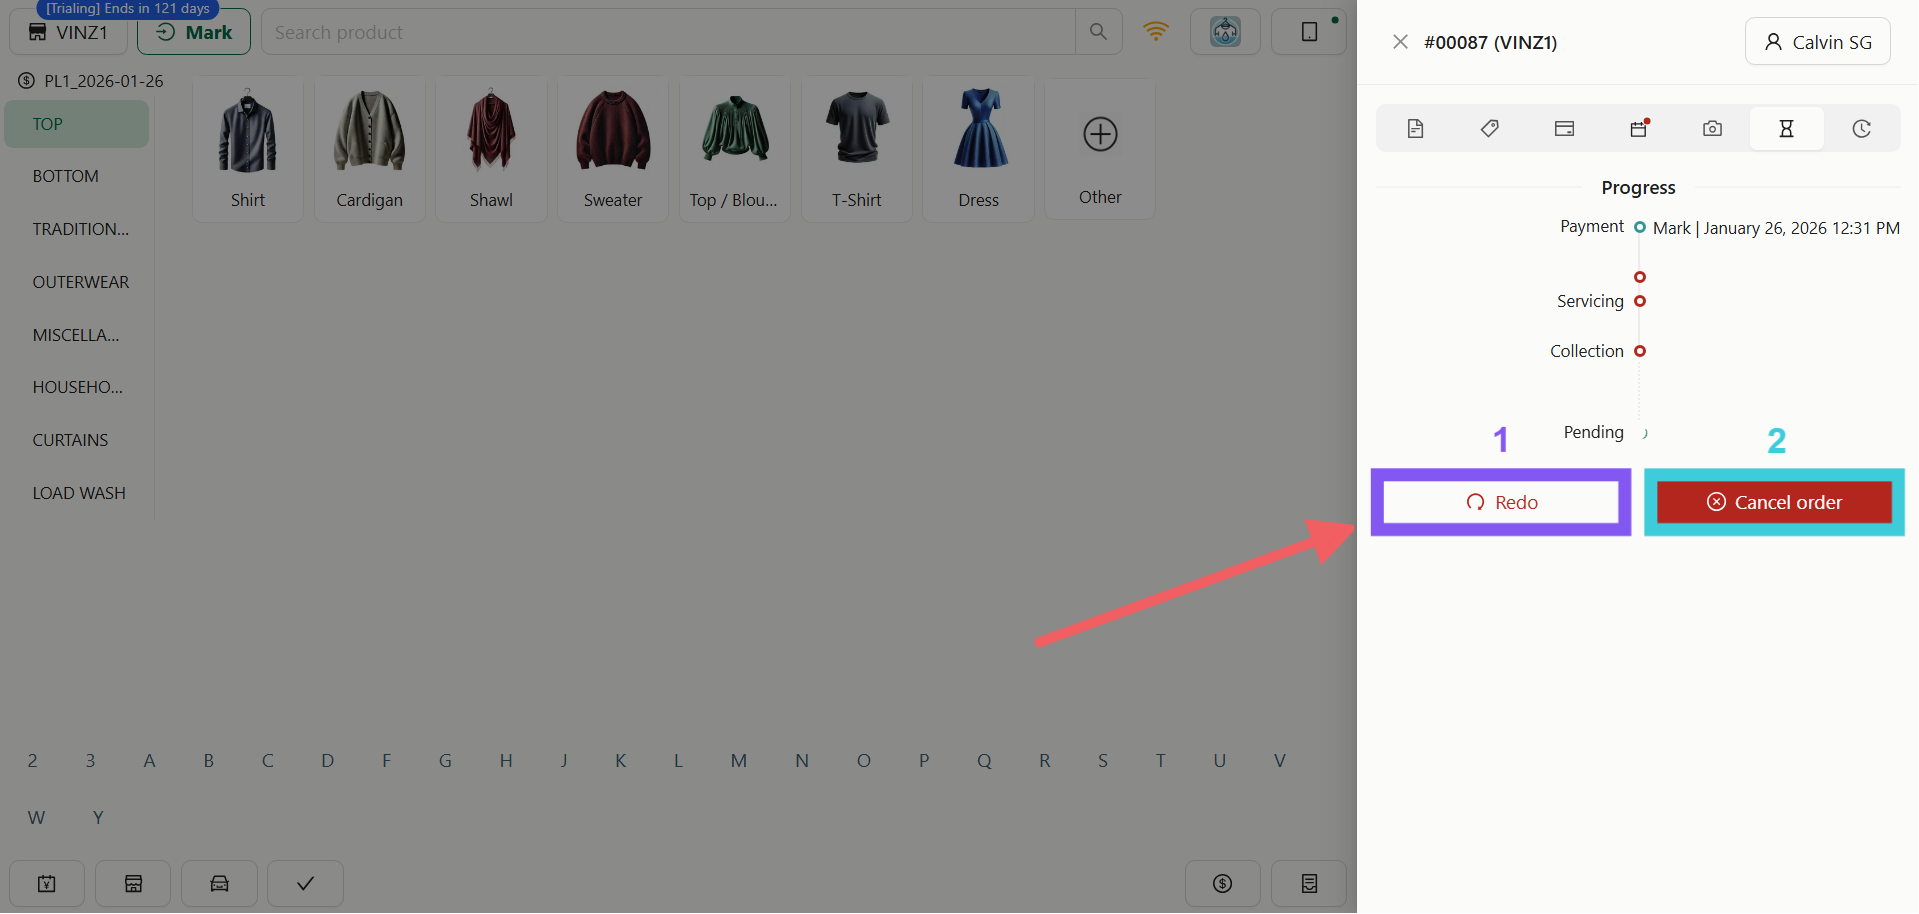
View the specific production status of each individual item.
1. **Redo Order:** Creates a new replacement order with a fresh Order ID. The total will be set to **$0.00 (Free of Charge)**, allowing you to re-process the items without charging the customer again.
2. **Cancel Order:** Void the current transaction immediately.
### The History Tab
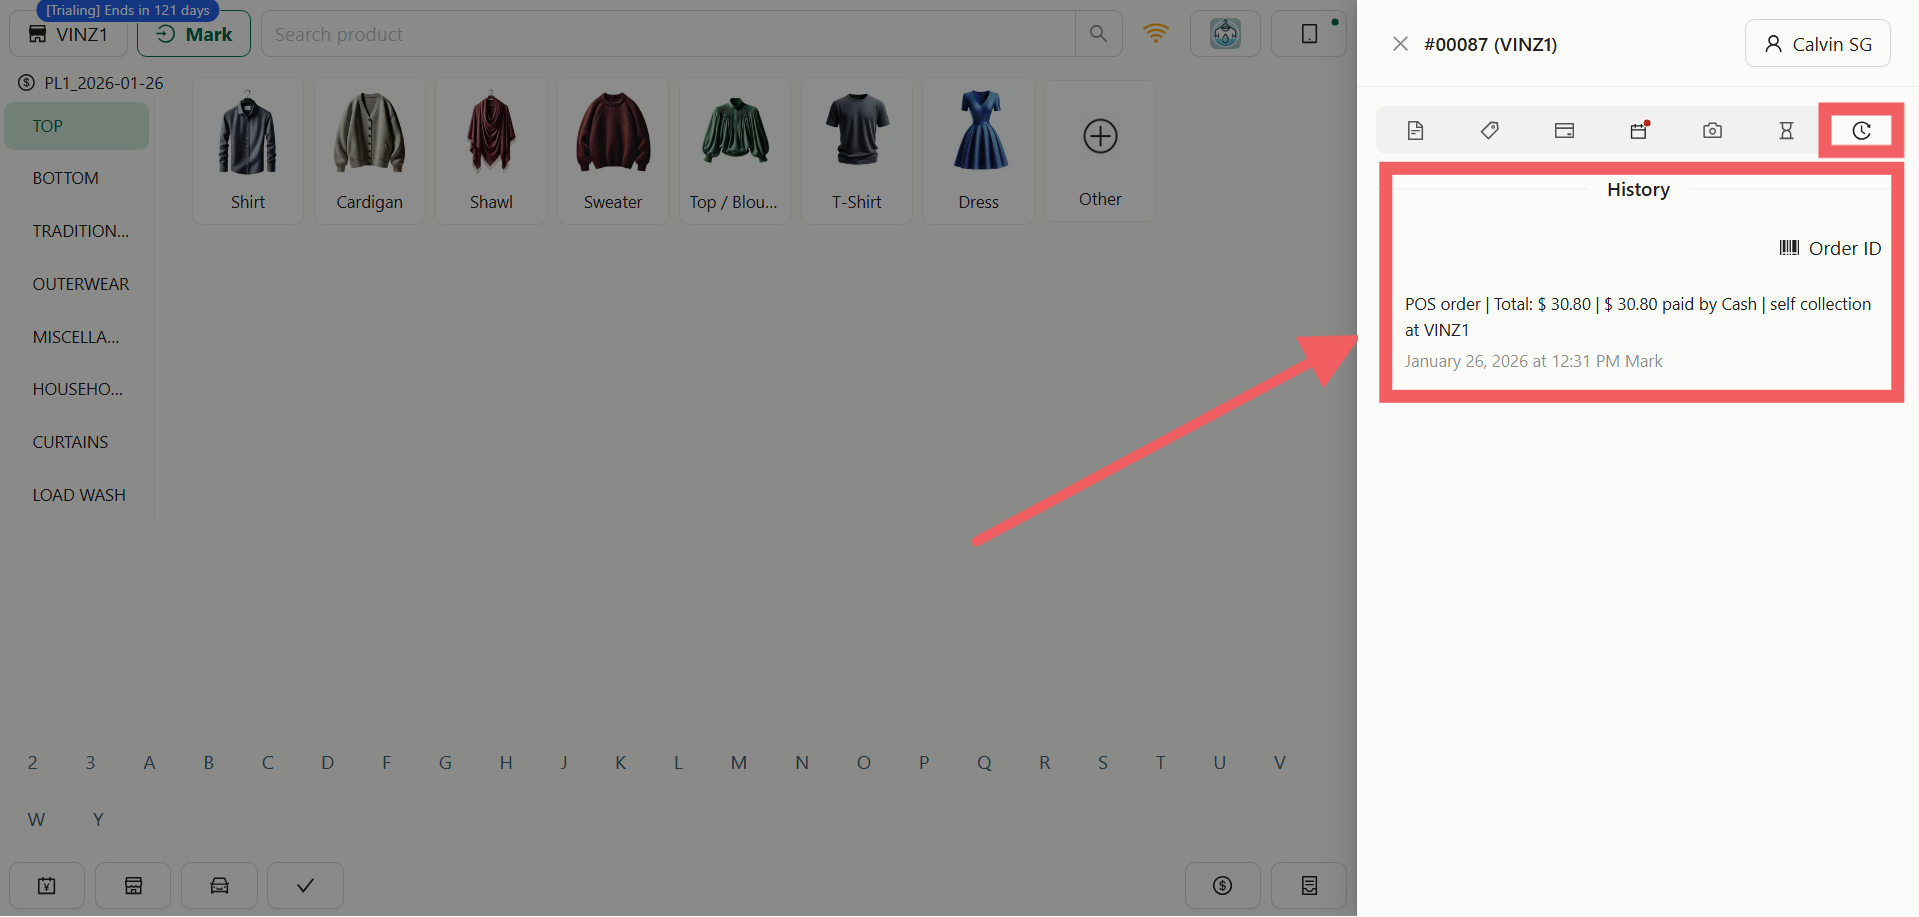
A complete security log of all actions taken on this order (created, paid, updated, printed) for staff accountability.
---
## Closing the Shift
At the end of the day, staff must balance the cash drawer and log out of the system.
### Staff Clock Out
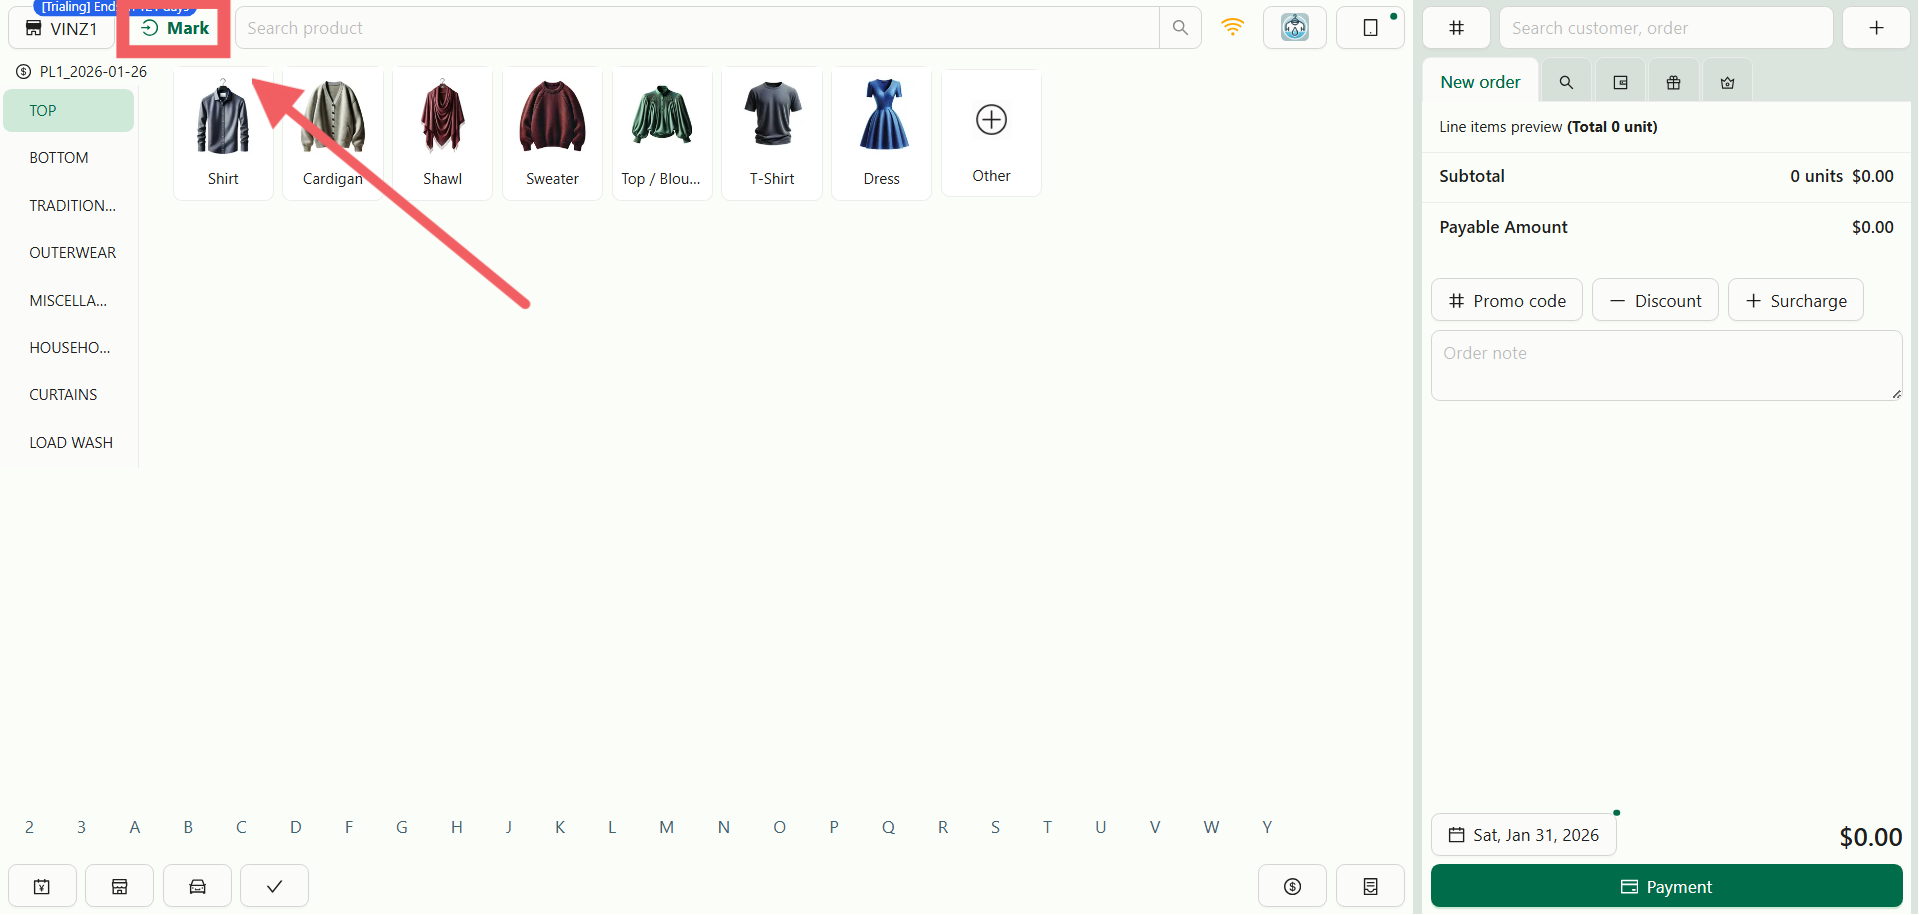
1. Click your Staff Name displayed in the top corner of the screen.
2. A dropdown or modal will appear.
3. Tap Clock Out to end your shift and lock the terminal.
### Close of Day (Cash Drawer)
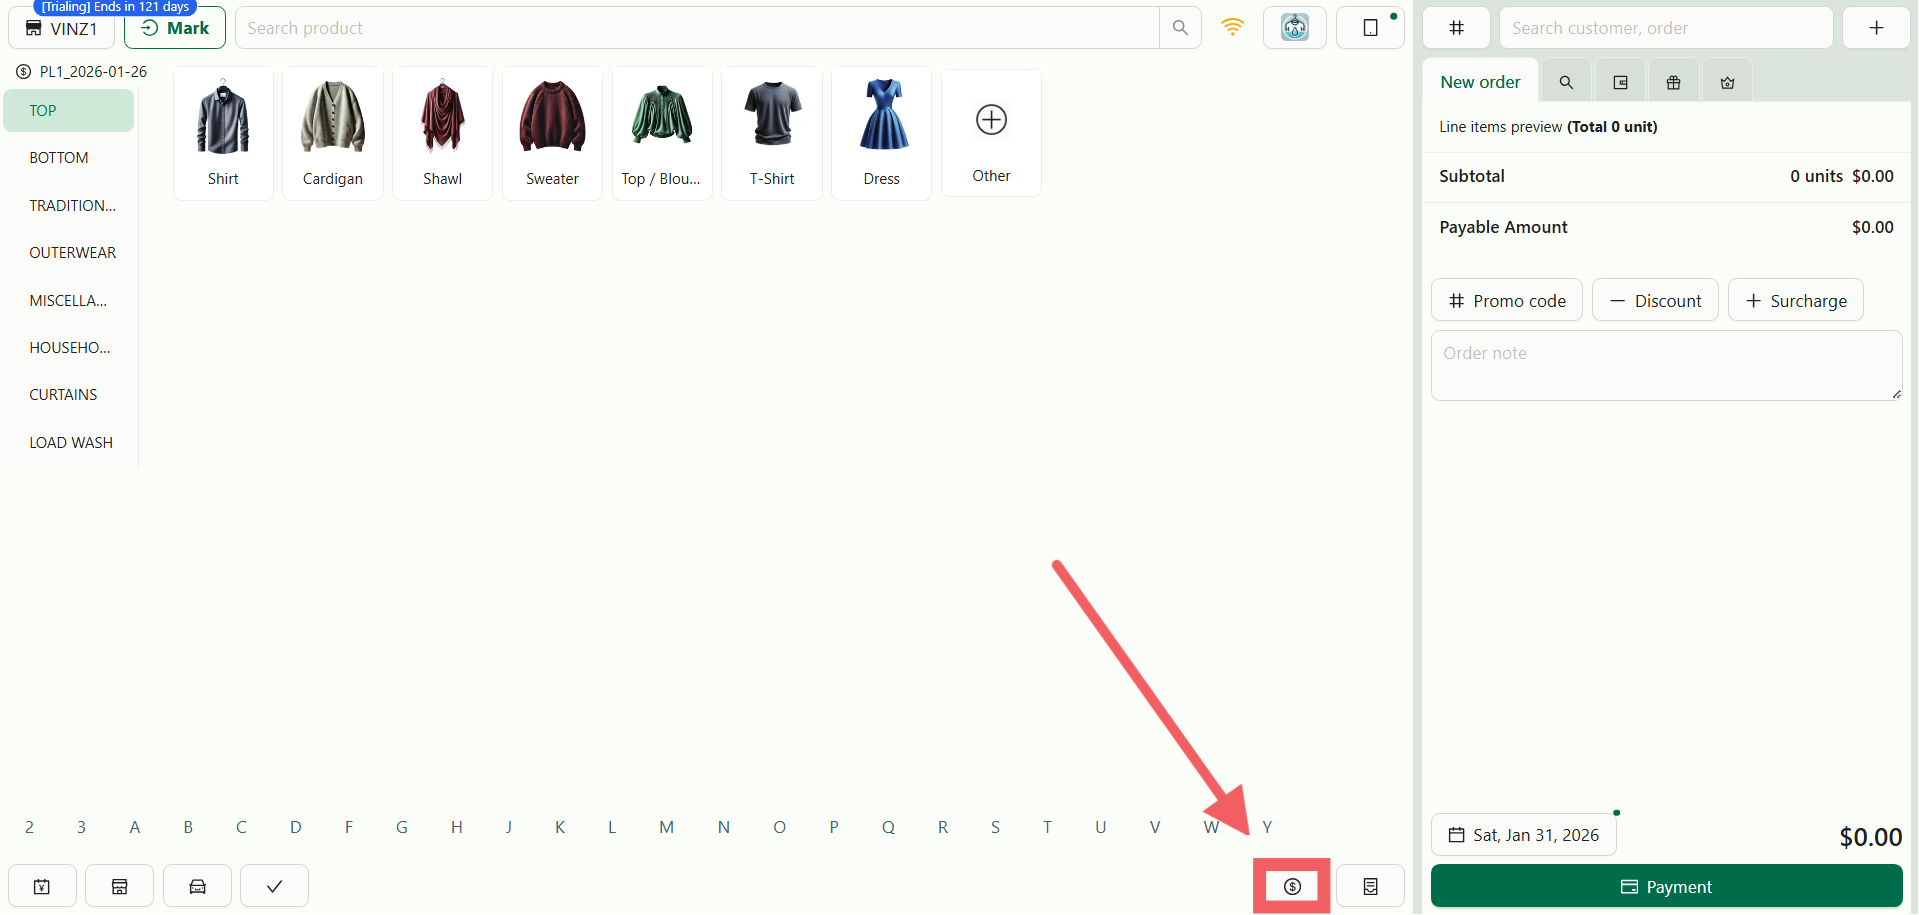
1. Click the **Dollar Icon (**$**)** in the menu bar.
2. Review the cash drawer summary.
3. Tap the Close of Day button to finalize the shift's financial report.