## **Setting Up Interactive Messages**
> Create engaging interactive messages—such as menus, quick replies, or direct links to Mini Apps—to send to your customers.
If you intend to use the "Mini App action" to link to a customized experience, you must create and publish your Mini App first. This will allow you to select it from the list when configuring your message action.
### 1. Create a New Template & Choose Type
- Start by defining the purpose of your message.
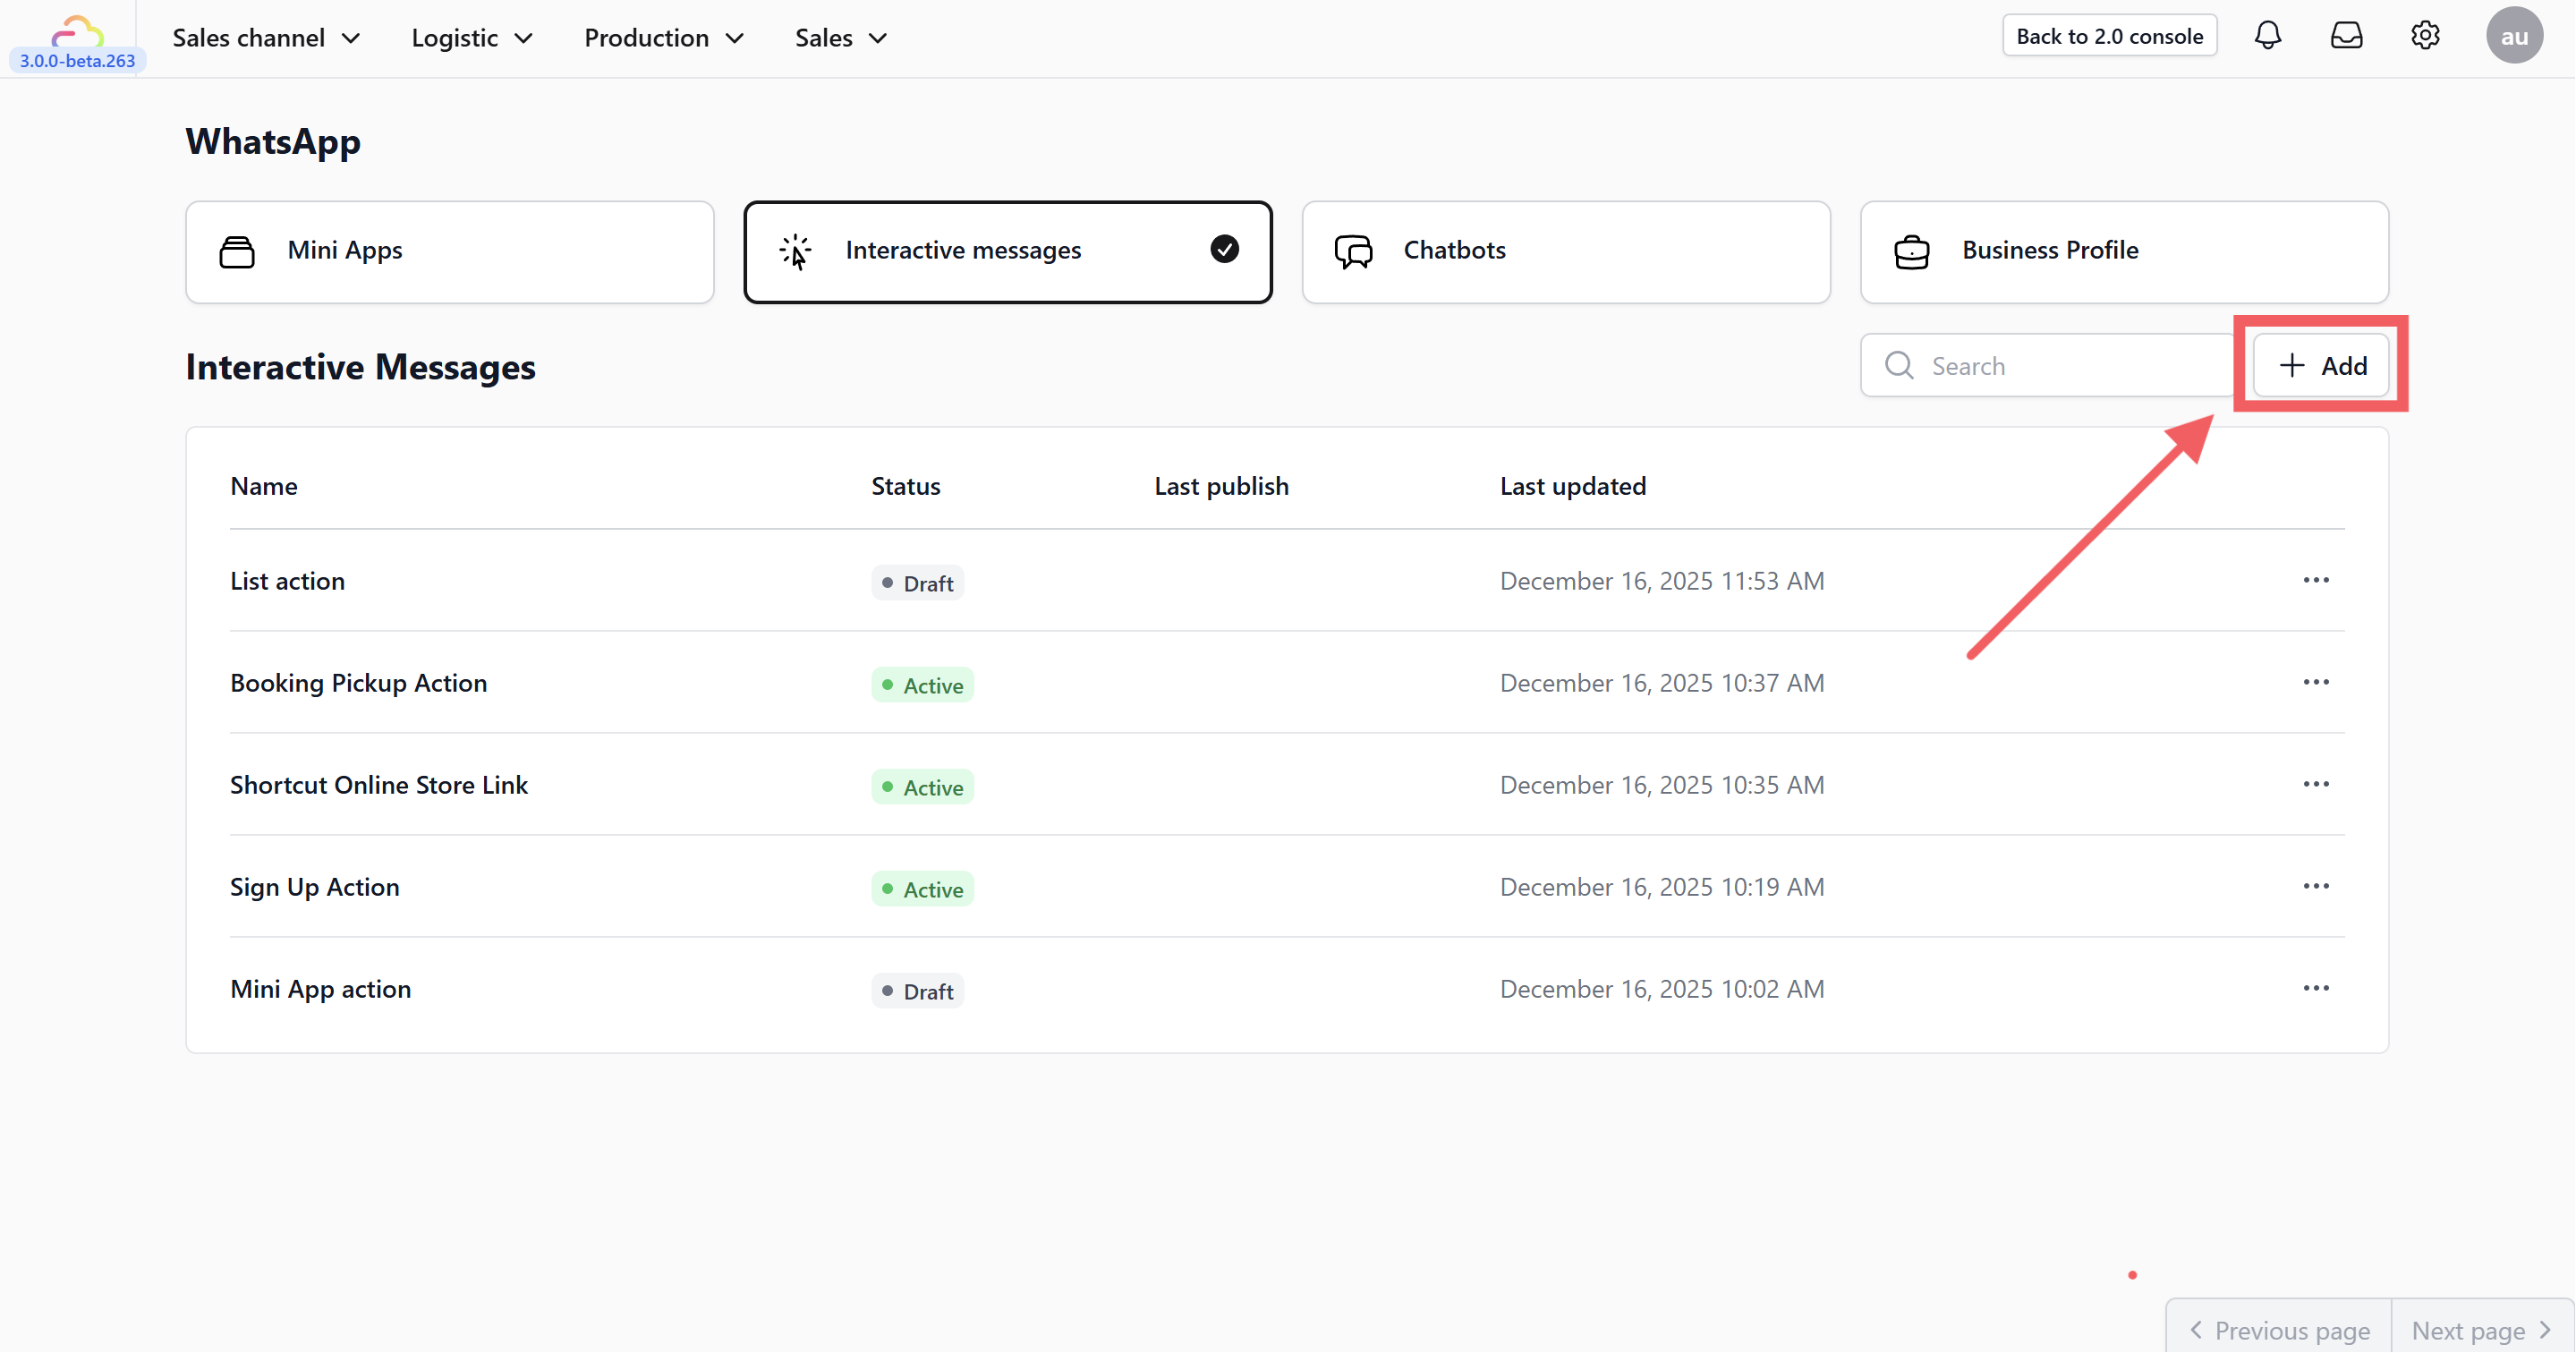
- Navigate to the Interactive messages tab and click + Add.
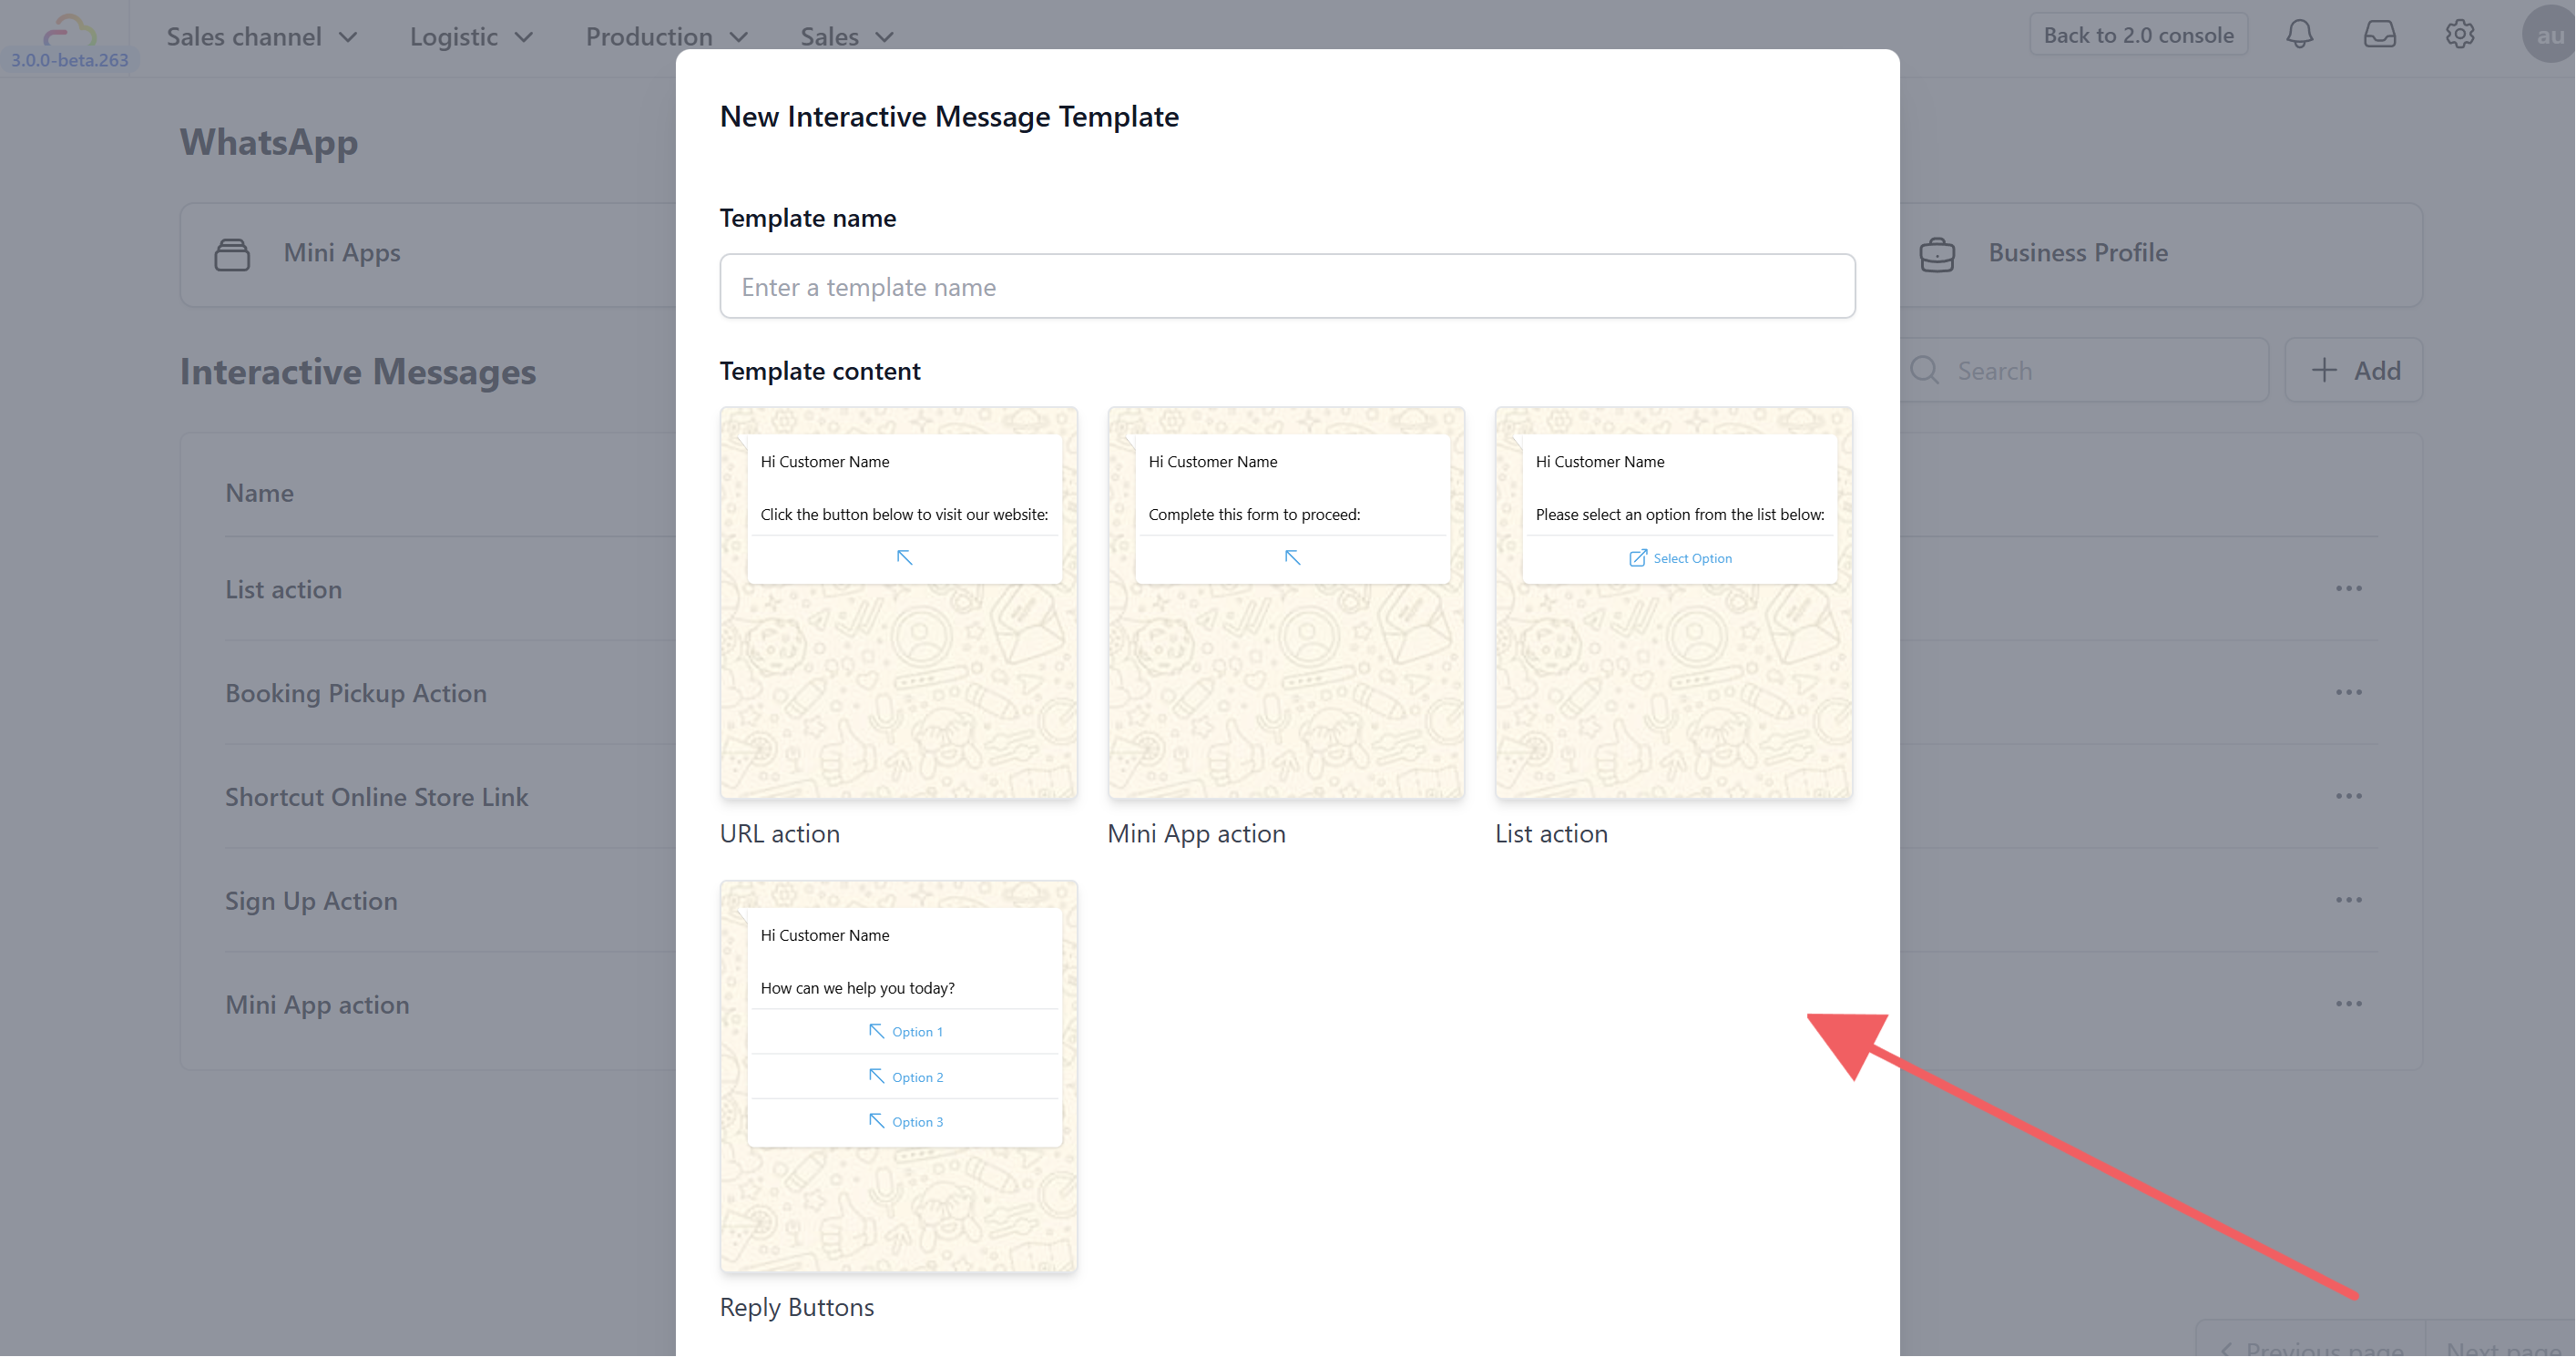
- In the popup window, enter a Template name for internal reference.
- Select the Template content type based on your goal:
- URL action: Directs users to an external website.
- Mini App action: Launches an interactive WhatsApp Flow.
- List action: Presents a menu of up to 10 options for the user to select.
- Reply Buttons: Offers up to 3 quick response buttons.
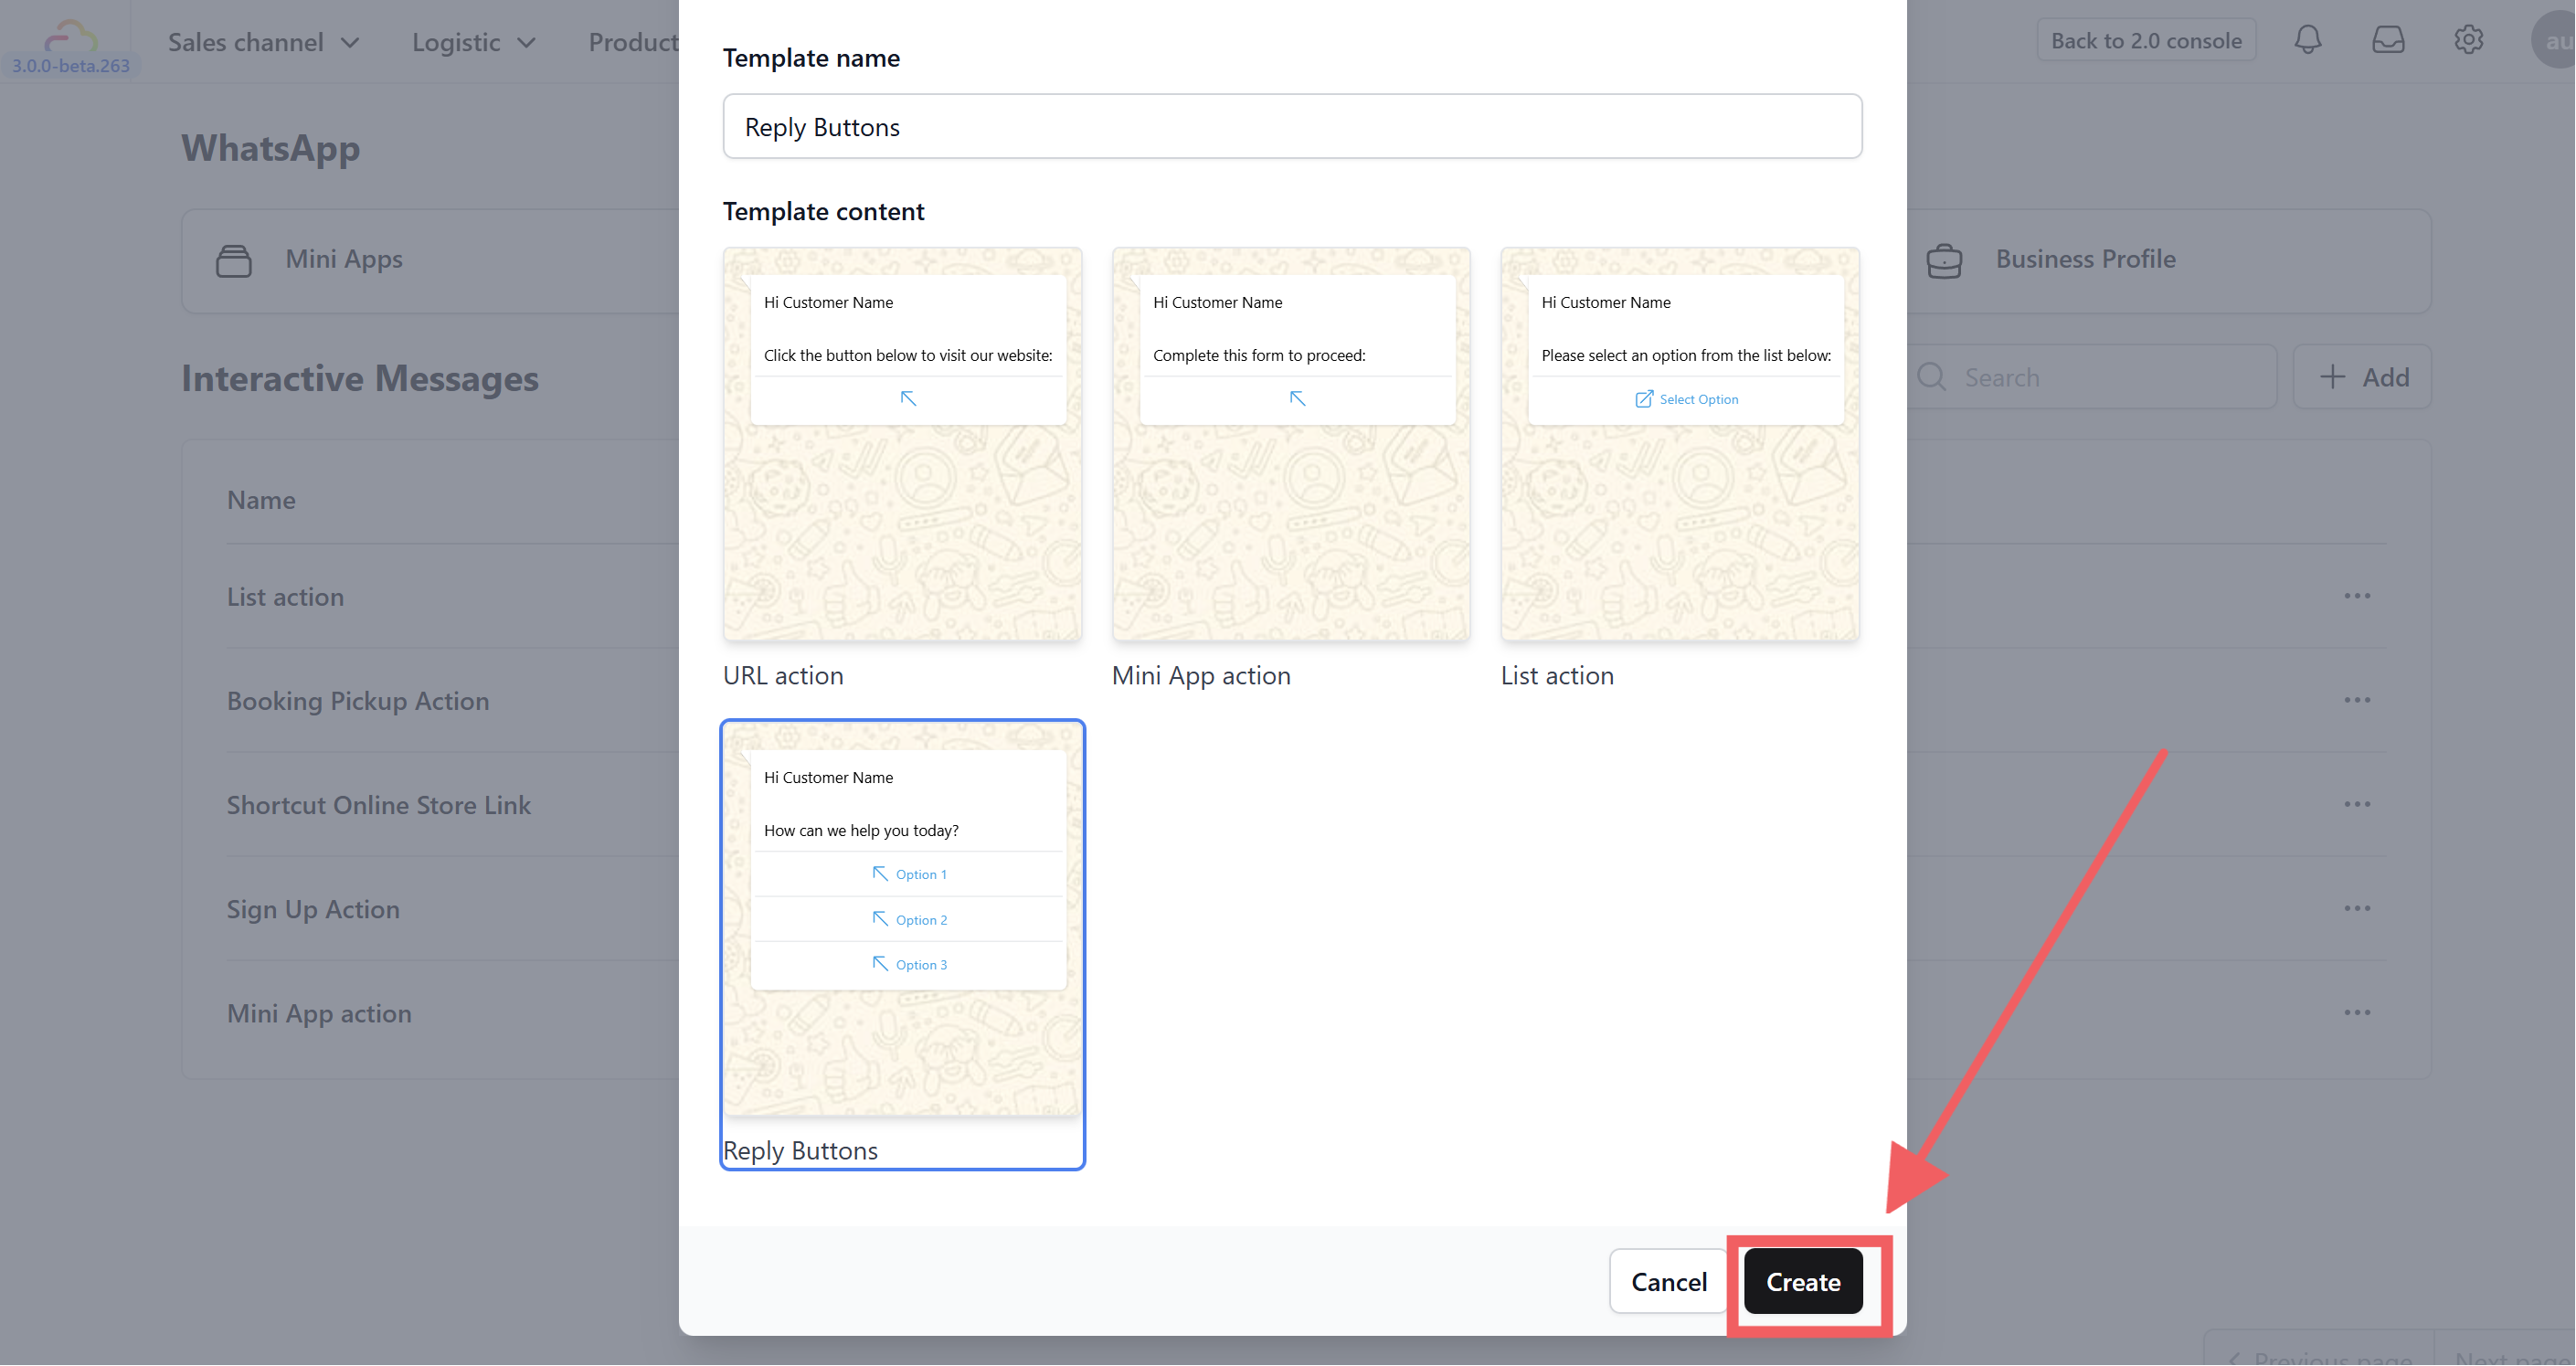
- Click Create.
---
### 2. Configure Message Content
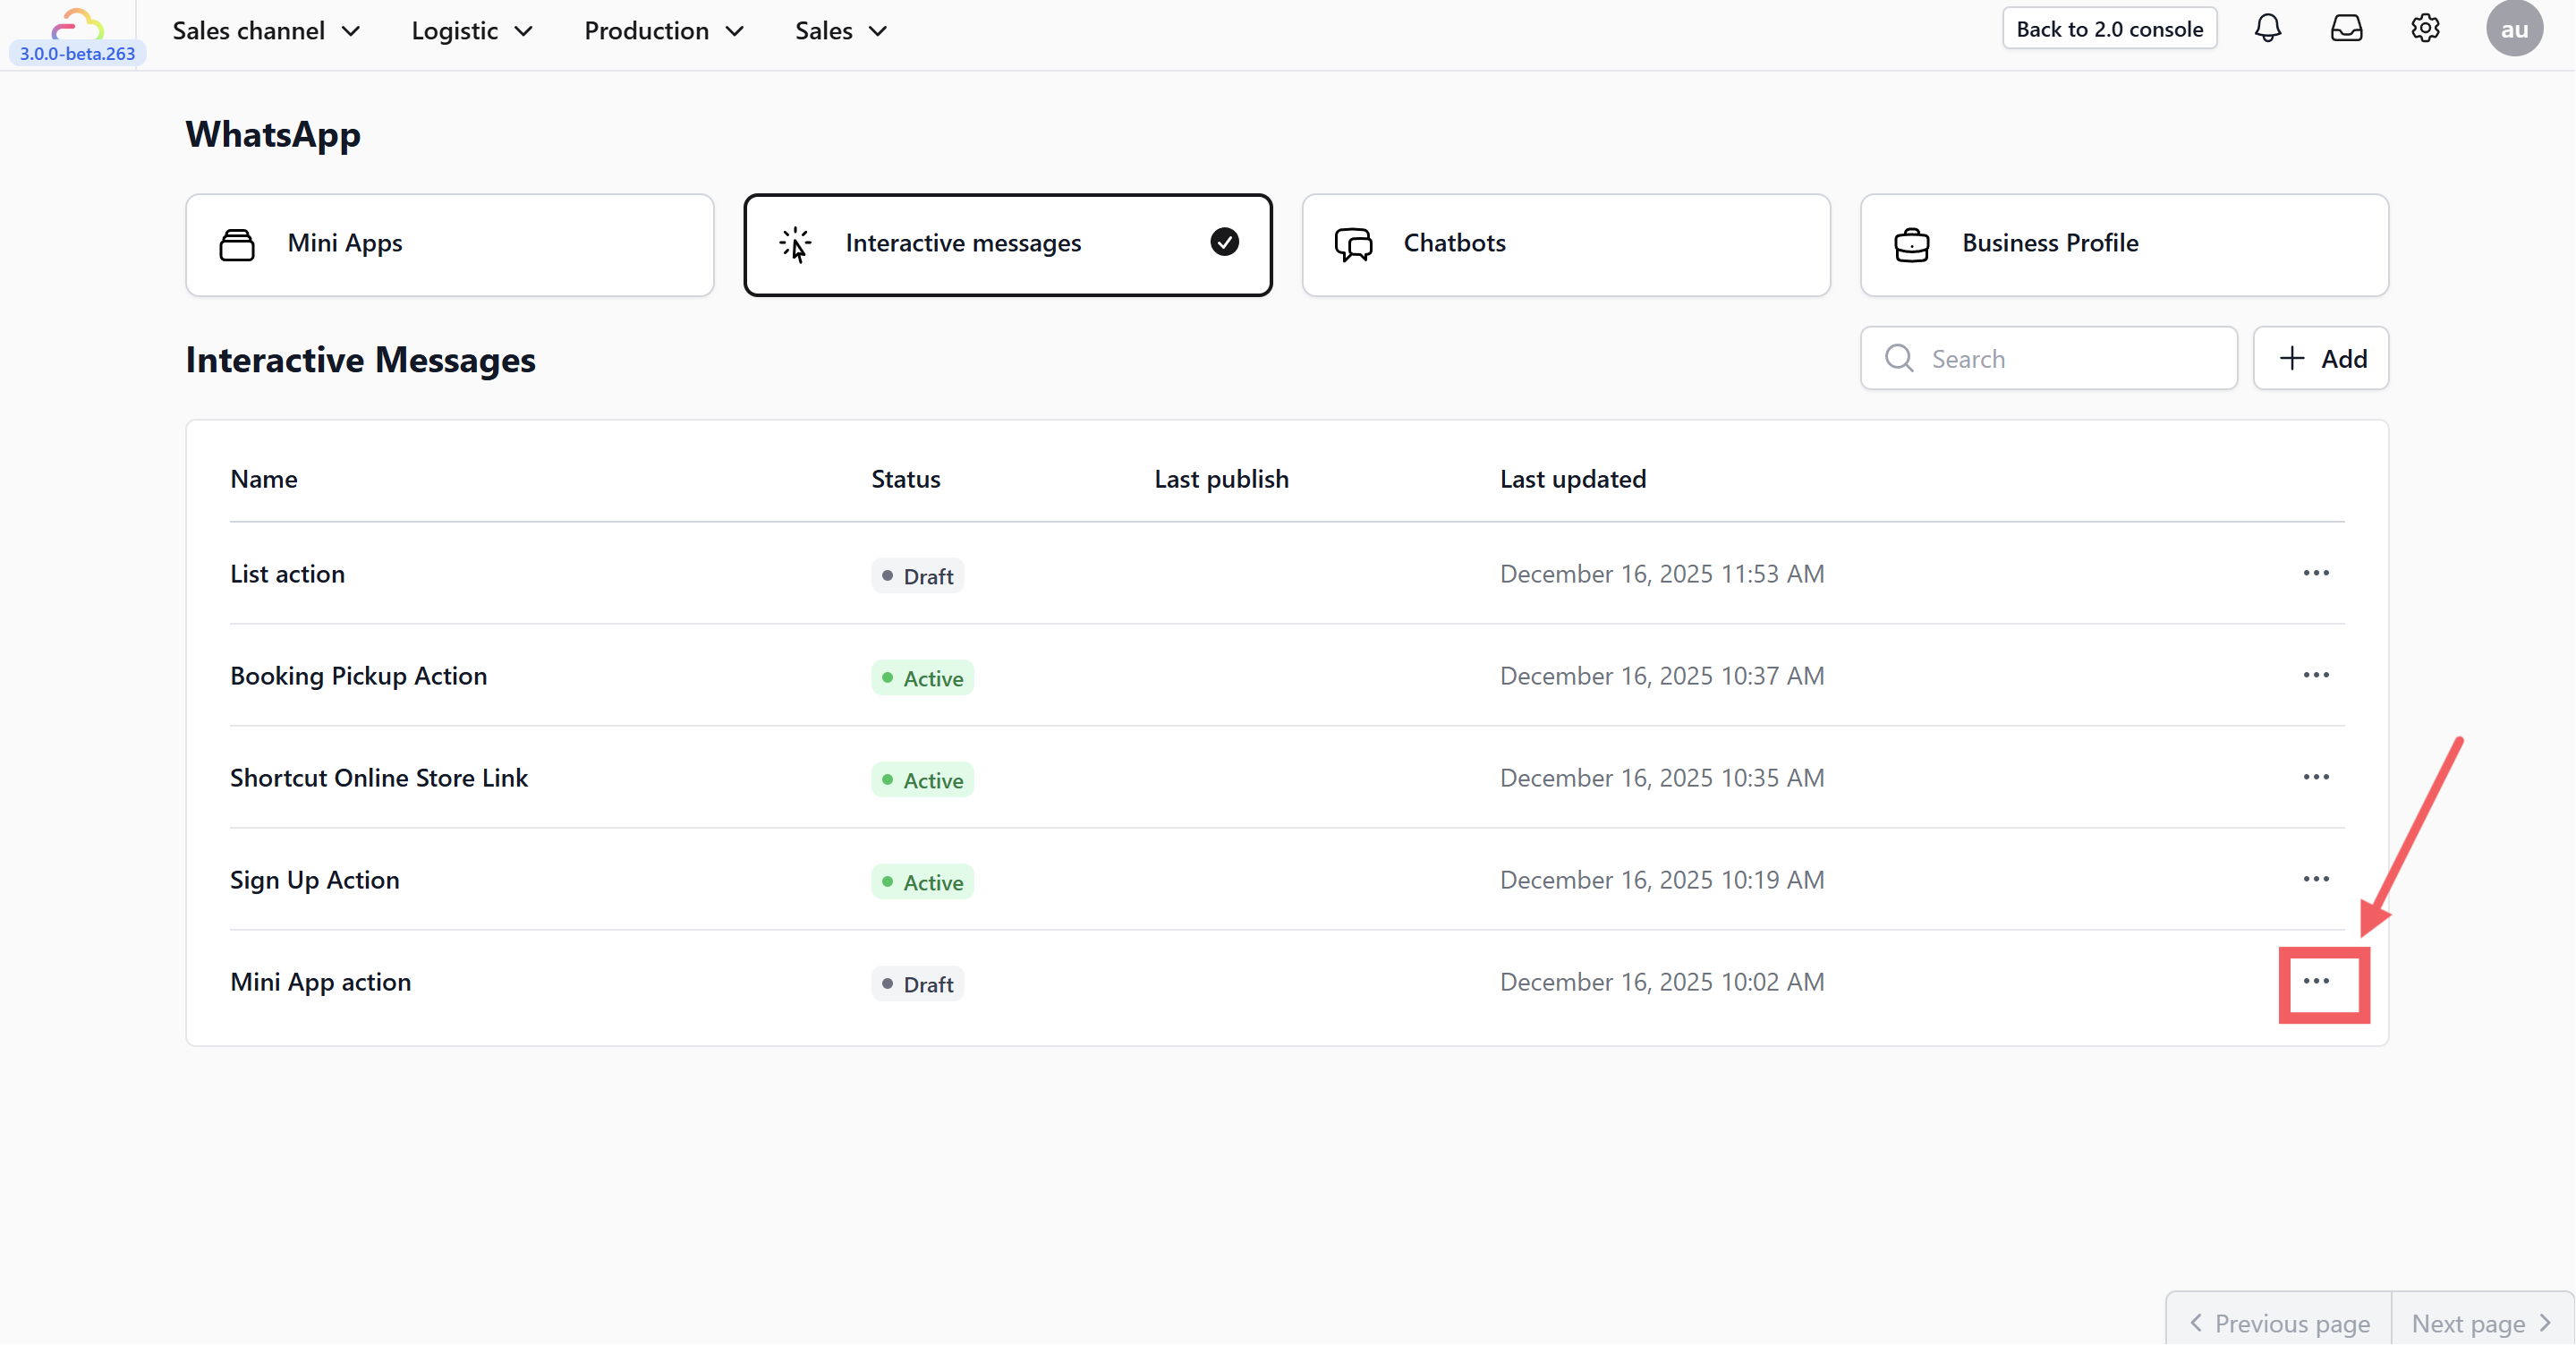
1.Click the **three dots** next to the template you want to configure.
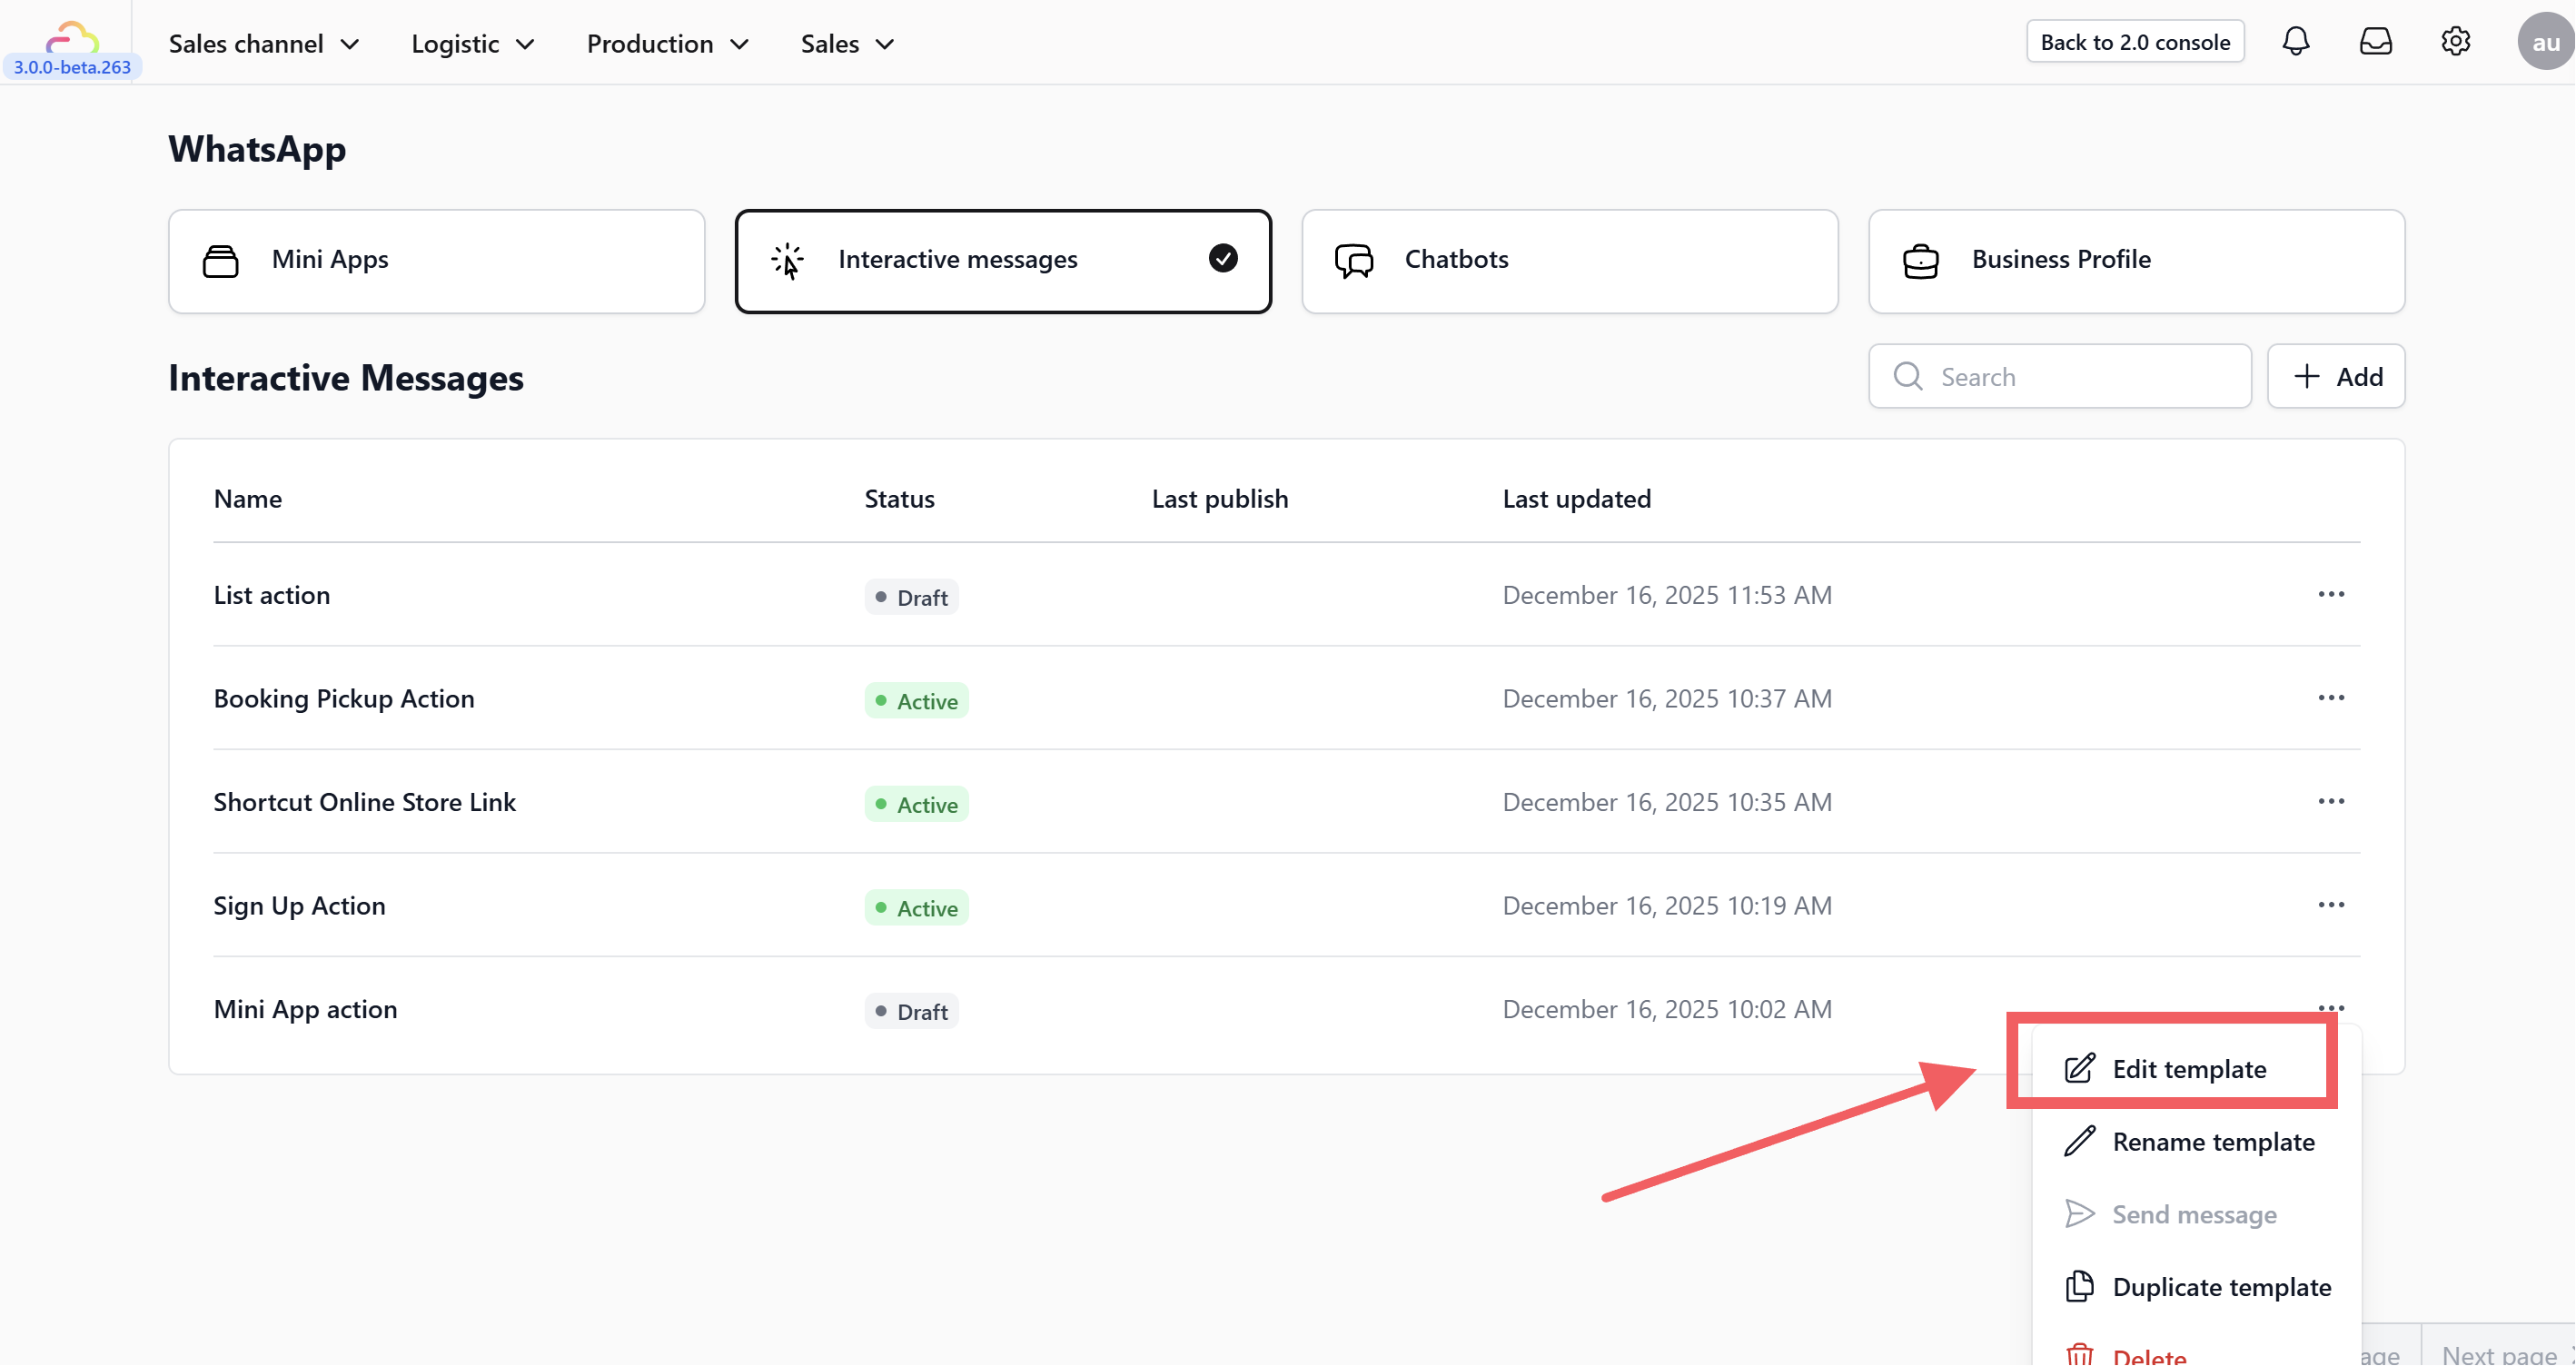
2.Select **"Edit Template."**
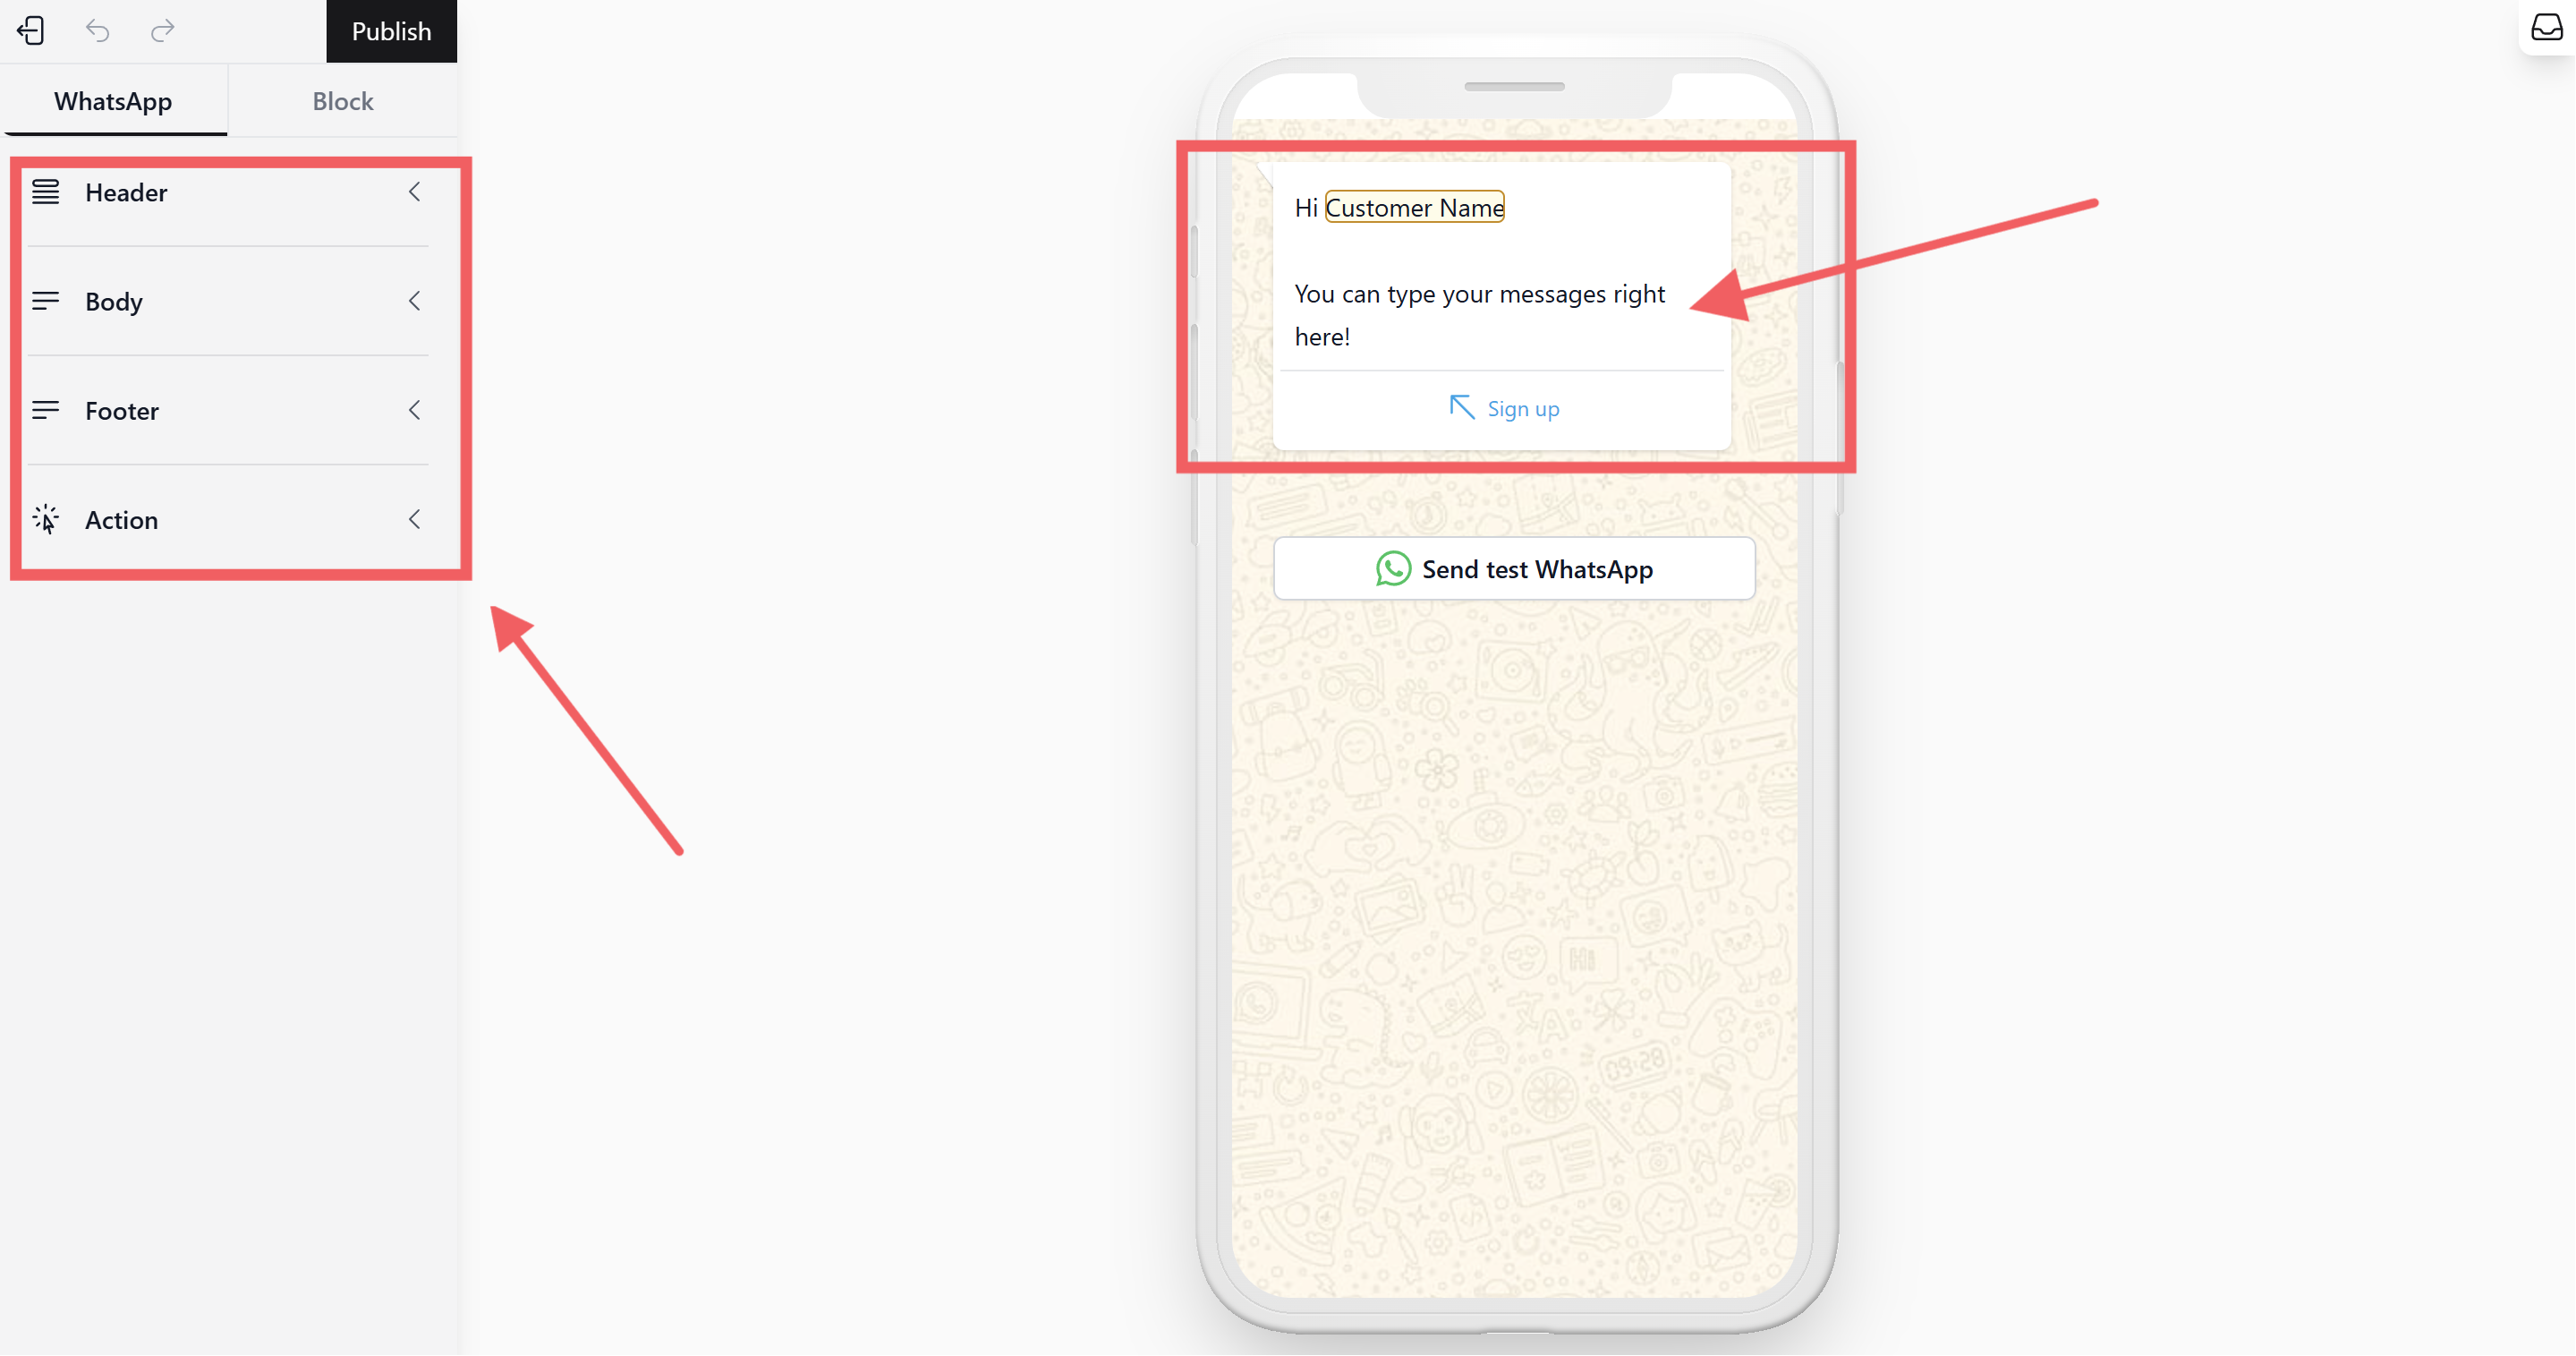
3.You will see that the message is fully customizable, including the header, body, footer, and actions.
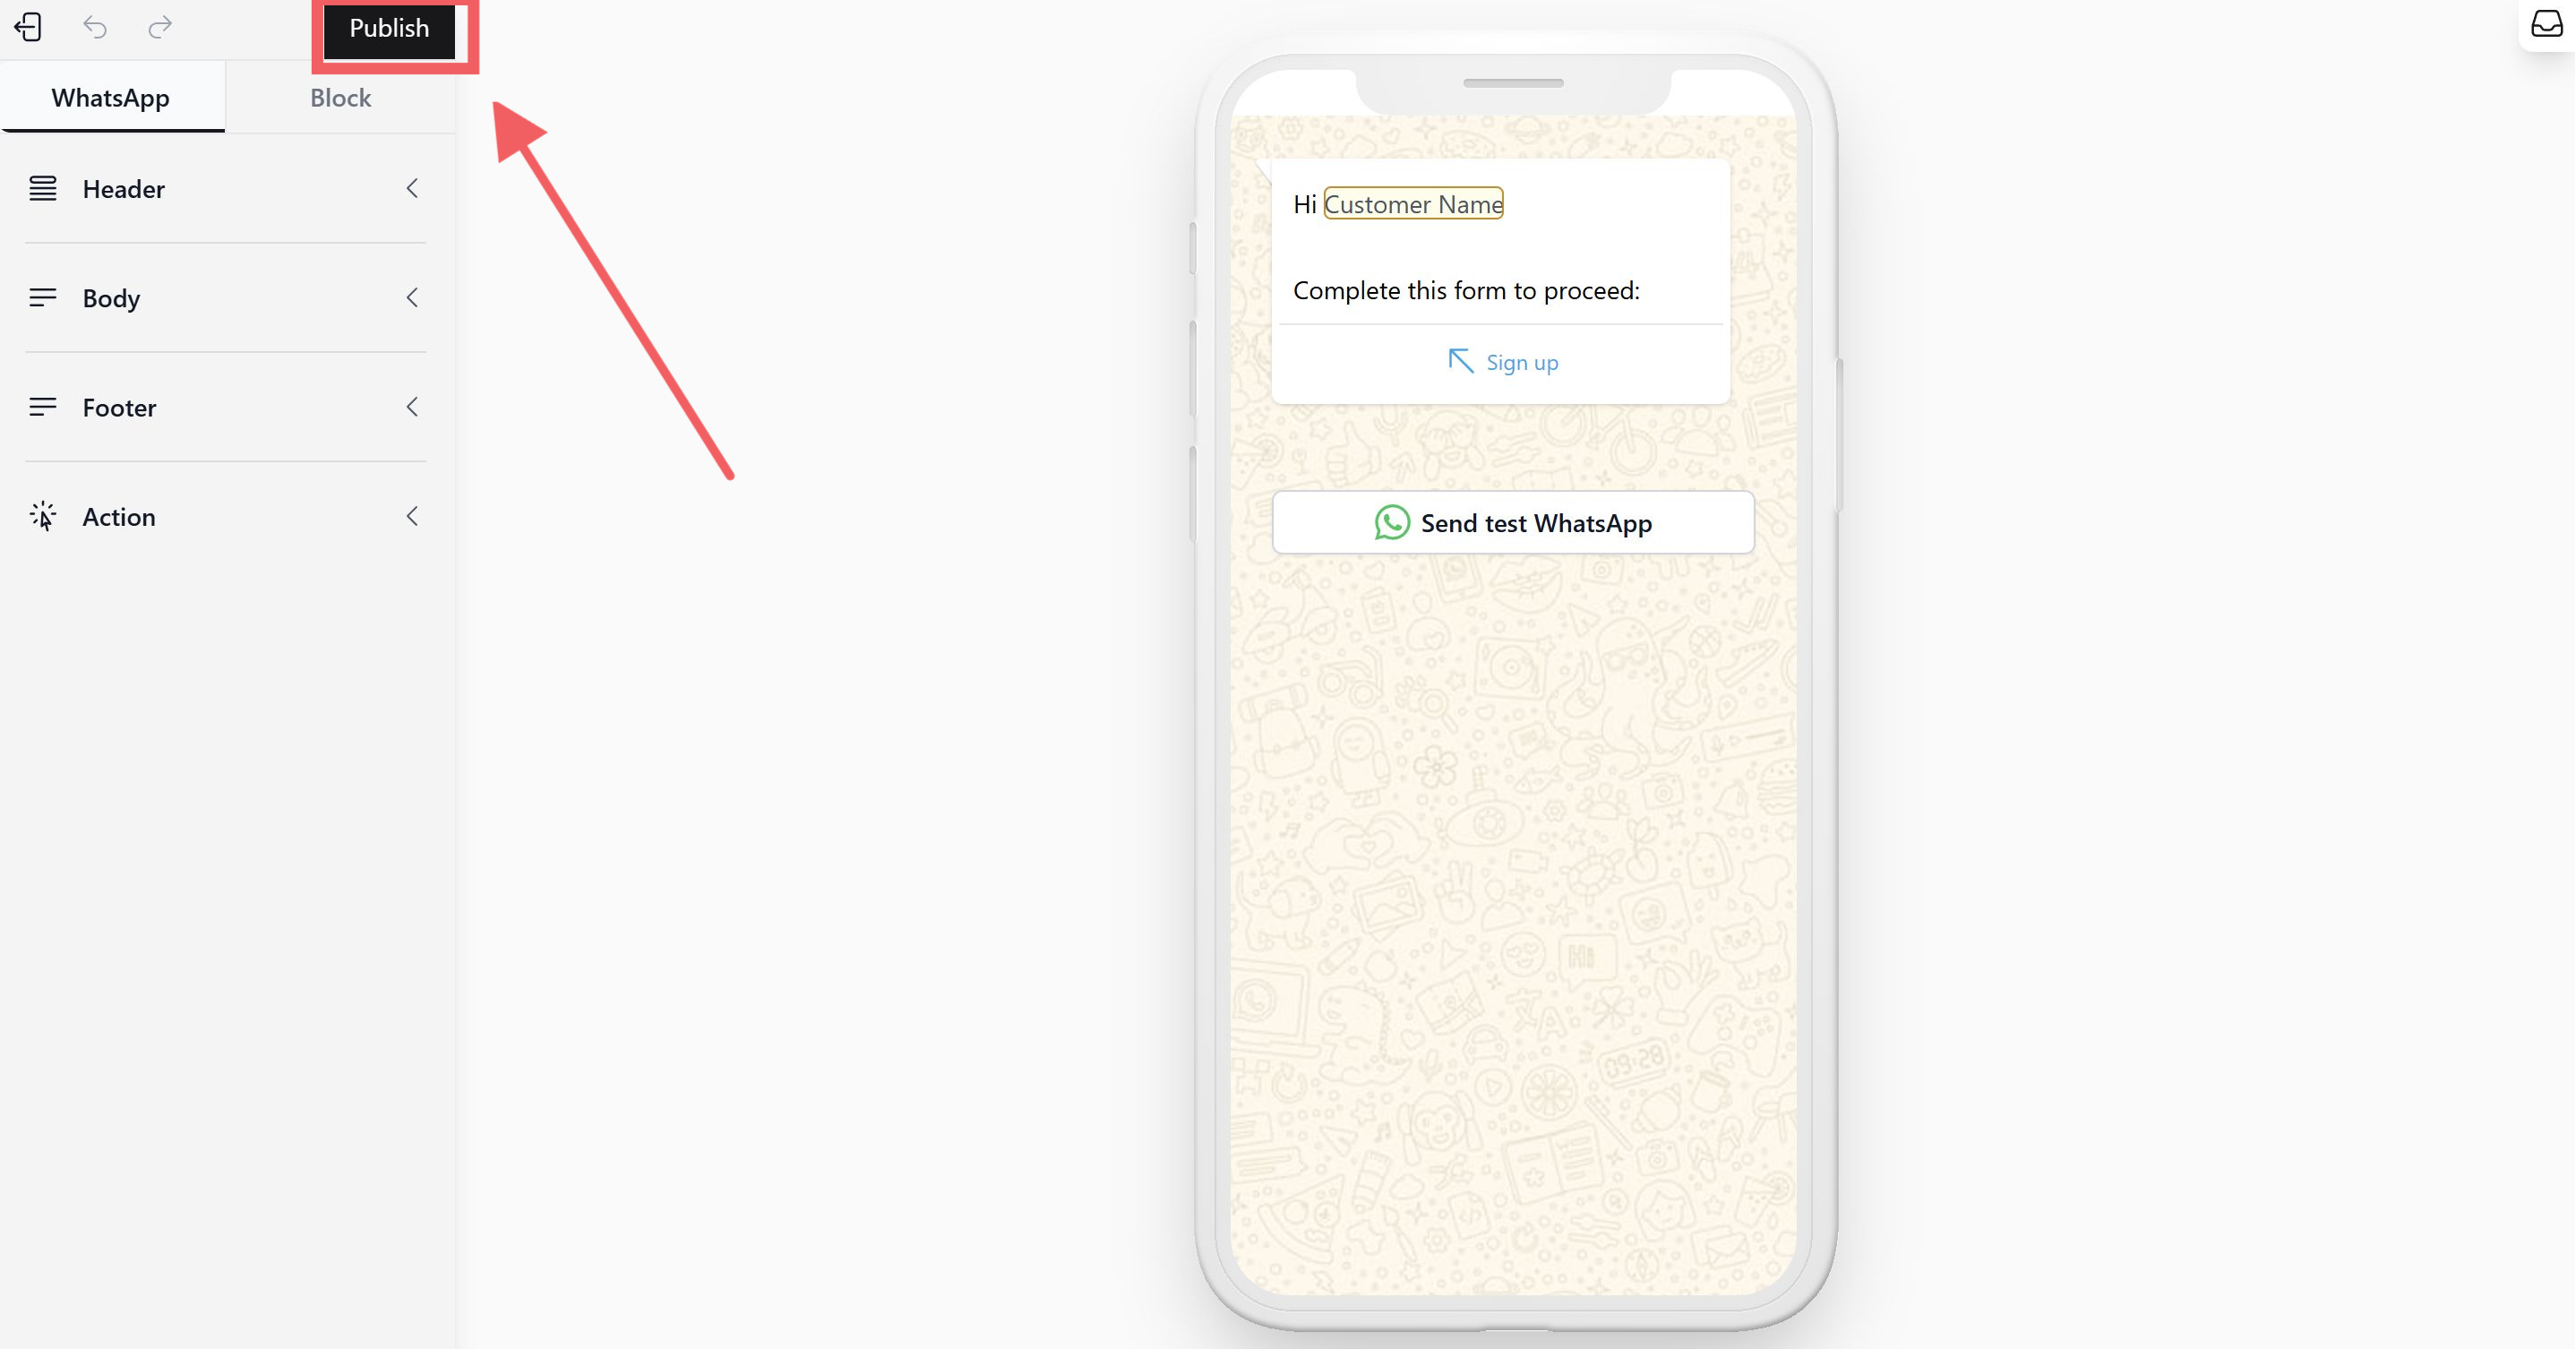
4.Once you have finished customizing, remember to click the **"Publish"** button.
---
> Regardless of the template type chosen, configure the main visual elements using the left sidebar.
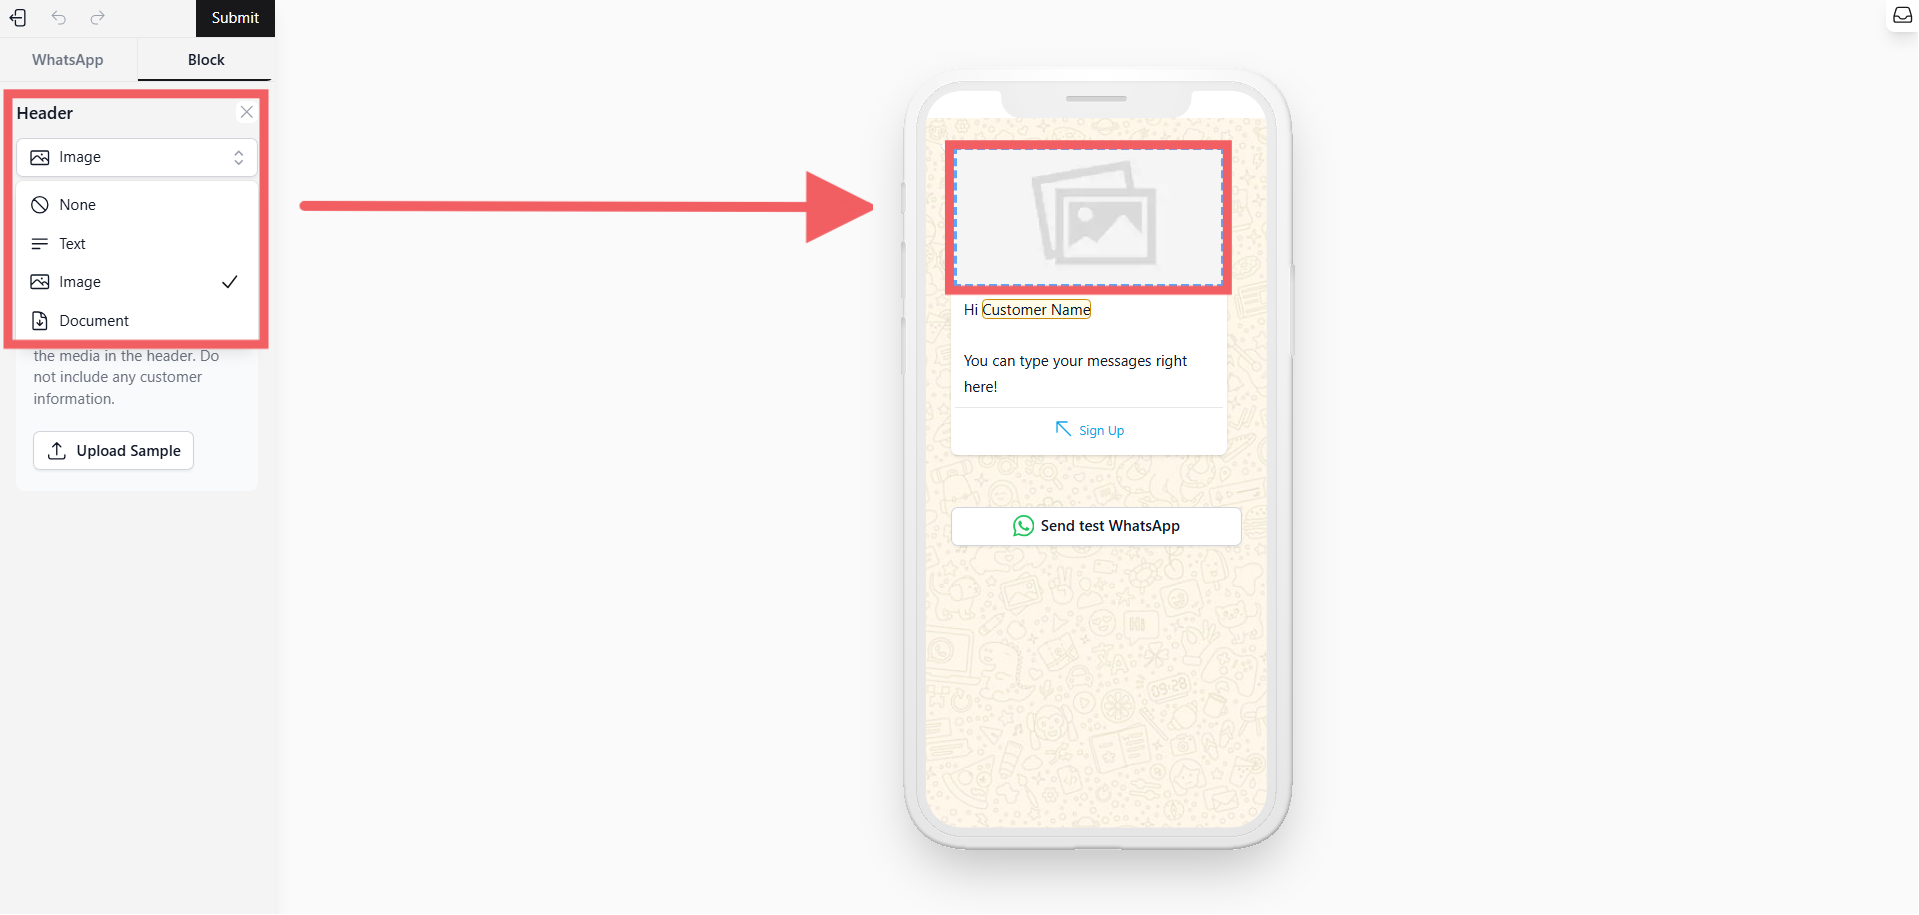
- Header: Choose to display Text, an Image, a Document, or keep it as None at the top of your message.
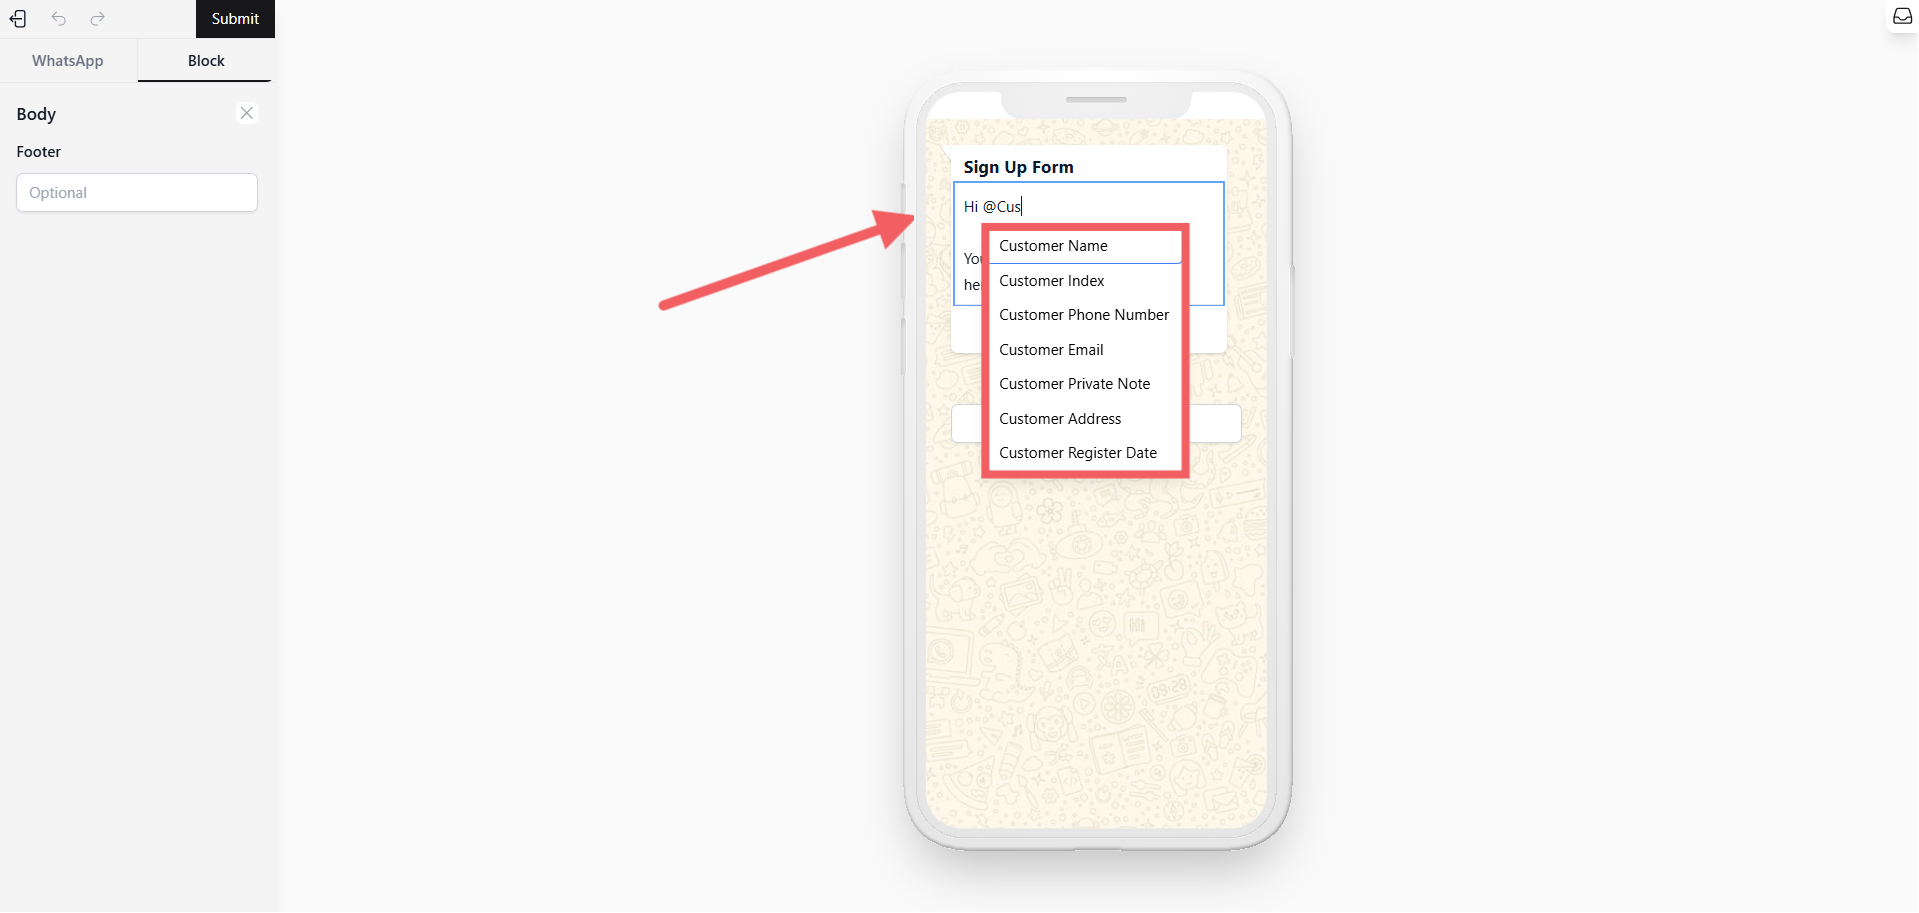
- Body: Type your main message. To make it personal, type @ where a dropdown list will appear to insert dynamic variables like \{\{Customer Name\}\} or \{\{Order Number\}\}.
Do not overuse variables, keep the message readable.
A message body cannot end with a variable. You must add at least one character or punctuation mark after the last variable.
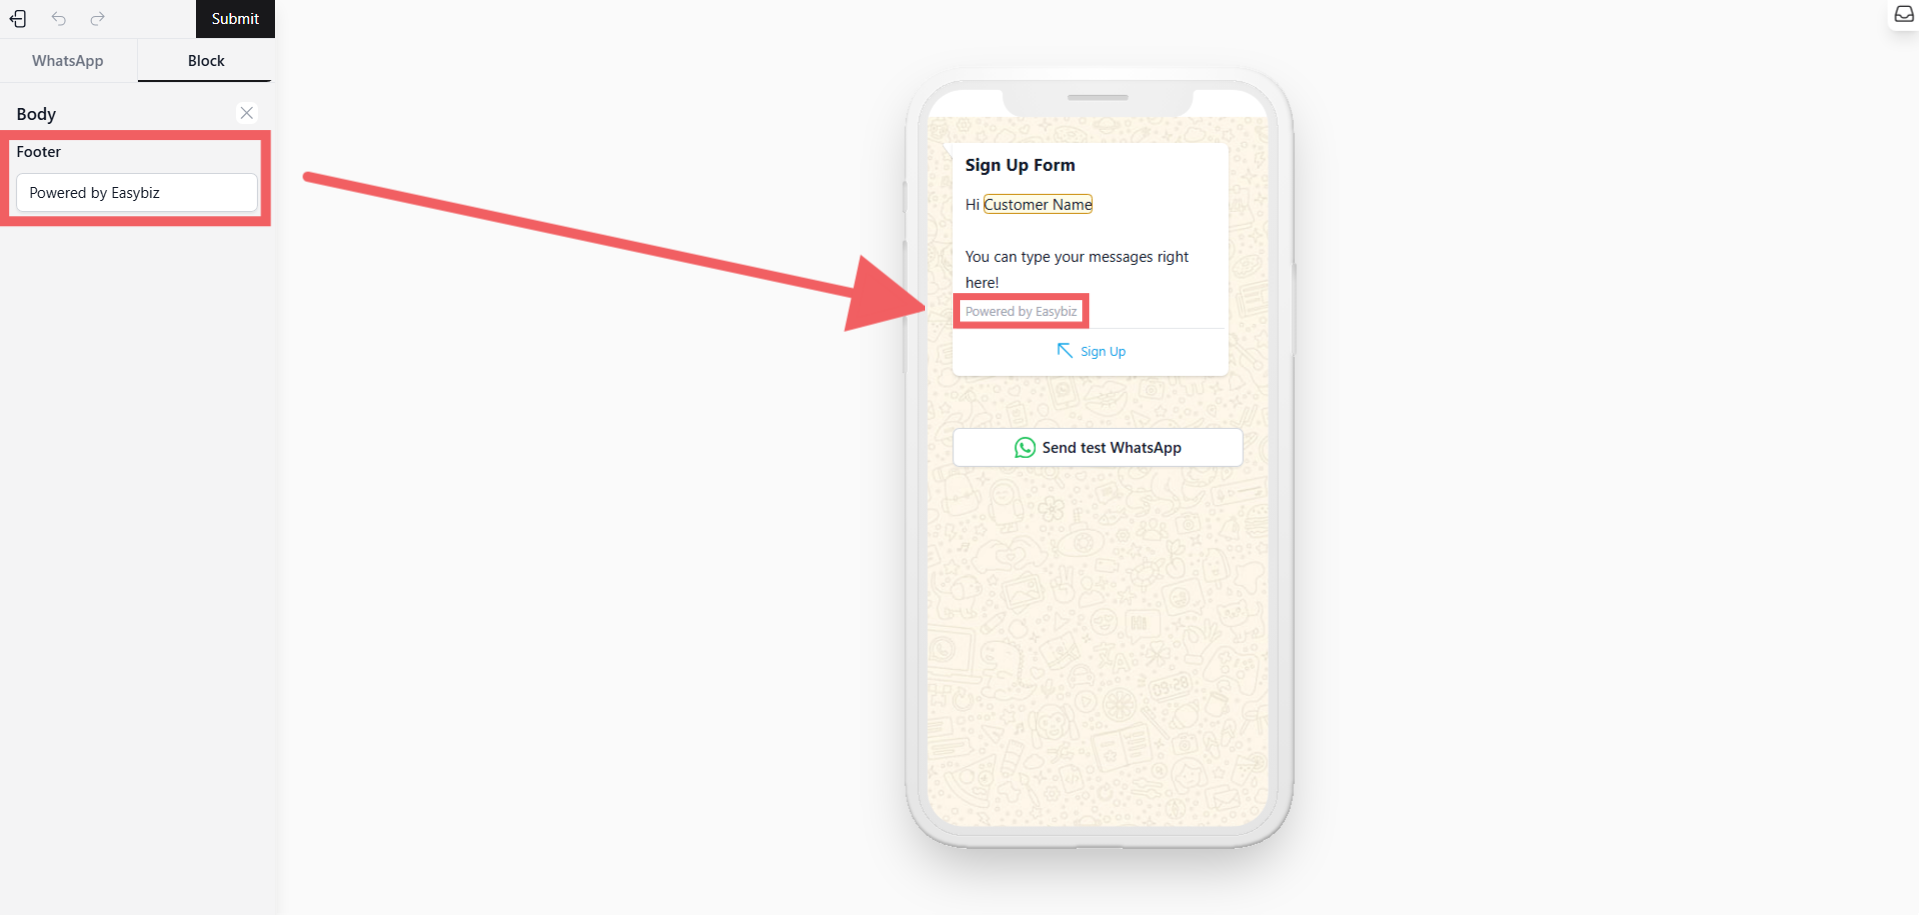
- Footer Add a short, fixed text at the very bottom. This is optional and cannot contain variables.
---
### 3. Configure the Action
- Click on the Action section in the sidebar. The settings here depend on the template type you selected in Step 1.
- Option A: If using "Mini App action"
- Action Type: Ensure Open mini App is selected.
- Button Text: Enter the label for the button (e.g., "Sign Up Now").
- Mini App: Select the specific, published Mini App you want to link to.
- Option B: If using "URL action"
- Action Type: Ensure Open Website is selected.
- Button Text: Enter the label for the button (e.g., "Visit Website").
- URL type: Select Static (fixed URL) or Dynamic (URL with variables), and enter the website address.
- Option C: If using "Reply Buttons" (Quick Replies)
- Action Type: Ensure Quick Replies is selected.
- Click + Add button.
- Select the Button type (Quick reply) and enter the text for the button.
- Repeat up to 3 times.
- Option D: If using "List action" (Select options)
- Action Type: Ensure Select options is selected.
- Button Text: Enter the text for the main button that opens the menu (e.g., "View Menu").
- List options: Click + Add item to define the menu choices.
- For each item, enter a Title (required) and a Description (optional), then click Save. You can add up to 10 items.
---
### 4. Send Message
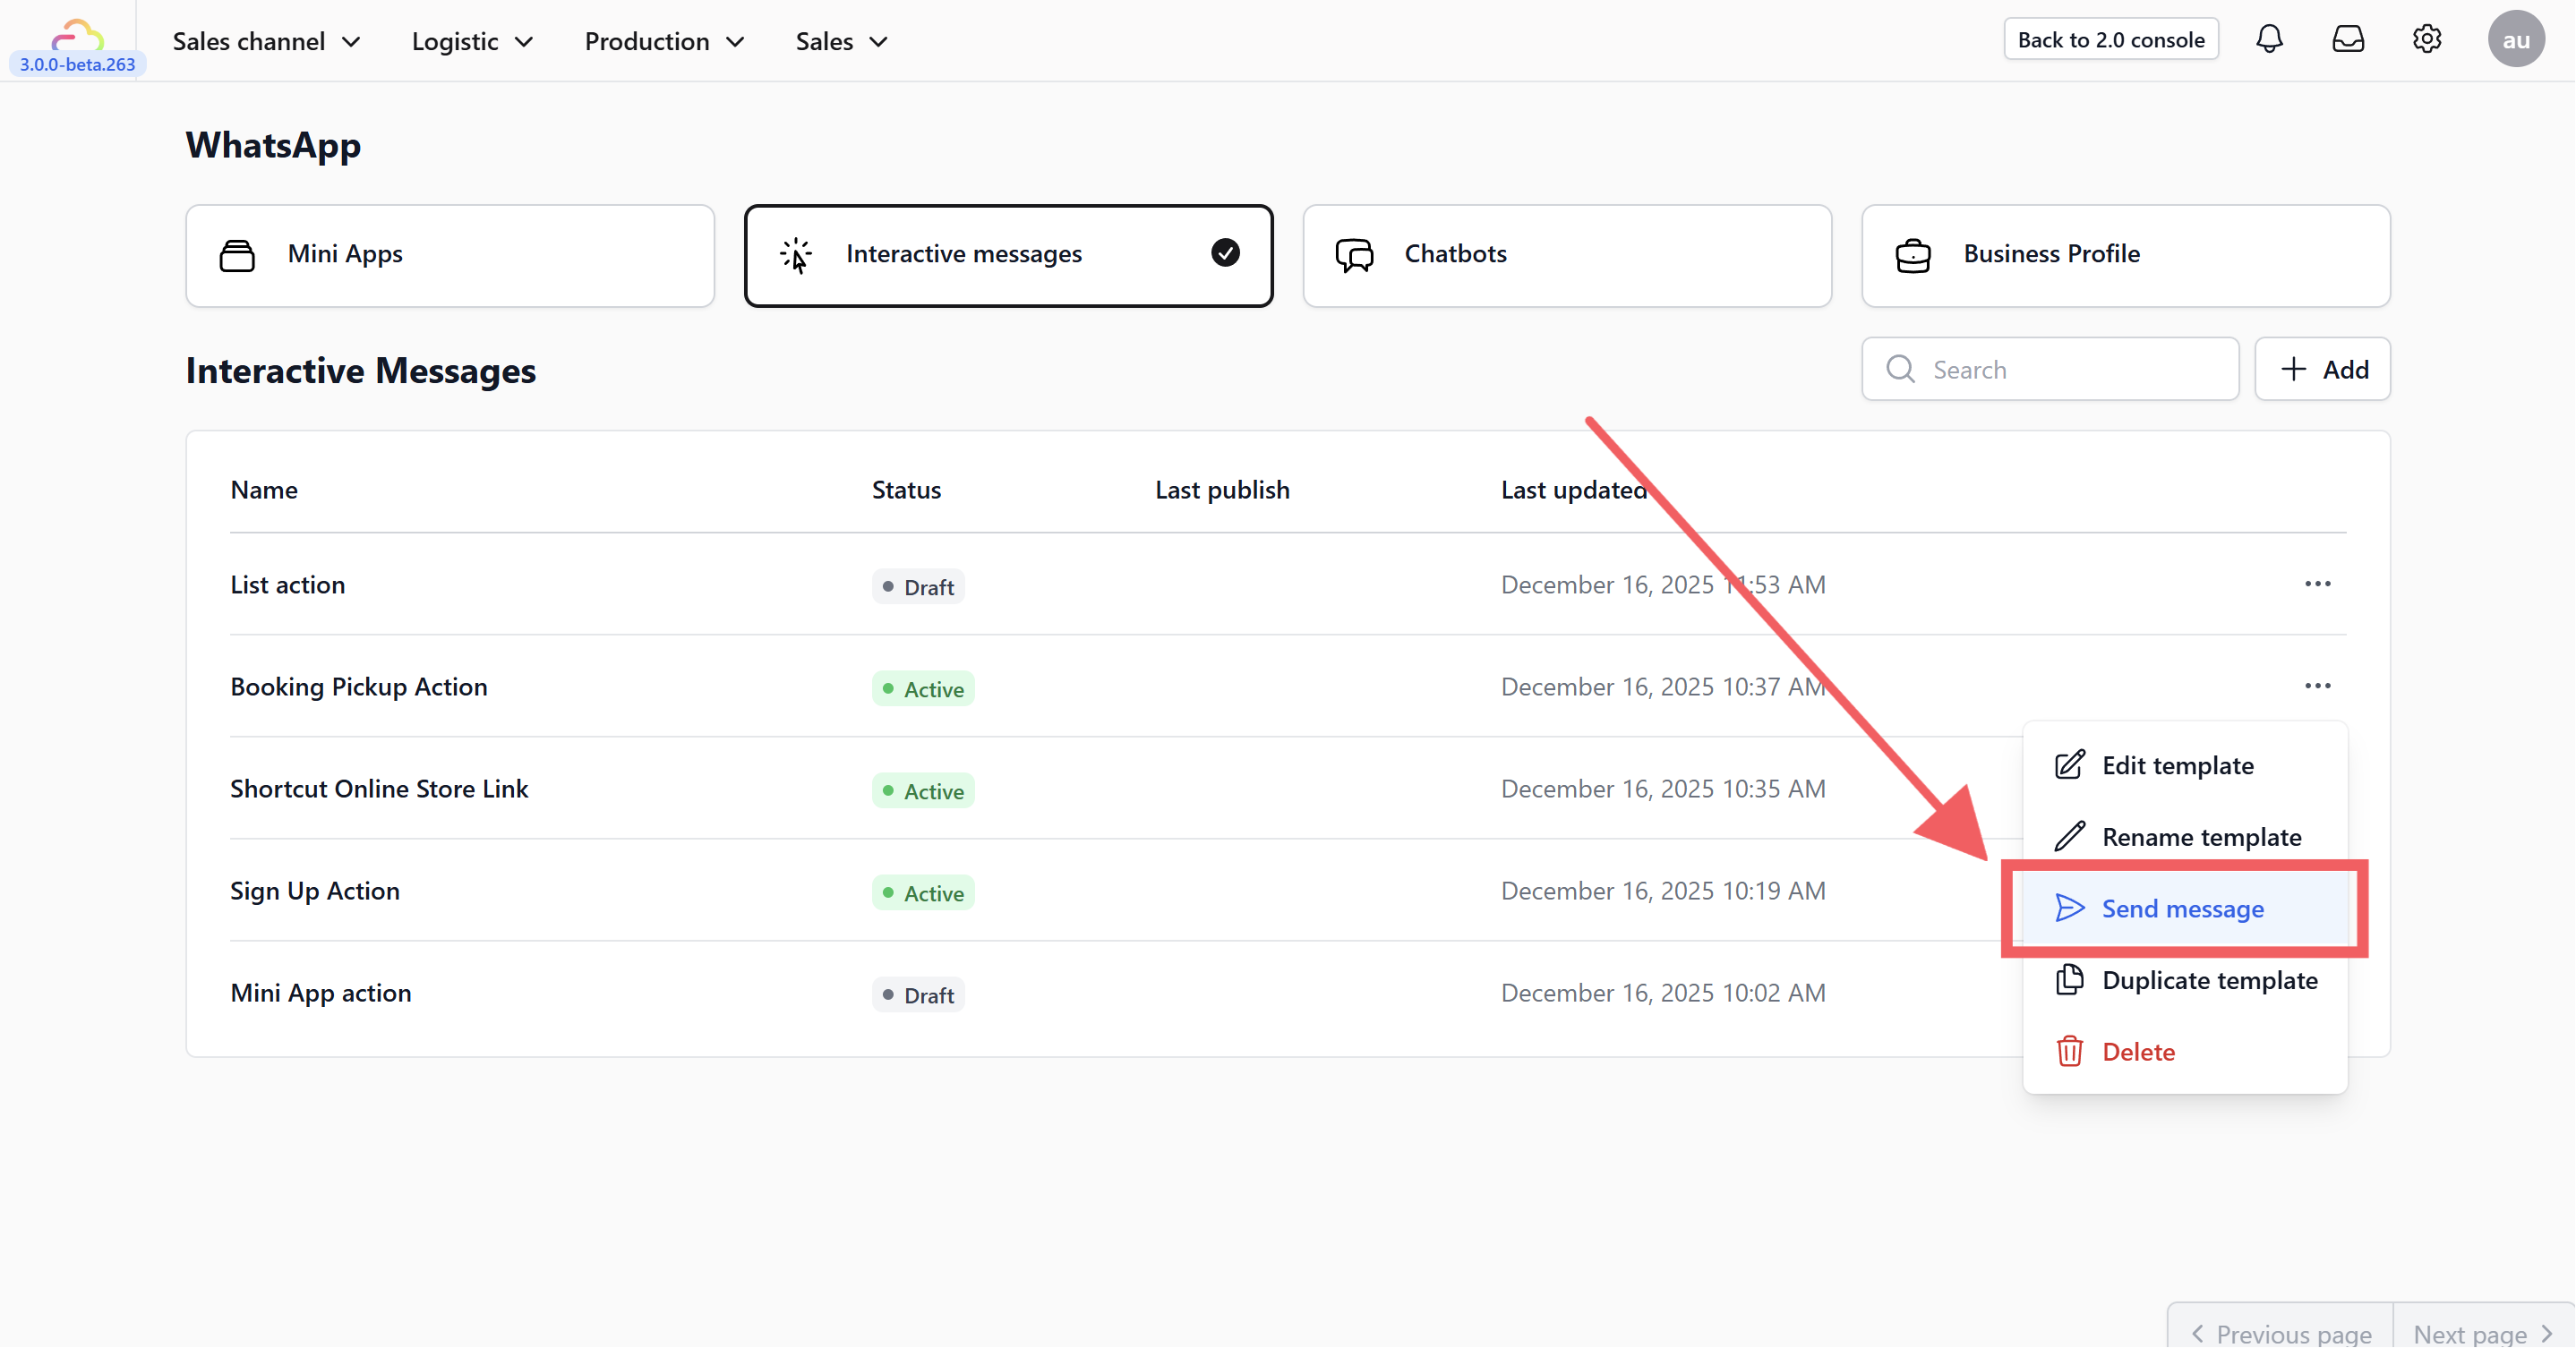
Once you are done, you can send the template message to WhatsApp by clicking the three dots next to the template.