## Where to Find Adjustment Options
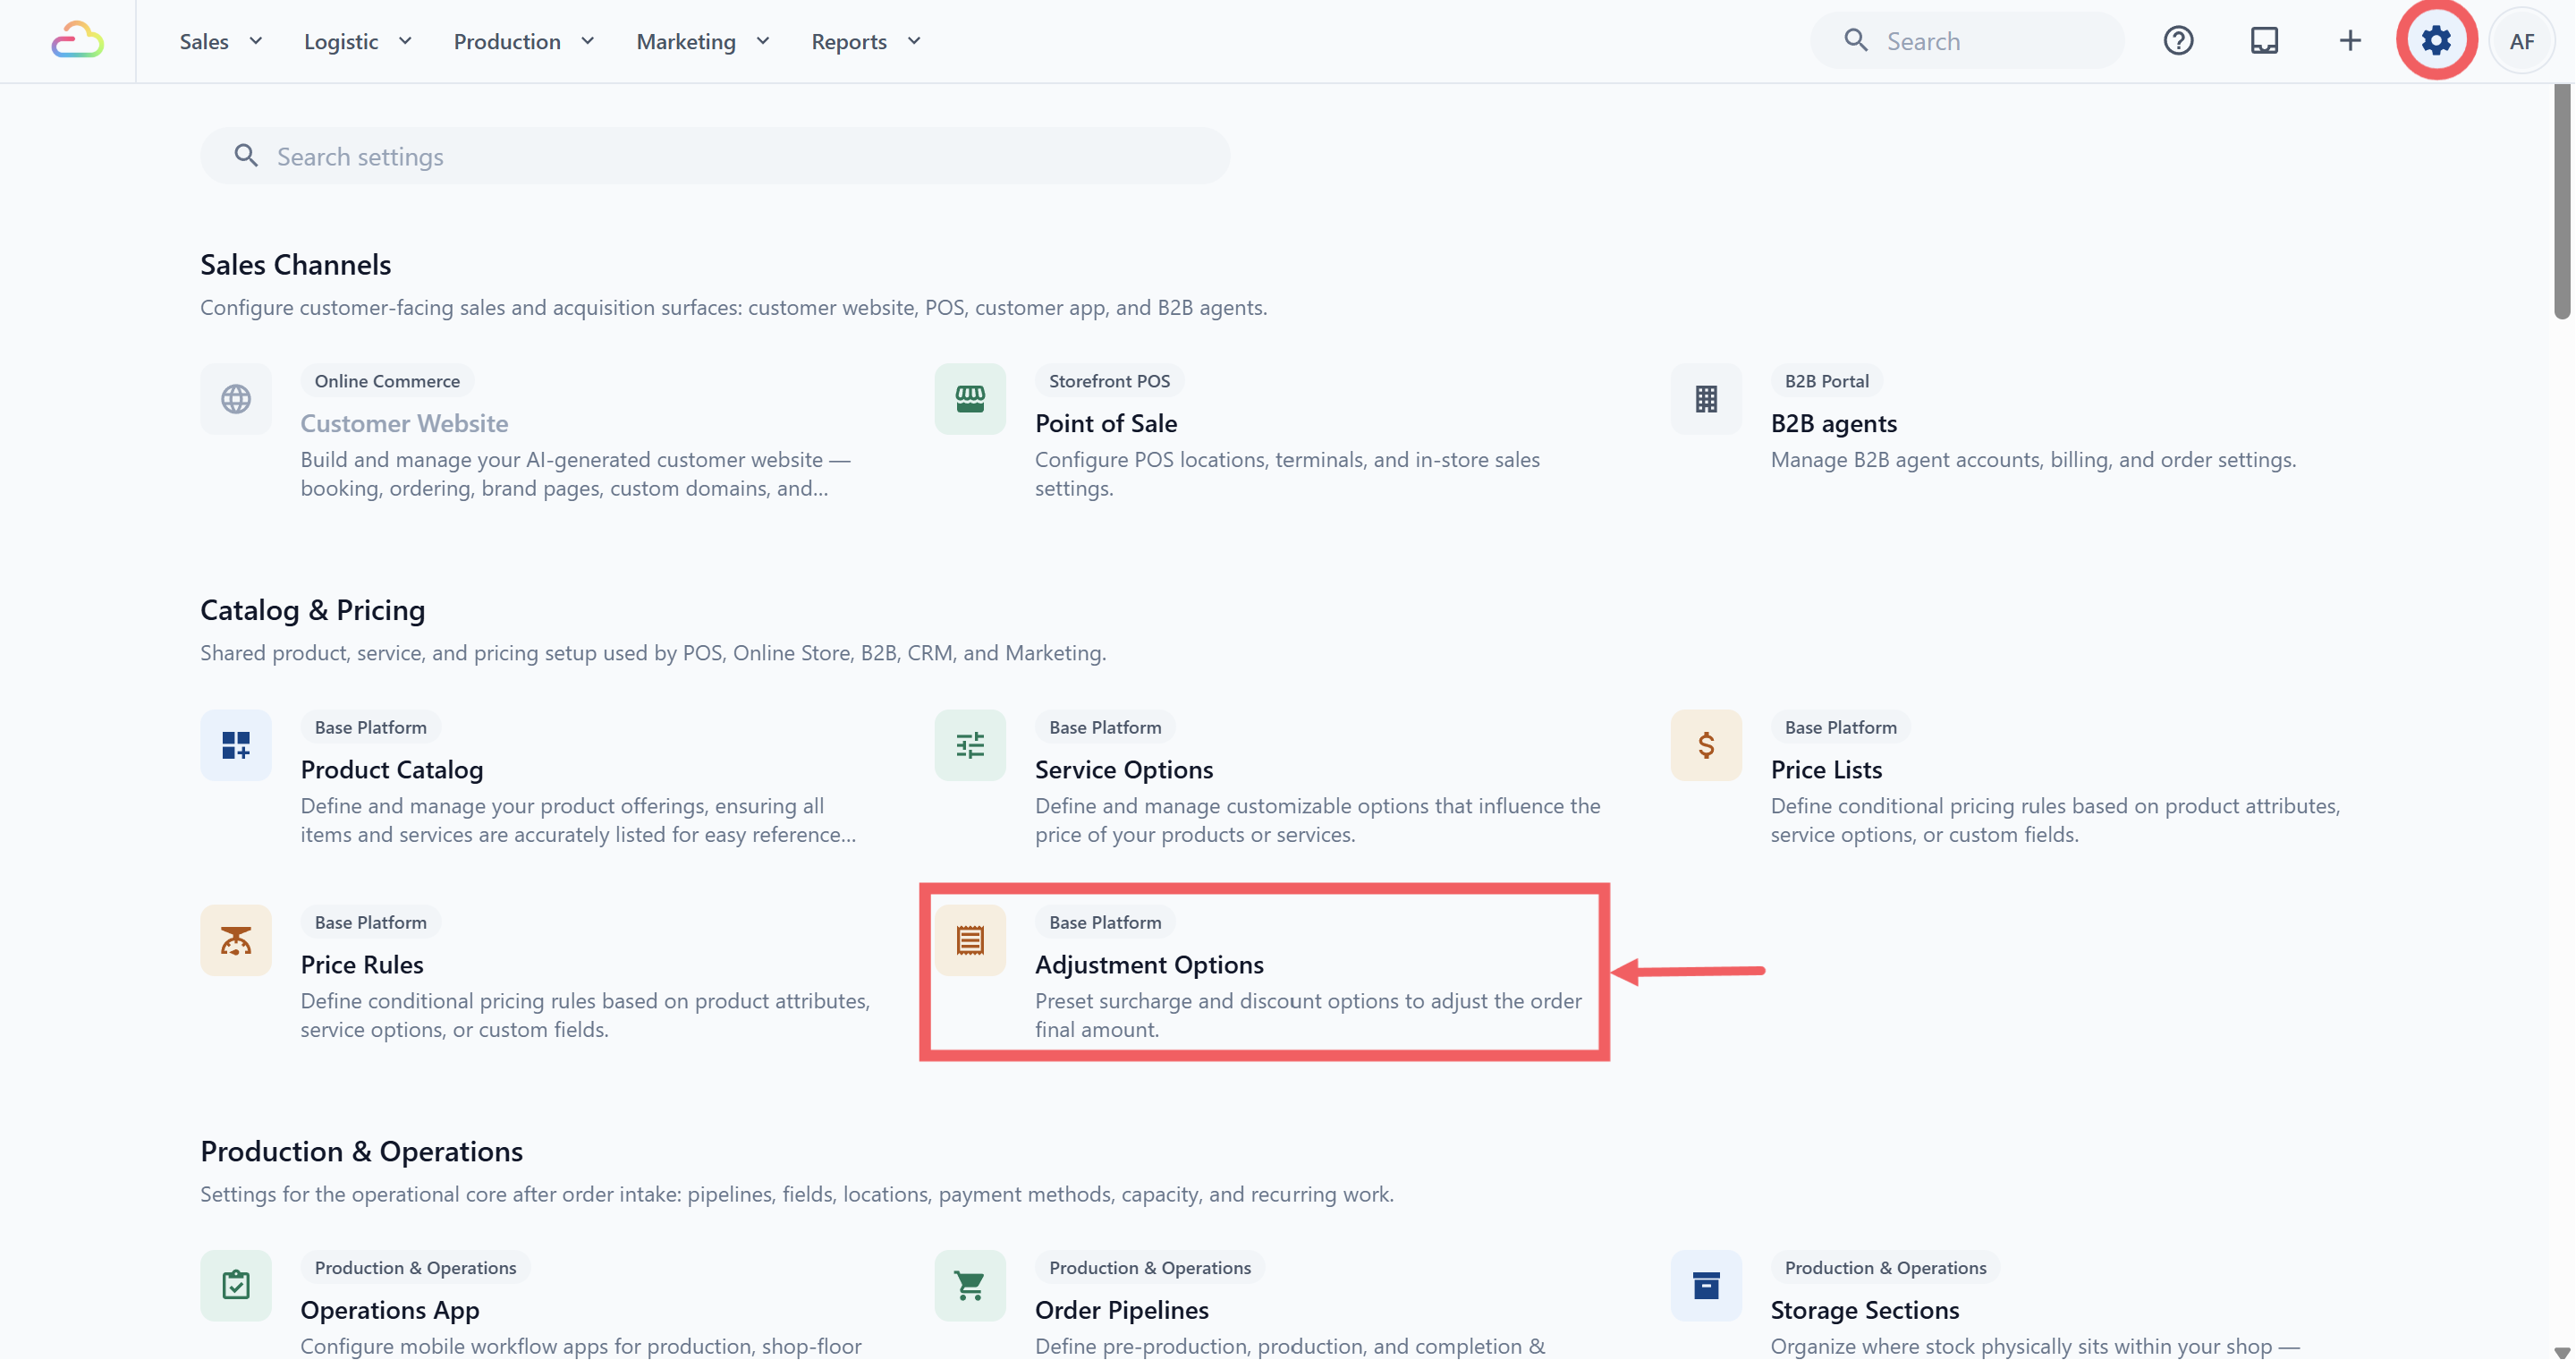
1. Click the ⚙️ Settings icon in the top-right corner.
2. Under the **Catalog & Pricing** section, click Adjustment Options.
3. Choose the **Discount** tab or the **Surcharge** tab at the top.
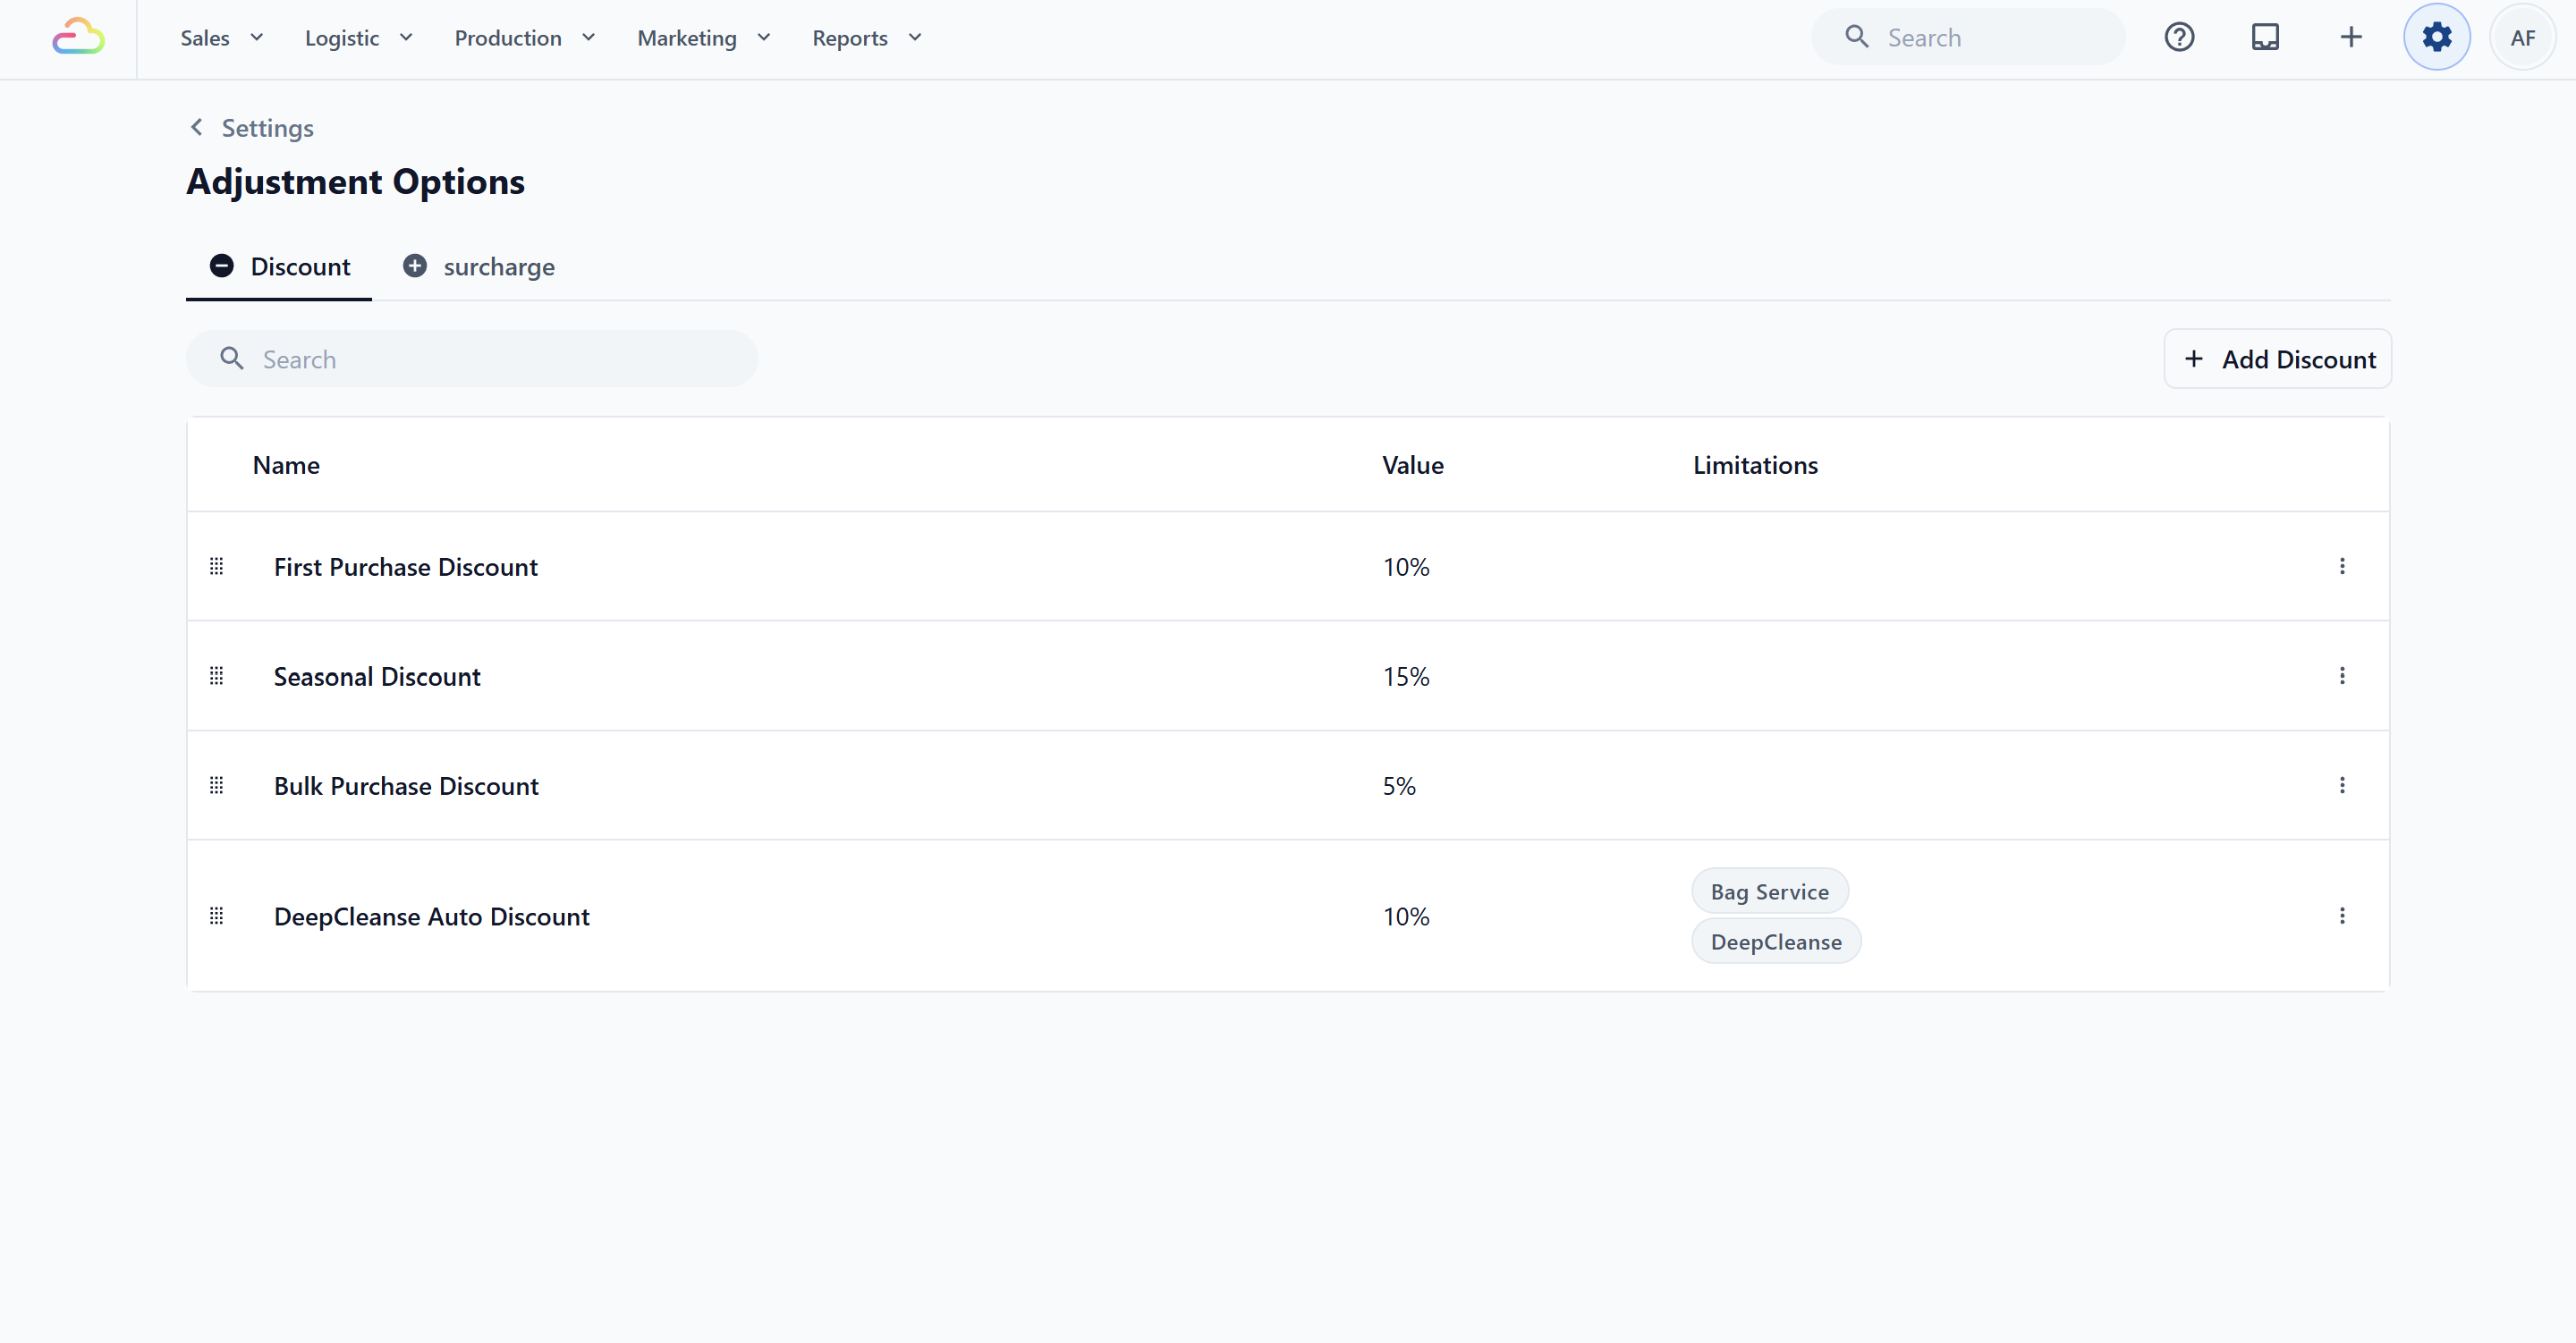
The table has three columns: **Name** (what staff and customers see), **Value** (a flat amount or a percentage), and **Limitations** (any restrictions you set). Use the Search bar to filter by name within the current tab. To find a Surcharge, switch to the Surcharge tab first.
---
## Create a New Option
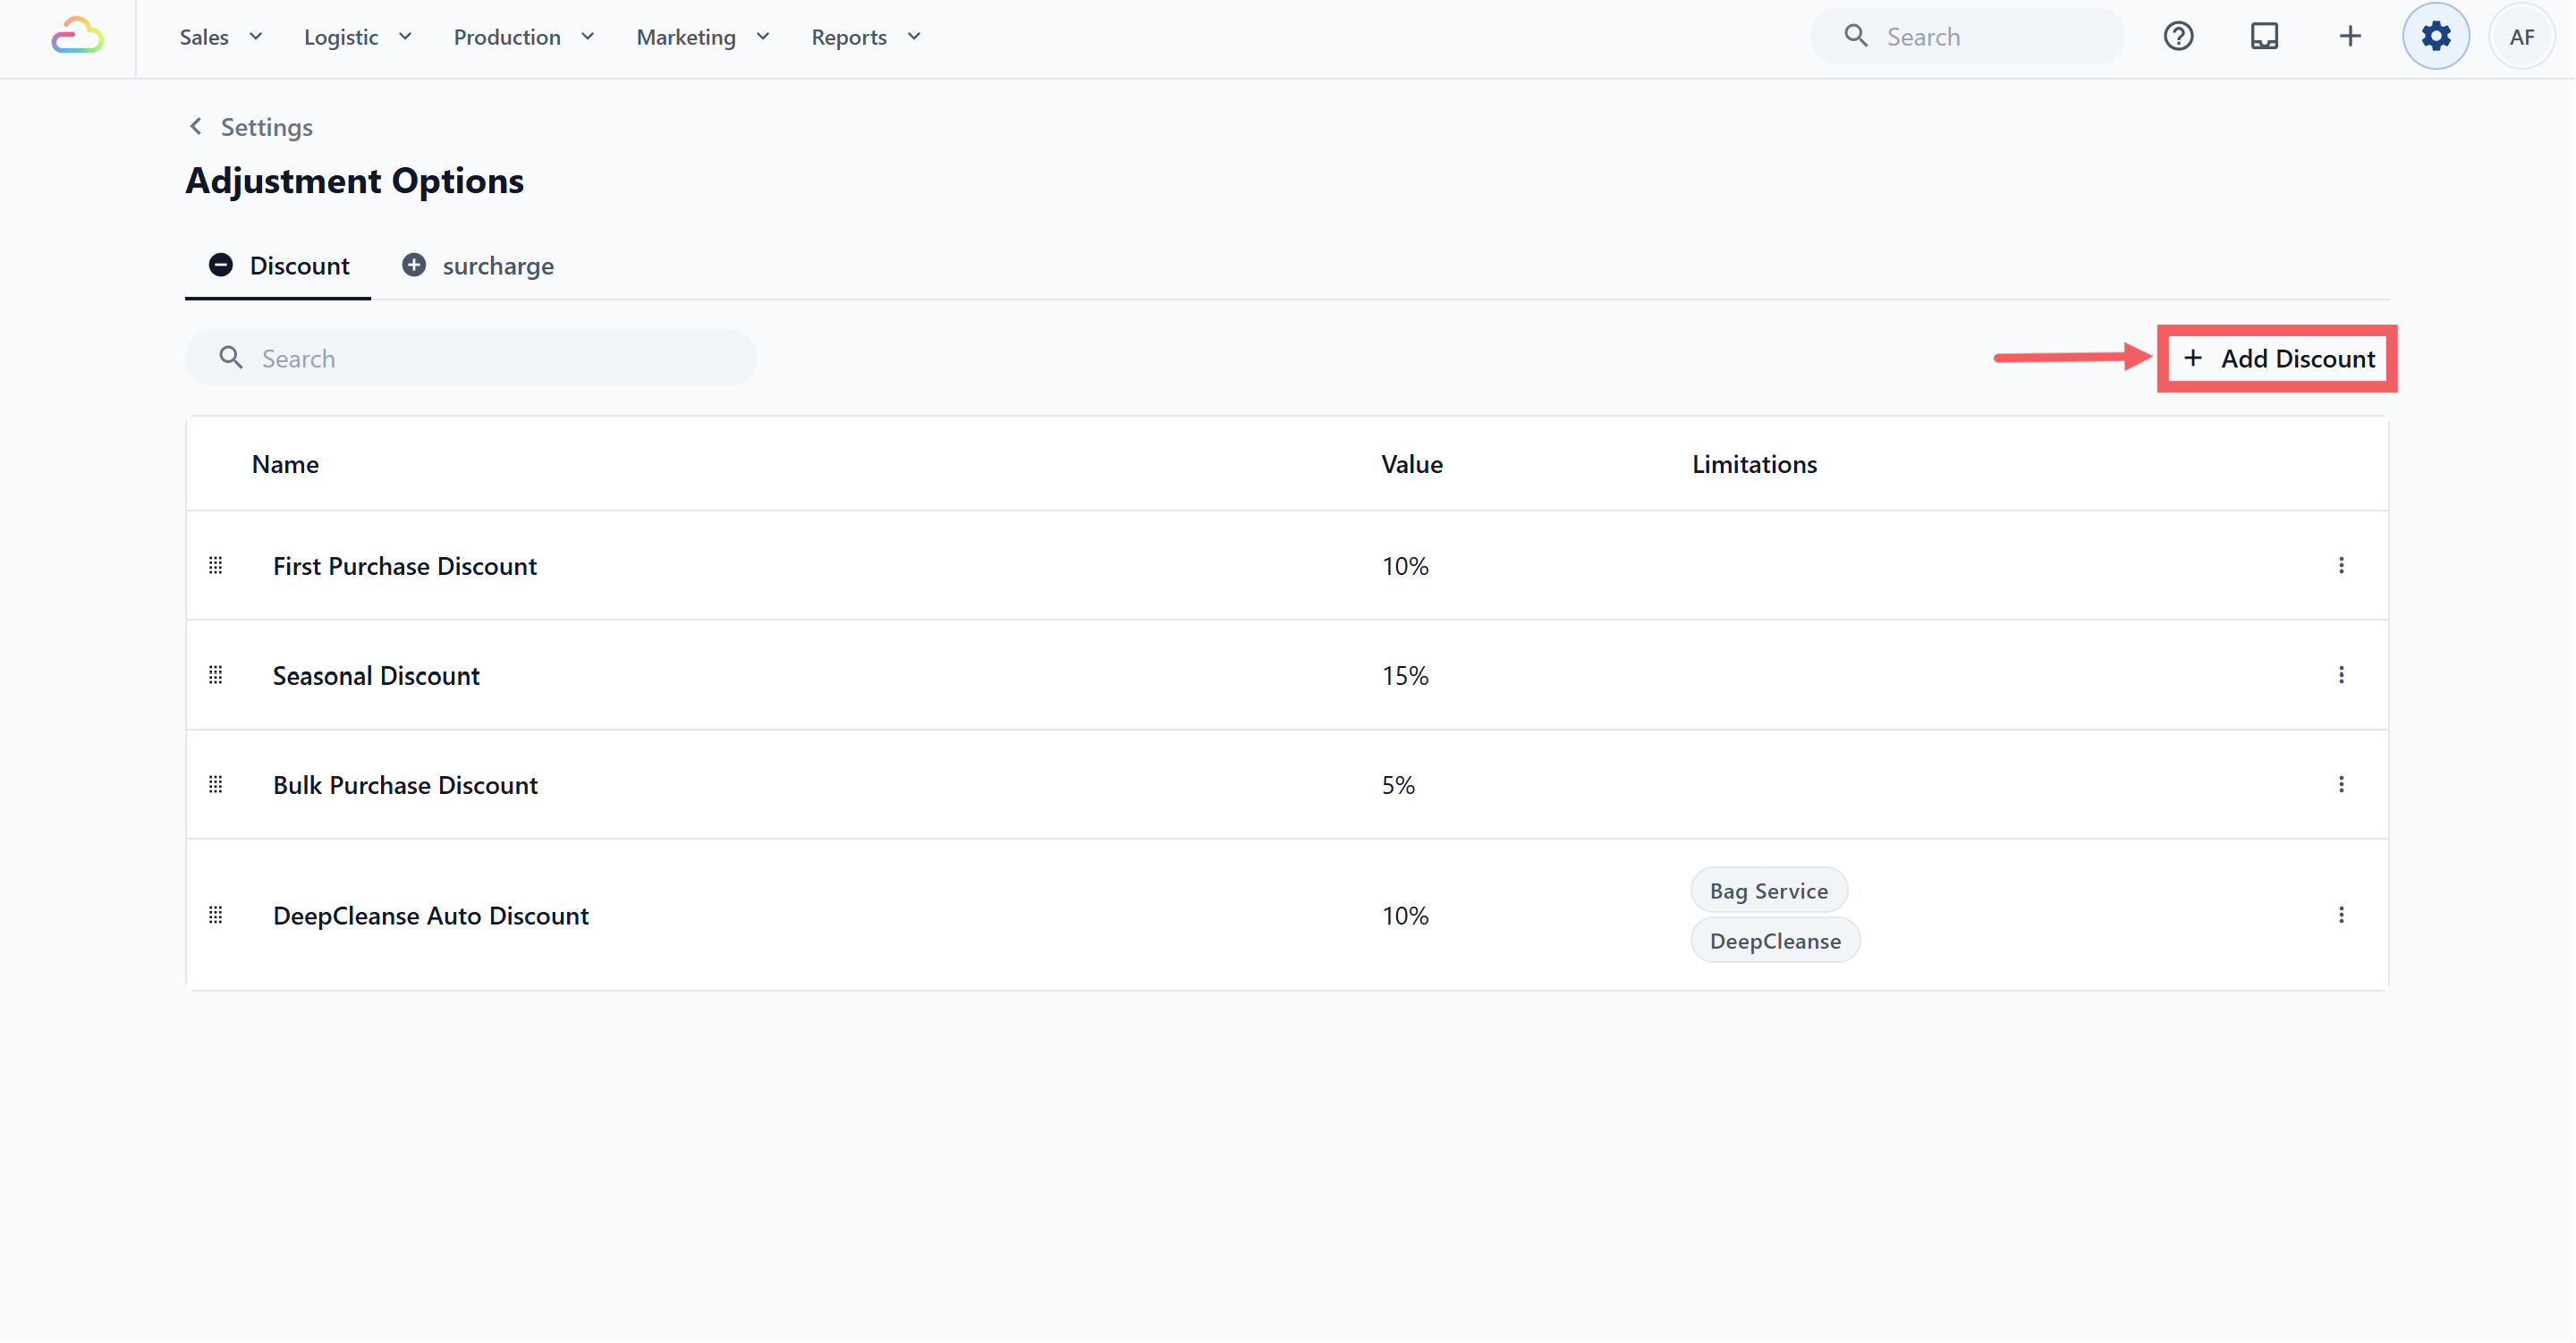
1. On the Discount tab click + Add Discount, or on the Surcharge tab click + Add Surcharge.
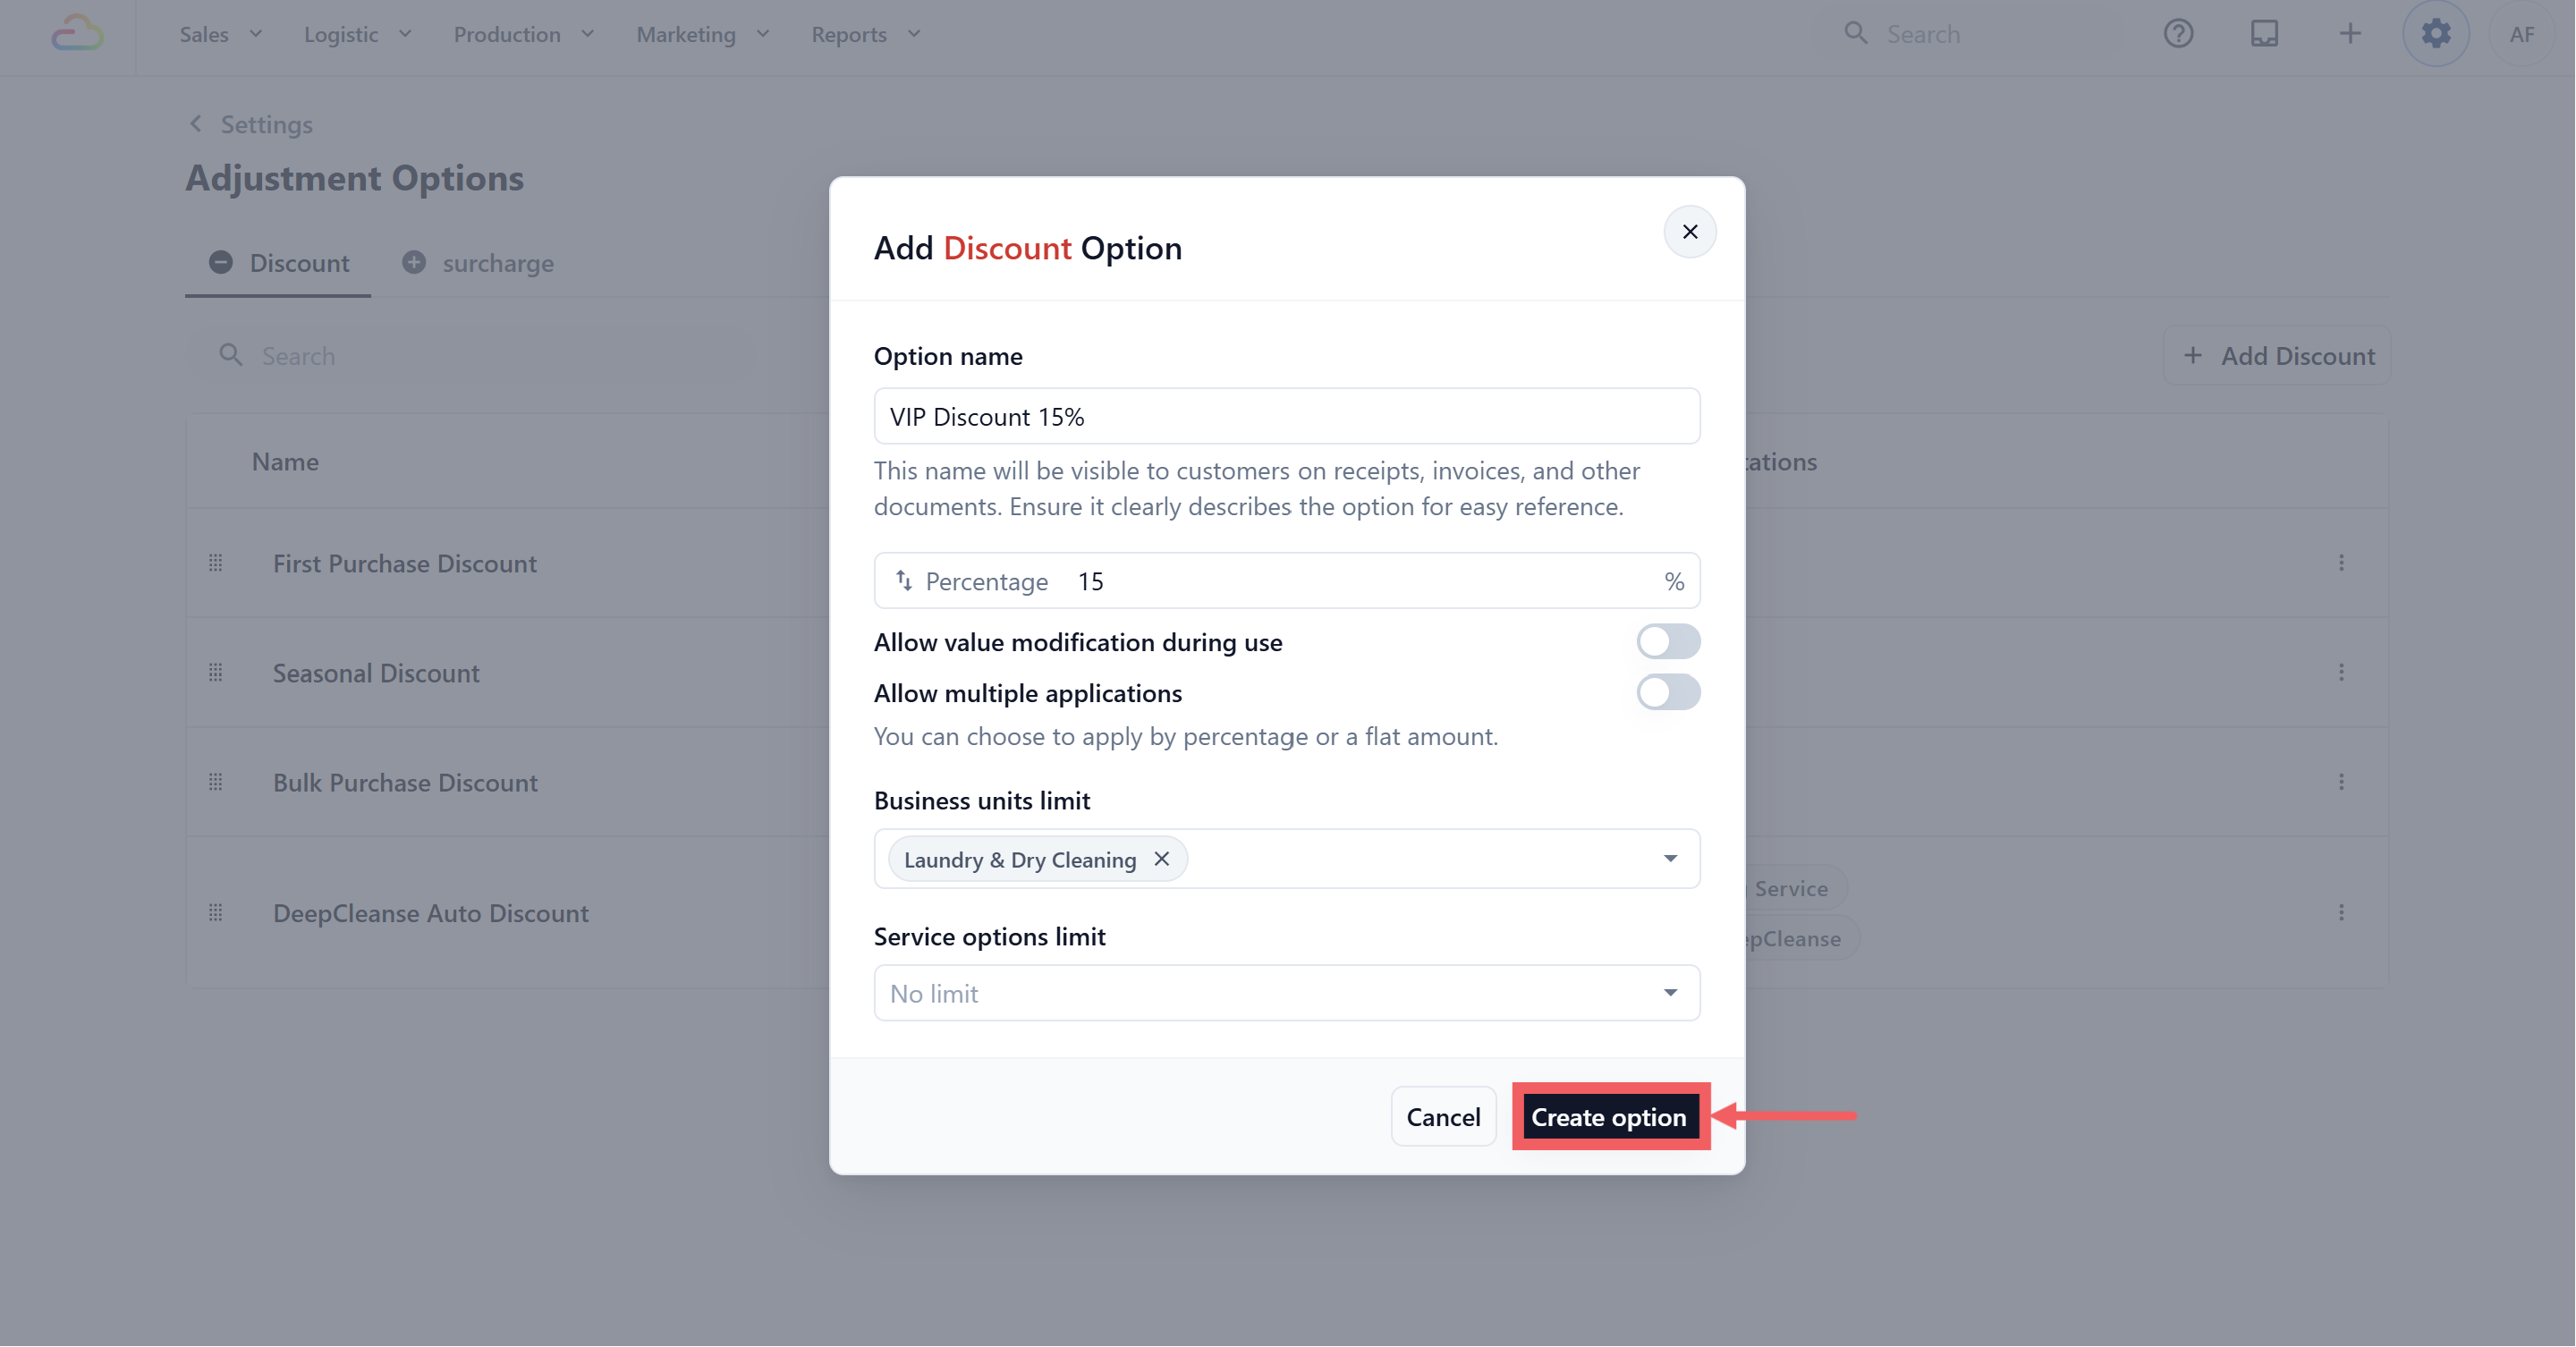
2. Fill in the dialog, [explained below](/docs/create-a-discount-or-surcharge-option#option-name).
3. Click Create option.
### Option name
A short, clear name. This is exactly what staff see in the cart and what the customer sees on the receipt and invoice, like "VIP Discount 10%" or "Delivery Surcharge".
Whatever you type here prints on receipts and invoices. Avoid internal codes or staff-only notes.
### Value : Percentage or Flat amount
Click the swap arrows at the left of the input to toggle.
| Pick this | Result |
| --- | --- |
| Percentage % | Takes a percentage off, or adds a percentage on top, of the order. Capped at 100%. |
| Flat amount | Subtracts or adds a fixed currency amount. |
**Allow value modification during use**
Off by default. Turn it on if staff needs to change the amount each time, like a goodwill discount the manager decides case by case. When this is off, the saved amount is fixed.
**Allow multiple applications**
Off by default. Turn it on if the same option can be added more than once on one order, like adding a Stain Treatment Fee per stained garment. Off means once per order.
---
## Limit Where an Option Can Be Used
Both fields are optional. Leave them empty for the option to work everywhere.
| Business units limit | Pick which Business Units (your lines of service like Laundry or Bag Repair) the option works on. Empty means all. |
| Service options limit | Pick which specific service options inside a business unit it applies to, like only certain garment or repair types. Empty means all. |
---
## How Tax Is Calculated
Tax follows the same rule as the rest of the order. If your price list is tax-inclusive, the discount or surcharge is treated as tax-inclusive too, and the system splits out the tax portion. If your price list is tax-exclusive, tax is added on top. You set tax once in your price list, and Adjustment Options follow it.
---
## Edit, Reorder, or Delete an Option
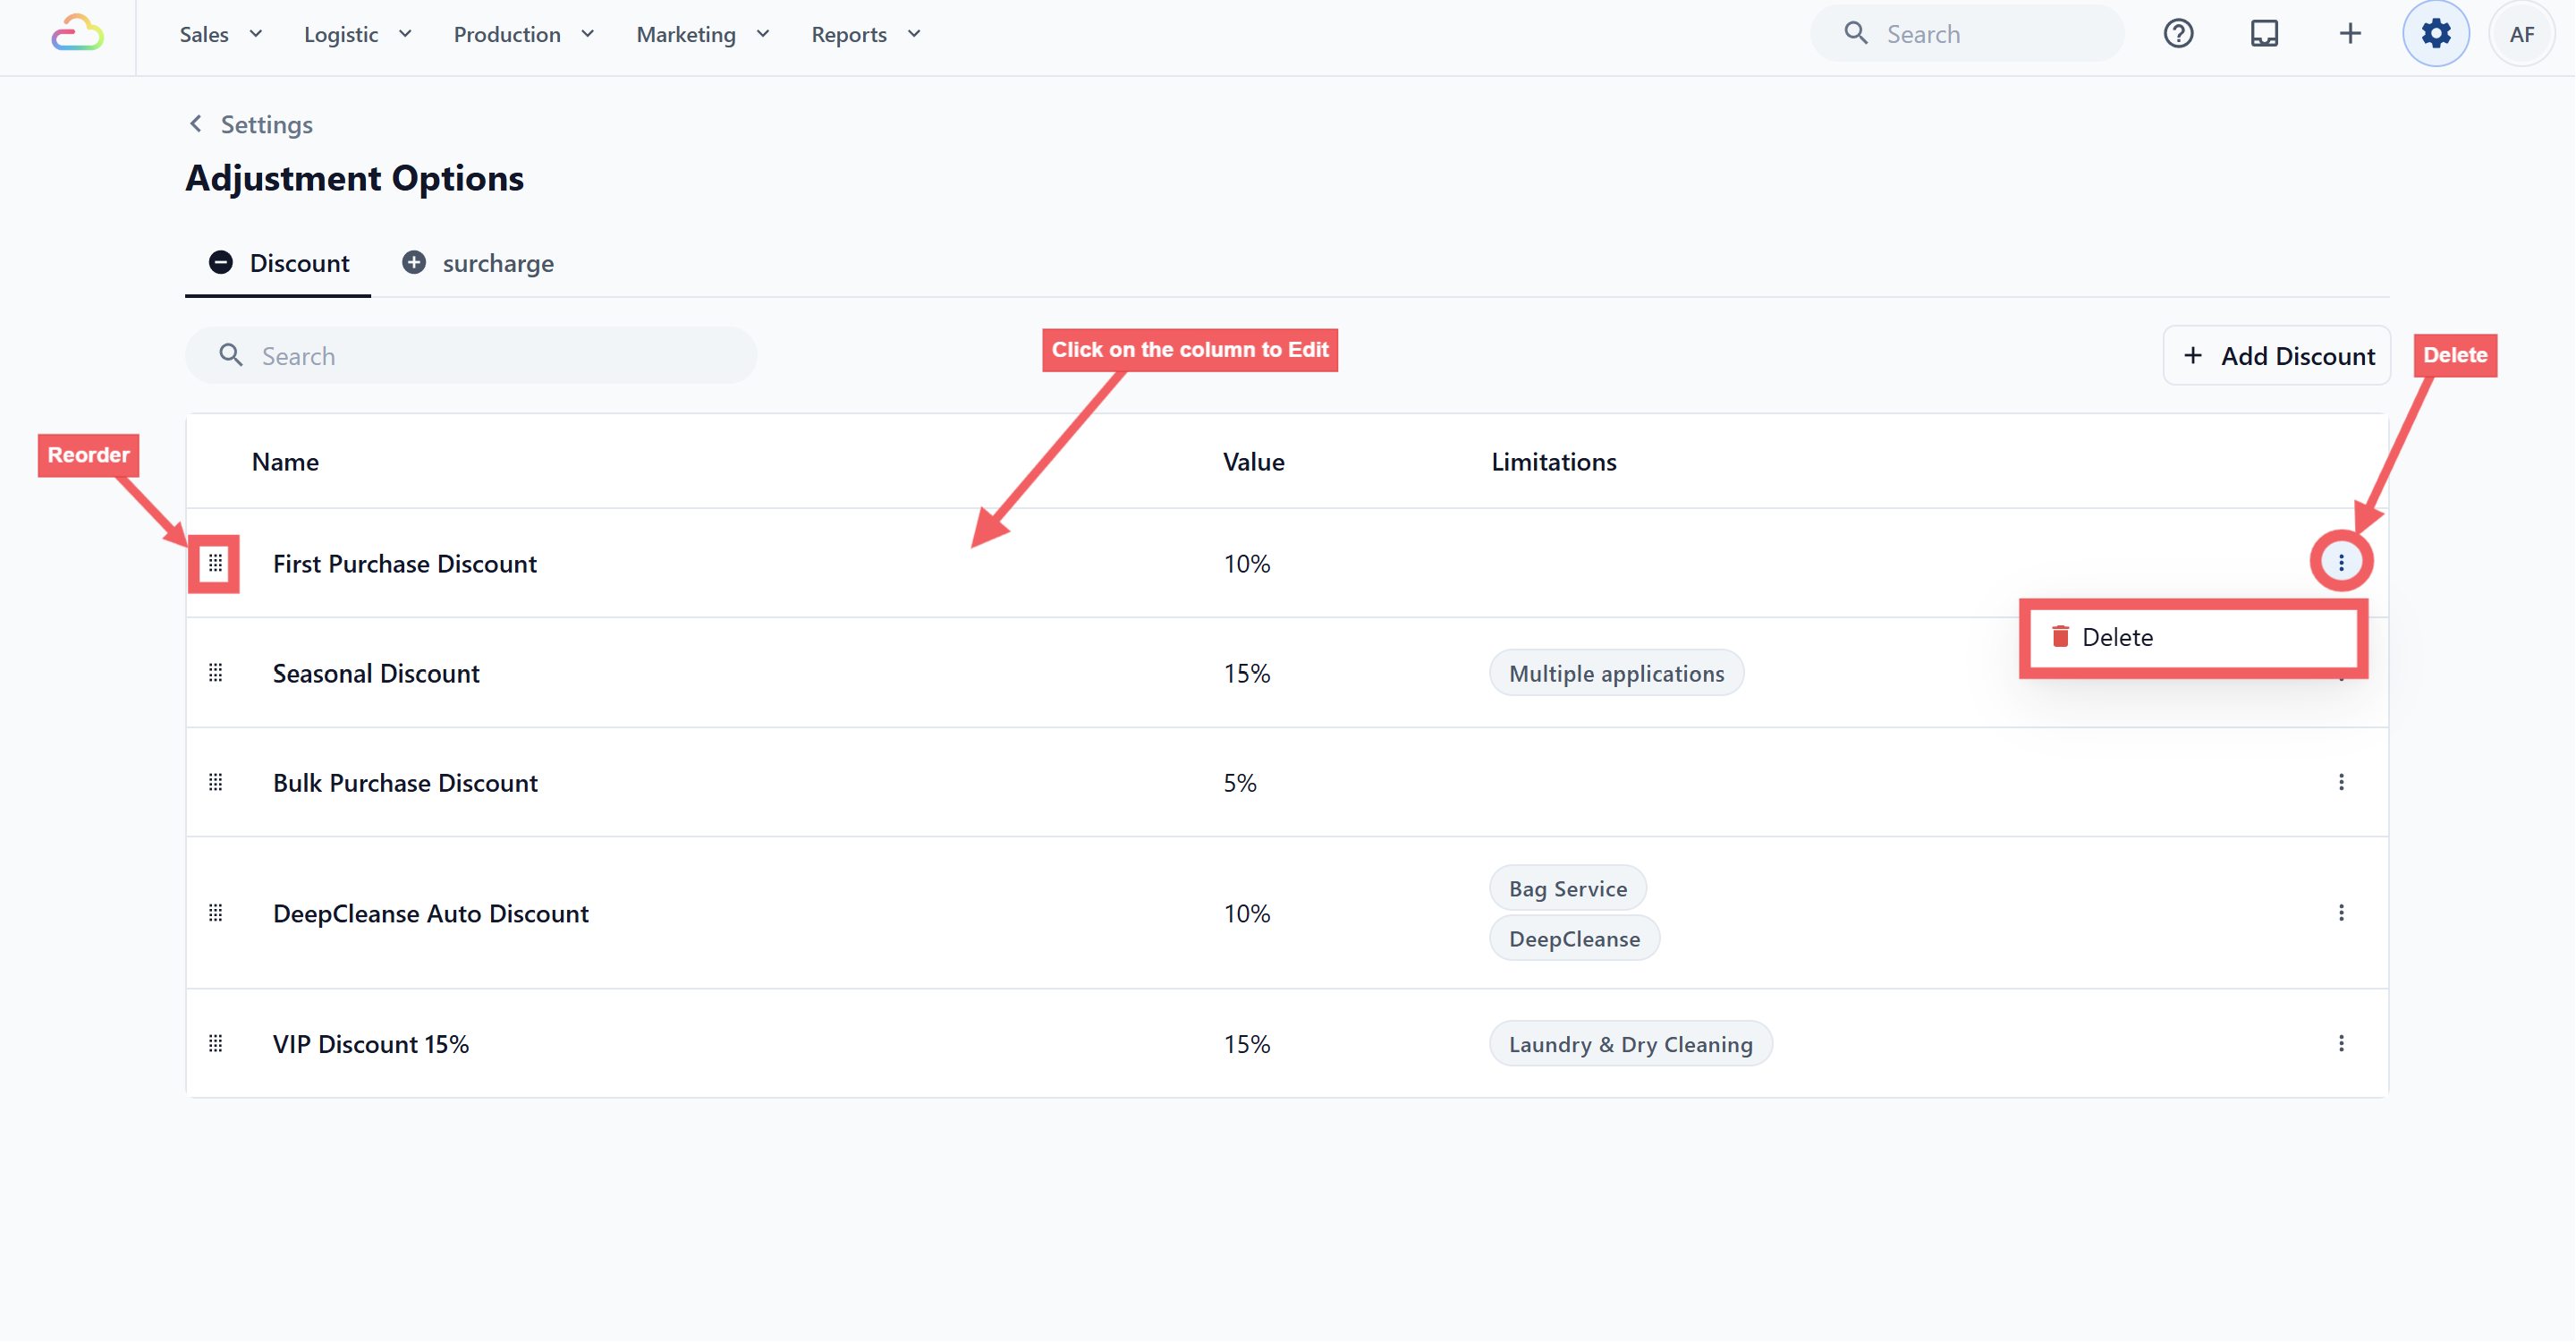
| Action | How |
| --- | --- |
| Edit | Click anywhere on the row, change the fields, and click Update option. |
| Reorder | Drag a row up or down. The order saves automatically and matches what staff see at the POS. |
| Delete | Click the three-dot menu at the right of the row, click Delete, and confirm. |
Deleting an option does not change past orders where it was applied. Old receipts keep the original name and amount. Deleting only stops it appearing in new orders.
## How to Use an Option at the POS
Once saved, the option appears as a button staff can tap on any order.
In the POS cart, look at the bottom-right for two round buttons:
| Button | Colour | What it opens |
| --- | --- | --- |
| + (plus) | Red | The list of Surcharge options |
| − (minus) | Green | The list of Discount options |
To apply one:
1. Add the customer's items to the cart as usual.
2. Tap the red + for a surcharges, or the green − for a discounts.
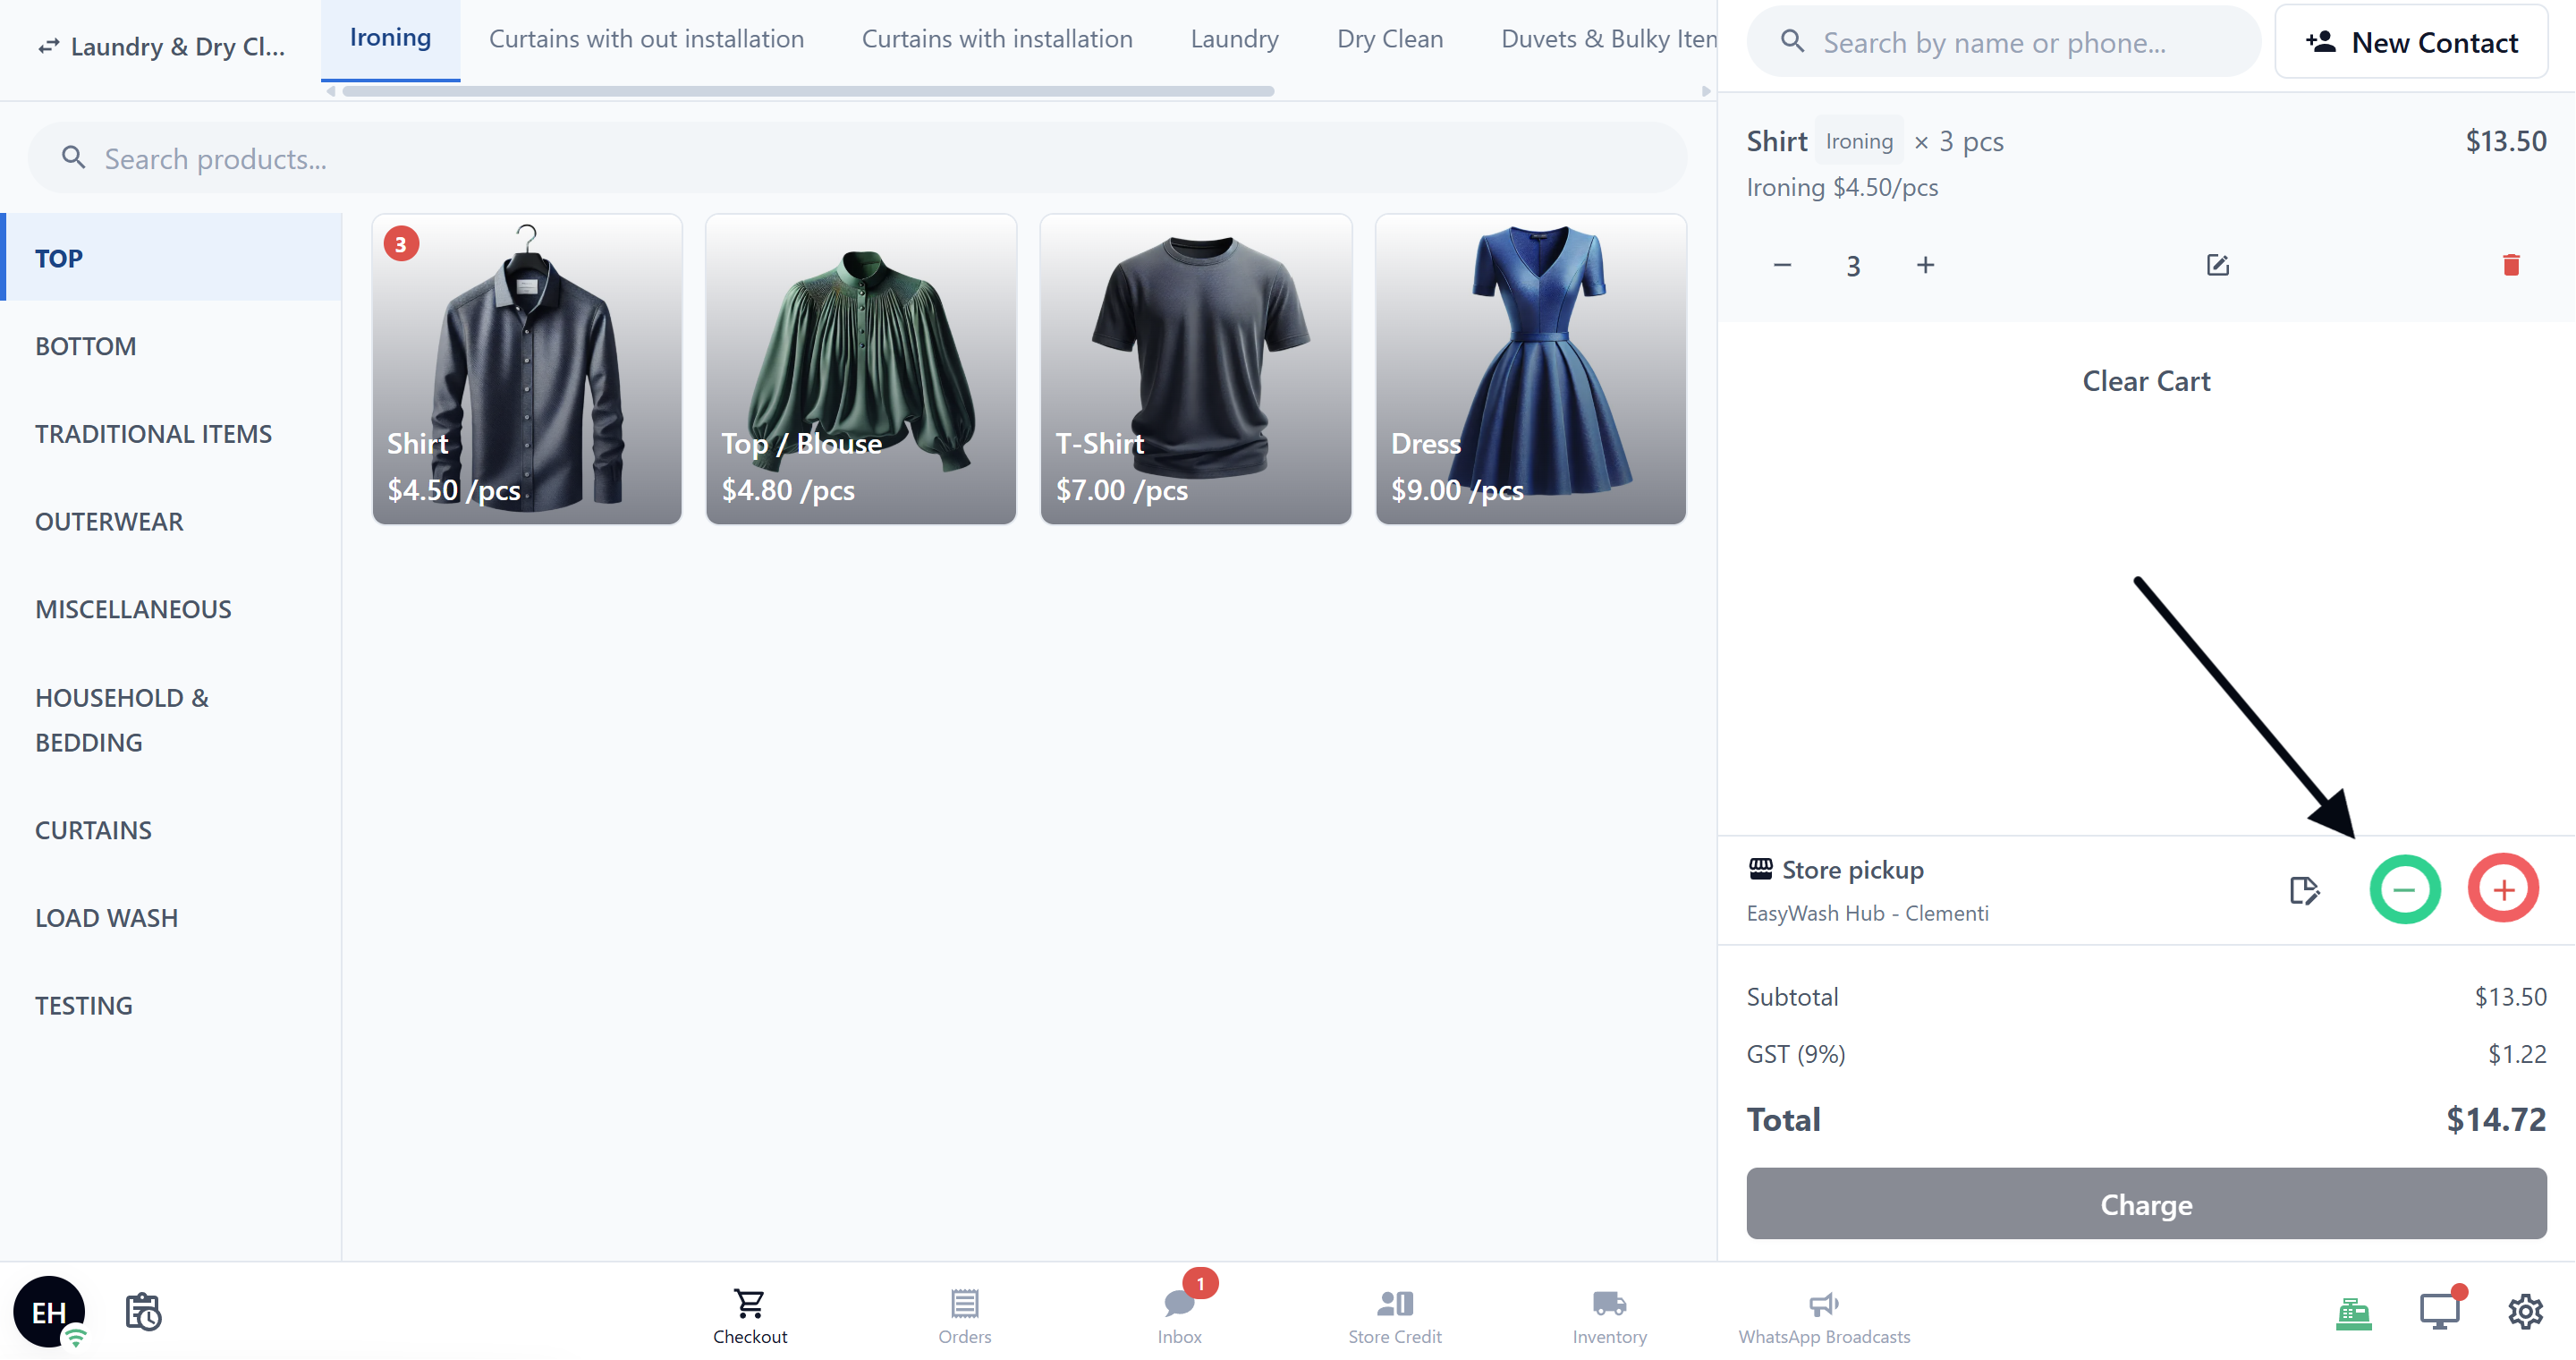
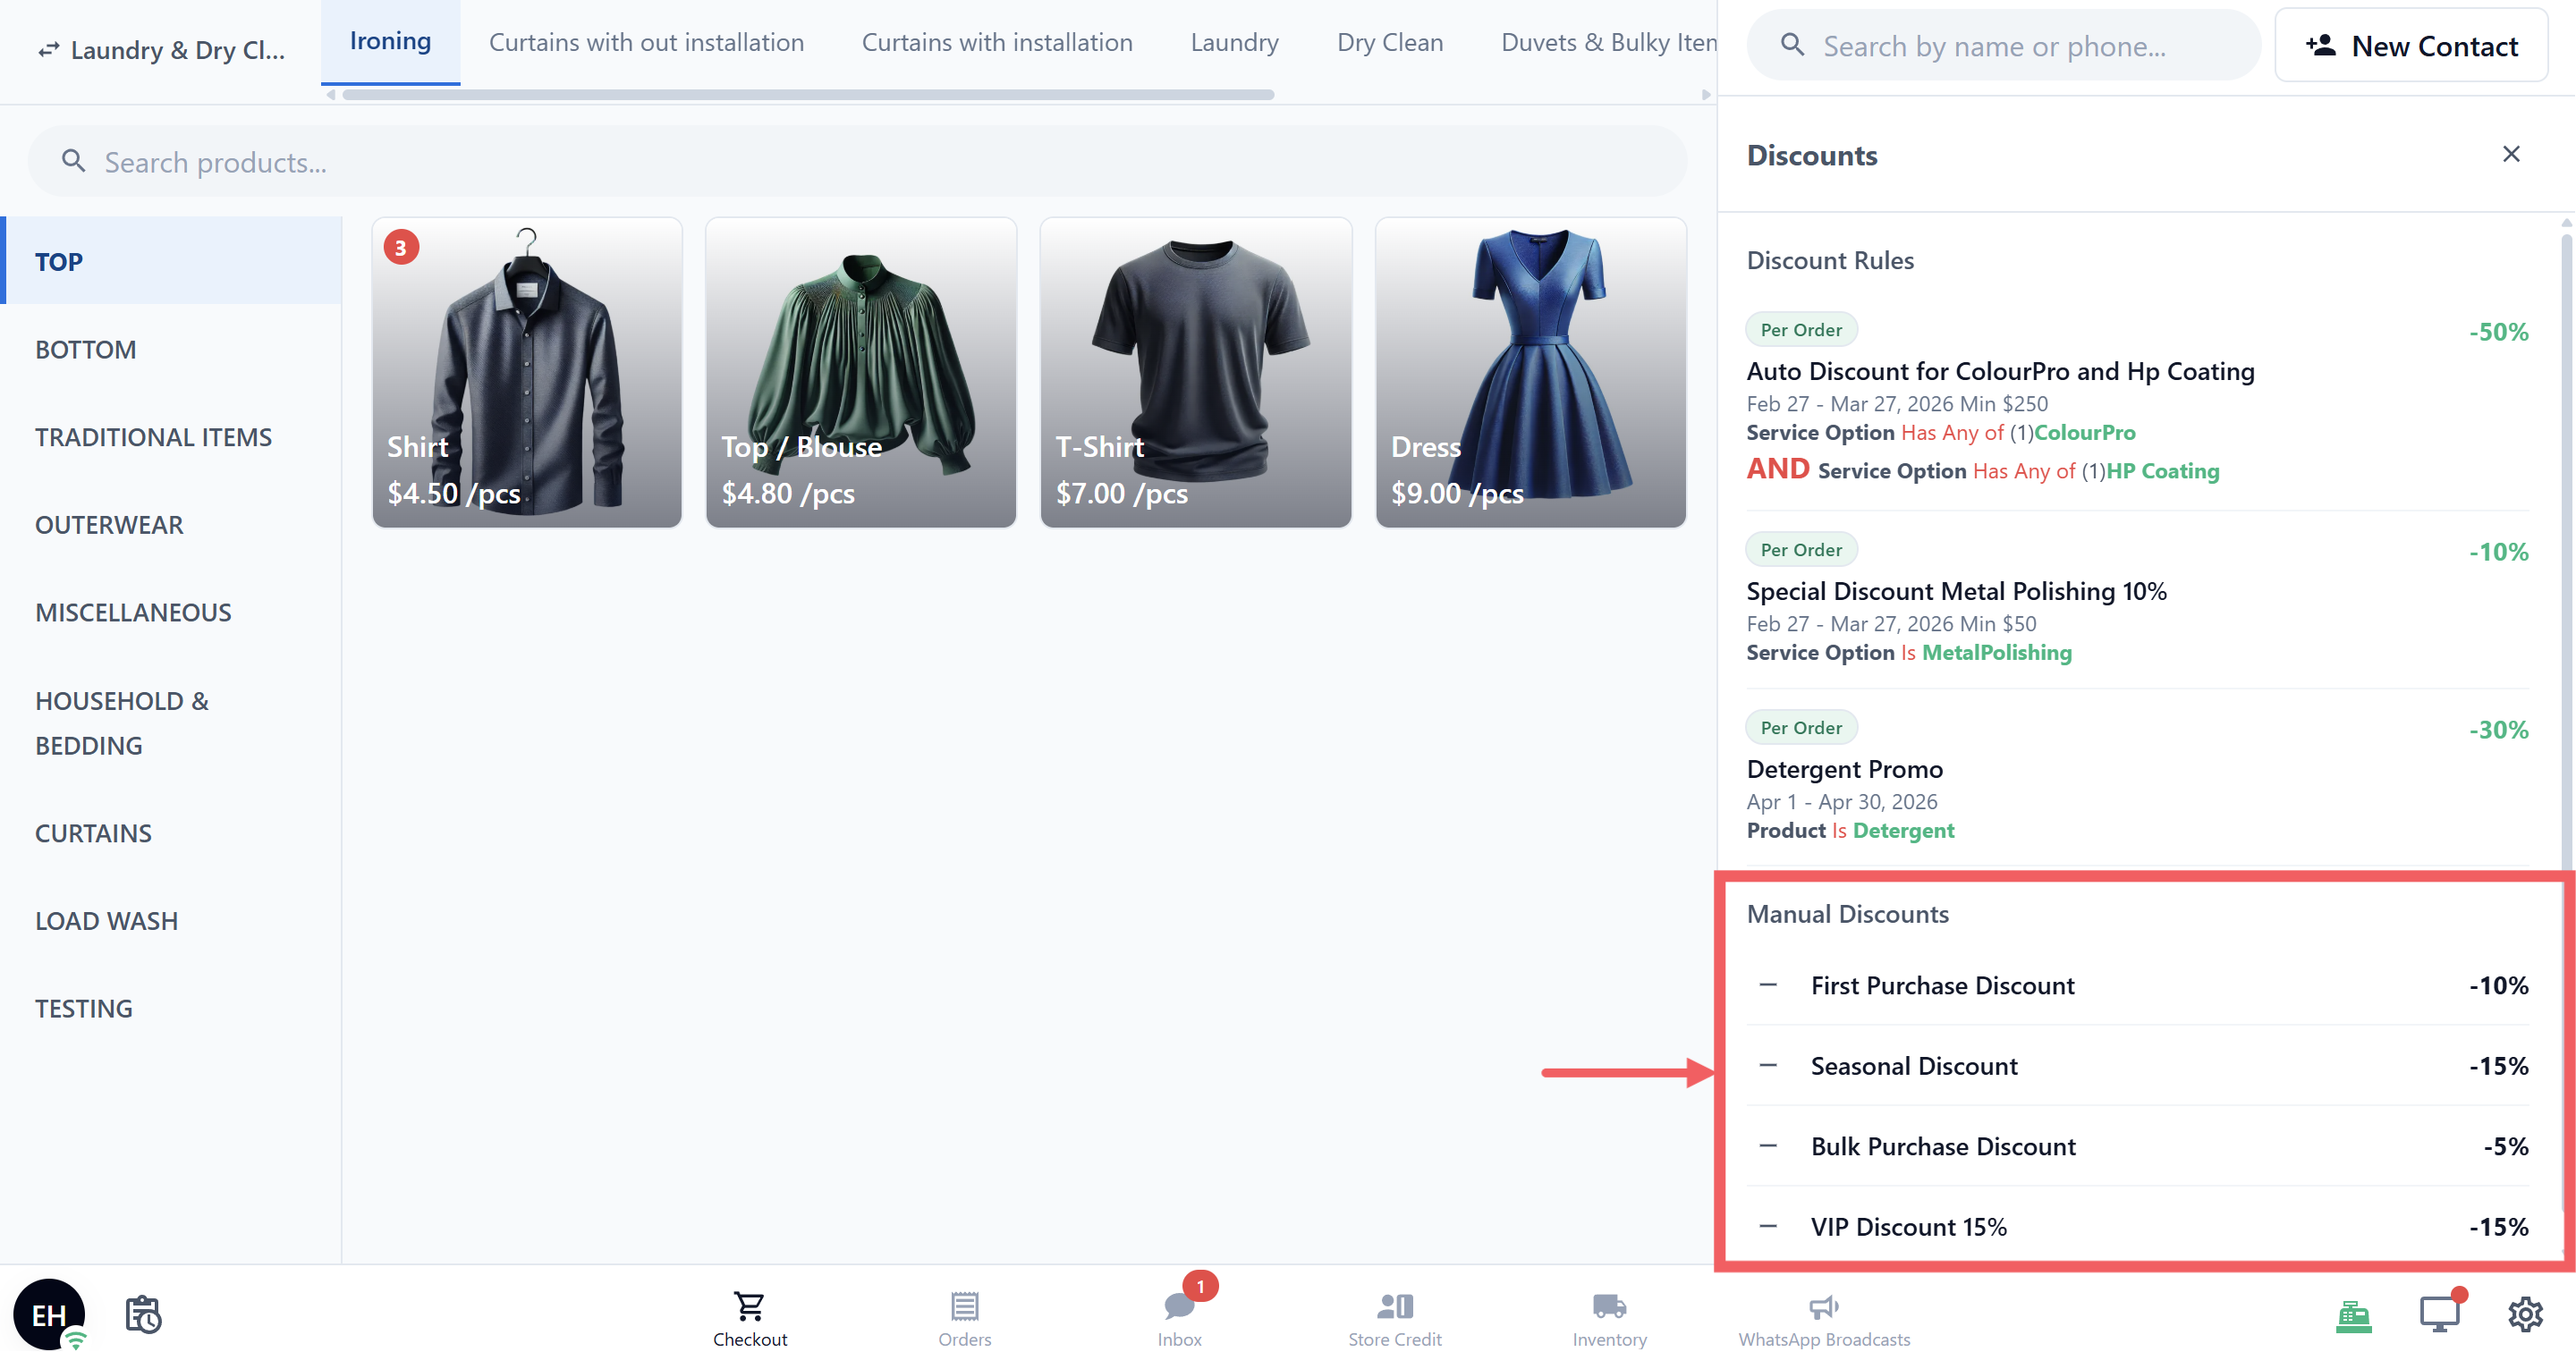
3. The panel slides in on the right with your created options.
4. Tap the option you want.
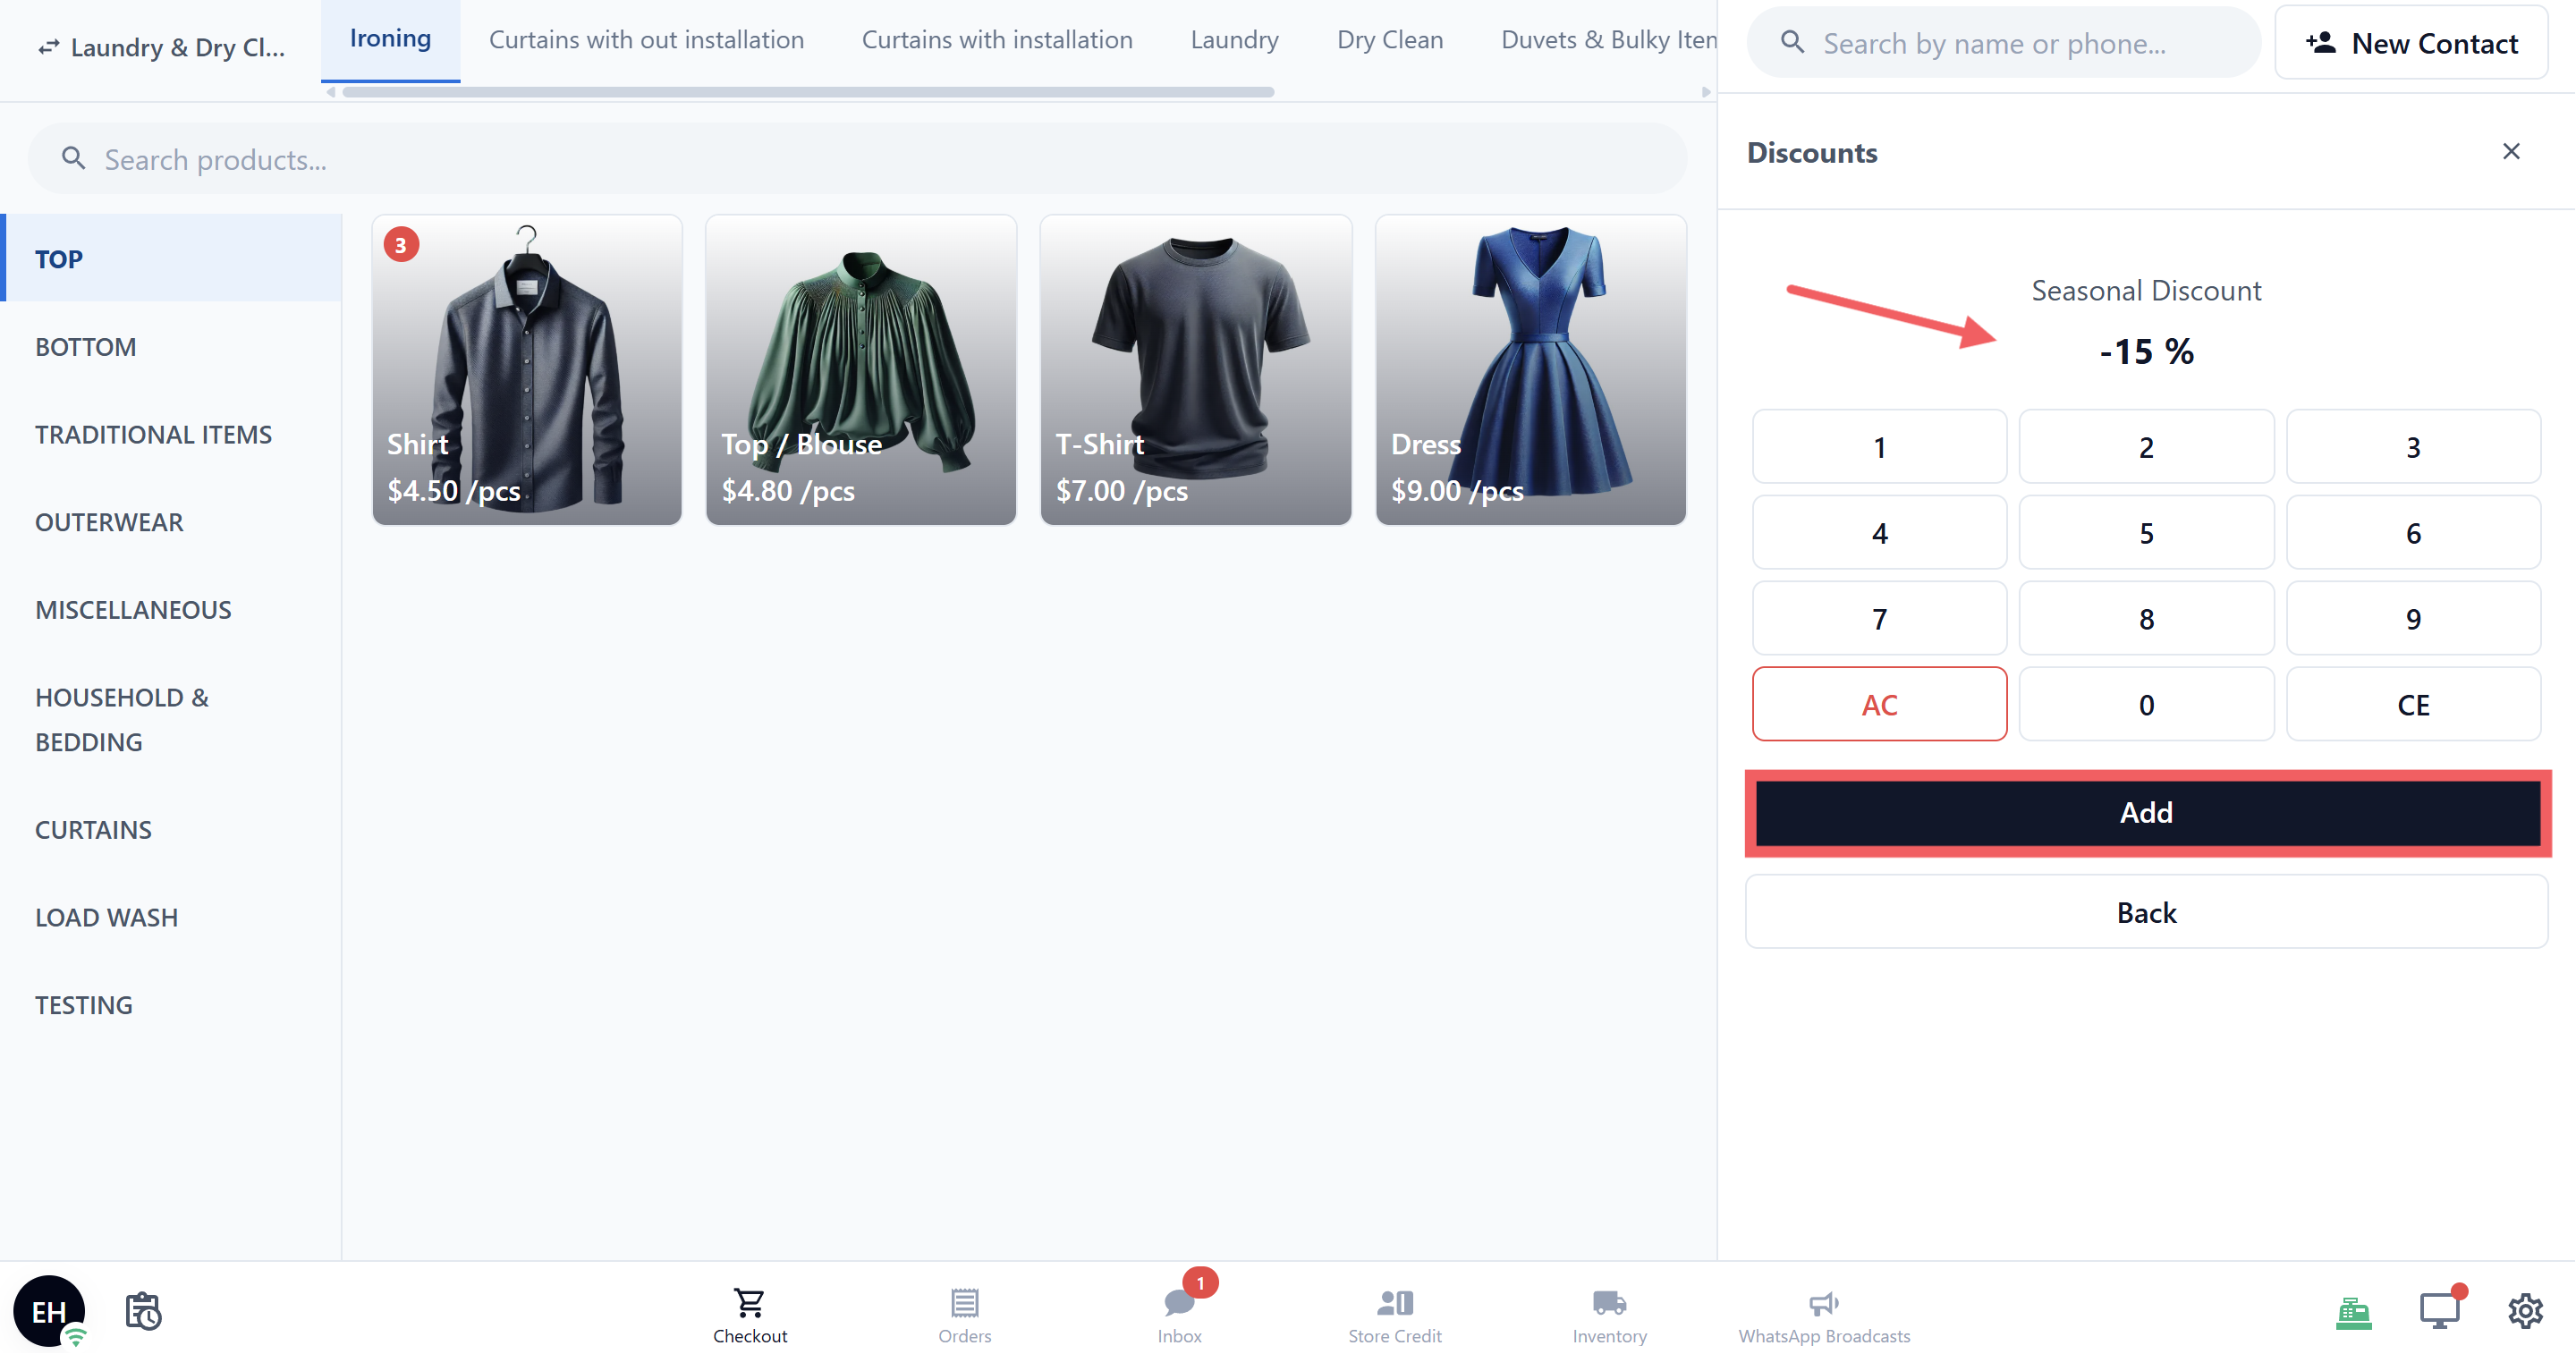
5. If Allow value modification is on, type the amount and tap Add. Otherwise tap Add directly to use the saved value.
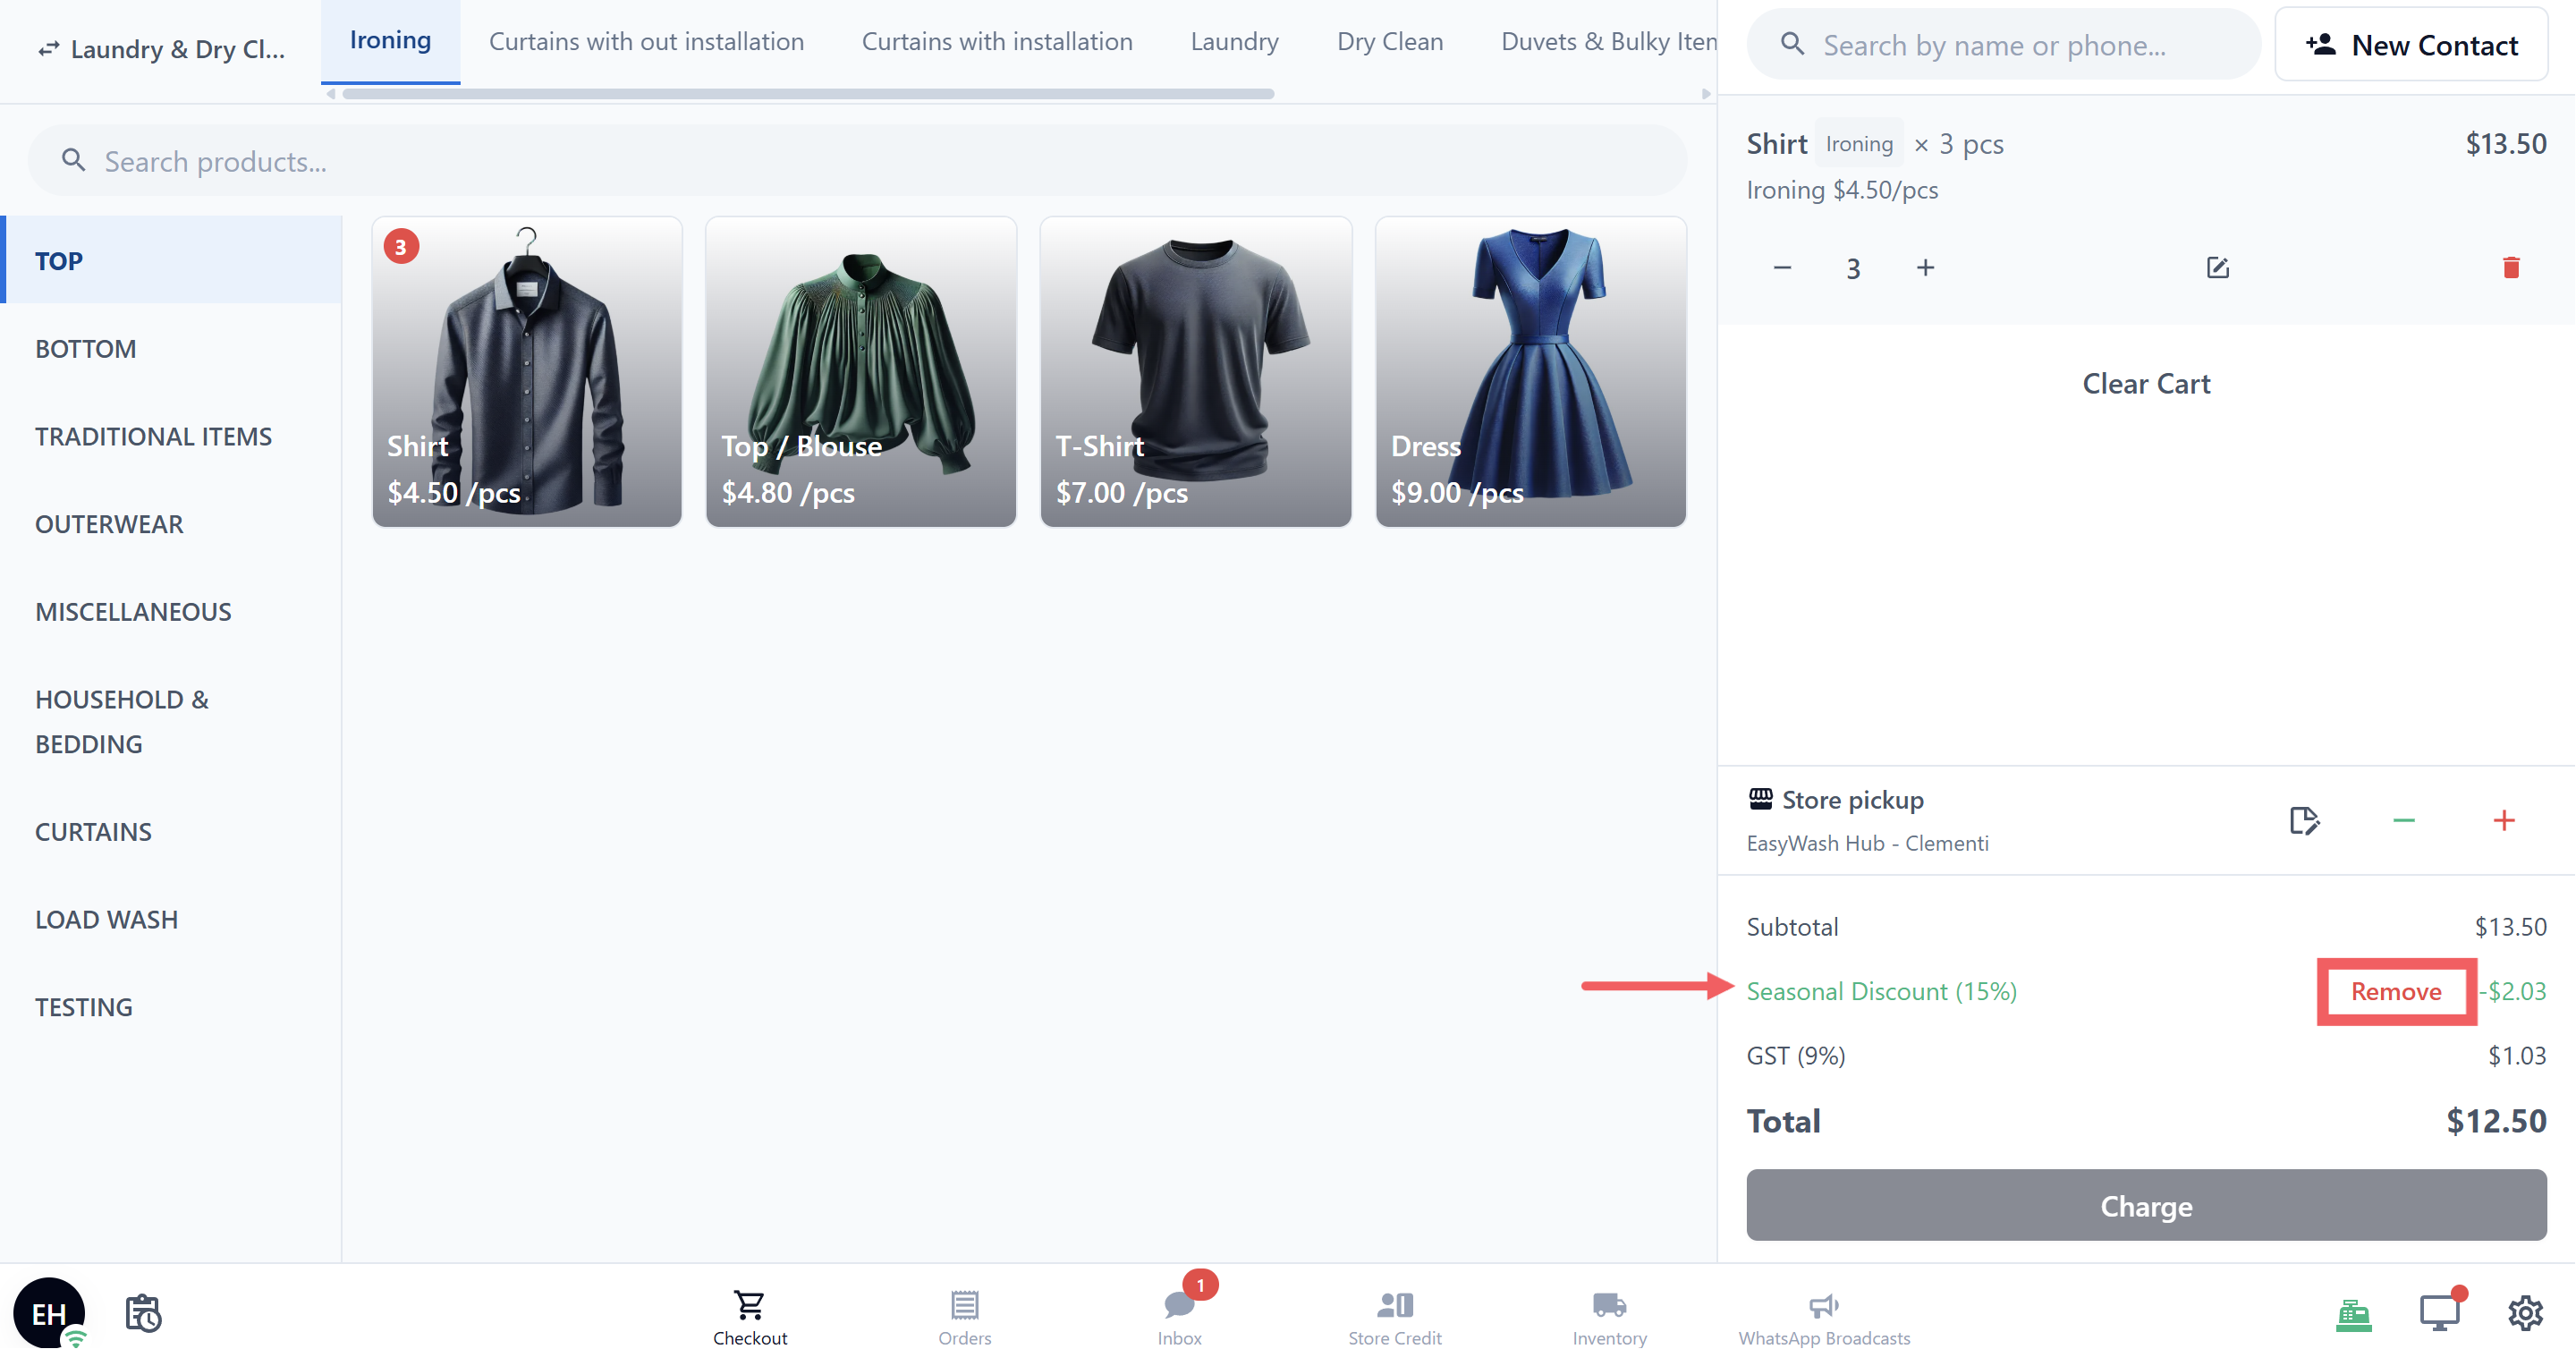
1. The option name and amount appear in a row right under the Subtotal, visible to you and the customer.
2. To remove one, find its row under the Subtotal and tap Remove. The total updates immediately.
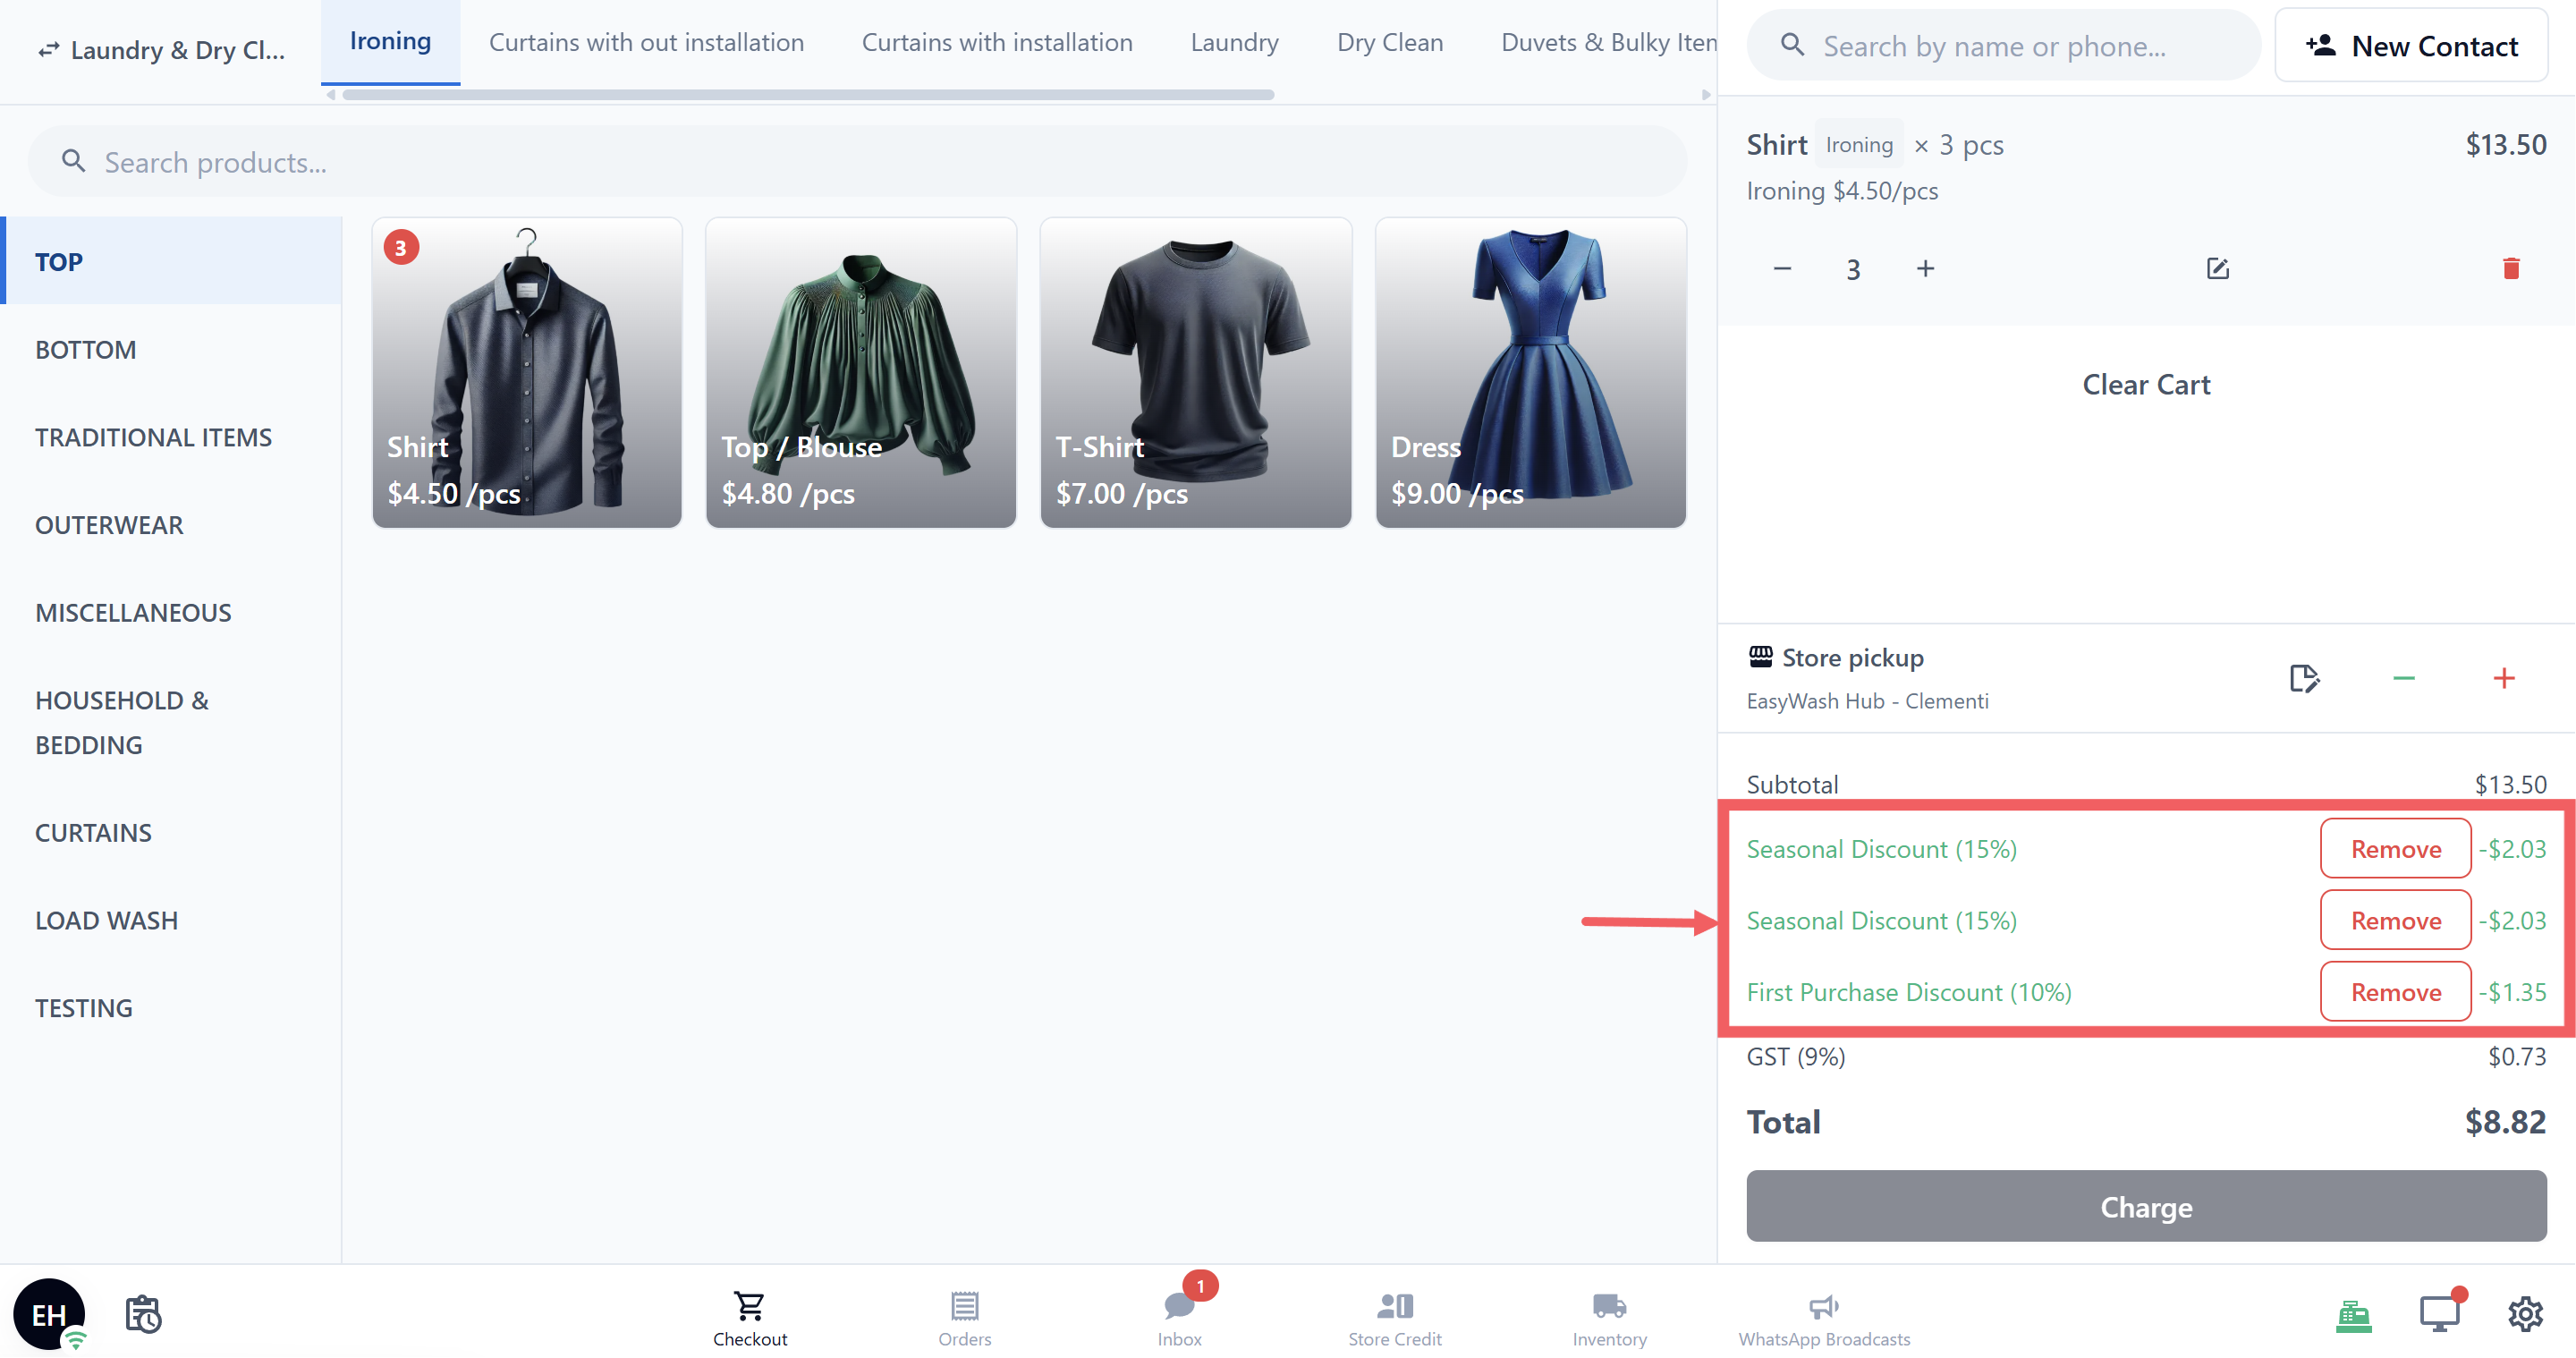
3. You can stack different options on one order, like a VIP Discount 10% and a Delivery Surcharge $3, each as its own row. If Allow multiple applications is on, you can also add the same option more than once.
You can remove an adjustment any time before checkout. Once the order is paid, it becomes part of the order record and the receipt.
---
## FAQs
**What if I want a discount to apply automatically to every order?**
> Use Price Rules instead, under Settings, Catalog & Pricing, Price Rules. They apply on their own when conditions match. Adjustment Options are manual only.
**Should I add my Express Booking surcharge here?**
> No. Express Booking surcharges are set inside Booking Options, where the system adds them automatically when a customer chooses Express.
**Can I limit one option to only Laundry and another to only Bag Repair?**
> Yes. Use the Business units limit on each option. Leave it empty for everywhere, or pick specific units to limit.
**If I edit an option, do past orders change too?**
> No. Past orders keep the name and value applied at the time. Only new orders use the updated values.
**Can I change a Discount into a Surcharge after saving?**
> No. The type is fixed. Delete it and create a new one in the correct tab.
---
### What's Next
Now that your first option is saved, head to the POS and pick any order, then use the red + or green − to apply it. For automatic rules the system applies on its own, see [Setting Up Price Rules](/docs/setting-up-price-rules).