## What this template does
A work order slip is a small printed ticket for your staff. It prints on your receipt printer, the same printer you use for customer receipts. When a business unit creates work orders, each service item becomes a work order. A work order is the job card for 1 item, with the tasks your team must do, such as washing, pressing or stitching.
The slip is for internal use. It travels with the item so your team knows what to do next. Your customers normally never see it.
It helps you:
- Tell staff exactly which tasks each item needs
- Match the slip to the item with a QR code
- Cut down on handwritten notes and mix-ups at the back
**Can I skip this?** Yes, if you don't use work orders, or your team works from the order screen. You can add a slip later at any time.
---
## Before you start
- **[Setting Up Packing Flows and Work Orders](/docs/setting-up-packing-flows-and-work-orders)**: turn on "Create a work order for each service item" on your business unit's Production tab and add your tasks. Without work orders, there is nothing for the slip to print.
- **[Setting Up Business Unit Documents](/docs/setting-up-business-unit-documents)**: the slip is chosen on the same page as your receipts and labels.
- **[Connecting Your Printers to the POS](/docs/connecting-your-printers-to-the-pos)**: the slip prints on a receipt printer, not a label printer.
---
## Open the Receipt Templates page
This part is done in the console (the EasyBiz website your office uses).
1. Click the ⚙️ Settings icon in the top-right corner.
2. Scroll to the **Library** section.
3. Click Receipt template.
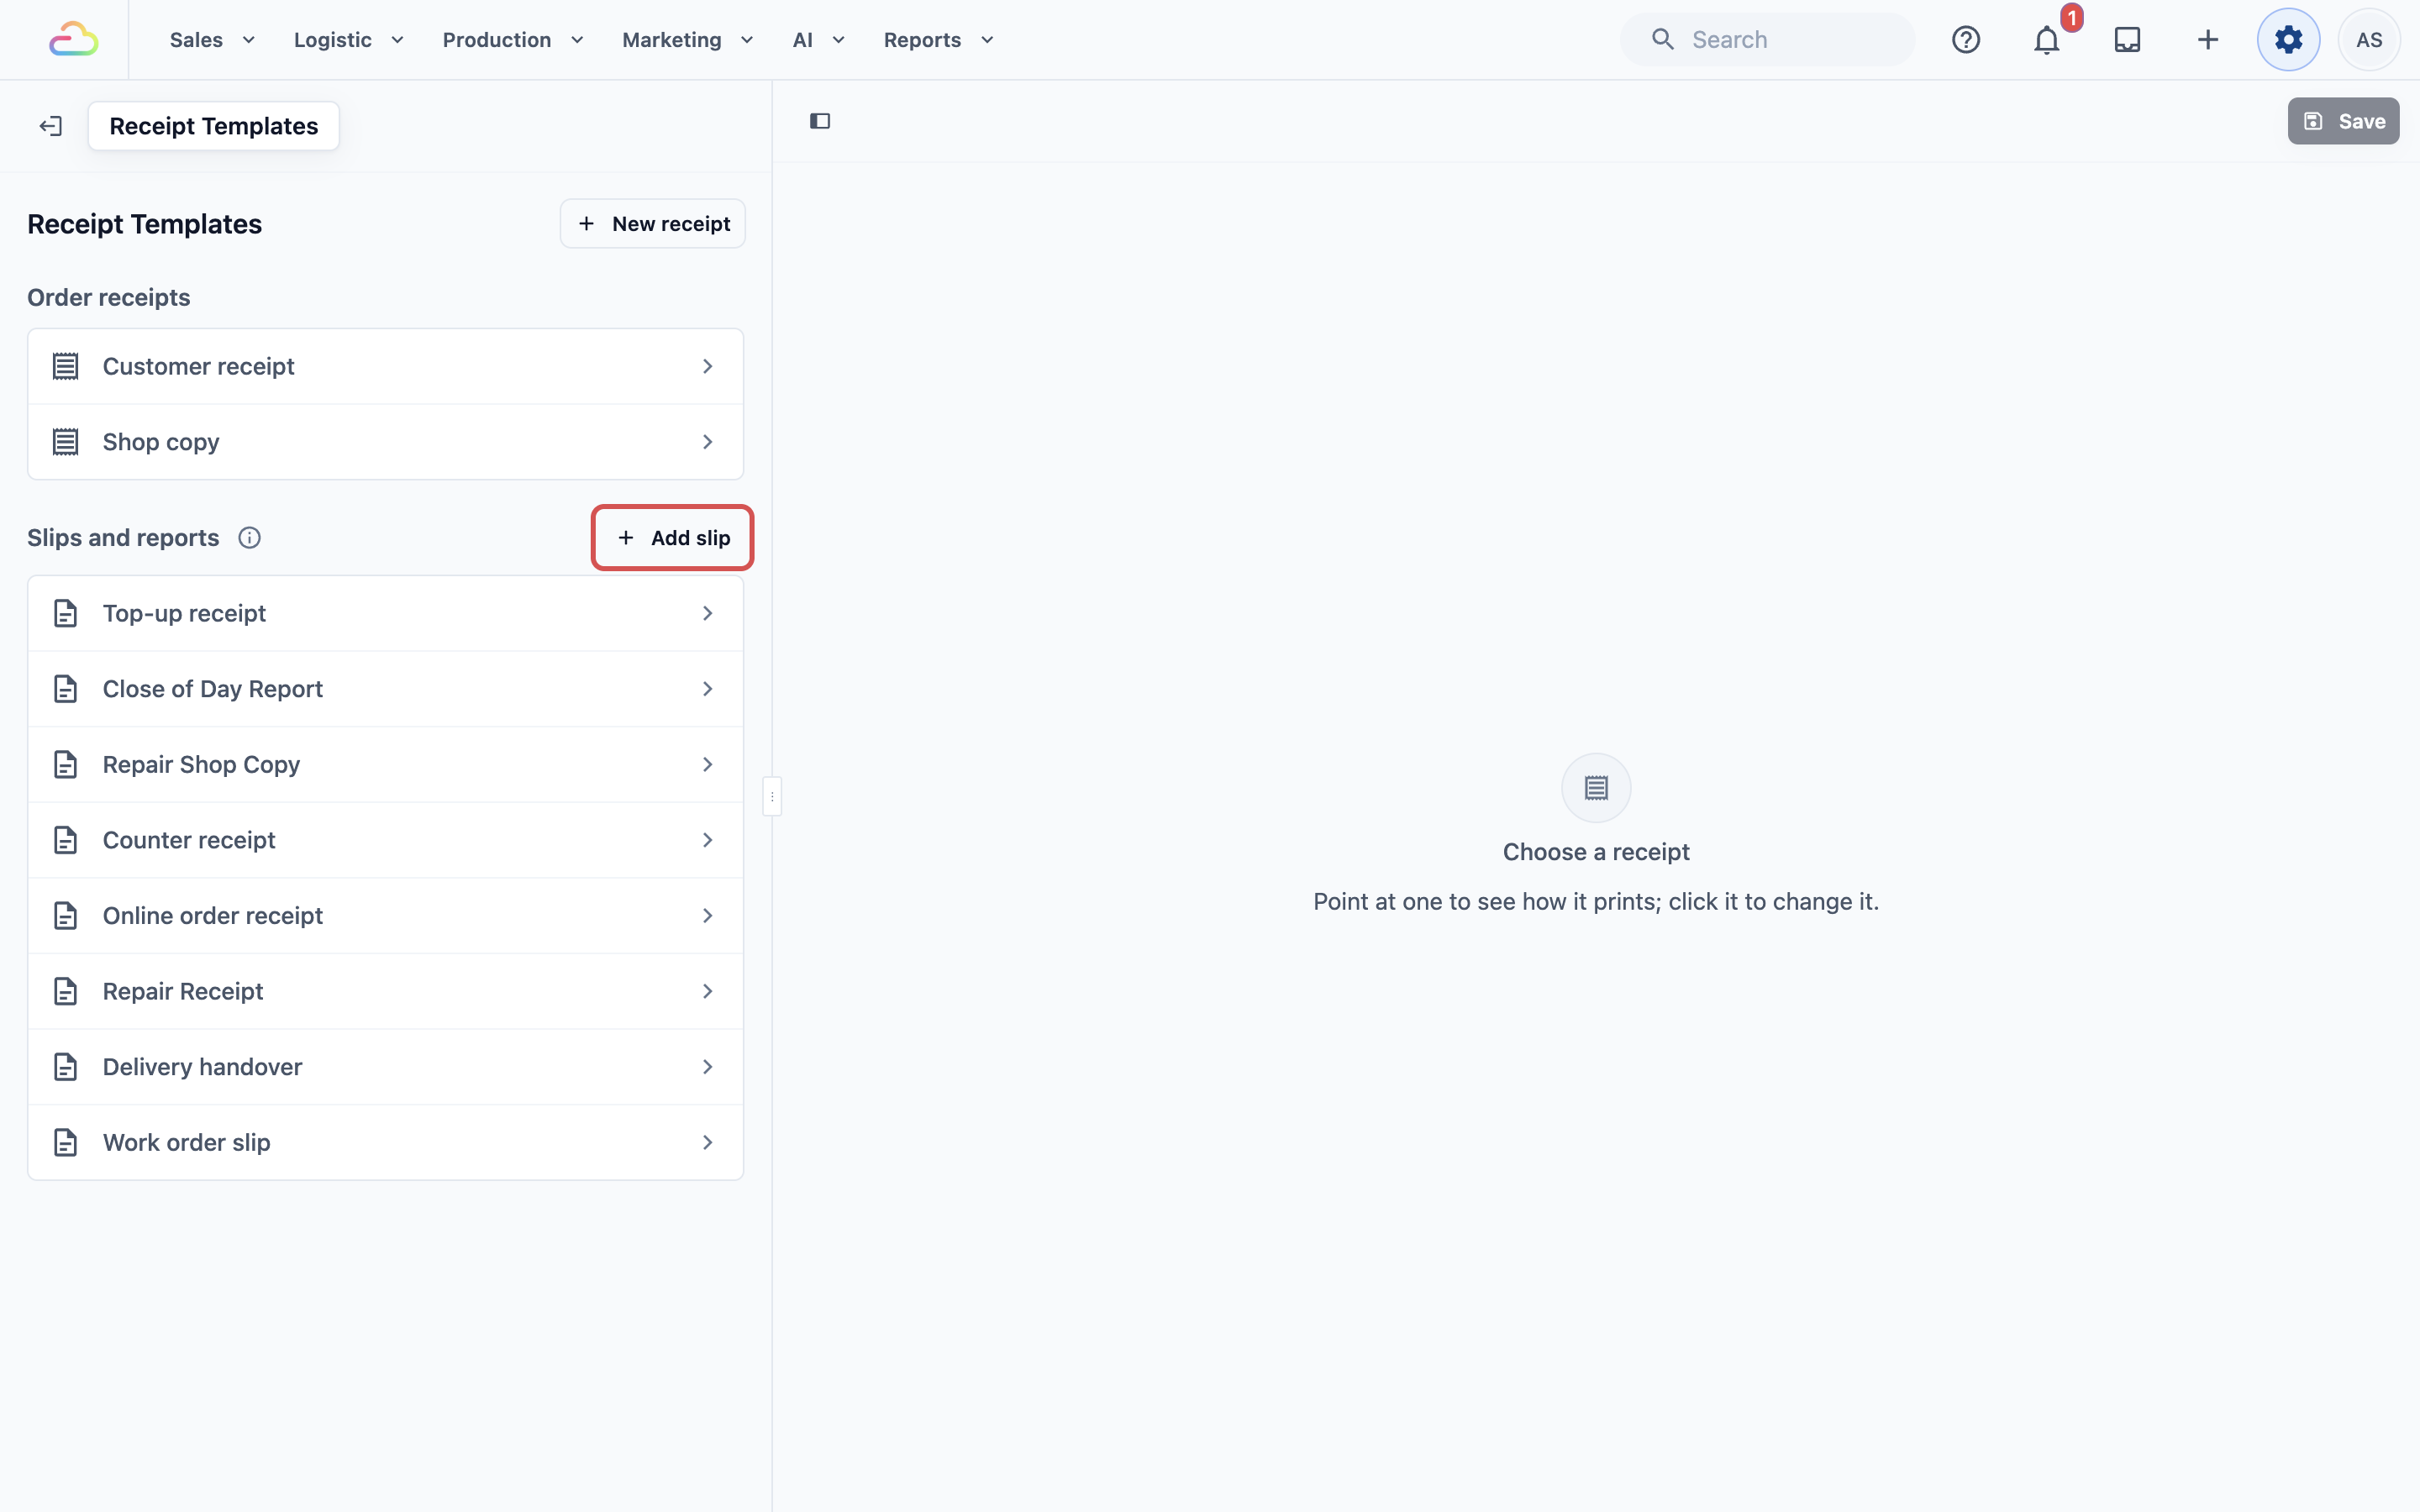
The page that opens is called **Receipt Templates**. Your work order slips are listed under **Slips and reports**.
---
## Create your work order slip
1. On the Receipt Templates page, under **Slips and reports**, click Add slip.
2. In **Template Name**, type a name, such as "Work order slip".
3. Under **Template content**, click the **Work Order Note** card.
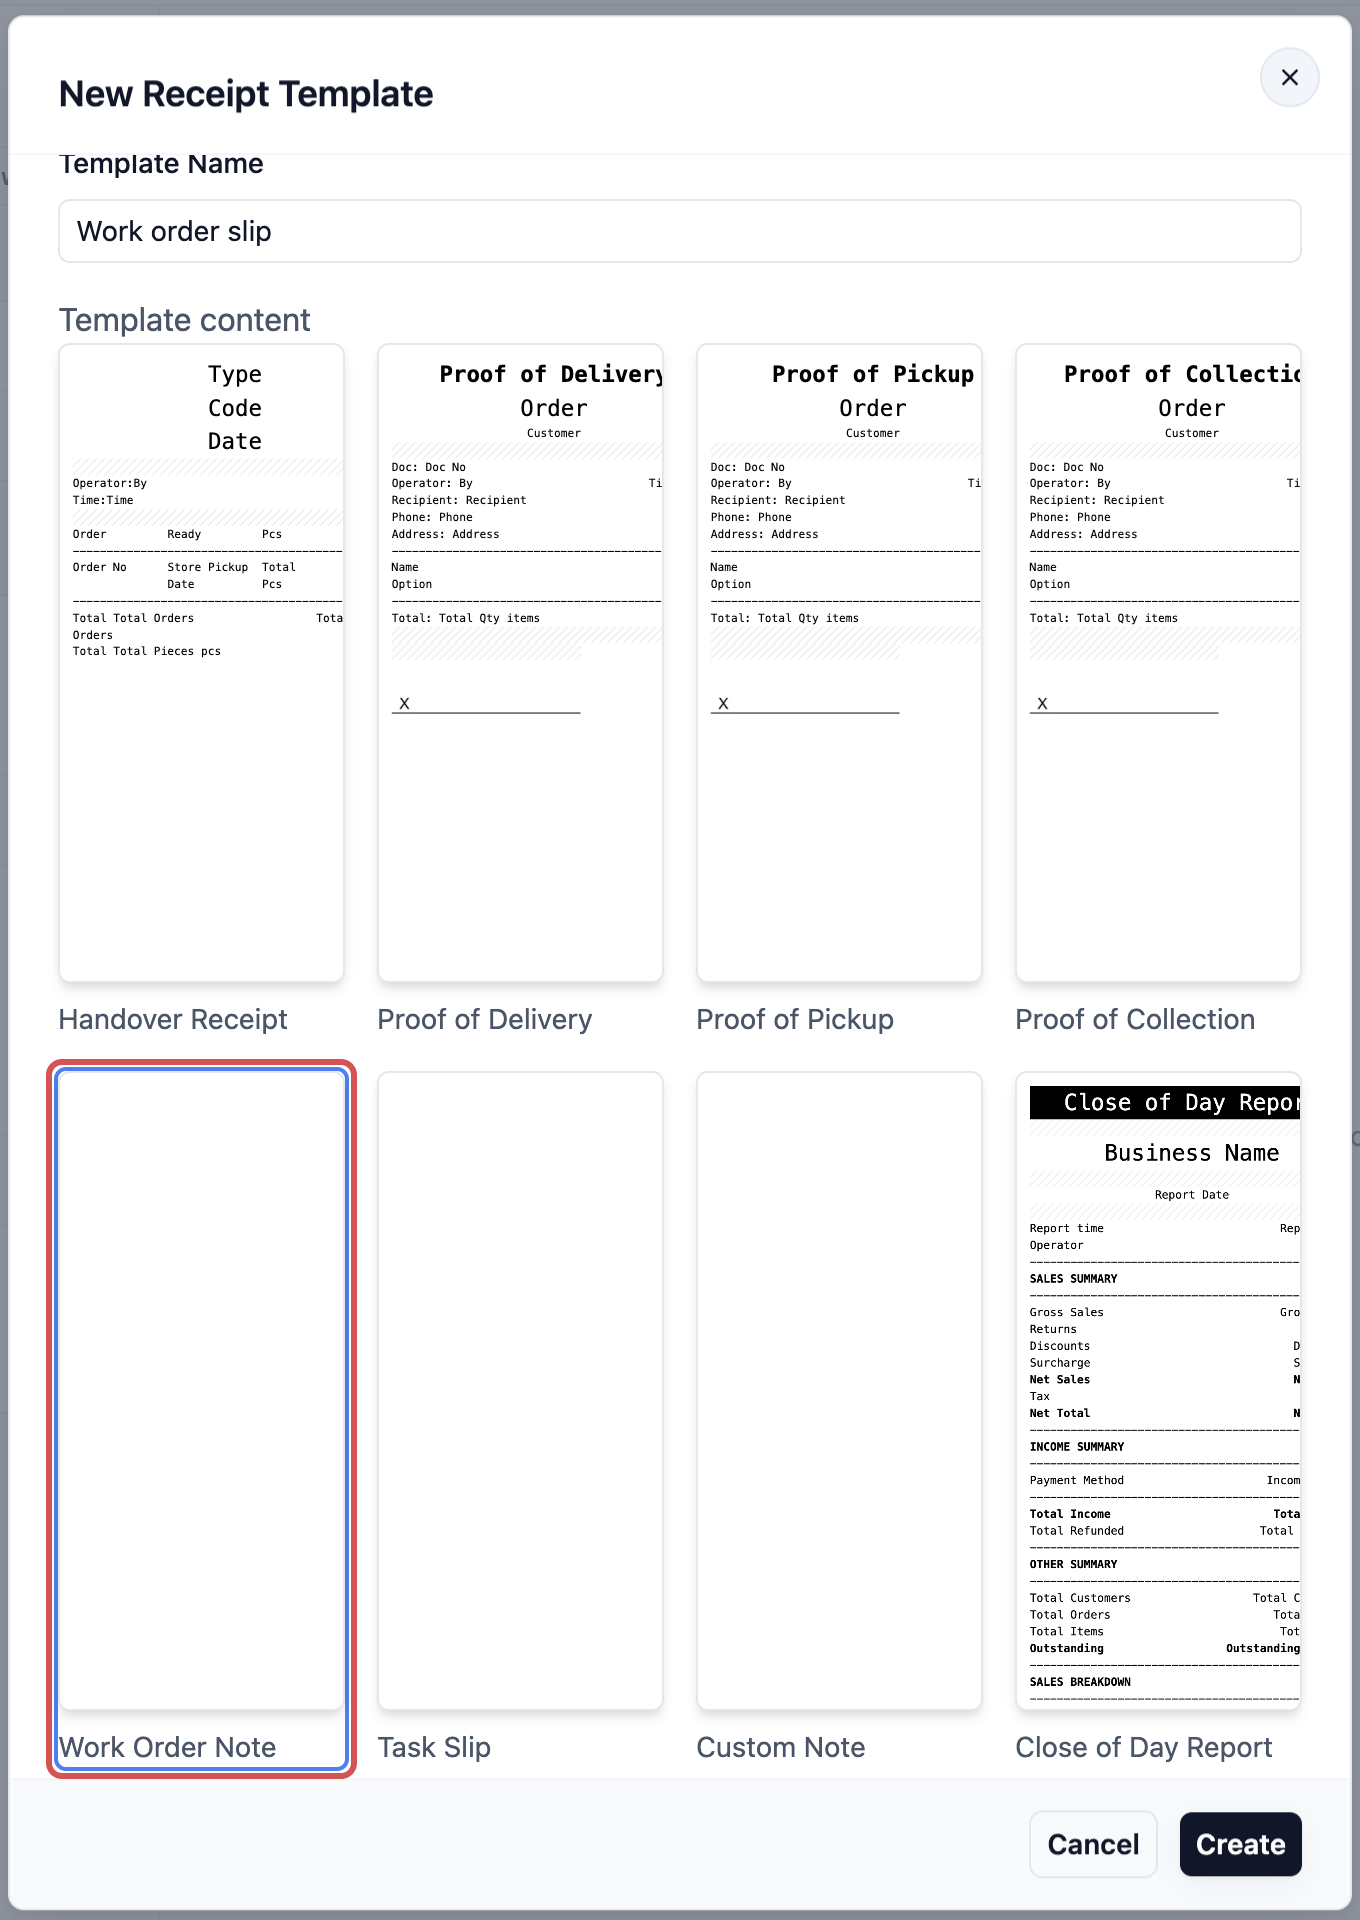
4. Click Create.
The Work Order Note starts blank. You add what you want staff to see.
| Option | What it means |
| --- | --- |
| Work Order Note | 1 slip per work order, listing its tasks. Use this for this article. |
| Task Slip | 1 slip per task, for shops that pass each task to a different person. |
---
## Add the details staff need
The editor shows the slip on the left and the blocks you can add on the right. A block is one piece of the slip, like a line of text or a QR code.
1. Click Edit template above the preview, if it is showing.
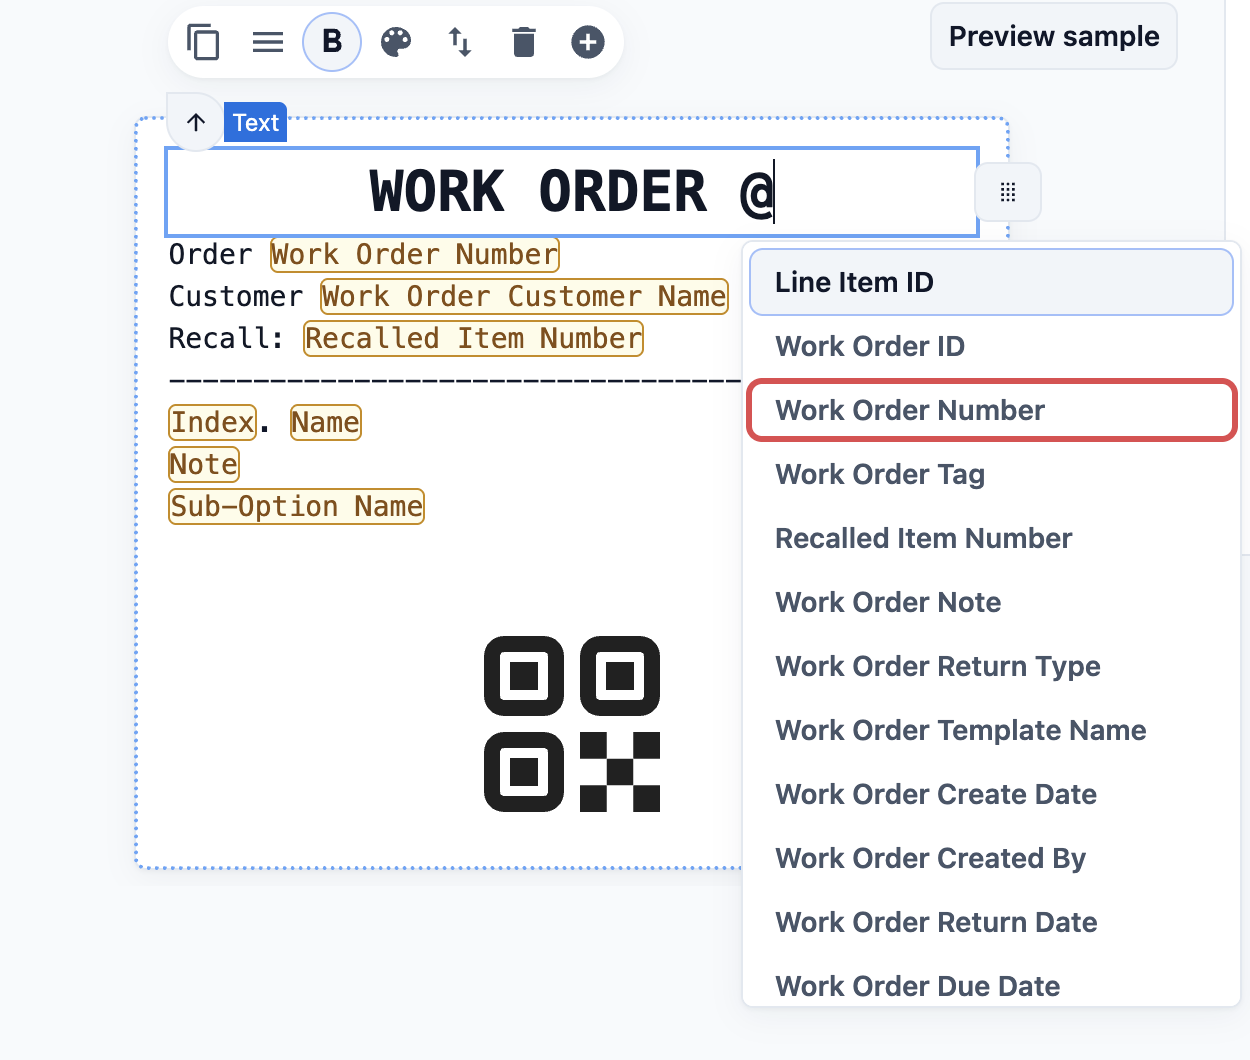
2. Add a text block and type a heading, such as "WORK ORDER".
3. Type **@** in the text to pick a detail from the list, such as **Work Order Number** or **Work Order Customer Name**.
4. Add the Work Order Tasks block. It lists the tasks for that item.
5. Add Line Item Service Sub-options if you want options such as "Starch: Light" to print.
6. Add the Line Item QR Code block so staff can scan the slip to find the item.
7. Click Save.
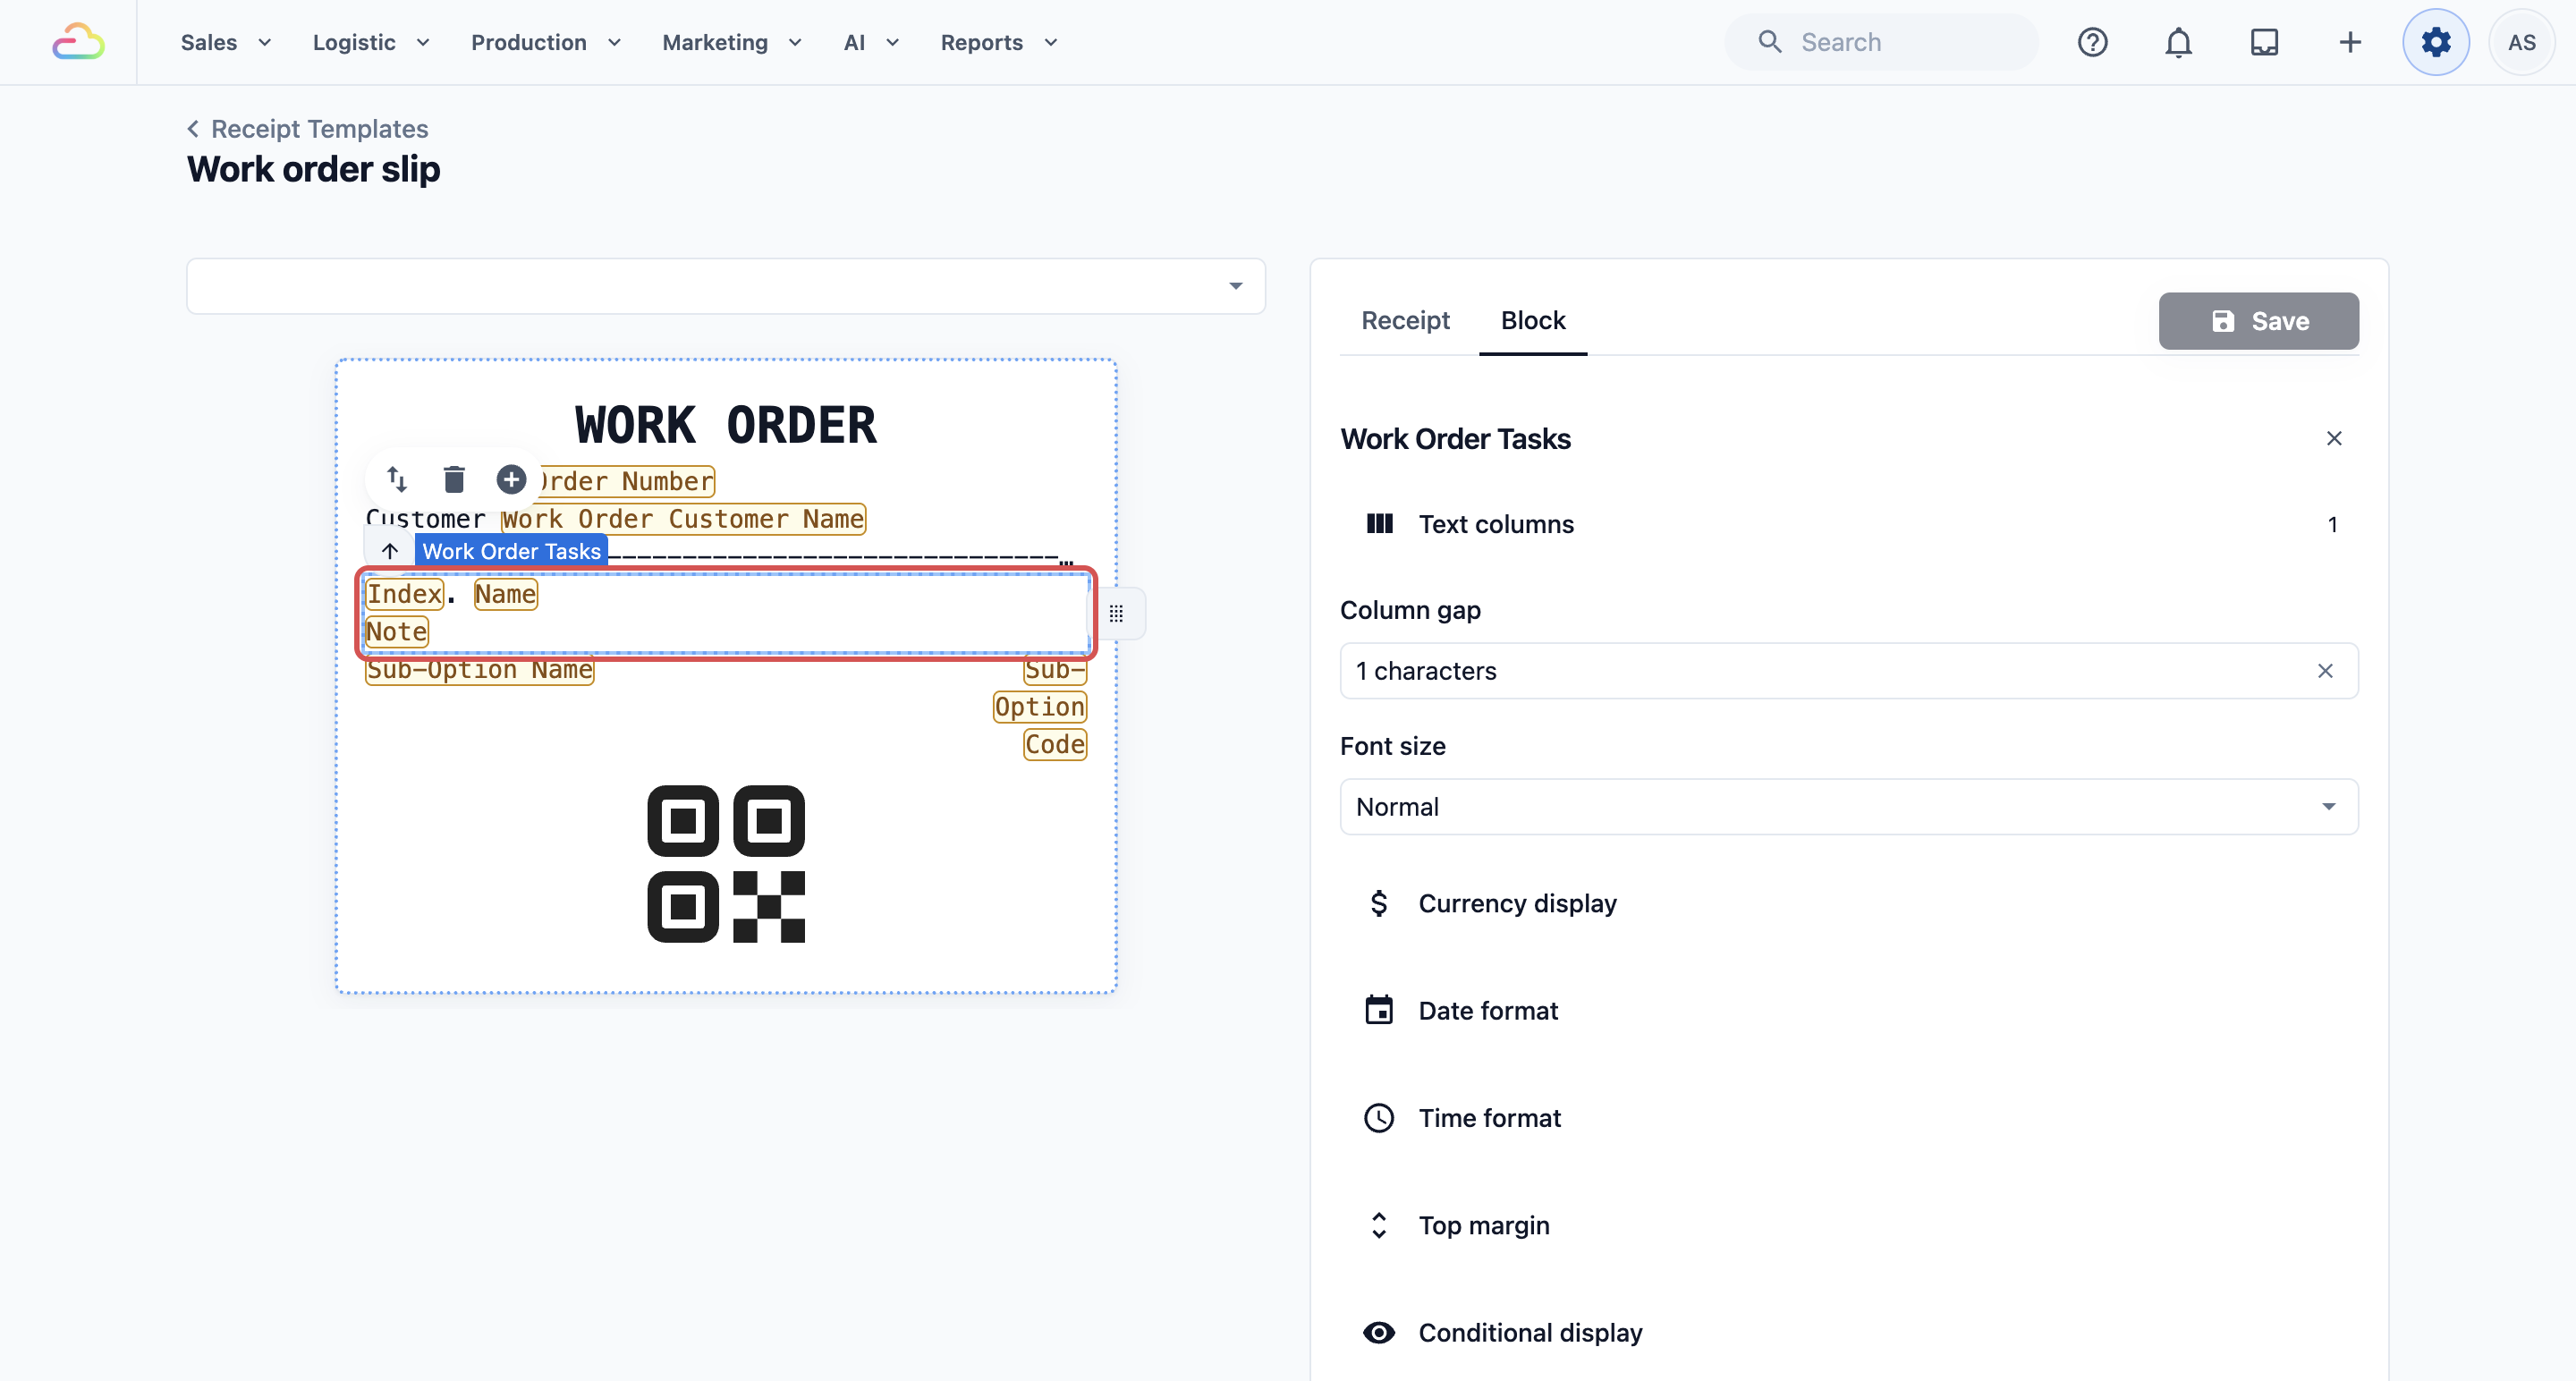
Keep the slip short. A slip with the order number, the tasks and a QR code is easy to read at a busy counter.
---
## Choose the slip for each business unit
A new slip does nothing until a business unit uses it.
1. Click the ⚙️ Settings icon.
2. In the **Administration** section, click Business Units.
3. Click the business unit, such as Laundry.
4. Click the Documents tab.
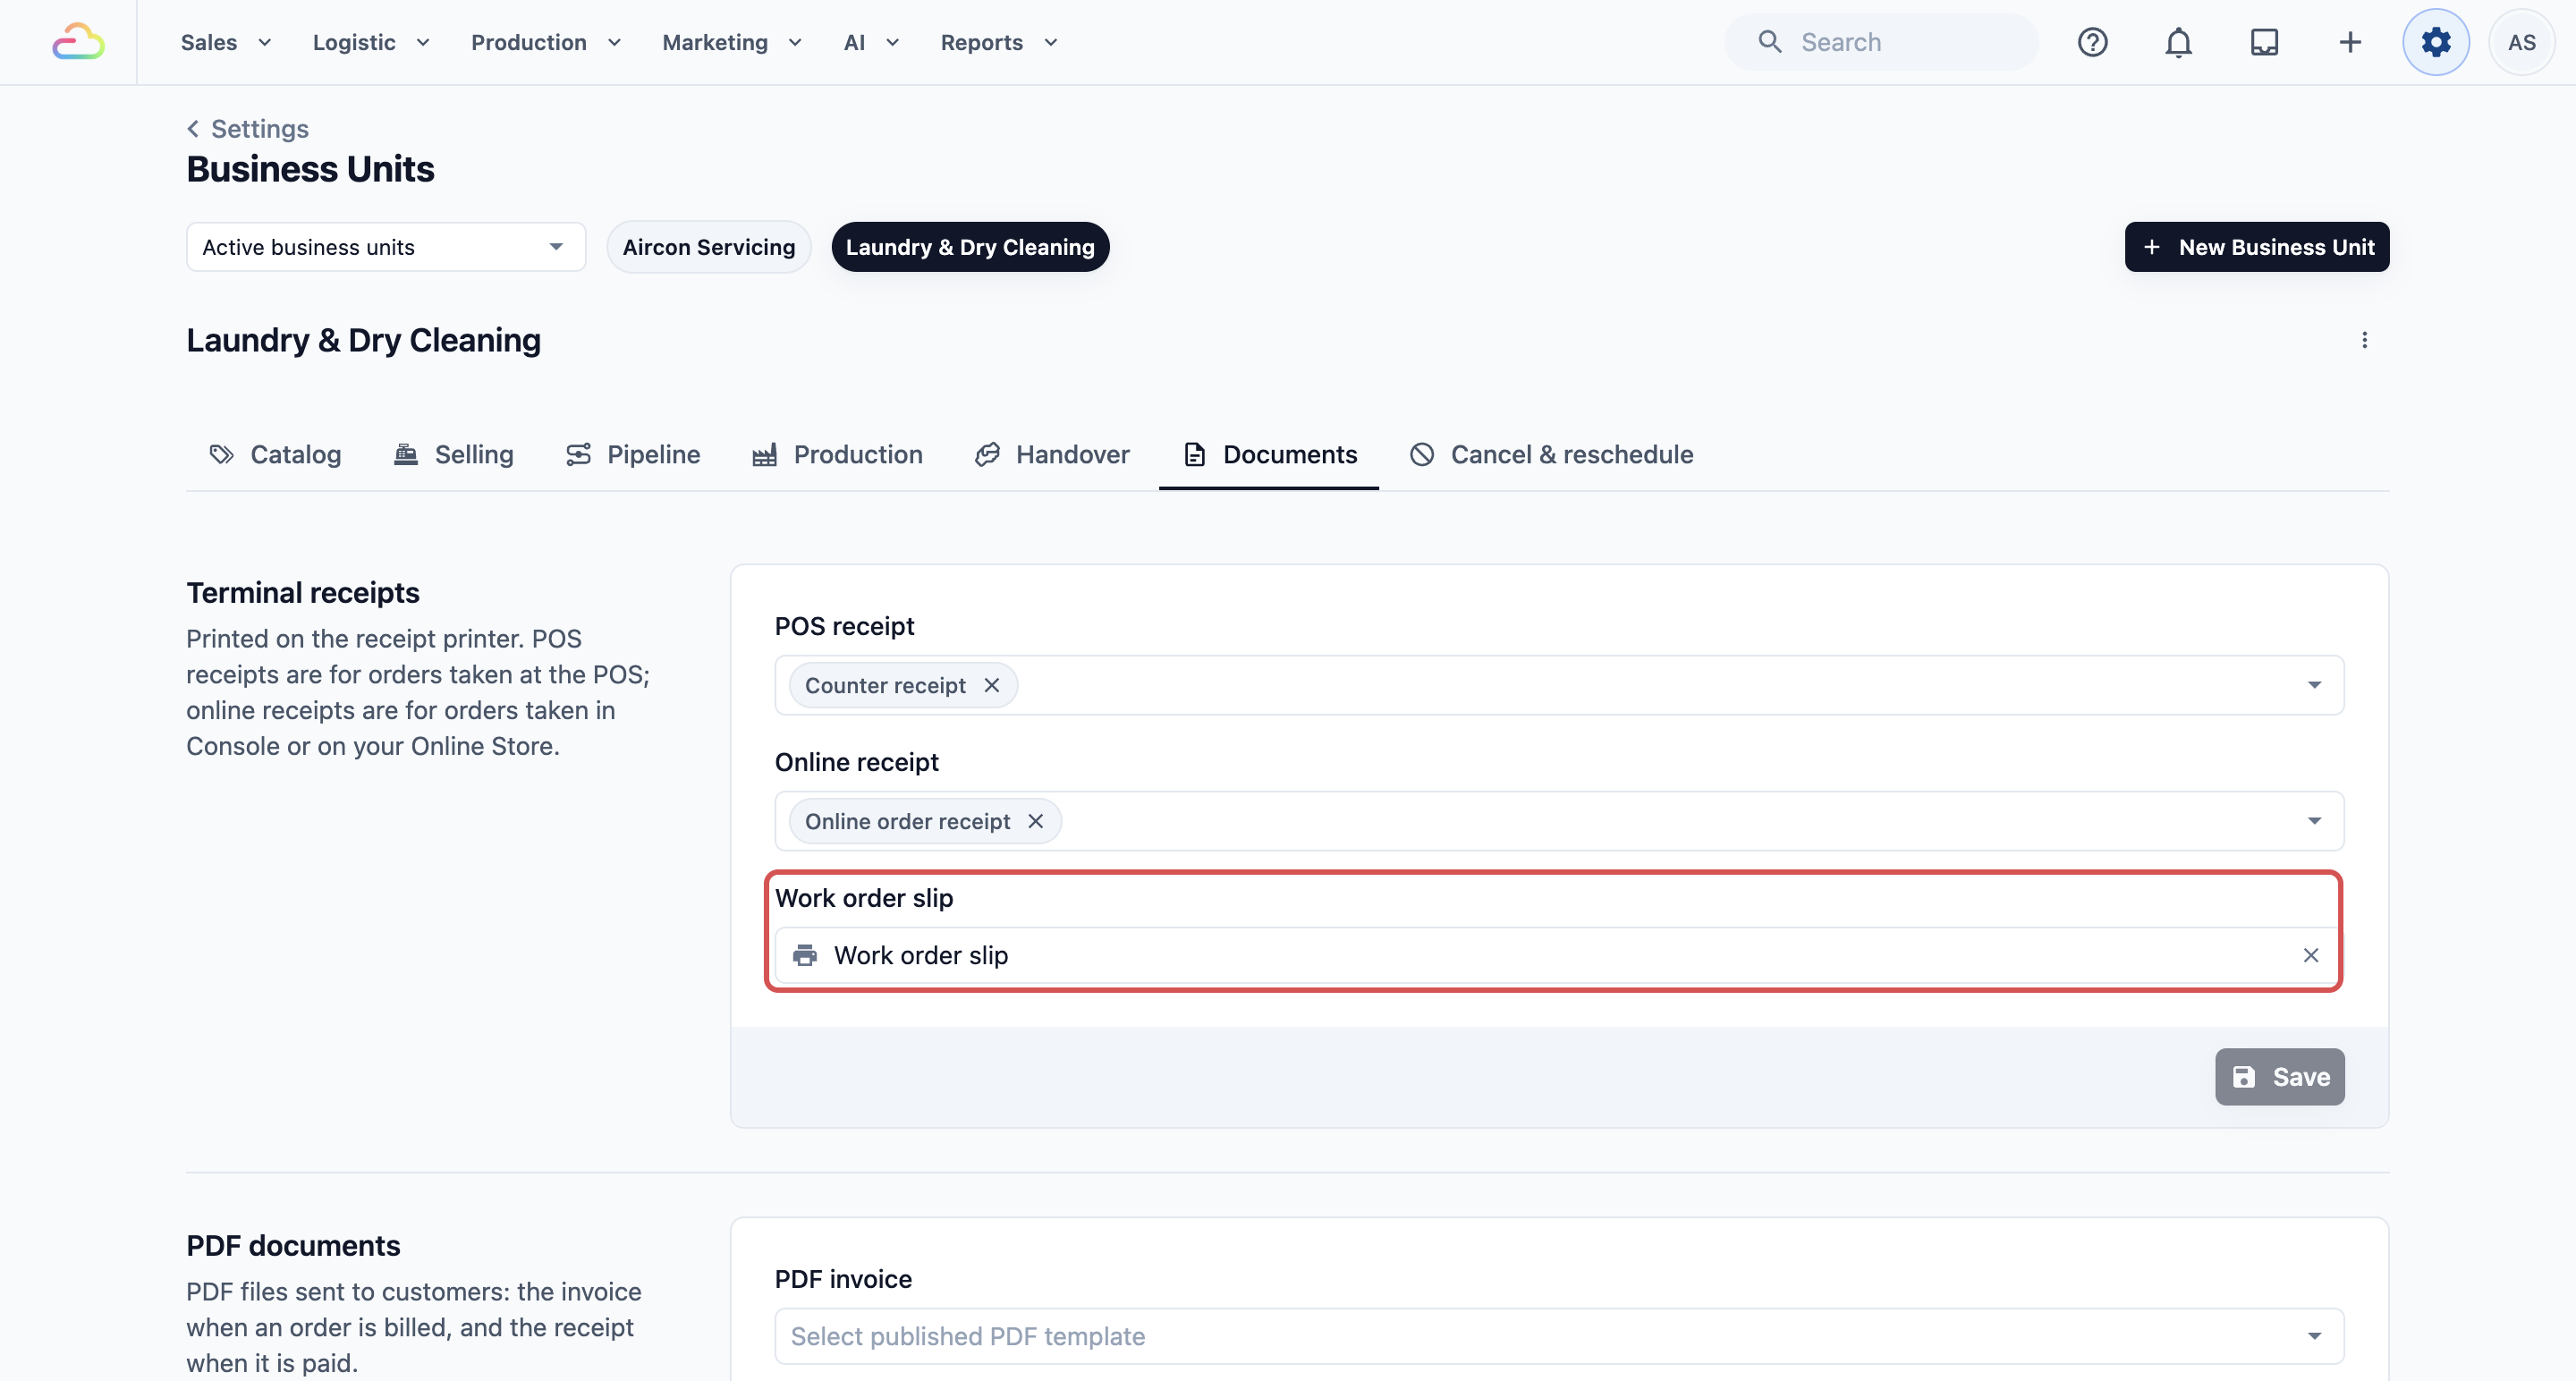
5. Find **Terminal receipts**.
6. In **Work order slip**, pick your new template.
7. Click Save. You'll see "Document settings updated".
---
## Print a work order slip
This part is done in the console.
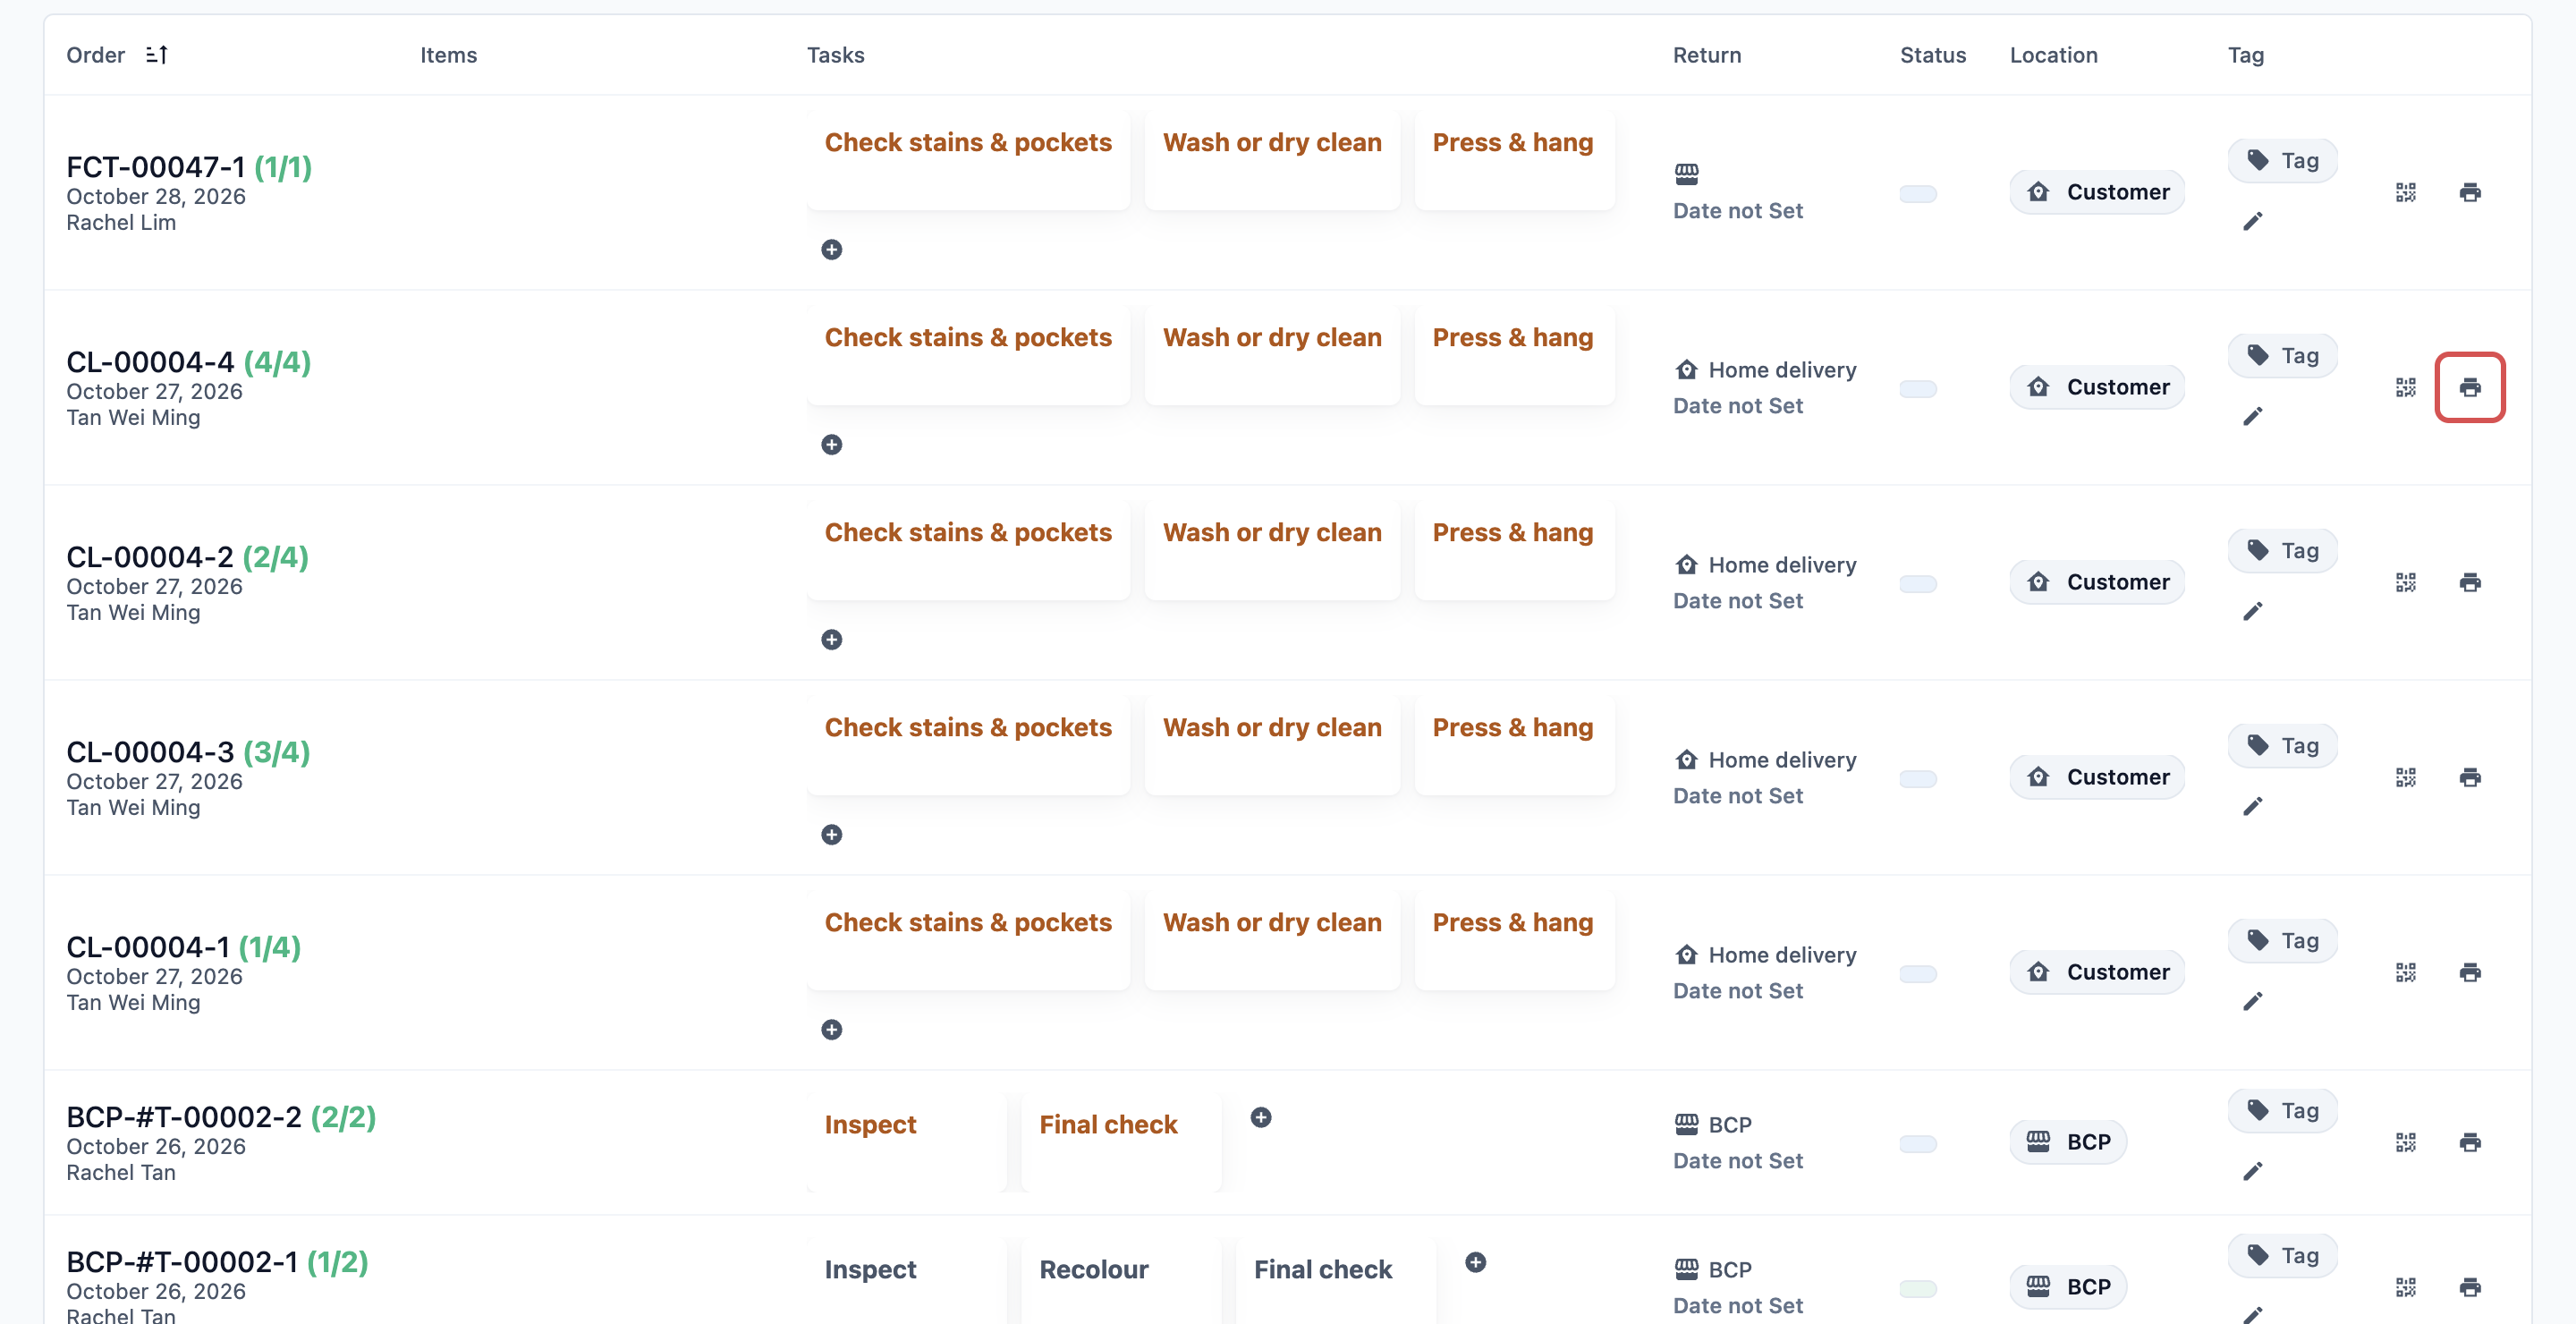
1. In the side menu, under **Production**, click **Work Orders**.
2. Find the work order.
3. Click the printer icon on its row.
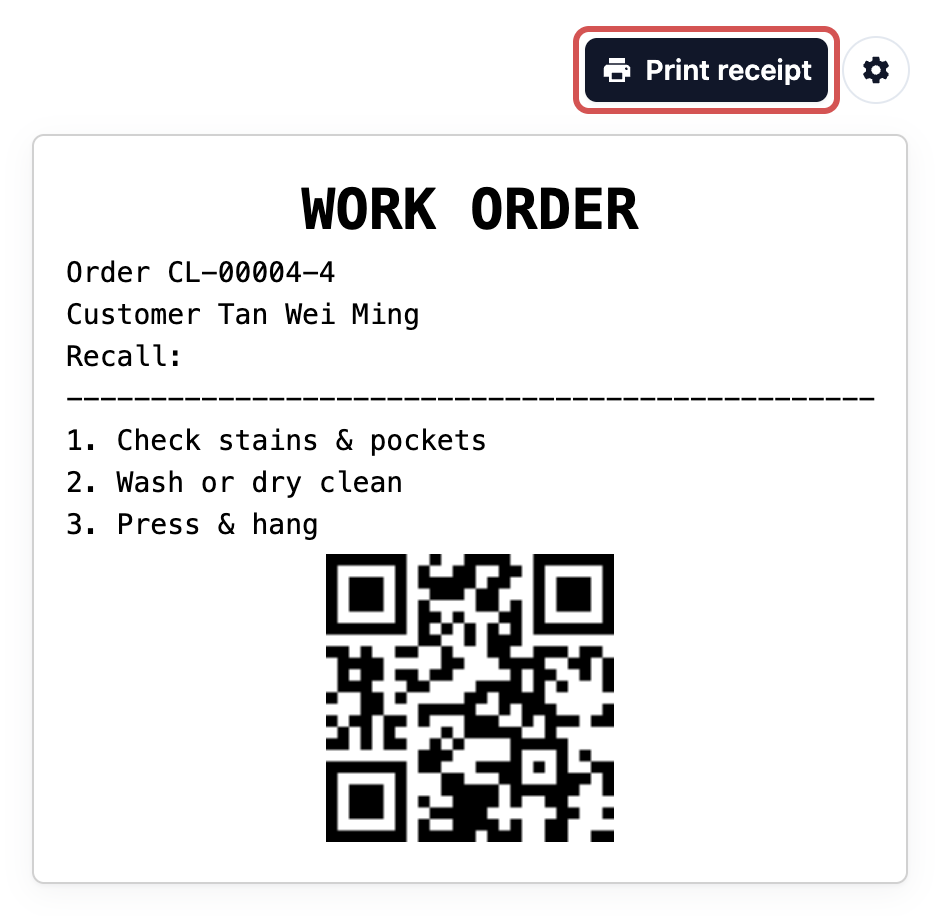
4. Check the slip in the window that opens.
5. Click Print receipt.
If you see "No Work Order Receipt Template", the business unit has no slip chosen yet. Pick one in **Work order slip** on the business unit's Documents tab.
---
## Example setups
- **CleanFast Laundry, Laundry unit**: prints 1 work order slip per item. It shows the order number, the tasks and a QR code that staff scan at each station.
- **CleanFast Laundry, Bag Repair unit**: uses a Task Slip, because each task goes to a different repairer. It adds sub-options to the slip, so the repairer sees "Colour: Dark brown" without opening the order.
---
## What your staff see
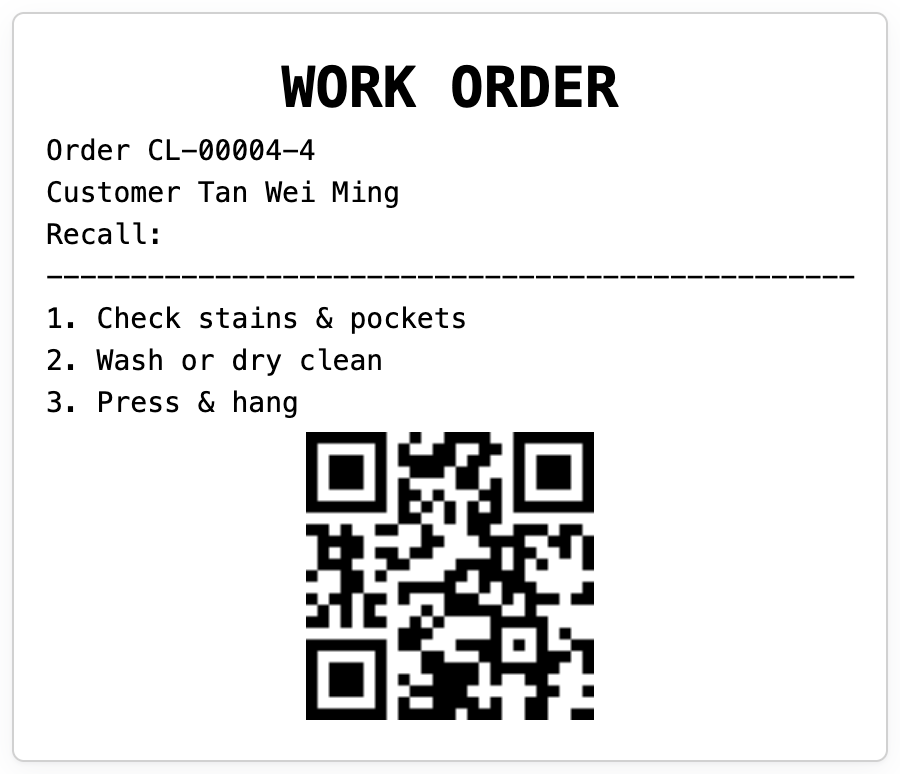
Your staff get a narrow paper slip from the receipt printer, one for each work order. It shows the heading, the order number, the list of tasks and a QR code. It goes with the item through your workroom.
---
## FAQs
**Do my customers get this slip?**
>No. It is for your staff. Your customers get their order receipt instead.
**Is this a PDF?**
>No. Work orders print as slips on your receipt printer. There is no work order or job PDF.
**Can I have different slips for different services?**
>Yes. Each business unit picks its own work order slip.
**Can I change the slip later?**
>Yes. Open it from **Slips and reports** on the Receipt Templates page, make your change and click Save.
**Does changing the slip affect slips already printed?**
>No. Paper already printed stays the same. The next slip you print uses the new layout.
---
## What's next
Your workroom slips are ready. Next, set up the labels that go on each item. See [Setting Up Your Item Labels](/docs/setting-up-your-item-labels).