An item label is the tag your staff stick or tie on each piece when an order comes in. You set it up in the Console under ⚙️ Settings › **Label Template**: click New label › **Item label**, set the size to match your roll, choose what the **First line**, **Details** and **Right column** say, choose how it looks, check the preview and click Save. Then choose it for each business unit in its **Documents** tab.
## What this label does
An item label carries the order number, which piece it is and the pickup date. Your staff use it to match every piece back to the right order in the workroom.
It helps you:
- Stop items from being mixed up between customers.
- Show at a glance how many pieces belong to one order, such as 2/5.
- Sort pieces by shop, or by the day they came in, with a short mark on the label edge.
- Scan a piece to find its order, when your label has a QR code.
**Can I skip this?** Yes, if your shop does not tag items, for example home cleaning or aircon servicing. Shops that take in garments or bags should set it up.
---
## Before you start
- **[Connecting Your Printers to the POS](/docs/connecting-your-printers-to-the-pos)**: pair your label printer first.
- **[Loading Labels and Carbon Ribbon](/docs/loading-labels-and-carbon-ribbon)**: load the right label roll before you test.
- **[Introduction to Business Units](/docs/introduction-to-business-units)**: each business unit chooses its own item label.
**If you set this up before:** the **Right column** now takes up to 5 lines instead of 3, the label edge can print a mark for each shop, and labels with a QR code have a new **QR code size** setting. Your saved labels keep printing as before until you change them.
---
## Open the Label Templates page
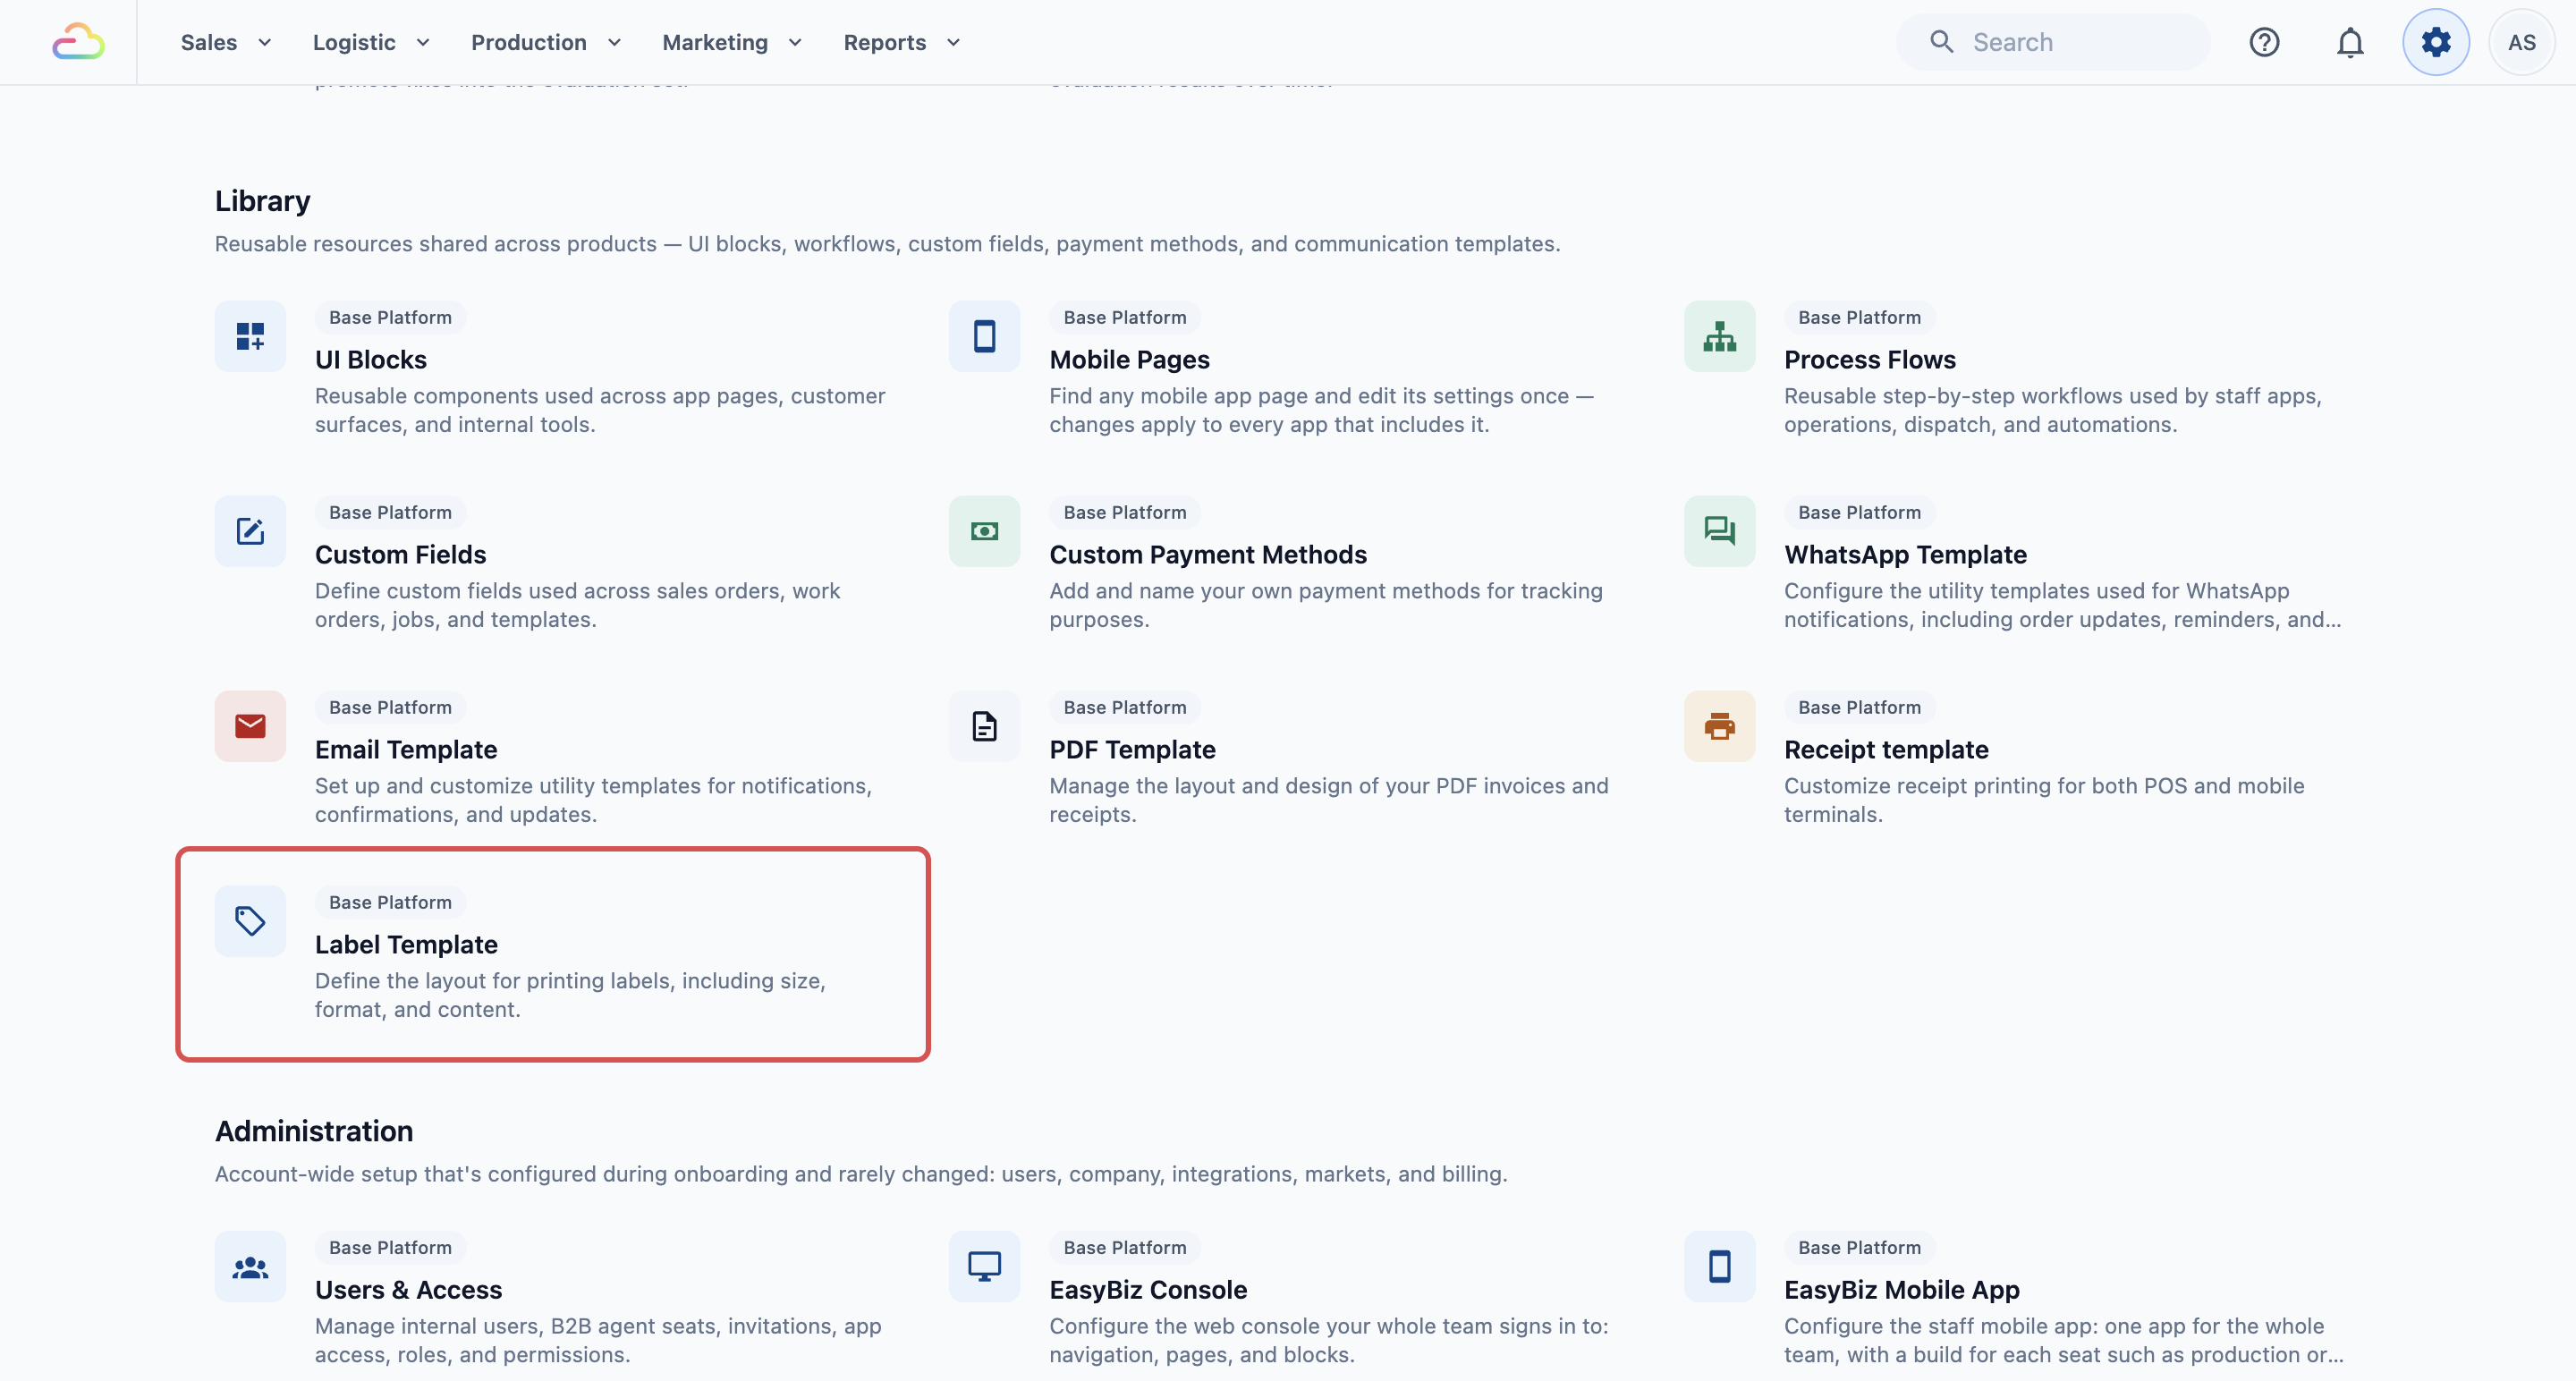
1. Click the ⚙️ Settings icon in the top-right corner of the Console.
2. Under the **Library** section, click Label Template.
3. The **Label Templates** page opens. It has 2 lists: **Item labels** and **Package labels**.
Point at a label to see it on the preview. Click it to change it.
---
## Add your item label
If **Item labels** already lists your label, click its name and skip to the next section.
1. Click New label in the top right.
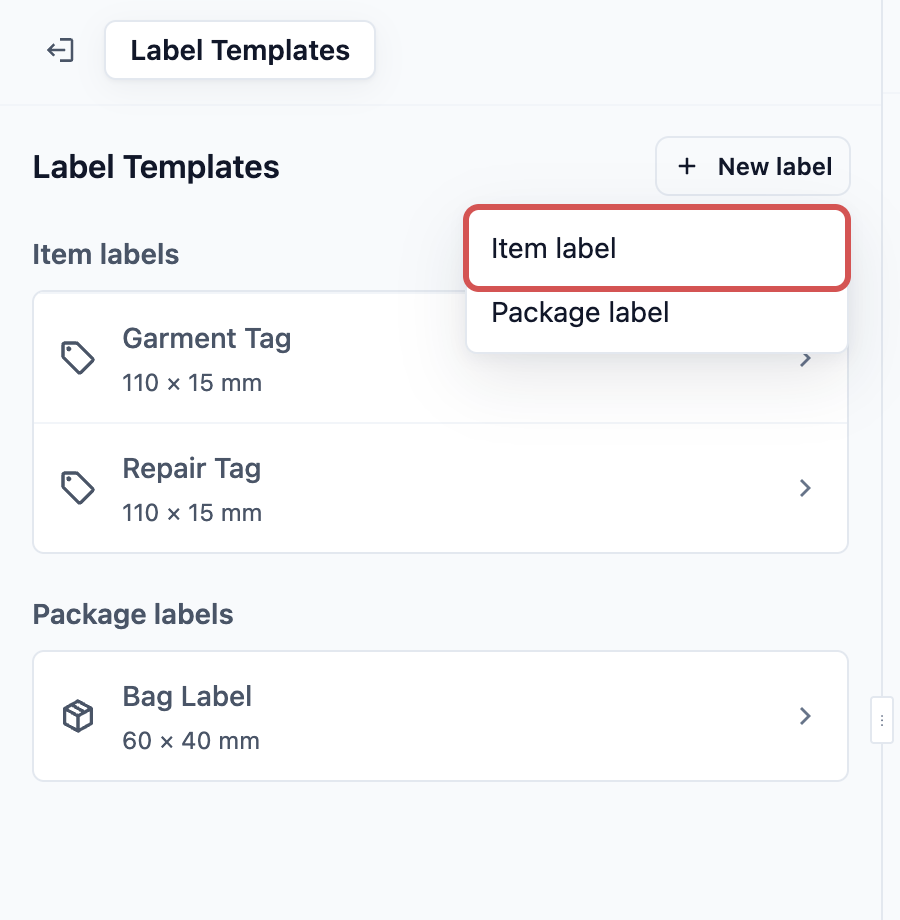
2. Click **Item label**. The label is saved straight away with the standard settings, and you see "Label added".
3. The label opens. Type a plain name in **Name**, such as "Garment Tag".
A new item label is 110 mm wide and 11 mm tall, on a continuous roll. It prints:
- **First line**, in large text: the order number, which piece this is out of the total, such as (2/5), and the pickup date.
- **Details**, in small text: the service code, the item name and the item's note.
- The sales channel code at both ends. A sales channel is the shop or counter that took the order, such as your Tampines shop.
- A QR code on the right.
---
## Set the label size
1. Set **Width (mm)** and **Height (mm)** to match the labels on your roll. Width can be 20 to 300 mm and height 5 to 300 mm. For example, 110 × 10 mm for a strip tied to a garment.
2. Set **Gap (mm)** to the space between labels on your roll. Leave 0 for a continuous roll.
3. Use **Blank at each end (mm)** to keep the ends of the label empty, for example where the tag is stapled or sewn on. Leave 0 to print close to the edge.
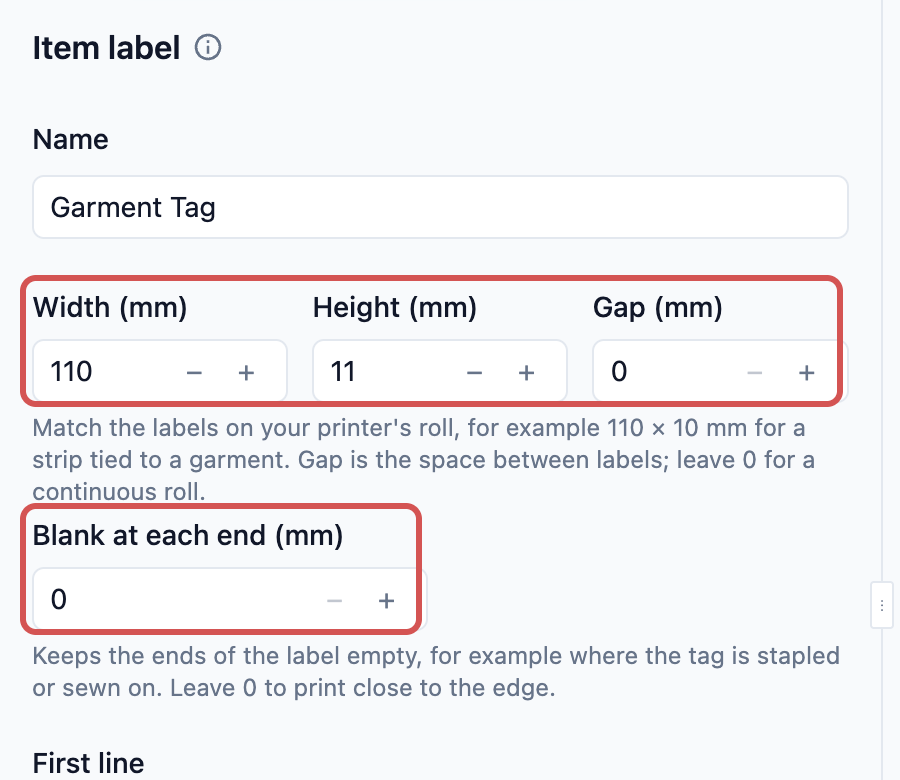
A label size that does not match the roll prints across 2 labels or wastes labels. Measure your roll before you set the width, height and gap.
---
## Choose what goes on the label
### Text on the label
Type the words you want, and type **@** to add a detail such as the order number, the customer's name or the item name. It fills in with each piece's real details when the label prints.
- **First line**: printed large, so staff spot it at a glance. For example, the order number and which piece this is: 1024 (2/5).
- **Details**: printed small under the first line, such as the customer's name, the service and the item. Lines that don't fit on the label are left off.
- **Right column**: up to 5 short lines at the right end, such as the drop-off and due dates. Leave it empty for more room for the details.
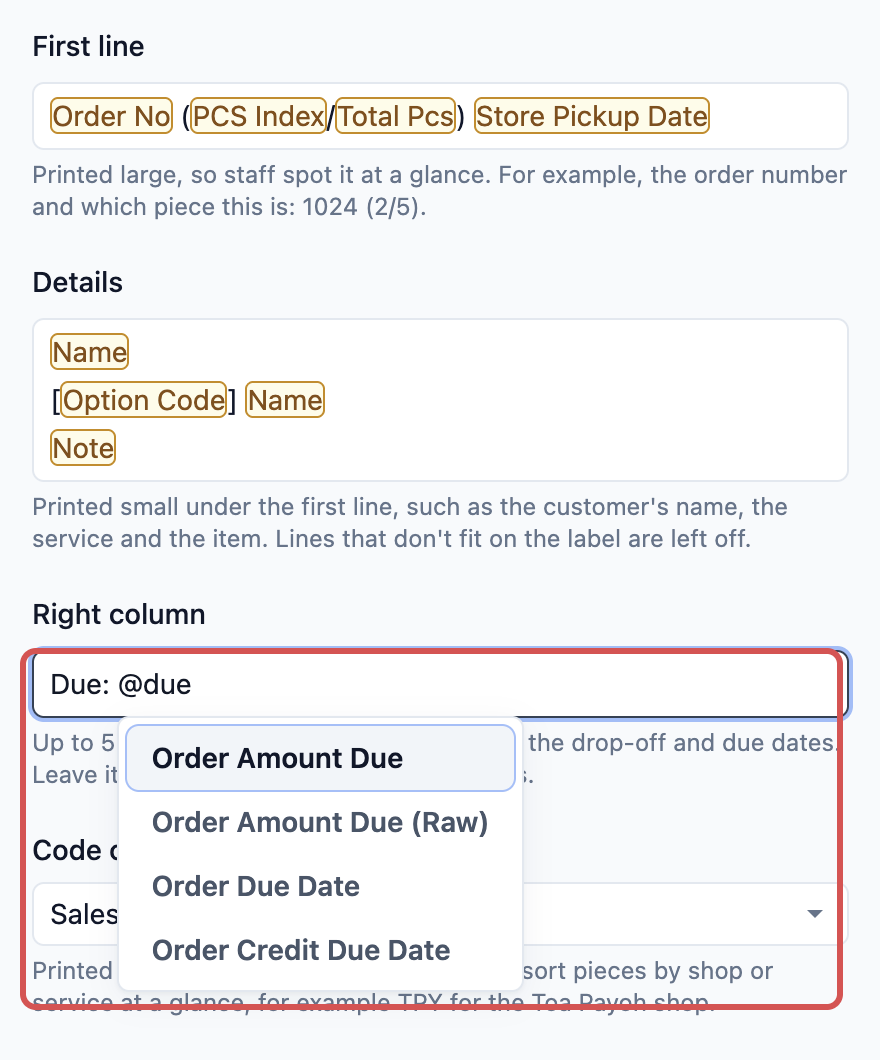
When you click a setting, the preview outlines what it prints.
Keep the order number and piece number on every item label. They are what your staff match on.
### How it looks
**Code on the label edge**
A short code printed at the end of the label, so staff can sort pieces at a glance.
| **Option** | **What it prints** |
|---|---|
| None | No code on the edge. |
| Sales channel code | The short name of the shop or counter that took the order. |
| Business unit code | The code of the business unit the order belongs to, such as Laundry or Bag Repair. |
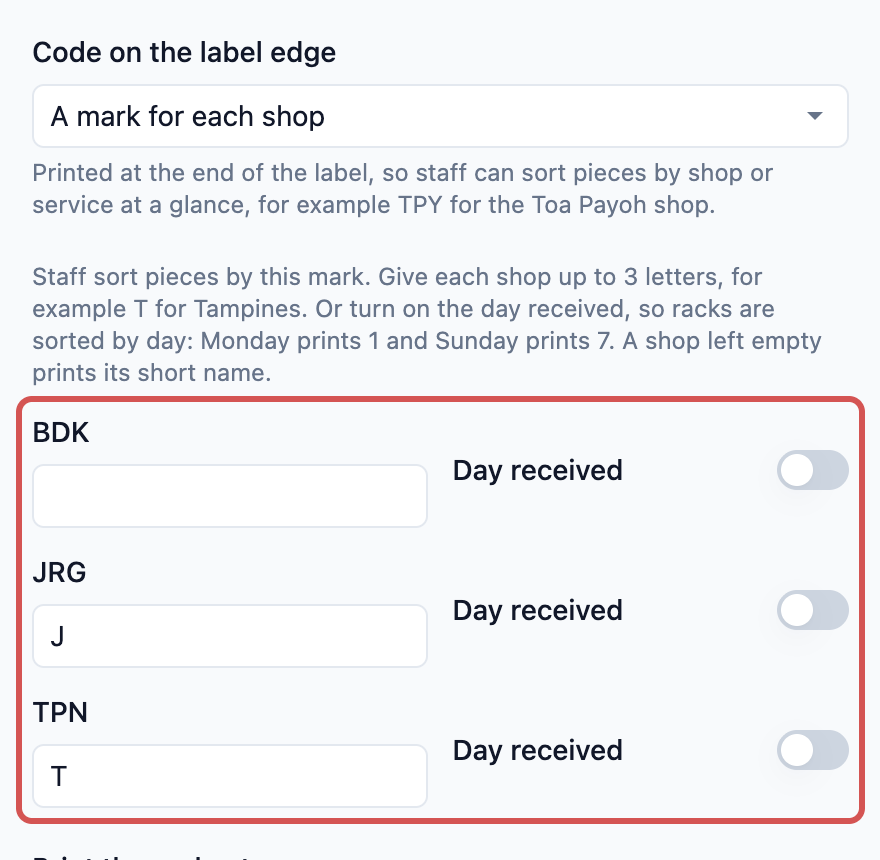
| A mark for each shop | A mark you choose for each shop: up to 3 letters, or the day the order came in. |
**A mark for each shop**
Use this only if you want marks that differ from your shops' short names, or want racks sorted by day. Each of your shops gets its own row:
- Type up to 3 letters for the shop, for example T for Tampines and J for Jurong.
- Or turn on **Day received** for that shop. Its labels then print the day the order came in: Monday prints 1 and Sunday prints 7, so racks can be sorted by day.
A shop uses either letters or **Day received**, not both. A shop left empty prints its short name.
With any code on the edge, 3 more settings appear:
**Print the code at**
| **Option** | **What it does** |
|---|---|
| Both ends | Prints the code at the left and right ends. |
| Left end only | Prints the code at the left end only. |
**Code size**
| **Option** | **What it does** |
|---|---|
| Large | As big as fits on the label, up to 6 mm. |
| Medium | Up to 5 mm tall. |
| Small | 3 mm tall. |
**Print the code upright**: if you turn this on, the code reads the same way as the rest of the label instead of sideways. It suits short labels, where a sideways code has little room.
**QR code**
Staff scan it to open the piece's order.
| **Option** | **What it does** |
|---|---|
| None | No QR code. |
| Left | A QR code at the left end. |
| Right | A QR code at the right end. |
| Both ends | A QR code at each end. |
**QR code size**
This appears when the label has a QR code.
| **Option** | **What it does** |
|---|---|
| Large | The standard size, as big as the label height allows. |
| Medium | About 12 mm, which leaves more room for the text. Helps when the label has a QR code at both ends. |
Print a label and scan it to check the QR code reads well at the size you chose.
**First line in white on black**: if you turn this on, the first line prints in white on a black band, so it stands out on a busy rack.
**Add-ons in boxes**: if you turn this on, each add-on's short code prints in a box after the details, for example S for starch.
**Text size**
| **Option** | **What it does** |
|---|---|
| Standard | The normal text size. |
| Large | Prints the first line bigger. |
| Extra large | Makes all the text bigger, for short labels with few words. |
**Dates print as**
| **Option** | **What it prints** |
|---|---|
| 24/10 | Day and month. |
| 24/10/2026 | Day, month and year. |
| 24 Oct | Day and short month name. |
---
## Preview and print a test
The preview sits beside the settings and changes as you type.
1. It starts with a made-up order, marked **Sample order**.
2. To check a real order, click **Select order to preview** and pick it. Then pick a piece from the list beside it.
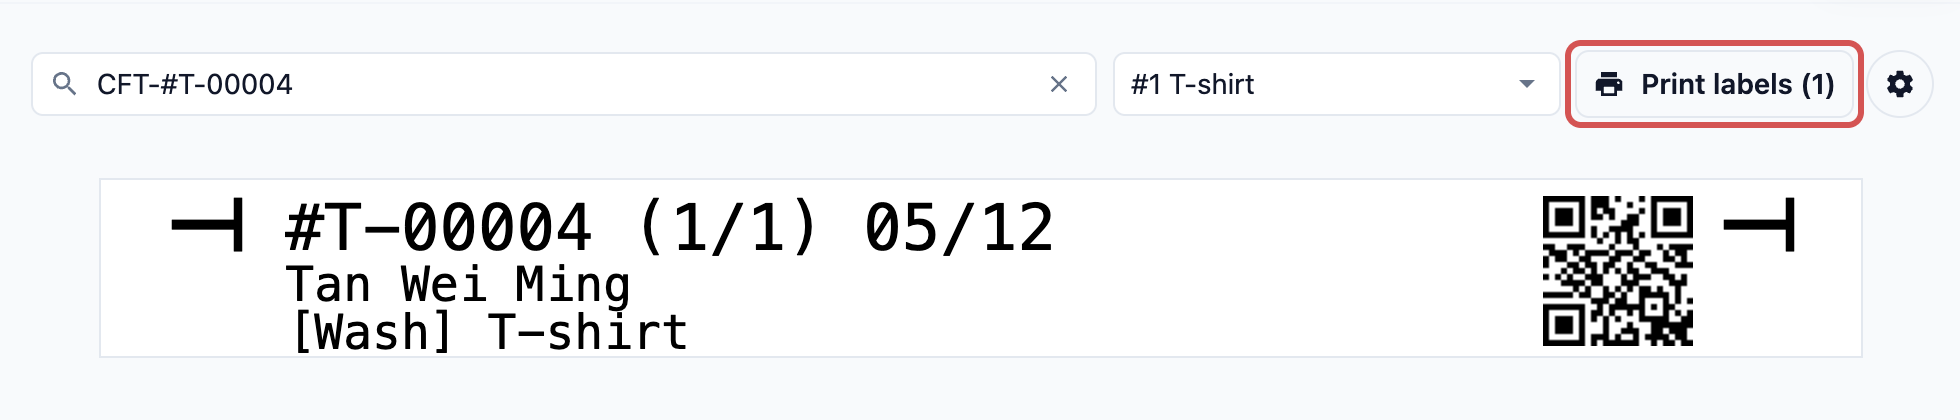
3. Click Print labels (1) to print that piece's label.
4. If nothing prints, click the gear button beside it to pair the label printer. The Console remembers its label printer in this browser only. Connecting a printer here doesn't change the POS, so connect it on each device you print from.
5. When the label looks right, click Save in the top right. You will see "Labels saved". Save stores every label you changed.
If the preview says "This order has no item labels to preview.", the order you picked has no items to tag. Pick another order.
### Darkness and DPI are set on the printer
How dark the label prints, the printer's DPI and where printing starts are saved for each printer, not on the label. Open them from the gear button beside **Print labels**. These settings are saved for this printer only. The **Test print** there prints a fixed 110 mm × 10 mm sample. It checks the printer, not your label.
---
## Choose the label for each business unit
1. Click the ⚙️ Settings icon.
2. Under the **Administration** section, click Business Units.
3. Open the business unit, then click the **Documents** tab.
4. Under **Labels**, open **Item label** and choose your label.
5. Click Save. You will see "Document settings updated".
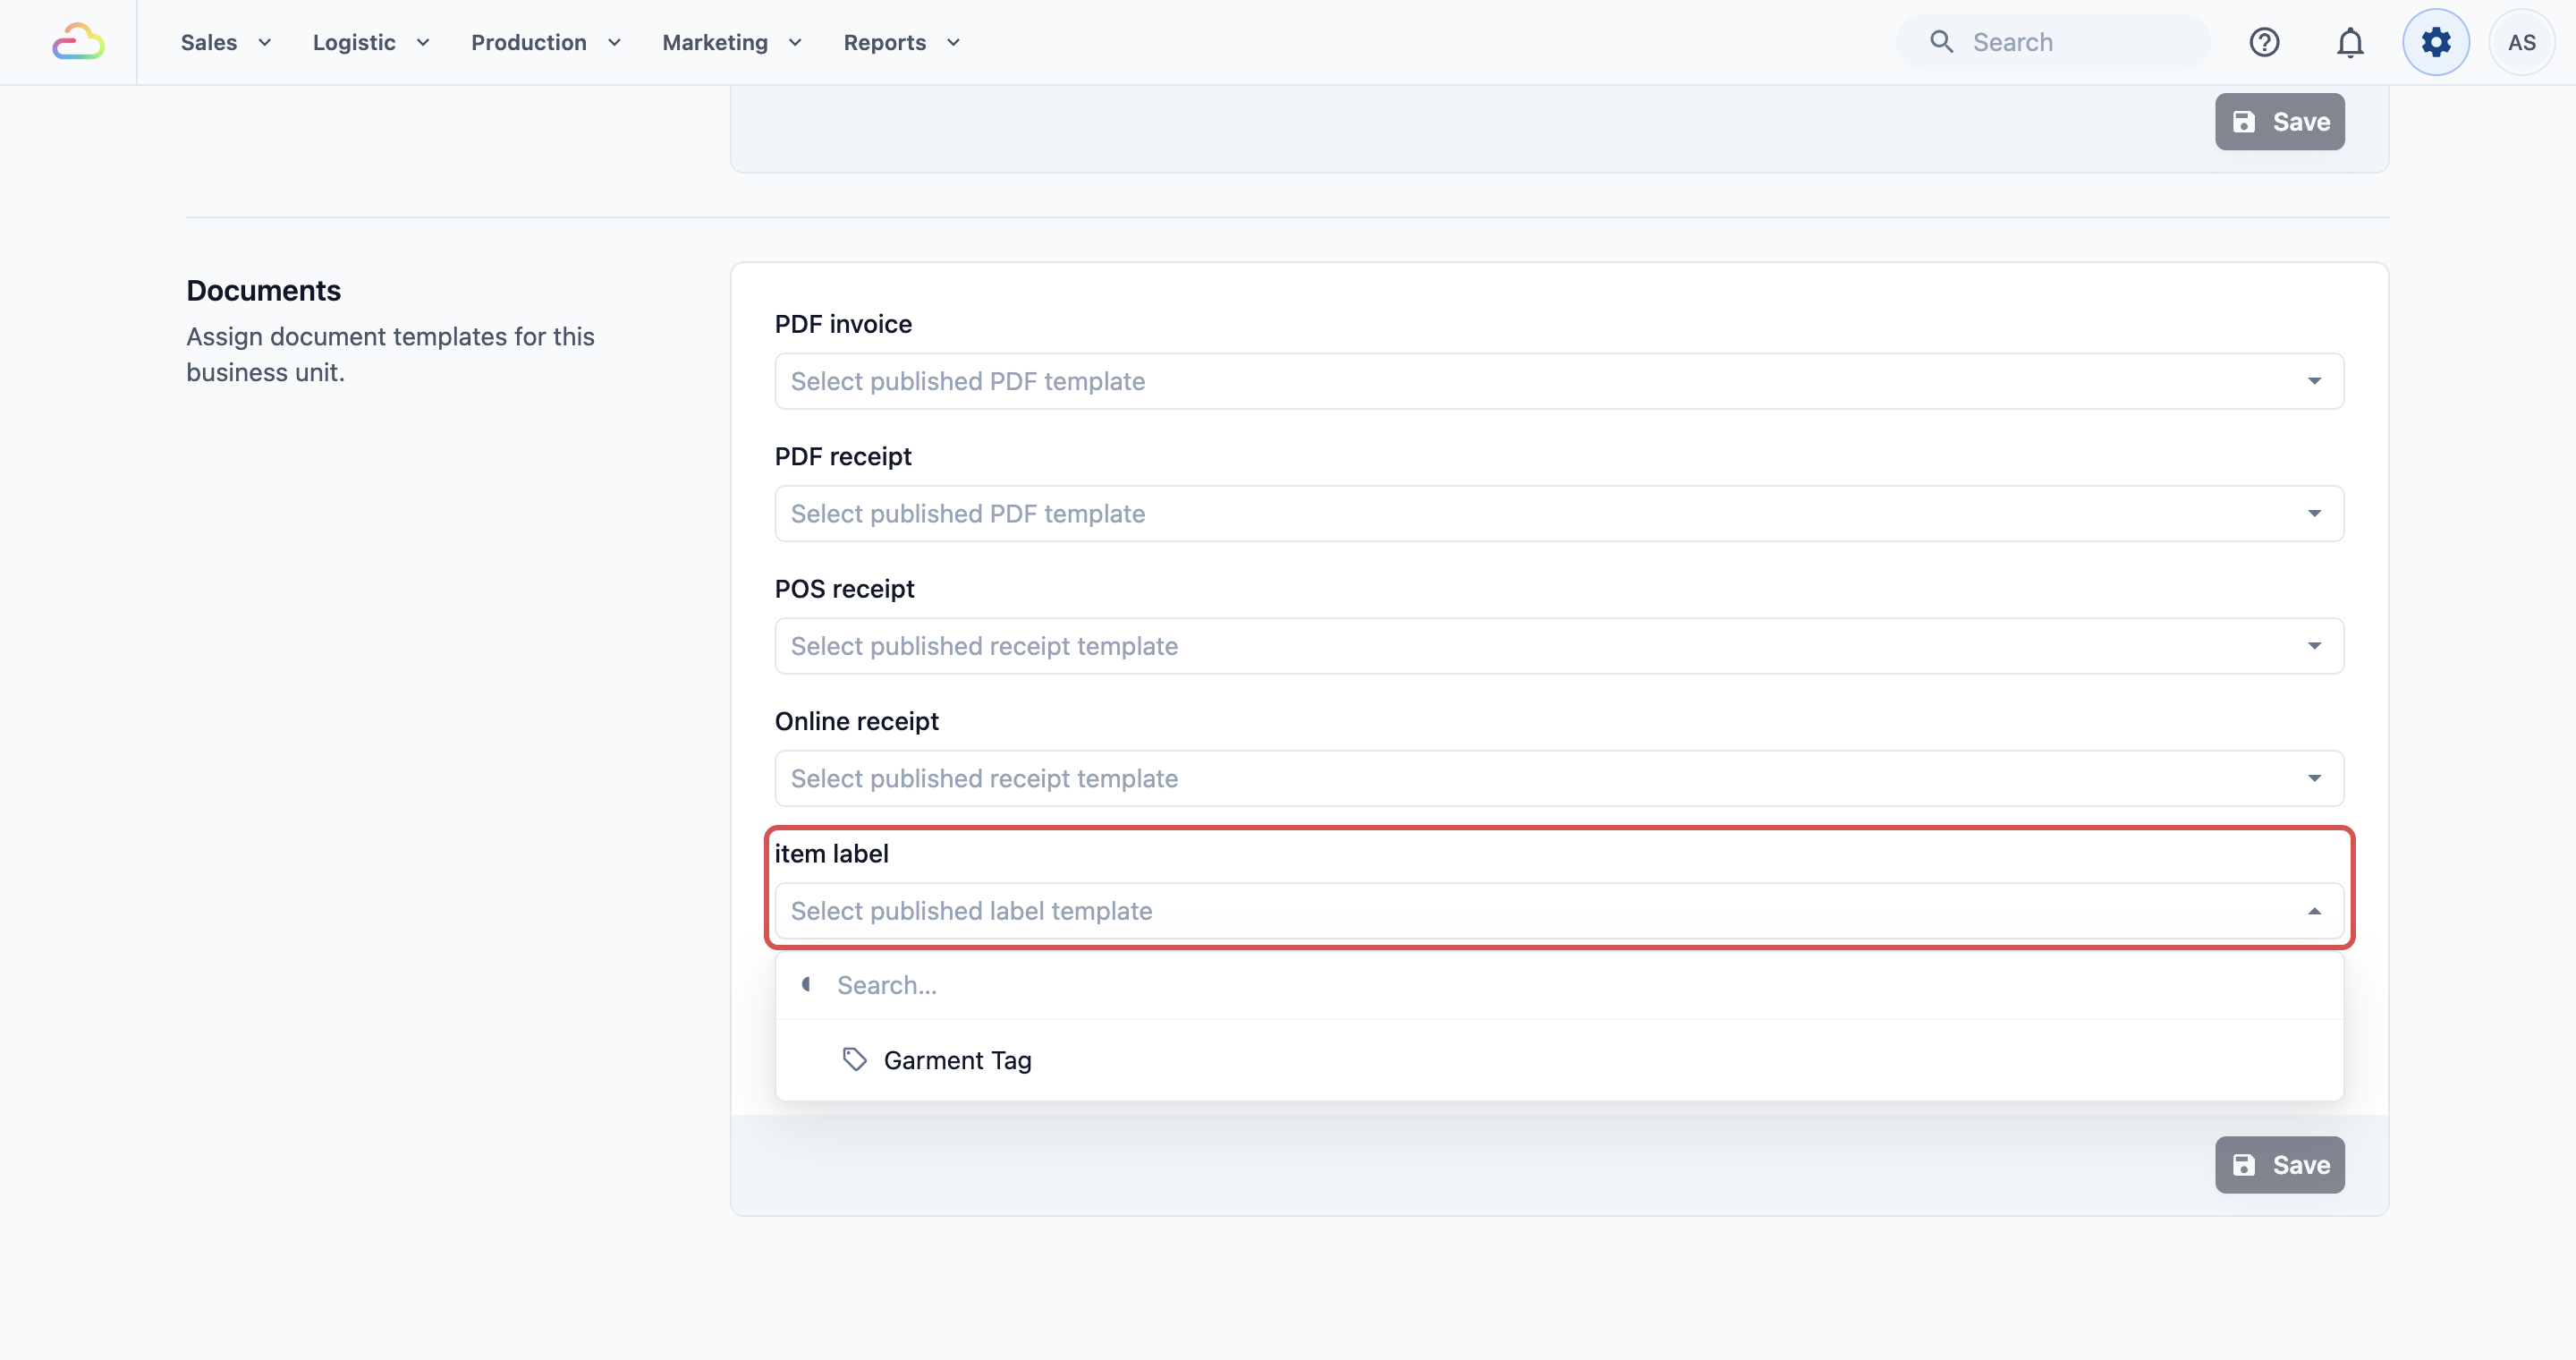
If staff see "No item label is configured for this business unit." on the POS, this step was missed.
---
## Duplicate or delete a label
Duplicate label and Delete label sit at the bottom of an open label's settings.
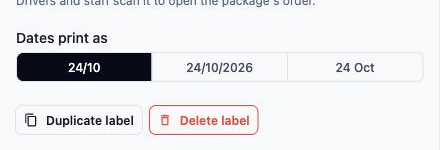
To make a copy, for example a smaller item label for the printer at your second shop:
1. Open the label and click Duplicate label.
2. **Name** is filled in as "Copy of [name]", such as "Copy of Item label". Change it if you like.
3. Click Duplicate. You will see "Label duplicated", and the copy opens.
The copy is made from the last saved version. If you have changes you haven't saved, the dialog says "The copy is made from the last saved version. Save first to include your latest changes." A new copy isn't used by any business unit until you choose it in their **Documents** tab.
To delete a label, open it and click Delete label. A label a business unit still uses can't be deleted. Clear it, or choose another label, in that unit's **Documents** tab first.
---
## Printing labels at the counter (POS only)
Staff print item labels from the order on the POS.
- On an order, staff tap Print Labels. The **Order Labels** window opens with a label for each piece.
- After checkout, staff can tap Print all to print every piece at once.
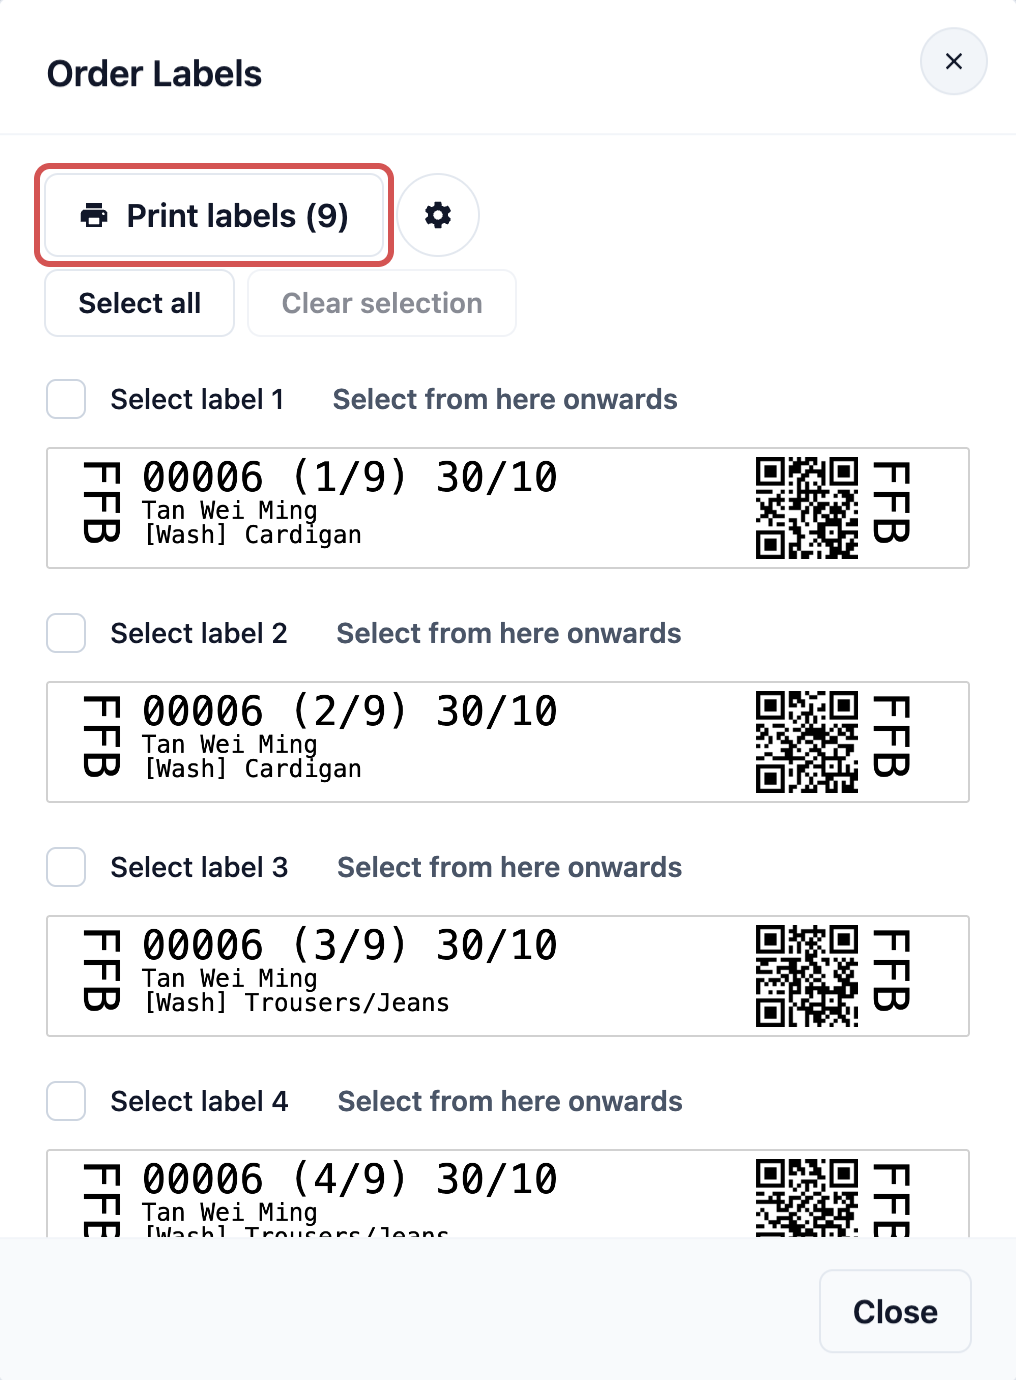
Item labels print on the printer connected as the label printer. To set it up, open Settings on the POS, go to Printer › Label Printer and tap Connect. If a printer is already connected, the button says Settings.
---
## Example setup
CleanFast Laundry has POS shops in Tampines and Jurong and sends all garments to one workroom. They set up their item label like this:
- **Size:** 110 × 11 mm on a continuous roll, so **Gap (mm)** is 0.
- **First line:** the order number and piece number, such as 1024 (2/5).
- **Details:** the customer's name, the service and the item.
- **Right column:** the drop-off date and the due date.
- **Code on the label edge:** A mark for each shop, with T for Tampines and J for Jurong, printed at **Both ends** in **Large**.
- **QR code:** **Both ends**, with **QR code size** set to **Medium** to leave room for the details.
In the workroom, staff sort every piece into the T or J rack by the mark at the end of the tag, and scan either end to open its order.
---
## What your customers see
Your customers see the tag on their returned items. It shows your shop's code or mark, their order number, the piece number and the pickup date. Taller labels can also show the item name and their name.

---
## FAQs
**Why does my label print across 2 labels?**
> The label height or gap does not match your roll. Measure the roll and set Height (mm) and Gap (mm) again.
**Why is my label too faint or too dark?**
> Darkness is set on the printer, not on the label. Click the gear button beside Print labels and change it for that printer.
**What prints for a shop I didn't give a mark?**
> Its short name, the same as Sales channel code. Give it letters or turn on Day received when you want something different.
**My label has a QR code at both ends and the details are cut off. What can I do?**
> Set QR code size to Medium. Each QR code becomes about 12 mm, which gives the text more room. Print one and scan it to check.
**Can each business unit have a different item label?**
> Yes. Each business unit chooses its own item label under Documents › Labels.
**Do I need a label printer to set up the label?**
> No. The preview shows the label on screen, with a sample order or a real one.
**Why does the preview say "This order has no item labels to preview."?**
> The order you picked has no items to tag. Pick another order with items.
---
## What's next
Your item label is ready. Next, set up the label that goes on each bag or package when an order is packed. See [Setting Up Your Package Labels](/docs/setting-up-your-package-labels).